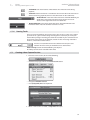
1
StudioLive Software Library
Reference Manual
™
Universal Control with Virtual StudioLive and Smaart
System Check Wizards | StudioLive Remote for iPad
QMix for iPhone /iPod touch
Capture | Studio One Artist
®
®
™
®
™
®
®
®
www.presonus.com
English
Table of Contents
1Overview — 1
3.3.3
Copying Mixes — 26
3.3.4
Copying Channel Settings — 26
3.3.5
GEQ in Focus
(24.4.2 and 16.4.2 only) — 27
1.1
Introduction — 1
1.2
About This Manual — 1
3.4
VSL: Fat Channel Tab — 27
1.3
Summary of Virtual StudioLive Features — 2
3.5
Loading Scenes and Presets from VSL — 28
1.4
Summary of StudioLive Remote
for Apple iPad Features — 3
3.5.1
Loading a Scene — 28
3.5.2
Loading Scribble Strip Labels — 28
Summary of QMix for iPhone
and iPod touch Features — 3
3.5.3
Loading a Fat Channel Preset — 29
3.5.4
Loading an FX Preset — 29
1.6
Summary of Capture Features — 4
3.5.5
Loading a GEQ Preset — 30
1.7
Summary of Studio One Artist Features — 4
2
Connecting to a Computer — 5
3.6.1
Selecting a GEQ to Edit
(24.4.2 and 16.4.2 only) — 30
2.1
Installation for Windows — 5
3.6.2
Enabling a GEQ — 31
2.2
Installation for Mac OS X — 6
3.6.3
Flattening a GEQ Curve — 31
2.3
Using the StudioLive as an Audio Interface — 7
3.6.4
Enabling Smaart Analysis — 31
2.4
Using the StudioLive with
Popular Audio Applications — 7
3.6.5
Time-Frequency Spectrograph — 31
FireWire Sends and Returns — 9
3.6.7
Using the Smaart Spectrograph to Ring Out
Monitors — 33
3.6.8
Using the Smaart RTA
While Mixing — 34
1.5 2.5
2.5.1
Channel FireWire Sends — 9
2.5.2
Auxiliary FireWire Sends
(StudioLive 16.4.2 and 24.4.2 only) — 9
2.5.3
FireWire Returns — 10
2.5.4
Main FireWire Return — 11
2.6
Using Plug-In Effects as Inserts — 11
2.7
Printing Fat Channel Dynamics and EQ — 12
2.8
Configuring the StudioLive
For Core Audio (Mac Only) — 15
3
Universal Control and VSL — 18
3.1
Universal Control Launch Window — 18
3.1.1
Advanced WDM Features
(Windows Only) — 21
3.6
VSL: GEQ Tab — 30
3.6.6RTA — 32
3.7
VSL: Setup Tab — 37
3.7.1
Auxiliary Inputs Router
(16.4.2 and 24.4.2 only) — 37
3.7.2
Flexible Inputs Router
(StudioLive 16.0.2 only). — 38
3.7.3
MIDI Control Mode Menu
(StudioLive 16.0.2 only). — 38
3.7.4
Noise Gate Mode (StudioLive 16.4.2
only). — 38
3.7.5
Scene Recall Filters — 38
3.7.6
Link Channel Faders Preference — 38
3.7.7
Default to Fader Locate Preference — 39
3.2
VSL: Browser — 23
3.7.8
Talkback Assignments — 39
3.3
VSL: Overview Tab — 25
3.7.9
Remote Devices Permissions — 39
3.3.1
Aux Send/Masters Views — 25
3.3.2
Tap Tempo — 26
3.7.10 Enabling Lockout Mode — 40
3.8
Smaart System Check Wizards
(StudioLive 16.4.2 and 24.4.2 only) — 41
3.8.1
Smaart Room Analysis Wizard — 43
3.8.2
Smaart System Delay Wizard — 47
3.8.3
Smaart Output Check Wizard — 51
3.8.4
Go Remote — 52
3.8.5
Mic Position — 53
3.8.6
System Alignment Rules — 55
3.8.7
Using the Trace: Spotting the Trend — 56
5
QMix for iPhone
and iPod touch — 74
5.1
Networking your iPhone or iPod touch and
Computer — 74
5.1.1
Step 1: Creating an Ad Hoc Network on
your Computer — 74
5.1.2
Step 2: Connect your iPhone/iPod Touch
to your Ad Hoc Network — 75
5.1.3
Step 3: Connecting QMix
to StudioLive Mixers — 76
4
StudioLive Remote for iPad — 60
5.2
Aux Mix Page — 77
4.1
Networking your iPad and Computer — 60
5.3
Wheel of Me — 78
4.1.1
STEP 1: Creating an Ad Hoc Network
on your Computer — 60
5.4
Settings Page — 79
4.1.2
STEP 2: Connect your iPad to
your Ad Hoc Network — 62
4.1.3
STEP 3: Connecting to Virtual StudioLive
and StudioLive Mixers — 63
4.2
4.3
6Capture — 80
6.1
Start Page — 80
6.2
The Session Page — 81
6.2.1Transport — 82
Overview Page — 64
4.2.1
Bus Assignments Query — 64
4.2.2
Fat Channel Microviews
and Zooms — 64
6.2.2
Meter Bridge — 83
6.2.3
Editing Tools — 84
6.2.4
The Edit Window — 86
4.2.3
Channel Controls — 65
6.3
Creating a New Capture Session — 87
4.2.4
Masters Overview
and Masters Section Page — 66
6.4
Recording in Capture — 88
Aux Mix Page — 66
4.3.1 Aux Mix Select and Aux Mixing
— 67
4.3.2
FX Mix Select and FX Bus Mixing — 67
4.3.3
FX Edit — 68
6.5
6.4.1
Monitoring Live Inputs — 88
6.4.2
Setting Input Levels — 88
6.4.3
Capture Main Source Selection
(StudioLive 16.4.2 and 24.4.2 only) — 89
Capture Session Navigation — 89
4.4
GEQ Page — 69
6.5.1Scrolling — 89
4.5
Scenes Page — 70
6.5.2
Timeline Zooming — 89
4.6
Settings Page — 71
6.5.3
Using Markers — 90
4.6.1
4.7
Launching Smaart System
Check Wizards Remotely — 72
Channel Zoom Page — 73
6.6
Mixing Your Session — 91
6.6.1
Creating a Mix in Capture — 91
6.6.2
Mixing a Capture Session
in Studio One — 92
6.6.3
Mixing a Capture Session in
a Different Recording Application — 92
6.7
Importing Audio Files — 94
6.7.1
Preview Player — 95
8Troubleshooting — 141
8.1
Universal Control: Driver
and General Connectivity — 141
Capture Key Commands — 97
8.2
Universal Control: VSL — 142
7
Studio One Artist Quick Start — 98
8.3
StudioLive Remote — 142
7.1
Installation and Authorization — 98
8.4
QMix — 142
7.1.1
Running the Studio One Installer — 98
8.5
7.1.2
Creating a User Account — 99
Troubleshooting your
iPad Ad Hoc Network — 143
7.1.3
Activating Studio One
Artist Online — 101
8.6
Troubleshooting your
iPhone Ad Hoc Network — 143
7.1.4
Activating Studio One
Artist Offline — 102
7.1.5
Installing Bundled Content for
Studio One Artist — 107
7.1.6
Installing Third-Party Content — 109
7.1.7
Enabling the Audio Driver — 110
6.8
Export Audio Files — 95
6.9
7.2
7.3
7.4
Configuring MIDI Devices — 111
7.2.1
Setting Up an External MIDI Keyboard
Controller from the Start Page — 111
7.2.2
Setting up an External MIDI Sound Module
from the Start Page — 114
Creating a New Song — 116
7.3.1
Creating a New Song from
a StudioLive Template — 116
7.3.2
Creating an Empty Song
and Configuring Audio I/O — 116
Creating Audio Tracks — 120
7.4.1
7.5
Creating MIDI Tracks — 121
7.5.1
7.6
7.7
Anatomy of an Audio Track — 121
Remote Controlling Your StudioLive 16.0.2
with Studio One — 123
Adding Virtual Instruments
and Plug-in Effects to Your Song — 134
7.6.1
Drag-and-Drop Virtual
Instruments — 136
7.6.2
Drag-and-Drop Effects — 136
7.6.3
Drag-and-Drop Audio and MIDI
Files — 137
Recording in Studio One Artist — 137
StudioLive™ Software Library
Reference Manual
1Overview
1.1Introduction
1Overview
1.1
Introduction
Your StudioLive™-series mixer comes with a powerful Software Library that includes
Universal Control with Virtual StudioLive (VSL), Capture™, and Studio One® Artist.
In addition, PreSonus offers StudioLive Remote (SL Remote) for iPad® and QMix™
for iPhone®/iPod touch® , both of which are free downloads from the Apple App
Store. Whether you want to remote-control your StudioLive from an iPad, provide
your musicians with the ability to control their own monitor mixes, record a live
show with just two mouse clicks, mix your next hit album, or all of the above,
your StudioLive and its software provides you with a complete suite of tools.
We encourage you to contact us with questions or comments regarding
this product. PreSonus Audio Electronics is committed to constant
product improvement, and we value your suggestions highly. We believe
the best way to achieve our goal of constant product improvement is by
listening to the real experts: our valued customers. We appreciate the
support you have shown us through the purchase of this product.
For technical support, please see Section 7.1: Troubleshooting.
1.2
About This Manual
We suggest that you use this manual to familiarize yourself with the features,
applications, and correct connection procedures for your StudioLive
Software Library before trying to connect your StudioLive to your computer.
This will help you avoid problems during installation and setup.
Throughout this manual you will find Power User Tips. These tips
provide useful hints on how to best use the StudioLive Software
Library and take advantage of less-obvious features.
1
1Overview
1.3
Summary of Virtual StudioLive Features
1.3
StudioLive™ Software Library
Reference Manual
Summary of Virtual StudioLive Features
The Virtual StudioLive (VSL) application is completely integrated with your StudioLive
mixer. VSL is a highly advanced editor/librarian and control panel. Because of the
continuous bidirectional communication between your StudioLive and VSL, whatever
you do on the StudioLive‘s control surface will be reflected in VSL and vice versa.
•• Easy drag-and-drop workflow
•• Drag presets directly to channels
•• Drag parts of presets directly to components in the Fat Channel
•• Adjust the Fat Channel gate, compressor, and EQ plus the graphic EQ and effects
•• Quickly drop entire Scenes to the mixer for instant recall
of all channel, effects, and graphic EQ settings
•• Load effects quickly by simply dragging presets onto a channel or bus
•• Makes StudioLive as easy to use as Studio One
•• Remote-controllable with an Apple iPad running PreSonus StudioLive
Remote and with an iPhone/iPod touch running PreSonus QMix
•• Swipe the mouse to quickly mute, solo, assign channels to multiple buses, etc.
•• Time-stamped backups of the entire board
•• Smaart Spectra™ Time-Frequency Spectrograph
•• Smaart Spectra Real-Time Analyzer
•• Smaart Room Analysis Wizard: generates a frequency-response trace of your room
•• Smaart System Delay Wizard: automatically calculates and
sets the correct delay time on subgroup outputs
•• Smaart Output Check: quickly verify that StudioLive
outputs are connected and functioning correctly
•• Talkback On/Off
•• Talkback Assign
•• Preset Management:
•• Store and organize presets on your computer, then
transfer them to your mixer for use at the gig
•• Create presets on the road, store them to the mixer, then drag them to
your preset pool the next time you’re connected to the computer
•• Reorder presets in mixer memory; easily order
presets to best fit your gigs and workflow
•• Share presets with friends; drag presets out of the browser and
email, IM, or disk-swap presets with other StudioLive owners
•• Mixer Overview
•• See all of the most-used parameters on the mixer at once
•• See the state of all Fat Channel settings at once
•• See all aux mixes at once
•• See the current effects and parameter settings
•• See graphic equalizer settings
2
1Overview
1.4
Summary of StudioLive Remote for Apple iPad Features
1.4
StudioLive™ Software Library
Reference Manual
Summary of StudioLive Remote for Apple iPad Features
StudioLive Remote (SL Remote) for iPad provides direct wireless control over
PreSonus Virtual StudioLive software for Mac® and Windows®, which in turn controls
any StudioLive-series digital mixer. As long as you have a wireless connection
between your iPad and a computer running VSL, SL Remote can control the console.
•• Provides wireless control over Virtual StudioLive and
hence, over any StudioLive-series digital mixer
•• Overview Page displays levels, mutes, panning, EQ curves, and
Fat Channel processing for multiple channels at once
•• Aux Page shows the levels, panning, and Fat Channel
processing for the aux sends and internal FX buses
•• GEQ Page lets you adjust the graphic EQs
•• Channel Zoom Page shows every parameter for a single channel
•• Control any StudioLive mixer on the wireless network from one iPad
•• Multiple iPads can control the same StudioLive
•• Set Permissions in VSL so that StudioLive Remote on any iPad
on the network controls only specified functions
•• Talkback On/Off
•• Talkback Assignments
•• Smaart System Check Wizards
•• Recall Scenes from the “On the Disk” section in the VSL Browser
•• Available free from the Apple App Store
1.5 Summary of QMix for iPhone and iPod touch Features
QMix for iPhone and iPod touch provides performers with wireless control
over their monitor (aux) mixes onstage and in the recording studio.
•• Provides wireless control over Virtual StudioLive aux-mix functions, and
hence, over the aux mixes on any StudioLive-series digital mixer
•• Remote-control aux mixes on any StudioLive on the same network
•• Using the Wheel of Me, control the levels of all of the user’s
channels simultaneously, with one simple control.
•• Set permissions in VSL so that QMix on any iPhone on
the network only controls a specified aux mix
•• Available free from the Apple App Store
3
1Overview
1.6
Summary of Capture Features
1.6
StudioLive™ Software Library
Reference Manual
Summary of Capture Features
Included with StudioLive is Capture, a digital-audio multitrack-recording application
designed to make recording quick and easy. Perfect for live recording and for mixing
your audio in real time to a stereo audio file, Capture was designed to interface
perfectly with StudioLive-series mixers, allowing instant setup and recording.
For StudioLive 16.4.2 and 24.4.2 users, Capture allows you to record a
single stereo track from the StudioLive’s main output, one pair of subgroup
outputs, or a pair of aux sends, in addition to all input channels. This
enables you to record the main mix or create a separate recording mix.
•• Scalable 16x16, 18x18, 26x26, or 34x34 multitrack recording application
•• Scales to fit your StudioLive system, no configuration required
•• Record with two mouse clicks
•• Essential editing suite (copy, cut, paste, splice, resize)
•• Peak LED-style meter bridge with clip indicators
•• Marker placement and recall
•• Export between markers
•• Record stereo mix from StudioLive mixer
•• Import/export WAV, AIFF, and OpenTL files
1.7
Summary of Studio One Artist Features
All PreSonus audio interfaces include PreSonus Studio One Artist recording
software, which comes with over 6 GB of plug-ins, loops, and samples, giving
you everything you need for music recording and production. The Studio
One Artist Quick Start Guide is located in Section 7.5 of this manual. You will
find a complete user manual on the Studio One Artist installation DVD.
•• Unlimited track count, inserts, and sends
•• 20 high-quality native plug-ins: amp modeling (Ampire), delay (Analog Delay,
Beat Delay), distortions (RedLight Dist™), dynamics processing (Channel Strip,
Compressor, Gate, Expander, Limiter, Tricomp™), equalizer (Channel Strip, Pro EQ),
modulation (Autofilter, Chorus, Flange, Phaser, X-Trem), reverb (Mixverb™, Room
Reverb), and utility (Binaural Pan, Mixtool, Phase Meter, Spectrum Meter, Tuner)
•• Over 6 GB of loops, samples, and instruments, including: Presence™
virtual sample player, Impact™ virtual drum machine, SampleOne™ virtual
sampler, and Mojito virtual analog-modeled subtractive synthesizer
•• Open Capture files natively
•• Innovative and intuitive MIDI mapping
•• Powerful drag-and-drop functionality for faster workflow
•• Mac OS X® and Windows® compatible
4
StudioLive™ Software Library
Reference Manual
2
2.1
Connecting to a Computer
Installation for Windows
2
Connecting to a Computer
The speed of your processor, amount of RAM, and capacity, size, and
speed of your hard drives will greatly affect the overall performance
of your recording system. A faster processor and more RAM can
reduce signal latency (delay) and improve overall performance.
Please visit www.presonus.com for the latest system requirements
and updated list of compatible hardware. It is also recommend that
you check your recording software for its system requirements.
Power User Tip: As part of our commitment to the quality of our products, PreSonus
continually updates its product drivers and software. Because of this, it is wise to visit
www.presonus.com and check for the latest driver build before installing your product.
2.1
Installation for Windows
The Universal Control installer includes the Universal FireStudio/StudioLive
driver, Universal Control, and Virtual StudioLive. We made the Universal Control
installer as simple and easy to follow as possible, and it will take you through each
step of the installation process. Please read each message carefully to ensure
the StudioLive driver and Universal Control with VSL are properly installed. In
particular, be careful not to connect your StudioLive to the computer too soon.
Before beginning the Universal Control installation setup, please quit all
applications, including antivirus software, and disconnect the StudioLive from
your computer.
Windows Vista Users: If you see any Windows Security alerts, click “Install
this driver software anyway.”
Follow the onscreen instructions to complete the installation. When the
installer has finished, it will prompt you to reboot your computer.
Click “Finish” to automatically restart your PC. Once your computer
has rebooted, connect the StudioLive. When the Found New
Hardware wizard launches, follow the “Recommended” steps.
Your StudioLive is now synced to your computer and ready to use!
5
2
2.2
Connecting to a Computer
Installation for Mac OS X
2.2
Installation for Mac OS X
StudioLive™ Software Library
Reference Manual
The Universal Control Installer will take you through each step of the installation
process. Please read each message carefully, and be especially careful that you do not
connect your StudioLive too soon.
1. After launching the installer, you will be directed to the Welcome screen.
2. Click “Continue” and follow the onscreen instructions.
3. You will be directed to choose the hard drive onto which you want to install the
StudioLive driver and Universal Control with VSL. You must choose your system
drive. Storage drives and partitions cannot be used as hosts for the driver.
4. When the installation is completed, you will be prompted to reboot your
computer. After your Mac has restarted, connect your StudioLive with a FireWire
cable and power it on.
5. Once the installation is completed, you will find the Universal Control program in
your Applications folder. It is recommended that you place this in your Dock.
You are now ready to use your StudioLive!
6
2
2.3
Connecting to a Computer
Using the StudioLive as an Audio Interface
2.3
Using the StudioLive as an Audio Interface
StudioLive™ Software Library
Reference Manual
The StudioLive features a built-in FireWire interface that can be
used with any application that supports Core Audio or ASIO and
can also be used as a WDM device for a Windows computer.
For StudioLive 16.4.2 and 24.4.2 users, any input and bus with a Select
button, plus the Solo bus, tape input, and talkback mic, can be recorded.
Please consult the documentation that came with your audio application
for specific instructions on how to select the StudioLive driver as the audio
device driver for your software. It is important to note that the StudioLive uses
the same driver as the PreSonus FireStudio family of interfaces, so its driver
will be displayed as “PreSonus FireStudio” in all driver-selection menus.
2.4
Using the StudioLive with Popular Audio Applications
Below are basic driver-setup instructions for several popular audio
applications. Complete setup instructions for PreSonus Studio One Artist
and a brief tutorial on its features are located in Section 7 of this manual.
Steinberg Cubase 4+
1. Launch Cubase.
2. Go to Devices | Device Setup.
3. Select “VST Audio System” from the Devices column in the Device Setup.
4. Select PreSonus FireStudio from the ASIO Driver dropdown list.
5. Click “Switch” to begin using the StudioLive Driver.
6. Once you have successfully changed the driver, go to Devices |
VST Connections to enable your input and output buses.
Ableton Live 5+
1. Launch Ableton Live
2. Go to Options | Preferences | Audio
3. Choose Driver Type: ASIO | Audio Device: ASIO PreSonus FireStudio
4. Go to Input Config : Enable and select the desired Input channels.
5. Go to Output Config : Enable and select the desired Output channels.
6. You may now select the StudioLive’s inputs and
outputs for each track created in Live.
7
2
2.4
Connecting to a Computer
Using the StudioLive with Popular Audio Applications
StudioLive™ Software Library
Reference Manual
Apple Logic Pro/Express 7+:
1. Launch Logic Pro/Express.
2. Go to Logic | Preferences | Audio.
3. Click on the Devices Tab.
4. On the Core Audio tab, check Enabled.
5. Select PreSonus FireStudio from the device menu.
6. You will be asked if you’d like to relaunch Logic. Click “try (re)launch.”
7. Your StudioLive features custom I/O labels for faster work flow. To enable
these labels for use in Logic, go to Options | Audio | I/O Labels.
8. The second column in the pop-up window will be named
“Provided by Driver.” Activate each of these labels for your
StudioLive. When you are done, close this window.
9. You are now ready to use your StudioLive.
Avid Pro Tools 9+
1. Launch Pro Tools
2. Got to Setup | Hardware and select PreSonus FireStudio
from the Peripherals list. Click OK.
3. Go to Setup | Playback Engine and select PreSonus FireStudio
from the menu at the top of the window. Click OK.
Cakewalk Sonar 6+
1. Launch Sonar.
2. Go to Options | Audio... and click on the Advanced tab.
3. Change the Driver Mode to “ASIO.”
4. Click the “OK” button.
5. Restart Sonar.
6. Go to Options | Audio... and click on the Drivers tab.
7. Highlight all input and output drivers beginning with “PreSonus FireStudio.”
8. Go to Options | Audio... and click on the General tab.
9. Set the Playback Timing Master to “PreSonus FireStudio ... DAW Out 1.”
10.Set the Recording Timing Master to “PreSonus FireStudio ... Mic/Inst 1.”
8
2
2.5
Connecting to a Computer
FireWire Sends and Returns
2.5
FireWire Sends and Returns
StudioLive™ Software Library
Reference Manual
When using the StudioLive as an audio interface, it is important to understand
the terms “FireWire send” and “FireWire return.” Because the audio interface
in the StudioLive is completely integrated with the other functions of
the mixer, the FireWire I/O is designed to work as an independent bus.
You can route (send) signals from other buses to the FireWire bus, and its
output (return) signal is hard-coded to designated mixer channels.
•• The StudioLive 24.4.2 has 32 available sends and 26 returns.
•• The StudioLive 16.4.2 has 32 available sends and 18 returns.
•• The StudioLive 16.0.2 has 16 available sends and 16 returns.
2.5.1 Channel FireWire Sends
FireWire sends 1 through 24/16 are hard-coded to be sent prefader from the 24/16 input channels of the StudioLive. These
sends can be pre- or post-Fat Channel EQ and dynamics.
To record the EQ and dynamics processing on any channel, simply enable the Dig
Out button. It will illuminate, indicating that the Fat Channel signal path is being
routed to the FireWire send. If this mode is not enabled, the signal sent via FireWire
will be post-trim and post-analog insert (if applicable).
StudioLive 16.02. Owners: The exceptions to this rule are FireWire sends 15/16.
These FireWire sends are Flexible Inputs and can be set to record either the
analog signal on inputs 15 and 16 on the back of your StudioLive or the main
mix. Section 3.7.2 discusses how to assign these Flexible Input Sends.
Power User Tip: When the Flexible Input pair is set to record the main
mix, you can still connect a microphone or instrument to analog inputs
15 and 16, use them in your mix, and record them as a part of the main
mix. However, they cannot be recorded as individual tracks.
2.5.2 Auxiliary FireWire Sends (StudioLive 16.4.2 and 24.4.2 only)
The StudioLive 16.4.2 and 24.4.2 feature additional FireWire sends
that can be routed in stereo pairs from the Setup tab in VSL. Any
combination of the following inputs and buses can be selected:
•• Main Mix Left / Right
•• Subgroup 1 and 2
•• Subgroup 3 and 4
•• Aux Send 1 and 2
•• Aux Send 3 and 4
•• Aux Send 5 and 6
•• Aux Send 7 and 8 (StudioLive 24.4.2 only)
•• Aux Send 9 and 10 (StudioLive 24.4.2 only)
•• Aux Send A and B (EFXA and EFXB Send)
•• Aux Return A (Aux Input A)
•• Aux Return B (Aux Input B)
•• FX Return A (EFXA Return)
•• FX Return B (EFXB Return)
•• 2 Track Left/Right
•• Talkback Left/Right
•• Solo Left/Right
9
2
2.5
Connecting to a Computer
FireWire Sends and Returns
StudioLive™ Software Library
Reference Manual
Power User Tip: Note that either channel of the stereo pair can still be accessed
on a mono track in your host application; only the routing must be assigned as a
stereo pair. For instance, if you have a backing-vocal group routed to Subgroup 1
and a guitar group routed to Subgroup 2, you would create two mono tracks in
your recording application. The track whose input is assigned to Subgroup 1 will
record the backing-vocal group, and the track whose input is assigned to Subgroup
2 will record the guitar group. If, however, you have a stereo drum group assigned
to Subgroups 3-4, you can create a stereo track in your recording application
and assign its input to Subgroups 3 and 4. For more information on subgroup
mixing, please see Section 4.5 in the StudioLive 24.4.2/16.4.2 Owner’s Manual.
The obvious exception to this principle is the Talkback Mic input. In this instance, the
same signal will be printed on both sides of the send. In your recording software, you can
create a mono track and assign it to either side of the stereo FireWire send to which it is
routed. Both FireWire sends receive the same mono signal from the talkback mic preamp.
Please note that you have access to both the internal effects-send group and
the effects returns. If you record an internal effects send (Aux Sends A and
B), you will capture the unprocessed (“dry”) mix of the channels being sent
to that internal effects bus. To record the processed mix, choose the internal
effects returns (FX Return A or FX Return B). This is the direct output from
the internal effects, so it will be 100% wet. You may wish to record both the
dry and the wet mix so that you can blend them to taste in your session.
As discussed in Section 4.1.5 of the StudioLive 24.4.2/16.4.2 Owner’s
Manual, the Dig Out button is not operable for the subgroups, main
outputs, aux bus, internal FX returns, and aux inputs. The subgroups, main
outputs, and aux inputs are also sent post-fader to their FireWire sends.
Section 3.7.1 discusses how to select the sources for
these auxiliary stereo FireWire sends.
2.5.3 FireWire Returns
Each StudioLive input is hard-coded to receive its respective FireWire return. Outputs
1 through 24/16 in your recording application route these playback streams to their
respective channels on the StudioLive (that is, the software’s Output 1 always goes to
StudioLive Channel 1 FireWire Return and so on). Once you route a track in your
recording application to play through one of these outputs, it will always be
accessible on its channel by simply pressing the FireWire return button.
Power User Tip: It is important to think of your FireWire returns and your analog inputs
in the same way. When a FireWire return is engaged, it replaces the analog input in the
mix. You can process it in the Fat Channel, include in it Aux mixes, and send it to an FX mix.
StudioLive 16.0.2 Owners: As discussed in Section 4.5 of the StudioLive
16.0.2 Owner’s Manual, you must first engage FireWire Return mode before
you are able to use the MultiMode buttons to engage/disengage a FireWire
return on a channel. The FireWire returns to the stereo channels behave
just as the analog inputs do. So if you have Channel 11/12 unlinked, only
FireWire Return 11 will be heard on that channel. Once you engage Stereo
Link for Channel 11/12, FireWire Returns 11 and 12 will both be heard.
10
2
2.6
Connecting to a Computer
Using Plug-In Effects as Inserts
StudioLive™ Software Library
Reference Manual
2.5.4 Main FireWire Return
To provide the most flexible mixing environment, the main mix output for any
application should be assigned to the Main FireWire Return. These FireWire returns
are hard-coded to the FireWire Return buttons in the 2 Track In (StudioLive 16.4.2 and
24.4.2 only) and Monitor sections of the StudioLive. In this way, you can monitor the
main output from your recording application without using two channels on your
StudioLive, leaving the other channels available to be routed to the Fat Channel or
for inserting a plug-in on a live instrument (see the next section for more details).
The Main FireWire Return button is routed as follows:
•• StudioLive 24.4.2: FireWire Returns 25-26
•• StudioLive 16.4.2: FireWire Returns 17-18
•• StudioLive 16.0.2: FireWire Returns 1-2
2.6
Using Plug-In Effects as Inserts
FireWire streaming on your StudioLive is continuously bidirectional. This
means that the StudioLive is always sending signals from the direct FireWire
sends on all input channels, as well as from the auxiliary inputs and buses
assigned to the second bank of FireWire sends (StudioLive 16.4.2 and 24.4.2
only). At the same time, the StudioLive is receiving signals back from the
FireWire returns. Because the FireWire returns always come back to their
respective StudioLive channels, you can quickly insert a plug-in from your
recording application into any channel strip and monitor it in real time.
In this example, we will insert the Beat Delay plug-in from
PreSonus Studio One onto Channel 4 of the StudioLive.
1. To begin, create a mono audio track in Studio One.
2. Assign its input to Channel 4 and its output to Output 4.
(Several DAW applications, including Apple Logic, do not offer mono output
buses. If this is the case, you must route the output stream to, for example,
Channels 3-4 and pan the channel all the way to the right so that it will only
be sent to Output 4. Please consult your software’s user manual for specific
instructions.)
3. Once you have the routing set up in Studio One, drag-and-drop the Beat Delay
plug-in onto your track and record-enable it. Software monitoring will be enabled
automatically.
11
2
2.7
Connecting to a Computer
Printing Fat Channel Dynamics and EQ
StudioLive™ Software Library
Reference Manual
4. Press the FireWire Return button on Channel 4 of your StudioLive. You can now
monitor the analog signal from Channel 4 on your StudioLive with your inserted
effect (in this case, Beat Delay).
Power User Tip: When using plug-ins as inserts, it is very important that you set
as low a buffer size on your computer as possible without creating performance
issues. For most new computers, this won’t be an issue. A buffer size of 128 or less
will provide low enough latency for most plug-in types; however, dynamics and
EQ plug-ins and performance plug-ins such as amp-modelers may require lower
latency settings. See Section 3.1 for more information on buffer size settings.
Please note: setting the buffer size too low on older or slower computers,
or on a computer that has not been properly optimized, may result
in poor performance. Always be sure to test the limits of your system
before attempting CPU-intensive tasks in mission-critical situations.
2.7
Printing Fat Channel Dynamics and EQ
You probably will want to use the Fat Channel dynamics processing and EQ
during post-production. The question is how to print these changes to your
recording. An easy way to do this is through the main bus FireWire sends.
In this example, we will be processing a stereo drum loop in Studio One
through the Fat Channel processing on Channel 3 and 4 on your StudioLive.
1. In Studio One, route the channel’s outputs to StudioLive FireWire Returns 3 and 4
(see Section 7.3.2 to learn how to create input and output buses in Studio One).
2. Engage the FireWire return button on Channel 3 on your StudioLive.
3. Select Channel 3 on your StudioLive.
Select
12
2
2.7
StudioLive™ Software Library
Reference Manual
Connecting to a Computer
Printing Fat Channel Dynamics and EQ
4. Press the Link button in the Fat Channel to stereo-link Channels 3 and 4.
Link
5. Press and hold the SIP button.
SIP
6. Solo Channel 3-4. You will notice that all other channels have muted.
1
2
3
4
Select
Select
Select
Select
Select
Solo
Solo
Solo
Solo
Mute
Solo
Mute
Mute
LOOP L
LooP R
Mute
Keys R
Keys L
Tom 2
High Hat
OH Left
OH Right
7. Raise the faders on Channels 3 and 4 to Unity.
dB
dB
dB
dB
dB
dB
10
10
10
10
10
10
5
5
5
5
5
5
U
U
U
U
U
U
5
5
5
5
5
5
10
10
10
10
10
10
20
20
20
20
20
20
30
30
30
30
30
30
40
50
60
40
50
60
40
50
60
40
50
60
40
50
60
40
50
60
1
2
3
4
5
dB
dB
dB
dB
dB
dB
10
10
10
10
10
10
5
5
5
5
5
U
U
U
U
U
5
5
5
5
5
10
10
10
10
10
10
20
20
20
20
20
20
30
30
30
30
30
30
40
50
60
40
50
60
40
50
60
40
50
60
40
50
60
40
50
60
SUB1
SUB2
SUB3
SUB4
6
8. Raise the Main fader to Unity.
MAIN
13
2
2.7
Connecting to a Computer
Printing Fat Channel Dynamics and EQ
StudioLive™ Software Library
Reference Manual
9. StudioLive 16.4.2 and 24.4.2 owners: In VSL, patch Main L/R to Auxiliary FireWire
Returns 31 and 32.
StudioLive 16.0.2 owners: In VSL, patch Main L/R to the Flexible Inputs.
10.In Studio One, create a new stereo audio track
(see section 7.4 for more information).
11.In Studio One, select StudioLive Auxiliary FireWire Sends 31 and 32 (24.4.2 and
16.4.2 owners) or StudioLive FireWire Sends 15 and 16 (16.0.2 owners) for the
inputs on the new track.
12.You can then process the playback stream through the Fat Channel
for both the individual channel and for the Main bus.
13.Once you are happy with the sound, record it in Studio One.
Power User Tip: The unprocessed track can be removed from the session
or used in tandem with the processed track as an effect. The flexible routing
and mixing capability of the StudioLive provides you with an arsenal of tools
previously unavailable to “in the box” mixes. Don’t be afraid to test the limits
of modern mixing techniques and to create techniques of your own!
Note: The Dig Out button does not function when you have a FireWire return
selected as an input source. If Dig Out is enabled, any aux, subgroup (StudioLive
24.4.2/16.4.2), and the main bus to which the return is routed will not receive
the post-Fat Channel signal. The unprocessed signal will still be routed to these
buses, as well as to the FireWire bus, but the Fat Channel processing will not.
If you wish to add Fat Channel processing to a FireWire
return, you must disable Dig Out.
14
2
2.8
Connecting to a Computer
Configuring the StudioLive For Core Audio (Mac Only)
2.8
Configuring the StudioLive For Core Audio (Mac Only)
StudioLive™ Software Library
Reference Manual
Your StudioLive can be used as the main Core Audio device for a Mac, and you
can route the main outputs of your Mac to any of its available output streams.
By default, these streams are routed to Channels 1 and 2 on your StudioLive. For
StudioLive 16.4.2 and 24.4.2 owners, this presents an obvious limitation in that you
will use up two input channels on your StudioLive just for Core Audio playback.
Channels 25-26/17-18 are available through the FireWire Return buttons
in the 2 Track In and Monitor sections of the StudioLive 16.4.2 and 24.4.2,
and we recommend that you use these channels for Core Audio playback.
The following instructions will help you configure your StudioLive
to be used as the main audio playback device for your Mac.
StudioLive 16.4.2 and 24.4.2 users will first need to route their Mac’s output
to the Main FireWire Return. StudioLive 16.0.2 users can skip to Step 7.
1. Go to MacHD | Applications | Utilities and launch Audio MIDI setup.
2. Click on the Outputs tab.
3. Click on the Configure Speakers button.
4. Check the boxes next to Stream 1 and Stream 2.
15
2
2.8
Connecting to a Computer
Configuring the StudioLive For Core Audio (Mac Only)
5. Choose 2TrackIn L for the left speaker.
Choose 2TrackIn R for the right speaker.
6. When you are finished, click Apply and then Done.
16
StudioLive™ Software Library
Reference Manual
2
2.8
Connecting to a Computer
Configuring the StudioLive For Core Audio (Mac Only)
StudioLive™ Software Library
Reference Manual
7. Next you will set up your StudioLive as the main output
device for your Mac. Launch System Preferences.
8. Open the Sound Preferences.
9. Click on the Output tab and select PreSonus FireStudio.
The playback from all your Core Audio applications will now be
routed to the Main FireWire Return buttons on your StudioLive
Power User Tip: Because of the flexibility the Monitor Bus offers, you may wish
to use the Control Room Outputs to connect your studio monitors and use the
Main FireWire Return on your StudioLive as the Main Output for your DAW.
For StudioLive 16.0.2 owners, this means that you
should select Outputs 1-2 for your Main Bus.
For StudioLive 16.4.2 owners, this means that you should
select Outputs 17-18 (2Track L/R) for your Main Bus.
For StudioLive 24.4.2 owners, this means that you should
select Outputs 25-26 (2Track L/R) for your Main Bus.
17
3
3.1
Universal Control and VSL
Universal Control Launch Window
3
Universal Control and VSL
StudioLive™ Software Library
Reference Manual
Universal Control includes two windows: the Launcher window and the Device
window. For the StudioLive, the Device window is the Virtual StudioLive
(VSL) application. VSL provides bidirectional control of channel, subgroup
(16.4.2 and 24.4.2), aux, and main-bus levels; Fat Channel parameters; aux
mixes; effects; and the graphic EQs. It also provides a visual overview of
your StudioLive settings so that you can see, adjust, and organize them. VSL
includes a librarian, allowing you to easily manage your presets and Scenes.
Controlling your StudioLive with VSL is as easy as drag-and-drop. Load Fat Channel
presets and scenes by simply dragging them onto the channel or mixer overview.
You can load Fat Channel presets as a complete channel strip or as individual gate,
compressor, and EQ presets. Through VSL, you can back up all of the Scenes and
presets stored on your StudioLive. These stored settings can be loaded from disk
or sent to, and stored internally on, the StudioLive. You can even drag presets out
of the browser and email, IM, or disk-swap them with other StudioLive owners.
Since control is bidirectional, fader moves and parameter changes made on the
StudioLive are reflected in VSL. So, for example, you can set up the StudioLive
the way you want it and then save your Scene or other presets in VSL.
VSL also lets you create a password for your StudioLive so that you can lock out
unauthorized users. (See Section 3.7.10 for details.) From the Launcher window, you
can set basic parameters such as buffer size and sample rate. In addition, you can use
the Launcher window to configure your WDM outputs (PC only; see Section 3.1.1).
Note that the Meter Style and Meter Decay options in the Launcher window
are not active when only a StudioLive is connected to a computer.
3.1
Universal Control Launch Window
Sample Rate Selector Changes StudioLive Sample Rate.
Sets the sample rate to 44.1 or 48 kHz from the Launcher window
when your StudioLive is connected to a computer.
A higher sample rate will increase the fidelity of the recording. It will also increase
the file size and the amount of system resources necessary to process the audio.
However, be sure to select 44.1 kHz when using iTunes, Windows Media Player, or
another application to play produced media in order to avoid playback issues.
Power User Tip: To ensure the safety of the audio equipment connected to it, the
StudioLive will mute all post-converter outputs for two seconds when the sample
rate is changed or when the mixer is connecting to a computer. This includes the
main and the control-room outputs, as well as the aux and subgroup outputs.
While this offers a good measure of protection to your sound system, it could put
the brakes on a live show. Because of this, it is very important that the sample rate
be selected and locked in prior to beginning any recording or performance.
Clock Source. Changes the Clock Source for Chained FireStudio-family Devices.
The StudioLive cannot slave to an external clock. However, if
you are cascading it with FireStudio-family products that feature
digital inputs, the clock source becomes selectable.
The clock-source setting will determine where the device chain is
receiving word-clock information. This keeps the chained devices in
sync with other digital devices and with each other. The menu options
are determined by the available digital inputs in the chain.
In general, you will want the StudioLive to be your master clock,
in which case set the clock to StudioLive-Internal.
18
3
3.1
Universal Control and VSL
Universal Control Launch Window
StudioLive™ Software Library
Reference Manual
Operation Mode. Changes How the StudioLive Driver’s Buffer Size is Set.
•• Low Latency. Input and Output buffers are both identical to the Buffer Size setting.
•• Normal Mode. Slightly increases the Output buffer for typical operation.
•• Safe Mode 1-2. Increases the output buffer size for added stability.
Buffer Size Selector (Windows Only). Changes the StudioLive Buffer Size.
You can set the buffer size from 64 to 4,096 samples. The buffer size determines
the round trip time it takes audio data to be converted from analog to digital and
back to analog. As a general rule, the higher the buffer size, the better the system
performance, but the less playable virtual instruments and the like become. In
general, 512 samples (11 to 12 milliseconds) will provide you with a large enough
buffer for optimum system performance, but low enough to be unobtrusive.
You should set your buffer size and sample rate prior
to launching your host application.
On the Mac, the buffer size is set from inside your host application.
Device Window Button. Opens the Device Window.
Click on this button to open Virtual StudioLive (VSL).
To give your StudioLive a custom name, double-click on the
default label (StudioLive) to open a text field. When you have
finished entering your custom name, hit the Enter key.
File Menu. Opens and Closes Launch and Device Windows.
From the File menu of the Launch Window, you can open and close
both windows, as well as quit the Universal Control application.
•• Close Window. Closes just the Launch window.
•• Show All Devices. Opens the Device window for all of
the connected FireStudio-family interfaces.
•• Close All Devices. Closes the Device window for all of
the connected FireStudio-family interfaces.
•• Quit. Quits the Universal Control application.
Settings: Check Firmware. Scans Your StudioLive and Updates the Firmware.
A firmware updater is built into the Universal Control application. Periodically, a driver
update will require that the firmware on your StudioLive be updated. Whenever you
install an update for the Universal Control or add a new FireStudio-family product to
your system, you should use this feature to ensure that the firmware is up to date. If
the firmware needs to be updated, the update application will launch automatically.
If you have presets and Scenes saved in your StudioLive, updating
the firmware will not overwrite them; however, it is highly
recommended that you back up your custom Scenes and presets prior
to updating Universal Control or the firmware on your mixer.
Settings: Factory Reset. Resets Your StudioLive to its Factory Default Settings.
The Factory Reset option will reset your StudioLive to factory default. All user presets
and scenes will be deleted. All FX and Channel Strip presets will be reset to their
factory settings.
19
3
3.1
Universal Control and VSL
Universal Control Launch Window
StudioLive™ Software Library
Reference Manual
Settings: Run at Startup. Launches the Universal Control Application Automatically
on Startup (Windows Only).
When this is enabled, the Universal Control application will
automatically launch each time you boot your Windows PC.
On the Mac, you can set this up first by dragging Universal Control to your dock, then
by Option-clicking it and selecting Options>Open at Login.
Settings: Always on Top. Allows the Launch Window to Stay in View When Other
Applications are in Use.
When this is enabled, the Launch window will remain in the foreground when other
applications are active, rather than being in the background behind the current
application’s window.
Settings: WDM Setup. Opens the WDM Channel Mapper (Windows Only).
The StudioLive features an advanced WDM setup-configuration window. Please see
the next section for details.
20
3
3.1
Universal Control and VSL
Universal Control Launch Window
StudioLive™ Software Library
Reference Manual
3.1.1 Advanced WDM Features (Windows Only)
Like the FireStudio-family interfaces, the StudioLive features advanced WDM
features to enhance its use as an audio interface. In the upper left-hand corner
of the Universal Control Launcher window, you will find the Settings menu.
From here, you can configure your WDM input and output streams. For more
information on FireWire sends and returns, please consult Section 2.5.
Mac users: Please review Section 2.7 for important information
about using your StudioLive as your main Core Audio device.
Your StudioLive can be used as the main WDM device for a Windows computer,
and you can route the main outputs of your computer to any of its available output
streams. By default, these streams are routed to Channels 1 and 2 on your StudioLive.
Because of this, StudioLive 16.0.2 users do not need to do any further
setup to use the Main FireWire Return in their monitor bus to listen to
iTunes or the latest PreSonus video. For StudioLive 16.4.2 and 24.4.2
owners, however, this presents an obvious limitation in that you will use
up two input channels on your StudioLive just for WDM playback.
Channels 25-26/17-18 are available through the FireWire Return buttons
inside the 2 Track In and Monitor sections of the StudioLive 16.4.2 and
24.4.2, and we recommend that you use these channels for WDM playback.
The following instructions will help you configure your StudioLive to
be used as the main audio playback device for your computer.
1. In the Launch window, go to Settings | WDM setup. The WDM Channel Mapper
window will open. By default, WDM Outputs 1 and 2 are routed to StudioLive
Channels 1 and 2. As previously mentioned, we recommend that they be set,
instead, to Channels 25-26/17-18.
2. To begin, check the box next to Output.
21
3
3.1
Universal Control and VSL
Universal Control Launch Window
StudioLive™ Software Library
Reference Manual
3. Click on WDM 1 (front left) and drag it down to place
it next to StudioLive 2 Track In Left.
4. Click on WDM 2 (front right) and drag it down to place
it next to StudioLive 2 Track In Right.
5.
Your stereo WDM playback will now be routed directly to the main FireWire Return
buttons in the 2 Track In and Monitor buses in the StudioLive Master Section.
22
3
3.2
Universal Control and VSL
VSL: Browser
3.2
VSL: Browser
StudioLive™ Software Library
Reference Manual
When you first launch VSL, notice the Browser window along the right side of
the screen. The browser in VSL functions similarly to the browser in Studio One.
From the browser, you can see all of the Scenes, Fat Channel presets, FX presets,
and graphic EQ settings that are saved on your StudioLive and on your computer.
You can also create new settings and can back up your entire library from this
window. Simply drag-and-drop a Scene or preset to load it on your StudioLive.
Please Note: Your StudioLive’s firmware version must be compatible with
VSL’s version. VSL will scan your StudioLive to verify that its firmware is
compatible. If an update needs to be run, VSL will prompt you to update the
firmware. VSL will not open until the update has been run successfully.
Power User Tip: As with any firmware update, there is a risk that your custom settings
will not be saved. Because of this, it is highly recommended that you create a backup
file for your StudioLive using VSL prior to installing any Universal Control update.
Get Button. Transfers All Scenes, Fat Channel, FX, and Graphic EQ Presets Stored on
the StudioLive to VSL.
When you first launch VSL, you will need to create a link between your StudioLive‘s
internal memory and your computer. To do this, click on the Get button.
A dialog will open, prompting you to click the transfer
button. Any settings that are temporarily stored in the local
cache (i.e., settings that are currently visible in the Device
Memory section of the Browser window) will be overwritten.
Send to Disk Button. Transfers all Scenes, Fat Channel, FX, and Graphic EQ
Presets from Temporary Memory to the Permanent Cache.
VSL allows you to back up your Scenes, Fat Channel, FX, and graphic EQ presets
and permanently store them on your computer. Each type of preset can be added
separately. In this way, you can back up only what you want, when you want.
To move a Scene or preset from temporary memory into permanent memory,
simply select one preset or Scene and click the Send to Disk button.
To select multiple presets, hold the Shift key while making your selections.
Note: If you want to be able to remotely recall Scenes using SL Remote, you must first
transfer your Scenes to the permanent cache. Only Scenes displayed in the On The Disk
section of the browser will be available to recall in SL Remote.
shift
23
3
3.2
StudioLive™ Software Library
Reference Manual
Universal Control and VSL
VSL: Browser
Browser Tab Buttons. Displays the Different Preset Categories on Your StudioLive
and on Your Computer.
All of your Scenes and presets are contained in dedicated folders in
VSL. To view a specific set of presets, simply click on its tab.
•• SCENE. Displays stored Scenes.
•• FAT CH. Displays stored Fat Channel presets.
•• FX. Displays stored effects presets.
•• GEQ. Displays graphic EQ presets.
•• BACKUP. Displays any backup logs that have been created in VSL.
Send Button. Transfers Designated Scenes, Fat Channel, FX, and Graphic EQ Presets
from VSL to StudioLive Memory.
VSL makes reorganizing all the Scenes and presets stored on your StudioLive as easy
as dragging-and-dropping a file. To load your StudioLive with new Scenes and
presets, simply drag any Scene or preset from the On The Disk section of the browser
to any position in the Device Memory section of the browser.
A dialog will open asking you to verify that you would like to
overwrite the Scene or preset at the new position. This will
not immediately overwrite what is stored internally on your
StudioLive; it will merely overwrite what is stored in the VSL
cache memory.
Once you have organized the files you wish to transfer to your StudioLive, press the
Send button. When the transfer is complete, you can disconnect your StudioLive
from your computer and take your chosen Scenes and presets with you.
Add New Button. Creates a New Scene or Preset.
In the On The Disk and Device Memory sections of the browser, you will see the
Add New button. Clicking this button will immediately create a new Scene or
preset. If you want this new preset to be temporarily stored in VSL and immediately
sent to the StudioLive‘s internal memory, add the new preset in the Device
Memory section. If you would prefer to have this new preset stored in permanent
memory on your computer, use the Add New button in the On The Disk section.
In either case, the new preset can be sent to your StudioLive at any time.
Remove Button. Deletes a Stored Scene or Preset.
In the On The Disk section of the browser, notice the Remove button. Clicking this
button will delete the currently selected stored Scenes or presets.
Backup Tab. Creates and Restores Backups of Your StudioLive.
The Backup tab allows you to create complete time-stamped snapshots of your
StudioLive. This can be especially useful when completing a project that may need
to be revisited in the future. To create a backup, simply click on the Backup button.
To restore any backup file, select it in the On the Disk portion of the browser and click
the Restore button. You will be warned that any Scene or preset currently loaded in
the Device Memory section of the browser will be overwritten. Once your backup is
restored, you can click the Send button to transfer your Scenes and presets back to
the StudioLive.
Show/Hide Browser. Displays/Hides the Browser Window.
The browser can be hidden from view to provide more real estate for your
mix. Simply click on the Hide Browser button to close the browser.
To reopen the browser, click on the Show Browser button
in the upper right corner of the VSL window.
24
3
3.3
Universal Control and VSL
VSL: Overview Tab
3.3
VSL: Overview Tab
StudioLive™ Software Library
Reference Manual
At the top of the VSL window, you will see four tabs: Overview, Fat Channel,
GEQ, and Setup. The Overview tab provides you with a complete graphical
representation of your StudioLive. As you adjust parameters on the StudioLive,
you will notice that the VSL overview is also updated. If you use your mouse
to adjust a parameter in VSL, the StudioLive will be updated remotely. It is
important to remember that every button, knob, slider, and fader on the VSL
corresponds directly to a button, knob, slider, or fader on your StudioLive.
Display Browser
Phantom Power
FireWire Return
Phase Reverse
Digital Out
Enable GEQ
Focus GEQ
High Pass Filter
Subgroup Assign
GEQ Assign
Main Bus Assign
Gate Microview
Compressor Microview
EQ Microview
Aux Send Levels
FX Send Levels
FX Type Menu
Focus GEQ
Pan Control
Talkback
Channel Select
Channel Solo
Channel Mute
Scribble Strip
Meter Mode
Copy Mix
Channel Meter
Channel Level
Stereo Link
The graphic above identifies each controller, labeled with its
corresponding control on the StudioLive, and can be used as a
map to quickly learn how to navigate the Overview tab.
3.3.1 Aux Send/Masters Views
VSL provides two views for your StudioLive aux outputs and FX buses. The Aux Send
view gives you an overview of the send levels of every channel on your StudioLive to
every aux output and FX bus.
Clicking on the arrow button will collapse the auxes, allowing you to view channel
faders and the microviews at the same time on lower-resolution screens.
Power User Tip: To quickly set up an aux mix, use your mouse to set
the send level for Channel 1. Right-click on the Channel 1 send level
and sweep your mouse across the other channel sends for that aux. The
send level will be copied to every other channel for that aux.
25
3
3.3
StudioLive™ Software Library
Reference Manual
Universal Control and VSL
VSL: Overview Tab
The Masters view displays the controls for each aux
output and FX bus as they appear on the StudioLive and
displays a scribble strip to give each aux a custom name.
From within the Masters view, you can also select
each aux and FX bus to edit its Fat Channel insert.
For StudioLive 16.4.2 and 24.4.2 users, the Masters view also displays
the send levels for the Aux Flip Mode Channels (Main FireWire Return,
Tape Input, Aux In A and B, FXA, FXB, and Talkback [24.4.2 only]).
3.3.2 Tap Tempo
VSL allows you to remotely control the Tap Tempo function for a delay loaded on
either FX bus. Once a Delay FX Type (Mono, Filter, Stereo, or Pingpong) has been
loaded onto FXA or FXB, the Tap Tempo button will be visible on that bus. Clicking on
it repeatedly will change the Time parameter to match the tempo entered.
3.3.3 Copying Mixes
Next to the main fader, and in each of the aux masters, you will see the
Copy Mix handle. When selected with your mouse, this handle lets you
drag-and-drop the mix for that bus to another bus. In this way, you
can drag the main-fader mix to Aux 1 to set a starting point and can
quickly give the singer the same mix on two different floor wedges.
Note: While the main mix can be copied to any aux, aux mixes can
only be copied to other aux mixes and not to the main mix.
3.3.4 Copying Channel Settings
VSL provides you with two ways to copy channel settings from one
channel or bus to another. The first method functions essentially
like you StudioLive hardware, the second is unique to VSL.
Copy Channel (Copy/Paste)
The StudioLive mixers give you the ability to quickly copy-and-paste a
single channel or bus’s Fat Channel settings onto multiple channels and
buses. VSL provides the same functionality in exactly the same way.
1. To copy a channel or bus, simply select it and click the Copy button. All the Select
buttons will flash.
2. Click the Select buttons for the channels and buses to which you want to copy the
Fat Channel settings.
3. When you are done, click Paste.
Note: Subgroup and Main bus assignments are only copied from channel to channel.
26
3
3.4
Universal Control and VSL
VSL: Fat Channel Tab
StudioLive™ Software Library
Reference Manual
Copy Channel (Drag-and-Drop)
At the top of the VSL window, you will see the Copy Channel handle. This handle
follows the selected channel and lets you drag-and-drop all the Fat Channel and bus
assignments for that channel onto another channel or bus.
Note: Channel bus assignments are only copied from channel to channel.
3.3.5 GEQ in Focus (24.4.2 and 16.4.2 only)
In general, graphic EQ settings are created prior to a live show and
are not adjusted after that. However, minor adjustments sometimes
must be made later. VSL makes this quick and easy.
You will have noticed that there is a GEQ above the Master section on the
Overview tab. Here, you can focus any GEQ in one of three ways:
Select a GEQ on the GEQ Tab. For example, if you leave GEQ 5/6 in focus
on the GEQ tab and switch back over to the Overview tab, you will still be
able to adjust GEQ 5/6 using the Focus GEQ above the Master section.
Select the GEQ from the GEQ Focus Menu. In the upper left corner of the GEQ in
Focus, you will find a pull-down menu. From this menu, you can select any of the
eight GEQs to put into focus on the Overview tab.
Click on a Focus GEQ button. Once a graphic EQ has been inserted on an aux,
subgroup, or main bus, a Focus GEQ button will be displayed above that bus. (Note:
For auxes, Focus GEQ buttons are displayed in the Masters view only.) Clicking on this
button will pull that bus’s inserted graphic EQ into focus on the Overview tab.
3.4
VSL: Fat Channel Tab
The Fat Channel tab provides a detailed overview of the Fat Channel parameters
for the selected channel. The selected channel will always be shown above
the Gate section. It is important to remember that you have continuous
bidirectional control. If you grab a point in the EQ with your mouse, for example,
you will change the parameters both in VSL and on your StudioLive.
StudioLive 16.4.2 and 24.4.2 users: To access the Fat Channel for Aux Inputs
A or B, press the aux input’s Select button on the StudioLive. You can then
load presets and make adjustments using VSL from within the Channel tab.
All aux buses, FXA, and FXB can be selected using the Masters view. The Fat
Channel Tab also provides access to Subgroup and Main bus assignments.
Power User Tip: The Fat Channel tab can also be opened by double-clicking on
any of the microviews on the Overview tab. The Fat Channel tab will open with the
selected parameter in view. For example, if you double click on the EQ microview
on Channel 4, the Fat Channel tab will open displaying the full EQ for Channel 4.
27
3
3.5
Universal Control and VSL
Loading Scenes and Presets from VSL
3.5
Loading Scenes and Presets from VSL
StudioLive™ Software Library
Reference Manual
As stated in the previous section, the Browser window in VSL functions in much the
same way as the browser in Studio One. To load a Scene or preset from the Browser
window, simply select it and drag it over the mixer or channel on which you wish to
load it. Scenes and presets can be dragged from either the On the Disk or the Device
Memory section of the browser and dropped onto the Overview or the Channel tab.
3.5.1 Loading a Scene
To load a new Scene on your StudioLive, select it from the Browser window and drag
it over the mixer in either the Overview or the Channel tab. The window will gray out,
indicating that a new Scene is about to be loaded. Note that only the parameters
that have been enabled for recall on the StudioLive will be recalled on the mixer.
3.5.2 Loading Scribble Strip Labels
Scribble Strip labels are stored with your Scenes. You can load just the labels
by selecting the Scene from the Browser window and dragging it over the row
of Scribble Strips above the Channel Faders. The Scribble Strips will gray out,
indicating that the Scribble Strip labels from the Scene are about to be loaded.
Please Note: Scribble Strip labels are not saved when a Scene created in VSL is transferred
to your StudioLive. For example, if you create a Scene in VSL, transfer it to your StudioLive’s
memory and then transfer it back into VSL (or recall it from the StudioLive while VSL
is connected), your Scribble Strip labels will have been removed and will not load.
28
3
3.5
Universal Control and VSL
Loading Scenes and Presets from VSL
StudioLive™ Software Library
Reference Manual
3.5.3 Loading a Fat Channel Preset
To load every component in a Fat Channel preset (gate, compressor, EQ,
etc.), select the preset from the Browser window and drag it over any
part of the desired channel.
If you drag it over any of the component microview, it will load only that
component (e.g., if you drag a preset over the gate microview, only the gate
will be loaded).
3.5.4 Loading an FX Preset
To load an FX preset, select it from the Browser window and drag it over any part
of the desired FX bus in the Master section of the Overview tab. Once it is loaded,
you can use the FX Type menu to change the effect and create new presets.
Note: At this time, VSL does not transfer the name of the preset to the
StudioLive. All FX presets loaded from within VSL will be labeled “Natural” in the
FX menu on your StudioLive.
29
3
3.6
Universal Control and VSL
VSL: GEQ Tab
StudioLive™ Software Library
Reference Manual
3.5.5 Loading a GEQ Preset
To load a graphic EQ preset, select it from the Browser window and drag it
over any part of the focused graphic EQ. Graphic EQ presets can be loaded
on the Overview tab or the GEQ tab. Once a preset is loaded, you can use the
sliders in VSL, or the encoders on the StudioLive, to make adjustments.
Please Note: You must be in the GEQ
menu page for the graphic EQ you wish
to control in order to use the encoders on
your StudioLive to control each graphic
EQ in VSL. See the Section 5.3 in the
StudioLive Owner’s Manual for details.
3.6
VSL: GEQ Tab
The StudioLive 16.4.2 and 24.4.2 feature 4 dual-mono graphic EQs. Assignable
in stereo pairs, these graphic EQs can be inserted on any of the 10/6 aux buses,
the 4 subgroups, or the main bus. The StudioLive 16.0.2 features one stereo
31-band graphic EQ on the main bus. In addition to allowing you to control
each graphic EQ individually, VSL automatically links each dual-mono graphic
EQ to create a true stereo graphic EQ if the pair is inserted onto a stereo bus,
allowing you to control both sides at once. (For example, if you insert GEQ
1/2 onto Subgroups 3 and 4 and stereo-link the subgroups, GEQ 1/2 will
function as a stereo graphic EQ rather than a dual-mono graphic EQ.)
From the GEQ tab, you also have access to Smaart Spectra™ analysis
tools. These tools can be used to ring monitors, view the frequency
spectrum of your mix, or check the overall output level of a bus.
Note: The GEQ menu on your StudioLive does not have to be active to make
changes to a graphic EQ from VSL. If you wish to use the Fat Channel encoders
to control the graphic EQs in VSL, then you must open the GEQ menu on your
StudioLive. See Section 5.3 in the StudioLive Owner’s Manual for details.
3.6.1 Selecting a GEQ to Edit (24.4.2 and 16.4.2 only)
Along the top of the GEQ tab, you will see another set of tabs, one for each dualmono GEQ. To bring a GEQ in focus so that you can edit it, simply click on its tab.
Power User Tip: Unlike controlling the graphic EQs from the StudioLive
mixer, each pair of graphic EQs in VSL follows the linked state of the bus
to which it is assigned. If you link Aux 1 and 2, for example, and make a
change to the GEQ assigned to Aux 1, the GEQ assigned to Aux 2 will change
simultaneously. GEQs assigned to the Main bus are always stereo-linked.
GEQ Bus Assignment (24.4.2 only). To insert a graphic EQ on a bus, click on the
pull-down menu below the graphic EQ’s number and select the pair of buses onto
which you’d like to insert it.
Because the graphic EQs are dual-mono, they must be assigned
in stereo pairs. However, unless the bus is stereo linked,
you will have control over each GEQ individually.
Power User Tip: If a bus is stereo-linked, the graphic EQ will link
automatically. This can be overridden temporarily by holding
the ALT/OPTION Key while moving a graphic EQ slider.
30
3
3.6
Universal Control and VSL
VSL: GEQ Tab
StudioLive™ Software Library
Reference Manual
3.6.2 Enabling a GEQ
By default, all graphic EQs are disabled. To enable them remotely via VSL, simply click
on the Enable button to the left of the sliders.
3.6.3 Flattening a GEQ Curve
To zero out all curve settings on any GEQ, click on the Flatten GEQ button, which is
directly below the Enable button. This will flatten all band gains to 0 dB so that they
neither boost nor attenuate any of the 31 bands.
3.6.4 Enabling Smaart Analysis
By default, Smaart analysis is disabled. While Smaart is disabled, you have control
over which bus is routed to Auxiliary Inputs 29 and 30 (StudioLive 16.4.2 and 24.4.2).
Clicking on the Spectrograph or RTA buttons will start Smaart, and VSL will take
control over Auxiliary Inputs 29 and 30 (StudioLive 16.4.2 and 24.4.2).
StudioLive 16.0.2 Users: You must route your main mix to Flexible Inputs 15
and 16 in order to use Smaart analysis. If analog inputs 15 and 16 are patched
to the Flexible Inputs, the Spectrograph and RTA buttons will not function.
For more information on the Auxiliary Inputs and Flexible Inputs Routers, please see
Sections 3.7.1 and 3.7.2.
3.6.5 Time-Frequency Spectrograph
Clicking on the Spectrograph button will launch the Time-Frequency
Spectrograph. This Spectrograph provides a three-dimensional view of
your audio in which x = frequency, y = time, and color = decibel level.
Any signal below the lower dynamic-range threshold is black. Any signal above
the top dynamic-range threshold is white. Within the dynamic range, colors go
from blue to green to red, with blue indicating the quietest and red the loudest.
31
3
3.6
Universal Control and VSL
VSL: GEQ Tab
StudioLive™ Software Library
Reference Manual
Many audio signals that are encountered in the field are highly dynamic. Musical
signals, speech, and even environmental noise contain significant changes in spectral
content as a function of time. The Spectrograph can be thought of as a record of
multiple RTA measurements taken over time, with color representing amplitude.
Using this function, the spectral content of the input signal is recorded as it changes
in time. This allows you to view and analyze time-varying trends in the input signal.
As a troubleshooting tool, the Spectrograph is useful for finding spectral “defects”
in a system or acoustical environment. Certain audio signals or acoustical events
contain specific traits that can be easily detected due to their distinct time/
frequency signature—specifically, highly tonal sounds such as AC line noise
in an electrical signal chain or the presence of electro-acoustical feedback.
Dynamic Range
In the lower left-hand corner, you will see the dynamic-range sliders for the
Spectrograph. These sliders set the maximum and minimum volume thresholds for
the Spectrograph.
3.6.6 RTA
Clicking on the RTA button will launch the Real-Time Analyzer where x = frequency
and y = amplitude. An RTA provides a close visual representation of what you are
hearing. It provides a view of the long-term spectrum of the signal—for example,
the one-third-octave spectrum long-term average of a musical performance.
Averaging
While the RTA is engaged, you can adjust its averaging speed. When using music in
test measurements, it is often necessary to average the data over a brief amount of
time. This is because most musical signals do not have energy at all frequencies all of
the time.
Averaging is a mathematical process that takes multiple data samples and performs
division to acquire a statistically more accurate calculation of the response. That’s a
technical way of saying that it slows down the “real-time” of a Real-Time Analyzer.
32
3
3.6
Universal Control and VSL
VSL: GEQ Tab
StudioLive™ Software Library
Reference Manual
3.6.7 Using the Smaart Spectrograph to Ring Out Monitors
The Spectrograph shows frequency data over time, so a constant frequency,
such as feedback, results in a straight line in the spectrograph. Feedback is
short term for a feedback loop, where a portion of the signal from the speaker
returns to the microphone resulting in a constant tone at the offending
frequency. “Ringing out” is a process of attenuating the frequencies that are
feeding back to maximize gain before feedback in your floor monitors.
1. With the mic input gain at an appropriate level, bring the Aux Send level up on the
mic channel you wish to ring.
Power User Tip: If you are using one console for stage monitors and another console
for front of house, set the mic input gain on the front-of-house console. Do not “gain
up” the mic signal on the monitor mixer for the sake of getting more volume out of a
stage monitor, as you can do that in other places (Mix level for individual channels,
Aux Out level for global control, etc.). Gain staging is very important in order to have a
feedback-free show.
On
Shelf
On
Hi Q
On
2. Click on the GEQ tab in VSL and select the GEQ assigned to the Aux Output of the
stage monitor you are ringing out.
3. Enable the Spectrograph.
Input
Input
Aux 3
Input
Input
Aux 4
Solo
Aux 5
Solo
Output
Post
Select
4. Slowly bring the Aux Output level up until you hear (and see) feedback.
Input
Solo
Output
Post
Select
Post
Control
Control
Control
Mix
Mix|Pan
Mix
+28
26
24
22
20
18
16
14
Note: Ringing out stage monitors will produce feedback. If you are not careful, you can
produce a lot of feedback. Do not make sudden gain boosts; go slowly and carefully to
avoid causing any damage to speakers and ears.
5. Feedback will show up as a solid line on the Spectrograph and as a line peak on
the RTA. Use the dynamic threshold to adjust how bright, and at what input level,
the frequency information plots.
6. Lower the GEQ fader for the offending frequency in 3 dB increments to attenuate
(“ring”) it out of your stage monitor.
Power User Tip: Bring back the level on the GEQ slider to the point just before feedback
so you don’t take out too much frequency content and sacrifice overall timbre.
Because the speaker is pointed at the mic, stage-monitor feedback typically occurs
in the higher frequencies, which also is where intelligibility comes from. Maximizing
your intelligibility and gain structure results in clearer-sounding monitors.
You can apply this process to the Main system, as well. This is especially useful
with applications requiring lavaliere or podium mics. These types of microphones
are typically omnidirectional condensers and are very prone to feedback.
33
3
3.6
Universal Control and VSL
VSL: GEQ Tab
StudioLive™ Software Library
Reference Manual
In a main system, feedback is typically in the mid to low range. The
frequencies that are regenerating and creating a feedback loop
are those frequencies that are wrapping around the main system
due to the loss of directional control of lower frequencies.
When you are ringing out a system, and more than two or three feedback
loops are happening simultaneously, you have reached the level where
stability can no longer be achieved. Try bringing down the overall output level
or find a physical solution, such as moving the speaker or microphone.
3.6.8 Using the Smaart RTA While Mixing
The RTA and Spectrograph have useful applications beyond recognizing feedback
spikes. The ability to analyze frequency content—specifically, being able to
visualize the exact frequencies you are hearing in order to hone in on problem
areas— makes the RTA a secret weapon for many a mix engineer. The Smaart
Spectra tools also lend themselves very well to ear training and give you confidence
that you are choosing the right frequencies when making adjustments.
Because the RTA/Spectrograph is analyzing the bus signal digitally, room and speaker
anomalies are taken out of the equation. This provides a pure measurement of
your mix because you are measuring what is happening inside your StudioLive.
A Spectrograph shows the broadband information of a signal, making it easy to
view the fundamental frequency of a source, as well as its harmonic structure.
The RTA is a view of amplitude and frequency content over a specified plane.
With the Spectrograph, you can view what is happening in your signal now, at the
same time you are viewing what happened moments before. In contrast, there
is no history information for the RTA: Once an event happens, it goes away.
Power User Tip: Both the RTA and Spectrograph views are useful in understanding what
the spectral content of an instrument is when creating space for that instrument in a mix.
How you use these tools to achieve an objective is a matter of your subjective, or creative,
goals. Trust your ears and use the Spectra tools to verify what you are hearing.
Here is a mix of drums, bass, guitar, and male vocal
viewed by the RTA in VSL. In the first image, you will
notice a spike at 500 Hz. This correlated directly with an
edgy-sounding lead guitar that was competing with the
male vocal.
After making some adjustments to the guitar so it
would sit better in the mix, that spike went away:
Power User Tip: It should be noted that neither a
Spectrograph nor an RTA can be used as a substitute for
careful listening. While these tools provide a great visual
analysis of your mix, critical listening must always be your
main guide.
34
3
3.6
StudioLive™ Software Library
Reference Manual
Universal Control and VSL
VSL: GEQ Tab
Another powerful use for the RTA is to help you quickly EQ a problematic
instrument when dialing in your mix during sound check. In this example we will
be using the RTA to identify the offending frequency in a ringing Floor Tom.
1. To begin, press and hold SIP on your StudioLive.
SIP
SIP
1
2
3
4
5
Select
Select
Select
Select
Select
2. Solo the Floor Tom channel.
Solo
Solo
Solo
Solo
Solo
Solo
Mute
Mute
Mute
Mute
Mute
kick
Snare
dB
10
floor tom
dB
10
dB
10
Tom 1
Tom 2
High Hat
OH Left
OH Right
dB
10
3. Raise the Floor Tom channel Fader to Unity.
4. Raise the Main Fader to unity.
5. In VSL, click on the GEQ tab.
6. Select the Main Bus GEQ.
7. Engage the RTA button.
35
3
3.6
Universal Control and VSL
VSL: GEQ Tab
StudioLive™ Software Library
Reference Manual
8. Watch the RTA as the Floor Tom is played. Notice there is a spike at
250 Hz that correlates to the boomy ring you keep hearing.
9. On the StudioLive turn on the Low Mid EQ and set its frequency to 265 Hz.
10.Lower the gain until you hear (and see) the ring go away.
36
3
3.7
Universal Control and VSL
VSL: Setup Tab
3.7
VSL: Setup Tab
StudioLive™ Software Library
Reference Manual
The Setup tab allows you to customize VSL and your StudioLive, route your
Auxiliary FireWire inputs (StudioLive 16.4.2 and 24.4.2 only), route your
Flexible Inputs (StudioLive 16.0.2 only), set up MIDI Control mode (StudioLive
16.0.2 only), and enable or disable functions on connected iOS devices.
3.7.1 Auxiliary Inputs Router (16.4.2 and 24.4.2 only)
In additions to the 24/16 Input channels, the StudioLive 16.4.2 and 24.4.2 mixers
allow you to route to a computer the input channels and any 16 of 19 (16.4.2) or 8
of 23 (24.4.2) buses and other inputs. This is done via the Auxiliary Inputs Router
on the Setup tab. To route FireWire Sends 17-32 (16.4.2) or 25-32 (24.4.2), first
decide which buses and inputs you would like to record in addition to your input
channels. Once you’ve determined your input pairs, simply patch them to a stereo
pair of auxiliary inputs of your choice. Remember, all of these buses and inputs are
automatically set to send their signals post-Fat Channel dynamics and post-EQ
(where applicable). The inputs and buses selected in the Auxiliary Input Router will
be displayed in your recording application, along with the name of their routing.
For instance, the routed pairs in the picture would translate as
the following chart in your host recording application:
PHYSICAL
SOFTWARE
Main Mix Left
Auxiliary In 25
Main Mix Right
Auxiliary In 26
Subgroup 1
Auxiliary In 27
Subgroup 2
Auxiliary In 28
Subgroup 3
Auxiliary In 29
Subgroup 4
Auxiliary In 30
Aux Send 3
Auxiliary In 31
Aux Send 4
Auxiliary In 32
The Auxiliary Inputs Router also allows you to designate a specific bus as the
S/PDIF output, as well as enabling you to select which stereo pair will be recorded
on the Auxiliary Stereo Track in Capture. When the StudioLive is not connected to
a computer, the S/PDIF output can be routed using the System menu. However,
when your StudioLive is synced to your computer, you can route any of the 19 or 23
(depending on your mixer) available buses or inputs to the S/PDIF output by routing
them to FireWire Sends 31 and 32. In addition to being available for recording
via Aux In 31 and Aux In 32, these sends are normalled to the S/PDIF output.
As previously mentioned, if Smaart Spectra tools are engaged, VSL will take control
of Auxiliary Inputs 29 and 30. When VSL has control, these inputs will be grayed out.
37
3
3.7
StudioLive™ Software Library
Reference Manual
Universal Control and VSL
VSL: Setup Tab
3.7.2 Flexible Inputs Router (StudioLive 16.0.2 only).
The StudioLive 16.0.2 allows you to choose between recording analog Inputs 15 and
16 or the main bus. This is done via the Flexible Inputs Router on the Setup tab. By
default, your StudioLive is configured to record inputs 15 and 16 on FireWire Sends
15 and 16. To record the main-bus mix instead, simply repatch the main bus to
FireWire Sends 15 and 16, using the Flexible Inputs Router.
The main bus is automatically set to send its signal post-Fat
Channel dynamics processing and post-EQ (where applicable).
No matter which source is selected in the Flexible Inputs Router,
you will see inputs 15 and 16 in your recording application.
Note: In order to use the Smaart Spectra tools, you must patch
the main mix to the Flexible Inputs. When analog Inputs 15/16
are patched, the Smaart controls will not function.
3.7.3 MIDI Control Mode Menu (StudioLive 16.0.2 only).
MIDI Control mode is a powerful feature that allows
you to control key StudioLive 16.0.2 parameters
remotely, using a MIDI controller or DAW. This menu
corresponds directly to the MIDI Control mode
pages in the System menu on your StudioLive.
See Section 5.5 in the StudioLive 16.0.2
Owner’s Manual for complete details.
3.7.4 Noise Gate Mode (StudioLive 16.4.2 only).
The StudioLive 16.4.2 lets you choose between an expander and a noise gate for
each pair of channels. The Noise Gate Mode menu on the Setup tab corresponds
directly with the Gate Type page in the System menu on your StudioLive.
See Section 5.4 in the StudioLive 16.4.2/24.4.2 Owner’s Manual for details.
3.7.5 Scene Recall Filters
Your StudioLive allows you to decide which group of parameters you
would like to recall with a Scene. The Scene Recall menu on the Setup tab
corresponds directly with the Scene Recall menu on your StudioLive.
See Section 5.2.3 in the StudioLive Owner’s Manual for details.
3.7.6 Link Channel Faders Preference
When the Link Channel Faders preference is enabled, stereo-linked channels will
no longer have individual control over each fader in VSL or StudioLive Remote.
This allows you to control the volume of a stereo channel pair by moving either
channel’s fader.
38
3
3.7
StudioLive™ Software Library
Reference Manual
Universal Control and VSL
VSL: Setup Tab
3.7.7 Default to Fader Locate Preference
With the Default to Fader Locate preference enabled, Fader Locate will automatically
engage when a fader is moved remotely in VSL or StudioLive Remote. This preference
allows you to quickly sync your StudioLive when you return to the board.
Power User Tip: If you are remote-controlling the faders on your StudioLive, it is highly
recommended that you enable this preference. When Fader Locate Mode is activated,
the faders on your StudioLive will not be active. By allowing this mode to engage
automatically, you can avoid accidental volume jumps should you forget, when you
go back to the StudioLive, that a fader was adjusted up or down in VSL or SL Remote.
3.7.8 Talkback Assignments
Your StudioLive’s Talkback Assignments can be remote-controlled from VSL. The
Talkback on/off is controlled from the Talk button on the Overview tab (see graphic
in Section 3.3).
3.7.9 Remote Devices Permissions
Controlling VSL remotely with StudioLive Remote for iPad or QMix for
iPhone/iPod touch allows you to move about the venue freely. However,
it can also put the full power of the StudioLive in multiple hands—
some more adept than others. Therefore, VSL enables you to limit each
iOS device’s access to the mixer features by setting permissions.
Once an iOS device is connected to your wireless network and has launched
SL Remote or QMix, the device will be displayed in the Remote Devices
list on the Setup tab in VSL. Each device will be listed using its device
name so you can easily identify which device is which. This name can be
changed in iTunes or in the General>About settings on the iOS device.
Once you have connected and configured an iOS device, the same
permissions will be set for that device every time you connect it. Complete
information about SL Remote and QMix can be found in Sections 4 and 5.
StudioLive Remote for iPad Permissions:
When setting permissions for SL Remote users, you will choose between giving full
access to all SL Remote functions or providing limited access to just a few aux-mix
functions. In most cases, one iPad will be configured as front-of-house (FOH), and the
others will be configured as aux mixes.
Front of House. Enables all SL Remote functions, including the
ability to launch Smaart System Check Mode from SL Remote.
When this option is disabled, SL Remote will only control a
specified aux mix or all aux mixes.
To select an individual aux mix or all aux mixes, click on the
pull-down menu.
Aux Fat (Aux Mixes Only). When enabled, the SL Remote user will
be able to control the Fat Channel for the auxes that device has
permission to control. This option is not available when Front of
House is enabled.
GEQ (Aux Mixes 16.4.2/24.4.2 Only). When enabled, the SL
Remote user will be able to control the GEQ assigned to their aux.
This option is not available when Front of House is enabled.
39
3
3.7
StudioLive™ Software Library
Reference Manual
Universal Control and VSL
VSL: Setup Tab
Channel Rename. Allows channels, auxes, and subgroups (16.4.2
and 24.4.2 only) to be renamed remotely using SL Remote.
Ignore. When Ignore is enabled, the device’s installation of SL
Remote will have no control over VSL.
QMix for iPhone/iPod Touch Permissions:
When setting permissions for QMix users, you will choose between providing full
access to all aux mixes, providing access to only a single aux mix or limiting the user
to just the Wheel of Me functions.
Aux Mix Selection. Gives access to a single aux mix or all auxes.
Wheel Only. Disables the Aux Mix page in QMix. When this is enabled, the
user will only be able to use the Wheel of Me on the single aux to which
you’ve provided access. When Wheel Only is enabled, you cannot give
access to all auxes.
Channel Rename. Allows channels, auxes, and subgroups (16.4.2 and
24.4.2 only) to be renamed remotely using SL Remote.
Ignore. When Ignore is enabled, the device’s installation of QMix will have
no control over VSL.
3.7.10 Enabling Lockout Mode
Your StudioLive features a Lockout mode that allows you to temporarily disable
nearly every feature on the StudioLive, although analog features (e.g., input-trim
knobs, faders, and cue, tape-input, and monitor levels) can still be adjusted.
Because of this, after unlocking your StudioLive, and before resuming
mixing, you should take a quick glance at your input trims and output levels.
If you have locked your fader position, you will be able to recall your prelockout fader positions using the Locate button in the meter section.
Until you connect your StudioLive to a computer, the mixer cannot be
locked, so don’t worry about accidentally locking yourself out.
1. With your StudioLive connected and synced to your computer, launch VSL and
click on the Setup tab.
2. Click on the Lock Out button.
3.To set your custom password, click on the box next to “Device is
Lockable.” At this point, a cursor will appear in the password box.
Enter a 5-digit code using any number between 1 and 9, and click
the Set button. Your password will no longer be displayed. Should
you need to change your password, simply click on the box next to
“Device is Lockable.” Your old password will be deleted, and you will be
able to enter a new password. Once you have set your password, the
StudioLive can be locked whether it’s synced to a computer or not.
40
3
3.8
Universal Control and VSL
SmaartSystemCheckWizards(StudioLive16.4.2and24.4.2only)
StudioLive™ Software Library
Reference Manual
4. To lock your StudioLive, press the System button in the Digital Effects | Master
Control section.
System
5. Navigate to the Lockout menu. Your StudioLive cannot be
locked unless this page is active. (StudioLive 16.4.2 and 24.4.2
users: If you have two StudioLive mixers linked, you only
need to lock the Master unit to lock both mixers in the chain.)
6. To lock your StudioLive, press the Select buttons that correspond to the 5-digit
password you have set. In this example, the password is 12345, so you would press
the Select buttons for Channels 1, 2, 3, 4, and 5, in that order. The Panel Status will
switch to Locked, indicating that Lockout mode is active.
1
2
3
4
5
Select
Select
Select
Select
Select
7. To unlock your StudioLive, navigate back to the Lockout page in the System menu
on your mixer, if this page is not currently active. Press the same sequence of Select
buttons. The Panel Status will change to Unlocked, and you will be able to resume
your mix.
1
2
3
4
5
Select
Select
Select
Select
Select
3.8
Power User Tip: At its lowest level of security, Lockout mode allows you to freeze the
current Fat Channel and effects settings. Faders, aux mixing, master section functions like
Talkback and Monitoring, and Scene recall are still functional. Each of these mix functions
can be added to Lockout mode.
Smaart System Check Wizards (StudioLive 16.4.2 and 24.4.2 only)
VSL also includes three System Check Wizards to provide you with the
ability to view the frequency response of the venue; quickly calculate
and set delay system timing; and verify output connectivity.
Traditionally, in professional sound reinforcement, the mixing console is there to
mix, and the system processor is there to align and tune the speaker system. When
functioning and set correctly, the system processor is invisible to everyone but
the System Engineer. For the first time, the tools used to tune and align speaker
systems are built into the mixing console itself and accessible to any engineer
who wants to improve their PA’s sound and get the most out of their PA system
For all but the most seasoned professional sound technician, this is a new extra
step in the process of setting up for a show. For most FOH engineers, getting a
good mix is a big victory. But imagine being able to recreate that same killer mix
night after night, show after show. Once the system has also been optimized for the
environment it is in, any FOH engineer working on it will achieve that big victory
without so much work. This is why System Alignment is a standard procedure
in professional level sound reinforcement. Again, this solution is not typically
achieved from the mixing console, but built into the system design itself. Universal
Control 1.7 merges these two worlds into the StudioLive 16.4.2 and 24.4.2.
41
3
3.8
Universal Control and VSL
SmaartSystemCheckWizards(StudioLive16.4.2and24.4.2only)
StudioLive™ Software Library
Reference Manual
Clicking on the Smaart button at the top of the VSL window will launch Smaart
System Check Mode. While in this mode you can launch any of the following wizards:
•• SRA: Smaart Room Analysis generates a frequency-response
trace and overlays it on the parametric EQ in VSL so you can adjust
your system to get rid of unwanted anomalies in the room.
•• SSD: Smaart System Delay calculates and sets the correct
amount of delay time between two full-range systems.
•• SOC: Smaart Output Check verifies that your system
outputs are routed correctly and are passing signal.
To run any of the Smaart System Check Wizards, VSL will need to
take over your mixer. When you first click on the Smaart System
Check button, you will see a warning to this effect.
Clicking on the “Proceed” button will launch the Wizard select window and you will
no longer have control over your mixer. You can exit the Wizards and regain control at
any point simply be clicking on the Overview, Fat Channel, GEQ, or Setup tabs in VSL.
Note: To run the SRA and SSD wizards, you will need to connect a measurement
microphone to your StudioLive’s Talkback input. You’ll also need a mic stand
and a long enough cable to place the mic in front of your speakers.
A measurement microphone is special type of condenser microphone that is
designed to provide an accurate reproduction of a room’s sound characteristics
for use with audio-analysis tools, such as RTAs and spectrographs. Measurement
microphones typically have an omnidirectional polar pattern and deliver a very flat
frequency response between a low end of 5 Hz to 30 Hz and a high end of 15 to
30 kHz. While measurement microphones can be quite expensive, most affordable
models will do the job nicely when paired with the Smaart System Check Wizards.
42
3
3.8
Universal Control and VSL
SmaartSystemCheckWizards(StudioLive16.4.2and24.4.2only)
StudioLive™ Software Library
Reference Manual
3.8.1 Smaart Room Analysis Wizard
The SRA Wizard is an automated process that will guide you through the steps
of acquiring a frequency-response trace for your audio system. A frequencyresponse trace is the plotted result (frequency and amplitude) of the system
measurement. This measurement is calculated using Rational Acoustics’
transfer function, which is a set of proprietary algorithms that compare the
signal from a measurement mic to computer-generated pink noise.
Reference Signal
(Input Signal)
Sound System
Measurement Signal
(Output Signal)
Measurement Channel RTA
Reference Channel RTA
(Pink Noise)
=
Frequency Response Trace
1. To launch the Room Analysis Wizard, click on the Room
Analysis tab.
2. You will be instructed to connect a measurement microphone to the Talkback
input on the back of your StudioLive mixer.
16.4.2
3. Set the Talkback trim pot on the back of your mixer to 12 o’clock.
16.4.2
43
3
3.8
Universal Control and VSL
SmaartSystemCheckWizards(StudioLive16.4.2and24.4.2only)
StudioLive™ Software Library
Reference Manual
4. You will be asked which output you would like to analyze. Stereo-linked outputs
will be listed as stereo. (e.g., If Sub 1 and Sub 2 are stereo-linked, they will be listed
as Sub 1/2)
5. Click OK to start the wizard.
Next you will be asked to pick the type of analysis you would like to do. Basic
Analysis requires you to take a single measurement of your system. When analysis
is complete, the wizard will continue to output pink noise through your system
while you EQ, allowing you to view the effects of your filters in real-time.
Advanced Analysis requires you to take three separate measurements
and will generate a more accurate frequency-response trace of your
system by averaging the measurements together. Once the trace has
been generated, this wizard will not continue to analyze your system. To
view the effects of your filters, you must run the wizard again. Skip to the
next part of this section for more information on Advanced Analysis.
Basic Analysis
1. Place your microphone on-axis in front of the speaker you
want to analyze. If you are analyzing a stereo bus, place your
microphone on-axis in front of the Left speaker. See Section
3.8.5 for tips in choosing the best primary mic position.
1
2. Select Basic Analysis from the pull-down menu.
3. Click OK when your microphone is properly placed.
4. It is now time to make some noise—pink noise, that is. Raise the fader until the
pink noise output through your speaker is louder than the ambient noise floor in
the room. At the appropriate measurement level, you should not hear the air
conditioning, traffic noise from the street, etc.
44
3
3.8
Universal Control and VSL
SmaartSystemCheckWizards(StudioLive16.4.2and24.4.2only)
StudioLive™ Software Library
Reference Manual
5. To mute the pink noise at any time, simply click on the Speaker Icon.
6. Click OK when the pink noise is at the appropriate level.
7. Click Analyze to generate the frequency-response trace.
8. Adjust the EQ to shape the frequency-response into the correct Trend for your
application. (See Sections 3.8.6 and 3.8.7 for best practices.) In general, you do
not want to boost any frequencies and you do not want to make any cuts greater
than 6 dB. The frequency-response trace will refresh as you make your changes.
9. Click Exit to complete the wizard.
Advanced Analysis
1. Place your microphone on-axis in front of the speaker you
want to analyze. If you are analyzing a stereo bus, place your
microphone on-axis in front of the Left speaker. See Section
3.8.5 for tips in choosing the best primary mic position.
1
2. Select Advanced Analysis from the pull-down menu.
45
3
3.8
Universal Control and VSL
SmaartSystemCheckWizards(StudioLive16.4.2and24.4.2only)
StudioLive™ Software Library
Reference Manual
3. Click OK when your microphone is properly placed.
4. Raise the fader until the pink noise output through your speaker is louder than the
ambient noise floor in the room. At the appropriate measurement level, you
should not hear the air conditioning, traffic noise from the street, etc.
5. To mute the pink noise at any time, simply click on the Speaker Icon.
6. Click Analyze to generate the first frequency-response trace.
7. Place your microphone off-axis in front of the same speaker.
See Section 3.8.5 for tips in choosing the best secondary mic
positions.
2
8. Click OK when your microphone is properly placed.
9. Click Analyze to generate the second frequency-response trace.
10. Place your microphone in a different off-axis position in front
of the same speaker. See Section 3.8.5 for tips in choosing the
best secondary mic positions.
3
11.Click OK when your microphone is properly placed.
46
3
3.8
Universal Control and VSL
SmaartSystemCheckWizards(StudioLive16.4.2and24.4.2only)
StudioLive™ Software Library
Reference Manual
12.Click Analyze to generate the third frequency-response trace.
13.Adjust the EQ to shape the frequency response into the correct
trend for your application. (See Sections 3.8.6 and 3.8.7 for best
practices.) In general, you do not want to boost any frequencies
and you do not want to make any cuts greater than 6 dB.
14.Click Exit to complete the wizard.
To view the effects of your filter on the system, run the Room Analysis Wizard again.
Power User Tip: In most cases, you will want to EQ the left and right side of a
stereo system the same. This is why the SRA wizard asks you to measure the left
side of your system only and linked buses are displayed as such. If you are in an
unusual situation where you need to separately EQ each side (e.g., you are using
a different model 15” speaker on the left side that you are on the right side),
connect your system to a pair of subgroup outputs and do not link them.
3.8.2 Smaart System Delay Wizard
Using multiple sets of speakers is at a live performance can make a huge difference
in the quality of the sound. Rather than relying on a pair of front-of-house speakers
to fill the entire room, you can create listening zones throughout the room so
that your front-of-house system only needs to be loud enough to cover the
front of the room. This allows you to lower the level, give the front row listeners’
ears a break, and get better fidelity from your speakers. Sounds great, right?
However, it’s not as easy as just bringing an extra pair of speakers. Any additional
sets of speakers will need to be delayed; otherwise the audience will feel that
the sound is coming from the walls, rather than the stage. Even worse, since
electricity travels much faster than sound, listeners in the rear of the room are
likely to hear the sound coming from the nearest set of speakers before they
hear the sound from stage, which can dampen the attack and intelligibility
of the sound and create an unpleasant phasing effect. To compensate,
you need to delay the signal going to the additional sets of speakers.
Sound travels at a rate of 1,130 feet per second, providing that the temperature,
humidity, and air pressure are all “normal.” Therefore, it takes 1 ms for sound to travel
0.88 feet. But what if you’re setting up for an outdoor show in, let’s say, Baton Rouge,
Louisiana, in August, when the temperature and humidity are unpleasantly far above
“normal”? Your calculations might be a little off, unless you happen to be a whiz at
calculating the effect of barometric and atmospheric pressure on sound waves.
47
3
3.8
StudioLive™ Software Library
Reference Manual
Universal Control and VSL
SmaartSystemCheckWizards(StudioLive16.4.2and24.4.2only)
I just wanted to mix sound......
I didn’t know there’d be math
2
5
x-16
5 x-15 = 8
2
5
x-16+15
5 x-15+16 = 8
5
5
5
2
x= 8 x- 8 x-1
5 x- 8
2
5
x( 5 - 8 )=-1
2 8
5 8
x( 5 8 - 8 8 )=-1
*Special thanks to our friends at www.roadie.net for the use of this awesome cartoon.
The SSD Wizard is an automated process that calculates and sets the correct
delay time between two full-range systems. The purpose of this wizard is to
set the delay time for a secondary system that is being fed from one or more
subgroups. No calculators, slide rules, or finger-counting are necessary!
STAGE
FOH L
FOH R
30 Feet
30 Feet
Side Fill
(left)
Side Fill
(right)
40 Feet
37 Feet
Rear Fill
(right)
Rear Fill
(left)
inconveniently positioned column
In the above example, you see three sets of speakers: main front-of-house,
sidefills for the middle of the room, and rear fills for the back. As a general
rule, you should set the delay on a satellite system based on its distance
from the next closest system to the mains. In this case, you’ll set the delay
on the sidefills based on their distance from the main front-of-house system
and the delay for the rear fills based on their distance from the sidefills.
48
3
3.8
Universal Control and VSL
SmaartSystemCheckWizards(StudioLive16.4.2and24.4.2only)
StudioLive™ Software Library
Reference Manual
When using the SSD Wizard for the above system, you would run the
wizard four times. The first time, you’d use the main front-of-house left
for the main system and the left sidefill for the delay system. The second
time, you will use the left sidefill as the main system, and the left rear-fill
for the delay system. Then repeat the proceedure for the right side.
Please Note: it is important that you set the delay on the first satellite
pair before you set the delay on the subsequent satellite pair.
Power User Tip: Because rooms often have inconveniently placed
architectural features—fire exits, tables, and so on—the left and right side
of a system with satellites will rarely be equidistant on both sides of the
system. Because of this, you need to run the wizard for each side of a stereo
system, starting at the front and working your way to the back.
Please note: the SSD Wizard is not designed to analyze systems that include a subwoofer.
Temporarily disconnect or disable your subwoofer before beginning analysis.
System Delay Wizard
1. To launch the System Delay Wizard, click on the
System Delay tab.
2. You will be instructed to connect a measurement microphone to the Talkback
input on the back of your StudioLive mixer.
16.4.2
3. Set the Talkback trim pot on the back of your mixer to 12 o’clock.
16.4.2
4. From the top pull-down menu, select the speaker output you
want to delay. Please note: Only Subgroup Outputs 1 through
4 can be delayed.
5. From the bottom pull-down menu, select the speaker output
to which you’d like to align. This can be your Main Outputs or
any of the Subgroup Outputs, even if the Subgroup Outputs
have been delayed.
6. Click OK to start the wizard.
49
3
3.8
Universal Control and VSL
SmaartSystemCheckWizards(StudioLive16.4.2and24.4.2only)
StudioLive™ Software Library
Reference Manual
7. Place your microphone on-axis in front of the speaker you
want to delay. See Section 3.8.5 for tips in choosing the best
primary mic position.
1
8. Click OK when your microphone is properly placed.
9. Raise the fader until the pink noise outputted through your main system (the
speaker to which you want to align) is louder than the ambient noise floor in the
room. At the appropriate measurement level, you should not hear the air
conditioning, traffic noise from the street, etc.
10.To mute the pink noise at any time, simply click on the Speaker icon.
11.Click Analyze.
12.If necessary, adjust the pink noise level for your delay system (the speaker you
want to delay) so that it is louder than the ambient noise floor in the room.
13.Click Analyze to calculate the delay time.
14. When the wizard is finished, you will be shown the measured
delay time.
50
3
3.8
StudioLive™ Software Library
Reference Manual
Universal Control and VSL
SmaartSystemCheckWizards(StudioLive16.4.2and24.4.2only)
15. Click Apply to set that measure delay time on the subgroup out.
16.Click Exit to leave the wizard.
Note: For delay times between 0 and 50 ms, the delay will be set to the nearest
0.5 ms; between 51 and 100 ms, the delay will be set to the nearest 1 ms; and
between 102 and 300 ms, the delay time will be set to the nearest 2 ms.
Once you have positioned and delayed your satellite system, you will want to
match the output levels of the main and delay systems. To do this, use an SPL
meter to match the output of the Main and Delay systems at the delay system
measurement position. This means that if you are standing 20 ft from the left side
of the Main system and 30 ft from the left side of the delay system and the output
of the Main system is 85 dB, the output of the delay system should also be 85 dB.
Delay System
Measurement Position:
1) Frequency Response
(SRA Wizard)
2) Delay Time
(SSD Wizard)
3) SPL Reference Point
MAIN
DELAY
FOH Mix Position
3.8.3 Smaart Output Check Wizard
It’s five minutes before a show, and suddenly the drummer says there’s
nothing coming out of his monitor. Or you do a friend a favor and run sound
at her club because she has the flu, and you show up not knowing which aux
is connected to what monitor or which sub is controlling what sidefill. The
SOC Wizard was designed to make these problems disappear like magic!
By momentarily taking over the routing and volume control of an output
and patching pink noise to it, the SOC Wizard lets you quickly discover
which speaker is connected where and helps you quickly get to the root of a
routing problem. In the case of the drummer with silent monitor, if he hears
pink noise, you can save yourself ten minutes of frantic cable tracing only to
discover the output level was inadvertently turned down on his aux mix.
51
3
3.8
Universal Control and VSL
SmaartSystemCheckWizards(StudioLive16.4.2and24.4.2only)
StudioLive™ Software Library
Reference Manual
Click on the Output Check tab to use the Smaart Output Check Wizard. You will be
shown buttons for all outputs on your StudioLive. Click on an output’s button, and
pink noise will fade in for three seconds. You can click on the button again to stop it.
To adjust the pink noise, use the fader on the right side of the page.
3.8.4 Go Remote
At any point during any of the Smaart System Check Wizards, you can
switch over to iPad control using SL Remote. This allows you to continue
to the next step of the Wizard without having to walk back to FOH, which
is especially useful when placing your measurement microphone.
1. Follow the instructions in Section 4.1 and network your iPad and Computer.
2. Launch SL Remote on your iPad. See Section 4.1.3 for more information.
3. Connect to you StudioLive from SL Remote. See Section 4.1.3 for more
information.
4. SL Remote will launch to a warning page telling you that the device is under test.
52
3
3.8
Universal Control and VSL
SmaartSystemCheckWizards(StudioLive16.4.2and24.4.2only)
StudioLive™ Software Library
Reference Manual
5. From the Smaart System Check Wizards, click on the Go Remote button. This will
pull down a menu of connected iPads. Select your iPad from the list.
6. You can now continue the wizard from SL Remote.
Any iPad that has been given FOH permission can launch the Smaart
System Check Wizards remotely. For more information on starting
Smaart System Check from SL Remote, please see Section 4.6.1. More
information on FOH permission can be found in Section 3.7.9.
Power User Tip: An iPad does not have to be given FOH permission to be listed
in the Go Remote list. The advantage of this is that you can grab any iPad that
happens to be handy to take the Smaart System Check Wizards with you.
3.8.5 Mic Position
The SRA and SSD Wizards do all of the calculations and complex routing through the
StudioLive for you. Two very important decisions are up to you: Where to place the
mic and, in the case of the SRA wizard, what to do with the frequency-response trace.
Improper mic placement can create “problems” in your trace
that actually don’t exist in your sound system.
Primary Mic Position
This is the main reference point for a speaker and can be used
as a single, “representative” position if you’re short on time or
patience and just want to get a “gut check” of your system.
Your goal in setting the primary mic position is to find a point that puts
the microphone in the center (on axis) of a speaker’s throw, within
the listening area. In other words, you want to put the microphone
smack dab in the middle of where your speaker sounds its best.
1
53
3
3.8
Universal Control and VSL
SmaartSystemCheckWizards(StudioLive16.4.2and24.4.2only)
StudioLive™ Software Library
Reference Manual
Secondary Mic Position
You will use two different secondary positions in a multi-point measurement. These
can be on- or off-axis measurements of a speaker within the listening area. This will
allow the SRA wizard to create an average frequency response of your sound system.
Avoid using locations outside the core coverage area of your system or on the edges.
The graphic below displays some good secondary measurement positions relative
to the primary position, as well as some positions that would be more problematic
than useful. With any mic position, avoid creating position-dependent anomalies.
X
2
2
2
2
1
2
2
2
2
2
2
A word of caution about ground bounce: Ground reflections become an
issue when a speaker is flown and angled down. The proper mic position,
in this case, will also catch the reflection of the signal off the floor.
Reflection arrives ~4 ms late...
In this case, you can choose from three options:
•• Block the reflection with a baffle that is large enough to
be effective above 100 Hz (so at least 5’ by 5’).
54
3
3.8
Universal Control and VSL
SmaartSystemCheckWizards(StudioLive16.4.2and24.4.2only)
StudioLive™ Software Library
Reference Manual
•• Do a ground-plane measurement.
•• Do a multi-point measurement. Enough measurement
positions will randomize the effect of the floor bounce.
3.8.6 System Alignment Rules
The visual result of a sound-system test can be a powerful tool;
however, like all powerful things, you must be responsible about
how you wield it. Here are few basic principles to follow:
Solve the problem at its source. The closer to the source, the more effective
the solution will be. If your kick drum lacks punch in the mix, take a look
at the kick-drum channel’s EQ and dynamics processing. Is the kick drum
properly tuned? Are you boosting the attack of the kick beater enough
and at the right frequency? Is your compressor’s attack too long?
Use the right tool. The system EQ is the last in a long line of possible solutions
to frequency problems. Once you have fully assessed the problem, you
can choose the right tool. Check the acoustic space, choice of equipment,
and system design first. Obviously, you don’t always have control over the
acoustic design or treatment (or lack thereof) of a room, and your wallet
might determine your choice of speakers more than your needs do, but
usually you have some control over your sound system’s design.
Can you raise the speakers to mitigate some of the harsher
reflections? What about widening the stereo field?
After you’ve ruled out physical solutions to a sound problem, move on to level and
delay. Can you simply lower the level of your subwoofer to kill some of the boom
in the room? Can you delay your front-of-house speakers by a few milliseconds
so that they’re in alignment with the guitar cabinets blaring from stage?
55
3
3.8
Universal Control and VSL
SmaartSystemCheckWizards(StudioLive16.4.2and24.4.2only)
StudioLive™ Software Library
Reference Manual
If you can’t find a physical solution and can’t mitigate the issue with
level and delay control, it’s time to employ the system EQ.
A frequency-response trace is not a video game. Your goal is to fix your
system and make it sound the best it can, not create an EQ curve that is an exact
inversion of the frequency-response trace. Mix with your ears, not your eyes.
An analyzer is a tool: you are the carpenter. You decide where
to measure your speakers. You decide what the resulting data
means. You decide what (if anything) to do about it.
3.8.7 Using the Trace: Spotting the Trend
As discussed in the previous section, many factors can affect the response
of a sound system: the room, system configuration, electronics, wiring, and
more. Part of understanding what you see is knowing what you should
not be seeing—or at least having a basic idea of what to expect. After
all, you are trying to sculpt the EQ curve of the system into something
that compliments that sound system’s frequency response.
For example, a small system without a subwoofer can’t reproduce much energy
below 50 Hz. In fact, this frequency cutoff could be even higher, depending
on the size of the speaker, its factory tuning, porting, etc. This means that
if you are analyzing a system that is comprised of two 2-way, 12” powered
speakers, you should expect your frequency-response trace to drop off
around 50 Hz or so (depending on the frequency response of your speakers).
Because of this, boosting low frequencies in this type of system wouldn’t
achieve much and may introduce more problems than it would solve.
Power User Tip: A subwoofer can significantly change the frequency
response of a full-range system. A 3-way system with a subwoofer will
be 6 to 18 dB hotter below 80 to 100 Hz than a 3-way system without
a subwoofer. Keep this in mind when viewing your trace.
Different types of live performances have different requirements of a PA system.
A classical concert has very different needs from a rock concert. Just as you
wouldn’t mix an evening of Bach quartets the same as an evening of thrash metal,
you don’t want to tune your PA system the same for both types of events.
A classical concert doesn’t need an exaggerated subwoofer output. The
audience and performer expect and want a natural reproduction of the music. In
contrast, systems that are tuned for a rock show will use subwoofers essentially
as an effect. This is how they achieve those pummeling kick and toms and
huge bass guitar sound: the system is pre-tuned with more bass response.
In other words, you can stack the deck to be assured of a big FOH mix win. In System
Alignment, this deck stacking is called “trends”. And every genre and performance
type requires a different type of trend. The sole objective of a system EQ is to smooth
out the sound system by creating a uniform slope that the system follows. This
will give your system a more uniform sound and performance, as well as better
clarity, because your system has been pre-EQ’d to meet the needs of concert.
56
3
3.8
StudioLive™ Software Library
Reference Manual
Universal Control and VSL
SmaartSystemCheckWizards(StudioLive16.4.2and24.4.2only)
Below are some examples of trends for various applications:
Music Concert:
Subs
2 to 4 kHz
Rock Concert:
Subs
Extended LF
2 to 4 kHz
Music Playback/Reproduction
Subs
Speech Intelligibility
100 Hz
2 to 4 kHz
Power User Tip: The amplitudes depicted in the trend examples above are
guidelines: examples of very general slopes required for different applications.
The desired value will be different for every gig, and it is ultimately up to you to
decide what is required for your show, based on what type of artist is performing
and what kind of sound system you are using. While making a trace follow these
trends is recommended, in real-world applications, this might not always be
possible. Being able to compromise and work with what you have often requires
a certain amount of creativity and artistry on the part of the system engineer.
57
3
3.8
StudioLive™ Software Library
Reference Manual
Universal Control and VSL
SmaartSystemCheckWizards(StudioLive16.4.2and24.4.2only)
Spotting the Trend: Real World Example
Let’s take a look at the following frequency response trace. In this
example we can see a few peaks that don’t go along with our
application, for our purposes, let’s make that a music concert.
Our goal is to get from this:
to this:
Subs
2 to 4 kHz
…all the while keeping in mind that we cannot alter the speaker’s
frequency-response curve, even if we would like to.
Looking at our trace, it’s easy to spot a few problem areas. There’s a
bump at 300 Hz that could be smoothed out a bit. Another bump
at 750 Hz could stand some flattening, and a big rise at 1 kHz to
10 kHz is going to make our system shrill at higher volumes.
What about all the other bumps and dips? Remember: The frequency-response
trace is not a video game. You don’t need to put a filter on every bump or dip
in your trace when a few carefully placed filters will achieve a much better
result. This is also why the wizard overlays the trace on your parametric EQ.
58
3
3.8
Universal Control and VSL
SmaartSystemCheckWizards(StudioLive16.4.2and24.4.2only)
StudioLive™ Software Library
Reference Manual
A parametric EQ is an ideal tool to shape your system’s frequency-response trace into
a trend that will complement your application; with a parametric EQ, you have the
ability to effect large areas of bandwidth, with minimal electronic smearing to the
signal. This also frees up your graphic EQ for aesthetic adjustments or fine-tuning.
So, let’s apply the following EQ setting and take a look
at the resulting frequency response trace:
As you can see, just four filters made a big difference and now our system’s
frequency response trace follows the general Music Concert trend that we needed.
Music Concert
Trend (no sub)
Power User Tip: Spotting the Trend and knowing what to do with it are experiential
skills that get better over time. Because of this, you may try using the trends in the
previous section as practice tools. Shoot your room with the SRA wizard and try to
EQ it for Speech Intelligibility, then play an audio book or a recording of your favorite
inspirational speech through your system. Turn the EQ on and off while listening.
Did you make the system better? Try the same experiment using the Rock Concert
trend and play your favorite live album through your system this time. Over time,
you’ll begin to see what really constitutes a problem and what can be overlooked.
You don’t need to have access to a live venue to do this. Set your speakers up in
your garage, or living room, or both and try to see the differences in the rooms.
59
4
4.1
StudioLive Remote for iPad
Networking your iPad and Computer
4
StudioLive Remote for iPad
StudioLive™ Software Library
Reference Manual
StudioLive Remote (SL Remote) for iPad provides an unprecedented level
of remote control over your StudioLive. With SL Remote, you can adjust
level, pan, dynamics, bus routing, FX mixes, aux mixes, and GEQ settings
from an Apple iPad via a wireless network. All you need is a computer with
Wi-Fi capabilities and an Apple iPad, and you’re ready to get started.
4.1
Networking your iPad and Computer
To use StudioLive Remote, you must first install Universal Control on, and sync
your StudioLive to, a Windows or Mac computer that has a FireWire connection
and a wireless card. (If your computer lacks a wireless card but has Ethernet, you
can set up your wireless network using a Wi-Fi-equipped router.) Once you have
connected and synced your StudioLive to VSL on your computer, the next step is
to create an ad hoc wireless network between your iPad and your computer.
An ad hoc, or “peer-to-peer,” network is a very simple network involving
at least two systems—in this case, the computer to which your
StudioLive is connected and an Apple iPad. Unlike the usual local area
network (LAN) that you use to connect multiple computers to the
Internet or to a shared file server, no server or router is needed.
Creating an ad hoc wireless network between your computer and your
iPad is quick and easy. The network will allow you to remote-control VSL,
and hence your StudioLive, from an iPad, using StudioLive Remote.
Power User Tip: Network connections occasionally require troubleshooting,
especially when a lot of wireless networks are in use. Because of this, it is always
a good idea to get your iPad and computer happily communicating before the
pressure is on, and you have a singer trying to dial in a monitor mix while you’re
trying to mic the drum kit. So while the guitarist is flirting with the bartender,
take a quick moment to get your iPad, computer, and StudioLive talking.
4.1.1 STEP 1: Creating an Ad Hoc Network on your Computer
Windows Vista
1. Open Start>Connect to.
2. Click “Set up a connection or network.”
3. Select “Set up a wireless ad hoc network” and click Next.
4. Enter the new network name, such as “StudioLive.”
5. Enter a Security key or password. For the best security,
include letters, numbers, and punctuation.
6. Check “Save this Network.”
60
4
4.1
StudioLive Remote for iPad
Networking your iPad and Computer
StudioLive™ Software Library
Reference Manual
Windows 7
1. Open Start>Control Panel.
2. Click “Network and Internet.”
3. Click “Network and Sharing Center.”
4. Under “Change your networking settings,” click
“Set up a new connection or network.”
5. Select “Set up a wireless ad hoc (computer-to-computer) network.”
6. Click on “Next” twice.
7. Enter the network name, such as “StudioLive.”
8. Select the Security WAP (or WEP).
9. Enter the Security key or password. For the best security, include
letters, numbers, and punctuation. Then click OK.
10.Check “Save this network.”
11.Click “Turn on Internet connection sharing.”
Windows 8
Windows 8 does not natively support ad hoc connections.
Therefore, we recommend that Windows 8 users employ a
wireless router, rather than setting up an ad hoc network.
Mac OS X 10.6 and later
1. On the Menu bar click on the Wireless Status icon.
2. From the pull-down menu select “Create Network…”
3. Give your Network a name, such as “StudioLive.”
4. If you would like set up a password (recommended), check “Require Password.”
5. Create your password within the guidelines and click “OK.”
6. Once your network has been successfully created, you
will see it in your list of available networks.
61
4
4.1
StudioLive Remote for iPad
Networking your iPad and Computer
StudioLive™ Software Library
Reference Manual
4.1.2 STEP 2: Connect your iPad to your Ad Hoc Network
1. Tap on the Settings icon in your iPad.
2. Tap on “Network.”
3. Tap on “Wi-Fi.”
4. Under “Choose a Network,” you should now see your ad hoc network in the list.
5. Tap on your newly created network to select it.
6. If you secured your network with a password, you will be prompted to enter it.
7. Tap on the menu arrow to the right of the desired network’s name to open its
network settings.
8. Turn Auto-Join to “On.” You are now ready to launch
StudioLive Remote and mix on the go!
62
4
4.1
StudioLive Remote for iPad
Networking your iPad and Computer
StudioLive™ Software Library
Reference Manual
4.1.3 STEP 3: Connecting to Virtual StudioLive and StudioLive Mixers
Once you have created your ad hoc network and joined it from
your iPad, you are ready to launch StudioLive Remote.
Important: You must connect to your computer’s ad hoc network each
time you plan on remote-controlling your StudioLive with StudioLive
Remote, and Virtual StudioLive must be launched on your computer
and synced to your StudioLive in order to use StudioLive Remote.
Apple’s iPad offer two viewing options: Landscape and Portrait.
For the most part, you will hold your iPad in Landscape view. This will allow
you to use the Start, Overview, Aux Mix, GEQ, and Setup pages. Portrait view
provides you with a zoomed-in look at the currently selected channel and allows
you to scroll quickly through every channel and bus on your StudioLive.
To launch StudioLive Remote, tap on the SL Remote icon on your iPad. When you
launch StudioLive Remote, you will be taken to the Start page.
On the Start page, you will see a list of every StudioLive mixer on the
network. The Start page also includes simulations for each of the three
StudioLive mixers so you can practice your finger control away from
your StudioLive. Tap on the Demo Mixers tab to view this list.
To connect to your mixer, tap on the StudioLive device icon. The
text will change color to alert you that it has been selected.
Tap the Connect button to open SL Remote and control your mixer from your iPad.
At the top of the Start page, you will see the Reconnect button. This lets you quickly
reestablish communication with the last mixer you were controlling (provided that
mixer is still available).
63
4
4.2
StudioLive Remote for iPad
Overview Page
4.2
Overview Page
StudioLive™ Software Library
Reference Manual
The Overview page in StudioLive Remote corresponds directly with
most of the controls on the Overview page in VSL. The following
parameters can be controlled and/or viewed from this page:
•• Channel and Main Volume
•• Channel and Main Select
•• Channel Mute
•• Channel and Master Metering
•• Channel Panning
•• Channel FireWire Return
•• Channel and Main Gate, Compressor, and EQ Overview
•• Channel and Main Gate, Compression, and EQ Zoom
If you have labeled your channels using the Scribble Strip on the Overview
tab in VSL, you will also be able to see your channel names.
Power User Tip: Because StudioLive Remote is a wireless controller
for Virtual StudioLive, the fastest way to get comfortable with
StudioLive Remote is to get well acquainted with VSL.
4.2.1 Bus Assignments Query
Above each channel, you will find the Bus Assignments view. This displays the current
bus assignments (StudioLive 16.4.2 and 24.4.2 only) and FireWire Return status for
each channel. To engage a particular channel’s FireWire Return, or to assign it to a bus
(StudioLive 16.4.2 or 24.4.2 only), tap on the display.
This will open the Bus Assignments Query page
for that channel. Pressing on the FireWire icon to
activate the FireWire Return. Pressing on a Sub or
Main Assign button will assign/unassign the channel
to that bus (StudioLive 16.4.2 and 24.4.2 only). Any
change made on this page is immediately displayed
in the corresponding Bus Assignment Query.
To close the page, press anywhere on the screen.
4.2.2 Fat Channel Microviews and Zooms
Each channel and bus features a Microview of the Fat Channel components. These
Microviews allow you to see whether a particular channel or bus has dynamics
processing enabled. If any of the dynamics processors in the Fat Channel are turned
off, its Microview will be grayed out.
To make changes to the Fat Channel dynamics processing, tap on any
of the Microviews. This will launch the Fat Channel zoomed view, with
64
4
4.2
StudioLive Remote for iPad
Overview Page
StudioLive™ Software Library
Reference Manual
that component in focus; for example, if you tap on the EQ Microview,
the Fat Channel zoom will open with the EQ in focus. The zoomed Fat
Channel view corresponds directly to the Fat Channel tab in VSL.
You can switch between the dynamics components in the zoomed Fat
Channel view by swiping your finger to the left or right. For example, if you
launch the Gate Zoom and swipe your finger to the left, the Fat Channel Zoom
will focus on the compressor; swiping to the left again focuses the EQ.
To close the Fat Channel Zoom, tap on the “x” in the upper right-hand corner. This will
display the normal Overview page.
4.2.3 Channel Controls
Select. Selects Channel for Fat Channel Zoom and Portrait View.
When no Microview has been selected for Fat Channel Zoom, the
channel Select buttons merely display the channel number or name,
if one has been entered into the Scribble Strip in VSL or in the Channel
Name setup in SL Remote or QMix. See Sections 3.3, 4.6, and 5.4.
Once Fat Channel Zoom is launched, the channel Select buttons
become active, and you can use them to select another channel
so that you can view its zoomed Fat Channel settings.
Pan. Controls the Panning for Each Channel.
To pan a channel, tap and hold anywhere on the Pan control and then slide your
finger right or left, while maintaining constant contact with the iPad screen.
These controls correspond directly to those in VSL and on the StudioLive.
Power User Tip: The Pan control supports off-axis movement. Once you
have pressed a Pan field to select it, you can slide your finger anywhere in the
screen and make a side-to-side movement to control the pan position.
The pan position is displayed numerically in the Channel Select field while the Pan
control is being adjusted in SL Remote.
Mute. Controls the Mute for Each Channel.
To mute a channel, tap its Mute button. The Mute button will
turn red, indicating that the channel has been muted.
Fader and Metering. Controls the Level for Each Channel
To control the volume of a channel, tap the fader and move your finger
up or down while maintaining constant contact with the iPad screen.
Power User Tip: The fader supports off-axis movement. Once you have touched a fader
to select it, you can slide your finger anywhere in the screen and make an up/down
movement to control the fader.
The fader position is displayed numerically in the Channel Select field.
Power User Tip: As with VSL, the fader position set in StudioLive Remote is the level that
you will hear. To sync the physical faders on your StudioLive with StudioLive Remote,
press the Locate button on your mixer. While in Locate mode, the physical faders on
your StudioLive will not be active, so you can adjust them without any changes in level.
SL Remote gives you the option to have Fader Locate mode engage automatically
when a fader is adjusted remotely. For more information, please see Section 4.6.
65
4
4.3
StudioLive Remote for iPad
Aux Mix Page
StudioLive™ Software Library
Reference Manual
Metering. Displays the Signal Level for Each Channel.
To the left of the fader, you will see the meter for the channel. The meter will follow
the meter mode selected on the StudioLive or from VSL. The meter mode cannot be
changed from SL Remote.
4.2.4 Masters Overview and Masters Section Page
In the upper right corner of every page in StudioLive Remote (Overview, Aux Mixer,
and Graphic EQ), you will find the Masters Overview. This displays the metering for
the subgroups (StudioLive 16.4.2 and 24.4.2), auxes (StudioLive 16.0.2 only), and
Main bus.
Tapping on the Masters Overview will open the Masters Section page.
The Masters Section page displays the fader, meter, and Fat Channel Microviews
for the mains, subgroups (16.4.2 and 24.4.2) and auxes (16.0.2), as well as showing
the FXA and FXB Mute buttons (16.4.2 and 24.4.2 only). These parameters are
controlled in the same way they are controlled for channels in the Overview page.
Tapping on any of the Fat Channel Microviews will close the
Masters Section page. The Fat Channel Zoom will open with
the selected parameter in focus for the selected bus.
To close the Masters Section page, simply tap anywhere outside it.
4.3
Aux Mix Page
The Aux Mix page shows the send level for each channel on each Aux
and FX bus. It corresponds directly to the Aux Mix tab in VSL but has been
streamlined to show only the parameters you need to control when away
from the StudioLive. The Aux Mix Page has two zones. The top zone allows
you to scroll through your Aux and FX buses. The bottom zone allows you
to scroll through the channel sends for the currently selected aux or FX bus.
To navigate right or left in either zone, touch anywhere in the upper or lower
half of the screen and swipe your finger to the left or right. Swiping left
scrolls the screen to the left. Swiping right scrolls the screen to the right.
From the Aux Mix Page, you can control and view the following parameters:
•• Channel Send
•• Pre / Post Position
•• Aux and FX Bus Gate, Compressor, and EQ Overview
•• Aux and FX Bus Gate, Compression, and EQ Zoom
•• Edit Effects
•• Recall Effects
•• Assign/Unassign Effects
66
4
4.3
StudioLive Remote for iPad
Aux Mix Page
StudioLive™ Software Library
Reference Manual
4.3.1 Aux Mix Select and Aux Mixing
To create an aux mix using StudioLive Remote, tap anywhere in the Aux Mix Select
tab for that aux. The selected Aux Mix tab will be highlighted to alert you that its
individual channel-send levels will be displayed below.
Press the Post button to engage post-fader sends (StudioLive 16.4.2 and 24.4.2 only).
The Gate, Compressor, and EQ Microviews function the
same for auxes as they do for channels and mains.
To adjust the send levels for any channel, tap anywhere in its send level and
move your finger up or down while maintaining constant contact with the iPad
screen. These send-level displays have been designed to emulate the StudioLive
Fat Channel meters while in Aux Mix mode, so they should look very familiar!
Power User Tip: The aux sends support off-axis movement. Once you have
touched a send-level control to select it, you can slide your finger anywhere on
the screen and make an up/down movement to control the send level.
4.3.2 FX Mix Select and FX Bus Mixing
To create an FX mix using SL Remote, tap anywhere in the FX Mix Select tab for that
FX bus. The selected FX Mix tab will be highlighted to alert you that its individual
channel-send levels will be displayed below.
Press the Post button to engage post-fader sends (StudioLive 16.4.2 and 24.4.2 only).
Press the Mute button to mute the effect to its assigned buses.
The Gate, Compressor, and EQ Microviews function the
same for auxes as they do for channels and mains.
67
4
4.3
StudioLive Remote for iPad
Aux Mix Page
StudioLive™ Software Library
Reference Manual
To adjust the send levels for any channel, tap anywhere in its send level and
move your finger up or down, while maintaining constant contact with the iPad
screen. These send-level displays have been designed to emulate the StudioLive
Fat Channel meters while in Aux Mix mode, so they should look very familiar!
Power User Tip: The FX sends support off-axis movement. Once you have
touched a send-level control to select it, you can slide your finger anywhere in
the screen and make an up/down movement to control the send level.
4.3.3 FX Edit
From SL Remote, you can load new FX types and adjust their parameters. To edit an
effect, tap on the Edit button in the FX Select tab for FXA or FXB. This will launch the
FX Editor.
To load a new effects type, tap on the Effects Type window, and then tap on the new
effects type to load it.
To adjust a parameter, simply tap on it and move your finger up or down while
maintaining constant contact with your iPad.
To close the Effects Editor, tap the “x” in the upper right corner.
SL Remote allows you to remotely control the Tap Tempo function for a delay loaded
on either FX bus. Once a Delay FX type (Mono, Filter, Stereo, or Pingpong) has been
loaded onto FXA or FXB, the Tap Tempo button will be visible on that bus. Tapping on
it repeatedly will change the Time parameter to match the tempo entered.
68
4
4.4
StudioLive Remote for iPad
GEQ Page
4.4
GEQ Page
StudioLive™ Software Library
Reference Manual
As with StudioLive and VSL, StudioLive Remote includes a Graphic EQ page
so that you can tune the room from any listening position or can dial in
a monitor on stage while you are actually standing in front of it. The GEQ
page in StudioLive Remote corresponds directly to the GEQ tab in VSL. From
the GEQ page you can control and view the following parameters:
•• All 31 bands of each graphic EQ (1 main stereo GEQ for StudioLive
16.0.2, 4 dual-mono GEQs for StudioLive 16.4.2 and 24.4.2)
•• GEQ insert assignments (StudioLive 24.4.2 only)
•• Zoom in for fine adjustments
You also can draw the EQ curve you want, rather than adjust each slider manually.
GEQ Select Tab (StudioLive 16.4.2 and 24.4.2 only). Brings a Pair of Graphic EQs
into View.
To begin making changes to a particular graphic EQ, you must first select
it. To do this, simply tap on the graphic EQ pair you’d like to edit.
GEQ On/Off Button. Turns a Graphic EQ On or Off.
By default, each graphic EQ is turned off. To enable a graphic EQ, tap the GEQ On
button in StudioLive Remote and VSL, or use the GEQ menu on your StudioLive.
Power User Tip: If you are making adjustments to a graphic EQ,
and you can’t hear your changes, make sure it is on!
GEQ Flatten Button. Sets All Graphic EQ Band Levels to 0 dB.
To reset a graphic EQ to 0 dB, simply tap its Flatten button. This will return
each slider to 0 dB so that no frequency band is boosted or attenuated.
GEQ Link Button. Links the Graphic EQ Pair.
When a graphic EQ is inserted on a stereo-linked bus, the GEQ Link button will
automatically enable, and the two mono graphic EQs will function as a stereo
graphic EQ (for instance, if you adjust Band 15 on GEQ2, Band 15 on GEQ1
will be adjusted accordingly, and vice versa). To disable this, simply tap the
GEQ Link button, and each GEQ will function independently once more.
Overview Map. Provides a Reference Point for the Current Bands in View.
The GEQ tab in SL Remote allows you to Zoom in and out to make fine adjustments.
However, all of this zooming in and out makes it easy to get lost and forget which
bands in the graphic EQ you’re adjusting. This is where the Overview Map comes in.
The Overview Map is located in the bottom right corner of the GEQ page. Whether
you’ve zoomed in on a few bands, or zoomed all the way out so that you can
see all 31 bands on your iPad, the Overview Map will highlight which bands are
currently in view and where they are in reference to the rest of the graphic EQ.
Power User Tip: The Overview Map always follows your current position, so if you
scroll left or right while you are zoomed in, the Overview Map will scroll with you.
Zooming In. Zooms View In to Make Fine Adjustments.
Press the “+” button to zoom in on the GEQ view. Slide your
finger to the left or right to access additional bands.
Use the Overview Map in the bottom right corner of the GEQ page
to reference your current position within the 31 bands.
69
4
4.4
StudioLive Remote for iPad
GEQ Page
StudioLive™ Software Library
Reference Manual
Zooming Out. Zooms View Out.
Press the “-” button to zoom out the GEQ view. If you have not zoomed
all the way out (so that you don’t have all 31 bands on your screen), you
can slide your finger to the left or right to access additional bands.
Use the Overview Map in the bottom right corner of the GEQ page
to reference your current position within the 31 bands.
Draw Tool. Allows You to Draw an EQ Curve with Your Finger.
SL Remote provides flexible control over your graphic EQ settings. You can
control each band individually, or several bands at once, via the sliders,
or you can simply draw in an EQ curve and fine-tune from there.
To enable EQ-curve drawing, tap the Draw button and slide your finger over the
graphic EQ bands. Each band’s slider will snap to your finger as you pass over it.
GEQ Assignment (StudioLive 24.4.2 only). Inserts Each graphic EQ on an aux,
subgroup, or main-bus output pair.
Like VSL and the StudioLive 24.4.2, SL Remote allows you to choose onto which
output pair you’d like to insert each graphic EQ. To change an assignment,
simply tap on the Assign menu; then choose the output pair by tapping it.
StudioLive 16.4.2 users: Each of your graphic EQs is already assigned to either
your main output or one of your auxes. These assignments cannot be changed.
StudioLive 16.0.2 users have a graphic EQ available for the main bus only.
4.5
Scenes Page
The Scenes page allows you to remotely recall Scenes that have been stored
on the computer to which you are networking SL Remote. These Scenes are
displayed in the On Disk section of the Scenes tab in the VSL browser.
Scene List. Displays Stored Scenes.
You can use the Scene list to scroll through the Scenes you have stored on the
computer to which you are networked. Tap on a Scene to select it. A box will be
drawn around it, indicating that it is selected to load. The Scene that is currently
loaded will be highlighted.
Load Button. Loads Currently Selected Scene.
Once you have selected the Scene you would like to load, tap the Load button. The
Scene will be highlighted in the Scene list, indicating that it is active.
Scroll Up/Down. Navigates Up or Down through the Scene List.
Use the Up and Down arrows to navigate through your Scene list one scene at a time.
70
4
4.6
StudioLive Remote for iPad
Settings Page
4.6
Settings Page
StudioLive™ Software Library
Reference Manual
The Settings page allows you to set scrolling and metering
functions and to create custom names for each channel, aux,
and subgroup (16.4.2 and 24.4.2 only) in your mix.
Scroll by Page. Scrolls Through Channels by Page.
When the Scroll by Page option is enabled, the mixer
will scroll to through channels by entire pages, rather
than by individual channels. Turning this option off
will allow you to scroll over by a single channel and offer more granular control.
Scroll by Page can be enabled/disabled for both the Mixer and Aux pages.
Peak Hold Metering. Displays the
Most Recent Signal Peak.
When Peak Hold Metering is enabled, each meter
in SL Remote will continue to display the most recent signal peak. This allows
you to keep an eye on the average loudness of each channel’s signal.
Talkback Bus Assignments. Engages/
Disengages Talkback Assignments.
Use these switches to remotely engage/disengage the
Talkback bus assignments on your StudioLive mixer.
Link Channel Faders. Links Channel Faders
when Channels are Stereo Linked.
When Link Channel Faders is enabled,
stereo-linked channels will no longer have
individual control over each fader in SL
Remote or VSL. This allows you to control the
volume of a stereo channel pair by moving either channel’s fader.
Default to Fader Locate. Activates Fader Locate
on StudioLive when Fader is Moved Remotely.
With the Default to Fader Locate preference enabled, Fader Locate will automatically
engage when a fader is moved remotely in VSL or StudioLive Remote. This preference
allows you to quickly sync your StudioLive when you return to the board.
Power User Tip: If you are remotely controlling the faders on your StudioLive, it is highly
recommended that you enable this preference. When Fader Locate Mode is activated,
the faders on your StudioLive will not be active. By allowing this mode to engage
automatically, you can avoid accidental volume jumps should you forget that a fader
was adjusted up or down in VSL or SL Remote when you go back to your StudioLive.
71
4
4.6
StudioLive™ Software Library
Reference Manual
StudioLive Remote for iPad
Settings Page
Channel Naming. Creates Custom Names
for Channels, Auxes, and Subgroups.
To create a custom name for any channel, aux, or
subgroup in your mix, simply tap on the text field
next to it. This will launch the iPad keyboard. After you
have entered the new name, tap the Done button.
The channels’ default name will be replaced with its
new custom name in SL Remote, VSL, and QMix.
Note: Channel Naming in SL Remote can be disabled
in VSL. If you are unable to change channel names
from QMix, verify your device’s permissions in the
Setup tab in VSL. See Section 3.7.9 for details.
4.6.1 Launching Smaart System Check Wizards Remotely
SL Remote allows you to remote control the Smaart System Check Wizards.
This is especially useful while you’re schlepping the measurement mic,
stand, and cable from one speaker to another. Any iPad can be used
to Go Remote (See Section 3.8.4), however if an iPad has been given
FOH permission, you can launch the Smaart System Check Wizards
from SL Remote without having to walk back to your computer.
Sliding the Launch Smaart Wizard switch to the
On position on the Settings page will launch the
Smaart System Check Wizards. These wizards look and
function the same in SL Remote as they do in VSL.
For complete instructions on using the Smaart
System Check Wizards, please review Section 3.8.
More information on FOH Permissions can be found in Section 3.7.9.
72
4
4.7
StudioLive Remote for iPad
Channel Zoom Page
4.7
Channel Zoom Page
StudioLive™ Software Library
Reference Manual
The Channel Zoom page opens automatically when you turn your iPad to the
Portrait view. This page provides you with a look at every controllable parameter
for a channel or bus. It also allows you to quickly scroll through every channel and
bus on your mixer by sliding your finger down the right side of your screen.
FW In:
Engages
FireWire Return
Sub / Main Bus Assigns:
Assigns Channel / Bus
to Subs or Mains
Next:
Advances View to
Next Channel
Gate:
Controls
Gate
Functions
Compressor:
Controls
Compressor
Functions
Channel
Scroll Bar
EQ:
Controls
EQ Functions
Pan:
Controls /
Displays
Panning
HPF:
Control
High-Pass
Filter
Frequency
Fader:
Controls
Output
Level
Limiter:
Controls
Limiter
Functions
Metering:
Displays
Metering
(Meter Mode
Set in VSL
or on Mixer)
Mute:
Mutes
Channel
Post:
Aux / FX Send Controls:
Engages Sets Channel Send Levels to Each
Dig Out
Aux and FX Bus
(Channel)
Post Fader
(Aux / FX)
Phase:
Inverts
Channel
Phase
73
5
5.1
QMix for iPhone and iPod touch
Networking your iPhone or iPod touch and Computer
5
QMix for iPhone and iPod touch
StudioLive™ Software Library
Reference Manual
QMix for iPhone and iPod touch puts each musician’s monitor (aux) mix in his or
her own hands. With QMix, you can adjust each StudioLive channel’s aux-send level
to taste and can create a group of channels that you simultaneously control with
the amazing Wheel of Me. All you need is a computer with Wi-Fi capabilities and
an iPhone or iPod touch, and you’re ready to take control of your own destiny.
This section describes QMix’s operation with all three StudioLive series
mixers. All images presented here are from the StudioLive 24.4.2.
5.1
Networking your iPhone or iPod touch and Computer
To use QMix, you must first install Universal Control on, and sync your
StudioLive to, a Windows or Mac computer that has a FireWire connection
and a wireless card. Once you have connected and synced your StudioLive
to VSL on your computer, the next step is to create an ad hoc wireless
network between your iPhone or iPod touch and your computer.
An ad hoc, or “peer-to-peer,” network is a very simple network involving at least
two systems—in this case, the computer to which your StudioLive is connected
and an Apple iPhone or iPod touch. Unlike the usual local area network (LAN) that
you use to connect multiple computers to the Internet or to a shared file server, no
server or router is needed. (That said, you might want to connect your computer
to a router to get a stronger Wi-Fi signal than your wireless card provides.)
Creating an ad hoc wireless network between your computer and your iPhone/
iPod touch is quick and easy. The network will allow you to remote-control
VSL, and hence your StudioLive, from an iPhone/iPod touch, using QMix.
Power User Tip: Network connections can occasionally require troubleshooting,
especially when a lot of wireless networks are in use. Because of this, it is always
a good idea to get your iPad and computer happily communicating before the
pressure is on, and you have a singer trying to dial in a monitor mix while you’re
trying to mic the drum kit. So while the guitarist is flirting with the bartender, take a
quick moment to get your iPhone/iPod touch, computer, and StudioLive talking.
5.1.1 Step 1: Creating an Ad Hoc Network on your Computer
Windows Vista
1. Open Start>Connect to.
2. Click “Set up a connection or network.”
3. Select “Set up a wireless ad hoc network” and click Next.
4. Enter the new network name such as “StudioLive.”
5. Enter a Security key or password. For the best security,
include letters, numbers, and punctuation.
6. Check “Save this Network.”
Windows 7
1. Open Start>Control Panel.
2. Click “Network and Internet.”
3. Click “Network and Sharing Center.”
4. Under “Change your networking settings,” click
“Set up a new connection or network.”
5. Select “Set up a wireless ad hoc (computer-to-computer) network.”
74
5
5.1
QMix for iPhone and iPod touch
Networking your iPhone or iPod touch and Computer
StudioLive™ Software Library
Reference Manual
6. Click on “Next” twice.
7. Enter a network name, such as “StudioLive.”
8. Select the Security WAP (or WEP).
9. Enter the Security key or password. For the best security, include
letters, numbers, and punctuation. Then click OK.
10.Check “Save this network.”
11.Click “Turn on Internet connection sharing.”
Windows 8
Windows 8 does not natively support ad hoc connections.
Therefore, we recommend that Windows 8 users employ a
wireless router, rather than setting up an ad hoc network.
Mac OS X 10.6 / 10.7
1. On the Menu bar click on the Wireless Status Icon.
2. From the pull-down menu select “Create Network…”
3. Give your Network a name, such as “StudioLive.”
4. If you would like set up a password (recommended), check “Require Password.”
5. Create your password within the guidelines and click “OK.”
6. Once your network has been successfully created, you
will see it in your list of available networks.
5.1.2 Step 2: Connect your iPhone/iPod Touch to your Ad Hoc Network
1. Tap on the Settings icon in your iPhone/iPod touch.
2.
Tap on “General.”
3.
Tap on “Network.”
4.
Tap on “Wi-Fi” making sure it is set to “On.”
5.
Under “Choose a Network,” you should now
see your ad hoc network in the list.
6.
Tap on your newly created network to select it.
7.
If you secured your network with a password, you will be prompted
to enter it.
75
5
5.1
QMix for iPhone and iPod touch
Networking your iPhone or iPod touch and Computer
StudioLive™ Software Library
Reference Manual
5.1.3 Step 3: Connecting QMix to StudioLive Mixers
Once you have created your ad hoc network and joined it from
an iPhone/iPod touch, you are ready to launch QMix.
Important: You must connect to your computer’s ad hoc network each
time you plan on remote-controlling your StudioLive with QMix.
The iPhone and iPod touch offer two viewing options: Landscape and Portrait.
These two orientations open two different windows. When you hold your iPhone/
iPod touch in Landscape view, the Aux Mix window will open. When you hold
your iPhone/iPod touch in Portrait view, the Wheel of Me window will open.
1. To launch QMix, tap on the QMix icon on your iPhone/iPod touch. When you
launch QMix you will be taken to the Start page.
2. On the Start page, you will see a list of every StudioLive mixer on the network. You
can also view QMix using three different Demo Mixer simulations (StudioLive
16.0.2, 16.4.2, and 24.4.2). These offline simulations enable you to practice your
finger control away from your StudioLive.
3. To connect to your mixer, tap on the StudioLive device icon. The text will change
color to alert you that it has been selected.
4. Tap the Connect button to open QMix and control the mixer from the
iPhone/iPod touch.
The Reconnect button at the top of the page allows you to quickly reestablish
communication with your mixer when you launch QMix (provided your mixer is still
available on the network).
76
5
5.2
QMix for iPhone and iPod touch
Aux Mix Page
5.2
Aux Mix Page
StudioLive™ Software Library
Reference Manual
The Aux Mix page shows the send level for each channel on each aux to
which your iOS device has access. It corresponds directly to the aux mixes
in VSL and has been streamlined to show only the send levels. To open the
Aux Mix page, simply hold your iPhone/iPod touch in Landscape view.
Aux Mix Select. Displays Channel Send Levels to Aux Bus.
To create an aux mix using StudioLive Remote, tap on the Aux Mix Select
tab for that Aux. The selected Aux Mix tab will be highlighted to alert
you that its individual channel-send levels will be displayed below.
To navigate right or left, touch anywhere in the Aux tabs and
swipe your finger to the left or right. Swiping left scrolls the screen
to the left. Swiping right scrolls the screen to the right.
Please Note: Your device’s access to aux mixes is determined from
within VSL. If you only have access to one aux mix, verify your device’s
permissions on the Setup tab in VSL. See Section 3.7.9 for details.
Channel Send Levels. Sets the Channel Send Levels to the Selected Aux Bus.
To adjust the send levels for any channel, tap anywhere in the channel’s level
control and move your finger up or down while maintaining constant contact
with the iPad screen. These send-level displays have been designed to emulate the
StudioLive Fat Channel meters while in Aux Mix mode, so they should look familiar!
To navigate right or left, touch anywhere in the channel sends
and swipe your finger to the left or right. Swiping left scrolls the
screen to the left. Swiping right scrolls the screen to right.
To the left of each channel send is a meter that displays the channel’s
current signal level. Use this meter to determine if a particular channel has
signal and to see how hot a signal is before you set the send level.
Power User Tip: The aux sends support off-axis movement. Once you have
touched a send-level control to select it, you can slide your finger anywhere in
the screen and make an up/down movement to control the send level.
77
5
5.3
QMix for iPhone and iPod touch
Wheel of Me
StudioLive™ Software Library
Reference Manual
Lock Orientation. Locks Device in the Landscape View.
Enabling the Lock Orientation button will lock your iPhone/iPod touch in
Landscape view. While this button is enabled, you cannot open the Wheel of Me.
Locking the view will also remove the Start Page button. Until this option is
disabled, QMix will launch in this view when connected to the current mixer.
5.3
Wheel of Me
QMix’s Wheel of Me provides you with an easy and effective way to control all
of the channels that contain your voice and instruments. To open the Wheel of
Me, turn your iPhone/iPod touch to the Portrait view. The Wheel of Me will open
for the currently selected aux mix (so if you have Aux Mix 3 selected on the Aux
Mix page, Aux Mix 3 will still be selected when you open the Wheel of Me).
To begin, set up your monitor mix using the Aux Mix page in QMix, VSL, or your
StudioLive. Once you have your monitor mix dialed in to taste, you simply need to
identify which channels are yours. After this, the Wheel of Me will control the volume
of all your channels as a group, preserving the volume of each channel relative to
the others.
Lock Orientation. Locks Device in the Portrait View.
Enabling the Lock Orientation button will lock your iPhone/iPod touch in Portrait
view. While this button is enabled, you cannot open the Aux Mix page.
Locking the view will also remove the Start Page button. Until this option is
disabled, QMix will launch in this view connected to the current mixer.
Me Button. Opens the Me Page.
From the Me page, you can identify which channels are yours in any aux
mix. For example, if you sing backup vocals and play bass, you probably
want to hear more of those channels. As a bass player, you might also
want the kick drum level to increase in proportion to your bass.
Once you’ve identified these channels as your “Me” channels, the Wheel of Me will
increase or decrease the level of these channels concurrently, allowing you to create
a subgroup of your most critical channels in your monitor mix.
To return to the Wheel of Me, tap the Aux button in the upper left-hand corner.
78
5
5.4
StudioLive™ Software Library
Reference Manual
QMix for iPhone and iPod touch
Settings Page
Wheel of Me. Controls the Level of the Me Channels
The Wheel of Me increases or decreases the level of your Me channels as a mix
relative to the rest of the channels (the Band). If you increase the level of your Me
channels beyond the top level, the other channels will decrease in volume.
On either side of the Wheel of Me, you will find Me and Band mix indicators. These
level displays show the balance between the Me channels and the Band channels.
The Band channels consist of any channels not identified as Me channels. These
indicators will adjust automatically as you move the Wheel of Me up or down.
5.4
Settings Page
To open the Setting page, tap on the Settings button on the Aux Mix page or Wheel
of Me page. From the Settings page, you can customize your QMix scrolling and
create custom names for each channel and aux mix.
Scroll by Page. Scrolls through Channels by Page.
When the Scroll by Page option is enabled,
the mixer will scroll through channels by
entire pages, rather than by individual channels. Turning this option off will
allow you to scroll one channel at a time, offering more granular control.
Peak Hold Metering. Displays the Last Signal Peak.
When Peak Hold Metering is enabled, each meter in
QMix will continue to display the most recent signal
peak. This allows you to keep an eye on the average loudness of each channel’s signal.
Channel Naming. Creates Custom Names
for Channels, Auxes, and Subgroups.
To create a custom name for any channel, aux, or subgroup
(16.4.2 and 24.4.2 only) in your mix, simply tap on the text field
next to it. This will launch the iPhone/iPod touch keyboard. After
you have entered the new name, tap the Done button. The default
name will be replaced with the new custom name in SL Remote,
VSL, and QMix.
Please Note: Channel Naming can be disabled in Universal Control.
If you are unable to change channel names from QMix, verify your
device’s permissions in the Setup tab in Universal Control.
79
StudioLive™ Software Library
Reference Manual
6Capture
6.1
Start Page
6Capture
Capture™ is a digital audio multitracking application designed to make
recording with your StudioLive quick and easy. With the look and feel of
industry-standard digital multitrack hard-disk recorders, it is instantly familiar
to every musician and engineer. It uses the same high-quality audio engine
as PreSonus’ groundbreaking Studio One DAW, and its session files can be
opened directly by Studio One—no conversion or exporting required.
Capture was designed exclusively for StudioLive-series mixers, allowing
instant setup and recording directly from the mixer with no configuration.
You just launch Capture, click Arm All Tracks, and click Record. At the
end of the show, click Stop, save the file, and you’re done!
For StudioLive 16.4.2 and 24.4.2 owners, Capture will record an
additional stereo track to record from any of the StudioLive’s
buses that are accessible to the Auxiliary Inputs router.
Power User Tip for StudioLive 16.4.2 owners: Capture will scale to fit one or two
StudioLive 16.4.2 mixers, so you can use it to record when cascading mixers.
In general, the features that make a DAW a powerful tool for audio production
and mixing in the studio are the very culprits that bog down a computer’s
performance and make for an unstable live-recording environment. Capture
simplifies this environment, providing only the tools necessary to record a
great performance, without placing huge demands on your CPU’s resources.
As with all of the StudioLive Software User Library, you should check the PreSonus
Web site for the latest version of Capture. You can download Capture updates from
your My PreSonus account once you have registered your StudioLive hardware. For
instructions on creating a My PreSonus account, please see Section 7.1.4 (Step 3).
6.1
Start Page
You will be taken to the Start page when Capture is launched. The Start page allows
you to create a new session, open a session stored on your computer, view recent
sessions, and verify that your StudioLive is properly communicating with its driver.
Create and Open Session
At the upper left of the Start page are two buttons: Create Session and Open Session.
Click on the Create Session button to create a new Session or click on the Open
Session button to browse for and open an existing Session.
Power User Tip: A Session is a Capture file in which you record, arrange,
and edit your audio files. This should not be confused with your audio
files. Think of a Capture session as you would a StudioLive Scene. It is a
snapshot of what audio files were recorded and how they were edited.
Recent Files
Located to the right of the Start page menu section, the Recent Files list includes links
to the most recently opened documents. Click on any of these links to quickly open
the Session.
80
StudioLive™ Software Library
Reference Manual
6Capture
6.2
The Session Page
Audio Device and Sample Rate
Capture was specifically created for use with the PreSonus StudioLive series mixer
and will only work with that device. It is not possible to configure any other audio
device for use with Capture, as it relies on the StudioLive mix bus. The Audio Device
window will either display “PreSonus FireStudio” or “No Audio Device”; the former
indicates that your StudioLive mixer is connected to the computer correctly and is
ready to use with Capture. The Sample Rate window displays the currently
configured sample rate, as set on the StudioLive mixer.
About Capture
At the bottom of the Start page, you can view information about Capture, including
your version-number build date.
The Session Page
6.2
Capture features a single-window user interface so you don’t need to
manage multiple windows and views. When a new Session is created, or an
existing Session is opened, you will be taken to the Session page. This page
contains all of the necessary tools to record and edit multitrack audio.
Capture takes full advantage of the StudioLive’s bidirectional FireWire bus and
hardwired configuration. When you launch Capture, a recording track is created
for each input channel on your StudioLive. That track, in turn, is automatically
patched to the corresponding FireWire return on your StudioLive mixer for
playback. The following diagrams show this one-to-one relationship:
Capture Recording Routing
STUDIOLIVE 16.4.2
-10
+30
Mic/Line
-10
+30
Mic/Line
1
2
-10
+30
Mic/Line
3
-10
+30
Mic/Line
4
-10
+30
Mic/Line
Digital Recording and Performance Mixer
-10
+30
Mic/Line
5
6
-10
+30
Mic/Line
7
-10
+30
Mic/Line
8
-10
+30
Mic/Line
-10
+30
Mic/Line
9
10
-10
+30
Mic/Line
11
-10
+30
Mic/Line
12
-10
+30
Mic/Line
-10
13
+30
Mic/Line
14
-10
+30
Mic/Line
-10
15
+30
Mic/Line
16
48V
48V
48V
48V
48V
48V
48V
48V
48V
48V
48V
48V
48V
48V
48V
48V
Input
Input
Input
Input
Input
Input
Input
Input
Input
Input
Input
Input
Input
Input
Input
Input
Aux 1
Aux 2
Solo
Aux 3
Solo
Output
Post
Select
Solo
Output
Post
Aux 4
Select
Aux 5
Solo
Output
Post
Select
Solo
Output
Post
Aux 6
Select
Solo
Output
Post
Select
FX B
FX A
Mute
Mute
Output
Post
Select
Level
Post
Select
Level
Post
Select
Control
Control
Control
Control
Control
Control
Control
Control
Mix
Mix|Pan
Mix
Mix|Pan
Mix
Mix|Pan
Mix
Mix
OL
OL
-3
10
-6
0
-10
-9
-10
dB
-10
-15
-12
-25
10
-25
-24
-15
-40
-38
-18
-65
-72
-21
-80
0
-40
5
-65
-80
U
5
10
B
(s)
+28
26
24
22
20
18
16
14
12
10
8
6
4
2
0
10
Digital Effects | Master Control
A
0
-4
-8
-12
-16
-20
-24
-28
-32
-36
-40
-44
-48
-52
-56
OL
-1
-2
-6
TYPE
DECAY
TYPE
DECAY
56
HALL
3.4s
Bright Hall
12
ROOM
3.4s
Small Clear Room
20
30
MAIN
AUX34
MAIN
40
50
60
Value
PG UP
MAIN
Next
Prev
TAP
PG DN
FX
Scene
System
Store
Recall
81
StudioLive™ Software Library
Reference Manual
6Capture
6.2
The Session Page
Capture Playback Routing
STUDIOLIVE 16.4.2
-10
+30
Mic/Line
-10
+30
Mic/Line
1
2
-10
+30
Mic/Line
3
-10
+30
Mic/Line
4
-10
+30
Mic/Line
Digital Recording and Performance Mixer
-10
+30
Mic/Line
5
6
-10
+30
Mic/Line
7
-10
+30
Mic/Line
8
-10
+30
Mic/Line
-10
+30
Mic/Line
9
10
-10
+30
Mic/Line
11
-10
+30
Mic/Line
12
-10
+30
Mic/Line
-10
13
+30
Mic/Line
14
-10
+30
Mic/Line
-10
15
+30
Mic/Line
16
48V
48V
48V
48V
48V
48V
48V
48V
48V
48V
48V
48V
48V
48V
48V
48V
Input
Input
Input
Input
Input
Input
Input
Input
Input
Input
Input
Input
Input
Input
Input
Input
Aux 1
Aux 2
Solo
Aux 3
Solo
Output
Post
Select
Solo
Output
Post
Aux 4
Select
Aux 5
Solo
Output
Post
Select
Solo
Output
Post
Aux 6
Select
Solo
Output
Post
Select
FX B
FX A
Mute
Mute
Output
Post
Select
Level
Post
Select
Level
Post
Select
Control
Control
Control
Control
Control
Control
Control
Control
Mix
Mix|Pan
Mix
Mix|Pan
Mix
Mix|Pan
Mix
Mix
OL
OL
-3
10
-6
0
0
-10
-9
-10
-10
-15
-12
-25
-25
-24
-15
-40
-40
-38
-18
-65
-65
-72
-21
-80
-80
B
(s)
+28
26
24
22
20
18
16
14
12
10
8
6
4
2
0
10
Digital Effects | Master Control
A
0
-4
-8
-12
-16
-20
-24
-28
-32
-36
-40
-44
-48
-52
-56
OL
-1
-2
-6
TYPE
DECAY
56
MAIN
AUX34
TYPE
DECAY
12
MAIN
HALL
3.4s
Bright Hall
ROOM
3.4s
Small Clear Room
Value
PG UP
Next
Prev
TAP
PG DN
FX
Scene
System
Store
Recall
There is no need for audio inputs and outputs to be set up in Capture, as the
software automatically detects which type of StudioLive mixer is connected (a
16.0.2, 16.4.2, or 24.4.2 or two chained 16.4.2s) and self-configures. Each input
from the StudioLive mixer is represented with a mono input track in the Track
column of the Session and has a corresponding level meter in the meter bridge.
StudioLive 16.4.2 and 24.4.2 owners: An additional stereo track will also be added
to allow you to record the first pair of auxiliary inputs (Inputs 25-26/17-18).
It is possible to process each StudioLive mixer input channel with the Fat Channel
before the input signal is routed to Capture. To do this, engage the Post button in the
Dig Out section of the Fat Channel for each channel in your StudioLive mixer. This
routes the signal post-EQ and post-dynamics processing.
6.2.1 Transport
The Transport is located in the top right corner of the Session page. It
contains all the functions you need to navigate through your session.
Previous Marker. Jumps the playback cursor to the previous marker.
Rewind. Rewinds as long as this button is enabled.
82
StudioLive™ Software Library
Reference Manual
6Capture
6.2
The Session Page
Fast Forward. Fast Forwards as long as this button is enabled.
Next Marker. Jumps the playback cursor to the next marker.
Back to Beginning. Returns the playback cursor to the beginning of the Session.
Stop. Stops playback.
Play. Starts playback at the current playback-cursor position.
Record. Starts recording at the current playback-cursor position.
Loop. Engages/disengages Loop mode.
Time Display. Displays the time at the current playback-cursor position.
Remaining Time. Displays the remaining time that can be recorded, based
on the size of the available storage left on the hard drive to which you are recording.
Sample Rate Display. Displays the current Capture/StudioLive sample rate.
6.2.2 Meter Bridge
Capture provides input and output metering, depending on whether or not
a track is playing back or being recorded. These peak-style meters feature clip
indicators for each input into Capture from the StudioLive mixer. StudioLive
16.4.2 and 24.4.2 users will see an additional pair of meters for the routable
Master track. (See Section 3.7.1 for details on how to route a bus to this track.)
Link Button. Between each meter you will find a Link button. When this button is
active, Capture will record that track as a stereo-interleaved file. By default, the
routable bus pair (25-26/17-18) is link-enabled, as are the stereo channels on the
StudioLive 16.0.2 (9-10/15-16).
Record Arm Button. Below each meter is the Record Arm button for that track.
When this button is active, Capture is ready to record audio that is routed to the
track.
83
StudioLive™ Software Library
Reference Manual
6Capture
6.2
The Session Page
6.2.3 Editing Tools
In the upper right corner, you will see four editing-tool buttons. These tools will
determine the function of your mouse during editing.
Power User Tip: The audio-editing process can be unforgiving: Small inaccuracies when
splitting, moving, or performing other actions on recorded audio can lead to unwanted
results. As simple as it may seem, the act of listening while editing is often overlooked.
For instance, when sizing the edges of a vocal part to remove unwanted sounds
between words, it is tempting to make the edits based on the visual representation of
the waveform. While this may work sometimes, it is a much better idea to listen as you
size the events to be sure you are not removing any critical part of the vocals. Listening
to your edits as you make them will save time and frustration in nearly every case.
6.2.3.1 Arrow Tool
This is the default tool for access to most functions. Click on the Arrow tool button or
press [number 1] on the keyboard to select the Arrow tool.
The Arrow tool can be used for the following purposes:
•• Move an Event. To move an audio event using the Arrow tool, click
anywhere on the event and drag left, right, up, or down. Dragging the
event left or right will move the event backward and forward in time.
When dragging an event left or right beyond the viewable arrangement,
hold [Space Bar] on the keyboard to speed up the scrolling.
Dragging the event up or down will move the event to another track.
When dragging an event from one track to another (up or down), the
position of the event will be constrained within an automatic snapping
range to make it easy to keep the event at the same time position. To
defeat this snapping, hold Shift while dragging the event up or down.
•• Size an Event. Events can be thought of as windows into audio files and
musical performances, where what you see is what you hear. Sizing is a
fundamental technique with which events are made shorter or longer so that
only a portion of the audio or musical data they contain is seen and heard.
To size any event using the Arrow tool, float the mouse to the left or right edge of the
event to reveal the Sizing tool. When this tool appears, click-and-drag left or right to
size the event. Events can be sized and resized nondestructively any number of times.
•• Select Multiple Events. Multiple events can be selected in order
to edit them all at once, with a single action. To select multiple
events with the Arrow tool, do one of the following:
•• Click outside of the range of an event, and then drag over any other
events; a gray box will be drawn while you drag over the target-selection
area. Release the mouse button once the box is drawn over all of the
events you wish to edit, and these events will be selected for editing.
•• Click on any event; then, while holding [Shift] on the keyboard,
click on any other events to select them. This allows you to
select multiple events that are not in close proximity to each
other. All selected events can then be edited at once.
84
StudioLive™ Software Library
Reference Manual
6Capture
6.2
The Session Page
6.2.3.2 Range Tool
The Range tool is used to select a range, or area, within events. Click on the Range
tool button or press [number 2] on the keyboard to select the Range tool.
To select a range within an event, using the Range tool, click-and-drag over the
area to be selected; a gray box will be drawn over the target selection area. Release
the mouse button when the box is drawn over the range of the events you wish to
select. The range you have selected is now treated as a single, consolidated event.
The Range tool can be useful in several ways:
•• You can use the Range tool to select the content of several audio events
across multiple tracks for a specific portion of a song (say an amazing
drum groove), and then use the Arrow tool to move that section of
audio to another section of a song (say, to replace a drum groove).
•• Another common use of the Range tool is to quickly select and delete a
range of audio within an event, rather than using the Split tool to make
two splits, then select and delete the section with the Arrow tool.
When you float the mouse cursor over a selected range, the Arrow tool will
temporarily appear. This makes it easy to quickly select and edit a range of events.
To select multiple, discontiguous ranges across any event, on any track, hold the
[Shift] key while using the Range tool. Continue to hold [Shift] and use the Arrow
tool to select whole events. For instance, when using the Arrow tool, if you press
and hold [Ctrl], you get the Range tool. Press and hold [Ctrl] and [Shift] to select
multiple ranges, then continue to hold [Shift] but release [Ctrl]; now you have the
Arrow tool and can select whole events. All of your selections will remain selected.
Selected ranges can be sized by floating the Range tool at the left/
right edge of the selection. You also can split a selected range at the left
and right edges of the selection by choosing Split Range from the Edit
menu or by pressing [Ctrl]/[Cmd]+[Alt]+[X] after selecting a range.
6.2.3.3 Split Tool
Using the Split tool, single events can be split into multiple events. Click on the Split
Tool button, or press [number 3] on the keyboard to select the Split tool.
With the Split tool selected, a vertical and horizontal line will be drawn near the
current mouse-cursor position. The vertical line indicates the exact time position
of the Split tool, while the horizontal line underscores the track on which the event
to be split resides. The Split tool is directly affected by the current Snap settings.
Click on any event with the Split tool to split the event at that position.
By splitting a single event, you create two events that can be edited
independently. If multiple events are selected across multiple tracks,
the Split tool will affect all of the selected events in the same way.
It is also possible to split selected events at the timeline cursor, without
using the Split tool, by pressing [Alt]+[X] on the keyboard.
85
StudioLive™ Software Library
Reference Manual
6Capture
6.2
The Session Page
6.2.3.4 Eraser Tool
The Eraser tool is used to delete an event. Click on the Eraser Tool button or press
[number 4] on the keyboard to select the Eraser tool. To delete any event using the
Eraser tool, simply click on the event. The Eraser tool is unaffected by the current
selection and will only affect the event that is directly clicked on.
However, if you click on a selected element with the Eraser
tool, all currently selected elements will be erased.
6.2.3.5 Common Editing Actions
As with most other software applications, Capture supports basic cut,
copy, and paste actions. Once a selection of events, or a range of events,
has been made, these actions can be performed as follows:
•• Cut: Press [Ctrl]/[Cmd]+X on the keyboard to cut the current selection.
•• Copy: Press [Ctrl]/[Cmd]+C on the keyboard to copy the current selection.
•• Paste: Once a selection is cut or copied, press [Ctrl]/[Cmd]+V on the
keyboard to paste the selection. The selection will be pasted to the current
playback-cursor position, or to the beginning of the track from which the
selection originated if the playback cursor is not currently set anywhere.
6.2.4 The Edit Window
The Edit window is the main view of the Session page, which
provides an overview of the Session for editing.
The Edit Window contains the following:
•• Timeline Ruler: At the top of the Edit window, you will find the
Timeline Ruler. This displays time increments in seconds.
•• Marker Lane: Just below the Timeline Ruler, you will find the
Marker Lane. This displays any markers you have created.
•• Arm All: In the upper left-hand corner, you will find the Arm All button. Click this
button to arm all inputs for recording.
•• Marker ±: To the left of the Marker Lane, you will see the Add/Remove Marker
buttons. Click on the plus (+) button to add a marker at the current playbackcursor position. Select a marker and click on the minus (-) button to remove the
marker.
•• Track Column: The Track column contains a dedicated audio track for each audio
input into Capture from the StudioLive mixer, including a stereo track for
StudioLive 16.4.2 and 24.4.2.
86
StudioLive™ Software Library
Reference Manual
6Capture
6.3
Creating a New Capture Session
•• Track Mute: Each track features a Mute button. This mutes the track during
playback.
•• Track Solo: Each track features a Solo button. This will solo the track and mute all
other tracks during playback (similar to the SIP function on the StudioLive).
•• Vertical Zoom: In the lower left-hand corner of the Edit Window, you
will find the vertical-zoom controls. These controls increase or
decrease the height of the tracks and audio files.
•• Horizontal Zoom: In the lower right-hand corner of the Edit Window is the
Horizontal Zoom slider. This zooms the timeline in or out.
6.2.4.1 Naming Tracks
There are several benefits to giving each track in your session a name. First, it allows
you to know at a glance what is being recording where. Second, if you name your
tracks before you begin recording, the audio file recorded on your named track will
be given the same name. So, for example, instead of a bass line being recorded as
Track 15, it would be recorded as Bass.
To name a track, double-click on the default name to open a text
edit box. Enter the name you would like to use and hit Enter.
Power User Tip: Just like VSL and Studio One, you can press
the Tab key to move to the next track’s name field.
6.3
Creating a New Capture Session
1. To create a new Session, do one of the following:
•• From the Start page, click on the Create Session button.
•• Navigate to File/New Session.
•• Press [Ctrl]/[Cmd]+N on the keyboard.
2. When a new Session is created, a setup menu will open.
87
6Capture
6.4
Recording in Capture
StudioLive™ Software Library
Reference Manual
3. Session Title. This will be the title of your Session and will be the Session file name,
as well as the name of the new folder that contains all data related to your Session.
4. Session Location. This is where new Sessions and all related data will be
saved. The Session location can be chosen each time you create a Session.
By default, the new Session location will be the Capture folder in your
Documents folder. You can choose a different file location by clicking on
the Browse button and browsing to a new location. The last known save
location will appear as the default the next time you create a new Session.
6.4
Recording in Capture
To record to an audio track, the track must be record-enabled, or “armed.” Capture
provides two Record Enable buttons for each input: one on the track and on the
meter bridge.
To record-enable an audio track, click on the Record Enable button on the track or
on the meter bridge. Both buttons will turn entirely red in color when either button
is enabled, and the track’s corresponding meter in the meter bridge should begin
to move up and down if there is live audio on that channel in the StudioLive mixer.
Click on the Arm All button at the top of the Track column to record-enable every
track at once.
Once an audio track is record enabled, you are ready to record audio to that track.
To activate recording, click on the Record button in the transport. The Record button
will turn red, and the Play button will turn green in the transport; the playback cursor
will start to scroll from left to right from its current position; and new audio events
will be recorded to record-enabled tracks.
Recording will continue until you manually stop it by clicking on the Stop button in
the Transport or by pressing [Spacebar] on the keyboard.
6.4.1 Monitoring Live Inputs
You will monitor live audio input on the StudioLive mixer. There is no separate
monitoring capability within Capture. Please refer to Section 4.4.4 in the
StudioLive Owner’s Manual for information on creating monitor mixers.
6.4.2 Setting Input Levels
Setting the proper input levels is critical to making a good live mix and a good
recording. The basic idea is to set the input gain on the StudioLive mixer as
high as possible without overloading the input. Overloading the input will
cause clipping (digital distortion), which is particularly unpleasant and will
ruin the recording. This damage cannot be undone in software. There is a
clip indicator for each input on the StudioLive mixer for this purpose.
If an input channel is not clipping on your StudioLive mixer, you can
be sure that it will not clip in Capture. Refer to Section 2.1 in your
StudioLive Owner’s Manual for the proper level setting procedure.
88
6Capture
6.5
Capture Session Navigation
StudioLive™ Software Library
Reference Manual
6.4.3 Capture Main Source Selection (StudioLive 16.4.2 and 24.4.2 only)
The Auxiliary Stereo Track in Capture is a stereo channel intended to be used to
record a stereo mix from your StudioLive. This mix can be recorded while recording
the individual input channels, so a mix is available immediately after a live show, or
you can use this channel to route your final studio mixes through the StudioLive.
As discussed in Section 3.7.1, VSL features an Auxiliary Inputs Router that allows
you select which buses you want to record in addition to your input channels.
Auxiliary Inputs 25-26/17-18 are dedicated for recording a stereo mix in Capture.
However, in addition to the Main L/R mix, you can select from any of the following
outputs, buses, and inputs: Sub 1/2, Sub 3/4, Aux 1/2, Aux 3/4, Aux 5/6, Aux 7/8
(24.4.2 only), Aux 9/10 (24.4.2 only), EFX Send A, EFX Send B, Aux Return A, Aux
Return B, Tape In, Talkback, EFX Return A, EFX Return B, and the Solo bus.
6.5
Capture Session Navigation
The ability to quickly navigate to certain areas of your Session
is highly useful during mixing. The following describes the
ways in which you can quickly navigate your Session.
6.5.1 Scrolling
To scroll left and right through time in your Session, click and drag
the horizontal scroll bar near the bottom of the Edit window.
You can also scroll through your session by clicking
and drag the Timeline Ruler left or right.
6.5.2 Timeline Zooming
You can zoom in and out of your Session with respect to time in the
Edit window, so that you can look at the entire length of the Session
or just view a small region of time to make accurate edits.
To zoom, do one of the following:
•• Click-and-drag left or right on the Horizontal Zoom scroll bar in the lower
right-hand corner of the Edit window to zoom in or out.
•• [W] on the keyboard to zoom out slightly. Press [E]
on the keyboard to zoom in slightly.
•• Click inside the Timeline ruler at any point in time
and drag down or up to zoom in or out.
89
6Capture
6.5
Capture Session Navigation
StudioLive™ Software Library
Reference Manual
6.5.3 Using Markers
In Capture, the Marker Lane is used to place markers at desired
places in the Timeline, after which navigation to the markers is
easy. Markers are also helpful when exporting your Session to
individual mixes or to work in another recording application.
The Marker Lane is always visible, just below the Timeline.
Power User Tip: It is highly recommended that markers be inserted
during the recording of a live performance, as the markers will
make the rest of the production process much easier.
6.5.3.1 Inserting Markers
To insert a new marker into the Marker Lane, with playback running or stopped, click
on the Add Marker button, or press [Insert] on the keyboard. Each new marker will
be numbered sequentially by default (#1, #2, #3…).
To rename a marker, double-click on the marker in the Marker Lane,
type in a new name, and then press [Enter] on the keyboard.
6.5.3.2 Navigating Markers
It is possible to quickly jump the playback cursor between markers in
the Marker Lane. Jumping to markers during playback allows quick
comparisons between different sections of your Session.
To Navigate to a previous marker, do one of the following:
•• Click on the Previous Marker button in the transport.
•• Press [B] on the keyboard, to jump to the previous marker.
To Navigate to the next marker, do one of the following:
•• Click on the Next Marker button in the transport.
•• Press [N] on the keyboard, to jump to the next marker.
6.5.3.3 Looping
To loop the playback of any range of your Capture session, do one of the following:
•• Select an event with the Arrow tool or select a range with the Range tool. Press
[P] on the keyboard to set the loop range to your selection. The range will be
indicated by a bar drawn in the timeline, with a left and right flag on either end.
•• Mouse over the gray line above the time line. Notice that your cursor changes to a
Pencil tool, and you can draw your loop range.
90
StudioLive™ Software Library
Reference Manual
6Capture
6.6
Mixing Your Session
Once your loop range is set, you can click on the Loop button in the transport, or
press [L] or [/] on the keyboard to engage Loop mode.
Please Note: Engaging Record in the transport will disable Loop
mode and will begin recording at the current playback-cursor
position. It is not possible to engage Loop while recording.
6.6
Mixing Your Session
Mixing is the part of the production process where all recorded tracks are
combined to mono or stereo. The goal is to balance relative volume, frequency,
and dynamic content in order to achieve a desired cohesive sound.
6.6.1 Creating a Mix in Capture
No mixing can be done in Capture directly. Instead, the individual outputs
of each audio track in Capture are hardwired to the FireWire returns for
each corresponding input channel on the StudioLive mixer. Thus, with
the FireWire returns engaged for each input channel on your StudioLive
mixer, the output of your multitrack Capture Session is routed to the
StudioLive mixer, where it can be mixed just like any other audio input.
The process of creating a mix with Capture and the StudioLive
mixer is quite simple. You play back your recorded tracks through
the StudioLive and record the main output of the StudioLive to the
Auxiliary Stereo Track in Capture. The process works as follows:
1. StudioLive 24.4.2 owners: In VSL, select “Main L/R” for Auxiliary Inputs 25 and 26.
StudioLive 16.4.2 owners: In VSL, select “Main L/R” for Auxiliary Input 17 and 18.
StudioLive 16.0.2 owners: In VSL, patch “Main L/R” to Flexible Inputs 15 and 16.
Please Note: if you wish to create a mix using Capture, you will not be able to
record using analog inputs 15 and 16.
91
StudioLive™ Software Library
Reference Manual
6Capture
6.6
Mixing Your Session
Input
Input
Input
Input
Input
Input
Input
Input
Input
Input
Input
Input
Input
Input
Input
Input
2. Be sure that Record Arm is disabled for all audio-input tracks in Capture and that
the FireWire returns for all input channels on the StudioLive mixer are engaged.
3. In Capture, select the Auxiliary Stereo Track (StudioLive 16.4.2 and
24.4.2) or Track 15/16 (StudioLive 16.0.2) and enable Record Arm.
4. Bring the playback-cursor position to the beginning of the Session by clicking the
Return to Zero button in the Transport.
5. Activate recording by clicking on the Record button in the Transport; the playback
cursor should begin to move from left to right, and audio should be playing
through each input on the StudioLive mixer. The Auxiliary Stereo Track in Capture
should be recording a new audio event, which is the main mix from the
StudioLive mixer.
The new audio event that has been recorded from the StudioLive mixer will be
stored as a stereo WAV file at the sample rate to which the StudioLive mixer is set.
Export Your Final Mix to an Audio File
The most common physical medium on which recordings are published
is the audio CD. In order to put your final mix on an audio CD, the mix file
must be a 16-bit, 44.1 kHz WAV file. Once you have recorded your final mix
to the Auxiliary Stereo track in Capture, it is recommended you export
the audio from the Auxiliary Stereo track to an audio file for this purpose.
See Section 6.8 for details on Exporting Audio Tracks in Capture.
Once the correct audio file for your mix has been exported, you
may use any CD-burning application (including PreSonus Studio
One Professional) to put that mix on a recordable audio CD.
6.6.2 Mixing a Capture Session in Studio One
Many users will want to use Capture strictly as a track-recording tool and mix
the recorded tracks later in a DAW application. PreSonus has included a copy
of Studio One Artist with your StudioLive for just this purpose. All versions of
Studio One can open Capture Session files. All markers, edits, track names,
etc., will be preserved, and no further effort is required. Simply launch Studio
One and open your Capture session. (See Section 7 for more details.)
6.6.3 Mixing a Capture Session in a Different Recording Application
For users who wish to mix their Capture Session in a DAW other than Studio
One, there are several ways in which to import your Capture session.
92
6Capture
6.6
Mixing Your Session
StudioLive™ Software Library
Reference Manual
6.6.3.1 Save a Capture Session as OpenTL
Many audio-recording programs can open OpenTL (Open Track List) files. An OpenTL
file provides a reference for all of the audio tracks and audio events, with their
corresponding positions, in a Capture Session, so that another audio program can
reconstruct your Session automatically. This makes it possible for you to open your
Capture Session and work as you normally do in your favorite recording application.
To save an OpenTL version of your Session, select Save
Session As in the File menu of Capture.
Name the file as usual, and choose OpenTL (*.tl) in the Save As Type selection box.
Click on Save to save your Session as an OpenTL document and confirm the
command by clicking Yes in the confirmation window. This file will be placed
by default in your Session folder and will not overwrite the original Capture
Session file. Note that the OpenTL format will not save your markers.
93
6Capture
6.7
Importing Audio Files
StudioLive™ Software Library
Reference Manual
6.6.3.2 Import Capture Session Audio Files Directly
Some audio-editing applications (such as digital audio workstations, or DAWs)
do not support the OpenTL format, which makes the options somewhat limited
when importing sessions created in other programs. In this case, you must
manually import the audio events from your Capture Session into the audioediting application, using whatever means possible in that program. Refer to
the documentation of your software for more information on this process.
Note that in some cases, you may have more than one audio event on a given track,
as opposed to a single continuous audio event, or you may have audio events that
do not have the same start position. In either case, it is highly recommended that
you first export the audio for each track before attempting to import into an audioediting program, as described in the Export Audio Files portion of this section.
Be sure to select the Export Tracks option in the Export Audio
File menu, as shown, so that the result of the process will be a
single continuous audio file for each track in the session.
Once you have single, continuous audio files for each track, directly importing
the files into an audio editor is much easier. All that is required to reconstruct
your Capture Session is to align each file at the same start time. For complete
information on exporting tracks from Capture, please review Section 6.8.
6.7
Importing Audio Files
It is possible to import WAV and AIFF audio files into your Session.
1. To import an audio file, select Import Audio File from the
Session menu to open the Import File menu.
2. Browse to the desired file and click on it to select it.
3. The Import Audio window will open a preview player when
a compatible audio file is selected. See section 6.7.1.
94
StudioLive™ Software Library
Reference Manual
6Capture
6.8
Export Audio Files
4. Then click on Open to import the file into your Session.
5. An audio event for the imported file will be created and placed on the currently
selected track in your Session, at the current playback-cursor position.
6.7.1 Preview Player
When browsing for files in the Import File menu, it is possible to listen to the audio
files as you are browsing in the Preview Player. Click the Play button in the Preview
Player to play the currently selected audio file. Click the Stop button to stop playback.
Click the Loop button to loop the playback of the currently selected audio file.
6.8
Export Audio Files
To export audio from your Session in Capture, navigate to Session/Export to Audio
File, or press [Ctrl]/[Cmd]+E on the keyboard to open the Export to Audio File menu.
Location
In the top section of the Export to Audio File menu, select a location and name for
the audio file.
Click on the Browse button to choose a file location.
Double-click on the filename, type in a new name, and then press Enter
to choose a name for the file. Each file that is exported will begin with the
filename you enter, followed by the name of the track from which it was
exported and the first marker of the marker pair (if applicable). Examples:
“1602 Demo Session – kick: or “1602 Demo Session – Kick – Chorus.”
95
6Capture
6.8
Export Audio Files
StudioLive™ Software Library
Reference Manual
Format
Select the format of the mixdown audio file in the middle section
of the Export to Audio File menu. Choose from WAV or AIFF, and
then choose the desired resolution and sample rate.
If you wish to put your audio on a standard audio CD, the format should
be a WAV file with 16-bit resolution and a 44.1 kHz sample rate.
Options
The bottom section of the Export to Audio File menu has
several options that will affect how files are created:
•• The Export Session option will export the entire range of your Session,
to the furthest point in time that any audio event on a track extends.
•• The Export Each Marker option will export separate files for
each range between the markers in the Marker Lane.
•• The Export Between Selected Markers option will export audio files
between the ranges of any two selected markers in the Marker Lane.
96
StudioLive™ Software Library
Reference Manual
6Capture
6.9
Capture Key Commands
6.9
Capture Key Commands
Action
Key Command
File Menu
Action
Key Command
Transport... continued
New Session
Cntrl/Cntrl/Cmd+N
Record
NumPad *
Open Session
Cntrl/Cntrl/Cmd+O
Stop
NumPad 0
Close Session
Cntrl/Cmd+W
Return to Zero
NumPad
Save Session
Cntrl/Cmd+S
Navigation
Save Session As
Cntrl/Cmd+Shift+S
Focus Next
Tab
Quit
Cntrl/Cmd+Q
Focus Previous
Shift+Tab
Left
Left Arrow
Edit Menu
Undo
Cntrl/Cmd+Z
Extend Selection Left
Shift+Left Arrow
Redo
Cntrl/Cmd+Y
Extend Selection Left Add
Cntrl/Cmd+Shift+Left Arrow
Cut
Cntrl/Cmd+X
Skip Left
Cntrl/Cmd+Left Arrow
Copy
Cntrl/Cmd+C
Right
Right Arrow
Paste
Cntrl/Cmd+V
Extend Selection Right
Shift+Right Arrow
Delete
Del
Extend Selection Right Add
Cntrl/Cmd+Shift+Right Arrow
Select All
Cntrl/Cmd+A
Skip Right
Cntrl/Cmd+Right Arrow
Deselect All
Cntrl/Cmd+D
Up
Up Arrow
Zoom In
Cntrl/Cmd + or E
Extend Selection Up
Shift+Up Arrow
Zoom Out
Cntrl/Cmd - or W
Extend Selection Up Add
Cntrl/Cmd+Shift+Up Arrow
Zoom Full
F
Skip Up
Cntrl/Cmd+Up Arrow
Down
Down Arrow
Session Menu
Import File
Command+I
Extend Selection Down
Shift+Down Arrow
Export to Audio File
Command+E
Extend Selection Down Add
Cntrl/Cmd+Shift+Down Arrow
Insert Marker
Ins, I
Skip Down
Cntrl/Cmd+Down Arrow
Insert Named Marker
Shift+Ins, Shift+I
Page Up
Page Up
Locate Next Marker
N
Extend Selection Page Up
Shift+Page Up
Locate Previous Marker
B
Extend Selection Page Up Add
Cntrl/Cmd+Shift+Page Up
Recall Marker 1-9
NumPad+1-9, Command+1-9
Skip Page Up
Cntrl/Cmd+Page Up
Mute Track
M
Page Down
Page Down
Solo Track
S
Extend Selection Page Down
Shift+Page Down
Arm Track
A
Extend Selection Page Down Add
Cntrl/Cmd+Shift+Page Down
Skip Page Down
Cntrl/Cmd+Page Down
Tools
Select Arrow Tool
1
Start
Home
Select Range Tool
2
Extend Selection Start
Shift+Home
Select Split Tool
3
Extend Selection Start Add
Cntrl/Cmd+Shift+Home
Select Eraser Tool
4
Skip Start
Cntrl/Cmd+Home
End
End
Transport
Toggle Start/Stop
Space Bar
Extend Selection End
Shift+End
Start
Enter
Extend Selection End Add
Cntrl/Cmd+Shift+End
Skip End
Cntrl/Cmd+End
97
StudioLive™ Software Library
Reference Manual
7
7.1
Studio One Artist Quick Start
Installation and Authorization
7
Studio One Artist Quick Start
Your StudioLive mixer comes with Studio One Artist recording and production
software. Whether you are about to record your first album or your fiftieth,
Studio One Artist provides you with all of the tools necessary to capture and
mix a great performance. As a valued PreSonus customer, you are also eligible
for a discount upgrade to Studio One Producer or Studio One Professional.
For more details on the Studio One upgrade program for PreSonus
customers, please visit http://studioone.presonus.com/.
7.1
Installation and Authorization
Once you have installed the StudioLive drivers and connected your StudioLive
to your computer, you can use the included PreSonus Studio One Artist musicproduction software to begin recording, mixing, and producing music.
To install Studio One Artist, insert your installation disc into your computer’s DVD
drive. Follow the onscreen instructions to complete the installation process.
7.1.1 Running the Studio One Installer
nu
sA
udio
E lec
-A
t
To Install Studio One Artist, insert your Studio One Artist
installation DVD into your computer’s DVD drive.
Windows Users: Launch the Studio One Artist installer
and follow the onscreen instructions.
Mac Users: Drag the Studio One Artist application into the
Applications folder on your Macintosh hard drive.
98
7
7.1
Studio One Artist Quick Start
Installation and Authorization
StudioLive™ Software Library
Reference Manual
7.1.2 Creating a User Account
1. After installing Studio One Artist, launch the program,
and the Activate Studio One menu will appear.
2. Click on the Activate or Upgrade link to begin.
3. If you are a new Studio One user, you will need to create a user account. Click on
the “Create New Account” link if your computer is connected to the Internet.
If your computer is not connected to the Internet, skip to
Section 7.1.4 “Activating Studio One Artist Offline.”
If you already have a PreSonus user account, you can skip to
Section 7.1.3 “Activating Studio One Artist Online.”
99
7
7.1
Studio One Artist Quick Start
Installation and Authorization
StudioLive™ Software Library
Reference Manual
4. Fill out the user registration form. You will be asked to create a username and
password. This information will be used to access your PreSonus user account
on the PreSonus Web site. With this account, you can manage the registrations
for all of your PreSonus hardware and software products. You will be notified
of, and will have access to, important information and updates related to your
PreSonus products, ensuring you get the best performance possible from them.
Your username and password will also provide you with access to the PreSonus
user forums to chat with other PreSonus users as well as PreSonus employees.
Once your user account has been successfully created, you will be alerted that
the activation email has been sent to the email address that you provided.
Don’t forget to activate your PreSonus user account
the next time you check your email!
100
7
7.1
Studio One Artist Quick Start
Installation and Authorization
StudioLive™ Software Library
Reference Manual
7.1.3 Activating Studio One Artist Online
Now that you have created a user account, you can
activate your copy of Studio One Artist.
1. Click on the Activate Online link.
2. Your previously created account username and password
will automatically be filled in. Enter the Studio One Product
Key located on the Studio One Artist disc wallet.
3. Click on the Activate button to finish the activation process.
101
7
7.1
Studio One Artist Quick Start
Installation and Authorization
StudioLive™ Software Library
Reference Manual
7.1.4 Activating Studio One Artist Offline
1. Click on the Activate Offline Link.
2. Write down the Activation Code listed under Step 3 in the
onscreen instructions. You will need this for Step 9.
Activation Code:_________________________________
102
7
7.1
Studio One Artist Quick Start
Installation and Authorization
StudioLive™ Software Library
Reference Manual
3. Visit http://www.presonus.com/registration/ on an Internet-connected computer
and click on the Create New Account to create your PreSonus user account.
4. Fill out the PreSonus Registration form.
103
7
7.1
Studio One Artist Quick Start
Installation and Authorization
StudioLive™ Software Library
Reference Manual
5. Once you have created your user account, log in and
click on the Software Registration link.
6. Enter the Product Key located on the Studio One
Artist disc wallet and click “Submit.”
7. When product key is registered, you see a list of links to download
Studio One Artist and its bundled content. Click the Software
List link to view your full registration information.
104
7
7.1
Studio One Artist Quick Start
Installation and Authorization
StudioLive™ Software Library
Reference Manual
8. Click on the Activate link.
9. Enter the Activation Code you wrote down in Step 2.
10.You will see a list the available downloads for your product registration. This
includes the latest application installers as well as installers for the Studio One
Artist content packages. Click on the Download License link at the top.
11.A file called “Studio One 2 Artist.license” will be saved onto your computer.
You will need to copy this onto a piece of removable media and transfer
it onto the computer on which you want to run Studio One Artist.
105
7
7.1
Studio One Artist Quick Start
Installation and Authorization
StudioLive™ Software Library
Reference Manual
12.After installing Studio One Artist, launch the program,
and the Activate Studio One menu will appear.
13.Click on the Activate or Upgrade link to begin.
14.From the Activate Studio One Menu, click on the “Activate Offline” link.
106
7
7.1
Studio One Artist Quick Start
Installation and Authorization
StudioLive™ Software Library
Reference Manual
15.Drag the “Studio One 2 Artist.license” file onto the Offline
Activation window to complete the activation.
7.1.5 Installing Bundled Content for Studio One Artist
The Studio One Artist bundle includes all that you need to begin
producing music. This includes an array of demo and tutorial material,
instruments, loops, samples, and other third-party content.
Upon completing the Studio One Artist installation and activation
process, the Studio One Content Installer will appear.
1. Click on “Install content from DVD or local folder.”
107
7
7.1
Studio One Artist Quick Start
Installation and Authorization
StudioLive™ Software Library
Reference Manual
2. At the top of the installation menu, select the source from which
the content will be installed, as well as the location where you wish
to install the content. The source of the content will be the same
DVD from which you installed Studio One Artist. By default, Studio
One Artist will point to your DVD drive as the content source.
3. Listed in the installation menu are separate entries for each available
item. Click the checkbox next to each item you wish to install or click
on the Install Recommended or Install All links above the list.
4. Click on the Install Packets button at the bottom left
of the menu to install the selected content.
5. When finished installing content, click on the Done button to exit the menu.
Power User Tip: Studio One Artist content can be installed at any time by
accessing the Studio One 2>Studio One Installation... menu. If you choose
not to install any portion of the content, you can install it at a later time.
108
7
7.1
Studio One Artist Quick Start
Installation and Authorization
StudioLive™ Software Library
Reference Manual
7.1.6 Installing Third-Party Content
To install any of the third-party content, click on the arrow button next to its name in
the content list (Celemony Melodyne Trial and Native Instruments Komplete Player).
Notice that next to Native Instruments Komplete a serial number is listed. You
will need this number to authorize the plug-in the first time you open it.
When you have finished installing content, click the Done button.
Please Note: If you have any difficulty registering either plug-in,
please contact the plug-in’s manufacturer for assistance.
109
7
7.1
Studio One Artist Quick Start
Installation and Authorization
StudioLive™ Software Library
Reference Manual
7.1.7 Enabling the Audio Driver
Studio One Artist was designed with PreSonus interfaces in mind, so the
StudioLive setup is quick and easy. When Studio One Artist is launched, by
default you will be taken to the Start page. On this page, you will find documentmanagement and device-configuration controls, as well as a customizable
artist profile, a news feed, and links to demos and tutorials from PreSonus.
If you have an Internet connection on your computer, these links will be
updated as new tutorials become available on the PreSonus Web site.
Complete information on all aspects of Studio One Artist is available in the
Reference Manual PDF located on the Studio One Artist installation disc. The
information in this tutorial covers only the basic aspects of Studio One Artist
and is intended to get you set up and recording as quickly as possible.
Start Page: Setup Area. Shows Active Audio Driver and Sample
Rate and Provides Quick Links to Configure Audio and MIDI.
In the middle of the Start page, you will see the Setup area. Studio One
Artist automatically scans your system for all available drivers and selects
a driver. By default, it will choose a PreSonus driver, if one is available.
Selecting a Different Audio Driver from the Start Page.
If you do not see “PreSonus FireStudio” on the Start page when you
launch Studio One, click on the Configure Audio Devices link in
the Setup area to open the Audio Setup Options window.
110
7
7.2
StudioLive™ Software Library
Reference Manual
Studio One Artist Quick Start
Configuring MIDI Devices
In the Audio Device menu, select “PreSonus FireStudio.”
Click the Apply button and then OK.
After you have verified that the PreSonus FireStudio driver has been
detected (remember: StudioLive shares a driver with the PreSonus
FireStudio family of interfaces), please continue to the next section
to set up your external MIDI devices. If you do not have any MIDI
devices to connect at this time, please skip to Section 7.3.
7.2
Configuring MIDI Devices
From the External Devices window in Studio One Artist, you can configure your
MIDI keyboard controller, sound modules, and control surfaces. This section
will guide you through setting up your MIDI keyboard controller and sound
module. Please consult the Reference Manual located on your Studio One Artist
installation DVD for complete setup instructions for other MIDI devices.
If you are using a third-party MIDI interface or USB MIDI-controller
keyboard, you must install the drivers for these devices before
beginning this section. Please consult the documentation that came
with your MIDI hardware for complete installation instructions.
7.2.1 Setting Up an External MIDI Keyboard Controller from the Start Page
A MIDI keyboard controller is a hardware device that is generally used for playing
and controlling other MIDI devices, virtual instruments, and software parameters.
In Studio One Artist, these devices are referred to as Keyboards, and they must be
configured before they are available for use. In some cases, your MIDI keyboard
controller is also used as a tone generator. Studio One Artist views the controller
and tone-generation functions as two different devices: a MIDI keyboard controller
and a sound module. The MIDI controls (keyboard, knobs, faders, etc.) will be
set up as a Keyboard. The sound module will be set up as an Instrument.
You can set up your external MIDI devices from the Setup area
in the Start page. Before setting up a new Song for recording,
take a moment to configure external devices.
Left
100 - 240 VAC 50-60Hz
Right
On
111
7
7.2
Studio One Artist Quick Start
Configuring MIDI Devices
StudioLive™ Software Library
Reference Manual
1. Connect the MIDI Out of your external MIDI controller to a MIDI In on
your StudioLive 16.0.2 or other MIDI interface (StudioLive 16.4.2 and
24.4.2. owners will need to use a separate MIDI interface). If you are using
a USB MIDI controller, connect it to your computer and power it on.
2. Click on the Configure External Devices link in the Setup area
on the Start page to launch the External Devices window.
3. Click the Add button.
4. The Add Device window will launch.
112
7
7.2
Studio One Artist Quick Start
Configuring MIDI Devices
StudioLive™ Software Library
Reference Manual
5. From the menu on the left, select New Keyboard. At this point, you can customize
the name of your keyboard by entering the manufacturer and device names.
6. You must specify which MIDI channels will be used to communicate with
this keyboard. For most purposes, you should select all MIDI channels.
If you are unsure of which MIDI channels to choose, select all 16.
7. In the Receive From drop-down menu, select the MIDI-interface input
from which Studio One Artist will receive MIDI data. If you are using
the StudioLive 16.0.2 MIDI I/O, select PreSonus FireStudio Port 1.
8. In the Send To drop-down menu, select the MIDI interface output (PreSonus
FireStudio, for StudioLive 16.0.2 owners) from which Studio One Artist will
send MIDI data to your keyboard. If your keyboard controller does not need
to receive MIDI data from Studio One, you can leave this unselected. If your
keyboard does need to receive MIDI data, you must connect a MIDI cable
from the MIDI Out of the MIDI interface to the MIDI In of the keyboard.
9. If this is the only keyboard that you will use to control your external
synthesizers and virtual instruments, you should check the box next
to Default Instrument Input. This will automatically assign your
keyboard to control all MIDI devices in Studio One Artist.
10.Click OK.
If you have a sound module that you’d like to connect, leave the
External Devices window open and proceed to the next section.
If not, you can close this window and skip to Section 7.3.
113
7
7.2
StudioLive™ Software Library
Reference Manual
Studio One Artist Quick Start
Configuring MIDI Devices
7.2.2 Setting up an External MIDI Sound Module from the Start Page
MIDI instrument controllers (keyboards, MIDI guitars, etc.) send musical information
in the form of MIDI data to tone modules and virtual instruments, which respond
by generating sound, as instructed. Tone modules can be standalone sound devices
or can be integrated into a MIDI instrument, such as a keyboard synthesizer. Studio
One Artist refers to all tone generators as Instruments. Once you have set up your
MIDI keyboard controller, take a moment to configure your sound module.
Left
100 - 240 VAC 50-60Hz
Right
On
1. Connect the MIDI In of your external sound module to the MIDI Out
of your StudioLive 16.0.2 or other MIDI interface. (StudioLive 16.4.2
and 24.4.2 owners will need to use a separate MIDI interface.)
2. In the External Devices window, click the Add button.
114
7
7.2
Studio One Artist Quick Start
Configuring MIDI Devices
StudioLive™ Software Library
Reference Manual
3. The Add Device window will launch.
4. From the menu on the left, select New Instrument. At this
point, you can customize the name of your sound module
by entering the manufacturer and device names.
5. Specify which MIDI channels will be used to communicate with this
keyboard. For most purposes, you should select all MIDI channels. If you are
unsure of which MIDI channels to select, we suggest you select all 16.
6. In the Send To drop-down menu, select the MIDI-interface output from
which Studio One Artist will send MIDI data to your sound module.
Select the StudioLive 16.0.2, if you’re using it as a MIDI interface.
7. In the Receive From drop-down menu, select the MIDI-interface output
(PreSonus FireStudio for StudioLive 16.0.2 owners) from which Studio One
Artist will receive sound-module MIDI data. If your sound module will not
need to send information to Studio One, you can leave this unspecified.
8. Click OK and close the External Devices window.
You are now ready to start recording in Studio One Artist. The rest of this Quick
Start Guide will go over how to set up a Song and will discuss some general
workflow tips for navigating through the Studio One Artist environment.
115
7
7.3
Studio One Artist Quick Start
Creating a New Song
7.3
Creating a New Song
StudioLive™ Software Library
Reference Manual
Now that you’ve configured your MIDI devices, let’s create a new Song.
7.3.1 Creating a New Song from a StudioLive Template
1. From the Start page, select Create a new Song.
2. In the Browser window, name your Song and choose the directory in which
you’d like it saved. You’ll notice a list of templates on the left. The StudioLive
templates will create a Song with a track for each of the StudioLive inputs
and patch them to each of the StudioLive FireWire returns (just like a Capture
Session). Every track is armed for recording, and no further setup is required.
3. Select this template and click “OK.”
7.3.2 Creating an Empty Song and Configuring Audio I/O
1. From the Start page, select Create a new Song.
2. In the Browser window, name your Song and choose
the directory in which you’d like it saved.
116
7
7.3
Studio One Artist Quick Start
Creating a New Song
StudioLive™ Software Library
Reference Manual
3. Select Empty Song from the Templates list.
4. Select your preferred sample rate and bit depth. You can also
determine the length of your Song and the type of time format you
would like to use (Notation Bars, Seconds, Samples, or Frames).
5. Click the OK button when you are finished.
6. If you plan on importing loops into your Song, you may want to select
Stretch audio files to Song Tempo so that any loop of a known BPM (like
those in the included content library) will import at the correct tempo.
7. Go to Song>Song Setup menu.
8. Click on Audio I/O Setup.
117
7
7.3
Studio One Artist Quick Start
Creating a New Song
StudioLive™ Software Library
Reference Manual
9. We recommend that you create a mono input for each of the inputs on
your StudioLive. If you plan on recording in stereo, you should also create a
stereo bus and assign it to the appropriate set of inputs. StudioLive 16.0.2
users may wish to make a stereo input for channels 9/10 through 15/16.
10.You can remove any bus by simply selecting it and clicking the Remove button.
11.To customize the names of your buses, double-click on the default
name to open a text box. When you have finished typing, hit Enter.
12.If you would like the same inputs to be available every time you
launch Studio One Artist, click the Make Default button.
118
7
7.3
Studio One Artist Quick Start
Creating a New Song
StudioLive™ Software Library
Reference Manual
13.Click on the Outputs tab, and you will see all of the available
outputs on your StudioLive. We recommend that you create a mono
output for each of your StudioLive’s FireWire Returns and a stereo
output for the Main FireWire Return on your StudioLive.
14.Be sure to patch the Main Out bus to the Main FireWire return on
your StudioLive (16.0.2: Returns 1/2; 16.4.2: 2TrackIn Left/Right,
Returns 17/18; 24.4.2: 2TrackIn Left/Right, Returns 25/26).
15.In the lower right corner, you will see the Audition select menu. This allows you to
choose the output from which you will audition audio files prior to importing them
into Studio One Artist. In general, you will want this to be the main output bus.
16.If you would like this output configuration available every time you
launch Studio One Artist, click the Make Default button.
17.Click Apply to finish.
Now that you’ve configured your MIDI and audio I/O and created a new Song, let’s
go through some of the basics of Studio One Artist so you can start recording!
119
7
7.4
Studio One Artist Quick Start
Creating Audio Tracks
7.4
Creating Audio Tracks
StudioLive™ Software Library
Reference Manual
In the upper left corner of the Arrange window, you will notice
several buttons. The third button from the left is the Add Tracks
button. Click this button to bring up the Add Tracks window.
In the Add Tracks window, you can select the number and type of tracks you’d like
to create (Mono Audio, Stereo Audio, Folder, Instrument, or Automation) and can
customize the track name and color as well as add a preset rack of effects to the track.
Once you have added your tracks, you can assign the input by simply
clicking on the input to which a track is currently assigned. This will bring
up the inputs list. You can also access the audio I/O setup from here.
If you would like to add a track for each of the available inputs and have the
routing automatically assigned, simply go to Track | Add Tracks for All Inputs.
120
7
7.5
Studio One Artist Quick Start
Creating MIDI Tracks
StudioLive™ Software Library
Reference Manual
7.4.1 Anatomy of an Audio Track
Solo
Level
Mute Track Name
Track Color
Select
Rec Arm
Meter
Audio Input
Select
ST/Mono
Monitor
(in S1)
7.5
Creating MIDI Tracks
1. Click on the Add Tracks button.
2. When the Add Tracks window launches, select Instrument
as the track format and click the OK button.
3. To assign your MIDI input, click on the MIDI Outputs
list and select your external MIDI module.
4. If you have added virtual instruments to your session,
you will also see them as available outputs.
121
7
7.5
Studio One Artist Quick Start
Creating MIDI Tracks
StudioLive™ Software Library
Reference Manual
5. If you selected your MIDI keyboard controller as the default
keyboard, it will already be selected. If not, choose your MIDI
controller from the Input menu directly below.
6. To the left of the Add Track button, you will find the Inspector button.
Click it to display more parameters for the selected track.
7. At the bottom of the Inspector menu, you will see your Bank and
Program selections. From here, you can remotely change the patch on
your sound module. Check the box next to Program to enable remote
control over Program and Bank changes on your MIDI module.
8. If you don’t see the Program field, drag down the Resize bar
at the top of the Inspector to show the hidden fields.
9. Double-click on the Prog field and type in the
number of the preset you wish to recall.
122
7
7.5
StudioLive™ Software Library
Reference Manual
Studio One Artist Quick Start
Creating MIDI Tracks
Left
100 - 240 VAC 50-60Hz
Right
On
10.MIDI data does not contain audio signals. To hear your sound module,
you must connect the audio output of the sound module to a StudioLive
input, then connect the StudioLive’s audio outputs to a sound system.
(You also can listen on headphones, using the headphone output.)
When you are ready to mix your Song, you must convert the recorded
MIDI data to an audio waveform by recording a new audio track.
7.5.1 Remote Controlling Your StudioLive 16.0.2 with Studio One
The StudioLive 16.0.2’s MIDI Control mode enables you to MIDI-control
several features on your mixer from a DAW or other MIDI source. When
controlling the mixer from a DAW, you don’t need to worry about
connecting an external MIDI interface because the StudioLive 16.0.2
can receive MIDI control messages over its FireWire connection.
These setup instructions will enable you to quickly configure
Studio One Artist to control your StudioLive, while giving you the
information necessary for you to create a custom configuration.
You must first set up your StudioLive for MIDI control, so navigate to pages 4 and 5
of your StudioLive system menu and set each page up as shown in these images:
123
7
7.5
Studio One Artist Quick Start
Creating MIDI Tracks
StudioLive™ Software Library
Reference Manual
7.5.1.1 Configuring StudioLive 16.0.2 as a MIDI Device
To configure your StudioLive 16.0.2 for control by Studio One Artist,
you must first add the StudioLive as an external device.
1. From the Studio One Artist Start page, click on the External Devices link.
2. Click on the Add button.
3. Select New Instrument.
4. In the Device Name field, enter “StudioLive.”
124
7
7.5
Studio One Artist Quick Start
Creating MIDI Tracks
StudioLive™ Software Library
Reference Manual
5. From the Send To menu, select “PreSonus FireStudio Port 1.”
6. Click the All button to enable all MIDI channels.
7. Click OK.
8. In the StudioLive System menu, navigate to Page 4: MIDI Presets.
9. Set MIDI Control Mode to “ON.”
10.Set MIDI Source to “FireWire.”
7.5.1.2 Recalling Scenes and Presets
In our example, you have to set different MIDI channels to recall Scenes,
FXA Presets, and FXB Presets. These are the MIDI channels on which
Studio One will send Program Change messages for each function.
1. In Studio One, create a new Song and then create an Instrument track.
2. In the Input menu, select “StudioLive.”
125
7
7.5
Studio One Artist Quick Start
Creating MIDI Tracks
StudioLive™ Software Library
Reference Manual
3. Open the Inspector.
4. You will see that MIDI channel 1 is already selected
so let’s change a StudioLive Scene.
5. Check the box next to Program.
6. If you don’t see the Program field, drag down the Resize bar
at the top of the Inspector to show the hidden fields.
7. Double-click on the Prog field and type in the number of the Scene you wish to
recall. Please Note: You can recall FX presets using the same steps. Don’t forget
to change the MIDI channel to match what you’ve set on your StudioLive!
126
7
7.5
Studio One Artist Quick Start
Creating MIDI Tracks
StudioLive™ Software Library
Reference Manual
7.5.1.3 Controlling FXA, FXB, and Main Output Levels
1. In Studio One, select the Paint tool.
2. Using the Paint tool, draw a MIDI region several bars long.
3. Set the MIDI channel for the Instrument track to 4.
4. In the Track menu, select “Add Automation Track.”
5. From the Automation Track Inspector, click on the
Parameter menu and select “Add/Remove.”
127
7
7.5
Studio One Artist Quick Start
Creating MIDI Tracks
StudioLive™ Software Library
Reference Manual
6. From the Automation window, select “External Devices StudioLive MIDI.”
7. Select CH 4.
128
7
7.5
Studio One Artist Quick Start
Creating MIDI Tracks
StudioLive™ Software Library
Reference Manual
8. Scroll through the MIDI Control Change list until you find Controls 40-42.
9. Select these controls and click Add.
129
7
7.5
Studio One Artist Quick Start
Creating MIDI Tracks
StudioLive™ Software Library
Reference Manual
10.Click Close.
11.Select Control 42 from the parameter pull-down menu on the automation track.
12.Using your Paint tool, draw an automation curve.
13.Press Play to hear Studio One control the main output level of your StudioLive.
You can use the same steps to create volume-curve automation for
FXA and FXB output levels on your StudioLive mixer. Just be sure
to select the right Control Change number from the parameter
pull-down menu on the automation track in Studio One!
130
7
7.5
Studio One Artist Quick Start
Creating MIDI Tracks
StudioLive™ Software Library
Reference Manual
7.5.1.4 Assigning/Unassigning FXA and FXB to the Main Bus
1. In Studio One, select the Paint tool.
2. Using the Paint tool, draw a MIDI region several bars long.
3. Set the MIDI channel for the Instrument track to 4.
4. In the Track menu, select Add Automation Track.
5. From the Automation Track Inspector, click on the
Parameter menu and select “Add/Remove.”
131
7
7.5
Studio One Artist Quick Start
Creating MIDI Tracks
StudioLive™ Software Library
Reference Manual
6. From the Automation window, select “External Devices StudioLive MIDI.”
7. Select CH 4.
132
7
7.5
Studio One Artist Quick Start
Creating MIDI Tracks
StudioLive™ Software Library
Reference Manual
8. Scroll through the MIDI Control Change list until you find Sustain Pedal On/
Off (CC 64) and Sustenuto Pedal On/Off (CC 66). Unlike volume control,
the mute controls require On/Off messages; therefore, we recommend
using these two Control Change numbers when controlling the StudioLive
16.0.2 with Studio One Artist. Select each control and click Add.
9. Click Close.
10.Select Sustain Pedal On/Off from the Parameter pulldown menu on the automation track.
133
7
7.6
Studio One Artist Quick Start
Adding Virtual Instruments and Plug-in Effects to Your Song
StudioLive™ Software Library
Reference Manual
11.Using your Pencil tool, draw an “ON” message that lasts for several bars.
Note that the FXA/FXB assignment to the main bus is a simple toggle, so
when it receives its CC message, the button will be put into the opposite of its
current state. If you want the “On” state in Studio One to turn the button on,
the button will need to be in the “Off” state when it receives the message.
12.Press Play to watch and hear Studio One assign and unassign FXA to the Main bus.
These same steps can be used to control FXB assign/unassign to
the Main bus. Just be sure to select the correct Control Change
message from the Automation track’s parameter menu.
7.6
Adding Virtual Instruments and Plug-in Effects to Your Song
You can add plug-ins and instruments to your Song by dragging-and-dropping
from the browser. You can also drag an effect or group of effects from one
channel to another, drag in customized effects chains, and instantly load your
favorite virtual-instrument patch without ever scrolling through a menu.
Opening the Browser, Editor, and Mixer
In the lower right corner of the Arrange window are three buttons.
The Edit button opens or closes the audio editor or the MIDI pianoroll editor, depending on which type of track is selected.
134
7
7.6
Studio One Artist Quick Start
Adding Virtual Instruments and Plug-in Effects to Your Song
StudioLive™ Software Library
Reference Manual
The Mix button opens and closes the mixer window.
The Browse button opens the Browser window, which displays all of the
available virtual instruments, plug-in effects, audio files, and MIDI files,
as well as the pool of audio files loaded into the current session.
135
7
7.6
Studio One Artist Quick Start
Adding Virtual Instruments and Plug-in Effects to Your Song
StudioLive™ Software Library
Reference Manual
At the bottom of the Browser window, you will find six category tabs:
•• Home opens hot links to the other five tabs.
•• Instruments opens a list of all the available Virtual Instruments
that you have installed on your computer.
•• Effects opens a list of all the available plug-in effects
that you have installed on you computer.
•• Sounds opens a list of the audio and MIDI loops that
came with your Studio One content packages.
•• Files provides you with quick access to every file on your computer.
•• Pool opens a list of the audio files that have been recorded
and imported into your current session.
7.6.1 Drag-and-Drop Virtual Instruments
To add a virtual instrument to your session, click the Browse and Instrument
buttons to open the instrument browser. Select the instrument or one of its patches
from the instrument browser and drag it into the Arrange view. Studio One Artist
will automatically create a new track and load the instrument as the input.
7.6.2 Drag-and-Drop Effects
To add a plug-in effect to a track, click the Effects button and select
the plug-in or one of its presets in the effects browser, then drag the
selection over the track to which you would like to add the effect.
136
7
7.7
Studio One Artist Quick Start
Recording in Studio One Artist
StudioLive™ Software Library
Reference Manual
7.6.3 Drag-and-Drop Audio and MIDI Files
Audio and MIDI files can be quickly located, auditioned, and imported into
your Song by dragging them from the file browser into the Arrange view.
If you drag the file to an empty space, a new track will be created with that
file placed at the position to which you dragged it. If you drag the file to
an existing track, the file will be placed as a new part on the track.
7.7
Recording in Studio One Artist
Now that you’ve gone through the basics of configuring
and using Studio One Artist, let’s record a track!
1. To begin recording, create a mono audio track.
2. Select Input 1 as the input source.
137
7
7.7
Studio One Artist Quick Start
Recording in Studio One Artist
StudioLive™ Software Library
Reference Manual
3. Connect a microphone to the channel 1 input on the StudioLive.
4. Select Record Enable on your track in Studio One Artist.
5. Turn up the Channel 1 level while speaking/singing into the microphone.
You should see the input meter in Studio One Artist react to the input.
6. Adjust the gain so the input level is near its
maximum without clipping (distorting).
7. Connect a set of headphones to the StudioLive headphone output.
138
7
7.7
StudioLive™ Software Library
Reference Manual
Studio One Artist Quick Start
Recording in Studio One Artist
Reference Monitors
8. If you wish to listen to your StudioLive with studio monitors, make
sure to connect them to the StudioLive’s Control Room outputs.
Main
9. Enable the Main bus in the monitor bus on your StudioLive so
you can monitor through headphones or using the Control
Room Outs on your StudioLive and your studio monitors.
10.In Studio One, click Record.
11.Sing or speak into the microphone.
12.When you are done, click the Stop button in Studio One
or press the Space bar to stop the recording.
139
7
7.7
Studio One Artist Quick Start
Recording in Studio One Artist
StudioLive™ Software Library
Reference Manual
13.On the StudioLive, engage the Main FW Return button in the Monitor Bus.
14.Click the Return to Zero button in Studio One or press the
“ , ” (comma) key to return to the beginning of the Song.
15.Click Play in Studio One, or press the Space bar to listen to your recording.
For complete instructions, please consult the Studio One Reference
Manual, which is located on your Studio One Artist installation DVD.
140
8Troubleshooting
8Troubleshooting
8.1
Universal Control:
Universal
Control:
Driver
Driver
andand
General
General
Connectivity
Connectivity
StudioLive™
StudioLive™ Software
24.4.2/16.4.2
Library
Owner’s
ReferenceManual
Manual
8Troubleshooting
Many technical issues can arise when using a standard computer as a digital
audio workstation (DAW) and when networking wireless devices. PreSonus
can only provide support for issues that directly relate to the StudioLive mixer
and interface, Universal Control control-panel software, Virtual StudioLive
mixer-control software, StudioLive Remote, QMix, and Studio One.
PreSonus does not provide support for computer hardware, iOS hardware, wireless
networks, operating systems, and non-PreSonus hardware and software, and it may
be necessary to contact the manufacturer of these products for technical support.
Please check our Web site (www.presonus.com) regularly
for software information and updates, firmware updates, and
support documentation for frequently asked questions.
Online technical support is available at:
www.presonus.com/support/Contact-Technical-Support.
Technical support is available via email at [email protected].
PreSonus telephone technical support is available to customers in the USA
on Monday through Friday from 9 a.m. to 5 p.m. Central Time by calling
1-225-216-7887. Customers outside of the USA should contact their national
or regional distributor for telephone technical support. A list of international
distributors is provided at www.presonus.com/buy/international_distributors.
Advanced troubleshooting guides can be found at support.presonus.com/forums.
8.1
Universal Control: Driver and General Connectivity
StudioLive Will Not Connect to Computer.
Verify that the FireWire cable is properly connected to the StudioLive
and to your computer. Disconnect unnecessary peripheral FireWire
devices. StudioLive 24.4.2 users: Navigate to Page 3 of the System
menu on your StudioLive and verify that the Link ID is set to “0.”
StudioLive is Connected and Synced but will not Pass Audio.
Navigate to Page 3: Digital in the StudioLive System Menu
and toggle the link ID. This will soft boot the DSP.
Audio Playback is Distorted or Choppy
Verify that you have set a buffer size that is high enough for your computer’s
performance capacity. For most modern computers, a buffer size of 32 or 64
samples will perform quite well in most situations. However, if you have loaded
several plugins that require a large CPU overhead or your computer’s processor
is older or you do not have adequate RAM for your use case, you may find that
a buffer size of 256 or higher will allow to add more plugins and tracks.
141
8Troubleshooting
8Troubleshooting
8.2
8.2
Universal Control:
Universal
Control:
VSL VSL
8.2
StudioLive™
StudioLive™ Software
24.4.2/16.4.2
Library
Owner’s
ReferenceManual
Manual
Universal Control: VSL
VSL Will Not Launch (No Device Button in Universal Control Launch Window).
VSL will not launch if the StudioLive is not connected and synced to
your computer. Verify that your FireWire cable is connected both to
your computer and to your StudioLive. Navigate to Page 3: Digital in the
StudioLive System menu and verify that the FireWire status is locked.
Tap Tempo is Not Available on an FX Bus.
Make sure that a delay has been loaded on that effects bus. The
Tap Tempo button will not appear if a reverb is loaded.
Aux Mix Copies Fat Channel Settings Only and Not Mix (or Vice Versa).
Verify that you are using the correct drag handle. The drag handle that is available at
the top of the VSL window when an aux is selected copies the Fat Channel settings
only. The drag handle that is available from the Aux Masters copies only the aux mix.
Remote Devices Are No Longer Available.
When a remote device goes to sleep, or the iOS application (SL Remote or QMix)
is closed, the device will no longer be available in the VSL Setup tab. Once
the application is active again, the remote device will become available.
8.3
StudioLive Remote
Cannot Edit Channel Labels.
Verify in the VSL Setup tab that the device has permission to edit channel labels.
Tap Tempo Is Not Available.
Make sure that a delay has been loaded on that effects bus. The
Tap Tempo button will not appear if a reverb is loaded.
Cannot Connect to VSL.
Verify that the computer running VSL is not connected to a wireless
router or to another network with an Ethernet cable. VSL does not
support connections to two networks at the same time.
8.4
QMix
Cannot Edit Channel Labels.
Verify, in the VSL Setup tab, that the device has permission to edit channel labels.
Cannot Open the Wheel of Me or Aux Mix Page.
Verify that the Orientation Lock button is not enabled on the current page.
Wheel of Me Indicators Do Not Show Level for “Me” or “Band.”
The “BAND” indicator will not show a level until you create an aux mix on
the Auxes page. The “ME” indicator won’t show a level until at least one
channel is selected on the Me Channels page. If all channels in the aux
mix are selected on the Me Channels page, level will only be shown in the
“ME” indicator, and no level will be shown in the “BAND” indicator.
142
8Troubleshooting
8Troubleshooting
8.5
8.5
Troubleshooting youryour
Troubleshooting
iPad Ad
iPad
HocAd
Network
Hoc Network
8.5
StudioLive™
StudioLive™ Software
24.4.2/16.4.2
Library
Owner’s
ReferenceManual
Manual
Troubleshooting your iPad Ad Hoc Network
Every once in a while, an iPad will accept an ad hoc network even though
that network is not usable. When this happens, you will see the Wi-Fi icon
in the top status bar on your iPad but you will not see your StudioLive
in the Devices list in SL Remote. Here’s what to do if this happens:
1. Tap on the Settings icon in your iPad main menu.
2. Click on “Wi-Fi.”
3. Make sure a check mark is visible before your ad hoc network name.
4. Click on the arrow next to your ad hoc network name.
5. The IP address should begin with 169.254.xxx.xxx.
6. If there is no IP (the field is blank), that’s why StudioLive Remote can’t connect.
7. Wait about 60 seconds on that screen, and a new IP (like
169.254.xxx.xxx) will be assigned automatically.
8. If no IP appears, click “choose Static,” then enter:
IP Address 169.254.1.2
Subnet Mask 255.255.255.255
9. If address 169.254.1.2 is already in use by another device, replace
1 and 2 with numbers of your choice between 0 and 255.
10.If you are using StudioLive Remote in a venue with many wireless
networks, you can create a network on a different channel. Channel
11 is the default but it’s okay to use an alternative in order to ensure
that your iPad’s connection to your computer isn’t interrupted.
8.6
Troubleshooting your iPhone Ad Hoc Network
Once in a while, your iPhone might not be able to establish an ad hoc
Wi-Fi connection with your computer, or it might have intermittent
problems. This can be due to a compatibility problem with the WiFi module on your computer. The problem may be resolved by simply
rebooting your computer or trying a different Wi-Fi channel.
Once your iPhone and your computer have established a proper Wi-Fi
connection, the DNS IP on your computer should start with 68.28. If this field is
empty or has a different range, you will need to reconnect to your network.
The best way to reconnect to your network is to select it on
your iPhone and tap “Forget this network.” Wait several seconds
and then reconnect to the network from your iPhone.
Windows users only: If your iPhone doesn’t see the ad hoc network you created
on your computer, verify that the Wi-Fi adapter is not in power-saving mode.
If you use multiple iOS devices and have difficulty keeping them connected to your
computer’s ad hoc network, consider purchasing a wireless router. A wireless router
will provide you with a more stable network-generator and a wider connection range.
143
Dinner is Served
Added bonus: PreSonus’ previously Top Secret recipe for…
Redfish Couvillion
Ingredients:
••
••
••
••
••
••
••
••
••
••
••
¼ C Vegetable oil
¼ C flour
1 onion diced
1 clove garlic minced
1 green pepper diced
3 celery stalks diced
1 14oz can diced tomatoes
1 bottle light beer
2 bay leaves
1 tsp thyme
2 lbs Redfish fillets
Cooking Instructions:
1. In a heavy saucepan or large skillet, heat oil on medium high and slowly add flour a tablespoon at a time to create a roux.
Continue cooking the roux until it begins to brown, creating a dark blond roux.
2. Add garlic, onions, green pepper, and celery to roux.
3. Sauté vegetables for 3-5 minutes until they start to soften.
4. Add tomatoes, bay leaves, thyme, and redfish. Cook for several minutes.
5. Slowly add beer and bring to a low boil.
6. Reduce heat and simmer uncovered for 30-45 minutes until redfish and vegetables are completely cooked, stirring
occasionally. Break up redfish into bite size chunks and stir in. Add pepper or hot sauce to taste. Do not cover.
7. Serve over rice
Serves 6-8
While not one of Southeast Louisiana’s more famous dishes, Redfish Couvillion is a favorite way to serve our
favorite Gulf fish. Also known as Reds or Red Drum, Redfish is not only fun to catch, it’s also delicious!
© 2012 PreSonus Audio Electronics, Inc. All Rights Reserved. AudioBox, DigiMax, FireStudio, Nimbit, PreSonus, QMix, StudioLive, and XMAX are trademarks or registered trademarks
of PreSonus Audio Electronics, Inc. Capture, Impact, Mixverb Presence, RedLightDist, SampleOne, Studio One, and Tricomp are trademarks or registered trademarks of PreSonus
Software Ltd. Mac, Mac OS, and Macintosh are registered trademarks of Apple, Inc., in the U.S. and other countries. Windows is a registered trademark of Microsoft, Inc., in the U.S.
and other countries. Other product names mentioned herein may be trademarks of their respective companies. All specifications subject to change without notice...except the recipe,
which is a classic.
StudioLive Software Library
Reference Manual
™
Universal Control with Virtual StudioLive and Smaart
System Check Wizards | StudioLive Remote for iPad
QMix for iPhone /iPod touch
Capture | Studio One Artist
®
™
®
™
®
®
®
7257 Florida Boulevard • Baton Rouge,
Louisiana 70806 USA • 1-225-216-7887
www.presonus.com
Part# 820-SL0021-A
®