1
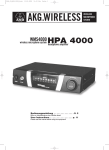
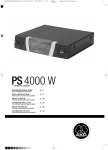
1670_03_PS4000_DT-IT-FRZ
13.10.2003
10:09 Uhr
Seite 1
WMS4000 PS
wireless microphone system
4000
+ antenna system
Bedienungsanleitung . . . . . . . . . . . . . . . S. 2
Bitte vor Inbetriebnahme des Gerätes lesen!
User Instructions. . . . . . . . . . . . . . . . . . p. 11
Please read the manual before using the equipment!
Mode d’emploi. . . . . . . . . . . . . . . . . . . . p. 20
Veuillez lire cette notice avant d’utiliser le système!
Istruzioni per l’uso . . . . . . . . . . . . . . . . p. 29
Prima di utilizzare l’apparecchio, leggere il manuale
Modo de empleo . . . . . . . . . . . . . . . . . . p. 38
¡Sirvase leer el manual antes de utilizar el equipo!
Instruções de uso . . . . . . . . . . . . . . . . . p. 47
Por favor leia este manual antes de usar o equipamento!
1670_03_PS4000_DT-IT-FRZ
13.10.2003
10:09 Uhr
Seite 11
Table of Contents
FCC Statement . . . . . . . . . . . . . . . . . . . . . . . . . . . . . . . . . . . . . . . . . . . . . . . . . . . . . . . . . . . . . 11
1 Safety and Environment . . . . . . . . . . . . . . . . . . . . . . . . . . . . . . . . . . . . . . . . . . . . . . . . . . . 12
1.1 Safety. . . . . . . . . . . . . . . . . . . . . . . . . . . . . . . . . . . . . . . . . . . . . . . . . . . . . . . . . . . . . . . 12
1.2 Environment. . . . . . . . . . . . . . . . . . . . . . . . . . . . . . . . . . . . . . . . . . . . . . . . . . . . . . . . . . 12
2 Description. . . . . . . . . . . . . . . . . . . . . . . . . . . . . . . . . . . . . . . . . . . . . . . . . . . . . . . . . . . . . . 12
2.1 Introduction . . . . . . . . . . . . . . . . . . . . . . . . . . . . . . . . . . . . . . . . . . . . . . . . . . . . . . . . . . 12
2.2 Unpacking . . . . . . . . . . . . . . . . . . . . . . . . . . . . . . . . . . . . . . . . . . . . . . . . . . . . . . . . . . . 12
2.3 Optional Accessories. . . . . . . . . . . . . . . . . . . . . . . . . . . . . . . . . . . . . . . . . . . . . . . . . . . 12
2.4 Description . . . . . . . . . . . . . . . . . . . . . . . . . . . . . . . . . . . . . . . . . . . . . . . . . . . . . . . . . . 13
2.4.1 Front Panel . . . . . . . . . . . . . . . . . . . . . . . . . . . . . . . . . . . . . . . . . . . . . . . . . . . . . . 13
2.4.2 Rear Panel . . . . . . . . . . . . . . . . . . . . . . . . . . . . . . . . . . . . . . . . . . . . . . . . . . . . . . 13
2.5 PSU 4000 Central Power Supply (optional) . . . . . . . . . . . . . . . . . . . . . . . . . . . . . . . . . 14
2.6 Receiving Antennas (optional) . . . . . . . . . . . . . . . . . . . . . . . . . . . . . . . . . . . . . . . . . . . . 14
2.6.1 SRA 1 . . . . . . . . . . . . . . . . . . . . . . . . . . . . . . . . . . . . . . . . . . . . . . . . . . . . . . . . . . 14
2.6.2 SRA 2B . . . . . . . . . . . . . . . . . . . . . . . . . . . . . . . . . . . . . . . . . . . . . . . . . . . . . . . . . 14
2.6.3 RA 4000 B . . . . . . . . . . . . . . . . . . . . . . . . . . . . . . . . . . . . . . . . . . . . . . . . . . . . . . 14
3 Getting Started . . . . . . . . . . . . . . . . . . . . . . . . . . . . . . . . . . . . . . . . . . . . . . . . . . . . . . . . . . 14
3.1 Rack Mounting a Single Antenna Splitter . . . . . . . . . . . . . . . . . . . . . . . . . . . . . . . . . . . 14
3.2 Rack Mounting Two Antenna Splitter s Side by Side . . . . . . . . . . . . . . . . . . . . . . . . . . 14
3.3 Setting Up Antennas . . . . . . . . . . . . . . . . . . . . . . . . . . . . . . . . . . . . . . . . . . . . . . . . . . . 14
3.3.1 Placement. . . . . . . . . . . . . . . . . . . . . . . . . . . . . . . . . . . . . . . . . . . . . . . . . . . . . . . 15
3.3.2 Mounting Antennas on Floor Stands . . . . . . . . . . . . . . . . . . . . . . . . . . . . . . . . . . 15
3.3.3 Wall/Ceiling Mounting . . . . . . . . . . . . . . . . . . . . . . . . . . . . . . . . . . . . . . . . . . . . . 15
3.4 Connecting Antennas . . . . . . . . . . . . . . . . . . . . . . . . . . . . . . . . . . . . . . . . . . . . . . . . . . 15
3.4.1 Single-channel System with SRA 1 Passive Antennas . . . . . . . . . . . . . . . . . . . . 15
3.4.2 Single-channel System with Active Antennas . . . . . . . . . . . . . . . . . . . . . . . . . . . 16
3.5 Multichannel Systems with PS 4000 Antenna Splitters . . . . . . . . . . . . . . . . . . . . . . . . 16
3.6 CLA Switch Bank . . . . . . . . . . . . . . . . . . . . . . . . . . . . . . . . . . . . . . . . . . . . . . . . . . . . . 17
4 Operating Notes . . . . . . . . . . . . . . . . . . . . . . . . . . . . . . . . . . . . . . . . . . . . . . . . . . . . . . . . . 18
4.1 General Hints. . . . . . . . . . . . . . . . . . . . . . . . . . . . . . . . . . . . . . . . . . . . . . . . . . . . . . . . . 18
4.2 Systems with Distributed Power Supplies . . . . . . . . . . . . . . . . . . . . . . . . . . . . . . . . . . 18
4.2.1 Powering Up. . . . . . . . . . . . . . . . . . . . . . . . . . . . . . . . . . . . . . . . . . . . . . . . . . . . . 18
4.2.2 Powering Down . . . . . . . . . . . . . . . . . . . . . . . . . . . . . . . . . . . . . . . . . . . . . . . . . . 18
4.3 Systems with PS 4000 Optional Central Power Supplies. . . . . . . . . . . . . . . . . . . . . . . 18
4.3.1 Powering Up. . . . . . . . . . . . . . . . . . . . . . . . . . . . . . . . . . . . . . . . . . . . . . . . . . . . . 18
4.3.2 Powering Down . . . . . . . . . . . . . . . . . . . . . . . . . . . . . . . . . . . . . . . . . . . . . . . . . . 18
5 Cleaning . . . . . . . . . . . . . . . . . . . . . . . . . . . . . . . . . . . . . . . . . . . . . . . . . . . . . . . . . . . . . . . . 18
6 Troubleshooting. . . . . . . . . . . . . . . . . . . . . . . . . . . . . . . . . . . . . . . . . . . . . . . . . . . . . . . . . . 18
7 Specifications . . . . . . . . . . . . . . . . . . . . . . . . . . . . . . . . . . . . . . . . . . . . . . . . . . . . . . . . . . . 19
Figs. 8 through 13. . . . . . . . . . . . . . . . . . . . . . . . . . . . . . . . . . . . . . . . . . . . . . . . . . . . . . . . . . . 59
FCC Statement
This equipment has been tested and found to comply with the limits for a Class B digital device, pursuant
to Parts 74, 15, and 90 of the FCC Rules. These limits are designed to provide reasonable protection against
harmful interference in a residential installation. This equipment generates, uses, and can radiate radio frequency energy and, if not installed and used in accordance with the instructions, may cause harmful interference to radio communications. However, there is no guarantee that interference will not occur in a particular installation. If this equipment does cause harmful interference to radio or television reception, which
can be determined by turning the equipment off and on, the user is encouraged to try to correct the interference by one or more of the following measures:
•
•
•
•
Reorient or relocate the receiving antenna.
Increase the separation between the equipment and the receiver.
Connect the equipment into an outlet on a circuit different from that to which the receiver is connected.
Consult the dealer or an experienced radio/TV technician for help.
Shielded cables and I/O cords must be used for this equipment to comply with the relevant FCC regulations.
Changes or modifications not expressly approved in writing by AKG Acoustics may void the user’s
authority to operate this equipment.
This device complies with Part 15 of the FCC Rules. Operation is subject to the following two conditions:
(1) this device may not cause harmful interference, and (2) this device must accept any interference
received, including interference that may cause undesired operation.
AKG PS 4000
11
1670_03_PS4000_DT-IT-FRZ
13.10.2003
10:09 Uhr
Seite 12
1 Safety and Environment
1.1 Safety
1. Do not spill any liquids on the equipment and do not drop any objects through the ventilation slots in
the equipment.
2. The equipment may be used in dry rooms only.
3. The equipment may be opened, serviced, and repaired by authorized personnel only. the equipment
contains no user-serviceable parts.
4. Before connecting the equipment to power, check that the AC mains voltage stated on the supplied
power supply is identical to the AC mains voltage available where you will use the equipment.
5. Operate the equipment with the supplied 12 VDC power supply. Using adapters with an AC output
and/or a different output voltage may cause serious damage to the equipment.
6. If any solid object or liquid penetrates into the equipment, shut down the sound system immediately.
Disconnect the power supply from the power outlet immediately and have the equipment checked by
AKG service personnel.
7. If you will not use the equipment for a long period of time, disconnect the power supply from the
power outlet. Please note that the equipment will not be fully isolated from power when you set the
power switch to OFF.
8. Do not place the equipment near heat sources such as radiators, heating ducts, or amplifiers, etc. and
do not expose it to direct sunlight, excessive dust, moisture, rain, mechanical vibrations, or shock.
9. To avoid hum or interference, route all audio lines, particularly those connected to the microphone
inputs, away from power lines of any type. If you use cable ducts, be sure to use separate ducts for
the audio lines.
10.Clean the equipment with a moistened (not wet) cloth only. Be sure to disconnect the power supply
from the power outlet before cleaning the equipment! Never use caustic or scouring cleaners or cleaning agents containing alcohol or solvents since these may damage the enamel and plastic parts.
11.Use the equipment for the applications described in this manual only. AKG cannot accept any liability for damages resulting from improper handling or misuse.
1.2 Environment
1. The power supply will draw a small amount of current even when the equipment is switched off. To
save energy, disconnect the power supply from the power outlet if you will leave the equipment
unused for a long period of time.
2. When scrapping the equipment, separate the case, circuit boards, and cables, and dispose of all components in accordance with local waste disposal rules.
2 Description
2.1 Introduction
Thank you for purchasing an AKG product. This Manual contains important instructions for setting up and
operating your equipment. Please take a few minutes to read the instructions below carefully before operating the equipment. Please keep the Manual for future reference. Have fun and impress your audience!
2.2 Unpacking
1 PS 4000 antenna splitter
1 12 VDC power supply
1 rack mount kit
Check that the packaging contains all of the components listed above. Should anything be missing,
please contact your AKG dealer.
2.3 Optional Accessories
• SRA 1 passive directional antenna
• MK PS antenna cables
• SRA 2 B active directional antenna
• PSU 4000 central power supply
• RA 4000 B active omnidirectional
antenna
• ASU 4000 remote power adapter
• AB 4000 antenna booster with N
connectors (AB 4000/N) or BNC
connectors (AB 4000/BNC)
12
AKG PS 4000
1670_03_PS4000_DT-IT-FRZ
13.10.2003
10:09 Uhr
Seite 13
2 Description
The PS 4000 is an antenna splitter for setting up UHF multichannel systems with up to four SR 4000
receivers per antenna splitter. (Note that the number of channels you can actually operate simultaneously depends on local frequency plans.)
The PS 4000 features two rear panel antenna inputs for connecting either SRA 1 passive antennas or SRA
2B or RA 4000 B active antennas with built-in boosters. Each antenna input provides a 12 VDC supply
voltage for powering up to three active antenna components, e.g., one active antenna and two AB 4000
antenna boosters. Also located on the rear panel are two sets of four antenna output connectors for up
to four SR 4000 diversity receivers and two additional antenna outputs for feeding the antenna signal to
several additional PS 4000 antenna splitters.
The PS 4000 is housed in a 1 U, half-rack case so you can mount two antenna splitters in a single rack
space.
The PS 4000 can be powered by the included power supply. For systems with more than four channels,
we recommend using an optional PSU 4000 central power supply for three antenna splitters each.
Both the antenna boosters and the antenna splitter are wideband devices for the entire UHF band of the
WMS 4000 system.
2.4 Description
2.4.1 Front Panel
Fig. 1: PS 4000 front panel.
The antenna splitter front panel provides the following controls and indicators:
ON/OFF: Press this key to switch power to the unit ON. Press again to switch power to the unit OFF.
ANTENNA A, ANTENNA B: The blue OK LED will be lit for as long as the ANTENNA A IN/ANTENNA B
IN input provides the correct supply voltage for active components.
Should the supply voltage at an input be shorted or fail (drop below 2 V) the OK LED for that input will
extinguish and the red ERROR LED be lit instead.
The two OK LEDs do NOT indicate the operating status of the connected antenna booster and therefore will not go out when you disconnect an antenna cable.
CLA: The round plate with the AKG logo covers a bank of three DIP switches for matching the antenna
inputs (ANTENNA A IN, ANTENNA B IN) to the length of the connected cable run.
Note:
Refer to Table 1 on page 17.
2.4.2 Rear Panel
Fig. 2: PS 4000 rear panel.
The PS 4000 rear panel provides the following inputs and outputs:
DC IN 12 V/2A: Input jack for the standard power supply or optional PSU 4000 central power supply.
ANTENNA A IN, ANTENNA B IN: BNC input connectors for SRA 1, SRA 2 B, or RA 4000 B remote antennas. Since the SR 4000 is a diversity receiver you will need two receiving antennas (optional). Each
antenna input provides a 12 VDC supply voltage for an active antenna.
ANTENNA A OUT TO SR: The four BNC connectors 1A through 4A deliver the antenna signals for the A
inputs of up to four SR 4000 diversity receivers. All unused outputs are electrically terminated automatically.
ANTENNA B OUT TO SR: The four BNC connectors 1B through 4B deliver the antenna signals for the
B inputs of up to four SR 4000 diversity receivers. All unused outputs are electrically terminated automatically.
In addition to the antenna signals, outputs 1A through 4A and 1B through 4B provide a 12 VDC supply voltage for the connected SR 4000 receivers.
The only way to ensure that outputs 1A through 4B will provide sufficient current to power the
connected receivers is to connect the antenna splitter to an optional PSU 4000 central power
supply.
If you power the PS 4000 antenna splitter from its standard power supply, make sure to power
each receiver from its own standard power supply, too. If you connect receivers to the antenna
splitter without connecting each receiver to a power supply and AC power, the antenna splitter's standard power supply may be damaged due to overload.
AKG PS 4000
Important!
13
1670_03_PS4000_DT-IT-FRZ
13.10.2003
10:09 Uhr
Seite 14
2 Description
See also Wiring Diagrams
figs. 10 through 13.
LINK A TO PS, LINK B TO PS: These two BNC outputs carry the RF signal of the two antennas A and
B. You can connect the LINK outputs to the antenna inputs of another PS 4000 antenna splitter to
daisy-chain several antenna splitters.
Note that you will need one optional PSU 4000 central power supply each to power three PS 4000
antenna splitters.
2.5 PSU 4000 Central Power
Supply (optional)
The PSU 4000 central power supply delivers a 12 VDC, 2 A secondary voltage for powering three
PS 4000 antenna splitters and the receivers (12 max.) connected to the antenna splitters. For details refer
to the PSU 4000 user manual.
2.6 Receiving Antennas
(optional)
One passive directional antenna, one active directional antenna, and one active omnidirectional antenna
are available for the PS 4000 antenna system. All antennas are wideband devices for the entire
WMS 4000 UHF band.
The active antennas are powered by the PS 4000 antenna splitter via the antenna cables. For complex
systems with long antenna cables, we recommend powering each active antenna from a PSU 4000 central power supply via an ASU 4000 remote power adapter.
2.6.1 SRA 1
The SRA1 is a remote UHF antenna with a hypercardioid polar pattern. The SRA1 will even operate perfectly as close to the floor or ceiling as 15 cm (6 in.). For details, refer to the SRA 1 User Manual.
2.6.2 SRA 2 B
The SRA 2 B is an active directional antenna with a rugged, water-resistant case designed specifically for
indoor and outdoor use at a distance from the performance area. An integrated high-performance antenna booster allows you to position the antenna up to 100 m (330 ft.) away from the receiver. Using RG213
antenna cables and two AB 4000 antenna boosters in series, you can set up the SRA 2 B even 200 m
(660 ft.) away from the receiver.
The antenna provides a BNC output, status LED, and integrated stand adapter. An optional laser pointer makes it easy to align the antenna precisely with the performance area.
2.6.3 RA 4000 B
The RA 4000 B is an active omnidirectional antenna with a rugged, water-resistant case designed specifically for indoor and outdoor use in close proximity to the performance area. An integrated high-performance antenna booster allows you to position the antenna up to 100 m (330 ft.) away from the receiver. Using RG213 antenna cables and two AB 4000 antenna boosters in series, you can set up the SRA 2 B
even 200 m (660 ft.) away from the receiver.
The antenna provides a BNC output, status LED, and integrated stand adapter.
3 Getting Started
3.1 Rack Mounting a Single
Antenna Splitter
Refer to fig. 8.
1. Unscrew the four rubber feet (1) from the antenna splitter bottom panel.
2. Unscrew the two fixing screws (2) from each side panel.
3. Use the fixing screws (2) to screw the short bracket (3) to one side panel and the long bracket (4) to
the other side panel. The brackets are contained in the supplied rack mounting kit.
4. Install the antenna splitter in your rack.
3.2 Rack Mounting Two
Antenna Splitters
Side by Side.
Refer to fig. 9.
1. Unscrew the four rubber feet (1) from each antenna splitter's bottom panel and remove the screws (5)
from the rubber feet (1).
2. Unscrew the two fixing screws (2) from the right-hand side panel of one antenna splitter and from the
left-hand side panel of the other antenna splitter.
3. Remove the plastic covers (3) from the side panels with the fixing screws (2) still on.
4. Insert one connecting strip (4) into each free slot in the side panel of the first antenna splitter, making
sure to align the hole in each connecting strip (4) with the appropriate threaded hole in the antenna
splitter bottom panel.
5. Fix the two connecting strips (4) on the first antenna splitter using two of the screws (5) you removed
from the rubber feet.
6. To join the two antenna splitters, slide the connecting strips (4) on the first antenna splitter through the
free slots in the side panel of the second antenna splitter. Make sure to align the hole in each connecting strip (4) with the appropriate threaded hole in the bottom panel of the second antenna splitter.
7. Fix the two connecting strips (4) on the second antenna splitter using two of the screws (5) you
removed from the rubber feet.
8. Screw a short bracket (6) to the outer side panel of each antenna splitter using for each bracket two
of the screws (2) you removed from the antenna splitter side panels.
9. Install the antenna splitters in your rack.
Note:
3.3 Setting Up Antennas
14
Be sure to keep the remaining screws (5) for later use.
The following hints on placing antennas apply to both single-channel and multichannel systems with any
number of channels.
AKG PS 4000
1670_03_PS4000_DT-IT-FRZ
13.10.2003
10:09 Uhr
Seite 15
3 Getting Started
Reflections off metal parts, walls, ceilings, etc. or the shadow effects of musicians and other people may
weaken or cancel the direct transmitter signal. For best results, place the antennas as follows:
3.3.1 Placement
1. Place the antennas near the performance area (stage). Make sure, though, that the transmitter will
never get any closer to the antennas than 16 ft. (5 m). Place the two antennas at least 8 inches. (20 cm)
from each other.
2. There should always be a direct line of sight between the transmitter and antennas.
3. Place the receiver at least 5 ft. (1.5 m) away from any big metal objects, walls, scaffolding, ceilings, etc.
4. Do not place antennas in wall recesses.
5. Place antennas at least 5 ft. (1.5 m) away from any equipment that may emit RF radiation such as lighting racks, fluorescent lamps, digital effects units, or PCs.
6. If you set up two antennas side by side (e.g., for diversity reception), check that the two antennas are
spaced at least 20 cm (8 in.) apart.
When mounting the antennas on floor stands, be sure to proceed as
follows:
1. Use the supplied SA 63 or the integrated stand adapter to mount
the antenna on the boom of a boom stand.
2. Pull the boom out all the way to one side to make sure the
antenna will be at least 28 inches (70 cm) away from the stand.
3. Extend the stand high enough to place the boom at least 6 ft.
(1.8 m) above the floor.
4. Wind the antenna cable around the boom. Do not allow the cable
to sag below the boom because this may degrade the reception
quality.
3.3.2 Mounting Antennas on
Floor Stands
≥ 70cm
˛
˛
˛
≥ 180cm
˛
Fig. 3: Antenna mounted on floor
stand
If you mount your antennas on a wall or ceiling, be sure to keep the following minimum distances:
˛
1. Mount the antenna at least 10 cm (4 in.) in front of and at a minimum lateral distance of 50 cm (20 in.) from any walls or other
plane surfaces, metal grids, or metal scaffolding.
3.3.3 Wall/Ceiling Mounting
˛
≥ 10cm
˛
˛
≥ 50cm
˛
˛
≥ 50cm
Fig. 4: Minimum distances from
plane surfaces.
˛
2. Make sure the antenna will sit at least 15 cm (6 in.) above the
floor or 50 cm (20 in.) from the ceiling (or 15 cm (6 in.) if you route
the cable to the antenna from above).
˛
˛
≥ 50 (15) cm
˛
≥ 15cm
For a single-channel system, you need no antenna splitter. Connect the antennas to the receiver directly.
1. Measure the cable run between the SR 4000 receiver and each SRA 1 antenna.
2. Refer to Table 1 on page 17 to find out whether you will need to break the cable run down into several cables and insert one or two AR 4000 antenna boosters. Table 1 states the maximum acceptable
cable lengths for RG58 and RG213 cables separately.
Fig. 5: Minimum distances from
floor and ceiling.
3.4 Connecting Antennas
3.4.1 Single-channel System
with SRA 1 Passive Antennas
Refer to Table 1 on page 17
and fig. 6.
SRA 1
RG58: 0 - 13 m / RG213: 5 - 26 m
SR 4000
A
AB 4000
B
AB 4000
B
SRA 1 A: RG58: 0 - 13 m / RG213: 5 - 26 m
B: RG58: 6 - 46 m / RG213: 12 - 97 m
<- DC/AC ->
ASU 4000
<- DC/AC ->
Fig. 6: Wiring a single-channel
system with passive antennas and
different antenna cable runs.
3. Connect an antenna cable to each antenna.
15
AKG PS 4000
1670_03_PS4000_DT-IT-FRZ
13.10.2003
10:09 Uhr
Seite 16
3 Getting Started
4. Referring to Table 1, connect the antennas to the antenna inputs on the SR 4000 receiver.
If you need one or two AB 4000 antenna boosters, you will need to insert an ASU 4000 remote power
adapter between the receiver and the first antenna booster.
Important!
5. Check that the AC mains voltage stated on the power supplies for the ASU 4000 and the receiver is identical to the AC mains voltage available where you will use your system. Using the
power supplies with a different AC voltage may cause damage to the unit.
6. Connect the remote power adapter and the receiver to their respective power supplies and connect
each power supply to a convenient power outlet.
3.4.2 Single-channel System
with Active Antennas
Refer to Table 1 on page 17
and fig. 7.
1. Measure the cable run between the SR 4000 receiver and each active antenna.
2. Refer to Table 1 on page 17 to find out whether you will need to break the cable run down into several cables and insert one or two AR 4000 antenna boosters. Table 1 states the maximum acceptable
cable lengths for RG58 and RG213 cables separately.
<- DC/AC ->
ASU 4000
SRA 2B
RG58: 0 - 13 m / RG213: 5 - 26 m
Fig. 7: Wiring a single-channel
system with active antennas and
different antenna cable runs.
AB 4000
AB 4000
A
B
B
SRA 2B A: RG58: 0 - 13 m / RG213: 5 - 26 m
B: RG58: 6 - 46 m / RG213: 12 - 97 m
SR 4000
<- DC/AC ->
ASU 4000
<- DC/AC ->
3. Connect an antenna cable to each antenna.
4. Referring to Table 1, connect each antenna to one or two AB 4000 antenna boosters (if necessary),
an ASU 4000 remote power adapter, and to the appropriate antenna input on the SR 4000 receiver.
Important!
5. Check that the AC mains voltage stated on the power supplies for the two ASU 4000s and the
receiver is identical to the AC mains voltage available where you will use your system. Using
the power supplies with a different AC voltage may cause damage to the unit.
6. Connect the remote power adapters and the receiver to their respective power supplies and connect
each power supply to a convenient power outlet.
3.5 Multichannel Systems with
PS 4000 Antenna Splitters
For wiring examples for multichannel systems, refer to figs. 10 through 13 on page 59.
When setting up a multichannel system, remember the following points:
1. You can connect up to four SR 4000 receivers to each PS 4000 antenna splitter.
Warning!
If you power both the antenna splitter and the receivers from their respective standard power supplies, make absolutely sure to connect the receiver power supplies to AC power before connecting the antenna splitter power supply to AC power.
Connecting the antenna splitter to power first may cause damage to the antenna splitter power
supply due to the load presented by the receivers.
2. For large systems with up to 50 channels you can daisy-chain the required number of antenna splitters:
• Connect the LINK outputs on the first antenna splitter to the ANTENNA IN connectors on the next
antenna splitter and so on.
• We recommend powering large systems from optional PSU 4000 central power supplies for three
antenna splitters and four receivers each.
3. Each antenna input on the antenna splitter is capable of powering a maximum of three active components (e.g., RA 4000 B + 2 x AB 4000) via the antenna cables.
In the following cases you will need an ASU 4000 remote power adapter to power active components
(each ASU 4000 is capable of powering up to three active components, too):
• The cable run from the antenna splitter to an active component is long enough to reduce the supply voltage below the acceptable minimum.
• A device (e.g., an antenna combiner*) in the line between the PS 4000 and an active component
interrupts the DC supply voltage across the antenna cable.
Note:
* The ZAPD 21 antenna combiner from Mini Circuit feeds the supply voltage through. Similar
devices from other manufacturers may not do so.
• You have used an antenna combiner to connect two antenna lines to the same antenna input. If
you use three or more active components in one antenna line, insert an ASU 4000 remote power
adapter between the antenna combiner and the first of the active components. If the number of
active components in both lines totals more than three, be sure to insert an ASU 4000 remote
power adapter into each line. The remote power adapter prevents the antenna splitter power supply from being overloaded.
16
AKG PS 4000
1670_03_PS4000_DT-IT-FRZ
13.10.2003
10:10 Uhr
Seite 17
3 Getting Started
The RF signal level at each antenna input on the antenna splitter(s) depends on the frequency band,
antenna type, cable type, and cable length.
To ensure optimum signal level at the antenna input, set the CLA switches on each antenna booster and
on the antenna splitter(s) as shown in Table 1 below.
3.6 CLA Switch Bank
1. Remove the cover of the CLA switch bank.
2. Set the three DIP switches as required for your frequency band, antenna model, cable type, and cable
length.
3. Replace the cover.
A
B
B
14 dB
12 dB
10 dB
ON
CLA
1
2
8 dB
3
6 dB
4 dB
2 dB
A
BAND I + II
A
SRA2B -> AB 4000 or PS 4000
RG58
RG213
CLA
(m)
(m)
(dB)
53 - 57 111 - 121
0
48 - 53 100 - 111
2
43 - 48
89 - 100
4
38 - 43
79 - 89
6
33 - 38
68 - 79
8
28 - 33
58 - 68
10
23 - 28
47 - 58
12
18 - 23
37 - 47
14
A
RA 4000 B ->AB 4000 or PS 4000
RG58
RG213
CLA
(m)
(m)
(dB)
38 - 43
79 - 89
0
33 - 38
68 - 79
2
28 - 33
58 - 68
4
23 - 28
47 - 58
6
18 - 23
37 - 47
8
13 - 18
26 - 37
10
8 - 13
16 - 26
12
3-8
5 - 16
14
A
SRA 1 -> AB 4000 or PS 4000
RG58
RG213
CLA
(m)
(m)
(dB)
8 - 13
16 - 26
0
3-8
5 - 16
2
0-3
4
6
8
10
12
14
B
AB 4000 -> AB 4000 or PS 4000
RG58
RG213
CLA
(m)
(m)
(dB)
41 - 46
87 - 97
0
36 - 41
76 - 87
2
31 - 36
66 - 76
4
26 - 31
55 - 66
6
21 - 26
45 - 55
8
16 - 21
34 - 45
10
11 - 16
24 - 34
12
6 - 11
13 - 24
14
BAND III + IV
A
SRA2B -> AB 4000 or PS 4000
RG58
RG213
CLA
(m)
(m)
(dB)
50 - 55 105 - 115
0
45 - 50
95 - 105
2
40 - 45
85 - 95
4
36 - 40
75 - 85
6
31 - 36
65 - 75
8
26 - 31
55 - 65
10
21 - 26
45 - 55
12
17 - 21
35 - 45
14
A
RA 4000 B ->AB 4000 or PS 4000
RG58
RG213
CLA
(m)
(m)
(dB)
36 - 40
75 - 85
0
31 - 36
65 - 75
2
26 - 31
55 - 65
4
21 - 26
45 - 55
6
17 - 21
35 - 45
8
12 - 17
25 - 35
10
7 - 12
15 - 25
12
2-7
5 - 15
14
A
SRA 1 -> AB 4000 or PS 4000
RG58
RG213
CLA
(m)
(m)
(dB)
7 - 12
15 - 25
0
2-7
5 - 15
2
0-2
4
6
8
10
12
14
B
AB 4000 -> AB 4000 or PS 4000
RG58
RG213
CLA
(m)
(m)
(dB)
39 - 44
83 - 93
0
35 - 39
73 - 83
2
30 - 35
63 - 73
4
25 - 30
53 - 63
6
20 - 25
43 - 53
8
15 - 20
33 - 43
10
11 - 15
23 - 33
12
6 - 11
13 - 23
14
BAND V + VI
0 dB
A
SRA2B -> AB 4000 or PS 4000
RG58
RG213
CLA
(m)
(m)
(dB)
47 - 51 100 - 110
0
42 - 47
90 - 100
2
38 - 42
81 - 90
4
34 - 38
71 - 81
6
29 - 34
62 - 71
8
24 - 29
52 - 62
10
20 - 24
43 - 52
12
16 - 20
33 - 43
14
A
RA 4000 B ->AB 4000 or PS 4000
RG58
RG213
CLA
(m)
(m)
(dB)
33 - 38
71 - 81
0
29 - 33
62 - 71
2
24 - 29
52 - 62
4
20 - 24
43 - 52
6
16 - 20
33 - 43
8
11 - 16
24 - 33
10
7 - 11
14 - 24
12
2-7
5 - 14
14
A
SRA 1 -> AB 4000 or PS 4000
RG58
RG213
CLA
(m)
(m)
(dB)
7 - 11
14 - 24
0
2-7
5 - 14
2
0-2
4
6
8
10
12
14
B
AB 4000 -> AB 4000 or PS 4000
RG58
RG213
CLA
(m)
(m)
(dB)
37 - 41
79 - 88
0
32 - 37
69 - 79
2
28 - 32
60 - 69
4
23 - 28
50 - 60
6
19 - 23
40 - 50
8
14 - 19
31 - 40
10
10 - 14
21 - 31
12
6 - 10
12 - 21
14
Table 1: CLA DIP switch positions depending on frequency band, antenna, cable type, and cable length.
17
AKG PS 4000
1670_03_PS4000_DT-IT-FRZ
13.10.2003
10:10 Uhr
Seite 18
4 Operating Notes
4.1 General Hints
1. Be sure to assign a separate carrier frequency to each wireless channel (transmitter and receiver).
2. Do not operate two or more wireless channels on the same frequency at the same time and location.
This would cause unwanted noise due to radio interference.
Important!
To prevent damage from overloading the antenna splitter power supply, always switch power to
the various components of your system on and off in the order described in sections 4.2 and 4.3.
4.2 Systems with Distributed
Power Supplies
4.2.1 Powering Up
4.2.2 Powering Down
4.3 Systems with PS 4000
Central Power Supplies
4.3.1 Powering Up
4.3.2 Powering Down
1. Switch power to all transmitters ON.
2. Switch ON all receivers connected to the antenna splitter.
3. Press the ON/OFF key on the antenna splitter to switch power to the antenna splitter ON.
The blue OK LEDs and the green status LEDs on the connected active components will illuminate.
1. Switch OFF all receivers connected to the antenna splitter.
2. Switch power to all transmitters OFF.
3. Press the ON/OFF key on the antenna splitter to switch power to the antenna splitter OFF.
The blue OK LEDs and the green status LEDs on the connected active components will extinguish.
1. Switch the PSU 4000 central power supply ON.
2. Switch power to all transmitters ON.
3. Press the ON/OFF key on the antenna splitter to switch power to the antenna splitter ON.
The blue OK LEDs and the green status LEDs on the connected active components will illuminate.
4. Switch ON all receivers connected to the antenna splitter.
1. Switch OFF all receivers connected to the antenna splitter.
2. Switch power to all transmitters OFF.
3. Press the ON/OFF key on the antenna splitter to switch power to the antenna splitter OFF.
The blue OK LEDs and the green status LEDs on the connected active components will extinguish.
4. Switch the PSU 4000 central power supply OFF.
5 Cleaning
Use a soft cloth moistened with water to clean the antenna splitter surfaces.
6 Troubleshooting
Problem
No sound.
No or poor reception on individual
channels.
Green LED on an active antenna
component is dark.
One of the ERROR LEDs on the
antenna splitter is lit.
Possible Cause
Remedy
1. Power supplies/PSU 4000 not connected
to power outlet(s).
2. DC cables not connected or defective.
3. Antennas not connected.
4. Power supplies/PSU 4000 defective.
1. Connect power supplies/PSU 4000 to
power outlet(s).
2. Connect or replace DC cables.
3. Connect antennas.
4. Contact your nearest AKG Service Center.
1. Transmitter and/or receiver switched OFF.
2. Transmitter batteries down.
3. Power supply of receiver or feeder cable
from PSU 4000 to receiver
a) makes poor contact or
b) is defective.
4. Transmitter and receiver of dead channel
are tuned to different frequencies.
1. Switch transmitter and/or receiver ON.
2. Replace transmitter batteries.
3. a) Check power supply or feeder cable
connectors for secure fit or
b) Replace power supply or feeder cable.
5. Transmitter or receiver defective.
4. Tune transmitter and receiver to the same
frequency. Refer to the transmitter and
receiver Instruction Manuals.
5. Contact your nearest AKG Service Center.
1. Antenna cable not connected or makes
poor contact.
2. Antenna cable defective.
3. Active antenna component defective.
1. Connect antenna cable or check connectors for secure fit.
2. Replace antenna cable.
3. Contact your nearest AKG Service Center.
1. Supply voltage for active antenna compo- 1. Check all cables and active antenna comnents shorted out.
ponents connected to antenna splitter.
2. Supply voltage for active antenna compo- 2. Refer to Table 1 to check cable lengths
nents too low because cable run is too
and use shorter cables or break down
long.
cable run and insert ASU 4000(s) (see also
Wiring Diagrams).
18
AKG PS 4000
1670_03_PS4000_DT-IT-FRZ
13.10.2003
10:10 Uhr
Seite 19
7 Specifications
PS 4000 Antenna Splitter
Type:
Carrier range:
Attenuation:
RF inputs:
RF outputs:
Power requirement:
Size:
Weight:
2 x 1 to 4 SR 4000 + 2 x 1 PS (for daisy-chaining)
650 MHz to 870 MHz
+2, 0, -2, -4, -6, -8 dB switchable
2 x BNC sockets, 50 ohms
10 x BNC sockets, 50 ohms
12 VDC
200 x 190 x 44 mm (7.8 x 7.5 x 1.7 in.)
approx. 970 g (2.2 lbs.)
AB 4000 Antenna Amplifier
Carrier range:
Gain:
RF input:
RF output:
Power requirement:
Size:
Weight:
650 MHz to 870 MHz
approx. 17 dB
1 x BNC, 50 ohms
1 x BNC, 50 ohms
8 VDC, supplied through connecting cable from PS 4000 or ASU 4000
110 x 35 mm (4.3 x 1.4 in.)
approx. 150 g (5.3 oz.)
RA 4000 B Omnidirectional Booster Antenna
Carrier range:
650 to 870 MHz
Gain:
17, 15, 13, 11, 9, 7 dB switchable
RF input:
1 x BNC or N socket, 50 ohms
RF output:
1 x BNC or N socket, 50 ohms
Power requirement:
8 VDC, supplied through connecting cable from PS 4000 or ASU 4000
Size:
78 x 50 x 50 mm / 3.1 x 2 x 2 in. (BNC Version), 78 x 50 x 50 mm / 3.1 x 2 x 2 in. (N version)
Weight:
68 g (2.4 oz.)
SRA 1 Passive Directional Antenna
Carrier range:
Antenna gain:
Coverage angle:
Front-to-back ratio (180°):
Off-axis attenuation (90° to 110°):
Size:
Weight:
680 to 945 MHz
approx. 6 dB
70 °
13 dB min.
approx. 25 dB
152 x 65 mm (6 x 2.6 in.)
180 g (6.4 oz.)
SRA 2 B Active Directional Antenna
Carrier range:
Antenna Gain:
Coverage angle:
Amplifier Gain:
Size:
Weight:
650 to 870 MHz
approx. 6 dB
70 °
approx. 17 dB
230 x 240 x 26 mm (9 x 9.5 x 1 in.)
approx. 250 g (8.8 oz.)
ASU 4000 Remote Power Adapter
Carrier range:
RF input:
RF output:
Power requirement:
Size:
Weight:
650 to 870 MHz
1 x BNC or N socket, 50 ohms
1 x BNC or N socket, 50 ohms
12 VDC
78 x 50 x 50 mm / 3.1 x 2 x 2 in. (BNC Version), 78 x 50 x 50 mm / 3.1 x 2 x 2 in. (N version)
167 g (5.9 oz.)
19
AKG PS 4000
1670_03_PS4000_PORT
13.10.2003
10:14 Uhr
Seite 57
Dieses Produkt erfüllt nationale Vorschriften
von Ländern in und außerhalb der EG.
Für genauere Informationen wenden Sie sich
bitte an Ihren Händler.
Lesen Sie vor Inbetriebnahme die
Bedienungsanleitung sorgfältig.
Hiermit erklärt AKG Acoustics GmbH,
dass das Produkt PS 4000 die wesentlichen Anforderungen und sonstigen
einschlägigen Bestimmungen der
Richtlinie 1999/5/EG erfüllt.
AKG Acoustics GmbH hereby declares
that the product PS 4000 complies
with the essential requirements and
other relevant provisions of Directive
1999/5/EC.
AKG Acoustics GmbH déclare que le produit PS 4000 satisfait aux exigences
essentielles et autres dispositions y relatives de la Directive 1999/5/CE.
Con la presente AKG Acoustics GmbH
dichiara che il prodotto PS 4000 è
conforme alle richieste essenziali e alle
This product complies with national regulations of countries within and outside the EC.
For details please contact your dealer.
Before operating the equipment read the
user manual carefully.
altre disposizioni pertinenti
Direttiva 1999/5/CE.
della
AKG Acoustics GmbH declara que el
producto PS 4000 cumple los requisitos
esenciales y otras disposiciones aplicables de la Directiva 1999/5/CE.
A AKG Acoustics GmbH declara que o
produto PS 4000 cumpre os requisitos
essenciais e as outras disposições relevantes da Directiva 1999/5/CE.
AKG Acoustics GmbH verklaart hiermee
dat het product PS 4000 aan de essentiële eisen en overige desbetreffende
bepalingen van de richtlijn 1999/5/EG
voldoet.
AKG Acoustics GmbH erklærer hermed
at produktet PS 4000 overholde de
væsentliga krav samt andre relevante
bestemmelser fra Direktiv 1999/5/EF.
AKG Acoustics GmbH erklerer med
dette, at produktet PS 4000 oppfyller de
vesentlige krav og andre relevante
bestemmelser som fremgår av Direktiv
1999/5/EF.
Härmed förklarar AKG Acoustics GmbH
att produkten PS 4000 uppfyller de väsentliga krav och andra relevanta bestämmelser som framgår av Direktiv
1999/5/EC.
AKG Acoustics GmbH vakuuttaa, että
tuotteemme PS 4000 täyttää tarvittavat
1999/5/EC direktiivin mukaiset vaatimukset.
1670_03_PS4000_Umschl
13.10.2003
10:18 Uhr
Seite 2
Fig. 8
Inhaltsverzeichnis
1 Sicherheit und Umwelt . . . . . . . . . . . . . . . . . . . . . . . . . . . . . . . . . . . . . . . . . . . . . . . . . . . . . 2
1.1 Sicherheit. . . . . . . . . . . . . . . . . . . . . . . . . . . . . . . . . . . . . . . . . . . . . . . . . . . . . . . . . . . . . 2
1.2 Umwelt. . . . . . . . . . . . . . . . . . . . . . . . . . . . . . . . . . . . . . . . . . . . . . . . . . . . . . . . . . . . . . . 3
Fig. 9
A
B
C
1
RA 4000 B
2
B
A
RA 4000 B
RA 4000 B
B
D
B D
AB 4000
AB 4000
AB 4000
AB 4000
AB 4000
AB 4000
RA 4000B
A
B
A in
A
PS 4000
B
4x SR 4000
A
B in
A
RA 4000B
ASU 4000
ZAPD-21
ZAPD-21
ZAPD-21
ZAPD-21
ASU 4000
AB 4000
PS 4000
Fig. 10
B
AB 4000
ASU 4000
ASU 4000
A
Vierkanalanlage (Antennen, HF-Verbindungen)
Four-channel system (antennas, RF connections)
Système à quatre canaux (antennes, connections HF)
Sistema con quattro canali (antenne, cablaggio RF)
Sistema de cuatro canales (antenas, cableado de RF)
Sistema de quatro canais (antenas, cablagem de RF)
Fig. 12
12-Kanalanlage mit PSU 4000 (HF-Verbindungen und Stromversorgung)
12-channel system with PSU 4000 (RF and power connections)
Système à 12 canaux avec PSU 4000 (connections HF et d'alimentation)
Sistema con 12 canali e PSU 4000 (cablaggio RF e di alimentazione)
Sistema con 12 canales y PSU 4000 (cableado de RF y de alimentación)
Sistema con 12 canais e PS 4000 (cablagem de RF e de alimentação)
B
B
1 Sicherheit und Umwelt
PSU 4000
100-240V AC/2A
1. Schütten Sie keine Flüssigkeiten auf das Gerät und lassen Sie keine sonstigen Gegenstände durch die
Lüftungsschlitze in das Gerät fallen.
2. Das Gerät darf nur in trockenen Räumen eingesetzt werden.
3. Das Gerät darf nur von autorisiertem Fachpersonal geöffnet, gewartet und repariert werden. Im
Inneren des Gehäuses befinden sich keinerlei Teile, die vom Laien gewartet, repariert oder ausgetauscht werden können.
4. Prüfen Sie vor Inbetriebnahme des Gerätes, ob die auf dem mitgelieferten Netzgerät angegebene
Betriebsspannung der Netzspannung am Einsatzort entspricht.
5. Betreiben Sie das Gerät ausschließlich mit dem mitgelieferten Netzgerät mit einer Ausgangsspannung
von 12 V DC. Andere Stromarten und Spannungen könnten das Gerät ernsthaft beschädigen!
6. Brechen Sie den Betrieb der Anlage sofort ab, wenn ein fester Gegenstand oder Flüssigkeit in das
Geräteinnere gelangen sollte. Ziehen Sie in diesem Fall sofort das Netzkabel des Netzgeräts aus der
Steckdose und lassen Sie das Gerät von unserem Kundendienst überprüfen.
7. Ziehen Sie das Netzkabel des Netzgeräts bei längerer Nichtverwendung aus der Steckdose. Bitte
beachten Sie, dass bei angestecktem Netzgerät das Gerät nicht vollständig vom Netz getrennt wird,
wenn Sie es ausschalten.
8. Stellen Sie das Gerät nicht in der Nähe von Wärmequellen wie z. B. Radiatoren, Heizungsrohren,
Verstärkern, usw. auf und setzen Sie es nicht direkter Sonneneinstrahlung, starker Staub- und
Feuchtigkeitseinwirkung, Regen, Vibrationen oder Schlägen aus.
9. Verlegen Sie zur Vermeidung von Störungen bzw. Einstreuungen sämtliche Leitungen, speziell die der
Mikrofoneingänge, getrennt von Starkstromleitungen und Netzleitungen. Bei Verlegung in Schächten
oder Kabelkanälen achten Sie darauf, die Übertragungsleitungen in einem separaten Kanal unterzubringen.
10.Reinigen Sie das Gerät nur mit einem feuchten, aber nicht nassen Tuch. Ziehen Sie unbedingt das
Netzkabel des Netzgeräts vorher aus der Steckdose! Verwenden Sie keinesfalls scharfe oder scheuernde Reinigungsmittel sowie keine, die Alkohol oder Lösungsmittel enthalten, da diese den Lack
sowie die Kunststoffteile beschädigen könnten.
11.Verwenden Sie das Gerät nur für die in dieser Bedienungsanleitung beschriebenen Anwendungen. Für
Schäden infolge unsachgemäßer Handhabung oder missbräuchlicher Verwendung kann AKG keine
Haftung übernehmen.
2
A
3 Inbetriebnahme . . . . . . . . . . . . . . . . . . . . . . . . . . . . . . . . . . . . . . . . . . . . . . . . . . . . . . . . . . . 5
3.1 Rackmontage eines Antennensplitters . . . . . . . . . . . . . . . . . . . . . . . . . . . . . . . . . . . . . . 5
3.2 Rackmontage zweier Antennensplitter nebeneinander . . . . . . . . . . . . . . . . . . . . . . . . . . 5
3.3 Antennen aufstellen . . . . . . . . . . . . . . . . . . . . . . . . . . . . . . . . . . . . . . . . . . . . . . . . . . . . . 5
3.3.1 Aufstellungsort . . . . . . . . . . . . . . . . . . . . . . . . . . . . . . . . . . . . . . . . . . . . . . . . . . . . 5
3.3.2 Montage auf Bodenstativ . . . . . . . . . . . . . . . . . . . . . . . . . . . . . . . . . . . . . . . . . . . . 6
3.3.3 Wand/Deckenmontage . . . . . . . . . . . . . . . . . . . . . . . . . . . . . . . . . . . . . . . . . . . . . . 6
3.4 Antennen anschließen . . . . . . . . . . . . . . . . . . . . . . . . . . . . . . . . . . . . . . . . . . . . . . . . . . . 6
3.4.1 Einkanalanlage mit passiven Antennen SRA 1 . . . . . . . . . . . . . . . . . . . . . . . . . . . . 6
3.4.2 Einkanalanlage mit aktiven Antennen. . . . . . . . . . . . . . . . . . . . . . . . . . . . . . . . . . . 7
3.5 Mehrkanalanlagen mit Antennensplitter PS 4000 . . . . . . . . . . . . . . . . . . . . . . . . . . . . . . 7
3.6 CLA-Schalter . . . . . . . . . . . . . . . . . . . . . . . . . . . . . . . . . . . . . . . . . . . . . . . . . . . . . . . . . . 8
5 Reinigung . . . . . . . . . . . . . . . . . . . . . . . . . . . . . . . . . . . . . . . . . . . . . . . . . . . . . . . . . . . . . . . . 9
6 Fehlerbehebung. . . . . . . . . . . . . . . . . . . . . . . . . . . . . . . . . . . . . . . . . . . . . . . . . . . . . . . . . . . 9
7 Technische Daten . . . . . . . . . . . . . . . . . . . . . . . . . . . . . . . . . . . . . . . . . . . . . . . . . . . . . . . . 10
Fig. 8 bis 13 . . . . . . . . . . . . . . . . . . . . . . . . . . . . . . . . . . . . . . . . . . . . . . . . . . . . . . . . . . . . . . . . 56
A
2 Beschreibung. . . . . . . . . . . . . . . . . . . . . . . . . . . . . . . . . . . . . . . . . . . . . . . . . . . . . . . . . . . . . 3
2.1 Einleitung . . . . . . . . . . . . . . . . . . . . . . . . . . . . . . . . . . . . . . . . . . . . . . . . . . . . . . . . . . . . . 3
2.2 Lieferumfang . . . . . . . . . . . . . . . . . . . . . . . . . . . . . . . . . . . . . . . . . . . . . . . . . . . . . . . . . . 3
2.3 Empfohlenes Zubehör . . . . . . . . . . . . . . . . . . . . . . . . . . . . . . . . . . . . . . . . . . . . . . . . . . . 3
2.4 Beschreibung. . . . . . . . . . . . . . . . . . . . . . . . . . . . . . . . . . . . . . . . . . . . . . . . . . . . . . . . . . 3
2.4.1 Frontplatte . . . . . . . . . . . . . . . . . . . . . . . . . . . . . . . . . . . . . . . . . . . . . . . . . . . . . . . 4
2.4.2 Rückseite . . . . . . . . . . . . . . . . . . . . . . . . . . . . . . . . . . . . . . . . . . . . . . . . . . . . . . . . 4
2.5 Zentrale Stromversorgung PSU 4000 (optional). . . . . . . . . . . . . . . . . . . . . . . . . . . . . . . 4
2.6 Empfangsantennen (optional) . . . . . . . . . . . . . . . . . . . . . . . . . . . . . . . . . . . . . . . . . . . . . 5
2.6.1 SRA 1 . . . . . . . . . . . . . . . . . . . . . . . . . . . . . . . . . . . . . . . . . . . . . . . . . . . . . . . . . . . 5
2.6.2 SRA 2 B . . . . . . . . . . . . . . . . . . . . . . . . . . . . . . . . . . . . . . . . . . . . . . . . . . . . . . . . . 5
2.6.3 RA 4000 B. . . . . . . . . . . . . . . . . . . . . . . . . . . . . . . . . . . . . . . . . . . . . . . . . . . . . . . . 5
4 Betriebshinweise . . . . . . . . . . . . . . . . . . . . . . . . . . . . . . . . . . . . . . . . . . . . . . . . . . . . . . . . . . 9
4.1 Allgemeine Hinweise . . . . . . . . . . . . . . . . . . . . . . . . . . . . . . . . . . . . . . . . . . . . . . . . . . . . 9
4.2 Anlagen mit dezentraler Stromversorgung . . . . . . . . . . . . . . . . . . . . . . . . . . . . . . . . . . . 9
4.2.1 Einschalten . . . . . . . . . . . . . . . . . . . . . . . . . . . . . . . . . . . . . . . . . . . . . . . . . . . . . . . 9
4.2.2 Ausschalten . . . . . . . . . . . . . . . . . . . . . . . . . . . . . . . . . . . . . . . . . . . . . . . . . . . . . . 9
4.3 Anlagen mit optionaler zentraler Stromversorgung PSU 4000 . . . . . . . . . . . . . . . . . . . . 9
4.3.1 Einschalten . . . . . . . . . . . . . . . . . . . . . . . . . . . . . . . . . . . . . . . . . . . . . . . . . . . . . . . 9
4.3.2 Ausschalten . . . . . . . . . . . . . . . . . . . . . . . . . . . . . . . . . . . . . . . . . . . . . . . . . . . . . . 9
C
AKG PS 4000
SRA 2B
SRA 1
B in
DC
DC
RF
B in
A in
RF
A in
A out
B in
A out
PS 4000/4
PS 4000/3
A in
PS 4000/2
PS 4000/1
B out
PS 4000/2
PS 4000/1
DC
B in
DC+RF
B out
A in
DC+RF
DC+RF
DC+RF
SR 4000 / 1-3
SR 4000 / 8-11
SR 4000 / 16-18
DC+RF
PS 4000
SR 4000 / 1-4
SR 4000 / 9-12
DC+RF
DC+RF
Fig. 11
DC in 12V/2A
DC in 12V/2A
A out
PS 4000/3
DC+RF
DC in 12V/2A
DC in 12V/2A
A in
DC+RF
DC+RF
DC in 12V/2A
B in
RF
RF
4x SR 4000
B out
PS 4000/5
Vierkanalanlage (HF-Verbindungen und Stromversorgung)
Four-channel system (RF and power connections)
Système à quatre canaux (connections HF et d'alimentation)
Sistema con quattro canali (cablaggio RF e di alimentazione)
Sistema de cuatro canales (cableado de RF y de alimentación)
Sistema de quatro canais (cablagem de RF e de alimentação)
DC+RF
DC+RF
SR 4000 / 5-8
Fig. 13
Komplexe Anlage (HF-Verbindungen)
Complex system (RF connections)
Système complexe (connections HF)
Sistema complesso (cablaggio RF)
Instalación complexa (cableado de RF)
Instalação complexa (cablagem de RF)
SR 4000 / 4-7
SR 4000 / 12-15
RA 4000 B
1670_03_PS4000_Umschl
13.10.2003
10:17 Uhr
Seite 1
WMS4000 PS
wireless microphone system
Mikrofone
·
Kopfhörer
·
Drahtlosmikrofone
·
Drahtloskopfhörer
·
Kopfsprechgarnituren
·
Akustische
4000
+ antenna system
Komponenten
Microphones · Headphones · Wireless Microphones · Wireless Headphones · Headsets · Electroacoustical Components
Microphones · Casques HiFi · Microphones sans fil · Casques sans fil · Micros-casques · Composants acoustiques
Microfoni
·
Cuffie
HiFi
·
Microfoni
senza
filo
·
Cuffie
senza
filo
·
Cuffie-microfono
·
Componenti
acustici
Bedienungsanleitung . . . . . . . . . . . . . . . S. 2
Micrófonos · Auriculares · Micrófonos inalámbricos · Auriculares inalámbricos · Auriculares con micrófono · Componentes acústicos
Bitte vor Inbetriebnahme des Gerätes lesen!
Microfones · Fones de ouvido · Microfones s/fios · Fones de ouvido s/fios · Microfones de cabeça · Componentes acústicos
User Instructions. . . . . . . . . . . . . . . . . . p. 11
Please read the manual before using the equipment!
Mode d’emploi. . . . . . . . . . . . . . . . . . . . p. 20
Technische Änderungen vorbehalten. Specifications subject to change without notice. Ces caractéristiques sont susceptibles de modifications.
Ci riserviamo il diritto di effettuare modifiche tecniche. Nos reservamos el derecho de introducir modificaciones técnicas. Especificações sujeitas à mudanças sem aviso prévio.
Veuillez lire cette notice avant d’utiliser le système!
AKG Acoustics GmbH
Istruzioni per l’uso . . . . . . . . . . . . . . . . p. 29
Lemböckgasse 21–25, P.O.B. 158, A-1230 Vienna/AUSTRIA, Tel: (+43 1) 86 654-0*, Fax: (+43 1) 86 654-7516, www.akg.com, e-mail: [email protected]
Prima di utilizzare l’apparecchio, leggere il manuale
AKG Acoustics GmbH
Bodenseestraße 228, D-81243 München/GERMANY, Tel: (+49 89) 87 16-0, Fax: (+49 89) 87 16-200, www.akg-acoustics.de, e-mail: [email protected]
Modo de empleo . . . . . . . . . . . . . . . . . . p. 38
AKG ACOUSTICS, U.S.
¡Sirvase leer el manual antes de utilizar el equipo!
914 Airpark Center Drive, Nashville, TN 37217, U.S.A., Tel: (+1 615) 620-3800, Fax: (+1 615) 620-3875, www.akgusa.com, e-mail: [email protected]
Instruções de uso . . . . . . . . . . . . . . . . . p. 47
For other products and distributors worldwide see our website: www.akg.com
Printed in Austria on recycled paper.
06/03/9100 K 1059
Por favor leia este manual antes de usar o equipamento!