1
BIM-EPIC
DISK / TAPE MANAGEMENT SYSTEM
INSTALLATION
AND
SYSTEM GUIDE
Release 6.3
(COPYRIGHT © 2001, B I MOYLE ASSOCIATES, INC.)
BIM-EPIC is a proprietary product of B I Moyle Associates, Inc. It cannot be reproduced,
changed, copied, or stored in any form (including, but not limited to, copies on magnetic
media) without the express prior written permission of B I Moyle Associates, Inc.
This documentation applies to
Release 6.3 of the program product
BIM-EPIC.
Original Printing ................ 01/08/2001
Last Revised....................... 10/15/2001
Contents
Trademark Information................................................................................................ix
Preface .......................................................................................................................... x
Related Publications ..................................................................................................xiii
Chapter 1 Installation Worksheets......................................................................................1-1
Initial Installation Checklist .......................................................................................1-2
Pre-4.1 Upgrade Checklist.........................................................................................1-4
Pre-Installation Worksheet ........................................................................................1-6
Disk Pools Worksheet................................................................................................1-9
Tape Pools Worksheet .............................................................................................1-10
TSIDMAP Worksheet .............................................................................................1-11
Configuration Options Worksheet ...........................................................................1-12
Vault Management Worksheet.................................................................................1-14
Chapter 2 Installing the Basic System.................................................................................2-1
BIM-GSS Installation.....................................................................................................2-2
Introduction ...............................................................................................................2-2
Preparing to Upgrade from the Previous Release...........................................................2-3
Preparing for First-Time Installation..............................................................................2-4
Introduction ...............................................................................................................2-4
Operating System Requirements................................................................................2-5
Determining Space Requirements..............................................................................2-7
Compatibility with Other Software ............................................................................2-8
Additional Software Considerations ..........................................................................2-9
Creating BIM-EPIC System Components................................................................2-12
Reinstalling BIM-EPIC System Components ..........................................................2-13
BIM-EPIC Installation Jobstreams ..........................................................................2-15
BIM-EPIC System Datasets .........................................................................................2-17
Introduction .............................................................................................................2-17
Defining the DSN Catalog .......................................................................................2-19
Defining the Recorder File.......................................................................................2-21
Formatting the DSN Catalog and Recorder File ......................................................2-23
Defining the JOBQ ..................................................................................................2-24
Defining the BIM-EPIC Resource Dataset (ERD) .......................................................2-25
Introduction .............................................................................................................2-25
The TSIDSMNT Program .......................................................................................2-26
ACLOFFL................................................................................................................2-27
ACLONL .................................................................................................................2-28
ADD ........................................................................................................................2-29
CTL..........................................................................................................................2-32
DEL .........................................................................................................................2-33
FMT.........................................................................................................................2-34
PRT..........................................................................................................................2-35
JCL Examples..........................................................................................................2-36
Defining the BIM-EPIC Environment..........................................................................2-39
Creating the TSIDPOL Phase ..................................................................................2-39
Designing Disk Pools...............................................................................................2-40
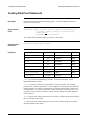
Creating Disk Pool Statements ................................................................................2-42
Designing Tape Pools ..............................................................................................2-44
Contents
iii
Creating Tape Pool Statements ................................................................................2-45
Specifying the TSIDMAP Macro.............................................................................2-47
Quick DASD Allocation System (QDAS)....................................................................2-52
Introduction..............................................................................................................2-52
Creating QDAS Share Files .....................................................................................2-53
Defining Disk Volumes to QDAS (TSIVDEF)........................................................2-55
Updating the ASI Procedure.........................................................................................2-57
Partition Updates .....................................................................................................2-57
Modifying Standard Labels......................................................................................2-58
Adding a Dummy Tape Device and Modifying Tape Modes ..................................2-61
Updating SVA Size..................................................................................................2-62
GETVIS Considerations ..........................................................................................2-63
Updating LIBDEF Procedures.................................................................................2-64
Additional System Considerations ...............................................................................2-65
Activating BIM-EPIC Support for Multiple Job Exits.............................................2-65
COBOL II Support (VSE/ESA)...............................................................................2-67
Multi-Partition/CPU Environments ..............................................................................2-68
Sharing the DSN Catalog.........................................................................................2-68
Activating BIM-EPIC Online Components..................................................................2-70
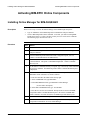
Installing Online Manager for BIM-FAQS/ASO .....................................................2-70
Accessing Online Manager using VTAM ................................................................2-71
Installing Online Manager for CICS ........................................................................2-72
Starting Online Manager with Batch Partition Memory...........................................2-73
Completing CICS Installation ......................................................................................2-74
Activating CICS Quick Installation .........................................................................2-74
Manual CICS Installation.........................................................................................2-75
Update PPT Tables ..................................................................................................2-76
Update PCT Tables..................................................................................................2-77
CICS Installation Table Entries....................................................................................2-78
Event Posting ...........................................................................................................2-78
TOJA .......................................................................................................................2-79
TPRT .......................................................................................................................2-80
TVTO ......................................................................................................................2-81
TAID........................................................................................................................2-82
BIM-EPIC................................................................................................................2-83
Transactions Notes...................................................................................................2-84
Initializing the Job Accounting Database.................................................................2-85
Modifying CICS Start-Up JCL ................................................................................2-86
Modifying the FCT Table ........................................................................................2-87
Modifying DCT Entries ...........................................................................................2-88
Modifying the TCT Table........................................................................................2-89
Modifying the PLTPI Table.....................................................................................2-90
Post-Installation Procedures .........................................................................................2-91
Creating Maintenance JCL.......................................................................................2-91
Converting a BIM-EPIC/VSE 2.x DSN Catalog (TSIDCLN) .................................2-92
Converting from Another Tape/Disk Manager ........................................................2-93
Modifying the EPICON Procedure ..........................................................................2-94
Chapter 3 Installing the Autoattach Feature..................................................................... 3-1
Overview....................................................................................................................3-2
Autoattach Installation Via Dynamic Command Definition.......................................3-4
Autoattach Installation for VM/ESA Version 2 Release 2 Using VMSES/E...........3-10
iv
BIM-EPIC Installation and System Guide
Autoattach Installation for VM/ESA Version 1 Release 2 Using VMSES/E...........3-20
Autoattach Installation for VM/ESA Version 1 Release 1.1 Using VMSES/E........3-27
Autoattach Installation for VM/XA .........................................................................3-35
Autoattach Installation for VM/SP, VM/HPO, and VM/ESA 370 ..........................3-41
Chapter 4 Maintenance Procedures ....................................................................................4-1
Regular Maintenance .................................................................................................4-2
Moving and Changing the Size of the DSN Catalog..................................................4-6
Moving and Changing The Size of the Recorder File................................................4-7
Emergency Recovery of the DSN Catalog.................................................................4-8
Chapter 5 Activating and Deactivating BIM-EPIC ...........................................................5-1
Activating and Deactivating BIM-EPIC.........................................................................5-2
Turning BIM-EPIC On (TSIDON)............................................................................5-2
OPTION Control Statement.......................................................................................5-4
Configuration Option Descriptions............................................................................5-8
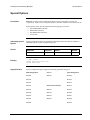
Special Options........................................................................................................5-29
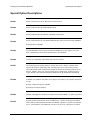
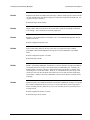
Special Option Descriptions ....................................................................................5-31
Turning BIM-EPIC Off (TSIDOFF)........................................................................5-44
Maintaining the BIM-EPIC Recorder File ...................................................................5-45
TSIDRFS Program...................................................................................................5-45
BACKUP .................................................................................................................5-46
CLEAR ....................................................................................................................5-47
END.........................................................................................................................5-48
MAINT ....................................................................................................................5-49
RECORD .................................................................................................................5-50
START ....................................................................................................................5-51
Activating and Deactivating QDAS .............................................................................5-52
BIM-EPIC Dispatcher..................................................................................................5-53
BIM-EPIC ACL Support..............................................................................................5-54
General Requirements..............................................................................................5-54
Ejecting Cartridges from an ACL ............................................................................5-57
ACL Leveling...............................................................................................................5-59
IBM ACL Support .......................................................................................................5-60
General Requirements..............................................................................................5-60
BIM-EPIC Tape Pool Definitions............................................................................5-62
Memorex ACL Support................................................................................................5-63
General Requirements..............................................................................................5-63
VM Directory Entry Requirements..........................................................................5-64
VSE Guests..............................................................................................................5-65
BIM-EPIC and LMS Tape Pools.............................................................................5-67
STK ACL Support .......................................................................................................5-68
General Requirements..............................................................................................5-68
VM Directory Entry Requirements..........................................................................5-69
VSE Guests..............................................................................................................5-70
What If the IUCV Path is Severed? ................................................................5-70
BIM-EPIC and HSC Tape Pools .............................................................................5-72
OPTI-TAPE Support....................................................................................................5-73
General Requirements..............................................................................................5-73
Chapter 6 Additional BIM-EPIC Utilities ..........................................................................6-1
Maintaining the DSN Catalog (TSIDUTL) ....................................................................6-2
Contents
v
Introduction................................................................................................................6-2
ACLEJECT................................................................................................................6-5
BACKUP ...................................................................................................................6-6
DSPLY and BDSPLY................................................................................................6-7
FASTBU ..................................................................................................................6-10
FASTRS...................................................................................................................6-11
INDEX.....................................................................................................................6-12
RESTORE................................................................................................................6-13
Scratch Functions.....................................................................................................6-14
SYNCIBM ...............................................................................................................6-17
SYNCMEM .............................................................................................................6-18
SYNCOPT ...............................................................................................................6-19
SYNCSTK ...............................................................................................................6-20
Formatting the DSN Catalog and Recorder File (TSIDCDK)......................................6-21
Introduction..............................................................................................................6-21
Rebuilding the DSN Catalog in an Emergency (TSIDBLD) ........................................6-23
The TSIDBLD Program...........................................................................................6-23
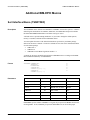
Reconfiguring BIM-EPIC Dynamically (TSIDDEB)...................................................6-24
Introduction..............................................................................................................6-24
Reporting Capabilities .............................................................................................6-25
Deactivating and Reactivating BIM-EPIC by Partition ...........................................6-26
Overriding Configuration Options ...........................................................................6-27
Using the Operator Console.....................................................................................6-29
Printing the Summary Report...................................................................................6-30
Vaults and Vaulting Methods.......................................................................................6-38
Introduction..............................................................................................................6-38
Defining Vault Locations.........................................................................................6-39
Defining Vaulting Methods......................................................................................6-40
Assembling and Linking VAULTDEF and METHOD Macros...............................6-41
Additional BIM-EPIC Macros .....................................................................................6-42
Sort Interface Macro (TSSRTDEF) .........................................................................6-42
Job Scheduling Macro (TSIDFAV) .........................................................................6-44
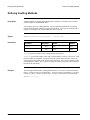
Coding the Label Print Subroutine ...............................................................................6-45
Introduction..............................................................................................................6-45
Printing Labels In Batch Mode ................................................................................6-46
Printing Labels Using CICS.....................................................................................6-47
User Exits .....................................................................................................................6-48
Interfacing to Your Security Package (TSIDSEC)...................................................6-48
Interfacing to Your Job Scheduling Package (TSIDPCS)........................................6-50
Reading and Modifying a VSE Label ......................................................................6-51
Displaying Tapes Required By a Job (TSIDLST)........................................................6-53
The TSIDLST Program ...........................................................................................6-53
Updating VTOC Entries (TSIDVUT) ..........................................................................6-54
Introduction..............................................................................................................6-54
PACKSCAN Command...........................................................................................6-56
DELETE Command.................................................................................................6-58
PERM Command .....................................................................................................6-60
RENAME Command ...............................................................................................6-62
RENUM Command..................................................................................................6-64
RENUMB Command...............................................................................................6-66
RETAIN Command .................................................................................................6-68
Combining Multiple DSN Catalogs into a Single DSN Catalog (TSIDCMRG) ..........6-70
vi
BIM-EPIC Installation and System Guide
The TSIDCMRG Program.......................................................................................6-70
Master Index .......................................................................................................................M-1
Contents
vii
viii
BIM-EPIC Installation and System Guide
Trademark Information
This manual refers to the following brand or product names, registered trademarks, and trademarks which are listed
according to their respective owners.
Software Diversified Systems, Inc.
DUSP™
MAXBACK/VSE
Computer Associates International, Inc. (CA)
CA-ALERT
CA-DRIVER
CA-DYNAM
CA-DYNAM/D
CA-DYNAM/FI
CA-DYNAM/T
CA-Easytrieve
CA-EPIC
CA-FAQS
CA-FAQS/ASO for VSE
CA-FAQS™/PCS
CA-JARS
CA-JCL/MANAGER
CA-Librarian
CA-LIBRARIAN
CA-PANVALET
CA-SORT
CA-SPACE/MANAGER
CA-Super-EPAT
CA-System/Manager
CA-TAPE/MANAGER
CA-VOLLIE
Memorex Telex Corporation
Automatic Tape Library (ATL)
Library Management Software (LMS)
Storage Technology Corporation (Storage Tek®)
Host Software Component (HSC)
Software Pursuits, Inc.
MVT/VSE
SPRI
Syncsort Inc.
SyncSort
Universal Software, Inc.
ADAS™
PSAM™
Compuware Corporation
Abend- AID
International Business Machines Corporation (IBM)
CMS
IBM
MVS
MVS/ESA™
MVS/SP
MVS/XA™
VM
VM/CMS
VM/ESA
VM/SP
VM/XA™
VSE
VSE/ESA
VTAM
Trademark Information
ix
Preface
Most BIM-EPIC features operate only in conjunction with controlled datasets (datasets that
BIM-EPIC catalogs and maintains), and controlled datasets are assumed in the discussion of
each feature. Activity involving uncontrolled datasets is noted explicitly.
BIM-EPIC configuration options govern how BIM-EPIC operates and what you can expect
BIM-EPIC to do. Default options are assumed in the main body of the BIM-EPIC User
Reference Guide. Variations caused by non–default options are described in the BIM-EPIC
Installation and System Guide. Please consult your systems programmer if BIM-EPIC
appears different from the description in the documentation.
This manual contains references to the products BIM-GSS and BIM-FAQS/ASO. Unless
specifically stated otherwise, the products CA-GSS and/or CA-FAQS/ASO from Computer
Associates can be used instead of the BIM products.
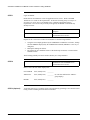
Special Terms
Command Syntax
The following terms have specific meanings in this manual:
Term
Means...
Enter
Type the boldfaced characters and press the ENTER key.
Type
Type the boldfaced characters without pressing ENTER.
Character
Alphanumeric characters such as A to Z and 0 to 9.
Descriptions of BIM-EPIC commands and control statements include the correct syntax or
format used. The following example shows the special characters and conventions used to
represent command syntax.
COMMAND
value
[,PARM1=(value1,value2,...valuen)]
,NOFUNCTION
{ ,FUNCTION }
[,DOTHIS=YES|NO]
Upper–case characters (COMMAND) must be specified as shown.
Italics (value) represent variable information. In command lines, do not enter the characters
shown. Instead, enter the information they represent.
In command lines, square brackets ([ PARM1=... ]) indicate optional items. To use the
option, specify only the information inside the brackets. Do not code the brackets ([])
themselves.
Parentheses (()) should be specified as shown. They are used to group multiple subparameters
or values together within a single parameter. If only one value is coded for a parameter,
parentheses are not required.
x
BIM-EPIC Installation and System Guide
Braces ({ NOFUNCTION }) also indicate required items. They surround lists of values or
parameters where only one must be supplied. Specify only one of the choices. Do not code
the braces ({}) themselves.
The vertical bar symbol (YES|NO) separates choices that are mutually exclusive. Enter only
one of the choices.
An underlined item (YES) indicates a default value that is used if the parameter is not
specified.
Unless otherwise noted, parameters must be specified in the order shown.
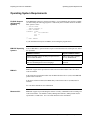
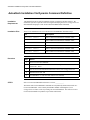
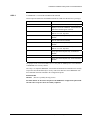
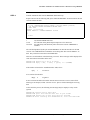
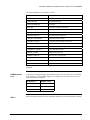
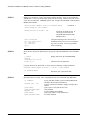
Parameter Tables
Most commands, control statements, and macro statements use parameters. Parameter tables
provide quick reference to those specifications. These tables indicate whether the parameter is
required or optional, what values are valid, and any defaults. Parameter tables display
information in the following way:
Parameter
Required?
Valid Entry
Default
value
Yes
1 to 99 characters
PARM1
No
See syntax
VALUEA
YES or NO
YES
One of the following two is required:
FUNCTION
NOFUNCTION
DOTHIS
No
Contacting BIMEPIC Technical
Support
You can reach BIM-EPIC Technical Support at any time. Our normal operating hours are
from 8:00 a.m. to 7:00 p.m. Central Time. In addition to our regular customer support, we
have technicians on call 24 hours a day, 7 days a week for emergency support. If you are
outside the United States or Canada, contact your BIM Sales Agent.
Technical Support
During Normal
Operating Hours
Please remember that we rely on your description of the situation in order for us to determine
its cause accurately. The more information you can provide, the more promptly we are able to
solve your problem. By following the guidelines below, you can help us provide you with the
exceptional service our customers have learned to expect.
Preface
xi
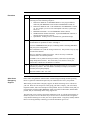
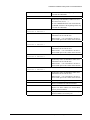
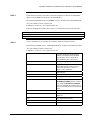
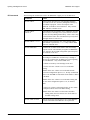
Procedure
Step
Action
1
Gain as thorough an understanding of the situation as you can, and classify your
call using one of the following categories:
1. MALFUNCTION IN A USER PROGRAM: A user program behaves
differently with BIM-EPIC turned on than with BIM-EPIC turned off.
2. MALFUNCTION IN VSE: VSE malfunctions when BIM-EPIC is turned
on. For example, you receive non-interruptible wait states, system loops,
and so on.
3. BIM-EPIC FAILURE: An overall BIM-EPIC failure (abend).
4. OPERATIONAL MALFUNCTION: A particular BIM-EPIC function or
message does not operate correctly.
5. QUESTION: Seeking “how-to” information or general knowledge.
2
Have your documentation ready and available. We require the following
documentation for problems in classes 1 through 4:
A current TSIDDEB Summary Report, containing details concerning BIM-EPIC
and your system configuration.
The CONSOLE LOG (with our messages turned on): This provides a step-by-step
account of the situation.
The JCL, including expanded procedures: This is necessary to enable the
technical staff to re-create the problem.
A DUMP (if one is produced and as presented by VSE and not by third party
dump management software): This is necessary if we cannot re-create your
problem due to differences in hardware or software.
3
Call us at 612- 933-2885. Please answer the questions asked by our receptionist as
accurately as possible. This will enhance our ability to interpret your situation
accurately and respond promptly.
Our FAX number is 612- 933-7764.
After-Hours
Emergency
Support
Please follow the guidelines outlined under "Technical Support During Normal Operating
Hours" to gather the information required by our technical staff to solve your problem.
When calling for after-hours emergency support, an outside answering service will answer
your call. Please be clear and precise when giving your name, company, your (after-hours)
telephone number, and a brief description of the problem. Be sure to mention clearly that you
need assistance with the product BIM-EPIC. EPIC can sound a lot like EDIT, another BIM
product, and you could end up in the wrong support area.
The answering service will page the support technician on call. It will take approximately 35
minutes for you to receive a call back. If you do not receive a call in this time, call again to
verify that the answering service has your correct phone number. Long delays usually indicate
that we are having difficulty contacting you with the information given to us.
xii
BIM-EPIC Installation and System Guide
Related Publications
The documents described below contain important BIM-EPIC technical information.
Familiarity with the relevant IBM operating system is assumed.
•
•
•
•
•
•
BIM-EPIC Installation and System Guide contains detailed procedures for BIM-EPIC
system installation, configuration, and maintenance. It assumes that you have access to
the User Reference.
BIM-EPIC User Reference Guide serves as both user guide and reference to BIM-EPIC
operating features.
BIM-EPIC Messages and Codes lists and describes BIM-EPIC messages and codes,
including message responses and problem resolution.
BIM-EPIC Conversion Guide contains instructions for converting to BIM-EPIC from
another tape and disk management system.
BIM-EPIC Technical Release Notice lists enhancements and feature changes that have
been put in place since the last release. It also describes any special information
required for upgrading to the current release.
Technical Notes, distributed on the BIM-EPIC installation tape, contains the latest
technical information, including updates to BIM-EPIC printed documentation.
Related Publications
xiii
xiv
BIM-EPIC Installation and System Guide
1
Installation Worksheets
Complete the following worksheets before installing BIM-EPIC.
Chapter Contents
Initial Installation Checklist .......................................................................................1-2
Pre-4.1 Upgrade Checklist.........................................................................................1-4
Pre-Installation Worksheet ........................................................................................1-6
Disk Pools Worksheet................................................................................................1-9
Tape Pools Worksheet .............................................................................................1-10
TSIDMAP Worksheet .............................................................................................1-11
Configuration Options Worksheet ...........................................................................1-12
Vault Management Worksheet.................................................................................1-14
1-1
Initial Installation Checklist
Initial Installation Checklist
Preparing for FirstTime Installation
Installing System
Datasets
Installing Storage
Management
Features
1-2
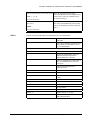
Here is a list of the steps to take when installing BIM-EPIC for the first time. Use this
checklist to record completion of each one. Related procedures are described in detail in the
rest of this manual.
__ 1.
Contact BIM-EPIC Technical Support
__ 2.
Install BIM-EPIC in Test Environment
__ 3.
Complete Pre-Installation Worksheet
__ 4.
Meet Operating System Requirements
__ 5.
Meet Space Requirements
__ 6.
Meet Software Compatibility Requirements
__ 7.
Ensure BIM-GSS Availability
__ 8.
If Automatic Cartridge Library (ACL) support is used, determine the system
requirements and identifying information used in the vendor’s ACL unit. This
information is specific to each ACL vendor.
__ 1.
Load Library Modules from Distribution Tape
__ 2.
Create the DSN Catalog
__ 3.
Create the Recorder File
__ 4.
Create the Separate JOBQ File (optional)
__ 5.
Create BIM-EPIC Resource Dataset (required to share tape resources among
multiple physical or virtual VSE machines)
__ 1.
Create the TSIDPOL Phase
__ 2.
Configure QDAS
BIM-EPIC Installation and System Guide
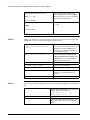
Initial Installation Checklist
Updating the ASI
Procedure
__ 1.
Partition Updates
__ 2.
Modify Standard Labels
__ 3.
Add a Dummy Tape Device and Modify Tape Modes
__ 4.
Update SVA Size
__ 5.
Increase System GETVIS
__ 6.
Increase Partition GETVIS
__ 7.
Increase Dynamic Space GETVIS
__ 8.
Update LIBDEF Procedures
__ 9.
Multi-Partition and Multi-CPU Environments
__ 10. Modify BIM-EPIC Configuration Options
__ 11. Activate BIM-EPIC
__ 12. Finish CICS Installation
Final Base
Installation
Procedures
__ 1.
Activate BIM-EPIC Support for Multiple Job Exits
__ 2.
Create JCL for Maintenance and System Recovery
__ 3.
Convert From Your Current Tape/Disk Manager
__ 4.
Implement BIM-EPIC
__ 5.
Sort Interface Macro (TSSRTDEF)
__ 6.
Code Label Print Program (optional)
__ 7.
Install Autoattach Feature (optional)
__ 8.
Configure Vaults and Vaulting Methods (optional)
Chapter 1. Installation Worksheets
1-3
Pre-4.1 Upgrade Checklist
Pre-4.1 Upgrade Checklist
Description
Pre-Installation
Modifications
Installation of
Major Datasets
Update Your ASI
Procedure
1-4
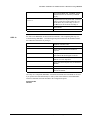
This is a list of the steps necessary to upgrade from a pre-4.1 version of BIM-EPIC. Use this
checklist to certify performance of each step.
__ 1.
Contact BIM-EPIC Technical Support for Upgrades
__ 2.
Complete Pre-Installation Worksheet
__ 3.
Meet Operating System Requirements
__ 4.
Meet Space Requirements
__ 5.
Meet Software Compatibility Requirements
__ 6.
Ensure BIM-GSS Availability
__ 7.
If Automatic Cartridge Library (ACL) support is used, determine the identifying
information used in the vendor’s ACL unit. This information is specific to each
ACL vendor.
__ 1.
Load Library Modules from Distribution Tape
__ 2.
Reassemble TSIDPOL Phase
__ 3.
Reassemble TSIVDEF Phase
__ 4.
Create the Separate JOBQ File (optional)
__ 5.
Create BIM-EPIC Resource Dataset (required to share tape resources among
multiple physical or virtual VSE machines)
__ 1.
Update SVA Size
__ 2.
Increase System GETVIS
__ 3.
Increase Partition GETVIS
__ 4.
Increase Dynamic Space GETVIS
__ 5.
Update LIBDEF Procedures
__ 6.
Activate BIM-EPIC
__ 7.
Finish CICS Installation
BIM-EPIC Installation and System Guide
Pre-4.1 Upgrade Checklist
Final Base
Installation
Procedures
__ 1.
Activating BIM-EPIC Support for Multiple Job Exits
__ 2.
Convert DSN Catalog Dataset
Chapter 1. Installation Worksheets
1-5
Pre-Installation Worksheet
Pre-Installation Worksheet
Description
During the installation dialog, information is requested based upon which options are selected.
To avoid delays on the operator console, complete this worksheet before beginning the
installation dialog.
CICS CSD
Information
If you are not using a CICS SYSTEM DEFINITION (CSD) file and you wish to implement
any or all of the BIM-EPIC CICS programs, you must perform a manual CICS installation of
the BIM-EPIC CICS programs. See 2-75 in this manual for procedures.
If you are using a CSD file, you may request that the BIM-EPIC CICS programs be added to
your CSD file automatically if label information for the CSD file is available. If label
information for DFHCSD and its corresponding VSAM catalog are stored in standard labels,
that label information can be used. Otherwise, specify the following:
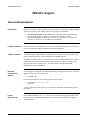
BIM-GSS
Information and
Requirements
•
CSD fileid
•
VSAM Catalog fileid _______________________________ (ie: VSESPUC)
_______________________________ (ie: VSESP.CSD.FILE)
The BIM-EPIC Online Manager (EOM) requires and runs as a subtask under BIM-GSS. The
BIM-GSS subtask can be accessed from CICS, VTAM, BTAM or CMS (if BIM-FAQS/ASO
is also installed). If you will be installing the BIM-EPIC Online Manager, the following
requirements must be met and information provided.
BIM-GSS must be be installed before BIM-EPIC installation. If you do not have BIM-GSS
installed or intend to install a more current release, refer to the BIM-GSS Installation and
Utilities Guide.
Standard labels for the BIM-GSS SYS$VIO and SYS$MON datasets must be defined before
beginning BIM-EPIC installation. The files must also be initialized.
•
1-6
BIM-GSS resides in: lib ______________ sublib ______________
BIM-EPIC Installation and System Guide
Pre-Installation Worksheet
BIM-EPIC Message
Help
VSE/ESA 2 users can install BIM-EPIC message explanations directly into the VSE/ESA
Message Explanation File. If label information for IESMSGS and its corresponding VSAM
catalog are stored in standard labels, that label information can be used. Otherwise, specify
the following:
•
IESMSGS fileid
•
VSAM Catalog fileid _________________________________ (ie: IJSYSCT)
_________________________________ (ie: VSE.MESSAGES)
VSE/ESA 1.3 or 1.4 users can install BIM-EPIC messages explanations directly into the BIMFAQS/ASO message file. Label information for FAQSMSG must be stored in standard labels.
Specify the following:
•
Autoattach
VM users can punch out the Autoattach installation files to be received by a CMS machine. If
so, the following information must be provided.
•
BIM-EPIC
Installation Library
The CMS userid where to route SYSPCH output: userid _________________
All users must provide the library and sublibrary to contain BIM-EPIC. The library must be
predefined. If the specified sublibrary name does not already exist, it will be defined
automatically during the installation process.
•
MSHP History File
BIM-FAQS/ASO resides in: lib__________ sublib __________
BIM-EPIC resides in: lib ______________ sublib ______________
BIM-EPIC supports MSHP installation. We recommend the use of a separate private history
file. A new private history file can be defined and formatted during the installation process.
To install BIM-EPIC under MSHP control using a private history file (separate or not), the
following information must be provided.
Installation Output
•
fileid of the private history file: __________________________________
•
serial number of the disk volume on which it resides: VOLSER ___________________
•
starting track/block number and file length : start ___________
length ___________
All users must provide the userid where to route SYSLST output.
The userid where to route SYSLST output to: userid ____________
(If your installation does not utilize the DEST parameter on the VSE/POWER LST JECL
statement, respond with "NONE".)
Chapter 1. Installation Worksheets
1-7
Pre-Installation Worksheet
Sharing Tape
Resources
To share tape resources (or an ACL) among multiple VSE machines (physical or virtual), the
BIM-EPIC Resource Dataset (ERD) must be defined. What is its DTF Name? (must match
the value for the ERDFILE configuration option) ________________
IBM ACL Support
To provide BIM-EPIC support for an IBM Automatic Tape Library in a VSE Guest
environment under VM:
•
•
•
The IBM VSE Guest Server (VGS) must be installed
The IBM LIBRCMS product must be installed
BIM-EPIC configuration option VM=YES must be specified.
To provide BIM-EPIC support for an IBM Automatic Tape Library in a native VSE
environment:
•
The IBM Library Control Device Driver (LCDD) must be installed
See 5-60 in this manual for more information.
Memorex ACL
Support
To provide BIM-EPIC support for a Memorex Automatic Tape Library in a VSE Guest
environment under VM:
•
•
1-8
Memorex Library Management Software (LMS) must be installed on a CMS Server.
What is the CMS Logon ID of the LMS Server? __________
VM=YES must be specified as a BIM-EPIC configuration option.
BIM-EPIC Installation and System Guide
Disk Pools Worksheet
Disk Pools Worksheet
Pool Name
Alias
Volid
Start
End
Level
Quiesce
Offline
Chapter 1. Installation Worksheets
1-9
Tape Pools Worksheet
Tape Pools Worksheet
TAPPOL=_____________________
Tape Pools:
Pool Name
Low Volser
High Volser
To define BIM-EPIC tape pools to a Memorex ATL, see 5-67.
1-10
BIM-EPIC Installation and System Guide
TSIDMAP Worksheet
TSIDMAP Worksheet
Uncontrolled DTF
Names
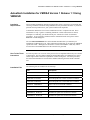
List the frequently accessed DTF names that BIM-EPIC does not control. Specify these DTF
names on the ILIST parameter. Include DTF names for all BIM-EPIC system files, include
the DSN Catalog (set by DSNAME, default IJSYSDS), Recorder file (IJSYSDR), BIM-EPIC
Resource Definition dataset (set by ERDFILE, suggested name IJSYSSP), and optional
separate JOBQ (set by JQNAME, suggested name IJSYSJQ).
______________ ______________ ______________ ______________
______________ ______________ ______________ ______________
______________ ______________ ______________ ______________
______________ ______________ ______________ ______________
______________ ______________ ______________ ______________
______________ ______________ ______________ ______________
______________ ______________ ______________ ______________
DTF Names for No
LUB Allocation
List the DTF names to inhibit LUB allocation for. Specify these DTF names on the
NLUBDTF parameter. BIM-EPIC automatically inhibits LUB allocation for specific DTF
names. See TSIDMAP for more information.
______________ ______________ _______________ ______________
______________ ______________ _______________ ______________
______________ ______________ _______________ ______________
______________ ______________ _______________ ______________
Program Names for
No LUB Allocation
Program Names for
Reblocking with
Undefined Record
Format
List the program names to inhibit LUB allocation for. You specify these names on the
NLUBPGM parameter.
_____________
______________
_______________
_______________
_____________
______________
_______________
_______________
_____________
______________
_______________
_______________
_____________
______________
_______________
_______________
List the program names which support reblocking. Specify these names on the RBLKPGM
parameter.
_____________
______________
_______________
_______________
_____________
______________
_______________
_______________
Chapter 1. Installation Worksheets
1-11
Configuration Options Worksheet
Configuration Options Worksheet
Use this worksheet to record desired values for configuration options. Defaults, if any, are
shown in parentheses. See 5-8 for descriptions of the options.
1-12
ACCEPT=____________ (YES)
CMSTAPE=___________ (NO)
ACLAUTI=___________ (NO)
CNTRL=_____________ (NO)
ACLIBM=___________ (NO)
CPUIDS=____________ (see 5-15)
ACLLIB=___________ (see 5-8)
CWDSPOL=____________ n/a
ACLMEM=___________ (NO)
CYCL=______________ (3)
ACLRECS=___________ (100)
DDERR=_____________ (see 5-16)
ACLSTK=____________ (NO)
DDGEN=_____________ (NO)
ACLSRVR=___________ (see 5-10)
DEBUG=_____________ (NO)
ACLTIME=___________ (180)
DEFEXT=____________ n/a
ALLMALL=___________ (NO)
DEFPOL=____________ n/a
ALLMSG=____________ (YES)
DEFTPL=______________ (NO)
ALTMSGS=___________ (NO)
DEFWPOL=____________ DEFPOL
AUTOATT=___________ (NO)
DISKALL=___________ (YES)
AUTOCAT=(_____,_____) (NO,NO)
DSKLUB=____________ (YES/100)
AUTOLOG=___________ (NO)
DSKRET=____________ (7)
AUTOSTP=___________ (NO)
DSNAME=___________ (IJSYSDS)
AUTSTPN=___________ (5)
DSNWARN=___________ (200)
AUTSTPNO=_________ AUTSTPN
DSNWMSG=___________ (10)
AUTSTPT=___________ (10)
EPICOFF=___________ n/a
AUTSTPTO=_________ AUTSTPT
ERDFILE=___________ n/a
BYPEXT=____________ (NO)
EURODAT=__________ (NO)
CANMSG=____________ (NO)
FBAFACT=___________ (0)
CATRT1=____________ (NO)
FRAG=______________ (NO)
CKDFACT=___________ (30)
GDI=_______________ (YES)
BIM-EPIC Installation and System Guide
Configuration Options Worksheet
GDIUR=_____________ (YES)
RECSHR=____________ (NO)
JCLAC=_____________ (YES)
RERUN=_____________ (YES)
JCLLANG=___________ (YES)
RETEN=_____________ (7)
JCLOPT=____________ (NO)
RMNTPRT=___________ (NO)
JCLOVRDE=__________ (NO)
SHARE=_____________ (NO)
JOBACCT=___________ (YES)
SLASIZE=____________ (300)
JQNAME=____________ n/a
STRTRK=____________ (1)
JQWARN=____________ n/a
TAPCUU=____________ (F00)
JQWMSG=____________ n/a
TAPE=______________ (YES)
MINDEX=____________ (NO)
TAPLUB=____________ (YES/10)
MINRET=____________ (7)
TAPPOL=____________ n/a
MODE=______________ (D0)
TSTJOB=____________ n/a
MSG088=____________ (NO)
UNCDSK=____________ (NO)
MULTCPU=___________ (NO)
UNCTAP=____________ (NO)
NCATDSK=___________ (NO)
UNCTL=_____________ (NO)
NOGVIS=____________ (CANCEL)
UNLABEL=___________ (YES)
ONLREWCD=___________ (RUN)
UNLOAD=___________ (NO)
PASSWD=____________ n/a
VGSFTAPE=_________ (YES)
PREFIX=____________ (EP)
VM=________________ (NO)
PURBYP=____________ (NO)
VSAM=______________ (NO)
RECORD=____________ (YES)
Chapter 1. Installation Worksheets
1-13
Vault Management Worksheet
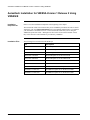
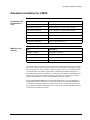
Vault Management Worksheet
Vault Number
Vault Name
Starting Slot
Number
Ending Slot
Number
1
2
3
4
5
6
7
8
9
10
11
12
13
14
15
16
17
18
19
20
21
22
23
Cartridges in an ACL are considered to be in the Main Library (Vault 0). See 6-38 for more
information.
1-14
BIM-EPIC Installation and System Guide
2
Installing the Basic System
This chapter contains procedures for installing or upgrading to the current release of BIMEPIC. Autoattach installation is presented at 3-1. BIM-EPIC configuration options are
described at 5-1. BIM-EPIC utilities are described at 6-1.
Chapter Contents
BIM-GSS Installation.....................................................................................................2-2
Preparing to Upgrade from the Previous Release...........................................................2-3
Preparing for First-Time Installation..............................................................................2-4
BIM-EPIC System Datasets .........................................................................................2-17
Defining the BIM-EPIC Resource Dataset (ERD) .......................................................2-25
Defining the BIM-EPIC Environment..........................................................................2-39
Quick DASD Allocation System (QDAS)....................................................................2-52
Updating the ASI Procedure ........................................................................................2-57
Additional System Considerations ...............................................................................2-65
Multi-Partition/CPU Environments and Sharing the DSN Catalog..............................2-68
Activating BIM-EPIC Online Components..................................................................2-70
Completing CICS Installation ......................................................................................2-74
CICS Installation Table Entries....................................................................................2-78
Post-Installation Procedures.........................................................................................2-91
2-1
Introduction
BIM-GSS Installation
BIM-GSS Installation
Introduction
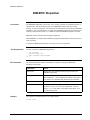
Description
BIM-EPIC provides the Online Manager for accessing and managing the DSN Catalog from
BIM-FAQS/ASO, VTAM, or CICS. Online Manager requires BIM’s Global Subsystem
(BIM-GSS) product. The current BIM-GSS release is included as part of the BIM-EPIC
Installation package.
WARNING!
BIM-GSS INSTALLATION MUST BE COMPLETED BEFORE BIM-EPIC INSTALLATION
BEGINS.
If You Already Use
BIM-GSS
Please refer to the BIM-GSS Installation and Utilities Guide for detailed information on how
to install the BIM-GSS release that is included with BIM-EPIC.
If You Do Not
Already Use BIMGSS
The BIM-GSS Installation and Utilities Guide provides a detailed description for doing a firsttime BIM-GSS installation.
2-2
BIM-EPIC Installation and System Guide
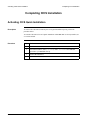
Preparing to Upgrade from the Previous Release
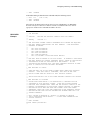
Introduction
Preparing to Upgrade from the Previous Release
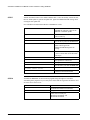
Procedure
If you are installing BIM-EPIC for the first time, skip this section.
To upgrade from the previous BIM-EPIC release:
Step
Action
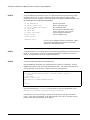
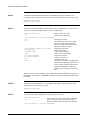
1
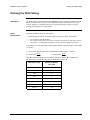
Back up the DSN Catalog and Recorder File. See Chapter 4 for details.
2
Review the Technical Release Notice for special upgrade information.
3
Run a TSIDDEB Summary Report for the current BIM-EPIC system, as follows:
// EXEC TSIDDEB
SUMMARY=YES
/*
4
Upgrading Over
More Than One
Release
Refer to special upgrade instructions during the installation procedure.
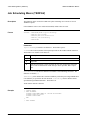
To upgrade from TFAST, DFAST, T/DFAST, or a version of BIM-EPIC that is more than
one release behind BIM-EPIC’s current version, additional steps may be required.
Please contact BIM-EPIC Technical Support for more information.
Chapter 2. Installing the Basic System
2-3
Introduction
Preparing for First-Time Installation
Preparing for First-Time Installation
Introduction
Test Installation
We recommend that you install and test BIM-EPIC in a test environment. A test environment
allows you to validate BIM-EPIC’s compatibility with other software products and allows you
to fine-tune your JCL without affecting your production system.
Pre-Installation
Worksheet
The Pre-Installation Worksheet (see Chapter 1) provides a step-by-step outline of the
installation process.
BIM-GSS
Installation
BIM-GSS must be installed before BIM-EPIC can be installed. A BIM-GSS tape and a BIMGSS Installation and Utilities Guide is included in the material you received with BIM-EPIC.
If the release level of the BIM-GSS tape you received with BIM-EPIC is the same as your
current BIM-GSS, do not re-install BIM-GSS from this tape.
Latest
Technical
Notes
Once you have completed the installation dialog and BIM-EPIC has been installed on your
system, read the TECHNOTE.Z member included with the SYSLST output. This document
contains all the latest installation, utilization, and documentation updates.
2-4
BIM-EPIC Installation and System Guide
Preparing for First-Time Installation
Operating System Requirements
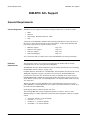
Operating System Requirements
FCOBOL Support
(All Operating
Systems)
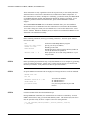
Some BIM-EPIC utilities are written in FCOBOL. If your installation does not have COBOL,
you must catalog the following program to a VSE library that is available whenever the BIMEPIC system is active:
// OPTION CATAL
PHASE $$BFCMUL,+0
// EXEC ASSEMBLY
$$BFCMUL CSECT
DC
CL8'$$BFCMUL'
SVC 11
END
/*
// EXEC LNKEDT
If your installation already uses FCOBOL, do not catalog the program above.
IBM VSE Operating
Systems
IBM ACL
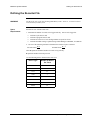
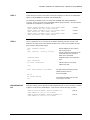
Some of BIM-EPIC’s optional features require certain functions in the VSE supervisor and/or
IPL procedure:
BIM-EPIC Feature
Required VSE Parameter
Sharing the DSN Catalog and disk pool space between
real or virtual machines.
,SHR on IPL ADD command
for every DASD shared.
Recording job accounting information with the Recorder
File, and Job Management Control Language.
JA=YES on IPL SYS
command.
BIM-EPIC support can be provided in a VSE Guest environment under VM or in a native
VSE environment.
In the VSE Guest environment under VM, the IBM VSE Guest Server (VGS) and LIBRCMS
product must be installed.
In the native VSE environment, the IBM Library Control Device Driver (LCDD) must be
installed.
See 5-60 in this manual for more information.
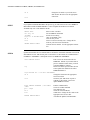
Memorex ACL
BIM-EPIC support is provided using the VM IUCV facility. BIM-EPIC must be running on a
VSE Guest machine. The Memorex Library Management Software (LMS) product must be
operational as a CMS Guest. See 5-64 in this manual for more information.
Chapter 2. Installing the Basic System
2-5
Operating System Requirements
STK ACL
2-6
Preparing for First-Time Installation
BIM-EPIC support is provided using the VM IUCV facility. BIM-EPIC must be running on a
VSE Guest machine. The STK Host Software Component (HSC) product must be operational
as a CMS Guest. See 5-64 in this manual for more information.
BIM-EPIC Installation and System Guide
Preparing for First-Time Installation
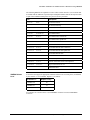
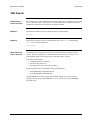
Determining Space Requirements
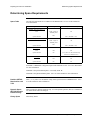
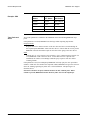
Determining Space Requirements
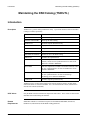
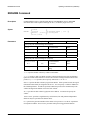
Space Table
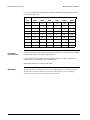
All GETVIS requirements are in addition to the IBM defaults. See 2-57 in this manual for
more information.
System Area
24-bit space
ANY (if 31-bit available)
430K + length of
TSIDPOL phase
0K
BIM-EPIC base system (ESA 1.3)
SVA
System GETVIS
28K
42K + (SLASIZE * 227)
BIM-EPIC base system (ESA 1.4, 2.x)
SVA
System GETVIS
400K + length of
TSIDPOL phase
11K
28K
42K + (SLASIZE * 227)
QDAS System
SVA
10K
0K
System GETVIS
0K
(n * 8) where n is the total of all map
values in the TSIVDEF macro
SVA
33K
0K
System GETVIS
0K
0K
ACL Support
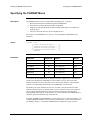
SLASIZE is a BIM-EPIC configuration option which defaults to 300. See 5-24 in this manual
for more information.
TSIDPOL is the pool definition phase. It is usually under 1K.
TSIVDEF is the QDAS definition phase. See 2-55 in this manual for more information.
Partition GETVIS
Required for each
Task
26K + (n * 8), where n is the number of map entries specified in the TSIDMAP macro. See 247 in this manual for more information.
Dynamic Space
GETVIS (Dynamic
Partitions Only)
60K is required in dynamic partitions only. For each dynamic partition, there is a limitation of
256 labels which cannot be enlarged.
Library Space
8400 library blocks
Chapter 2. Installing the Basic System
2-7
Compatibility with Other Software
Preparing for First-Time Installation
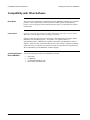
Compatibility with Other Software
Description
This section notes compatibility considerations between BIM-EPIC and other system software
products. It only includes major software products for which special considerations are
known. If you are using any software described in this section, you must make the required
modifications.
Conversions
If you are converting from another tape and/or disk management system, you must contact
BIM-EPIC Technical Support before attempting installation.
Some fixes that were applied for your current tape or disk management system may inhibit
BIM-EPIC from functioning properly. For instance, a fix applied to make CASystem/Manager and CA-DYNAM/T compatible can interfere with BIM-EPIC’s ability to
function. These fixes must be identified and removed. Since software companies continually
update their fixes, it is impractical to maintain a current list of problem fixes in printed form.
We recommend that you call BIM-EPIC Technical Support.
Activating Software
Before BIM-EPIC
2-8
Activate the following software before BIM-EPIC is started:
•
•
•
•
Abend-AID
CA-DRIVER
CA-EXTEND/DASD for VSE
Global Subsystem (BIM-GSS)
BIM-EPIC Installation and System Guide
Preparing for First-Time Installation
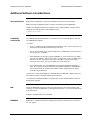
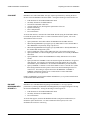
Additional Software Considerations
Additional Software Considerations
Other BIM Software
BIM-ALERT: BIM-EPIC’s special option EPS029 is required to run with ALERT.
BIM-FAQS/ASO and BIM-FAQS/PCS: Must be started before starting BIM-EPIC.
GSMTA: For Multiple Transient Area (GSMTA) users, update GSMTA’s enqueue table by
adding the following parameter to the GSMTA start-up:
$$BTSID,NQID=(VTOC)
COMPUTER
ASSOCIATES
CA-LIBRARIAN: Inhibit BIM-EPIC’s LUB allocation for all controlled datasets used with
CA-LIBRARIAN programs.
CA-SORT:
•
Set the CA-SORT options DYNAM/D and DYNAM/FI to NO. If these options are not
deactivated, INVALID DTF TYPE messages can occur.
•
Specify the CA-SORT macro parameter SPECIAL=2 if BIM-EPIC controlled tapes are
to be accessed by CA-SORT.
•
If the BIM-EPIC sort interface program (TSIDSRT) is executed instead of CA-SORT,
and if the CA-SORT RC option is set to NO or is unspecified, set the CA-SORT option
INVCNCL to YES. INVCNCL=YES causes CA-SORT to cancel the job when a
critical sort error occurs, just as if CA-SORT was executed directly.
•
We recommend that you set the BIM-EPIC special options EPS002 and EPS003 to
YES. These options permit LUB allocation for SORTIN, SORTOUT, and SORTWK
files, thus preventing any potential SYS number conflict which might occur during
secondary extent allocations.
CA-Easytrieve: Define EASYTRIEVE’s CRDWK dataset to BIM-EPIC’s DSN Catalog as a
non-generation dataset, and inhibit truncation on the dataset.
CA-PANVALET: Inhibit BIM-EPIC’s LUB allocation for all controlled datasets used with
PANVALET programs.
IBM
Deactivate BIM-EPIC in the entire VSE system when applying any VSE maintenance that
recatalogs or reloads any BIM-EPIC-required phases in the SVA. See 5-44 in this manual for
more information.
POWER: Start BIM-EPIC before POWER.
MEMOREX
BIM-EPIC is compatible with Library Management Software (LMS) releases 2.7 and above
for ACL support.
Chapter 2. Installing the Basic System
2-9
Additional Software Considerations
SYNCSORT
Preparing for First-Time Installation
BIM-EPIC users with SYNCSORT can enjoy superior performance by utilizing the direct
interface between BIM-EPIC and SYNCSORT. Among the advantages of this interface are:
•
•
•
•
•
•
•
LUB allocation for all standard SORT DTF names
Secondary allocations for SORTWK files
Truncation of SORTOUT disk files
Accurate input file size, allowing better optimization of the sort
Dynamic reblocking
Device independence
File concatenation
To invoke this interface, customize the SYNCSORT defaults (using the SYNCMAC Macro)
to include the options shown below. For more information on these options, refer to the
SYNCSORT Installation Guide.
•
•
•
•
•
•
•
•
Specify EPICINT=YES which enables the BIM-EPIC/SYNCSORT interface.
When utilizing BIM-EPIC tape support, specify TMS=EPIC to cause SYNCSORT to
allow BIM-EPIC to dynamically assign tape devices.
When utilizing BIM-EPIC disk support, specify DMS=EPIC to identify BIM-EPIC as
the installed disk management system.
Specify OUTRUNC=YES to allow SORTOUT files to be truncated when closed.
Specify SECMAX=8 to allow multiple logical unit numbers for secondary SORTWKn
allocations.
Specify SWKSEC=YES to allow SORTWKn secondary allocations to occur when
needed
Specify ICONLUN=IGNORE to cause inconsistent logical unit numbers to be ignored
when detected. (For example, an inconsistent logical unit number may occur when
SYNCSORT expects SORTOUT to use SYS001 but BIM-EPIC provides SYS030).
Specify VSESPRC=CANCEL to cause SYNCSORT to issue a CANCEL SVC (rather
than issuing normal EOJ with a positive return code) when terminating because of a
critical error. This setting is required when either the BIM-EPIC CANMSG or
PURBYP configuration options are set to YES and also to assure that DISP=
parameters are correctly processed.
Finally, set BIM-EPIC special options EPS002 and EPS003 to yes to permit LUB allocation
for all standard SORT DTF names.
IBM SORT
BEGINNING WITH
DFSORT 3.3
BIM-EPIC users with IBM SORT beginning with DFSORT 3.3 can enjoy superior
performance by utilizing the DFSORT File Management System support designed to attempt
interaction with BIM-EPIC. Among the advantages of this support are:
•
•
•
LUB allocation for all standard SORT DTF names
Secondary allocations for SORTWK files
File concatenation
To invoke this support, customize the DFSORT defaults (using the ILUINST Macro) to
include the option shown below. For more information on this option, refer to the
DFSORT/VSE Installation and Tuning .
2-10
BIM-EPIC Installation and System Guide
Preparing for First-Time Installation
•
Additional Software Considerations
Specify FMS=YES which enables the DFSORT File Management System support.
Also, set BIM-EPIC special options EPS002 and EP003 to yes to permit LUB allocation for
all standard SORT DTF names.
CA-SORT
BIM-EPIC users with CA-SORT can enjoy superior performance by utilizing CA-SORT
compatibility with BIM-EPIC feature for TLBL options and SORTWK deletion. To invoke
this support, customize the CA-SORT installation options (using the CASORT Option Macro)
to include the option shown below. For more information on this option, refer to the CASORT Systems Programmer Guide.
•
Specify special option 2.
Also, set BIM-EPIC special options EPS002 and EP003 to yes to permit LUB allocation for
all standard SORT DTF names.
BLUE LINE
SOFTWARE
BACKUP/RESTORE, DUSP, and MAXBACK: Use BIM-EPIC’s TSIDASS ASSGN
function for all tape assignments to satisfy the pre-open checking performed by these products.
In addition, inhibit BIM-EPIC’s LUB allocation for all tapes which do not use the DTF name
SYS000. There are no special considerations for disk datasets.
Chapter 2. Installing the Basic System
2-11
Creating BIM-EPIC System Components
Preparing for First-Time Installation
Creating BIM-EPIC System Components
Loading BIM-EPIC
Modules from the
Distribution Tape
BIM-EPIC is distributed on a magnetic tape or cartridge and is installed using the VSE
Maintain System History Program (MSHP). The file content of the tape volume is as follows:
•
•
•
•
•
•
•
•
•
File 1:
File 2:
File 3:
File 4:
File 5:
File 6:
File 7:
File 8:
File 9:
Installation program and dialog
Null file (tapemark)
Header File
History File
BIM-EPIC Production Sublibrary
Null file (tapemark)
EOB (end of BACKUP information)
Null file (tapemark)
Null file (tapemark)
The BIM-EPIC Installation dialog asks you for site–specific information, installation options
and desired optional components. Prior completion of the Pre-Installation Worksheet makes
the installation process much easier.
BIM-EPIC can be executed from private or system libraries. We strongly recommend
installing BIM-EPIC into a private sublibrary. The library structure can be either VSAM or
BAM.
MSHP is used to install BIM-EPIC into its libraries. We strongly recommend using MSHP in
conjunction with a separate private history file. BIM-EPIC APARs are distributed in MSHP
CORRECTS format only and a history file is required to apply them.
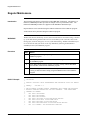
Procedure
Step
Action
1
As with any new software installation, back up your target libraries first.
2
Mount the BIM-EPIC distribution tape. From the VSE console, type:
PSTART RDR,cuu
where cuu is the address of the tape drive on which the distribution tape has been
mounted. A job named EPICINST is loaded into the POWER reader queue with
CLASS=0. If EPICINST does not execute automatically, alter the POWER job
class to allow EPICINST to execute in a partition where the Linkage Editor can be
run.
If you do not have POWER on your system, contact BIM-EPIC Technical Support
for special installation instructions.
2-12
3
Follow the instructions on the operator console. Use the entries on your PreInstallation Worksheet to assist you.
4
After the installation job is complete, dismount the distribution tape and save it.
BIM-EPIC Installation and System Guide
Preparing for First-Time Installation
Reinstalling BIM-EPIC System Components
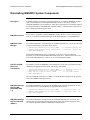
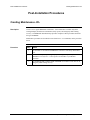
Reinstalling BIM-EPIC System Components
Description
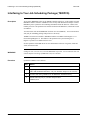
In multiple machine environments, following maintenance to VSE/ESA, BIM-EPIC or BIMGSS, or when making system configuration changes, it may be necessary to reinstall
individual BIM-EPIC system components. Most major components are conveniently supplied
in cataloged procedures in the BIM-EPIC installation library. Additional JCL required to run
these cataloged procedures appears below.
BIM-EPIC Libraries
No procedure is supplied to reload the BIM-EPIC product libraries. If it becomes necessary
to do so, re-execute the installation dialog from the distribution tape to reinstall BIM-EPIC.
BIM-EPIC Online
Manager
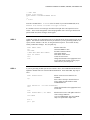
To reload the BIM-EPIC Online Manager into the BIM-GSS PDS files, execute the following
JCL after substituting the appropriate library names:
// LIBDEF PROC,SEARCH=library.sublib,TEMP
// LIBDEF PHASE,SEARCH=library.sublib,TEMP
// EXEC PROC=DCOMOBJS
<== BIM-EPIC Install lib
<== BIM-GSS Install lib
Ensure that the BIM-EPIC function or transaction is not in use when performing this
procedure or execute it when the BIM-GSS subtask is not active. Failure to do so may result
in an abend within BIM-GSS. If this occurs, recycle the BIM-GSS subtask.
CSD File for BIMEPIC CICS
Transactions
To reload the CSD file for BIM-EPIC CICS transactions, execute the JCL shown below after
substituting the appropriate library name, and file label information:
//
//
//
//
LIBDEF PROC,SEARCH=library.sublib,TEMP
<== BIM-EPIC Install lib
DLBL DFHCSD,'csd.file-id',,VSAM,CAT=csdcat <== CSD file
DLBL csdcat,'csdcat.file-id',,VSAM
<== CSD VSAM catalog
EXEC PROC=EPICCSD
After performing this procedure, use CEDA to re-install the EPIC6 group to the list specified
in the CICS GRPLIST start-up parameter.
BIM-EPIC Message
Help for BIMFAQS/ASO (ESA
1.3)
To reload the BIM-EPIC message text into the BIM-FAQS/ASO message database, execute
the JCL shown below after substituting the appropriate library names:
BIM-EPIC Message
Help for EXPLAIN
(ESA 2.1)
To reload the BIM-EPIC message text into the VSE/ESA EXPLAIN file, execute the JCL
shown below after substituting the appropriate library name and VSAM catalog DTF name
(for which the procedure assumes a standard label already exists):
// LIBDEF PROC,SEARCH=library.sublib,TEMP
// LIBDEF PHASE,SEARCH=library.sublib,TEMP
// EXEC PROC=TSIDMSGS
<== BIM-EPIC Install lib
<== FAQS/ASO Install lib
Chapter 2. Installing the Basic System
2-13
Reinstalling BIM-EPIC System Components
Preparing for First-Time Installation
// LIBDEF PROC,SEARCH=library.sublib,TEMP
<== BIM-EPIC Install lib
// EXEC PROC=IESMSGS,CAT='iescat'
<== EXPLAIN catalog DTF name
The EXPLAIN file must be inactive while it is being reloaded. The procedure prompts for the
necessary AR commands to deactivate and reactivate it at the appropriate times.
BIM-EPIC
Autoattach
Installation Files
2-14
To reload the BIM-EPIC Autoattach installation files to your CMS machine, follow the
procedure detailed at 3-20 in this manual.
BIM-EPIC Installation and System Guide
Preparing for First-Time Installation
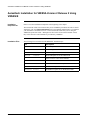
BIM-EPIC Installation Jobstreams
BIM-EPIC Installation Jobstreams
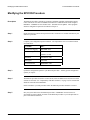
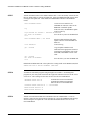
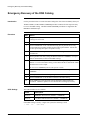
Description
The BIM-EPIC distribution tape contains all the procedures and jobs necessary to complete
BIM-EPIC installation. No additional JCL is required, but the supplied JCL may need to be
modified for your installation.
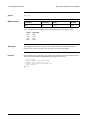
The procedures and jobs that are cataloged by the installation procedure are:
Member Name
Member Type
Use
CATMOVEn
SAMPJOB
Relocate (and optionally change the size of) the
DSN Catalog
DAILYn
SAMPJOB
Daily catalog maintenance and reports
DCOMOBJS
PROC
EPICCDK
Z
EPICCSD
PROC
EPICCWDS
EPICHF
EPICJADB
EPICON
Z
PROC
Z
PROC
Creates Online Manager executable files
Sample JCL to format a new DSN and Recorder file
Load BIM-EPIC definitions to CICS CSD File
Sample control statements to catalog common work
datasets for use by most assemblers, compilers, and
SORT packages
DLBL, EXTENT, and ASSGN for BIM-EPIC
MSHP private history file only if a private history
file was selected during installation dialog
Sample IDCAMS statements to define job
accounting VSAM file
Procedure to start the BIM-EPIC system
EPICPAGN
Z
Permanent ASSGN’s for SYSLNK and SYS001SYS007 to satisfy pre-open requirements for most
assemblers, compilers, and SORT packages
EPICSTDL
Z
Sample standard labels for the DSN catalog,
Recorder File, separate JOBQ, BIM-EPIC Resource
Dataset, and assembler, compiler, and SORTWK1
files
EPICVLT
Z
Sample Job stream to assemble and catalog
VAULTDEF and METHOD macros to the BIMEPIC sublibrary
IESMSGS
PROC
Procedure to load the BIM-EPIC messages to the
VSE EXPLAIN file (VSE 2.1 and subsequent
versions)
RECMOVEn
SAMPJOB
Relocate (and optionally change the size of) the
Recorder File
RECOVERn
SAMPJOB
Recovers the DSN Catalog
Chapter 2. Installing the Basic System
2-15
BIM-EPIC Installation Jobstreams
BIM-EPIC Sample
Jobstreams
Preparing for First-Time Installation
TSIDCLN
PROC
Upgrades DSN catalog from BIM-EPIC version 2.x
TSIDMSGS
PROC
Procedure to load the BIM-EPIC messages to the
BIM-FAQS/ASO Help File
TSIDPOL
Z
Sample job stream to assemble the TSIDPOL and
TSIDMAP macros to catalog the TSIDPOL phase
TSIVCLR
Z
Initialize QDAS Share File
TSIVDEF
Z
Sample job stream to assemble the TSIVDEF
macros to catalog the TSIVDEF phase
TSSRTDEF
Z
Sample job to assemble the TSSRTDEF macro to
catalog the TSSRTDEF phase
In addition to the installation jobstreams listed above, many JCL samples are provided with
BIM-EPIC in an effort to minimize the effort required to build successful jobstreams. Each
JCL sample contains a general description of its objectives and any prerequisites, and each job
step contains extensive notes explaining what it intends to accomplish. These JCL samples
illustrate utilization of BIM-EPIC in various environments but are not intended to illustrate the
features and capabilities of the various programs involved.
Each JCL sample is stored as a separate member in the VSE sublibrary where the BIM-EPIC
system is installed using an arbitrary but unique member name and a common member type of
SAMPJOB. The member name generally identifies what program or function in being
illustrated followed by a number to maintain uniqueness.
Several indexes are supplied to help you locate a JCL sample that most closely fits your
requirement. These indexes are also stored as separate members in the VSE sublibrary where
the BIM-EPIC system is installed each using a member name beginning with $INDEX and a
common member type of SAMPJOB. Use JCL similar to the following to list all these index
members:
Example
2-16
// EXEC LIBR
ACCESS SUBLIB=yourlib.sublib
LIST $INDEX*.SAMPJOB
/*
BIM-EPIC Installation and System Guide
BIM-EPIC System Datasets
Introduction
BIM-EPIC System Datasets
Introduction
BIM-EPIC System
Dataset Caching
Because BIM-EPIC's System Datasets are proprietary, physically chained
databases, the following two conditions must be met for safe caching:
•
The caching device must be one of the following:
• WRITE-THROUGH where writes are committed to disk before the device/channel
end is provided. Another term sometimes used is READ-ONLY CACHE, meaning
that only reads are cached.
• 100% NON-VOLATILE, so that the device will never fail (e.g., devices with internal
UPS). If this is the case, the device must also handle failed writes dynamically. If
the device fails or write requests cannot remain cached, forward recovery will not
properly recover the DSN Catalog.
I/O must not be reordered to optimize performance, either by the caching controller, the
operating system, or a vendor product at the operating system level. The I/O must
be processed in the order in which it was presented by BIM-EPIC.
•
DSN Catalog
BIM-EPIC uses the DSN Catalog to maintain information about files under its control. Freed
records are automatically reused and the file structure is self-reorganizing.
Recorder File
The Recorder File logs changes to the DSN Catalog. The Recorder File serves as security
against data loss if the DSN Catalog is damaged. The Recorder File can also be used for
BIM-EPIC’s job accounting reports and displays. It should be dumped and cleared on a
regular basis.
JOBQ
BIM-EPIC uses the JOBQ to control job-specific functions such as:
•
•
•
Purging datasets
Controlling common workfiles
Supporting BIM-EPIC DD statements
The JOBQ can reside within the DSN Catalog (it need not be a separate file), but system
performance can be enhanced by using a JOBQ that is a separate VSE file. If a separate
JOBQ is not defined, BIM-EPIC places the JOBQ in the DSN Catalog by default.
In single CPU environments, improved BIM-EPIC Performance is the only reason to create
the JOBQ as a separate file.
In multiple CPU environments (Real, LPAR, or VM Guests), if the BIM-EPIC Catalog is
shared, a separate JOBQ file MUST be used for each CPU.
Freed JOBQ records are automatically reused and the file structure is self-reorganizing.
Chapter 2. Installing the Basic System
2-17
Introduction
BIM-EPIC Resource
Dataset (ERD)
BIM-EPIC System Datasets
The BIM-EPIC Resource Dataset was designed to improve performance in VSE machines that
share tape devices. It is required for ACL devices and to share tape devices among multiple
VSE machines (physical or virtual).
Activation of the ERD requires setting the ERDFILE configuration option. In addition, the
ERD must be formatted and loaded with user definitions for all shared resources. For more
information, see 2-25 in this manual.
2-18
BIM-EPIC Installation and System Guide
BIM-EPIC System Datasets
Defining the DSN Catalog
Defining the DSN Catalog
Description
The DSN Catalog can be shared with other BIM-EPIC systems, including CA-EPIC for CMS.
When you plan the location and size for the DSN Catalog, the requirements of all systems
must be considered. If the DSN Catalog is to be shared with another system, review the
sharing requirements at 2-68 in this manual.
Space
Requirements
Determine the DSN Catalog size requirements.
1. First determine the number of records the DSN Catalog will contain. There will be:
•
•
two records for each dataset name
one record for each extent of a disk file or volume of a tape file for each active version,
each “open” or “conditionally cataloged” version, and each scratched tape version
If the JOBQ is to reside in the DSN Catalog, add the number of records required for the JOBQ
(see below).
2. Use one of the following formulas to determine the amount of space to allocate:
R+32
R+32
For FBA blocks:
16*B
2
where R is the estimated number of records the catalog will contain. B is the number of
blocks per track. Use the following table to determine the value of B:
For CKD tracks:
CKD Device Type
Number of Blocks
Per Track
3330
3
3340
2
3350
4
3375
8
3380
10
3390
12
9345-1
10
9345-2
10
Chapter 2. Installing the Basic System
2-19
Defining the DSN Catalog
BIM-EPIC System Datasets
3. Use the following table to determine the number of tracks or FBA blocks to allocate for
your DSN Catalog.
Device
Number of Records
Type
5,000
7,500
10,000
20,000
3330
105
157
209
418
3340
158
236
314
626
3350
79
118
157
313
3375
40
59
78
157
3380
32
48
63
126
3390
27
40
53
106
9345-1
20
30
40
80
9345-2
14
20
26
52
FBA
2516
3766
5016
10016
The minimum size of the DSN Catalog on a CKD device is 1 cylinder. On an FBA device, the
minimum size is 72 FBA blocks.
Placement
Considerations
Determine which disk volume will be used for the DSN Catalog. Consider the following:
•
•
•
•
The disk volume must be available to all machines running BIM-EPIC if the catalog is
to be shared.
For performance reasons, the DSN Catalog should be located on a volume which does
not contain heavily accessed datasets such as POWER files.
The DSN Catalog must be a single extent dataset.
The DSN Catalog and Recorder File should be placed on different physical devices.
If you will be sharing your DSN Catalog with CA-EPIC for CMS, it must reside on a disk
volume which is owned by VSE (with a VSE VTOC) and is also available to CMS. See 2-68
in this manual for more information.
If the DSN Catalog is to be updated by CA-EPIC for CMS, ensure that the disk volume has
only one active path to VM/CP.
WARNING!
2-20
The Recorder File provides backup security for the DSN Catalog. If the DSN Catalog and
Recorder File are both located on the same device and that device is lost or damaged,
information vital to recovery of the DSN Catalog is lost.
BIM-EPIC Installation and System Guide
BIM-EPIC System Datasets
Defining the Recorder File
Defining the Recorder File
WARNING!
The Recorder File can be shared among BIM-EPIC systems. However, it cannot be shared
with CA-EPIC for CMS systems.
Space
Requirements
Estimate the size of the Recorder File.
1. Determine the number of records to be logged each day. One record is logged for
•
•
•
•
each time a job starts or ends
each time a program starts or ends
each time an extent or reel of a cataloged dataset is opened or closed
each time the DSN Catalog is updated using Online Manager, TSIDMNT, or TSIDUTL
2. Use one of the following formulas to determine the amount of space to allocate:
R+4
R+4
For CKD tracks 4*B
For FBA blocks 2
where R equals the estimated number of records to log each day.
B equals the number of blocks per track.
Use the following table to determine the value of B.
Device Type
Number of Blocks
Per Track
3390
18
3380
18
3375
17
3350
7
3340
4
3330
5
9345-1
14
9345-2
21
Chapter 2. Installing the Basic System
2-21
Defining the Recorder File
BIM-EPIC System Datasets
3. Use the following table to determine the number of CKD tracks or FBA blocks to allocate
for various Recorder sizes:
Device
Placement
Considerations
Number of Records
Type
1000
2000
5000
7500
10000
20000
3390
10
20
50
75
100
200
3380
10
20
50
75
100
200
3375
10
20
50
75
100
200
3350
24
48
120
180
240
480
3340
42
84
210
315
420
840
3330
34
68
170
255
340
680
9345-1
48
96
240
360
480
960
9345-2
72
144
360
540
720
1440
FBA
668
1336
3340
5010
6680
13360
Determine which disk volume will be used for the Recorder File. The Recorder File and DSN
Catalog should be placed on different physical devices.
For performance reasons, the Recorder File should be placed on a volume which does not
contain heavily accessed datasets such as POWER files.
The Recorder File must be a single extent dataset.
WARNING!
2-22
The Recorder File provides backup security for the DSN Catalog. If the DSN Catalog and
Recorder File are both located on the same device and that device is lost or damaged,
information vital to recovery of the DSN Catalog will be lost.
BIM-EPIC Installation and System Guide
BIM-EPIC System Datasets
Formatting the DSN Catalog and Recorder File
Formatting the DSN Catalog and Recorder File
Description
The DSN Catalog and Recorder File are both formatted using the TSIDCDK utility. If you
expect your DSN Catalog to contain more than 30,000 records, we recommend that you create
a DSN Catalog with a Master Index. This is done by using the BCAT control statement
instead of the CAT control statement on the TSIDCDK control statement and setting the BIMEPIC configuration option MINDEX=YES.
Sample JCL
Use EPICCDK.Z as a sample to create the necessary JCL.
WARNING!
Different control statements must be used depending on whether a DSN Catalog or Recorder
File is being formatted. Use the following:
To format...
Use...
DSN Catalog
DSN=dtfname
Recorder File
REC=dtfname
CKD Example
*
CREATE BIM-EPIC DSN CATALOG ON CKD
// ASSGN SYS240,151
// DLBL IJSYSDS,'EPIC.VSE.CATALOG',2099/366
// EXTENT SYS240,TSI151,1,0,3750,63
// EXEC TSIDCDK
CAT=IJSYSDS
/*
*
CREATE BIM-EPIC RECORDER FILE ON CKD
// ASSGN SYS241,155
// DLBL IJSYSDR,'EPIC.VSE.RECORDER',2099/366
// EXTENT SYS241,TSI155,1,0,3900,81
// EXEC TSIDCDK
REC=IJSYSDR
/*
FBA Example
*
CREATE BIM-EPIC DSN CATALOG ON FBA
// ASSGN SYS240,150
// DLBL IJSYSDS,'EPIC.VSE.CATALOG',2099/366,,CISIZE=4096
// EXTENT SYS240,TSI150,1,0,5700,1024
// EXEC TSIDCDK
CAT=IJSYSDS
/*
*
CREATE BIM-EPIC RECORDER FILE ON FBA
// ASSGN SYS241,155
// DLBL IJSYSDR,'EPIC.VSE.RECORDER',2099/366,,CISIZE=2048
// EXTENT SYS241,TSI155,1,0,5700,1024
// EXEC TSIDCDK
REC=IJSYSDR
/*
Chapter 2. Installing the Basic System
2-23
Defining the JOBQ
BIM-EPIC System Datasets
Defining the JOBQ
Description
If the JOBQ will reside in the DSN Catalog (the default), include the JOBQ size requirements
in the overall DSN Catalog size requirements when planning the size of the DSN Catalog.
When the JOBQ is a separate file, the JOBQ is not affected by, and does not affect, activity in
the DSN Catalog. If you create the JOBQ as a separate file, it cannot be shared with any
other CPU (each CPU must have its own unique JOBQ).
In single CPU environments, improved BIM-EPIC performance is the only reason to create
the JOBQ as a separate file.
In multiple CPU environments (Real, LPAR, or VM Guests), if the BIM-EPIC Catalog is
shared, a separate JOBQ file MUST be used for each CPU.
BIM-EPIC does not use VSE’s “device-reserve” or “external-lock” facilities when accessing
the separate JOBQ in a multiple-CPU environment. However, BIM-EPIC must use these VSE
facilities to ensure the integrity of the DSN Catalog when the DSN Catalog is shared in a
multiple-CPU environment.
Space
Requirements
To determine the size requirements for the JOBQ, first calculate the total number of records as
follows:
•
•
•
•
•
Two records per partition
One record for every dataset flagged for purge
One record for every BIM-EPIC DD statement that uses a dataset name longer than 17
characters
One record for every BIM-EPIC DD statement that uses a refer-back
One record for every Common Work Dataset (CWDS) extent
If the JOBQ will reside in the DSN Catalog (the default), add the total number of JOBQ
records to the other DSN Catalog requirements. If the JOBQ will be a separate file, use the
formulas above to determine the space required for a separate JOBQ.
Please see the User Referencefor descriptions of BIM-EPIC DD statements and Common
Work Datasets (CWDS).
Placement
Considerations
A VSE/ESA virtual disk or other high-speed disk is recommended for a separate JOBQ.
Configuration
Options
Specify the DLBL name in the JQNAME configuration option
Formatting the
JOBQ
It is not necessary to format a separate JOBQ. BIM-EPIC formats it at start-up.
2-24
BIM-EPIC Installation and System Guide
Defining the BIM-EPIC Resource Dataset (ERD)
Introduction
Defining the BIM-EPIC Resource Dataset (ERD)
Introduction
Description
An ERD file is required when utilizing an ACL or for sharing tape devices among multiple
VSE machines (physical or virtual).
When utilizing ACL’s or sharing tape device among multiple VSE machines (physical or
virtual), a Unit Control Block (UCB) must be created for each tape device (reel or cartridge
type) that is accessible by BIM-EPIC. UCBs contain device number and attribute information
that BIM-EPIC needs for device allocation and deallocation. They are located in the BIMEPIC Resource Dataset (ERD).
An ERD should not be defined for a single-image system without an ACL device.
The ERD provides a single repository of tape characteristics and ownership information. Only
one ERD is used in a tape-sharing environment. For example, if CPU A, CPU B, and CPU C
are sharing a group of tape devices, only one ERD needs to be created. BIM-EPIC programs
running on these CPUs will all use this ERD.
Space
Requirements
The file can reside on CKD or FBA devices. The size requirements for the ERD are:
Device Type
Size
FBA
224 blocks
CKD
7 tracks
Configuration
Options
The ERDFILE configuration option must be used to identify the DTF name for the ERD.
Formatting the
ERD
The ERD is formatted and maintained using the TSIDSMNT program.
Chapter 2. Installing the Basic System
2-25
The TSIDSMNT Program
Defining the BIM-EPIC Resource Dataset (ERD)
The TSIDSMNT Program
Description
The TSIDSMNT program provides ERD file definition, maintenance and reporting functions.
TSIDSMNT can be executed from an operator console or by using JCL.
Control Statements
TSIDSMNT control statements can begin in any column. Any information after the end of the
parameter list is treated as comments.
Five control statements are used in TSIDSMNT processing.
Control
Statement
2-26
Action
ADD
Adds a UCB definition to the ERD
CTL
Provides the name of the ERD
DEL
Deletes a UCB definition from the ERD
FMT
Creates the ERD
PRT
Prints the ERD
ACLOFFL
Sets all cuu’s in an ACL to “offline” status
ACLONL
Sets all cuu’s in an ACL to “online” status
BIM-EPIC Installation and System Guide
Defining the BIM-EPIC Resource Dataset (ERD)
ACLOFFL
ACLOFFL
Description
The ACLOFFL statement is used to set all cuu’s within an ACL to an “offline” status. They
will remain in this status until an ACLONL statement is processed.
While in this status, the cuu’s will not be available for EPIC processing. This means Mounts,
Set SCRATCH/PRIVATE, EJECT Volume and SYNC commands will not be processed for
this ACL.
Reasons for using this statement include such things as an ACL is down for maintenance or
malfunctioning.
Syntax
ACLOFFL
aclname
Parameters
aclname is the name of this ACL that was used on TSIDSMNT ADD statements.
Chapter 2. Installing the Basic System
2-27
ACLONL
Defining the BIM-EPIC Resource Dataset (ERD)
ACLONL
Description
The ACLONL statement is used to set all cuu’s within an ACL to an “online” status.
This is the usual status and is set whenever BIM-EPIC is initialized. The TSIDSMNT
ACLOFFL statement can be used to remove the ACL from BIM-EPIC access.
Syntax
ACLONL
Parameters
aclname is the name of this ACL that was used on TSIDSMNT ADD statements.
2-28
aclname
BIM-EPIC Installation and System Guide
Defining the BIM-EPIC Resource Dataset (ERD)
ADD
ADD
Description
An ADD control statement is required for each UCB definition that is added to the ERD.
There must be one ERD ADD for each tape cuu ADD in the VSE $IPL PROC. If multiple
VSE images are using the ERD, then all of the VSE ADD statements must be identical. This
is true even if some the devices are not accessible by one or more of the VSE images. The
VSE ADD statements must be in ascending sequence in the $IPL PROC.
Syntax
ADD UCB=cuu,DEV=iplcode[,FEAT=fcode][,ACLNAME=aclname] [,ACLVEND=x]
[,ACLNUM=aclnum]
Parameters
The UCB and DEV parameters are always required. All other parameters are optional.
cuu is the actual device address of the tape media. If sharing this tape media, it must be
known to all sharing systems by this same device address.
iplcode can be any valid tape IPL code, such as 3420, 3480, 3490, or TPA. It must be the
same one used on the VSE ADD statement.
fcode is a 1 to 3-character code that specifies any combination of the following features:
Code
Feature
A
Device has an automatic cartridge loader
D
Dual density device
E
3490E device
I
IDRC-capable device
L
Leveling is used in an IBM ACL
T
“Native” 3590 drive
Do not define VTS 3590’s in the ERD.
Define each VTS-owned 3490E drive with
Feature Code E.
U
Remove Leveling feature from an IBM
ACL
Feature codes D, E, I, T are self-explanatory.
Feature Code A tells BIM-EPIC that the tape device has an automatic cartridge loader. This is
useful in the following scenario: A multi-cartridge input file is being processed, and all of the
input cartridges are stacked in the same cartridge loader. When a cartridge is “closed” a RUN
is issued and BIM-EPIC scans other drives looking for the next input volser. If the volser is
not found and A is not specified for the cuu, an EP001 MOUNT xxxxx message will be
issued. If A is specified, BIM-EPIC will wait until the RUN has completed and the next
Chapter 2. Installing the Basic System
2-29
ADD
Defining the BIM-EPIC Resource Dataset (ERD)
cartridge loaded. If that cartridge is the desired volser, EP001 is not issued, and the job
continues without operator intervention; otherwise EP001 is issued for the volser.
Feature Code L applies to IBM ACL’s only, and specifies that the ACL named in ACLNAME
parameter participates in BIM-EPIC’s ACL Leveling algorithm. If this code is specified for
any CUU in an ACL, then that ACL participates in leveling, i.e. there is no need to specify it
for each CUU in an ACL This Feature Code is only relevant in a multiple ACL environment.
When used, BIM-EPIC will attempt to use each ACL equally for Output mounts. This
equalization/leveling process will be most effective in multiple IBM VTS environments.
Feature Code U applies to IBM ACL’s only, and specifies that the ACL named in
ACLNAME parameter will have its participation in BIM-EPIC’s ACL Leveling algorithm
removed. If this code is specified for any CUU in an ACL, then that ACL will no longer
participate in leveling, i.e. there is no need to specify it for each CUU in an ACL. The code
has no meaning unless Feature Code L has previously been specified for an ACL.
aclname is the name of the Automated Cartridge Library (ACL) associated with this cuu. It
is required when an ADD statement defines an ACL device number (cuu).
For IBM ACLs operating in an LCDD environment, aclname must be the LCDD
LUNAME. For single IBM ACL’s, operating in a VGS environment, it can be any
1-8 character name. If more than one ACL is in the VGS environment, the name
must be the same name used in the VSE Library Name portion of the LIBCONFG
LIST that is defined to VGS for the ACL this UCB is being defined for.
For Memorex ACLs, the aclname must be identical to the 1-8 character name
specified in the ACL device microcode. The LMS “D ALL" command can be used
to display the value for aclname.
For OPTI-TAPE devices, aclname must be OPTITAPE
For STK ACLs, aclname can be any 1-8 character name the user wishes to use.
aclnum is a device number that identifies the Automatic Cartridge Library. It is required for
any ADD statement that defines an ACL device number (cuu).
For IBM ACLs, specify 1 (one). If two or more IBM ACL’s are in use (including
those logically partitioned for VTS use), use 2, 3, ... for the second, third, … ACL.
For Memorex ACLs, the number must be identical to the number specified in the
ACL device microcode. The LMS “D ALL" command can be used to display the
values for aclnum.
For OPTI-TAPE, specify 1 (one).
For STK ACLs, specify 1 (one).
2-30
BIM-EPIC Installation and System Guide
Defining the BIM-EPIC Resource Dataset (ERD)
ADD
aclvend is used if more than one vendor’s ACL is in use (IBM, Memorex, OPTI-TAPE, or
STK). It must not be used if the ACL or ACLs are from the same vendor. x is one of these
values:
I
IBM
M
Memorex
O
OPTI-TAPE
S
STK
Chapter 2. Installing the Basic System
2-31
CTL
Defining the BIM-EPIC Resource Dataset (ERD)
CTL
Description
The CTL control statement is required if TSIDSMNT is run while BIM-EPIC is not active and
an ERD already exists.
The CTL control statement must be first in the input stream. The FMT control statement
cannot be used when CTL is used.
Syntax
CTL [ NAME=dtf-name ]
Parameters
dtf-name is a 1 to 7-character DTF name.
2-32
BIM-EPIC Installation and System Guide
Defining the BIM-EPIC Resource Dataset (ERD)
DEL
DEL
Description
The DEL control statement deletes a UCB definition from the ERD. DEL control statements
can be intermixed with ADD control statements in any sequence.
Changing a UCB
Definition
If it becomes necessary to change an existing UCB definition, do the following:
Syntax
DEL UCB=device-number
Parameters
device-number specifies the address of the device to be deleted.
1.
2.
Delete the existing UCB definition with a DEL statement.
Add a new UCB definition with an ADD statement.
Chapter 2. Installing the Basic System
2-33
FMT
Defining the BIM-EPIC Resource Dataset (ERD)
FMT
Description
The FMT control statement is required to create the ERD. It must be the first statement in the
input stream. Once the ERD is formatted, FMT must not be used again unless the ERD is
being recreated.
Syntax
FMT [NAME=filename]
Parameters
filename is the 1 to 7-character DTF name of the ERD. The default is IJSYSSP.
2-34
BIM-EPIC Installation and System Guide
Defining the BIM-EPIC Resource Dataset (ERD)
PRT
PRT
Description
The PRT control statement prints the contents of the ERD on SYSLST. If used, the PRT
control statement must not precede a FMT or CTL statement in the input stream.
Syntax
PRT
Parameters
There are no parameters for this statement.
Chapter 2. Installing the Basic System
2-35
JCL Examples
Defining the BIM-EPIC Resource Dataset (ERD)
JCL Examples
Example One
A single CPU is being used. There are eight tape devices, numbered 300 to 307. An ERD is
not needed since no device sharing occurs.
Example Two
This example creates the ERD and adds UCB definitions. After the file has been created, the
ERD’s contents are printed on SYSLST.
The tape device environment is as follows:
•
•
•
•
Four 3420 tape devices (300-303), all shared by CPU A and CPU B. Drives have dualdensity capability.
Four 3490E tape devices (400-403) contained within an ACL unit ,all shared by CPU A
and CPU B. The ACL Name is ATLJOE, and the ACL Number is 1.
Two 3480 tape devices (500-501) for use by CPU A only.
Two 3490 tape devices (600-601) for use by CPU B only. Devices have the IDRC
feature.
// JOB ERDCREAT
// DLBL ERDFILE,'EPIC.SHARED.RESOURCES.DATASET',2099/366,SD
// EXTENT SYS040,SYS251,,,5000,15
// ASSGN SYS040,DISK,VOL=SYS251,SHR
// EXEC TSIDSMNT
FMT NAME=ERDFILE
ADD UCB=300,DEV=3420,FEAT=D
ADD UCB=301,DEV=3420,FEAT=D
ADD UCB=302,DEV=3420,FEAT=D
ADD UCB=303,DEV=3420,FEAT=D
ADD UCB=400,DEV=3490,FEAT=E,ACLNAME=ATLJOE,ACLNUM=1
ADD UCB=401,DEV=3490,FEAT=E,ACLNAME=ATLJOE,ACLNUM=1
ADD UCB=402,DEV=3490,FEAT=E,ACLNAME=ATLJOE,ACLNUM=1
ADD UCB=403,DEV=3490,FEAT=E,ACLNAME=ATLJOE,ACLNUM=1
ADD UCB=500,DEV=3480
ADD UCB=501,DEV=3480
ADD UCB=600,DEV=3490,FEAT=I
ADD UCB=601,DEV=3490,FEAT=I
PRT
/*
/&
Even though devices 500-501 and 600-601 are not shared between CPU A and CPU B, they
must still be included in the ERD. If an ERD is used, all tape devices must be described in it,
whether shared or not.
2-36
BIM-EPIC Installation and System Guide
Defining the BIM-EPIC Resource Dataset (ERD)
Example Three
JCL Examples
In this example, the ERD name IJSYSSP was used when the ERD was originally defined.
Two additional tape devices are defined.
// JOB CREATFIL
// EXEC TSIDSMNT
ADD UCB=304,DEV=3420,FEAT=D
ADD UCB=305,DEV=3420,FEAT=D
/*
/&
Example Four
In this example, the ERD name IJSYSSP was not used when the ERD was originally defined.
The name ACFERD was used.
One device (305) is being removed and another device (303) is having the dual density feature
removed. The ERD’s contents are printed after the maintenance has been completed.
// JOB ERDMAINT
// EXEC TSIDSMNT
CTL NAME=ACFERD
DEL UCB=303
ADD UCB=303,DEV=3420
DEL UCB=305
PRT
/*
/&
Example Five
In this example, the label information is not in the Standard Label Area.
// JOB CREATFIL
// DLBL FILE03A,'FILE.FOR.UCB.SHARING'
// EXTENT SYS050,USER01,1,0,3336,6
// ASSGN SYS050,DISK,VOL=USER01,SHR
// EXEC TSIDSMNT
CTL NAME=FILE03A
ADD UCB=300,DEV=3420,FEAT=IED
DEL UCB=402
/*
/&
Example Six
In this example, all cuu’s in an ACL named ACLPROD1 are set to “offline” status.
// JOB OFFLINE
// EXEC TSIDSMNT
ACLOFFL ACLPROD1
/*
/&
Chapter 2. Installing the Basic System
2-37
JCL Examples
Example Seven
Defining the BIM-EPIC Resource Dataset (ERD)
In this example, all cuu’s in an ACL named ACLPROD1 are set to “online” status.
// JOB ONLINE
// EXEC TSIDSMNT
ACLONL ACLPROD1
/*
/&
Example Eight
In this example, ACLs are present from IBM and STK.
// JOB ONLINE
// EXEC TSIDSMNT
…
…
ADD UCB=400,DEV=3490,FEAT=E,ACLNAME=ATLJOE,ACLNUM=1,ACLVEND=I
ADD UCB=401,DEV=3490,FEAT=E,ACLNAME=ATLJOE,ACLNUM=1,ACLVEND=I
…
ADD UCB=600,DEV=3490,FEAT=E,ACLNAME=ATLJIM,ACLNUM=1,ACLVEND=S
ADD UCB=601,DEV=3490,FEAT=E,ACLNAME=ATLJIM,ACLNUM=1,ACLVEND=S
…
/*
/&
2-38
BIM-EPIC Installation and System Guide
Defining the BIM-EPIC Environment
Creating the TSIDPOL Phase
Defining the BIM-EPIC Environment
Creating the TSIDPOL Phase
Description
The TSIDPOL phase is required to enable BIM-EPIC’s disk management services and also if
you want to use the tape pooling facility.
To create the TSIDPOL phase, you must assemble and link the TSIDPOL and TSIDMAP
macros. This is accomplished through six separate tasks in this installation procedure:
•
•
•
•
•
•
Designing disk pools
Creating disk pool statements
Designing tape pools
Creating tape pool statements
Specifying the TSIDMAP macro
Assembling the macros and cataloging the TSIDPOL phase
A sample job stream to assemble and catalog the TSIDPOL phase can be found on page 2-50
and also as member TSIDPOL.Z in the BIM-EPIC installation sublibrary.
WARNING!
If you are upgrading from an earlier release of BIM-EPIC, you must reassemble the
TSIDPOL phase.
Activating a New
TSIDPOL Phase
You can change the options you specify in the TSIDPOL and TSIDMAP macros at any time.
However, since TSIDPOL resides in the SVA, activating a new pool definition while BIMEPIC is active requires the following procedure:
Step
Example
Action
1
Turn BIM-EPIC off.
2
Execute a SET SDL in the BG partition to reload the new TSIDPOL phase into the
SVA.
3
Turn BIM-EPIC back on again.
// JOB ACTIVATE NEW TSIDPOL
// EXEC TSIDOFF
SET SDL
TSIDPOL,SVA
/*
// EXEC PROC=EPICON
/&
Chapter 2. Installing the Basic System
2-39
Designing Disk Pools
Defining the BIM-EPIC Environment
Designing Disk Pools
Description
The TSIDPOL macro defines each disk pool. As you design your disk pools, keep the
following in mind:
•
•
•
•
•
•
•
•
•
•
•
•
•
2-40
Each disk dataset must be assigned to a pool.
Uncontrolled datasets are allowed in pool areas.
You can define as many disk pools as you wish.
Choose disk volumes that have the most contiguous free space for your initial pool(s).
You can use a whole volume or only a partial volume in a pool. However, you can only
define one volume area per pool. If you wish, you can divide the volume into multiple
pools.
Each pool can contain multiple volumes. If you plan to use Start Track 1 datasets,
remember that BIM-EPIC must search the VTOC to find the dataset’s extents. If you
have multiple volumes in the pool, BIM-EPIC searches each volume’s VTOC in
sequence until it finds the first extent. To improve performance, keep the number of
volumes small for pools which will contain Start Track 1 datasets.
Do not mix device types in a pool. Although BIM-EPIC allows you to do so, VSE does
not support it.
Do not mix disk devices of the same type but different capacities in the same pool. For
example, do not put 3380 single, dual and triple-density volumes (or any combination of
these) in the same pool. If a pool is to contain VM mini-disks, all the disks in the pool
must be of the same size. If you do not observe this rule, you may find that VSE is
unable to process some multi-extent files.
Leveling is activated by pool.
Disk pools can be shared by any number of partitions or CPUs.
Disk pools can also be shared between multiple real and virtual VSE machines if you
define a VSE LOCK file and add the volumes to VSE as SHR. See 2-68 for details.
If you share your DSN Catalog between machines, you must also share the volumes in
your disk pools between your VSE machines. However, you are not required to share
your pools. You can create a separate TSIDPOL phase for any machine. Simply place
the TSIDPOL phase in a library which is searched before the library in which you have
installed BIM-EPIC.
You can deactiavte a specific volume in a pool at any time by using the OFFLINE
function of TSIDMNT. If a pool volume is in VSE’s “device down” (DVCDN) status,
you must place it offline to BIM-EPIC. You can reserve a volume for future use as a
BIM-EPIC pool volume. To do this, define the volume in the TSIDPOL macro and
place it offline. BIM-EPIC ignores the volume until you place it online again with the
ONLINE function of TSIDMNT.
BIM-EPIC Installation and System Guide
Defining the BIM-EPIC Environment
Procedure
Step
Designing Disk Pools
Action
1
Obtain a VTOC listing of all potential pool volumes. For each pool, perform the
steps below.
2
Choose the pool name and write it on the Disk Pool Worksheet. Pools are
referenced by six-character names. Use a real volume serial number or any other
six-character name for a disk pool.
Write “alias” pool names on the worksheet. Using aliases helps to avoid JCL
changes. Existing JCL can reference real disk volume serial numbers, and BIMEPIC considers those references to be pool names. By making each volume serial
number an alias for the pool that contains the actual volume, the JCL will
automatically refer to the correct pool. An alias can also be used to easily change
a pool name once it has become established in the system.
3
Choose the disk volumes for the pool and write each volume serial number on the
worksheet.
4
When you cannot use an entire volume in a pool area, write the starting and ending
address of the space to use next to the volume serial number on the worksheet.
Remember that a specific volume can be defined only once in a given pool. If you
want to pool multiple areas on a volume, you must place each area on that volume
in a separate pool.
Chapter 2. Installing the Basic System
2-41
Creating Disk Pool Statements
Defining the BIM-EPIC Environment
Creating Disk Pool Statements
Description
Disk pools can be defined using the following syntax. A separate TSIDPOL statement is
required for each disk pool.
Syntax for Disk
Pools
[poolname] TSIDPOL (volser1[,start1][,end1][,vol-restriction])
[,(volser2[,start2][,end2][,vol-restriction])]
[,LEVEL=YES|NO]
[,POLNAME=numeric-poolname]
You can also define pool name aliases if you wish, as shown below.
Syntax for Alias
Pool Names
Parameters
alias-name TSIDPOL EQU=poolname
Parameter
Required?
Values
Default
poolname
For alpha
6 characters
None
volser
Yes
6 characters
None
start
No
valid address
None
end
No
valid address
None
vol-restriction
No
QUIESCE or OFFLINE
None
LEVEL
No
YES or NO
NO
6 digits
None
numeric-poolname
alias-name
For numeric
For alias
6 characters
poolname specifies an alphanumeric pool name. For numeric pool names, use the
POLNAME parameter instead.
volser specifies the six-character serial number of a real disk volume. The remaining
parameters are optional but positional, so if one is skipped, its comma must be specified; only
trailing commas can be omitted. The parameters for each disk volume must be enclosed in a
set of parentheses. You can specify the same volume serial number only once per pool. You
can specify as many volsers as you like on a single statement, subject to the VSE Assembler
rules for macros.
start specifies track or block where the pool area begins. If omitted, the pool area begins at
the lowest address on the volume.
end specifies the track or block where the pool area ends. If omitted, the pool area ends at
the highest address on the volume.
2-42
BIM-EPIC Installation and System Guide
Defining the BIM-EPIC Environment
Creating Disk Pool Statements
If start and end track or block addresses are not specified, they will appear as 0 and 15728641
on the TAID transaction’s pool display panel and on the TSIDDEB Summary Report until the
first allocation occurs on the volume after an IPL. The first allocation forces BIM-EPIC to
read the volume’s VTOC and set the start and end track or block addresses based on the
volume’s actual capacity.
vol-restriction can be used to place the volume in QUIESCE or OFFLINE status. If
QUIESCE is specified, BIM-EPIC will provide access to existing files on this volume but will
not allocate any new files to the volume. If OFFLINE is specified, BIM-EPIC will not
provide access to any files on this volume. You can also place a volume in QUIESCE or
OFFLINE status with TSIDMNT or Online Manager. Volumes can be placed online again
using the ONLINE function.
LEVEL specifies whether leveling is active for the pool.
POLNAME=numeric-poolname must be used to specify a pool name such as 111111. If
you use POLNAME=numeric-poolname, do not specify the poolname label before
TSIDPOL.
alias-name is used to specify an alias name for a pool.
Examples
The following example specifies that the areas from tracks 1 through 5000 on volume
SYSWK2, and from tracks 1 through 9500 on SYSWK3 will make up the pool known as
POOL01.
POOL01 TSIDPOL (SYSWK2,1,5000),(SYSWK3,1,9500),LEVEL=YES
The following example specifies that all space from track 1000 through the end of the volume
on volume WORK09, all space on volume WORK10, and all space on volume WORK11 will
make up the pool known as POOL02.
POOL02 TSIDPOL (WORK09,1000),(WORK10),(WORK11),LEVEL=YES
The following example defines alias names for POOL02 so that JCL references to POOL02
can be made with these names. By choosing pool aliases that are the same as the volsers used
to define POOL02, JCL that used to reference volsers can now reference entire pools.
WORK09 TSIDPOL EQU=POOL02
WORK10 TSIDPOL EQU=POOL02
WORK11 TSIDPOL EQU=POOL02
Chapter 2. Installing the Basic System
2-43
Designing Tape Pools
Defining the BIM-EPIC Environment
Designing Tape Pools
Description
Tape pooling is a useful feature designed to enable additional control of tape libraries. Using
tape pooling, a dataset can be restricted to a particular set of tapes. For example, the dataset
‘BACKUP.TAPE’ could be limited to volume serial numbers within the range 990000 to
999000. Some reasons for using this extra form of control include:
•
•
•
•
Restricting datasets to tapes of a specific size
Reserving volumes for backup use
Reserving volumes for offsite shipment
Reserving volumes for unlabeled files
When a tape pool is specified as part of a dataset definition, BIM-EPIC only allows output for
that dataset on tapes in the specified pool. Conversely, when a dataset is defined without a
tape pool, BIM-EPIC prevents output for that dataset on all pool tapes.
Configuration
Options
Tape pooling requires the use of the TAPPOL configuration option. See 5-25 for more
information.
Rules for Tape
Pools
As you design your tape pools, keep the following in mind.
•
Tape pools are optional. Datasets assigned to a tape pool can only be created on tape
volumes that belong to that pool. Datasets not assigned to a pool can only be created on
tape volumes that do not belong to any pool.
Up to 36 tape pools are allowed. A tape pool is identified by a single alphanumeric
character (A-Z or 0-9).
A tape pool is defined with volume serial number ranges which can be alphanumeric. A
single pool can contain multiple volume serial number ranges.
If ACL’s are supported, one or more BIM-EPIC tape pools can be defined for ACLresident tape volumes. See Chapter 5 discussion for your vendors ACL support.
•
•
•
Procedure
2-44
Step
Action
1
Write the name of each tape pool on the Tape Pool Worksheet.
2
Write the low and high volume serial numbers for each range of each pool.
BIM-EPIC Installation and System Guide
Defining the BIM-EPIC Environment
Creating Tape Pool Statements
Creating Tape Pool Statements
Description
Tape pools are defined using the TSIDPOL macro.
All tape pools which will be active concurrently must be specified on the same TSIDPOL
macro. Each TSIDPOL macro defines a tape pool group. When BIM-EPIC is started, only
one tape group can be active; all others are ignored.
When you assemble the TSIDPOL phase, tape pool statement(s) must be placed after all disk
pool statements.
Syntax
Parameters
tappol TSIDPOL (poolname,low-volser,high-volser[,aclname]),TAPE=YES
Parameter
Required?
Values
Default
tappol
Yes
6 characters
None
poolname
Yes
1 character
None
low-volser
Yes
6 characters
None
high-volser
Yes
6 characters
None
aclname
No
1-8 characters
None
tappol specifies a group name to identify the tape pools on the TSIDPOL macro. Write this
name as the TAPPOL configuration option on the worksheet.
poolname specifies the name of the tape pool. Valid tape pool names are one character: AZ or 0-9. Repeat this name with each range if the pool has multiple ranges.
low-volser specifies the lowest volume serial number in the range.
high-volser specifies the highest volume serial number in the range.
aclname is the name of the ACL that will have tapes in this pool range. It must be the same
name used in the EPIC Resource Dataset (ERD) ADD statement. Before using this parameter,
be sure to read the information in the Tape Pools and ACL’s portion of BIM-EPIC ACL
SUPPORT topic in this manual.
TAPE=YES is required to distinguish tape pools from disk pools. It is specified only once.
Examples
The following example specifies that tape volumes 005000 through 005500 belong to tape
pool W.
POOLW
TSIDPOL (W,005000,005500),TAPE=YES
The following example specifies that tape volumes PR0001 through PR9999, and PY0001
through PY0200, belong to tape pool P.
Chapter 2. Installing the Basic System
2-45
Creating Tape Pool Statements
POOLP
Defining the BIM-EPIC Environment
TSIDPOL
(P,PR0001,PR9999),(P,PY0001,PY0200),TAPE=YES
The following example specifies that the tape volumes 010000 through 019999 belong to tape
pool K, and tape volumes 020000 through 029999 belong to tape pool L. Tape pools K and L
belong to tape pool group POOL2.
POOL2
TSIDPOL (K,010000,019999),(L,020000,029999),TAPE=YES
The following example specifies that tape volumes SR1234 through SR9999 belong to tape
pool C and reside in ACL B1VTS, that tape volumes JC4455 through JC5599 belong to tape
pool F and reside in ACL B2VTS, and that tape volumes PR0001 through PR9999 belong to
tape pool P and do not reside in an ACL.
POOLX
2-46
TSIDPOL (C,SR1234,SR9999,B1VTS),(F,JC4455,JC5599,B2VTS),(P,PR0001,PR9999)
BIM-EPIC Installation and System Guide
Defining the BIM-EPIC Environment
Specifying the TSIDMAP Macro
Specifying the TSIDMAP Macro
Description
The TSIDMAP macro is always required when specifying pools. It specifies:
•
•
•
•
DTF names that must be uncontrolled (ignored by BIM-EPIC)
DTF names for which LUB allocation must be inhibited
Programs for which LUB allocation must be inhibited (this affects every dataset the
program opens)
The size of the work area to be used to map disk devices.
See Chapter 1 of the BIM-EPIC User Reference for an explanation of BIM-EPIC LUB
allocation.
Syntax
Parameters
TSIDMAP [ nnn ]
,ILIST=(dtfname,dtfname,...)
,NLUBDTF=(dtfname,dtfname,...)
,NLUBPGM=(program,program,...)
,RBLKPGM=(program,program,...)
,END=YES
Parameter
Required?
Values
Default
nnn
No
300-32767
300
ILIST
No
1 to 7 characters
None
NLUBDTF
No
1 to 7 characters
None
NLUBPGM
No
1 to 8 characters
None
RBLKPGM
No
1 to 8 characters
None
END
Yes
YES
None
nnn indicates the maximum number of unexpired extents to support on any controlled disk
volume in any defined pool. BIM-EPIC uses this number to reserve space in the VSE
Partition GETVIS area for the map table it uses to allocate disk datasets. If the map table
capacity is exceeded during allocation processing, BIM-EPIC cancels the job.
The number you specify should be at least 300. Generally, a map specification of 800 is
sufficient for large devices (for instance, FBA or 3380). However, because 255 extents per
file are supported, underallocated files that are allowed to fragment could easily fill an
inadequate map table capacity. So be generous! If you use more than one TSIDMAP macro
statement, specify this parameter only on the first one.
For ILIST, NLUBDTF, and NLUBPGM: You can specify up to 31 items per parameter. Use
multiple TSIDMAP statements if you want to specify more than 31 items. These parameters
are mutually exclusive. Use separate TSIDMAP macro statements to specify each one.
Chapter 2. Installing the Basic System
2-47
Specifying the TSIDMAP Macro
Defining the BIM-EPIC Environment
ILIST specifies the DTF names that BIM-EPIC should ignore. Datasets processed with these
DTF names are uncontrolled. This list should include the names of the BIM-EPIC system
files, including the DSN Catalog(s) (default IJSYSDS) and the Recorder File (IJSYSDR), and
VSE system files, such as IJSYSRS, IJSYSRC, and the names of POWER files such as
IJQFILE and IJDFILE, and names of MSHP History Files.
NLUBDTF specifies DTF names for which LUB allocation is to be inhibited. BIM-EPIC
automatically inhibits LUB allocation for the following DTF names:
•
•
•
•
•
UIN
UOUT
IJSYSxx
SYS000
SORTxxx (unless TSIDSRT is executed inplace of SORT)
NLUBPGM specifies program names for which LUB allocation is to be inhibited. We
suggest that you specify programs known to use physical IOCS (PIOCS).
RBLKPGM specifies the names of programs that reblock files using an undefined record
format.
END=YES must be specified on the last TSIDMAP macro statement.
Procedure
Step
Action
1
Decide which DTF names should not be controlled by BIM-EPIC. Write them on
the TSIDMAP worksheet.
2
Decide which DTF names and programs should not use BIM-EPIC’s LUB
allocation. Write them on the TSIDMAP worksheet.
3
Specify your TSIDMAP macro statements using the format above.
Place TSIDMAP statements after all TSIDPOL statements. You must use at least one
TSIDPOL statement.
Assembling the
Macros
The TSIDPOL and TSIDMAP macros must be assembled and linked together to create the
TSIDPOL phase. If you will be using BIM-EPIC only for tape management, and you will not
be using tape pools, the TSIDPOL phase is not required.
TSIDPOL must reside in the SVA.
2-48
BIM-EPIC Installation and System Guide
Defining the BIM-EPIC Environment
Activating a New
TSIDPOL Phase
You can change the options you specify in the TSIDPOL and TSIDMAP macros at any time.
However, since TSIDPOL resides in the SVA, activating a new pool definition while BIMEPIC is active requires the following procedure:
Step
Example
Specifying the TSIDMAP Macro
Action
4
Turn BIM-EPIC off.
5
Execute a SET SDL in the BG partition to reload the new TSIDPOL phase into the
SVA.
6
Turn BIM-EPIC back on again.
// JOB ACTIVATE NEW TSIDPOL
// EXEC TSIDOFF
SET SDL
TSIDPOL,SVA
/*
// EXEC PROC=EPICON
/&
Chapter 2. Installing the Basic System
2-49
Specifying the TSIDMAP Macro
TSIDPOL Example
2-50
Defining the BIM-EPIC Environment
* $$ JOB JNM=TSIDPOL,LDEST=(,USERID)
// JOB TSIDPOL
*
* THIS IS SAMPLE JCL TO ASSEMBLE THE TSIDPOL AND TSIDMAP MACROS FOR
* CATALOGING TO THE BIM-EPIC SUBLIBRARY AS THE TSIDPOL PHASE. MODIFY
* THE EXAMPLE TO SUIT YOUR INSTALLATIONS REQUIREMENTS. CONSULT THE
* BIMEPIC INSTALLATION AND SYSTEM GUIDE FOR AN EXPLANATION OF ALL THE
* PARAMETERS FOR THESEMACROS. VALUES SURROUNDED BY ASTERISKS NEED TO
* BE MODIFIED.
*
// LIBDEF PHASE,CATALOG=*LIB.SUBLIB*
EPIC INSTALL LIBRARY
// LIBDEF *,SEARCH=*LIB.SUBLIB*
EPIC INSTALL LIBRARY
// OPTION CATAL
// EXEC ASSEMBLY
***********************************************************************
* POOL01 CONTAINS ALL OF VOLUMES *VOL1* AND *VOL2*
*
***********************************************************************
POOL01
TSIDPOL (*VOL1*),(*VOL2*)
***********************************************************************
* POOL02 IS THE SAME AS POOL01. THEREFORE, THE POOL01 AND POOL02
*
* NAMES MAY BE USED INTERCHANGEABLY AS POOL NAMES.
*
***********************************************************************
POOL02
TSIDPOL EQU=POOL01
***********************************************************************
* POOL03 CONTAINS *VOL1* FROM TRACK 15 TO 13274 AND *VOL2* FROM
*
* TRACK 15 TO 13274. LEVELING WILL BE PERFORMED ON POOL03.
*
***********************************************************************
POOL03
TSIDPOL (*VOL1*,00015,13274),
X
(*VOL2*,00015,13274),
X
LEVEL=YES
***********************************************************************
* POOL04 CONTAINS *VOL3* FROM TRACK 30 TO 16619 AND *VOL4* FROM
*
* TRACK 30 TO 16619. LEVELING WILL BE PERFORMED ON POOL03.
*
***********************************************************************
POOL04
TSIDPOL (*VOL3*,00030,16619),
X
(*VOL4*,00030,16619),
X
LEVEL=YES
***********************************************************************
* POOL05 IS THE SAME AS POOL04. THEREFORE, THE POOL04 AND POOL05
*
* NAMES MAY BE USED INTERCHANGEABLY AS POOL NAMES.
*
***********************************************************************
POOL05
TSIDPOL EQU=POOL04
***********************************************************************
* *VOL1* IS DEFINED AS A SINGLE PACK POOL USING ALL AVAILABLE SPACE *
* FROM THE FIRST TO THE LAST TRACK (OR BLOCK.)
*
***********************************************************************
*VOL1*
TSIDPOL (*VOL1*)
***********************************************************************
* TAPPOL SPECIFIED THAT ANY TAPE DATASET CATALOGED WITH TPL=A CAN
*
* ONLY VOLSERS IN THE RANGE 990000 THROUGH 990100 INCLUSIVE.
*
***********************************************************************
TAPPOL
TSIDPOL (A,990000,990100),TAPE=YES
***********************************************************************
* CONSULT THE EPIC/VSE INSTALLATION AND MAINTENANCE GUIDE FOR
*
* EXPLANATIONS OF THE TSIDMAP PARAMETERS.
*
***********************************************************************
TSIDMAP *400*
TSIDMAP ILIST=(*ENTRY1*,*ENTRY2*,...)
TSIDMAP ILIST=(*ENTRYA*,*ENTRYB*,...)
TSIDMAP NLUBPGM=(*PROGX*)
TSIDMAP NLUBDTF=(*NLUBDTF*,*NLUBTAP*)
TSIDMAP END=YES
BIM-EPIC Installation and System Guide
Defining the BIM-EPIC Environment
Specifying the TSIDMAP Macro
END
/*
// EXEC LNKEDT
/&
* $$ EOJ
Chapter 2. Installing the Basic System
2-51
Introduction
Quick DASD Allocation System (QDAS)
Quick DASD Allocation System (QDAS)
Introduction
Description
The BIM-EPIC Quick DASD Allocation System (QDAS) maps disk space usage in virtual
storage to drastically decrease the number of I/O operations required to allocate an output disk
extent, thus improving your system's performance. Because of the potential performance
advantage, we recommend that you activate QDAS in all your VSE machines in which BIMEPIC will be used.
Only disk volumes that are defined to BIM-EPIC pools can realize a performance
improvement when defined to QDAS.
See Chapter 1 of the BIM-EPIC User Reference for more information about QDAS.
Sharing Disk
Volumes
If your disk volumes are available to multiple VSE machines, you must:
WARNING!
Failure to meet either of the requirements above can result in disk dataset corruption.
2-52
•
•
Create a QDAS Share File for each shared volume.
Activate QDAS in every machine that shares the volume.
BIM-EPIC Installation and System Guide
Quick DASD Allocation System (QDAS)
Creating QDAS Share Files
Creating QDAS Share Files
Description
The Share File allows QDAS to access and update its space usage map from multiple
machines. A Share File is required for each volume that has been defined to QDAS and is
accessed by more than one machine. TSIVCLR initializes the Share Files. Sample JCL can
be found in the BIM-EPIC installation sublibrary as TSIVCLR.Z.
The name of each Share File in a VTOC is volid.QDAS.RELx.SHARE.FILE where volid is
the volume serial number of the QDAS-controlled volume. The Share File is given an
expiration date of 2099/366 (permanent retention).
Initialize a Share File for each shared volume with the TSIVCLR utility, as shown below.
// DLBL TSIVFLE,'volid.REL4.SHARE.FILE'
// EXTENT SYSnnn,volid,1,0,n,1
// ASSGN SYSnnn,DISK,VOL=volid,SHR
// EXEC TSIVCLR
MAP=nnnnn
/*
You must define the QDAS Share File with a DLBL statement, using the DTF name
TSIVFLE. You can specify any dataset name; TSIVCLR assigns the actual name in the
format shown above.
Use standard complete EXTENT and ASSGN statements to complete the definition of
TSIVFLE.
DASD Space Requirement for the File
CKD
FBA
1 track
96 blocks
To minimize arm movement, we recommend that the file be created close to the VTOC.
WARNING!
Failing to create a QDAS Share File on a shared volume may result in disk dataset
corruption on that volume.
BIM-EPIC Release 6.3 allows MAP= values greater than the previous maximum of 2044.
QDAS Share Files created prior to the 6.3 release can be used by 6.3, and QDAS Share Files
created under Release 6.3 can be shared between CPU’s using 6.3 and CPU’s using earlier
releases as long as a Share File created under Release 6.3 does not have a MAP= value
larger than 2044. If a QDAS Share File is created under Release 6.3 with a MAP= value
larger than 2044, that file and the DASD it controls CANNOT be shared with BIM-EPIC
releases prior to Release 6.3. File and VTOC corruption are guaranteed if this rule is not
observed.
Control Statements
The required MAP control statement specifies the number of VTOC entries (active extents)
that the QDAS Share File supports. Its value must not be less than the value of the TSIVDEF
MAP parameter for the same volume (see below).
Chapter 2. Installing the Basic System
2-53
Creating QDAS Share Files
Syntax
MAP Parameter
Quick DASD Allocation System (QDAS)
MAP=nnnn
Parameter
Required?
Values
Default
MAP
Yes
1- nnnn
None
nnnn – maximum number of MAP entries. Maximum depends on DASD device type.
DASD
3380
3390
9345
FBA
Maximum
5932
7081
5805
4094
SVA Usage
QDAS mapping information is kept in 31 bit System GETVIS. To calculate the amount
required, refer to the Determining Space Requirements section of the manual.
Example
In the example below, TSIVCLR creates a Share File on SYS2A1 at track 30 with the dataset
name SYS2A1.QDAS.RELx.SHARE.FILE which supports 300 extents.
// JOB TSIVCLR
// DLBL TSIVFLE,'QDAS.SHARE.FILE'
// EXTENT SYS040,SYS2A1,1,0,30,1
// ASSGN SYS040,DISK,VOL=SYS2A1,SHR
// EXEC TSIVCLR
MAP=300
/&
2-54
BIM-EPIC Installation and System Guide
Quick DASD Allocation System (QDAS)
Defining Disk Volumes to QDAS (TSIVDEF)
Defining Disk Volumes to QDAS (TSIVDEF)
Description
You define volumes to QDAS with the TSIVDEF macro. Sample JCL can be found on page
2-56 and as the TSIVDEF.Z member in the BIM-EPIC installation sublibrary.
NO
NO
TSIVDEF VOL=volser,MAP=n,SHARE={ YES} ,LAST={ YES}
Syntax
Parameters
Parameter
Required?
Values
Default
VOL
Yes
6 characters
None
MAP
Yes
1-32767 (7081 or smaller if
shared. Refer to DASD
types, above)
None
SHARE
No
NO or YES
NO
LAST
No
NO or YES
NO
VOL specifies the volume serial number of the disk volume to be placed under QDAS control.
MAP specifies the maximum number of extents (not files) to support on the disk volume being
defined. If the number of extents on the volume ever exceeds the number you specify here,
QDAS issues an error message, and the volume is removed from QDAS control.
SHARE indicates whether this volume is to be shared by multiple VSE machines. If YES,
you must create the QDAS Share File for the volume (see above), and all machines accessing
the volume must use QDAS.
LAST indicates whether this is the last volume to be defined to QDAS. Specify LAST=YES
on the statement that defines the last volume.
WARNING!
When SHARE=YES, the TSIVDEF MAP value must not be greater than the TSIVCLR MAP
value for the same volume. In addition, the TSIVDEF MAP value for any QDAS-controlled
volume must not be greater than the TSIDMAP value in the TSIDPOL disk pool definition
phase. See 2-47 in this manual for more information.
If Share Files created under BIM-EPIC Release 6.3 are to be shared with VSE CPU’s that
use BIM-EPIC 6.2 or earlier, refer to the WARNINGS in the “Creating QDAS Share Files”
section, above
Chapter 2. Installing the Basic System
2-55
Defining Disk Volumes to QDAS (TSIVDEF)
TSIVDEF Example
2-56
Quick DASD Allocation System (QDAS)
* $$ JOB JNM=TSIVDEF,LDEST=(,USERID)
// JOB TSIVDEF
*
* THIS IS SAMPLE JCL TO ASSEMBLE THE TSIVDEF MACROS FOR CATALOGING TO
* THE BIM-EPIC SUBLIBRARY AS THE TSIVDEF PHASE. MODIFY THE EXAMPLE TO
* SUIT YOUR INSTALLATIONS REQUIREMENTS. CONSULT THE BIM-EPIC
* INSTALLATION AND SYSTEM GUIDE FOR AN EXPLANATION OF ALL THE
* PARAMETERS FOR THESE MACROS. VALUES SURROUNDED BY ASTERISKS NEED TO
* BE MODIFIED.
*
// LIBDEF PHASE,CATALOG=*LIB.SUBLIB*
EPIC INSTALL LIBRARY
// LIBDEF *,SEARCH=*LIB.SUBLIB*
EPIC INSTALL LIBRARY
// OPTION CATAL
// EXEC ASSEMBLY
***********************************************************************
* VOL=
- THE VOLUME TO BE DEFINED
*
* MAP=
- THE MAXIMUM NUMBER OF EXTENTS ALLOWED ON THE VOLUME
*
* SHARE= - IS THIS VOLUME SHARED? IF SO, BE SURE TO RUN TSIVCLR
*
*
TO CREATE THE 'QDAS.SHARE.FILE' ON THE VOLUME.
*
* LAST= - IS THIS THE LAST VOLUME TO BE DEFINED TO QDAS?
*
***********************************************************************
TSIVDEF VOL=*VOL1*,MAP=*400*,SHARE=YES
TSIVDEF VOL=*VOL2*,MAP=*400*,SHARE=YES
TSIVDEF VOL=*VOL3*,MAP=*400*,SHARE=YES
TSIVDEF VOL=*VOL4*,MAP=*400*,SHARE=YES
TSIVDEF VOL=*VOL5*,MAP=*400*,SHARE=YES,LAST=YES
END
/*
// EXEC LNKEDT
/&
* $$ EOJ
BIM-EPIC Installation and System Guide
Updating the ASI Procedure
Partition Updates
Updating the ASI Procedure
This section describes several changes that need to be made to your ASI procedure. After you
have made these changes, recatalog your ASI procedure.
Partition Updates
Description
Permanent assignments for SYSLNK and SYS001-SYS007 must point to one of the volumes
in the disk pool used for compiler and SORTWK areas. These assignments are designed to
satisfy the pre-open requirements for the compilers and SORTWK packages. Use the
EPICPAGN.Z sample JCL to aid in accomplishing this requirement.
In addition, the lib.sublib where BIM-EPIC is installed must be added to the LIBDEF search
chain.
Chapter 2. Installing the Basic System
2-57
Modifying Standard Labels
Updating the ASI Procedure
Modifying Standard Labels
Description
Define your compiler and sort work areas using BIM-EPIC's Common Work Dataset (CWDS)
feature (see Chapter 7 in the User Reference). The EPICCWDS.Z sample JCL can be used for
this purpose.
You must add labels for the DSN Catalog, Recorder File, BIM-EPIC Resource Dataset (if
used), and separate JOBQ (if used) to the VSE Standard Label Area. We also strongly
recommend that you also add labels for your compiler and sort work areas.
Procedure
Step
Action
1
Locate your STDLABEL procedure.
2
Create a DLBL and EXTENT for the DSN Catalog, Recorder File, separate JOBQ
(if used), BIM-EPIC Resource Dataset (if used), and for your compiler and sort
work areas. The EPICSTDL.Z sample JCL member contains sample standard
labels for these files.
For the DSN Catalog, Recorder File, BIM-EPIC Resource Dataset (if used), and
separate JOBQ (if used), specify the disk volume serial number but omit the SYS
number. Use the same dataset names for the DSN Catalog, Recorder File, BIMEPIC Resource Dataset (if used), and those used when these files were created.
DTF Names
The default DTF name for the DSN Catalog is IJSYSDS. If necessary, you can change this
by using the DSNAME configuration option.
The DTF name for the Recorder File must be IJSYSDR.
There is no default DTF name for the separate JOBQ file. The JQNAME configuration
option must be used to specify one. We suggest using IJSYSJQ as the DTF name for the
separate JOBQ file.
There is no default DTF name for the BIM-EPIC Resource Dataset. The ERDFILE
configuration option must be used to specify one. We recommend using IJSYSSP (the
TSIDSMNT default).
Always record any DTF name changes on the Configuration Options Worksheet.
Work Files
2-58
Provide “short” EXTENT statements for all compiler work files and SORTWK files.
BIM-EPIC Installation and System Guide
Updating the ASI Procedure
Modifying Standard Labels
CKD Example
//
//
//
//
//
//
//
//
//
//
//
//
//
//
//
//
//
//
//
//
//
//
//
//
//
//
//
OPTION STDLABEL
DLBL IJSYSDS,'EPIC.VSE.CATALOG',2099/366
EXTENT ,TSI150,1,0,3750,90
DLBL IJSYSDR,'EPIC.VSE.RECORDER',2099/366
EXTENT ,TSI158,1,0,3900,57
DLBL IJSYSSP,’EPIC.RESOURCE.DATASET’,2099/366
EXTENT ,TSI161,1,0,3840,10
DLBL IJSYSJQ,'EPIC.VSE.JOBQ',2099/366
EXTENT ,TST160,1,0,1300,5
DLBL IJSYSLN,'$$$.IJSYSLN'
EXTENT SYSLNK
DLBL IJSYS01,'$$$.IJSYS01'
EXTENT SYS001
DLBL IJSYS02,'$$$.IJSYS02'
EXTENT SYS002
DLBL IJSYS03,'$$$.IJSYS03'
EXTENT SYS003
DLBL IJSYS04,'$$$.IJSYS04'
EXTENT SYS004
DLBL IJSYS05,'$$$.IJSYS05'
EXTENT SYS005
DLBL IJSYS06,'$$$.IJSYS06'
EXTENT SYS006
DLBL IJSYS07,'$$$.IJSYS07'
EXTENT SYS007
DLBL SORTWK1,'$$$.SORTWK1,(D)'
EXTENT SYS001
FBA Example
//
//
//
//
//
//
//
//
//
//
//
//
//
//
//
//
//
//
//
//
//
//
//
//
//
//
//
OPTION STDLABEL
DLBL IJSYSDS,'EPIC.VSE.CATALOG',2099/366,,CISIZE=4096
EXTENT ,TSI150,1,0,3750,1024
DLBL IJSYSDR,'EPIC.VSE.RECORDER',2099/366,,CISIZE=2048
EXTENT ,TSI158,1,0,3900,1024
DLBL IJSYSSP,’EPIC.RESOURCE.DATASET’,2099/366
EXTENT ,TSI161,1,0,3840,96
DLBL IJSYSJQ,'EPIC.VSE.JOBQ',2099/366,,CISIZE=2048
EXTENT ,TST160,1,0,1300,96
DLBL IJSYSLN,'$$$.IJSYSLN'
EXTENT SYSLNK
DLBL IJSYS01,'$$$.IJSYS01'
EXTENT SYS001
DLBL IJSYS02,'$$$.IJSYS02'
EXTENT SYS002
DLBL IJSYS03,'$$$.IJSYS03'
EXTENT SYS003
DLBL IJSYS04,'$$$.IJSYS04'
EXTENT SYS004
DLBL IJSYS05,'$$$.IJSYS05'
EXTENT SYS005
DLBL IJSYS06,'$$$.IJSYS06'
EXTENT SYS006
DLBL IJSYS07,'$$$.IJSYS07'
EXTENT SYS007
DLBL SORTWK1,'$$$.SORTWK1,(D)'
EXTENT SYS001
Chapter 2. Installing the Basic System
2-59
Modifying Standard Labels
Updating the ASI Procedure
Step 3
Define the work files to the DSN Catalog using TSIDMNT or Online Manager (see Chapters
2 and 3 of the User Reference).
Example
// EXEC TSIDMNT
CAT '$$$.IJSYSLN',WRK=YES,POL=POOL01,EXT=200
CAT '$$$.IJSYS01',WRK=YES,POL=POOL01,EXT=200,SYS001
CAT '$$$.IJSYS02',WRK=YES,POL=POOL01,EXT=200,SYS002
CAT '$$$.IJSYS03',WRK=YES,POL=POOL01,EXT=200,SYS003
CAT '$$$.IJSYS04',WRK=YES,POL=POOL01,EXT=200,SYS004
CAT '$$$.IJSYS05',WRK=YES,POL=POOL01,EXT=200,SYS005
CAT '$$$.IJSYS06',WRK=YES,POL=POOL01,EXT=200,SYS006
CAT '$$$.IJSYS07',WRK=YES,POL=POOL01,EXT=200,SYS007
CAT '$$$.SORTWK1',WRK=YES,POL=POOL01,EXT=200
/*
2-60
BIM-EPIC Installation and System Guide
Updating the ASI Procedure
Adding a Dummy Tape Device and Modifying Tape Modes
Adding a Dummy Tape Device and Modifying Tape Modes
Description
If you use BIM-EPIC’s tape management, you must define a dummy (non-existent) tape
device. The TSIDASS utility uses this dummy device to satisfy the pre-open checking that is
done by many generalized utility programs, such as SORT.
WARNING!
Do not issue the VSE DVCUP command for this tape device; errors will occur.
Step1
Locate the ADD statements in your ASI procedure.
Step 2
Add a PUB entry for a dummy tape device. For example:
ADD F00,3420T9
Any valid tape device type (and mode) can be specified. The dummy tape device is only
referenced by programs that do pre-open checking to determine device category (tape, disk,
printer, and so on). The actual tape device is selected by BIM-EPIC based on the mode
requested when a program issues an OPEN request.
Step 3
Write the dummy device address you used on your configuration option worksheet (the
TAPCUU option).
Step 4
For dual density tape drives, specify the highest available mode setting on the ADD statement
that defines the drive. For example:
ADD 880:884,3420T9,D0
(6250 BPI on a 1600/6250 drive)
Chapter 2. Installing the Basic System
2-61
Updating SVA Size
Updating the ASI Procedure
Updating SVA Size
Description
Procedure
BIM-EPIC automatically loads its modules into appropriate 24-bit or 31-bit SVA. Refer to 27 in this manual and if needed, change the parameters on the SVA statement in your IPL
procedure, as shown below.
Step
1
Action
Display the SVA free space and SDL entries using the following:
// EXEC LIBR
LISTDIR SDL
/*
If the SVA size must be increased, update the PSIZE value on the SVA statement
in your ASI procedure.
2-62
2
If ACL support is being used, add 33K.
3
Using the listing produced in Step 1, determine if the number of current SDL
entries + 40 exceeds the SDL value on the SVA statement. If the number of
entries needs to be increased, increase the SDL value on the SVA statement
accordingly.
BIM-EPIC Installation and System Guide
Updating the ASI Procedure
GETVIS Considerations
GETVIS Considerations
Increasing System
GETVIS
BIM-EPIC acquires storage for its tables and some modules from system 24-bit and 31-bit
GETVIS. Refer to “Determining Space Requirements" to determine required system GETVIS
and update the GETVIS parameter on the SVA statement in your IPL procedure.
Increasing Partition
GETVIS
BIM-EPIC acquires Partition GETVIS for task dependent data. We recommend that you
permanently increase the Partition GETVIS in each partition.
Use the following formula to determine BIM-EPIC’s Partition GETVIS requirements:
BIM-EPIC Partition GETVIS = 26K+(n * 8)
where n is the number specified for the map table size in the TSIDMAP macro. While this
calculation is sufficient for most installations, yours may require more. Optional file
reblocking also requires Partition GETVIS.
Decrease the VSE SIZE parameter for each partition in the ASI procedure by the number you
calculated above, or increase the size of the partition by that number.
Dynamic Space
GETVIS
Refer to “Determining Space Requirements". If you use IPF dialog panels, the dynamic space
GETVIS size can be increased using the Maintain Dynamic Partitions panel. If you are not
using the IPF dialog panels, you can update the dynamic space GETVIS size by updating the
DTR$DYNC procedure. The default member is included in the VSE/ESA system library
(IJSYSRS.SYSLIB) as member DTR$DYNC.Z.
Chapter 2. Installing the Basic System
2-63
Updating LIBDEF Procedures
Updating the ASI Procedure
Updating LIBDEF Procedures
Description
Update your library search chains to include the BIM-EPIC installation library.
Insert the name of the BIM-EPIC installation library in the LIBDEF search chain before the
SET SDL statement in the ASI procedure.
Example
2-64
// LIBDEF PHASE,SEARCH=(VENDOR.EPIC,PRD1.XXX,PRD2.XXX,...)
BIM-EPIC Installation and System Guide
Additional System Considerations
Activating BIM-EPIC Support for Multiple Job Exits
Additional System Considerations
Activating BIM-EPIC Support for Multiple Job Exits
Description
IBM provides support for multiple job exits for VSE/ESA 1.2.0 and above. This IBM feature
is optional. If your installation uses this support, you must place BIM-EPIC in the list of job
exits called, using the following procedure. If you do not use multiple job exit support, you
can skip this task. In this section, we assume familiarity with IBM’s requirements for multiple
job exits.
Step 1
Update the $JOBEXIT user exit list, as described in the IBM Guide to System Functions.
Choose a $JOBEXnn phase name that is not yet in use. For example purposes, $JOBEX01 is
used. Add the following two statements to your $JOBEXIT user exit list: The TSIDJCL
identifier allows BIM-EPIC to identify its own job exit. This information is required at BIMEPIC activation.
DC
DC
Example
CL8'$JOBEX01'
CL8'TSIDJCL'
BIM-EPIC job exit name
BIM-EPIC job exit identifier
In this example, the BIM-EPIC jobexit is first in the list, preceding the accounting and job
scheduling exits.
// OPTION CATAL
// EXEC ASSEMBLY
PUNCH ' PHASE $JOBEXIT,S,SVA '
START 0
DC
CL8'JCLLUSEX'
Identifier of user exit list
DC
CL8'$JOBEX01'
BIM-EPIC jobexit name
DC
CL8'TSIDJCL'
BIM-EPIC jobexit identifier
DC
CL8'$JOBEX03'
Accounting jobexit name
DC
CL8'ACCOUNT'
Accounting jobexit identifier
DC
CL8'$JOBEX05'
Scheduling jobexit name
DC
CL8'SCHED'
Scheduling jobexit identifier
DC
X'FFFFFFFF'
End of table
END
/*
// EXEC LNKEDT
Step 2
Rename the TSIDJUX module to the $JOBEXnn name you used in Step 1, using the LIBR
RENAME function.
Chapter 2. Installing the Basic System
2-65
Activating BIM-EPIC Support for Multiple Job Exits
Example
Additional System Considerations
In this example, the TSIDJUX phase name is changed to $JOBEX01.
// EXEC LIBR,PARM='MSHP'
ACCESS S=lib.sublib
RENAME TSIDJUX.PHASE:$JOBEX01.PHASE
/*
Step 3
Add the $JOBEXnn phase selected for BIM-EPIC to the $SVA0000 phase and reassemble/re-catalog it into IJSYSRS.SYSLIB. For this example, the phase would be:
$JOBEX01
Example
This is an example of a $SVA0000. Its creation and use is described in the “IBM
VSE/Enterprise Systems Architecture Guide to System Functions” manual.
// OPTION CATAL
// LIBDEF PHASE,CATALOG=EPTEST.HPICKENS
// EXEC ASSEMBLY
TITLE '$SVA0000 - IPL LOAD LIST FOR JCL EXIT ROUTINES'
SVALLIST $SVA0000,($JOBEX00),($JOBEX01),($JOBEX02)
END
/*
// EXEC LNKEDT,PARM='MSHP'
2-66
BIM-EPIC Installation and System Guide
Additional System Considerations
COBOL II Support (VSE/ESA)
COBOL II Support (VSE/ESA)
Description
When IBM’s LE/VSE is installed, BIM-EPIC uses the standard vendor exits for COBOL II,
C/370, PL/1 II, and RPG-II support. If IBM’s LE/VSE is not installed, a separate interface
must be installed.
BIM-EPIC requires COBOL II programs to invoke the VS COBOL II Library Management
Feature. COBOL II programs must be compiled with the CBL RES option to invoke the
Library Management Feature. Please refer to the IBM publication VS COBOL II Installation
and Customization for VSE.
You may have software written in COBOL II, which was not compiled to invoke the Library
Management Feature, but you have no access to the source code. To run these programs using
BIM-EPIC’s services, see “Processing with COBOL II" in Chapter 7 of the BIM-EPIC User
Reference.
To enable BIM-EPIC’s COBOL II support, perform the steps shown below.
Step 1
1. For COBOL II Release 3 and below, punch the IBM-supplied job IGZCPCO.Z from your
COBOL II library using the LIBR PUNCH function. For COBOL II Release 4 and above,
punch IGZWEOPC.Z instead.
2. Delete the INCLUDE IGZEQOC statement from the IGZCPCO.Z (or IGZWEOPC.Z) job
stream.
3. Recatalog and execute the modified IGZCPCO.Z (or IGZWEOPC.Z) jobstream.
Step 2
1. Punch IGYCOPTV.A from your COBOL II library using the LIBR PUNCH function.
2. If the RES parameter in IGYCOPTV specifies RES=YES, no further action is necessary at
this point to enable BIM-EPIC’s COBOL II support.
If RES=NO has been specified, change RES=NO to RES=YES. This forces the CBL RES
option for all COBOL II compiles, and all COBOL II programs you compile after Step 4
below will invoke the VS COBOL II Library Management Feature.
3. Recatalog the updated IGYCOPTV.A.
4. For COBOL II Release 3 and below, use the IBM-supplied job IGYCDOPT.Z in your
COBOL II library to assemble and link the updated IGYCOPTV. For COBOL II Release 4
and above, use IGYWEOP1.Z instead.
5. Recompile and link all your COBOL II programs that will require BIM-EPIC’s services.
Chapter 2. Installing the Basic System
2-67
Sharing the DSN Catalog
Multi-Partition/CPU Environments
Multi-Partition/CPU Environments
Sharing the DSN Catalog
Description
BIM-EPIC automatically operates in a multi-partition environment. The number of partitions
is restricted only by the VSE system. BIM-EPIC can also run in a multi-CPU environment.
The DSN Catalog can be shared among real and virtual machines, under VSE and VM/CMS.
For BIM-EPIC in any machine to share the DSN Catalog with another BIM-EPIC, or CAEPIC for CMS, in another machine, some VSE and BIM-EPIC features must be activated to
ensure the integrity of devices and datasets. We recommend that you share one DSN Catalog
in a multi-CPU environment, instead of creating separate DSN Catalogs. If you share the
DSN Catalog, you must also share the volumes in your disk pools.
BIM-EPIC uses IBM’s LOCK file mechanism (VSE LOCK/UNLOCK) and
RESERVE/RELEASE facilities to ensure catalog integrity between machines and operating
systems. The CMSTAPE and MULTCPU configuration options are used to enable these
facilities.
Write the configuration option changes on your worksheet. See 2-5 to ensure that the required
operating system options are contained in your VSE supervisor. The following instructions
pertain to sharing catalogs and tape drives between multiple virtual or real machines.
Sharing a DSN
Catalog Between
VSE and CMS
In BIM-EPIC for VSE...
In CA-EPIC for CMS...
Specify CMSTAPE=YES
On the System Options Panel:
1. Enter the DOS CATALOG specifications
2. Set ALLOW DOS/EPIC TAPES to ‘Y’
The DSN Catalog must be on a VSE disk volume (with a VSE VTOC). The DSN Catalog can
be on a minidisk. If so, its minidisk must be linked to all VSE machines that access it with the
MWV option. For best performance, we recommend that the DSN Catalog be the only dataset
on the minidisk.
2-68
BIM-EPIC Installation and System Guide
Multi-Partition/CPU Environments
Sharing a DSN
Catalog Among
Multiple VSE
Machines (Physical
or Virtual)
Sharing the DSN Catalog
BIM-EPIC for VSE (1)
BIM-EPIC for VSE (2)
BIM-EPIC for VSE(n)
MULTCPU=YES
MULTCPU=YES
MULTCPU=YES
If you are also sharing tape drives between physical CPUs or LPARs:
BIM-EPIC for VSE (1)
BIM-EPIC for VSE (2)
BIM-EPIC for VSE(n)
SHARE=YES
SHARE=YES
SHARE=YES
If you only plan to share tape drives among multiple VSE virtual machines (not different
physical CPUs or LPARs), set SHARE=NO.
Sharing Disk
Volumes Among
Multiple VSE
Machines
Specify SHR on the ADD statement for each shared volume in your ASI procedure.
Example
ADD 120:124,3380,SHR
Sharing the
Recorder File
Among VSE
Machines
BIM-EPIC for VSE (1)
BIM-EPIC for VSE (2)
BIM-EPIC for VSE(n)
RECSHR=YES
RECSHR=YES
RECSHR=YES
A BIM-EPIC Recorder File cannot be shared with CA-EPIC for CMS.
Sharing the BIMEPIC Resource
Dataset Among
VSE Machines
No additional configuration options are required.
Chapter 2. Installing the Basic System
2-69
Installing Online Manager for BIM-FAQS/ASO
Activating BIM-EPIC Online Components
Activating BIM-EPIC Online Components
Installing Online Manager for BIM-FAQS/ASO
Description
There are two ways to execute the Online Manager from a BIM-FAQS/ASO panel.
•
•
Procedure
Type .P=TSIO0001 on the BIM-FAQS/ASO command line and press ENTER.
Create a BIM-FAQS/ASO online command. To do this, you must be running BIMFAQS/ASO release 3.6 or later, and have security access to create such a command.
The following steps describe how to do it:
Step
Action
1
Enter AO from the BIM-FAQS/ASO command line to display the main menu.
2
From the BIM-FAQS/ASO Main Menu, select I (Initialization and Configuration)
and press ENTER.
3
From the BIM-FAQS/ASO Initialization and Configuration panel, select O
(Online Command Definition and Maintenance).
4
On the Online Command Definition and Maintenance panel, press PF6 to get the
current definition. This panel is called BIM-FAQS/ASO - Online Commands
Directory List.
5
On the Online Commands Directory List panel, type A beside any online command
file and press ENTER. The BIM-FAQS/ASO Online Command Definition panel
is displayed.
6
The Online Command Definition panel uses a number of input fields to define the
BIM-EPIC online command. Use them as follows:
a. Enter the CPU ID in the FILE field at the top right.
b. In the COMMAND field, type BIM-EPIC.
c. In the DESCRIPTION field, type BIM-EPIC Online Manager
(or some other description).
d. In the NEW COMMAND field, type .P=TSIO0001.
e. Press PF5 to save the new command. Then press PF3 to return to the BIMFAQS/ASO Online Command Definition panel. Review the new BIM-EPIC
online command. Press PF6 to load the new BIM-FAQS/ASO directory list.
2-70
7
Press PF3 twice to exit BIM-FAQS/ASO.
8
After the online command has been installed, type BIM-EPIC on any BIMFAQS/ASO command line to access Online Manager.
BIM-EPIC Installation and System Guide
Activating BIM-EPIC Online Components
Accessing Online Manager using VTAM
Accessing Online Manager using VTAM
Description
There are two different methods for accessing the BIM-EPIC Online Manager using VTAM,
depending on whether or not you are using BIM-FAQ/ASO.
If You Are Using
BIM-FAQS/ASO
If prior to Release 5.1A, or if CA-FAQS/ASO, select option ‘O’ at the DCMTDRIV Main
Menu panel.
If Release 5.1A or higher, select option ‘O’ at the BIM$TIDR Main Menu panel.
If You Are Not
Using BIMFAQS/ASO
Use the BIM-GSS “P=" parameter in the VTAM “LOGON" procedure, as shown in the
following example:
If prior to Release 5.1A, or if CA-FAQS/ASO:
LOGON APPLID(DCMTDRIV) DATA('P=TSIO0001')
If Release 5.1A or higher
LOGON APPLID(BIM$TIDR) DATA('P=TSIO0001')
Chapter 2. Installing the Basic System
2-71
Installing Online Manager for CICS
Activating BIM-EPIC Online Components
Installing Online Manager for CICS
Description
Online Manager members are installed in two areas of the VSE environment:
•
•
In the BIM-GSS datasets SYS$VIO and SYS$MON. The appropriate Online Manager
members are automatically cataloged into these datasets when the BIM-EPIC
installation tape is processed.
In the CICS System Definition file (CSD) (or individual Processing Program Table
(PPT) and Program Control Table (PCT) entries if the CSD file is not used).
When the BIM-EPIC installation tape is processed, you are given the option to select the
CICS Quick Installation method. If you select the Quick Installation method, the appropriate
CSD entries are made automatically. If you do not use the Quick Installation method, you
must make PCT and PPT entries and reassemble the two tables. In either case, the
“Completing CICS Installation" section of this chapter describes how to make the Online
Manager environment available to CICS users.
Memory that is required for Online Manager processing is obtained from the batch partition in
which the Online Manager resides.
Batch Partition
2-72
A batch partition must be dedicated to Online Manager processing when CICS is running.
VSE’s XPCC facility is used to communicate between Online Manager components in the
CICS and batch partitions.
BIM-EPIC Installation and System Guide
Activating BIM-EPIC Online Components
Starting Online Manager with Batch Partition Memory
Starting Online Manager with Batch Partition Memory
Description
Select a partition that can be dedicated to Online Manager for the same amount of time that
CICS will require Online Manager services. Submit the following job to that partition:
If using a release of BIM-GSS prior to 5.1A or if using any CA-GSS release, submit the
following job to that partition:
// JOB DCMBATCH
BATCH MEMORY INTERFACE TO CICS PARTITION
// EXEC DCMTDRIV,SIZE=DCMTDRIV
/*
(the slash asterisk is required)
/&
If using BIM-GSS Release 5.1A or higher, submit the following job to that partition:
// JOB DCMBATCH
BATCH MEMORY INTERFACE TO CICS PARTITION
// EXEC BIM$TIDR,SIZE=BIM$TIDR
/*
(the slash asterisk is required)
/&
CICS can be started either before or after this job is submitted, but Online Manager functions
are not available until this job has begun execution.
To terminate Online Manager and free its partition, enter the following at the console:
MSG partition-id
This ends BIM$TIDR or DCMTDRIV processing and makes Online Manager functions
unavailable.
Example
When DCMTDRIV is executing in the F8 partition, the following command ends its
execution:
MSG F8
This technique is discussed in more detail in the “Online Interfaces" chapter of the BIM-GSS
Installation and Utilities Guide.
Chapter 2. Installing the Basic System
2-73
Activating CICS Quick Installation
Completing CICS Installation
Completing CICS Installation
Activating CICS Quick Installation
Description
To activate the CSD entries loaded by the CICS Quick Installation option, perform the
procedure below.
To load the CSD entries for CICS Quick Installation when BIM-EPIC is already installed, see
2-13 in this manual.
Procedure
2-74
Step
Action
1
Run the CICS CEDA transaction.
2
Add GROUP(EPIC6) LIST(listname) where listname is the GRPLIST
specified in your DFHSIP start-up.
3
Install GROUP(EPIC6).
4
The BIM-EPIC, TVTO, TAID and TOJA transactions can be activated.
BIM-EPIC Installation and System Guide
Completing CICS Installation
Manual CICS Installation
Manual CICS Installation
Description
Follow the manual CICS installation procedures below. Then go to 2-84 to complete CICS
installation.
With a manual installation, all transactions are optional. However, we strongly recommend
installing the TAID transaction. If disk management is used, we recommend installing TVTO.
While this procedure describes how to install all transactions at once, individual transactions
can be installed at any time. Perform only the tasks related to the transactions desired.
Chapter 2. Installing the Basic System
2-75
Update PPT Tables
Completing CICS Installation
Update PPT Tables
Procedure
Step
Action
1
Locate your current PPT assembly JCL.
2
Add entries to the PPT assembly for any transactions you wish to install.
1
For Transaction...
Add...
TAID
COPY TSAIDPPT
TOJA
COPY TSOJAPPT
TPRT
COPY TSPRTPPT
TVTO
COPY TSVTOPPT
Online Manager
programs
COPY TSDCMPPT
2
3
2-76
Assemble and recatalog the PPT table.
BIM-EPIC Installation and System Guide
Completing CICS Installation
Update PCT Tables
Update PCT Tables
Procedure
Step
Action
1
Locate your current PCT assembly JCL.
2
Add entries to the PCT assembly for any transactions you wish to install.
1
For Transaction...
Add...
TAID
COPY TSAIDPCT
TOJA
COPY TSOJAPCT
TPRT
COPY TSPRTPCT
TVTO
COPY TSVTOPCT
BIM-EPIC (Online
Manager)
COPY TSDCMPCT
2
3
Assemble and recatalog the PCT table.
4
Go to the standard installation procedures at 2-84.
Chapter 2. Installing the Basic System
2-77
Event Posting
CICS Installation Table Entries
CICS Installation Table Entries
The following sections contain the table entries required to install BIM-EPIC CICS features.
Event Posting
PPT Entry
TSIDCLOC
DFHPPT
TYPE=ENTRY,PGMLANG=ASSEMBLER,PROGRAM=TSIDCLOC,
PGMSTAT=ENABLED,RELOAD=NO,RES=NO
X
X
TSIDCCHK
DFHPPT
X
X
TSIDCREL
DFHPPT
X
X
TYPE=ENTRY,PGMLANG=ASSEMBLER,PROGRAM=TSIDCCHK,
PGMSTAT=ENABLED,RELOAD=NO,RES=NO
TYPE=ENTRY,PGMLANG=ASSEMBLER,PROGRAM=TSIDCREL,
PGMSTAT=ENABLED,RELOAD=NO,RES=NO
TSIDCUNL DFHPPT TYPE=ENTRY,PGMLANG=ASSEMBLER,PROGRAM=TSIDCUNL,
PGMSTAT=ENABLED,RELOAD=NO,RES=NO
2-78
BIM-EPIC Installation and System Guide
X
X
CICS Installation Table Entries
TOJA
TOJA
PPT Entries
TSIDOJA
DFHPPT
TYPE=ENTRY,PROGRAM=TSIDOJA,
PGMLANG=COBOL,PGMSTAT=ENABLED,
RELOAD=NO,RES=NO
X
X
TSIDOMM
DFHPPT
TYPE=ENTRY,PROGRAM=TSIDOMM,
PGMLANG=ASSEMBLER,PGMSTAT=ENABLED,
RELOAD=NO,RES=NO
X
X
TSIDOMAM
PCT Entries
FCT Entry
DFHPPT
PGMLANG=ASSEMBLER,PGMSTAT=ENABLED,
PROGRAM=TSIDOMAM,TYPE=ENTRY,
RELOAD=NO,RES=NO
X
X
TOJA
DFHPCT
TYPE=ENTRY,PROGRAM=TSIDOJA,
TRANSID=TOJA,TWASIZE=0,
CLASS=SHORT,PRIVATE=YES,
SPURGE=YES,TPURGE=YES,
TRNSTAT=ENABLED
X
X
X
X
TOJ1
DFHPCT
TYPE=ENTRY,PROGRAM=TSIDOJA,
TRANSID=TOJ1,TWASIZE=0,
CLASS=SHORT,PRIVATE=YES,
SPURGE=YES,TPURGE=YES,
TRNSTAT=ENABLED
X
X
X
X
TSIJADB
DFHFCT
TYPE=DATASET,
DATASET=TSIJADB,
ACCMETH=(VSAM,KSDS),
SERVREQ=(GET,BROWSE),
OPEN=INITIAL,
JID=NO,
LOG=NO
RECFORM=(VARIABLE,UNBLOCKED),
BUFND=4,
BUFNI=3,
STRNO=3
X
X
X
X
X
X
X
X
X
X
Chapter 2. Installing the Basic System
2-79
TPRT
CICS Installation Table Entries
TPRT
Description
The DCT for TSPR must supply the program’s transaction ID, and a trigger level of one (1) or
greater to AUTOSTART the transaction. In addition, TRMINDNT=TSPR must be added to
the TCT for the label printer.
DFHPCT
TYPE=ENTRY,PROGRAM=TSIDPRT,
TRANSID=TPRT,TWASIZE=0,
SPRUGE=YES,CLASS=LONG,
TRANSTAT=ENABLED
X
X
X
DFHPCT
TYPE=ENTRY,PROGRAM=TSIDLPRT,
TRANSID=TSIL,TWASIZE=0,
SPURGE=YES,CLASS=LONG,
ANTICPG=1,DTB=NO,DUMP=YES,
RESTART=NO,FDUMP=ASRA,DVSUPRT=ALL,
PRIVATE=YES,RTIMOUT=NO,DTIMOUT=NO,
TPURGE=YES,TCLASS=NO,TRANSEC=1,
TRNPRTY=1,TRNSTAT=ENABLED
X
X
X
X
X
X
X
DFHPPT
TYPE=ENTRY,PROGRAM=TSIDPRT,
PGMSTAT=ENABLED,
RES=YES,RELOAD=NO
X
X
DFHPPT
TYPE=ENTRY,PGMLANG=COBOL,
PROGRAM=TSIDLPRT,PGMSTAT=ENABLED,
RELOAD=NO,RES=NO
X
X
DCT Entry
DFHDCT
TYPE=INTRA,DESTID=TSPR,TRANSID=TSIL
PLT Entry
(Optional)
DFHPLT
TYPE=ENTRY,PROGRAM=TSIDPRTS
PCT Entry
PPT Entry
TCT Entry
2-80
Add TRMINDNT=TSPR to your printer’s TCT.
BIM-EPIC Installation and System Guide
CICS Installation Table Entries
TVTO
TVTO
PPT Entry
DFHPPT
TYPE=ENTRY,PROGRAM=TSIDVTO
PCT Entry
DFHPCT
TYPE=ENTRY,
CLASS=SHORT,
PROGRAM=TSIDVTO,
SPURGE=YES,
TPURGE=YES,
TRANSID=TVTO
X
X
X
X
X
Chapter 2. Installing the Basic System
2-81
TAID
CICS Installation Table Entries
TAID
PCT Entry
DFHPCT
TYPE=ENTRY,
TRANSID=TAID,
PROGRAM=TSIDCAI,
PGMLANG=ASSEMBLER,
SPURGE=YES,
CLASS=SHORT,
TRNSTAT=ENABLED
X
X
X
X
X
X
PPT Entry
DFHPPT
TYPE=ENTRY,PROGRAM=TSIDCAI,
PGMSTAT=ENABLED,
RES=YES,RELOAD=NO
X
X
2-82
BIM-EPIC Installation and System Guide
CICS Installation Table Entries
BIM-EPIC
BIM-EPIC
BIM-EPIC
Transaction using
GSS prior to BIMGSS 5.1A
DCMOCIXP DFHPPT TYPE=ENTRY,PGMLANG=ASSEMBLER,PROGRAM=DCMOCIXP,
RES=YES,RSL=PUBLIC
X
EPIC
X
X
X
X
X
X
X
BIM-EPIC
Transaction using
BIM-GSS 5.1A and
later versions
BIM$TICI DFHPPT TYPE=ENTRY,PGMLANG=ASSEMBLER,PROGRAM=BIM$TICI,
RES=YES,RSL=PUBLIC
X
EPIC
X
X
X
X
X
X
X
DFHPCT TYPE=ENTRY,
PROGRAM=DCMOCIXP,
TRANSID=EPIC,
DTB=NO,
RSL=PUBLIC,
SPURGE=YES,
TPURGE=YES,
TRNPRTY=100
DFHPCT TYPE=ENTRY,
PROGRAM=BIM$TICI,
TRANSID=EPIC,
DTB=NO,
RSL=PUBLIC,
SPURGE=YES,
TPURGE=YES,
TRNPRTY=100
Chapter 2. Installing the Basic System
2-83
Transactions Notes
CICS Installation Table Entries
Transactions Notes
Introduction
Many transactions have special requirements or characteristics. Some of them require
configuration options to be set. This section presents special notes on each of these
transactions.
TVTO Installation
TVTO is an online VTOC display utility. It is written in Command-Level assembler
language, does its own screen mapping, and is pseudo-conversational
TOJA Installation
The TOJA transaction provides online access to the Job Accounting database.
You should create two transactions for online job accounting: TOJA (the normal TRANSID
for displaying job accounting data) and TOJ1 (a TRANSID you can use to purge queues if
you cannot reactivate TOJA after a failure). We recommend that you put TOJ1 in your PCT
tables, though it is not required. The CICS Quick Installation satisfies these requirements
automatically.
TOJA is written in COBOL and uses unaligned BMS maps. It executes in pseudoconversational mode.
TPRT Installation
Online label printing support must be activated with the RMNTPRT=YES configuration
option.
TAID Installation
TAID is a system programer’s tool to display and update resident BIM-EPIC components. It
is written in assembler language and does its own screen mapping. It executes in
conversational mode.
2-84
BIM-EPIC Installation and System Guide
CICS Installation Table Entries
Initializing the Job Accounting Database
Initializing the Job Accounting Database
Description
The Job Accounting database provides data for the TOJA transaction and any applications you
may wish to write, using the Recorder File backup or history tape as input.
Before you can build the job accounting database, you must define the database file. Use the
EPICJADB.Z sample JCL to do so.
Procedure
Step
Action
1
Punch the EPICJADB.Z sample JCL from the BIM-EPIC library.
2
Update the IDCAMS DELETE/DEFINE/CATALOG statements to reflect your
VSAM configuration.
3
Catalog the updated IDCAMS control statements as EPICJADB.PROC or a
different name of your choice.
4
Execute your updated procedure to initialize the database. You can re-execute this
procedure to re-initialize the database at any time.
5
Use the TSIDJLD utility to create the job accounting database. See Chapter 11 of
the User Reference for more information.
Chapter 2. Installing the Basic System
2-85
Modifying CICS Start-Up JCL
CICS Installation Table Entries
Modifying CICS Start-Up JCL
Description
Include a label for the job accounting database in your CICS job stream.
Example
// JOB CICS STARTUP
...
* LABELS FOR JOB ACCOUNTING DATABASE
// DLBL TSIJADB,'TSIJADB,JOB.ACCNT',99/365,VSAM,CAT=IJSYSCT
...
// EXEC DFHSIP
( CICS STARTUP PARAMETERS )
$END
/*
2-86
BIM-EPIC Installation and System Guide
CICS Installation Table Entries
Modifying the FCT Table
Modifying the FCT Table
Description
Procedure
TOJA requires an FCT entry.
Step
Action
1
Locate your current FCT assembly JCL.
2
Add the statement COPY TSOJFC17 (or COPY TSOJACFT if you are using
CICS 1.6 or earlier).
3
Reassemble and catalog the FCT table.
Chapter 2. Installing the Basic System
2-87
Modifying DCT Entries
CICS Installation Table Entries
Modifying DCT Entries
Description
Procedure
TPRT requires a DCT entry.
Step
Action
1
Locate your current DCT assembly JCL.
2
Punch the source book TSPRTDCT.A.
3
Supply your program’s transaction ID in TRANSID=xxxx. Also add a trigger
level of one or greater to AUTOSTART your transaction. The supplied DCT
book TSPRTDCT.A uses the transaction ID TSIL.
4
Recatalog the source book.
5
Add the following statement to your DCT assembly:
COPY TSPRTDCT
6
2-88
Reassemble and catalog the DCT table.
BIM-EPIC Installation and System Guide
CICS Installation Table Entries
Modifying the TCT Table
Modifying the TCT Table
Description
Procedure
TSIDPRT requires a TCT entry for the printer that will be used to print tape labels. This TCT
entry must specify TRMIDNT=TSPR.
Step
Action
1
Locate your current TCT assembly JCL. Find the TCT for the printer you will use
to print labels.
2
Add TRMIDNT=TSPR.
3
Reassemble and catalog the TCT table.
Chapter 2. Installing the Basic System
2-89
Modifying the PLTPI Table
CICS Installation Table Entries
Modifying the PLTPI Table
Description
You can create a PLT entry for TPRT.
If TPRT is started through the PLT, it does not require a dedicated terminal, but it requires a
dedicated printer port. That port cannot be detached unless the PLT entry is deleted.
If TPRT does not have a PLT entry, it must be started from a terminal using the TPRT
transaction. In this case, it requires a dedicated terminal, but not a dedicated printer port.
Procedure
Use the following steps to start TSIDPRT through the PLT, if you wish.
Step
Action
1
Locate your current PLT assembly JCL.
2
Add the following statement to your PLT:
COPY TSPRTPLT
3
2-90
Reassemble and catalog the PLT table.
BIM-EPIC Installation and System Guide
Post-Installation Procedures
Creating Maintenance JCL
Post-Installation Procedures
Creating Maintenance JCL
Description
Create JCL for regular BIM-EPIC maintenance. Such maintenance includes daily DSN
Catalog backups, Recorder File maintenance, daily reports, and emergency DSN Catalog
recovery. The BIM-EPIC distribution tape provides examples of these procedures under the
file type SAMPJOB.
Maintenance procedures are described in more detail at 4-2. At a minimum, do the procedure
below.
Procedure
Step
Action
1
Use the DAILY1 or DAILY2 SAMPJOB as a model to create daily maintenance
JCL.
2
Decide which reports to print regularly by reviewing the report examples in the
BIM-EPIC User Reference. Create report JCL and add it to your DAILY
procedure.
3
Use the RECOVER1 or RECOVER2 SAMPJOB as a model to create JCL for an
emergency DSN Catalog recovery.
Chapter 2. Installing the Basic System
2-91
Converting a BIM-EPIC/VSE 2.x DSN Catalog (TSIDCLN)
Post-Installation Procedures
Converting a BIM-EPIC/VSE 2.x DSN Catalog (TSIDCLN)
Description
If you are upgrading from BIM-EPIC/VSE Version 2, do the following:
•
•
Example
2-92
Activate the new version of BIM-EPIC
Run the TSIDCLN PROC to initialize new fields in your version 2.x DSN Catalog. The
TSIDCLN PROC can be rerun as needed.
// JOB TSIDCLN
// LIBDEF PROC,SEARCH=lib.sublib
// EXEC PROC=TSIDCLN
UPGRADE 3
/*
/&
BIM-EPIC Installation and System Guide
! BIM-EPIC installation library
Post-Installation Procedures
Converting from Another Tape/Disk Manager
Converting from Another Tape/Disk Manager
Description
See the for conversion procedures.
For more information about converting to BIM-EPIC, contact BIM-EPIC Technical Support.
Chapter 2. Installing the Basic System
2-93
Modifying the EPICON Procedure
Post-Installation Procedures
Modifying the EPICON Procedure
Description
The EPICON procedure contains an execution of TSIDON, including configuration options.
It also contains an execution of TSIDRFS and TSIVON. TSIDON activates and configures
BIM-EPIC. TSIDRFS activates the Recorder. TSIVON activates QDAS. These programs
and their configuration options are described in Chapter 5.
Step 1
Ensure that DATA=YES has been specified on the CATALOG or CATALP statement in your
$nJCLxxx procedure.
Step 2
Complete your configuration option worksheet. The requirements of a few common features
are listed below.
To enable..
Set...
Recorder File logging
RECORD=YES
Job accounting
RECORD=YES
JOBACCT=YES
Autoattach
AUTOATT=YES
VM support
VM=YES
CICS transactions
RMNTPRT=YES
Step 3
Update the configuration options in your EPICON procedure. Add any special configuration
options you require.
Step 4
The EPICON procedure should be executed in BG, before POWER starts and after most other
software is activated. See “Compatibility with Other Software," on page 2-8, for software that
should be activated before BIM-EPIC.
Insert a PAUSE in your ASI procedure where the EPICON procedure should be executed.
Step 5
2-94
IPL your system and execute the EPICON procedure. If BIM-EPIC and its features are
successfully activated, add the execution of the EPICON procedure to your ASI procedure in
place of the PAUSE statement.
BIM-EPIC Installation and System Guide
Post-Installation Procedures
TSIDON Example
Modifying the EPICON Procedure
// EXEC TSIDON
/*
/*
THE FOLLOWING OPTIONS HAVE BEEN COMMENTED OUT BECAUSE
/*
THEY DO NOT HAVE DEFAULT VALUES OR THEY HAVE SYSTEM/*
GENERATED DEFAULT VALUES.
/*
/*
OPTION ACLLIB=
/*
OPTION ACLSRVR=
/*
OPTION CPUIDS=
/*
OPTION CWDSPOL=
/*
OPTION DEFPOL=
/*
OPTION DEFWPOL=
/*
OPTION EPICOFF=
/*
OPTION ERDFILE=
/*
OPTION JQNAME=
/*
OPTION JQWARN=
/*
OPTION JQWMSG=
/*
OPTION PASSWD=
/*
OPTION TAPPOL=
/*
OPTION TSTJOB=
/*
/*
/*
THE FOLLOWING OPTIONS ARE SYSTEM DEFAULTS
/*
OPTION ACCEPT=YES
OPTION ACLAUTI=YES
OPTION ACLIBM=NO
OPTION ACLMEM=NO
OPTION ACLRECS=100
OPTION ACLTIME=180
OPTION ALLMALL=NO
OPTION ALLMSG=YES
OPTION ALTMSGS=NO
OPTION AUTOATT=NO
OPTION AUTOCAT=(NO,NO)
OPTION AUTOLOG=NO
OPTION AUTOSTP=NO
OPTION AUTSTPN=5
OPTION AUTSTPNO=5
OPTION AUTSTPT=10
OPTION AUTSTPTO=10
OPTION BYPEXT=NO
OPTION CANMSG=NO
OPTION CATRT1=NO
OPTION CKDFACT=30
OPTION CMSTAPE=NO
OPTION CNTRL=NO
OPTION CYCL=3
OPTION DDERR=IGNORE
OPTION DDGEN=NO
OPTION DEBUG=NO
OPTION DEFEXT=0
OPTION DISKALL=YES
OPTION DSKLUB=100
OPTION DSKRET=7
OPTION DSNAME=IJSYSDS
OPTION DSNWARN=200
OPTION DSNWMSG=10
OPTION EURODAT=NO
OPTION FBAFACT=0
OPTION FRAG=NO
OPTION GDI=YES
*/
*/
*/
*/
*/
*/
*/
*/
*/
*/
*/
*/
*/
*/
*/
*/
*/
*/
*/
*/
*/
*/
*/
Chapter 2. Installing the Basic System
2-95
Modifying the EPICON Procedure
OPTION
OPTION
OPTION
OPTION
OPTION
OPTION
OPTION
OPTION
OPTION
OPTION
OPTION
OPTION
OPTION
OPTION
OPTION
OPTION
OPTION
OPTION
OPTION
OPTION
OPTION
OPTION
OPTION
OPTION
OPTION
OPTION
OPTION
OPTION
OPTION
OPTION
OPTION
OPTION
OPTION
/*
*
// EXEC
START
/*
*
// EXEC
/*
2-96
Post-Installation Procedures
GDIUR=YES
JCLAC=YES
JCLLANG=YES
JCLOPT=NO
JCLOVRDE=NO
JOBACCT=YES
MINDEX=NO
MINRET=7
MODE=D0
MSG088=NO
MULTCPU=NO
NCATDSK=NO
NOGVIS=CANCEL
ONLREWCD=RUN
PREFIX=EP
PURBYP=NO
RECORD=YES
RECSHR=NO
RERUN=YES
RETEN=7
RMNTPRT=NO
SHARE=NO
SLASIZE=300
STRTRK=1
TAPCUU=F00
TAPE=YES
TAPLUB=10
UNCDSK=NO
UNCTAP=NO
UNCTL=NO
UNLABEL=YES
VM=NO
VSAM=NO
TSIDRFS
TSIVON
BIM-EPIC Installation and System Guide
3
Installing the Autoattach Feature
This chapter contains procedures for installing the Autoattach feature.
Chapter Contents
Overview....................................................................................................................3-2
Autoattach Installation Via Dynamic Command Definition ......................................3-4
Autoattach Installation for VM/ESA Version 2 Release 2 Using VMSES/E...........3-10
Autoattach Installation for VM/ESA Version 1 Release 2 Using VMSES/E...........3-20
Autoattach Installation for VM/ESA Version 1 Release 1.1 Using VMSES/E........3-27
Autoattach Installation for VM/XA .........................................................................3-35
Autoattach Installation for VM/SP, VM/HPO, and VM/ESA 370 Feature..............3-41
Chapter 3. Installing the Autoattach Feature
3-1
Overview
Overview
Description
The BIM-EPIC Autoattach feature is used to automatically attach tape drives to virtual
machines when datasets are opened, and to detach the drives when datasets are closed.
The Autoattach feature includes:
•
•
VATTACH and
VDETACH
two new CP commands (VATTACH/VDETACH) added to the CP nucleus
a command processing module added to the CP Load List
The VATTACH and VDETACH commands perform the same functions as the VM ATTACH
and DETACH commands, but they operate in silent mode. They do not print any messages
about execution success or failure. This allows BIM-EPIC to attach and detach tape drives
without generating unnecessary operator console messages every time a tape drive is attached
or detached.
An additional feature of VDETACH is that it does not automatically unload a tape, thereby
leaving the tape accessible to another virtual machine without need for operator intervention.
(In earlier releases of VM, there was no LEAVE option on the DETACH command.)
Attaching and detaching a tape drive without affecting the external operational environment
provides another operational advantage: VSE guests can attach a tape drive just to determine
whether a needed tape is mounted on it. If it isn't, the drive is detached and nothing else is
affected. This improves tape drive availability by reducing operator involvement.
Autoattach
Requirements for
BIM-EPIC
Using Autoattach with BIM-EPIC requires setting the VM and AUTOATT configuration
options to YES, and installing the VATTACH and VDETACH commands into the CP
Nucleus.
Installation
Assumptions
There are two ways of installing the BIM-EPIC AUTOATTACH feature into the CP
environment:
1.
2.
Add the VATTACH and VDETACH commands to the CP Nucleus.
Add the VATTACH and VDETACH commands dynamically.
For VM/ESA and VM/SP releases prior to VM/ESA Version 2, Release 2, only the first
method can be used since dynamic command definition is not available in earlier releases.
For VM/ESA Version 2, Release 2 and above, the second method is recommended. It
requires considerably less user effort and does not require any modifications to the CP
environment. The first method involves a lengthy update/assembly process and modification
of the CP Nucleus.
If the second installation method is to be used, read the How to Read the Instructions portion
of this Overview and then go directly to the Autoattach Installation Via Dynamic Command
Definition section.
3-2
BIM-EPIC Installation and System Guide
Overview
We assume that you have experience generating and servicing a VM/CP nucleus. If you do
not perform each installation step correctly, your VM system could become inoperable. If
questions arise on any of the procedures, do not hesitate to contact BIM technical support.
The term Local Service Disk refers to the MAINT minidisk where you maintain your
installation’s modifications to CP. We assume that the MAINT 191 A-disk is being used.
Many sites use MAINT 295 and other disks for the Local Service function. The minidisk you
choose must be accessed ahead of IBM service for Autoattach to be installed successfully.
Local service must always be applied after all other IBM service.
How to Read the
Instructions
Enter commands as shown, from the appropriate command line (CMS or XEDIT).
Commands are shown in the left column. XEDIT commands are shown in lowercase.
Explanations are shown in the right column. For example:
xedit HCPMDLAT AUXLCL
Edit or create an AUX control file for
HCPMDLAT.
top
Go to beginning of the file.
input EPICAA LCL * GSI EPIC
AUTOATTACH
Insert a line at the top to describe the new source
update file HCPMDLAT EPICAA. (This is also an
example of a command string that is entered as a
single line.)
fm E
Change the file-mode to the LOCALMOD disk.
gencpbls CPLOAD ESA CP
(OUTMODE LOCALMOD $SELECT
LOGMOD
Another example of a command string that is
entered as a single line.
When, due to space limitations, a command string is shown on two lines, be sure to add a
space after the last character of the first line before typing the first character of the second line.
For example:
ABCDEF
GHIJKLM
is entered as ABCDEF GHIJKLM and not as ABCDEFGHIJKLM
MDISK
abbreviations
The following MDISK abbreviations are used in these instructions (complete descriptions are
in the VM/ESA Service Guide):
APPLYALT
The Alternate Apply Disk used as a VMFAPPLY and VMFBLD staging
area.
BUILD7
Used in the VMFBLD process
LOCALMOD
The Local Modifications Disk where non-IBM-provided modifications to
CP are kept.
Chapter 3. Installing the Autoattach Feature
3-3
Autoattach Installation Via Dynamic Command Definition
Autoattach Installation Via Dynamic Command Definition
Installation
Requirements
This method can only be used for VM/ESA Version 2 Release 2 and later releases. We
assume that you have experience with accessing and modifying the System Configuration File
and understand the purpose of the CPACCESS and CPRELEASE commands.
Installation Files
These are the Installation Files to be obtained from the BIM-EPIC distribution tape:
File
Procedure
STEP 1
Description
EPICVATT
TEXT22
EPIC VATTACH command for VM/ESA V2R2
EPICVDET
TEXT22
EPIC VDETACH command for VM/ESA V2R2
EPICVATT
TEXT23
EPIC VATTACH command for VM/ESA V2R3
EPICVDET
TEXT23
EPIC VDETACH command for VM/ESA V2R3
EPICVATT
TEXT31
EPIC VATTACH command for VM/ESA V3R1
EPICVDET
TEXT31
EPIC VDETACH command for VM/ESA V3R1
Step
Action
1
Select a CP-Accessed Minidisk.
2
Obtain the BIM-EPIC AUTOTACH text decks and place them onto the disk
selected in 1, above.
3
Add AUTOATTACH definition statements to the System Configuration File.
4
Shutdown and re-IPL VM
5
Test BIM-EPIC’s VATTACH and VDETACH commands.
Select a CP-Accessed Minidisk and write its cuu here ___________.
The TEXT decks for the BIM-EPIC commands to be dynamically defined must reside on a
CP-Accessed Minidisk. This is usually the MAINT minidisk containing the System
Configuration File but it can be any existing CP-Accessed Minidisk. The creation of a new
CP-Accessed minidisk is beyond the scope of these instructions.
3-4
BIM-EPIC Installation and System Guide
Autoattach Installation Via Dynamic Command Definition
STEP 2
Obtain the BIM-EPIC AUTOTTACH text decks and place them onto the disk selected in 1,
above.
Prepare and execute the following VSE job to obtain the BIM-EPIC AUTOATTACH “all VM
versions” master file deck:
* $$ JOB JNM=AUTOATT,CLASS=x,LDEST=(,userid),PDEST=(,userid)
// JOB AUTOATT OBTAIN AUTOATTACH MASTER DECK
// EXEC LIBR
ACCESS S=lib.sublib
PUNCH EPAUTO.Z FORMAT=NOHEADER EOF=NO
/*
/&
* $$ EOJ
x
userid
lib.sublib
any desired POWER Job Class
the CMS user id the punch and print output are to be directed to.
the VSE library and sub-library where the current version of BIM-EPIC is
installed.
The card deck produced by this job contains BIM-EPIC AUTOATTACH files for all VM
versions. The CMS RECEIVE command is used to bring the files needed for your version
onto the MAINT “A” disk. They are then moved to the CP-Accessed disk.
These messages will be displayed for each AUTOATTACH member in the deck:
DMSDSK1079R Receive fn ft fm as fn fm A1?
DMSDSK1079R Reply 0 (NO), 1 (YES), 2 (QUIT), or 3 (RENAME)
Receive only the EPICVATT/VDET TEXTnn files pertaining to your VM release. For
example, if you are V2R3, then receive EPICVATT TEXT23 and EPICVDET TEXT23 and
bypass all of the other files.
It does no harm if members from other AUTOTACH versions are received, since all file
names/types are unique, but this “selective receive” process avoids cluttering the receiving
disk.
If the member is listed in the “Installation Files” table, above:
reply
1
to receive it
If it is not listed in the table:
reply
0
to ignore it
At the end of the process, the following error messages may be displayed. They can be
ignored:
DMSDSK078E Invalid card in input deck
DMSDSK1124W Spool file nnnn has been left in your reader
DMSDSK1124W because one or more files were not received
DMSWRC671E Error receiving file ACIMAP EPIC A; rc=32 from DISK LOAD
Chapter 3. Installing the Autoattach Feature
3-5
Autoattach Installation Via Dynamic Command Definition
Q RDR * ALL
Display the RDR queue
RECEIVE number (NEW REP
Move the AUTOATTACH files onto the “A” disk.
“(NEW” will cause them to be assigned the current date.
Number is the file number of the RDR queue entry for
the just-punched deck.
FILEL * *
STEP 3
Display a list of members on the “A” disk. There should
be a MAINT NETLOG member followed by 2 members
created as a result of the RECEIVE command. Compare
these 2 members with the Installation Files table, above.
If any are missing, repeat the RECEIVE command.
Add AUTOATTACH definition statements to the System Configuration File.
The System Configuration File is described in the Virtual Machine/Enterprise Systems
Architecture Planning and Administration manual. The methods used to access and update
this file are described in the Virtual Machine/Enterprise Systems Architecture Installation
Guide. The instructions given here assume MAINT CF1 Mode A is the CP-Accessed
minidisk containing the active System Configuration File. The USERID, CUU, and CP Mode
may be different in your environment.
Logon to MAINT
Q CPDISK
Display the CP-Accessed minidisks.
Make a note of the Mode of the CPDISK that
will be used to store the EPIC Autoattach
modules on.
CPRELEASE A
Make the minidisk available to CMS users.
Replace A with the CP Mode used in your
environment.
LINK MAINT CF1 CF1 MR
Establish a CMS link to the minidisk. Replace
CF1 with the CUU used in your environment.
ACC
Access it under CMS. Replace CF1 with the CUU
used in your environment.
CF1 Z
COPY EPICVATT TEXTnn A = = Z
Copy BIM-EPIC VATTACH command to the CP
minidisk. nn is the release level (22, 23, …).
COPY EPICVDET TEXTnn A = = Z
Copy BIM-EPIC VDETACH command to the CP
minidisk. . nn is the release level (22, 23, …).
XEDIT SYSTEM CONFIG Z
Edit the System Configuration File.
Add these statements to the file. They may be
added at any point in the file.
CPXLOAD EPICVATT TEXTnn fm NOCONTROL DELAY PERMANENT
Dynamically load BIM-EPIC VATTACH nn is
the release level (22, 23, …).
fm is the CPDISK Mode that was noted when the
3-6
BIM-EPIC Installation and System Guide
Autoattach Installation Via Dynamic Command Definition
Q CPDISK was done at the beginning of this step.
It is NOT the CMS Mode.
CPXLOAD EPICVDET TEXTnn fm NOCONTROL DELAY PERMANENT
Dynamically load BIM-EPIC VDETACH nn is
the release level (22, 23, …).
fm is the CPDISK Mode that was noted when the
Q CPDISK was done at the beginning of this step.
It is NOT the CMS Mode.
DEFINE COMMAND VATTACH ABBR 4 ENABLE EPNAME HCPGVAEP ,
PRIVCLASS B IBMCLASS B
Dynamically define the BIM-EPIC VATTACH
command to CP for Class B users.
PRIVCLASS … is on a second line. Be sure to
insert a blank prior to the comma on the first line.
DEFINE COMMAND VATTACH ABBR 4 ENABLE EPNAME
HCPGVAEP ,
PRIVCLASS G IBMCLASS G
Dynamically define the BIM-EPIC VATTACH
command to CP for Class G users.
PRIVCLASS … is on a second line. Be sure to
insert a blank prior to the comma on the first line.
DEFINE COMMAND VDETACH ABBR 4 ENABLE EPNAME HCPGVDEP ,
PRIVCLASS B IBMCLASS B
Dynamically define the BIM-EPIC VDETACH
command to CP for Class B users.
PRIVCLASS … is on a second line. Be sure to
insert a blank prior to the comma on the first line.
DEFINE COMMAND VDETACH ABBR 4 ENABLE EPNAME HCPGVDEP ,
PRIVCLASS G IBMCLASS G
Dynamically define the BIM-EPIC VDETACH
command to CP for Class G users.
PRIVCLASS … is on a second line. Be sure to
insert a blank prior to the comma on the first line.
FILE
File the System Configuration File.
REL Z (DET
Remove minidisk from CMS environment.
CPACCESS MAINT CF1 A SR
Add the minidisk to the CP environment.
Replace CF1 and A with the CUU and CP Mode
used in your environment.
Q CPDISK
Display the CP-Accessed minidisks and verify
that the minidisk is accessed by CP.
Chapter 3. Installing the Autoattach Feature
3-7
Autoattach Installation Via Dynamic Command Definition
STEP 4
Shutdown and re-IPL VM
Follow your normal procedure for shutting down and re-IPLing VM, or enter this command
from the Operator Console
CP SHUTDOWN REIPL
During the IPL, carefully check the OPERATOR Console for any error messages caused by
the newly added CPXLOAD and DEFINE commands.
If any errors are present, correct them and repeat the shutdown/re-IPL process.
If it is inconvenient to IPL VM at this time, the CPXLOAD and DEFINE COMMAND
statements can be entered from the MAINT operator console. This will enable the BIM-EPIC
VATTACH and VDETACH commands until the next IPL, and allow them to be tested as
described in Step 5. The same syntax as for the System Control File statements can be used.
You will get some warning error messages because some of the operands are not allowed in
the command line syntax, but these can be ignored. Of course, if something is misspelled, the
error message will not be a “warning”, so be sure to read the messages carefully.
3-8
BIM-EPIC Installation and System Guide
Autoattach Installation Via Dynamic Command Definition
STEP 5
Test BIM-EPIC’s VATTACH and VDETACH command
This description assumes that the MAINT machine has CMS Class B and Class G privileges.
Logon to MAINT
SP CONSOLE * CL T START
Spool console to MAINT for audit trail purposes.
Q COMMANDS
Display a list of CP commands. VATTACH and
VDETACH should appear in the list.
VATTACH rdef * 181
Test the VATTACH command rdef is the
address of a “real” tape drive.
Q TAPES
Query tapes and verify that rdef is attached to
MAINT.
VDETATCH 181
Test the VDETACH command.
Q TAPES
Query tapes and verify that rdef is not attached to
MAINT.
VATT rdef * 181
Test the VATTACH command rdef is the
address of a “real” tape drive.
Q TAPES
Query tapes and verify that rdef is attached to
MAINT.
VDET 181
Test the VDETACH command.
Q TAPES
Query tapes and verify that rdef is not attached to
MAINT.
The purpose of the VATT and VDET test is to verify that the ABBR portion of the DEFINE
COMMANDs was correctly entered.
After Step 5 is completed, BIM-EPIC VATTACH and VDETACH commands can be used by
an operator and will automatically be used by VSE Guests that have started BIM-EPIC with
these OPTION statements included in the configuration options:
AUTOATT=YES
VM=YES (this one is probably already present)
DO NOT add the AUTOATT=YES option to the BIM-EPIC configuration options until
all of the above steps have been successfully completed.
Chapter 3. Installing the Autoattach Feature
3-9
Autoattach Installation for VM/ESA Version 2 Release 2 Using VMSES/E
Autoattach Installation for VM/ESA Version 2 Release 2 Using
VMSES/E
Installation
Requirements
Please review the installation assumptions at the beginning of the chapter.
The instructions in this section assume that you use VMSES/E procedures and tools to install
Autoattach. The term LOCALMOD disk refers to the MAINT minidisk where you maintain
your installation’s modifications to CP. These instructions assume that you are using the
VMSES/E-specified 2C4 disk. Although some files will be created on the MAINT A-disk,
they will be moved to other minidisks as prescribed by VMSES/E.
Installation Files
The following files are loaded from the BIM-EPIC installation tape:
File
3-10
Description
CPLOAD
AUXLCL
CPLOAD update control file
EPICAA
PARTCAT
Parts catalog entries for Autoattach
HCPCOM
VATTESA
HCPCOM update file to add VATTACH
HCPCOM
VDETESA
HCPCOM update file to add VDETACH
HCPGVA
ASSEMBLE
Source code for VATTACH command
HCPGVD
ASSEMBLE
Source code for VDETACH command
HCPLDL
EPICAA
CP nucleus load list module update
HCPMDLAT
HCPGVA
HCPMDLAT update file for HCPGVA module
HCPMDLAT
HCPGVD
HCPMDLAT update file for HCPGVD module
BIM-EPIC Installation and System Guide
Autoattach Installation for VM/ESA Version 2 Release 2 Using VMSES/E
The following IBM files are updated or created. Those with an asterisk (*) next to them must
be loaded from the VM/ESA CP product tape and unpacked unless this has already been done
as part of the VM/ESA install process or a prior CP service procedure:
File
VM/ESA Release
Level
Description
CPLOAD
EXEC
CP nucleus load list
CPLOAD
MAP
CP nucleus load map
CPLOAD
MODULE
CP nucleus
ESALCL
PPF
CP local service PPF override file
HCPCOM
ASSEMBLE*
CP command table
HCPCOM
AUXLCL
CP command table control file
HCPCOM
EPICAA
CP command table update file
HCPLDL
ASSEMBLE*
CP nucleus load list module
HCPLDL
AUXLCL
CP nucleus load list module control file
HCPMDLAT
AUXLCL
CP module attribute table control file
HCPMDLAT
EPICAA
CP module attribute table update file
HCPMDLAT
MACRO*
CP module attribute table
HCPVM
CNTRL
Standard CP control file
VMSES
PARTCAT
Parts inventory for local parts
2VMVMBnn
VVTLCL
Version vector table for the CP component
2VMVMBnn
$SELECT
Object selection file for CP
2VMVMBnn
SRVBLDS
Build status table
You will need to supply the appropriate VM/ESA release level in several places, as indicated
by the variable nn in a command. Replace nn as follows:
If Release is...
Replace nn by...
VM/ESA 2.0
20
VM/ESA 2.1
21
VM/ESA 2.2
22
For example, for version 2 release 2.0, 2VMVMBnn VVTLCL becomes 2VMVMB20
VVTLCL.
Chapter 3. Installing the Autoattach Feature
3-11
Autoattach Installation for VM/ESA Version 2 Release 2 Using VMSES/E
STEP 1
Logon to MAINT.
Ensure that its environment is correct for application of CP service. Refer to the IBM
VM/ESA Service Guide for the requirements. At the time of writing, Step 1 in Chapter 6 Procedures for Local Service and Modifications, contained a description of these
requirements. If CP service has previously been applied, the MAINT environment may
already be correct.
SP CONSOLE * CL T START
Spool console to MAINT for audit trail
purposes
VMFSETUP ESA CP
Establish the correct MDISK access
environment for CP service.
Prepare for the “worst case” scenario of an unusable CP nucleus being installed:
•
•
•
Using the screen display produced by the VMFSETUP command as a reference, backup
all of the MDISK’s displayed by the VMFSETUP command (VMFPLC2 is one way of
doing this)
Backup the running CP nucleus.
Be prepared to do a standalone restore of the backed up CP nucleus or to IPL with an
alternate nucleus.
These backups probably will not be needed, but they are “cheap insurance”.
STEP 2
VMFSETUP ESA CP
Establish the correct MDISK access
environment for CP service.
Make a note of the file modes displayed for:
STEP 3 (Optional)
3-12
LOCALMOD
disk (usually 2C4)
________
APPLYALT
disk (usually 2A6)
________ (It’s the first disk listed in “APPLY”
group display)
BUILD7
disk (usually 493)
________
Verify that VM service is complete for the CP component by generating a new CP nucleus and
testing it before installing the AUTOATTACH feature.
BIM-EPIC Installation and System Guide
Autoattach Installation for VM/ESA Version 2 Release 2 Using VMSES/E
STEP 4
Load the Autoattach files from the BIM-EPIC distribution tape.
Prepare and execute the following VSE job to obtain the BIM-EPIC AUTOATTACH “all VM
versions” master file deck:
* $$ JOB JNM=AUTOATT,CLASS=x,LDEST=(,userid),PDEST=(,userid)
// JOB AUTOATT OBTAIN AUTOATTACH MASTER DECK
// EXEC LIBR
ACCESS S=lib.sublib
PUNCH EPAUTO.Z FORMAT=NOHEADER EOF=NO
/*
/&
* $$ EOJ
x
userid
lib.sublib
any desired POWER Job Class
the CMS user id the punch and print output are to be directed to.
the VSE library and sub-library where the current version of BIM-EPIC is
installed.
The card deck produced by this job contains BIM-EPIC AUTOATTACH files for all VM
versions. The CMS RECEIVE command is used to bring these files onto the MAINT “A”
disk. They are then moved to the LOCALMOD disk.
There are several members in the deck being “received”. These messages will be displayed for
each AUTOATTACH member in the deck:
DMSDSK1079R Receive fn ft fm as fn fm A1?
DMSDSK1079R Reply 0 (NO), 1 (YES), 2 (QUIT), or 3 (RENAME)
If the member is listed in the “Installation Files” table, above:
reply
1
to receive it
If it is not listed in the table:
Reply
0
to ignore it
It does no harm if members from other AUTOTACH versions are received, since all file
names/types are unique, but this “selective receive” process avoids cluttering the receiving
disk.
At the end of the process, the following error messages may be displayed. They can be
ignored:
DMSDSK078E Invalid card in input deck
DMSDSK1124W Spool file nnnn has been left in your reader
DMSDSK1124W because one or more files were not received
DMSWRC671E Error receiving file ACIMAP EPIC A; rc=32 from DISK LOAD
Chapter 3. Installing the Autoattach Feature
3-13
Autoattach Installation for VM/ESA Version 2 Release 2 Using VMSES/E
Q RDR * ALL
Display the RDR queue
RECEIVE number (NEW REP
Move the AUTOATTACH files onto the “A” disk.
“(NEW” will cause them to be assigned the current date.
Number is the file number of the RDR queue entry for
the just-punched deck.
FILEL * *
Display a list of members on the “A” disk. There should
be a MAINT NETLOG member followed by 9 members
created as a result of the RECEIVE command. Compare
these 9 members with the Installation Files table, above.
If any are missing, repeat the RECEIVE command.
Place the following command
next to each of the just-loaded
entries in the File List
Copy each of the newly-loaded members to the
LOCALMOD disk.
COPY / = = E
If the LOCALMOD entry noted in Step 2, above is not E
then use the file mode from Step 2.
and press the ENTER Key
If a message similar to the following appears for
CPLOAD AUXLCL:
DMSCPY024E File CPLOAD AUXLCL E1
already exists specify the REPLACE
option
It means that modifications have already been made to
CP LOAD. Do this to add BIM-EPIC’s modifications:
XEDIT CPLOAD AUXLCL A
SCR 2
XEDIT CPLOAD AUXLCL E
copy the contents of CPLOAD AUXLCL A to
CPLOAD AUXLCL E They must be the first/top entry
in the “E” member.
FILE the “E” member
QUIT the “A” member
Place the following command next to Erase the newly-loaded members from the “A” disk.
each of the just-loaded entries in the
File List
ERASE
and press the ENTER Key
3-14
BIM-EPIC Installation and System Guide
Autoattach Installation for VM/ESA Version 2 Release 2 Using VMSES/E
STEP 5
Update the Local Version Vector Table for the CP component to reflect the new BIM-EPIC
updates to the HCPMDLAT, HCPLDL and CPLOAD parts.
The following commands create a 2VMVMBnn VVTLCL member on the LOCALMOD disk.
“nn” is the VM/ESA Version 2 release level.
If VM/ESA Ver 2 Rel 2.0, “nn” is replaced with “20”
If the LOCALMOD entry noted in Step 2, above is not E then use the file mode from Step 2.
VMFSIM LOGMOD 2VMVMBnn VVTLCL E TDATA :PART HCPMDLAT MAC :MOD LCLEPIC.EPICAA
VMFSIM LOGMOD 2VMVMBnn VVTLCL E TDATA :PART HCPLDL TXT :MOD LCLEPIC.EPICAA
VMFSIM LOGMOD 2VMVMBnn VVTLCL E TDATA :PART HCPCOM TXT :MOD LCLEPIC.EPICAA
STEP 6
Create or update the service selection file to identify which CP parts must be built.
The following commands create a 2VMVMBnn $SELECT member on the APPLYALT disk:
“nn” is the VM/ESA Version 2 release level.
If VM/ESA Ver 2 Rel 2.0, “nn” is replaced with “20”
xedit 2VMVMBnn $SELECT G
Create the member or edit the existing
member. If the APPLYALT File Mode
noted in Step 2, above is different for
your installation, use it instead of G.
top
Go to beginning/top of the file.
input :APPLYID.
mm/dd/yy hh:mm:ss
Replace mm/dd/yy and hh:mm:ss with the
current date and time so the need for a
build can be determined. There is a
period (.) after :APPLYID.
input HCPMDLAT MACRO
Add a data line.
input CPLOAD EXC
Add a data line.
file
xedit EPICAA PARTCAT E
There are two entries with
PRODID.6VMVMB22 in them. Change
these entries to PRODID.2VMVMB20.
If the LOCALMOD entry noted in Step 2,
above is not E then use the file mode from
Step 2.
file
xedit VMSES PARTCAT G
The parts catalog for HCPGVA and
HCPGVD.
bot
Go to end/bottom of the file.
Get EPICAA PARTCAT
Add EPIC PARTCAT entries.
file
Chapter 3. Installing the Autoattach Feature
3-15
Autoattach Installation for VM/ESA Version 2 Release 2 Using VMSES/E
STEP 7
Add the Autoattach entries to the module attribute table. Create an auxiliary control file first,
then use Xedit Update to generate an update file. Ignore the DMSXUP180W message when
creating the new update file.
Next rebuild the HCPGPI MACLIB where HCPMDLAT resides.
xedit HCPMDLAT AUXLCL E
Create an AUX control file for
HCPMDLAT and insert a line for the
BIM-EPIC Autoattach update.
top
If this file exists, the BIM-EPIC update
must be at the top.
input EPICAA LCL LCLEPIC * EPIC AUTOATTACH
STEP 8
file
Save the file to your LOCALMOD disk.
xedit HCPMDLAT MACRO ( CTL HCPVM
Edit the module attribute table under
update control. Ignore the
DMSXUP180W Missing PTF file
message.
Fm E
If the LOCALMODE entry noted in Step
2, above is not E then use the file mode
from Step 2.
find .EHCPENA
Locate this label.
get = HCPGVA
Insert update for VATTACH.
get = HCPGVD
Insert update for VDETACH.
file
Save this file to your LOCALMOD disk.
GENCPBLS CPLOAD ESA CP (OUTMODE
LOCALMOD $SELECT LOGMOD
Create a new CP Load List.
VMFBLD PPF ESA CP HCPGPI (SERVICED
Rebuild the HCPGPI MACLIB.
Assemble the BIM-EPIC AUTOATTACH programs using the high-level assembler.
Assembling these programs on your VM system ensures that the copybooks and macros used
are at the correct service level.
VMFHLASM HCPGVA ESA CP
Assemble the VATTACH command.
VMFHLASM HCPGVD ESA CP
Assemble the VDETACH command.
FILEL * * A
Display contents of “A” disk
There will be an entry for
HCPGVA TXT00000 and
HCPGVD TXT00000
3-16
BIM-EPIC Installation and System Guide
Autoattach Installation for VM/ESA Version 2 Release 2 Using VMSES/E
Place the following next to each of these entries Move the TXT00000 modules to the
LOCALMOD disk. If the LOCALMOD entry
noted in Step 2, above is not E then use the
file mode from Step 2.
COPY / = = E
and press ENTER key
Place the following command next to each of
these entries
Remove the TXT00000 modules from the “A”
disk. If the LOCALMOD entry noted in Step
2, above is not E then use the file mode from
Step 2.
ERASE
and press ENTER Key
STEP 9
Add the VATTACH and VDETACH commands to the CP command table.
xedit HCPCOM AUXLCL E
Edit or create a new AUX control file for
HCPCOM.
top
Insert a line at the top to describe the new
source update file which will be file on
the LOCALMOD disk.
input EPICAA LCL LCLEPIC * EPIC AUTOATTACH
file
File th AUX control file
xedit HCPCOM ASSEMBLE ( CTL HCPVM
Edit the CP command table. Ignore the
DMSXUP180W Missing PTF file
HCPCOM EPICAA A message.
Fm E
If the LOCALMOD entry noted in Step 2,
above is not E then use the file mode
from Step 2.
Entries in HCPCOM must be in
alphabetical order.
locate /COMMAND=(VARY/
Locate the VARY command.
down 1
get = VATTESA
Insert the VATTACH definition after
VARY.
locate /COMMAND=(VDELETE/
Locate the VDELETE command
down 1
get = VDETESA
Insert the VDETACH definition.
file
File the member.
VMFHLASM HCPCOM ESA CP
Assemble command table.
Filel * * A
Display contents of "A" disk.
There will be an entry for
HCPCOM TXTLEPIC
Chapter 3. Installing the Autoattach Feature
3-17
Autoattach Installation for VM/ESA Version 2 Release 2 Using VMSES/E
Place the following next to this entry
Move the TXTLEPIC module to the
LOCALMOD disk. If the LOCALMOD
entry noted in Step 2, above is not E then
use the file mode from Step 2.
COPY / = = E
and press ENTER
Place the following next to this entry
Remove the TXTLEPIC module from the
“A” disk.
ERASE
and press ENTER
STEP 10
Build a new CP nucleus. If prior steps did not complete properly, errors can be produced by
VMFBUILD. Correct any errors before going on to the next step.
VMFSIM LOGMOD 2VMVMB20 VVTLCL E
TDATA :PART CPLOAD EXC :MOD
LCLEPIC
Add a CPLOAD entry to the Version
Vector Table The command is typed on a
single line. If the LOCALMOD entry
noted in Step 2, above is not E then use
the file mode from Step 2
VMFBLD PPF ESA CP CPLOAD ( ALL
Build the CP Nucleus. Make sure the
following message has a 0 return code:
VMFBLD1851I (1 of 1) VMFBDNUC
completed with return code 0
XEDIT CPLOAD MAP
To check for unresolved/undefined
SET CASE MIXED IGNORE
Ignore case when searching
ALL /UNRESOLV/
STEP 11
ALL /UNDEFINE/
If any unresolved or undefined items are
found, do not continue until they are
corrected.
QUIT
End the XEDIT
Move the new nucleus into production by copying the CPLOAD MODULE to the CP PARM
disk.
Q CPDISK
3-18
Display the CP PARM disks. You will see a
display similar to the following:
PARM1
MAINT
0CF1
A
R/O
PARM2
MAINT
0CF2
B
R/O
CPREL A
Release the PARM1 disk.
LINK MAINT CF1 CF1 MR
Link to the PARM1 disk. If PARM1 was not
CF1, then use the cuu from the Q CPDISK
display.
BIM-EPIC Installation and System Guide
Autoattach Installation for VM/ESA Version 2 Release 2 Using VMSES/E
ACCESS CF1 Z
Access the PARM1 disk. If PARM1 was not
CF1, then use the cuu from the Q CPDISK
display.
COPY CPLOAD MODULE K = = Z ( OLDD Copy the nucleus to the parms disk. (You may
REPLACE
want to rename the existing module first.) If
the BUILD7 entry noted in Step 2, above is
not K then use the file mode from Step 2.
STEP 12
REL Z(DET
Return Parm1.
CPACCESS MAINT CF1 A SR
Disk to CP control.
IPL and test the BIM-EPIC AUTOATTACH commands. After completing this step, test
Autoattach using BIM-EPIC . The following description assumes that the MAINT machine
has CMS Class B and Class G privileges.
CP SHUTDOWN REIPL
Shutdown VM and re-IPL.
Logon to MAINT
SP CONSOLE * CL T START
Spool console to MAINT for audit trail
purposes.
Q COMMANDS
Display a list of CP commands. VATTACH
and VDETACH should appear in the list.
VATTACH rdef * 181
Test the VATTACH command rdef is the
address of a “real” tape drive.
Q TAPES
Query tapes and verify that rdef is attached to
MAINT.
VDETATCH 181
Test the VDETACH command.
Q TAPES
Query tapes and verify that rdef is not
attached to MAINT.
After Step 12 is completed, BIM-EPIC VATTACH and VDETACH commands can be used
by an operator and will automatically be used by VSE Guests that have started BIM-EPIC
with these OPTION statements included in the configuration options:
AUTOATT=YES
VM=YES
Chapter 3. Installing the Autoattach Feature
3-19
Autoattach Installation for VM/ESA Version 1 Release 2 Using VMSES/E
Autoattach Installation for VM/ESA Version 1 Release 2 Using
VMSES/E
Installation
Requirements
Please review the installation assumptions at the beginning of the chapter.
The instructions in this section assume that you use VMSES/E procedures and tools to install
Autoattach. The term LOCALMOD disk refers to the MAINT minidisk where you maintain
your installation’s modifications to CP. These instructions assume that you are using the
VMSES/E-specified 2C4 disk. Although some files will be created on the MAINT A-disk,
they will be moved to other minidisks as prescribed by VMSES/E.
Installation Files
3-20
The following files are loaded from the DTR tape:
File
Description
CPLOAD AUXLCL
CPLOAD update control file
EPICAA DOCESA2
Documentation updates
EPICAA PARTCAT
Parts catalog entries for Autoattach
HCPCOM VATTESA
HCPCOM update file to add VATTACH
HCPCOM VDETESA
HCPCOM update file to add VDETACH
HCPGVA ASSEMBLE
Source code for VATTACH command
HCPGVD ASSEMBLE
Source code for VDETACH command
HCPLDL EPICAA
CP nucleus load list module update
HCPMDLAT HCPGVA
HCPMDLAT update file for HCPGVA module
HCPMDLAT HCPGVD
HCPMDLAT update file for HCPGVD module
BIM-EPIC Installation and System Guide
Autoattach Installation for VM/ESA Version 1 Release 2 Using VMSES/E
The following IBM files are updated or created:
File
Description
CPLOAD EXEC
CP nucleus load list
CPLOAD MAP
CP nucleus load map
CPLOAD MODULE
CP nucleus
ESA PPF
CP local service PPF override file
HCPCOM ASSEMBLE*
CP command table
HCPCOM AUXLCL
CP command table control file
HCPCOM EPICAA
CP command table update file
HCPLDL ASSEMBLE*
CP nucleus load list module
HCPLDL AUXLCL
CP nucleus load list module control file
HCPMDLAT AUXLCL
CP module attribute table control file
HCPMDLAT EPICAA
CP module attribute table update file
HCPMDLAT MACRO*
CP module attribute table
HCPVM CNTRL
Standard CP control file
VMSES PARTCAT
Parts inventory for local parts
6VMVMBnn VVTLCL
Version vector table for the CP component
6VMVMBnn $SELECT
Object selection file for CP
6VMVMBnn SRVBLDS
Build status table
* These files must be loaded from your product source tape to the BASE SOURCE disk and
unpacked.
VM/ESA Release
Level
You will need to supply the appropriate VM/ESA release level in several places, as indicated
by the variable nn in a command. Replace nn as follows. Be sure to edit VVT* LCL to see
what "nn" should be changed to.:
If Release is...
STEP 1
Replace nn by...
VM/ESA 2.0
20
VM/ESA 2.1
21
VM/ESA 2.2
22
Before installing Autoattach, back up all MAINT minidisks as well as the running CP nucleus.
Chapter 3. Installing the Autoattach Feature
3-21
Autoattach Installation for VM/ESA Version 1 Release 2 Using VMSES/E
STEP 2
Set up the MAINT environment to service CP. MAINT must have sufficient storage and be
operating in XA mode. If you have defined a nucleus with a preferred virtual machine,
storage must be four (4) megabytes greater than the sum of VRSIZE, VRFREE and RIO370 in
the SYSSTORE macro in HCPSYS ASSEMBLE.
CP SET MACHINE XA
CP DEFINE STORAGE 24M
CP IPL 190 CLEAR PARM AUTOCR
CP SPOOL PRT *
CP SPOOL PUN *
CP SPOOL CONS START *
ACCESS 51D D/D
ACCESS 5E5 B/B
VMFSETUP ESA CP
Operate in XA mode.
Define sufficient storage.
IPL non-shared CMS.
Spool the printer and punch output
back to your reader. Save console
log for problem determination.
Access VMSES/E tools.
Access your CP minidisks defined by the PPF file. Make a
note of the LOCALMOD disk filemode (2C4) and the
APPLYALT disk filemode (2A6).
STEP 3
Verify that VM service is complete for the CP component by generating a new CP nucleus and
testing it. Perform STEP 11 now before installing Autoattach to verify that your service is
current. If no problems are detected, continue with STEP 4.
STEP 4
Load the Autoattach files from the distribution tape.
During a BIM-EPIC installation, the Autoattach files are loaded to a VSE library. Execute
LIBR as shown below, using your userid and sublibrary name. The PUNCH (PU) line above
must be specified exactly as shown. Output is sent to the issuing machine.
* $$ JOB JNM=LIBR,CLASS=A,LDEST=(,userid),PDEST=(,userid)
// JOB LIBR
// EXEC LIBR
ACCESS S=lib.sublib
PUNCH EPAUTO.Z FORMAT=NOHEADER EOF=NO
/*
/&
* $$ EOJ
Issue the command below. filemode is the file mode of your LOCALMOD disk (2C4).
RECEIVE file-number filename filetype filemode
It is normal to receive error messages “Invalid card in input deck” and “Spool file left in
reader”. These can be disregarded. If the VM programmer uses a device type that does not
punch a blank card, these messages do not appear.
3-22
BIM-EPIC Installation and System Guide
Autoattach Installation for VM/ESA Version 1 Release 2 Using VMSES/E
STEP 5
Update the Local Version Vector Table for the CP component to reflect the new BIM-EPIC
updates to the HCPMDLAT, HCPLDL and CPLOAD parts.
The following commands create a file on the LOCALMOD disk called 6VMVMBnn
VVTCTL. Be sure to replace fm-LOCALMOD with the proper filemode. Also note that the
commands are continued to a second line here.
VMFSIM LOGMOD 6VMVMBnn VVTLCL fm-LOCALMOD TDATA
:PART HCPMDLAT MAC :MOD LCLEPIC.EPICAA
VMFSIM LOGMOD 6VMVMBnn VVTLCL fm-LOCALMOD TDATA
:PART HCPLDL TXT :MOD LCLEPIC.EPICAA
VMFSIM LOGMOD 6VMVMBnn VVTLCL fm-LOCALMOD TDATA
:PART HCPCOM TXT :MOD LCLEPIC.EPICAA
STEP 6
(cont’d.)
(cont’d.)
(cont’d.)
Create or update the service selection file to identify which CP parts must be built. This
$SELECT file must reside on the APPLYALT disk (2A6). Then create or update the local
parts catalog to add Autoattach parts.
xedit 6VMVMBnn $SELECT
top
input :APPLYID. mm/dd/yy hh:mm:ss
/HCPMDLAT MACRO
input CPLOAD EXC
set fmode fm-APPLYALT
Edit the $SELECT file to add an
entry for this project.
Use the current date and time for the
:APPLYID tag so the need for a
build can be determined.
If XEDIT replies "not found" then
enter
This file must be saved to the
APPLYALT disk.
file
xedit VMSES PARTCAT fm-LOCALMOD
bottom
get EPICAA PARTCAT
file
EPICAA PARTCAT
File
The parts catalog for HCPGVA and
HCPGVD must reside on
fm-LOCALMOD.
If the EPICAA PARTCAT file is not
on your tape, see below.
If the parts catalog was not included on older distribution tapes, it can be created as a variablelength file on the fm-LOCALMOD disk. Create the file with the following two lines:
:PARTID.HCPGVA ASSEMBLE :PRODID.6VMVMBnn%CP
:STAT.VMFREC.02/26/93.01:01:13.MAINT
:PARTID.HCPGVD ASSEMBLE :PRODID.6VMVMBnn%CP
:STAT.VMFREC.02/26/93.01:01:13.MAINT
(cont’d)
(cont’d)
Chapter 3. Installing the Autoattach Feature
3-23
Autoattach Installation for VM/ESA Version 1 Release 2 Using VMSES/E
STEP 7
Add the Autoattach entries to the module attribute table. Create an auxiliary control file first,
then use Xedit Update to generate an update file. Ignore the DMSXUP180W message when
creating the new update file. Then rebuild the HCPGPI MACLIB where HCPMDLAT
resides.
xedit HCPMDLAT AUXLCL
top
Create an AUX control file for
HCPMDLAT and insert a line for the
BIM-EPIC Autoattach update.
If this file exists, the BIM-EPIC update
must be at the top.
input EPICAA LCL LCLEPIC * BIM-EPIC AUTOATTACH
set fmode fm-LOCALMOD
Save the file to your LOCALMOD disk.
file
xedit HCPMDLAT MACRO ( CTL HCPVM
find .EHCPGIV
get = HCPGVA
get = HCPGVD
set fmode fm-LOCALMOD
file
Edit the module attribute table under
update control to create HCPMDLAT
EPICAA.
Locates the tag.
Copy in updates HCPGVA and
HCPGVD in the appropriate location to
position them in alphabetic order in the
NON-MP, PAGEABLE section of the
table.
Save this file to your LOCALMOD disk.
Rebuild the HCPGPI MACLIB. This replaces the existing maclib on the BUILD (490) disk.
VMFBLD PPF ESA CP HCPGPI HCPMDLAT (SERVICED
STEP 8
Assemble the Autoattach programs using the high-level assembler. Assembling these
programs on your VM system ensures that the copybooks and macros used are at the correct
service level. The resulting text files must be moved to the LOCALMOD disk.
VMFHLASM HCPGVA ESA CP
VMFHLASM HCPGVD ESA CP
Assemble the VATTACH command.
Assemble the VDETACH command.
Move the files to LOCALMOD disk.
COPYFILE HCPGVA TXT00000 A = = fm-LOCALMOD
COPYFILE HCPGVD TXT00000 A = = fm-LOCALMOD
ERASE HCPGVA TXT00000 A
ERASE HCPGVD TXT00000 A
STEP 9
3-24
Add the VATTACH and VDETACH commands to the CP command table. Create an
auxiliary control file first, then generate an update file. Ignore the DMSXUP180W message
when creating the new update file. Then assemble HCPCOM and move the text to the
LOCALMOD disk.
BIM-EPIC Installation and System Guide
Autoattach Installation for VM/ESA Version 1 Release 2 Using VMSES/E
xedit HCPCOM AUXLCL
top
Edit or create a new AUX control file for
HCPCOM and insert a line at the top to
describe the new source update file which
will be file on the LOCALMOD disk.
input EPICAA LCL LCLEPIC * BIM-EPIC AUTOATTACH
set fmode fm-LOCALMOD
Note that command entries must be kept
in alphabetic order.
file
xedit HCPCOM ASSEMBLE ( CTL HCPVM
locate /COMMAND=(VARY/
down 1
get = VATTESA
locate /COMMAND=(VDELETE/
down 1
get = VDETESA
set fmode fm-LOCALMOD
file
Edit the command table in
update mode.
Locate the VARY command.
Insert the VATTACH definition after
VARY.
Locate the VDELETE command and then
insert the VDETACH definition.
Save the update to the LOCALMOD disk.
VMFHLASM HCPCOM ESA CP
Assemble command table.
Move the text file to LOCALMOD disk.
COPY HCPCOM TXTLEPIC A = = fm-LOCALMOD
ERASE HCPCOM TXTLEPIC A
STEP 10
Update the nucleus load list. First create an auxilliary control file and then assemble
HCPLDL to generate the load list. The resulting text must be renamed and moved to the
LOCALMOD disk. The APAR information must also be commented out. Note that the
HCPLDL EPICAA update file which was loaded from the tape is a dummy update file. It
only serves to document the change to the load list which is effected by the changes to
HCPMDLAT.
xedit HCPLDL AUXLCL
top
Edit or create a new AUX control file for
HCPLDL and insert a line at the top to
describe the new source update file which is
called HCPLDL EPICAA.
input EPICAA LCL LCLEPIC * BIM-EPIC AUTOATTACH
set fmode fm-LOCALMOD
Save the new file on the LOCALMOD disk.
file
VMFHLASM HCPLDL ESA CP (NOCKGEN
Assemble HCPLDL.
Move the new text file to the
LOCALMOD disk.
COPYFILE HCPLDL TXTLEPIC A = = fm-LOCALMOD ( OLDDATE REPLACE
ERASE HCPLDL TXTLEPIC A
xedit HCPLDL TXTLEPIC fm-LOCALMOD
Edit the new load list.
top
set fname CPLOAD
Change the name to CPLOAD
EXCLEPIC.
set ft EXCLEPIC
change //*/ /&CONTROL OFF/
file
Comment out the update
information.
Save it to the LOCALMOD disk.
Chapter 3. Installing the Autoattach Feature
3-25
Autoattach Installation for VM/ESA Version 1 Release 2 Using VMSES/E
STEP 11
Build a new CP nucleus. If prior steps did not complete properly, errors can be produced by
VMFBUILD. Correct any errors before going on to the next step. Add an entry to the version
vector table for CPLOAD. VMFBLD replaces your existing CPLOAD MAP A and CPLOAD
MODULE fm-BUILD.
VMFSIM LOGMOD 6VMVMBnn VVTLCL fm-LOCALMOD TDATA
:PART CPLOAD EXC :MOD LCLEPIC
VMFBLD PPF ESA CP CPLOAD ( ALL
xedit CPLOAD MAP
set case mixed ignore
all /unresolv/
all /undefine/
qquit
STEP 12
(continued...)
Invoke the CP build process. If
successful, it will create new
CPLOAD MAP and CPLOAD
MODULE files.
Check the load map for any unresolved or
undefined reference errors. Do not continue if
any errors are found. Correct any problems
before continuing.
Move the new nucleus into production by copying the CPLOAD MODULE to the CP PARM
disk.
Q CPDISK
CPREL A
LINK MAINT CF1 CF1 MR
ACCESS CF1 Z
Display and release the CP PARM DISK.
Link and access the parm disk.
Copy the nucleus to the parms disk. You may want to rename the existing module first.
COPYFILE CPLOAD MODULE fm-TOOLS = = fm-CF1 ( OLDD REPLACE
CP SHUTDOWN REIPL
STEP 13
IPL and test the new system. After completing this step, test Autoattach using BIM-EPIC.
CP COMMANDS
VATTACH rdev * 181
QUERY TAPES
QUERY VIRTUAL TAPES
VDETACH 181
QUERY TAPES
QUERY VIRTUAL TAPES
3-26
Shut down your system and re-IPL.
BIM-EPIC Installation and System Guide
From a class BG machine, VATTACH and VDETACH
should be shown in the commands list.
Test the VATTACH command. Supply a real tape drive
address.
Query tapes to verify that the drive was
really attached.
Test the VDETACH command.
Query tapes again to verify that the drive
was really detached.
Autoattach Installation for VM/ESA Version 1 Release 1.1 Using VMSES/E
Autoattach Installation for VM/ESA Version 1 Release 1.1 Using
VMSES/E
Installation
Requirements
These Autoattach installation instructions assume that you have experience in generating and
servicing a VM/ESA CP nucleus using VMSES/E service procedures and tools. If you do not
perform each step without error, your system could become inoperable.
Autoattach is installed as a local service modification to the C component of VM. These
instructions are only a “guide” to installing Autoattach. If these instructions are unclear,
incomplete or conflicting, you should consult your “VM Service Guide” for definitive
procedures. If you experience problems with the Autoattach feature itself, please contact
BIM-EPIC Technical Support.
The term LOCALMOD disk refers to the MAINT minidisk where you maintain your
installation’s modifications to CP. These instructions assume that you are using the VMSES/E
specified 2C4 disk. Although some fileswill be created on the MAINT A-disk, they will be
moved to the LOCALMOD disk before the CP nucleus is generated.
How To Use These
Instructions
For each step there is an overview of the process to be accomplished followed by two columns
of instructions. The left column contains the actual CMS and/or CP commands to be issued
and the right column contains an explaination of what is being done. For Xedit procedures,
the Xedit subcommands to be issued will be indented following the actual Xedit command
line.
Installation Files
The following files are loaded from the DTR tape:
File
Description
CPLOAD AUXLCL
CPLOAD update control file
EPICAA DOCESA
Documentation updates
HCPCOM VATTESA
HCPCOM update file to add VATTACH command
HCPCOM VDETESA
HCPCOM update file to add VDETACH command
HCPGVA ASSEMBLE
Source code for VATTACH command
HCPGVD ASSEMBLE
Source code for VDETACH command
HCPLDL EPICAA
CP nucleus load list module update
HCPMDLAT HCPGVA
HCPMDLAT update file for HCPGVA module
HCPMDLAT HCPGVD
HCPMDLAT update file for HCPGVD module
Chapter 3. Installing the Autoattach Feature
3-27
Autoattach Installation for VM/ESA Version 1 Release 1.1 Using VMSES/E
The following IBM files are updated or created:
File
Description
CPLOAD EXEC
CP nucleus load list
HCPCOM ASSEMBLE
CP command table
HCPCOM AUXLCL
CP command table control file
HCPCOM EPICAA
CP command table update file
HCPLCL EXEC
HCPLCL MACLIB member list
HCPLDL ASSEMBLE
CP nucleus load list module
HCPLDL AUXLCL
CP nucleus load list module control file
HCPMDLAT AUXLCL
CP module attribute table control file
HCPMDLAT EPICAA
CP module attribute table update file
HCPMDLAT MACRO
CP module attribute table
HCPVM CNTRL
Standard CP control file
6VMVMB11 VVTLCL
Version vector table for the CP component
6VMVMB11 $SELECT
Object selection file for CP
* These files must be loaded from your product source tape to the BASE SOURCE disk and
unpacked.
STEP 1
Before installing Autoattach, back up your running CP nucleus. Also back up the MAINT
machine LOCALMOD and 191 disks.
DDR
input cuu 33xx volid
OUTPUT cuu 34xx
DUMP NUCLEUS
VMFPLC2 DUMP * * A
Invoke DASD Dump/Restore program.
Specify your CP sysres address
and device type and your tape
address and device type. DUMP
NUCLEUS will dump the IPL tracks
as well as the nucleus cylinders.
Copy all A-disk files to another tape and then access and
repeat this command for your LOCALMOD disk (2C4).
STEP 2
Verify that VM service is complete for the CP component by generating a new CP nucleus and
testing it. Perform STEP 11A or STEP 11B now before installing Autoattach to verify your
build process. If no problems are detected, continue with STEP 3.
STEP 3
Set up the MAINT environment to service CP. MAINT must have sufficient storage and be
operating in XA mode. If you have defined a nucleus with a preferred virtual machine,
storage must be four (4) megabytes greater than the sum of VRSIZE, VRFREE and RIO370 in
the SYSSTORE macro in HCPSYS ASSEMBLE.
3-28
BIM-EPIC Installation and System Guide
Autoattach Installation for VM/ESA Version 1 Release 1.1 Using VMSES/E
CP SET MACHINE XA
CP DEFINE STORAGE 24M
CP IPL 190 CLEAR PARM AUTOCR
CP SPOOL PRT *
CP SPOOL PUN *
ACCESS 51D D/D
ACCESS 5E5 B/B
VMFSETUP ESA CP
STEP 4
Operate in XA-mode.
Define sufficient storage.
IPL CMS.
Spool the printer and punch
output back to your reader.
Access VMSES/E tools.
Access your CP minidisks defined by the PPF
file. Make a note of the LOCALMOD disk
filemode (2C4).
Load the Autoattach files from the distribution tape.
During a BIM-EPIC installation, the Autoattach files are loaded to a VSE library. Execute
LIBR as shown below, using your userid and sublibrary name. The PUNCH (PU) line above
must be specified exactly as shown. Output is sent to the issuing machine.
* $$ JOB JNM=LIBR,CLASS=A,LDEST=(,userid),PDEST=(,userid)
// JOB LIBR
// EXEC LIBR
ACCESS S=lib.sublib
PUNCH EPAUTO.Z FORMAT=NOHEADER EOF=NO
/*
/&
* $$ EOJ
Issue the command below. filemode is the file mode of your LOCALMOD disk (2C4).
RECEIVE file-number filename filetype filemode
It is normal to receive error messages “Invalid card in input deck” and “Spool file left in
reader”. These can be disregarded. If the VM programmer uses a device type that does not
punch a blank card, these messages do not appear.
STEP 5
Modify the control file to include a local service maclib which contains the updated
HCPMDLAT macro. HCPVM is the default name of the control file. You can determine the
name that VMSES will use by looking for the :CNTRL. tag in the :COMPNAME. CP section
of ESA PPF.
xedit HCPVM CNTRL
top
locate /MACS/
change/MACS/MACS HCPLCL/ 1
set fmode fm-LOCALMOD
file
STEP 6
Edit the control file.
Insert HCPLCL into the MACS line ahead of the
other maclibs.
Save the file to your LOCALMOD disk.
Add the Autoattach entries to the module attribute table. Create an auxiliary control file first,
then use Xedit Update to generate an update file. Ignore the DMSXUP180W message when
creating the update.
Chapter 3. Installing the Autoattach Feature
3-29
Autoattach Installation for VM/ESA Version 1 Release 1.1 Using VMSES/E
NOTE: In VM/ESA 1.0 base code, the HCPGVA and HCPGVD entries go after HCPENA.
In VM/ESA 1.1 base code, they go after HCPGIV. You can determine your base source level
by editing HCPOPTNS COPY and locating global variable label &HCPVRSN.
xedit HCPMDLAT AUXLCL
top
Create an AUX control file for HCPMDLAT.
Insert a line for the BIM-EPIC Autoattach
update. If this file exists, the BIM-EPIC
update must be at the top.
input EPICAA LCL LCLEPIC * GSI EPIC AUTOATTACH
set fmode fm-LOCALMOD
Save the file to your LOCALMOD disk.
file
Edit the module attribute table under update
control to create HCPMDLAT EPICAA.
xedit HCPMDLAT MACRO ( CTL HCPVM
find tag
Locates the tag. The value of tag
depends on the VM/ESA release level as
follows:
VM/ESA 1.0: find .EHCPENA
VM/ESA 1.1: find .EHCPGIV
get = HCPGVA
get = HCPGVD
set fmode fm-LOCALMOD
file
STEP 7
Copy in updates HCPGVA and HCPGVD in
the appropriate location to position them in
alphabetic order in the NON-MP,
PAGEABLE section of the table. This should
be after label .EHCPGIV.
Save this file to your LOCALMOD disk.
Create a new HCPLCL MACLIB containing the updated HCPMDLAT macro. A member
list, HCPLCL EXEC, must be created and then the maclib is built. The new maclib should be
moved to your LOCALMOD disk.
xedit HCPLCL EXEC
set stay off
locate /HCPMDLAT/
input &1 &2 HCPMDLAT MACRO &3 &4
set fmode fm-LOCALMOD
file
VMFMAC HCPLCL HCPVM
Edit or create a member list for HCPLCL
MACLIB.
Search for an existing entry for
HCPMDLAT if the member list already
exists.
Insert an entry for it if there is none.
Save this file to your LOCALMOD disk.
Generate the new maclib.
Move the maclib to your LOCALMOD
disk.
COPYFILE HCPLCL MACLIB A = = fm-LOCALMOD
ERASE HCPLCL MACLIB A
3-30
BIM-EPIC Installation and System Guide
Autoattach Installation for VM/ESA Version 1 Release 1.1 Using VMSES/E
STEP 8
Assemble the Autoattach modules using the high-level assembler. The resulting text files
must be moved to the LOCALMOD disk.
VMFHLASM HCPGVA ESA CP
VMFHLASM HCPGVD ESA CP
Assemble the VATTACH command.
Assemble the VDETACH command.
Move the files to LOCALMOD disk.
COPYFILE HCPGVA TEXT A = = fm-LOCALMOD
COPYFILE HCPGVD TEXT A = = fm-LOCALMOD
ERASE HCPGVA TEXT A
ERASE HCPGVD TEXT A
STEP 9
Add the VATTACH and VDETACH commands to the CP command table. Create an
auxiliary control file first, then generate an update file. Ignore the MSXUP180W message
when creating the update.
NOTE: The VDELETE command was added in VM/ESA 1.1 base source. VM/ESA 1.0 users
should just insert both updates after the VARY command. The command table must be kept
in alphabetical sequence!
xedit HCPCOM AUXLCL
Edit or create a new AUX control file
for HCPCOM
Insert a line at the top to describe the
new source update file which will be
called HCPCOM EPICAA.
top
input EPICAA LCL LCLEPIC * GSI EPIC AUTOATTACH
set fmode fm-LOCALMOD
Save the new file on the LOCALMOD
file
disk.
xedit HCPCOM ASSEMBLE ( CTL HCPVM
find HCPCOMCV
locate /COMMAND=(VARY/
down 1
get = VATTESA
locate /COMMAND=(VDELETE/
down 1
get = VDETESA
set fmode fm-LOCALMOD
file
STEP 10
Edit the command table in update
mode.
Find the ‘V’ commands and locate the
VARY command.
Insert the VATTACH definition after
VARY.
If your base code is VM/ESA 1.1 or
above, locate the VDELETE command
before inserting the VDETACH
definition.
Save the update to the LOCALMOD
disk.
Assemble the CP command table. The resulting text file will have a file type of TXTLCL and
should be moved to the LOCALMOD disk.
VMFHASM HCPCOM ESA CP
Assemble the command table. Move the text file
to LOCALMOD disk.
COPY HCPCOM TXTLEPIC A = = fm-LOCALMOD
ERASE HCPCOM TXTLEPIC A
Chapter 3. Installing the Autoattach Feature
3-31
Autoattach Installation for VM/ESA Version 1 Release 1.1 Using VMSES/E
STEP 11A
VM/ESA 1.0 base level users must perform STEP 11B instead.
Update the nucleus load list. First create an auxilliary control file and then assemble
HCPLDL to generate the load list. The resulting text must be renamed and moved to the
LOCALMOD disk. The APAR information must also be commented out. Note that the
HCPLDL EPICAA update file which was loaded from the tape is a dummy update file. It
only serves to document the change to the load list which is effected by the changes to
HCPMDLAT.
xedit HCPLDL AUXLCL
top
Edit or create a new AUX control file for
HCPLDL and insert a line at the top to describe
the new source update file which is called
HCPLDL EPICAA.
input EPICAA LCL LCLEPIC * GSI EPIC AUTOATTACH
set fmode fm-LOCALMOD
Save the new file on the LOCALMOD disk.
file
VMFHASM HCPLDL ESA CP
Assemble HCPLDL. The new text file must be
renamed to CPLOAD EXCLEPIC and moved to
the LOCALMOD disk.
COPYFILE HCPLDL TXTLEPIC A CPLOAD EXCLEPIC fm-LOCALMOD (OLDDATE
ERASE HCPLDL TXTLEPIC A
The HCPLDL text file can be erased since it is no
xedit CPLOAD EXCLEPIC
top
longer needed.
Edit the new load list exec and make sure all
APAR information lines are preceded by an *.
change ‘/* ‘&CONTROL OFF’2
file
STEP 11B
VM/ESA 1.1 base level users must perform STEP 11A instead.
Update the nucleus load list. First create an auxiliary control file and then assemble HCPLDL
to generate the load list. The resulting text must be moved to the LOCALMOD disk. Then
use the UTILITY EXEC to generate a new CPLOAD EXEC. Note that the HCPLDL
EPICAA update file which was loaded from the tape is a dummy update file. It only serves to
document the change to the load list which is affected by the changes to HCPMDLAT.
xedit HCPLDL AUXLCL
top
Edit or create a new AUX control file for
HCPLDL.
Insert a line at the top to describe the new source
update file which is called HCPLDL EPICAA.
input EPICAA LCL LCLEPIC * GSI EPIC AUTOATTACH
set fmode fm-LOCALMOD
Save the new file on the LOCALMOD disk.
file
VMFHASM HCPLDL ESA CP
Assemble HCPLDL. The new text file must
then be moved to the LOCALMOD disk.
COPYFILE HCPLDL TXTLEPIC A = = fm-LOCALMOD ( OLDDATE
ERASE HCPLDL TXTLEPIC A
UTILITY GEN CPLOAD
Generate the new CPLOAD EXEC.
3-32
BIM-EPIC Installation and System Guide
Autoattach Installation for VM/ESA Version 1 Release 1.1 Using VMSES/E
STEP 12
VMSES/E users only. VMSES users skip this step.
Update the Local Version Vector Table for the CP component to reflect the new BIM-EPIC
updates to the HCPMDLAT, HCPLDL and CPLOAD parts. Create or update the $SELECT
file to allow a new CPLOAD part to be built. This $SELECT file must reside on the
APPLYALT disk (2A6).
The following commands will create a file on the LOCALMOD disk called 6VMVMB11
VVTCTL. Be sure to replace fm-LOCALMOD with the proper filemode. Also note that the
commands had to be continued to a second line here.
VMFSIM LOGMOD 6VMVMB11 VVTLCL fm-LOCALMOD TDATA
:PART HCPMDLAT MAC :MOD LCLEPIC.EPICAA
VMFSIM LOGMOD 6VMVMB11 VVTLCL fm-LOCALMOD TDATA
:PART HCPLDL ASM :MOD LCLEPIC.EPICAA
VMFSIM LOGMOD 6VMVMB11 VVTLCL fm-LOCALMOD TDATA
:PART CPLOAD EXC :MOD LCLEPIC
xedit 6VMVMB11 $SELECT
set fmode fm-APPLYALT
file
STEP 13
(cont’d)
(cont’d)
Edit the $SELECT file to add an entry for
this project.
top
input :APPLYID. mm/dd/yy hh:mm:ss
input HCPMDLAT MACRO
input HCPLDL TXT
input CPLOAD EXC
(cont’d)
Use the current date and time for the
:APPLYID tag so the need for a build can
be determined.
Insert a line for each of the load list parts
containing the name and type
abbreviation. NOTE: If there is already
an entry in the file for any of these three
load list parts, DO NOT issue the ‘input’
command for that part.
This file must be saved to the
APPLYALT disk.
Build a new CP nucleus. Save the load map to your BUILD7 tools disk. If prior steps did not
complete properly, this step might cause your system to become inoperable.
CP SPOOL PUN *
CP SPOOL PRT *
VMFBLD PPF ESA CP CPLOAD ( ALL
CP QUERY RDR * ALL
CP ORDER RDR spoolid
CP CHANGE RDR spoolid KEEP
Direct the printer and punch
output back to your reader.
Invoke the build process which will generate a
new CP load list using the CPLOAD
EXCLEPIC file previously created. It will
punch the load deck to your reader. Make a
note of the spoolid created.
Order the load deck file to the
top of your reader and change it
to keep. Then IPL the reader to
Chapter 3. Installing the Autoattach Feature
3-33
Autoattach Installation for VM/ESA Version 1 Release 1.1 Using VMSES/E
CP IPL 00C CLEAR
load the nucleus. The following message
indicates that the nucleus has loaded successfully.
CP ENTERED; DISABLED WAIT PSW 000A0000 00009010
CP IPL 190 CLEAR
Re-IPL CMS and load the nucleus
ACCESS 493 E
load map to your test system tools
CP QUERY RDR * ALL
disk, BUILD7.
RECEIVE spoolid CPNUC MAP E ( REPLACE
xedit CPNUC MAP
Edit the nucleus map and search
locate /UNRESOLVED/
for any unresolved references. If any are found,
they should be corrected and a new nuceus built
before continuing from this point.
STEP 14
IPL and test the new system. After completing this step, test Autoattach using BIM-EPIC.
CP COMMANDS
VATTACH rdev * 181
QUERY TAPES
QUERY VIRTUAL TAPES
VDETACH 181
QUERY TAPES
QUERY VIRTUAL TAPES
3-34
BIM-EPIC Installation and System Guide
From a class BG machine, VATTACH and VDETACH
should be shown in the commands list.
Test the VATTACH command. Supply a real tape drive
address.
Query tapes to verify that the drive was
really attached.
Test the VDETACH command.
Query tapes again to verify that the drive
was really detached.
Autoattach Installation for VM/XA
Autoattach Installation for VM/XA
Files Needed from
the Distribution
Tape
IBM Files To Be
Updated
File
Description
AUTOATT DOCXA
Preliminary documentation
HCPCOM VATTACH
HCPCOM update for VATTACH command
HCPCOM VDETACH
HCPCOM update for VDETACH command
HCPMDLAT HCPTVA
HCPMDLAT update for HCPTVA module
HCPMDLAT HCPTVD
HCPMDLAT update for HCPTVD module
HCPTVA ASSEMBLE
VATTACH command source
HCPTVD ASSEMBLE
VDETACH command source
File
Description
HCPXA CNTRL
Standard CP control file
HCPCOM ASSEMBLE
CP command table **
HCPLDL ASSEMBLE
CP nucleus load list **
HCPMDLAT MACRO
CP module attribute table **
** source files must be loaded to your CP BASE disk from the source tape and unpacked.
These instructions assume that the user has experience in generating and servicing a VM/XA
CP nucleus. Failure to perform each step without error could result in an inoperable system.
These instructions are only a guideline to show the steps necessary to successfully install the
Autoattach feature. This feature is distributed as a modification to IBM’s VM product. If
these instructions are unclear, incomplete or conflicting, you should consult the IBM VM/XA
SP Installation and Service manual for definitive procedures. If you experience problems
with the Autoattach feature, please contact BIM-EPIC Technical Support.
The term Local Service Disk refers to the MAINT minidisk where your own installation
modifications to CP are maintained. For these instructions we will assume that the MAINT
191 A-disk is being used. Many sites use MAINT 295, as well as other disks for the Local
Service function. Whichever minidisk you use, it must be accessed ahead of IBM service for
Autoattach to be installed successfully.
Chapter 3. Installing the Autoattach Feature
3-35
Autoattach Installation for VM/XA
STEP 1
Before installing Autoattach, back up your running CP nucleus and MAINT local service disk.
DDR
INPUT cuu 33xx volume
OUTPUT cuu 34xx
DUMP NUCLEUS
VMFPLC2 DUMP * * A
Invoke the DASD Dump/Restore program.
Specify your CP sysres address,
DASD type and volid.
DUMP NUCLEUS will provide the nucleus cylinders as
well as the IPL tracks on cylinder 0.
Back up the local service disk using VMFPLC2 or your
own procedure.
STEP 2
Before performing any installation steps, verify that MAINT service is complete by generating
a new CP nucleus and testing it. Follow STEP 13 of this script to generate a CP nucleus and
then IPL your machine. If no problems are detected, proceed to STEP 3.
STEP 3
Set up the MAINT environment with 16 meg of storage and access to all CP minidisks.
DEFINE STOR 16M
IPL 190
VMFSETUP 56643082 CP ( ALL
STEP 4
Specify product ID 56643082 for VM/XA SP 2.0
or 56643089 for VM/XA SP 2.1.
Load the Autoattach files from the distribution tape.
During a BIM-EPIC installation, the Autoattach files are loaded to a VSE library. Execute
LIBR as shown below, using your userid and sublibrary name. The PUNCH (PU) line above
must be specified exactly as shown. Output is sent to the issuing machine.
* $$ JOB JNM=LIBR,CLASS=A,LDEST=(,userid),PDEST=(,userid)
// JOB LIBR
// EXEC LIBR
ACCESS S=lib.sublib
PUNCH EPAUTO.Z FORMAT=NOHEADER EOF=NO
/*
/&
* $$ EOJ
Issue the command below. filemode is the file mode of your LOCALMOD disk (2C4).
RECEIVE file-number filename filetype filemode
It is normal to receive error messages “Invalid card in input deck” and “Spool file left in
reader”. These can be disregarded. If the VM programmer uses a device type that does not
punch a blank card, these messages do not appear.
3-36
BIM-EPIC Installation and System Guide
Autoattach Installation for VM/XA
STEP 5
Update the control file to include a local service maclib which will contain the updated
HCPMDLAT macro.
HCPXA CNTRL
top
c/TEXT MACS/TEXT MACS HCPLCL/*
fm A
file
STEP 6
Edit the control file
and insert HCPLCL into
the MACS line ahead of
the other maclibs.
Change the filemode to the appropriate local
service disk mode.
Add the Autoattach entries to the module attribute table. Create an AUX control file first and
use XEDIT Update to generate an update file.
xedit HCPMDLAT AUXLCL
top
Edit or create an aux
control file for HCPMDLAT
input EPICAA LCL * GSI EPIC AUTOATTACH
fm A
and insert a line at the
file
top to describe the new source update
xedit HCPMDLAT MACRO ( CTL HCPXA
find .EHCPTSI
get = HCPTVA
get = HCPTVD
fm A
file
STEP 7
file which will be called HCPMDLAT
EPICAA. Change the filemode to the
appropriate local service disk.
Editing the macro source
with update control will
create a filetype EPICAA.
Copy in HCPMDLAT HCPTVA
and HCPMDLAT HCPTVD to
position them in alpha order in the
PAGEABLE, NON-MP section of the
table. This should be after the label
.EHCPTSI, depending on your service
level. Change the filemode to the
appropriate local service disk.
Create a new HCPLCL MACLIB containing the updated HCPMDLAT MACRO. The
member list, HCPLCL EXEC, must be created or updated to include HCPMDLAT MACRO
only once.
xedit HCPLCL EXEC
set stay off
/HCPMDLAT/
input &1 &2 HCPMDLAT MACRO &3 &4
fm A
file
VMFMAC HCPLCL HCPXA
Edit or create a member
list for HCPLCL MACLIB.
Search for an existing
entry for HCPMDLAT. Only
insert an entry for the
macro if it does not already exist. Change
the file mode to your local service disk
mode.
Generate the new maclib.
Chapter 3. Installing the Autoattach Feature
3-37
Autoattach Installation for VM/XA
STEP 8
Assemble the Autoattach modules, HCPTVA and HCPTVD, using Assembler-H. The
resulting text files will have filetype TXTLCL and should be moved to the local service disk.
VMFHASM HCPTVA HCPXA
VMFHASM HCPTVD HCPXA
STEP 9
Add the VATTACH and VDETACH commands to the CP command table. Create an AUX
control file first and use XEDIT Update to generate an update file.
xedit HCPCOM AUXLCL
top
Edit or create a new AUX
control file for HCPCOM
input EPICAA LCL * GSI EPIC AUTOATTACH
fm A
and insert a line at the
file
top to describe the new source update
xedit HCPCOM ASSEMBLE ( CTL HCPXA
find HCPCOMCV
/COMMAND=(VARY/
down 1
get HCPCOM VATTACH
get HCPCOM VDETACH
fm A
file
file which will be called HCPCOM
EPICAA. Change the file mode to the
appropriate local service disk.
Editing the source with
update control will
create a filetype EPICAA.
NOTE!: The command table
must be kept in alpha
sequence. Find the ‘V’
command section and
copy in the VATTACH and VDETACH
updates into the appropriate positions. In
most cases this will place them between
VARY and VMDUMP. Change the
filemode to the appropriate local service
disk.
VM/XA 2.0 users may get assembly errors if update HCPCOM H36104HP is not applied. If
this happens, remove the FL1=CMDPROC parameters from HCPCOM VDETACH and then
reassemble.
STEP 10
Assemble the CP command table. The resulting text file will have filetype TXTLCL and
should be moved to the local service disk.
VMFHASM HCPCOM HCPXA
STEP 11
Create AUX control and update files to be used to generate load list.
xedit HCPLDL AUXLCL
top
Edit or create a new AUX control file for HCPLDL
Insert a line at the top to describe the new source
update file which will be called HCPLDL EPICAA.
input EPICAA LCL * GSI EPIC AUTOATTACH
3-38
BIM-EPIC Installation and System Guide
Autoattach Installation for VM/XA
fm A
file
xedit HCPLDL EPICAA
top
Change the filemode to the appropriate local service
disk.
Create a new update file for HCPLDL with only a
comment for the resulting CPLOAD EXEC.
input ./ * FORCE REASSEMBLY FOR GSI EPIC AUTOATTACH
fm A
Change the filemode to your local service disk.
file
STEP 12
Generate a new CP load list by assembling HCPLDL and then invoking the UTILITY EXEC
to create CPLOAD EXEC.
VMFHASM HCPLDL HCPXA
RENAME HCPLDL TXTLCL A = TEXT =
Assemble HCPLDL, rename
the resulting TXTLCL file to filetype
TEXT and then move it to your local
service disk.
Generate a new CP load list and move the
resulting CPLOAD EXEC to your local
service disk. The UTILITY EXEC will
look for the HCPLDL TEXT which was
just created.
UTILITY CPLOAD
STEP 13
Build a new CP nucleus. This procedure may vary for different releases or you may
accomplish it using other service aids. This is the recommended approach.
CP SPOOL PUN *
CP SPOOL PRT *
CP SPOOL RDR HOLD
VMFBLD 56643082 CP ( PUNCH
Spool the virtual punch
and printer back to your
reader and invoke VMFBLD
to create a load deck. Use product ID 56643082
for VM/XA SP 2.0 and 56643089 for VM/XA
SP 2.1.
ORDER RDR nnnn
IPL 00C CLEAR
CP SPOOL PRT CLOSE
IPL 190
CP QUERY RDR * ALL
RECEIVE nnnn CPNUC MAP A ( REPLACE
xedit CPNUC MAP
/UNRESOLVED/
Order the load deck to
the top of the queue and
IPL your virtual reader
to load the nucleus to
the sysres volume. When
you have received the ‘NUCLEUS
LOADED’ message, close the virtual
printer and then receive the CPLOAD
MAP to your local service disk.
Edit the nucleus map and
search for any unresolved external
references. Any that are found must be
determined to be ‘normal’ or they must
be corrected before IPL’ing.
Chapter 3. Installing the Autoattach Feature
3-39
Autoattach Installation for VM/XA
STEP 14
IPL and test the new system. After completing this step, test Autoattach using BIM-EPIC.
CP COMMANDS
VATTACH rdev * 181
QUERY TAPES
QUERY VIRTUAL TAPES
VDETACH 181
QUERY TAPES
QUERY VIRTUAL TAPES
3-40
BIM-EPIC Installation and System Guide
From a class BG machine, VATTACH and VDETACH
should be shown in the commands list.
Test the VATTACH command. Supply a real tape drive
address.
Query tapes to verify that the drive was
really attached.
Test the VDETACH command.
Query tapes again to verify that the drive
was really detached.
Autoattach Installation for VM/SP, VM/HPO, and VM/ESA 370
Autoattach Installation for VM/SP, VM/HPO, and VM/ESA 370
Files Needed from
the Distribution
Tape
File
Description
ACIMAP EPIC
Access Control Interface entries
Used by HPO at PUT 8806 or above
IBM Files to be
Updated
AUTOATT DOCSP
Preliminary documentation
DMKCFB VMSP5
Command table update for VM/SP 5 and above
DMKCFC VMSP3
Command table update for VM/SP 3
DMKCFC VMSP4
Command table update for VM/SP 4
DMKCFC VMSP5
Command table update for VM/SP 5 before PUT8806
DMKTSI ASSEMBLE
Autoattach source file
DMKTSI AUXLCL
AUX control file for source updates
DMKTSI EP22002S
Update for VM Release 3 and above
DMKTSI EP22003S
Update for VM Release 3 with VM20560 or above
DMKTSI EP22004S
Update for VM/HPO Release 3
DMKTSI EP22005S
Update for VM/SP Release 4 and above
DMKTSI EP22006S
Update for VM/SP Release 5 and above
DMKTSI EP22007S
Update for VM Release 5 with MP and AFFINITY
File
Description
ACIMAP MACRO**
Access Control Interface
VM/HPO at PUT 8902 or above only
CPLOAD EXEC
Standard system load list. May be different depending on
the type of system generated.
DMKCFB ASSEMBLE**
CP command table VM Release 5 PUT8806 & above
DMKCFC ASSEMBLE**
CP command table prior to VM/SP 5 PUT8806
DMKSP CNTRL
Standard CP control file. May be different depending on
the type of system generated.
** - must be loaded to the CP BASE(source) disk and unpacked.
NOTE: These instructions assume that the user has experience in generating and servicing a
VM/SP or VM/HPO CP nucleus. Failure to perform each step without error could result in an
inoperable system.
Chapter 3. Installing the Autoattach Feature
3-41
Autoattach Installation for VM/SP, VM/HPO, and VM/ESA 370
These instructions are only a guideline to show the steps necessary to successfully install the
Autoattach feature. This feature is distributed as a modification to IBM’s VM product. If
these instructions are unclear, incomplete or conflicting, you should consult your IBM VM/SP
or VM/HPO INSTALLATION AND SERVICE manuals for definitive procedures. If you
experience problems with the Autoattach feature, please contact BIM-EPIC Technical
Support.
The term Local Service Disk refers to the MAINT minidisk where your own installation
modifications to CP are maintained. For these instructions we will assume that the MAINT
191 A-disk is being used. Many sites use MAINT 295, as well as other disks for the ‘Local
Service’ function. Whichever minidisk you use, it must be accessed ahead of IBM service for
Autoattach to be installed successfully.
STEP 1
Before installing Autoattach, back up your running CP nucleus. Also back up the MAINT
local service disk.
DDR
input cuu 33xx volume
OUTPUT cuu 34xx
DUMP NUCLEUS
VMFPLC2 DUMP * * A
Invoke the DASD Dump/Restore program.
Specify your CP sysres address,
DASD type and volid.
DUMP NUCLEUS will provide the nucleus cylinders as
well as the IPL tracks on cylinder 0.
Back up the local service disk using VMFPLC2 or your
own procedure.
STEP 2
Before performing any installation steps, verify that MAINT service is complete by generating
a new CP nucleus and testing it. Follow step 11 of this script to generate a CP nucleus and
then IPL your machine. If no problems are detected, proceed to STEP 3.
STEP 3
Set up the MAINT environment with 16 megabytes of storage and access to all CP minidisks.
DEFINE STOR 16M
IPL 190
VMFSETUP 5664167E CP ( ALL
SPGEN SETUP CP
procedure-name
STEP 4
Access the CP minidisks
for VM/SP Release 6
for VM/SP Release 5
Use your own procedure for prior VM
releases.
Load the Autoattach files from the distribution tape.
During a BIM-EPIC installation, the Autoattach files are loaded to a VSE library. Execute
LIBR as shown below, using your userid and sublibrary name. The PUNCH (PU) line above
must be specified exactly as shown. Output is sent to the issuing machine.
* $$ JOB JNM=LIBR,CLASS=A,LDEST=(,userid),PDEST=(,userid)
// JOB LIBR
3-42
BIM-EPIC Installation and System Guide
Autoattach Installation for VM/SP, VM/HPO, and VM/ESA 370
// EXEC LIBR
ACCESS S=lib.sublib
PUNCH EPAUTO.Z FORMAT=NOHEADER EOF=NO
/*
/&
* $$ EOJ
Issue the command below. filemode is the file mode of your LOCALMOD disk (2C4).
RECEIVE file-number filename filetype filemode
It is normal to receive error messages “Invalid card in input deck” and “Spool file left in
reader”. These can be disregarded. If the VM programmer uses a device type that does not
punch a blank card, these messages do not appear.
STEP 5
Update the control file to include the local service maclib and an AUX record for local service
updates. Note that the control file name may be different if you are generating an MP or AP
system, with or without a V=R area, or using the small CP option. Your control file may
already contain these changes. If so, skip this step.
xedit DMKSP CNTRL
top
find TEXT
c/TEXT MACS/TEXT MACS DMKLCL/
input LCL AUXLCL
fm A
file
STEP 6
Edit the control file
and insert DMKLCL into
the MACS statement ahead
of the other maclibs.
Then add an AUX control
record for local service.
Change the filemode to the appropriate local
service disk mode. NOTE!: Use the proper
control file for your VM system.
If you are generating an HPO system at PUT 8902 or above, the ACIMAP MACRO must be
updated to include entries for VATTACH and VDETACH. If not under HPO, skip steps 6
and 7.
xedit ACIMAP AUXLCL
top
Edit or create an AUX control file for
ACIMAP
Insert a line at the top to describe the new
source update file which will be called
ACIMAP EPICAA.
input EPICAA LCL * GSI EPIC AUTOATTACH
fm A
Change the filemode to the appropriate local
service disk.
file
xedit ACIMAP MACRO ( CTL DMKSP
find VARYR
Edit the macro source with update control to
create a filetype EPICAA.
Copy in ACIMAP EPIC after the VARYR
entry to be positioned in alpha order.
down 1
get = epic
Chapter 3. Installing the Autoattach Feature
3-43
Autoattach Installation for VM/SP, VM/HPO, and VM/ESA 370
fm A
Change the file mode to your local service
disk. NOTE!: Be sure to use the appropriate
control file.
file
STEP 7
If you updated ACIMAP MACRO in the prior step, you will need to create a new DMKLCL
MACLIB to include ACIMAP MACRO. Create or update the member list to include
ACIMAP only once. Then build the maclib.
DMKLCL EXEC
set stay off
/ACIMAP/
input &1 &2 ACIMAP MACRO
fm A
file
VMFMAC DMKLCL DMKSP
STEP 8
Edit or create a member
list for DMKLCL MACLIB.
Search for an existing
entry for ACIMAP. Only
insert an entry for the
macro if it does not already exist. Change the file
mode to your local service disk mode.
Generate the new maclib. Use the appropriate control
file.
Update and assemble the CP command table to include the Autoattach commands VATTACH
and VDETACH. For VM releases prior to VM release 5 at PUT 8806, the command table is
in DMKCFC ASSEMBLE. Subsequent releases use DMKCFB ASSEMBLE.
xedit DMKCFB AUXLCL
top
Edit or create an AUX control file for
DMKCFB. NOTE: If your VM release is
prior to VM/SP 5 at PUT 8806, you need
to update DMKCFC instead.
Insert a line at the top to describe the new
source update file which will be called
DMKCFB EPICAA.
input EPICAA LCL * GSI EPIC AUTOATTACH
fm A
Change the filemode to the appropriate
file
xedit DMKCFB ASSEMBLE ( CTL DMKSP
/VARY/
get = vmsp5
fm A
file
VMFASM DMKCFB DMKSP
3-44
BIM-EPIC Installation and System Guide
local service disk.
NOTE: If your VM release is prior to
VM/SP 5 at PUT 8806, you need to
update DMKCFC instead.
Edit the command table,
search for VARY command
entry and insert the
entries for VATTACH and
VDETACH. Change the file- mode to the
appropriate local service disk.
Assemble the updated command table.
Autoattach Installation for VM/SP, VM/HPO, and VM/ESA 370
STEP 9
Update and assemble the Autoattach module, DMKTSI. The updates provided tailor the
module for your VM release and generation type. Any that don’t apply must be removed from
the AUX file.
xedit DMKTSI AUXLCL
fm A
file
VMFASM DMKTSI DMKSP
STEP 10
Edit the AUX control file for DMKTSI and
remove the lines for updates that do not apply to
your VM release.
Assemble the module.
Update the CP load list. For standard VM/SP systems this file will be CPLOAD EXEC.
There are different load lists depending on whether VM/HPO is being used, V=R is used and
whether an AP or MP nucleus is being generated. This example refers to CPLOAD EXEC
although you should substitute the load list used to generate your system.
xedit CPLOAD EXEC
/DMKCKP/
-/&1 &2/
input &1 &2 &3 DMKTSI
fm A
Edit the appropriate load list
and locate the end of the pageable nucleus.
Insert a DMKTSI entry after the last pageable module
but before DMKCKP.
Change the file mode to the appropriate local service
disk.
file
STEP 11
This procedure can vary for different releases and can be accomplished using other service
aids. Use the procedure defined by IBM for your installation.
Build the new CP nucleus.
If you have...
Use...
VM/SP 6
VMFBLD 5664167E CP
VM/SP 5
SPGEN NUCLEUS CP
VM/SP 3 or VM/SP 4
GENERATE CP NUCLEUS
RECEIVE nnnn CPNUC MAP A ( REPLACE
xedit CPNUC MAP
bottom
BACK
STEP 12
Receive the nucleus load
map to your local service
disk and check for any
undefined references. Any found must
be verified.
IPL and test the new system. After completing this step, test Autoattach using BIM-EPIC.
CP COMMANDS
VATTACH rdev * 181
From a class BG machine, VATTACH and VDETACH
should be shown in the commands list.
Test the VATTACH command. Supply a real tape drive
address.
Chapter 3. Installing the Autoattach Feature
3-45
Autoattach Installation for VM/SP, VM/HPO, and VM/ESA 370
QUERY TAPES
QUERY VIRTUAL TAPES
VDETACH 181
QUERY TAPES
QUERY VIRTUAL TAPES
3-46
BIM-EPIC Installation and System Guide
Query tapes to verify that the drive was
really attached.
Test the VDETACH command.
Query tapes again to verify that the drive
was really detached.
4
Maintenance Procedures
This chapter describes procedures for routine maintenance of the DSN Catalog and Recorder
File.
Chapter Contents
Regular Maintenance .................................................................................................4-2
Moving and Changing the Size of the DSN Catalog..................................................4-6
Moving and Changing The Size of the Recorder File................................................4-7
Emergency Recovery of the DSN Catalog.................................................................4-8
4-1
Regular Maintenance
Regular Maintenance
Introduction
The following tasks must be performed for proper BIM-EPIC functioning. The DAILY1 (or
DAILY2) SAMPJOB procedure provides an example of how to perform these tasks. The
DAILYn SAMPJOB procedures are supplied on the BIM-EPIC distribution tape.
Expired datasets can be scratched using the SCRATCH function of the TSIDUTL program.
Vault rotation can be performed using the TSIDVLT program.
WARNING!
Procedure
DAILY1 Example
4-2
The Recorder must be backed up, cleared, and restarted whenever the DSN Catalog is backed
up. If the DSN Catalog and Recorder File are not backed up at the same time, data can be
missing after you do an emergency recovery of the DSN Catalog. BACKUP should therefore
be executed in the same job stream, in the step immediately following the BACKUP or
FASTBU function of the TSIDUTL program.
Step
//
/*
/*
/*
/*
/*
/*
/*
/*
/*
/*
/*
/*
/*
/*
/*
/*
/*
Action
6
Back up the DSN Catalog daily using the FASTBU or BACKUP function of the
TSIDUTL program.
7
Back up, reinitialize, and restart the Recorder File using the MAINT function of
the TSIDRFS program.
8
Check DSN Catalog integrity regularly (preferably weekly) with the BACKUP
(not FASTBU) function of the TSIDUTL program.
9
Whenever a large number of new datasets or tapes have been added to the DSN
Catalog, re-index the DSN Catalog using the INDEX function of the TSIDUTL
program.
JOB DAILY1
PURPOSE: BIM-EPIC DAILY MAINTENANCE AND REPORTING USING VSE LABELS.
PREREQ:
VSE/ESA 1.3
THE FOLLOWING TSIDMNT CONTROL STATEMENTS WILL CREATE THE REQUIRED
BIM-EPIC DATASET DEFINITIONS FOR THIS EXAMPLE. CODE ADDITIONAL
OPERANDS AS NEEDED.
CAT
CAT
CAT
CAT
CAT
CAT
CAT
CAT
'EPIC.CAT.BACKUP'
'EPIC.REC.BACKUP'
'EPIC.REC.HISTORY'
'EPIC.UTL.WORK' POL=POOLNM EXT=N WRK=YES
'EPIC.ACL.EJECT' POL=POOLNM EXT=N
'EPIC.ARP.XREF' POL=POOLNM EXT=N
'EPIC.BRP.XREF.WORK' POL=POOLNM EXT=N WRK=YES
'$$$.SORTWK1' POL=POOLNM EXT=N WRK=YES
BIM-EPIC Installation and System Guide
Regular Maintenance
/*
* STEP DAILY1.000 TSIDUTL
/*
/* BACKUP THE BIM-EPIC CATALOG TO TAPE AND VALIDATE CATALOG INTEGRITY.
/* THE OUTPUT MAY SPAN MORE THAN ONE OUTPUT TAPE VOLUME AND WILL
/* DEFAULT TO UNLOAD WHEN THEN THE BACKUP TAPE IS CLOSED.
/*
// TLBL BACKUP,'EPIC.CAT.BACKUP'
// EXEC TSIDUTL
BACKUP
/*
* STEP DAILY1.005 TSIDRFS
/*
/* PERFORM MAINTENANCE ON THE EPIC RECORDER FILE. THIS MAINTENANCE
/* COMBINES THE END, BACKUP, CLEAR, AND START COMMANDS INTO A
/* SINGLE COMMAND TO ENSURE THAT ALL THESE REQUIRED FUNCTIONS ARE
/* ALWAYS PERFORMED AND IN THE CORRECT ORDER. OUTPUT MAY SPAN MORE
/* THAN ONE OUTPUT TAPE VOLUME AND WILL DEFAULT TO REWIND WHEN THE
/* BACKUP TAPE IS CLOSED.
/*
// TLBL RFBKUP,'EPIC.REC.BACKUP'
// EXEC TSIDRFS
MAINT
/*
* STEP DAILY1.010 TSIDUTL
/*
/* DO DAILY SCRATCH FUNCTION AND PRODUCE TYPICAL AND RECOMMENDED
/* CATALOG LISTINGS.
/*
// DLBL WORK,'EPIC.UTL.WORK(D)'
// EXTENT SYS002,POOLNM,,,1,100
// DLBL SORTWK1,'$$$.SORTWK1'
// EXTENT SYS001
// EXEC TSIDUTL
SCRATCH
DSPLY ALL,SEQ=DSN
DSPLY ALL,SEQ=SERIAL
/*
* STEP DAILY1.015 TSIVON
/*
/* REFRESH QDAS TABLES. REMOVE THIS STEP IF NOT RUNNING QDAS.
/*
// EXEC TSIVON
/*
* STEP DAILY1.020 TSIDVLT
/*
/* DO VAULT MOVEMENT. THE LABEL FOR ACLFIL1 IS REQUIRED ONLY
/* IF OPTION ACLMEM=YES (SUPPORT FOR THE MEMOREX AUTOMATIC
/* TAPE LIBRARY) HAS BEEN SPECIFIED FOR YOUR BIM-EPIC SYSTEM.
/*
// DLBL ACLFIL1,'EPIC.ACL.EJECT'
// DLBL SORTWK1,'$$$.SORTWK1'
// EXTENT SYS001
// EXEC TSIDVLT
MOVESER
/*
* STEP DAILY1.025 TSIDUTL
/*
/* EJECT ACL VOLUMES FLAGGED FOR VAULT MOVEMENT. REMOVE THIS
/* JOB STEP IF 'OPTION ACLMEM=YES' HAS NOT BEEN SPECIFIED FOR YOUR
/* BIM-EPIC SYSTEM.
/*
// DLBL ACLFIL1,'EPIC.ACL.EJECT(D)'
// EXEC TSIDUTL
Chapter 4. Maintenance Procedures
4-3
Regular Maintenance
ACLEJECT
/*
* STEP DAILY1.030 TSIDSRT
/*
/* COMBINE CURRENT RECORDER FILE WITH PRIOR RECORDER FILE HISTORY
/* GIVING AN UPDATED RECORDER FILE HISTORY THAT CAN BE USED FOR
/* ANY PURPOSE. THIS EXAMPLE USES SORT TO COMBINE THE RECORDER
/* FILES INTO A COMBINED RECORDER FILE HISTORY. HOWEVER, ANY
/* PREFERRED MECHANISM (INCLUDING TSIDDTD) CAN BE USED TO MAINTAIN
/* THE HISTORY FILE USING ANY DESIRED FREQUENCY.
/*
// TLBL SORTIN1,'EPIC.REC.BACKUP'
// TLBL SORTIN2,'EPIC.REC.HISTORY',,,,,,2
// TLBL SORTOUT,'EPIC.REC.HISTORY',,,,,,2
// DLBL SORTWK1,'$$$.SORTWK1'
// EXTENT SYS004
// EXEC SORT
SORT FIELDS=(25,2,A,21,6,A,17,4,A),FILES=2,FORMAT=BI,WORK=1
RECORD TYPE=F,LENGTH=338
INPFIL BLKSIZE=5746
OUTFIL BLKSIZE=5746
END
/*
* STEP DAILY1.035 TSIDARP
/*
/* PRODUCE THE ACTIVITY LOG REPORT SHOWING OPEN AND CLOSE ACTIVITY
/* FOR EPIC-CONTROLLED DATASETS, SORTED BY SYSTEM ID, DATE, TIME,
/* AND JOB NAME. REMOVE THIS STEP IF THIS REPORT AND THOSE
/* GENERATED BY THE FOLLOWING TSIDBRP PROGRAM ARE NOT DESIRED.
/*
// ASSGN SYS003,SYSIPT
// ASSGN SYS004,SYSLST
// DLBL SYS002,'EPIC.ARP.XREF'
// TLBL SYS005,'EPIC.REC.BACKUP'
// DLBL SORTWK1,'$$$.SORTWK1'
// EXTENT SYS001
// EXEC TSIDARP
/*
* STEP DAILY1.040 TSIDBRP
/*
/* PRODUCE THE DSN/JOB CROSS-REFERENCE AND ACCEPTED TAPES REPORTS.
/* REMOVE THIS STEP IF THESE REPORTS ARE NOT DESIRED.
/*
// ASSGN SYS004,SYSLST
// DLBL SYS002,'EPIC.ARP.XREF(D)'
// DLBL SYS005,'EPIC.BRP.XREF.WORK(D)'
// DLBL SORTWK1,'$$$.SORTWK1'
// EXTENT SYS001
// EXEC TSIDBRP
/*
* STEP DAILY1.045 TSIDJAC
/*
/* PRODUCE THE JOB TIME ACTIVITY REPORT SHOWING USAGE STATISTICS
/* BY JOB. REMOVE THIS STEP IF THIS REPORT IS NOT DESIRED.
/*
// ASSGN SYS004,SYSLST
// TLBL SYS005,'EPIC.REC.BACKUP'
// DLBL SORTWK1,'$$$.SORTWK1'
// EXTENT SYS001
// EXEC TSIDJAC
/*
* STEP DAILY1.050 TSIDTAC
/*
/* PRODUCE THE DATE TIME ACTIVITY REPORT SHOWING USAGE STATISTICS
4-4
BIM-EPIC Installation and System Guide
Regular Maintenance
/* BY PARTITION. REMOVE THIS STEP IF THIS REPORT IS NOT DESIRED.
/*
// ASSGN SYS004,SYSLST
// TLBL SYS005,'EPIC.REC.BACKUP'
// DLBL SORTWK1,'$$$.SORTWK1'
// EXTENT SYS001
// EXEC TSIDTAC
/*
* STEP DAILY1.055 TSIDJLD
/*
/* MAINTAIN THE EPIC JOB ACCOUNTING DATABASE. REMOVE THIS STEP IF
/* THIS FILE IS NOT DESIRED. A SAMPLE IDCAMS DEFINITION FOR THE
/* TSIJACB.JOB.ACCOUNT VSAM KSDS FILE IS FOUND IN TSIJADB.SAMPJOB.
/* CORRECT OR REMOVE CAT= VALUE AS APPROPRIATE.
/*
// ASSGN SYS003,SYSIPT
// ASSGN SYS004,SYSLST
// DLBL SORTWK1,'$$$.SORTWK1'
// EXTENT SYS001
// TLBL SYS005,'EPIC.REC.BACKUP',,,,,,2
// DLBL TSIJADB,'TSIJADB.JOB.ACCOUNT',,VSAM,CAT=USRCAT,BUFSP=32768
// EXEC TSIDJLD
ADD
/*
/&
Chapter 4. Maintenance Procedures
4-5
Moving and Changing the Size of the DSN Catalog
Moving and Changing the Size of the DSN Catalog
Introduction
Procedure
4-6
The CATMOVE1 (or CATMOVE2) SAMPJOB procedure provides an example of the
procedure you should use if you need to move or change the size of your DSN Catalog. If
your DSN Catalog was accidentally destroyed, use the procedure for emergency recovery.
The CATMOVEn SAMPJOB procedures are supplied on the BIM-EPIC distribution tape.
Step
Action
1
Deactivate BIM-EPIC with TSIDOFF in all machines which share the catalog
except the machine you are using to move the DSN Catalog.
2
Back up the DSN Catalog with the BACKUP function of the TSIDUTL program.
3
Perform Recorder File maintenance and backup using the TSIDRFS program.
4
Turn BIM-EPIC off using TSIDOFF.
5
Formate the new DSN Catalog using the TSIDCDK program.
6
If moving to a new volume, update Standard Labels in all machines that share this
DSN Catalog.
7
Activate BIM-EPIC in the machine you are using to move the DSN Catalog.
8
Restore the DSN Catalog using the backup created in Step 2 above.
9
Reactivate BIM-EPIC in all machines that share this DSN Catalog.
BIM-EPIC Installation and System Guide
Moving and Changing The Size of the Recorder File
Moving and Changing The Size of the Recorder File
Introduction
Procedure
The RECMOVE1 (or RECMOVE2) SAMPJOB procedure provides an example of the
procedure you should use if you need to move or change the size of your Recorder File. The
RECMOVEn SAMPJOB procedures are supplied on the BIM-EPIC distribution tape.
Step
Action
1
Deactivate BIM-EPIC with TSIDOFF in all machines which share the Recorder
File EXCEPT the machine you are using to move the Recorder File.
2
Backup the catalog with the BACKUP function of the TSIDUTL program.
3
Perform Recorder File maintenance and backup using the TSIDRFS program.
4
Format the new Recorder File using the TSIDCDK program.
5
If moving to a new volume, update Standard Labels in all machines sharing this
Recorder File.
6
Activate BIM-EPIC in a machine you are using to move the Recorder File.
7
Reactivate BIM-EPIC in all machines that share this Recorder File.
Chapter 4. Maintenance Procedures
4-7
Emergency Recovery of the DSN Catalog
Emergency Recovery of the DSN Catalog
Introduction
Use the procedure below to recreate the DSN Catalog after it has been accidentally destroyed.
The RECOVER1 (or RECOVER2) SAMPJOB procedure contains all of the steps necessary
to recover the DSN Catalog. The RECOVERn SAMPJOB procedures are supplied on the
BIM-EPIC distribution tape.
Procedure
Step
Action
1
Using TSIDOFF, deactivate BIM-EPIC in all machines which share the DSN
Catalog to be recovered.
2
Deactivate all Recorder systems.
3
Reactivate BIM-EPIC in the VSE machine being used to perform the recovery.
Use the EPICON procedure normally used to bring up the machine. Ensure that
no other processing takes place except the recovery.
4
Restore the DSN Catalog in the reactivated machine using the RESTORE function
of TSIDUTL.
5
Back up the Recorder File(s) using the MAINT function of TSIDRFS. Use tapes
that are uncontrolled (not listed in the DSN Catalog).
6
Perform forward recovery of the BIM-EPIC DSN Catalog using the specified
datasets. To recover the DSN Catalog, set the UPSI switches to indicate the which
Recorder Files to use as input.
Do not execute TSIDBLD from the VSE operator console.
UPSI Settings
7
Close the backup dataset with the CLOSE function of Online Manager or
TSIDMNT.
8
Back up the recovered DSN Catalog using the BACKUP function of TSIDUTL.
9
Reactivate BIM-EPIC in all machines which share the DSN Catalog.
10
Rerun TSIDVLT if it has been run since the last DSN Catalog backup was
performed. TSIDVLT updates are not reflected after an emergency recovery.
The USPI switches are set as follows:
Switch
Description
UPSI 1xx
BIM-EPIC Recorder File (SYS005 = VSEBKUP)
UPSI x1x
CA-EPIC/CMS Recorder File (SYS006 = CMSBKUP)
If the DSN Catalog is used by a single VSE system, the following is used:
// UPSI
4-8
100
BIM-EPIC Installation and System Guide
(VSE ONLY)
Emergency Recovery of the DSN Catalog
// TLBL
VSEBKUP
If the DSN Catalog is shared between VSE and CMS, the following is used:
// UPSI
// TLBL
// TLBL
110
(VSE & CMS)
VSEBKUP
CMSBKUP
When sharing the DSN Catalog among mixed releases of BIM-EPIC, any BIM-EPIC
Recorder File prior to Release 4.1 must be treated as a CMS Recorder File, with the
appropriate UPSI switches and TLBL included in the JCL.
RECOVER1
Example
// JOB RECOVER1
/*
/* PURPOSE:
RECOVER THE BIM-EPIC CATALOG USING VSE LABELS.
/*
/* PREREQ:
VSE/ESA 1.3
/*
/* THE FOLLOWING TSIDMNT CONTROL STATEMENTS WILL CREATE THE REQUIRED
/* BIM-EPIC DATASET DEFINITIONS FOR THIS EXAMPLE. CODE ADDITIONAL
/* OPERANDS AS NEEDED.
/*
/*
CAT 'EPIC.CAT.BACKUP'
/*
CAT 'EPIC.VSE.BACKUP'
/*
CAT 'COMB.VSE.BACKUP'
/*
CAT 'EPIC.CMS.BACKUP'
/*
CAT 'COMB.CMS.BACKUP'
/*
CAT '$$$.SORTWK1' POL=POOLNM EXT=N WRK=YES
/*
/* BIM-EPIC MUST BE TURNED ON IN YOUR SYSTEM. IF UNABLE TO INITIALIZE
/* BIM-EPIC BECAUSE NO CATALOG CURRENTLY EXISTS, REFER TO THE BIM-EPIC
/* INSTALLATION GUIDE FOR INITIALIZING A NEW CATALOG. DO NOT
/* INITIALIZE THE RECORDER FILE. THE DATA CURRENTLY RESIDING IN THAT
/* FILE IS CRITICAL TO THIS RECOVERY PROCEDURE.
/*
* STEP RECOVER1.000 PAUSE
/*
/* TURN BIM-EPIC OFF IN ALL OTHER SYSTEMS WHICH SHARE THIS BIM-EPIC
/* CATALOG. ONCE THIS STEP IS COMPLETED, THIS WILL BE THE ONLY
/* ACTIVE SYSTEM THAT HAS ACCESS TO THIS BIM-EPIC CATALOG.
/*
// PAUSE TURN BIM-EPIC OFF ON ALL OTHER MACHINES SHARING THIS CATALOG
/*
* STEP RECOVER1.005 TSIDDEB
/*
/* ASSURE THAT START-TRACK-1 (OR START-BLOCK-1) DATASETS WILL BE
/* SUPPORTED BY YOUR BIM-EPIC SYSTEM. SINCE THE TSIDUTL RESTORE
/* FUNCTION WILL AUTOMATICALLY CLEAR THE THE BIM-EPIC CATALOG OF ALL
/* ENTRIES IN PREPARATION OF THE ACTUAL CATALOG RESTORE, NO DATASET
/* DEFINITIONS EXIST WHEN THE WORK AND SORTWK1 FILES ARE OPENED.
/* THEREFORE, THESE TWO FILES ARE IDENTIFIED USING TEMPORARY STRTK=1
/* DEFINITIONS AND BOTH WILL BE AUTOMATICALY DELETED WHEN THIS JOB
/* STREAM COMPLETES.
/*
/* ALSO, ENSURE A RESPONSE OF 'ACCEPT' IS ALLOWED IF MESSAGE
/* 'EP011 UNASSIGNED INPUT BACKUP ...' OCCURS WHEN ATTEMPTING THE
/* TSIDUTL FUNCTION.
/*
// EXEC TSIDDEB
OPTION STRTK=1,ACCEPT=YES
/*
Chapter 4. Maintenance Procedures
4-9
Emergency Recovery of the DSN Catalog
* STEP RECOVER1.010 TSIDUTL
/*
/* RESTORE THE BIM-EPIC CATALOG. IF THE DATASET NAME REFERENCED IN THE
/* 'BACKUP' LABEL DOES NOT EXIST IN THE BIM-EPIC CATALOG,
/* MESSAGE 'EP011 UNASSIGNED INPUT BACKUP ...' MAY APPEAR. THIS SHOULD
/* BE ANSWERED WITH THE CUU OF THE TAPE DRIVE WHERE THE CORRECT
/* BIM-EPIC CATALOG BACKUP HAS BEEN MOUNTED.
/* IF THE MESSAGE 'EP001 MOUNT TAPE...' IS ISSUED CALLING OTHER THAN
/* THE VOLSER OF THE DESIRED BIM-EPIC CATALOG BACKUP, RESPOND WITH THE
/* CUU OF THE PHYSICAL TAPE DRIVE WHERE THAT CORRECT BACKUP IS MOUNTED
/* AND THEN RESPOND 'ACCEPT' TO MESSAGE 'EP009 INCORRECT
/* DATASET/VERSION ...' WHICH MAY ALSO OCCUR.
/*
// TLBL BACKUP,'EPIC.CAT.BACKUP',,,,,,2
// DLBL WORK,'EPIC.UTL.WORK(D)'
// EXTENT SYS002,POOLNM,,,1,15
<======= FIX ME!
// DLBL SORTWK1,'===.SORTWK1(X)'
// EXTENT SYS001,POOLNM,,,1,100
<======= FIX ME!
// EXEC TSIDUTL
RESTORE
/*
* STEP RECOVER1.015 TSIDMNT
/*
/* CHANGE STATUS OF THE BIM-EPIC.CAT.BACKUP TO CLOSED.
/* THIS STEP IS NEEDED SINCE THE STATUS OF THIS VERSION
/* WAS OPEN WHILE THE CATALOG WAS BEING COPIED TO TAPE.
/*
// EXEC TSIDMNT
CLOSE 'EPIC.CAT.BACKUP'
/*
* STEP RECOVER1.020 TSIDRFS
/*
/* PERFORM MAINTENANCE ON THE BIM-EPIC RECORDER FILE.
/* THIS MAINTENANCE COMBINES THE 'END', 'BACKUP', 'CLEAR',
/* AND 'START' COMMANDS INTO A SINGLE COMMAND WHICH ASSURES
/* THAT ALL THESE REQUIRED FUNCTIONS ARE ALWAYS PERFORMED
/* AND IN THE CORRECT ORDER. THE OUTPUT MAY SPAN MORE
/* THAN ONE OUTPUT TAPE VOLUME.
/*
// TLBL RFBKUP,'EPIC.VSE.BACKUP'
// EXEC TSIDRFS
MAINT
/*
* STEP RECOVER1.025 TSIDSRT
/*
/* IF MORE THAN ONE BIM-EPIC RECORDER FILE BACKUP TAPE IS REQUIRED FOR
/* INPUT TO THIS RECOVERY PROCEDURE, USE JCL SIMILAR TO THIS TSIDSRT TO
/* COMBINE THEM INTO A SINGLE DATASET AS REQUIRED BY THE TSIDBLD
/* PROGRAM. IF ONLY THE 'EPIC.REC.BACKUP' DATASET VERSION CREATED ABOVE
/* IS REQUIRED AS INPUT TO THIS RECOVERY PROCEDURE, SKIP THIS STEP.
/*
// TLBL SORTIN1,'EPIC.VSE.BACKUP',,,,,1,2
// TLBL SORTIN2,'EPIC.VSE.BACKUP',,,,,2,2
// TLBL SORTOUT,'COMB.VSE.BACKUP'
// DLBL SORTWK1,'$$$.SORTWK1'
// EXTENT SYS001
// EXEC TSIDSRT
SORT FIELDS=(29,5,CH,A,17,4,CH,A),WORK=1,FILES=2
RECORD TYPE=F,LENGTH=338
INPFIL BLKSIZE=5746
OUTFIL BLKSIZE=5746
OPTION PRINT=ALL,ROUTE=LST
END
* STEP RECOVER1.030 CA-EPIC/CMS
4-10
BIM-EPIC Installation and System Guide
Emergency Recovery of the DSN Catalog
/*
/* IF CA-EPIC/CMS IS UTILIZED, ACCOMPLISH THE EPIC/CMS RECORDER
/* COMMAND TO PERFORM THE 'MAINT' FUNCTION WHICH INCLUDES CREATING
/* A CA-EPIC/CMS RECORDER FILE BACKUP TO TAPE. THIS SAMPLE JOB
/* ASSUMES THE DATASET NAME FOR THIS CA-EPIC/CMS RECORDER FILE
/* BACKUP IS 'EPIC.CMS.BACKUP'.
/*
// PAUSE ACCOMPLISH CA-EPIC/CMS RECORDER FILE BACKUP, IF APPROPRIATE.
/*
* STEP RECOVER1.035 TSIDSRT
/*
/* IF MORE THAN ONE BIM-EPIC RECORDER FILE BACKUP TAPE IS REQUIRED FOR
/* INPUT TO THIS RECOVERY PROCEDURE, USE JCL SIMILAR TO THIS TSIDSRT
/* TO COMBINE THEM INTO A SINGLE DATASET AS REQUIRED BY THE TSIDBLD
/* PROGRAM. IF ONLY THE 'EPIC.CMS.BACKUP' DATASET VERSION CREATED
/* ABOVE IS REQUIRED AS INPUT TO THIS RECOVERY PROCEDURE, OR
/* CA-EPIC/CMS IS NOT UTILIZED, SKIP THIS STEP.
/*
// TLBL SORTIN1,'EPIC.CMS.BACKUP',,,,,1,2
// TLBL SORTIN2,'EPIC.CMS.BACKUP',,,,,2,2
// TLBL SORTOUT,'COMB.CMS.BACKUP'
// DLBL SORTWK1,'$$$.SORTWK1'
// EXTENT SYS004
// EXEC TSIDSRT
SORT FIELDS=(29,5,CH,A,17,4,CH,A),WORK=1,FILES=2
RECORD TYPE=F,LENGTH=241
INPFIL BLKSIZE=2410
OUTFIL BLKSIZE=2410
OPTION PRINT=ALL,ROUTE=LST
END
* STEP RECOVER1.040 TSIDBLD
/*
/* ACCOMPLISH THE BIM-EPIC CATALOG RECOVERY PROGRAM. THIS SAMPLE JCL
/* NEEDS TO BE MODIFIED AS FOLLOWS:
/*
/*
// UPSI 10
USE IF ONLY BIM-EPIC IS UTILIZED
/*
// UPSI 11
USE IF BOTH BIM-EPIC AND CA-EPIC/CMS ARE UTILIZED
/*
/* FOR // UPSI 10 ONLY, REMOVE THE LABEL FOR CMSBKUP.
/*
/* FOR BOTH // UPSI 10 AND // UPSI 11, CORRECT THE FILE-ID FOR VSEBKUP
/* IF MORE THAN ONE BIM-EPIC RECORDER FILE WAS COMBINED ABOVE.
/*
/* FOR // UPSI 11 ONLY, CORRECT THE FILE-ID FOR CMSBKUP IF MORE THAN
/* ONE CA-EPIC/CMS RECORDER FILE WAS COMBINED ABOVE.
/*
// UPSI ??
// TLBL VSEBKUP,'EPIC.VSE.BACKUP'
// TLBL CMSBKUP,'EPIC.CMS.BACKUP'
// EXEC TSIDBLD
/*
// UPSI 00
/*
* STEP RECOVER1.045 TSIDUTL
/*
/* BACKUP THE NEWLY RECOVERED BIM-EPIC CATALOG TO TAPE.
/*
// TLBL BACKUP,'EPIC.CAT.BACKUP'
// EXEC TSIDUTL
BACKUP
/*
* STEP RECOVER1.050 PAUSE
/*
/* THE RECOVERY PROCEDURE HAS BEEN COMPLETED. BE SURE TO CHECK EACH
Chapter 4. Maintenance Procedures
4-11
Emergency Recovery of the DSN Catalog
/* TSIDBLD PRINTED PAGE FOR CORRECTNESS.
/*
// PAUSE RECOVERY COMPLETE - BE SURE TO REVIEW OUTPUT.
/*
/&
4-12
BIM-EPIC Installation and System Guide
5
Activating and Deactivating BIM-EPIC
This chapter describes programs that activate, configure, and deactivate BIM-EPIC system
features. If you have not yet customized the EPICON procedure, go to 2-94 in this manual
before continuing with this chapter.
Chapter Contents
Activating and Deactivating BIM-EPIC.........................................................................5-2
Maintaining the BIM-EPIC Recorder File ...................................................................5-45
Activating and Deactivating QDAS .............................................................................5-52
BIM-EPIC Dispatcher..................................................................................................5-53
BIM-EPIC ACL Support..............................................................................................5-54
ACL Leveling...............................................................................................................5-59
IBM ACL Support .......................................................................................................5-60
Memorex ACL Support................................................................................................5-63
STK ACL Support .......................................................................................................5-68
OPTI-TAPE Support....................................................................................................5-73
5-1
Turning BIM-EPIC On (TSIDON)
Activating and Deactivating BIM-EPIC
Activating and Deactivating BIM-EPIC
Turning BIM-EPIC On (TSIDON)
Description
BIM-EPIC is activated and configured by using the TSIDON program.
Once BIM-EPIC is activated, it becomes active in each partition once the first dataset is
opened. Once activated, BIM-EPIC remains active until VSE is IPLed or until it is
deactivated. You can turn BIM-EPIC off and back on in a partition by using TSIDDEB.
TSIDON is usually executed from the EPICON procedure. It can also be executed from the
operator console or from JCL. When you execute TSIDON from a procedure, the procedure
must be cataloged with DATA=YES.
Processing Note
We recommend that you execute TSIDON in BG during an IPL, and before you activate any
other partition. Execute TSIDON after activating most other software. For the exceptions,
see 2-8 in this manual.
Executing from the
Console
If you are executing TSIDON from the operator console, BIM-EPIC issues console messages
to request control statements. You do not have to type OPTION in front of the configuration
options (for example, ACCEPT=NO). You can enter as many options as you wish, separating
the options with commas. When you are finished, press ENTER.
Configuration options remain in effect only as long as BIM-EPIC remains active. We
recommend that you submit configuration options from the EPICON procedure (not from the
operator console) to ensure a standard configuration every time BIM-EPIC is activated.
For more information, see the OPTION control statements and Configuration Option
Descriptions.
JCL Requirements
// EXEC TSIDON
OPTION control statements
/*
Dataset
Requirements
IJSYSDS defines the DSN Catalog. You can use a different DTF name if you specify it in the
DSNAME configuration option. It can be defined with standard assignments and labels.
5-2
BIM-EPIC Installation and System Guide
Activating and Deactivating BIM-EPIC
Control Statements
Turning BIM-EPIC On (TSIDON)
TSIDON control statements are required.
OPTION control statements are used to define BIM-EPIC configuration options. Parameters
for these statements can be specified in any order.
You can specify multiple parameters on any control statement. Separate parameters from each
other with a comma. Only columns 1 through 72 are valid. Parameters beginning in column
73 and beyond are ignored.
Control statements cannot be continued. However, you can use as many statements as you
need.
To specify a comment, begin the statement with “/*” in column 2 or beyond. End the
statement with “*/”.
Chapter 5. Activating and Deactivating BIM-EPIC
5-3
OPTION Control Statement
Activating and Deactivating BIM-EPIC
OPTION Control Statement
Description
OPTION control statements are used to supply BIM-EPIC configuration options. OPTION
statements begin with the word OPTION, followed by a space and one or more option
expressions. One OPTION statement can define multiple options, but OPTION statements
cannot be continued. For a full description of each configuration option, see the next section.
Syntax
OPTION option=value[,option=value...]
Parameters
In the following table, Scope indicates whether the option applies to Tape only, to Disk only,
or to the System as a whole. BIM-EPIC uses the default when no value is supplied using an
OPTION statement.
5-4
option
Scope
value
Default
ACCEPT
Tape
YES or NO
YES
ACLAUTI
Tape
YES or NO
NO
ACLIBM
Tape
YES or NO
NO
ACLLIB
Tape
lib.sublib
None
ACLLVLOO
Tape
YES or NO
NO
ACLMEM
Tape
YES or NO
NO
ACLOPT
Tape
YES or NO
NO
ACLRECS
Tape
1 to 32767
100
ACLSRVRI
Tape
CMS server ID for IBM ACL
None
ACLSRVRM
Tape
CMS server ID for Memorex ACL
None
ACLSRVRO
Tape
Server ID for BSI’s OPTI-TAPE
None
ACLSRVRS
Tape
CMS server ID for STK ACL
None
ACLSTK
Tape
YES or NO
NO
ACLTIME
Tape
1 to 32767
180
ALLMALL
Disk
YES or NO
NO
ALLMSG
Disk
YES or NO
YES
ALTMSGS
System
YES or NO
NO
AUTOATT
Tape
YES or NO
NO
AUTOCAT
System
(tape,disk)
YES or NO or sysparm
(NO,NO)
BIM-EPIC Installation and System Guide
YES or NO or sysparm
Activating and Deactivating BIM-EPIC
OPTION Control Statement
option
Scope
value
Default
AUTOLOG
Tape
YES or NO or sysparm
NO
AUTOSTP
Tape
YES or NO
NO
AUTSTPN
Tape
1 to 999
5
AUTSTPNO
Tape
0 to 999
AUTSTPN value
AUTSTPT
Tape
1 to 999
10
AUTSTPTO
Tape
0 to 999
AUTSTPT value
BYPEXT
Disk
YES or NO
NO
CANMSG
System
YES or NO
NO
CATRT1
Disk
YES or NO
NO
CKDFACT
Disk
0 to 32767
30
CMSTAPE
System
YES or NO
NO
CNTRL
Tape
YES or NO or CANCEL
NO
CPUID[S]
System
A-Z, 0-9
Last digit of CPU
serial number
CWDSPOL
Disk
6 characters
None
CYCL
System
0 to 999
3
DDERR
System
CANCEL|IGNORE|OPCORR
IGNORE
DDGEN
System
YES or NO
NO
DEBUG
System
YES or NO
NO
DEFEXT
Disk
0-999999
0 (zero)
DEFPOL
Disk
6 characters
None
DEFTPL
Tape
NO or 1 character
NO
DEFWPOL
Disk
6 characters
DEFPOL value
DISKALL
Disk
YES or NO
YES
DSKLUB
Disk
YES or NO or 1-255
YES (100)
DSKRET
Disk
1 to 999
7
DSNAME
System
1 to 7 characters
IJSYSDS
DSNWARN
System
1 to 999
200
DSNWMSG
System
1 to 999
10
EPICOFF
System
2 characters
None
ERDFILE
Tape
1 to 7 characters
None
EURODAT
System
YES or NO
NO
Chapter 5. Activating and Deactivating BIM-EPIC
5-5
OPTION Control Statement
5-6
Activating and Deactivating BIM-EPIC
option
Scope
value
Default
FBAFACT
Disk
0 to 32767
0 (zero)
FRAG
Disk
YES or NO
NO
GDI
System
YES or NO
YES
GDIUR
System
YES or NO
YES
JCLAC
System
YES or NO
YES
JCLLANG
System
YES or NO
YES
JCLOPT
Tape
YES or NO
NO
JCLOVRDE
System
YES or NO
NO
JOBACCT
System
YES or NO
YES
JQNAME
System
1 to 7 characters
None
JQWARN
System
0 to 999
0 (zero)
JQWMSG
System
0 to 999
0 (zero)
MINDEX
System
YES or NO
NO
MINRET
Disk
1 to 999
7
MODE
Tape
Valid density code
D0
MSG088
Tape
YES or NO
NO
MULTCPU
System
YES or NO
NO
NCATDSK
Disk
YES or NO
NO
NOGVIS
System
CANCEL or IGNORE
CANCEL
ONLREWCD
System
RUN or REW
RUN
PASSWD
System
1 to 8 characters
None
PREFIX
System
2 characters
EP
PURBYP
Disk
YES or NO
NO
RECORD
System
YES or NO
YES
RECSHR
System
YES or NO
NO
RERUN
Tape
YES or NO
YES
RETEN
System
0 to 999
7
RMNTPRT
Tape
YES or NO
NO
SHARE
Tape
YES or NO
NO
SLASIZE
System
1 to 32767
300
STRTRK
Disk
NO or 1 to 32767
1
TAPCUU
Tape
3 characters
F00
BIM-EPIC Installation and System Guide
Activating and Deactivating BIM-EPIC
OPTION Control Statement
option
Scope
value
Default
TAPE
Tape
YES or NO
YES
TAPLUB
Tape
YES or NO or 001-255
YES (010)
TAPPOL
Tape
6 characters
None
TPAMODE
Tape
Valid TPA Mode
None
TSTJOB
System
1 to 8 characters
None
UNCDSK
Disk
YES or NO
NO
UNCTAP
Tape
YES or NO
NO
UNCTL
Tape
YES or NO
NO
UNLABEL
Tape
YES or NO
YES
UNLOAD
Tape
YES or NO
NO
VGSFTAPE
Tape
YES or NO
YES
VM
System
YES or NO or SVC no.
NO
VSAM
Disk
YES or NO
NO
Chapter 5. Activating and Deactivating BIM-EPIC
5-7
Configuration Option Descriptions
Activating and Deactivating BIM-EPIC
Configuration Option Descriptions
ACCEPT
Determines whether ACCEPT is a valid response to EP009 INCORRECT
DATASET/VERSION. If ACCEPT=YES (the default), ACCEPT is a valid response to
EP009, and BIM-EPIC will accept the mounted tape regardless of tape contents. Under
certain conditions, EPS067 is required for the EP009 message to be issued (see 5-38).
If ACCEPT=NO, ACCEPT is not a valid response, so you must mount the correct tape.
ACCEPT=NO is required in order to set EPS032=YES.
Related Special Options: EPS032, EPS040, EPS067
Related Messages: EP009, EP034
ACLAUTI
Determines whether uninitialized tapes that reside in an IBM ACL are automatically
initialized during an ACL SYNC operation. If ACLAUTI=YES, any uninitialized tape found
in an IBM ACL during an ACL SYNC operation will be initialized with VOL and HDR
records and placed into the BIM-EPIC DSN. The volume serial number is set to the tape’s
barcode serial number. If tape pools are used, the tape’s barcode serial number must be within
a pool definition.
If ACLAUTI=NO (the default), tapes are not initialized during an ACL SYNC operation.
Related Configuration Options: ACLIBM
ACLIBM
Determines whether the IBM ACL Tape Library Dataserver is supported. If ACLIBM=NO
(the default), the IBM ACL is not supported.
If ACLIBM=YES, the IBM ACL is supported. MSG088=YES is also required.
Related Configuration Options: ACLAUTI, ACLLIB, ACLRECS, ACLSRVRI, ACLTIME,
ERDFILE, MSG088, VM
ACLLIB
ACLLIB=lib.sublib specifies the VSE Library and Sublibrary to be used to manage the
cartridge statuses and inventory of ACL units.
The sublibrary has members used by the BIM-EPIC Dispatcher to process ACL-related
scratch, retain, eject, add, purge, and other requests made as a result of TSIDMNT, TSIDUTL
and TSIDVLT processing against the BIM-EPIC DSN Catalog.
For Memorex and STK ACL’s, lib.sublib can be any valid VSE library and sublibrary.
Naming requirements for IBM ACL’s are:
•
5-8
If the IBM Library Control Device Driver (LCDD) for VSE/ESA is used as the ACL
manager, sublib must be the same name as that used in the LUNAME parameter to
identify the 3494 in the LCDD configuration.
BIM-EPIC Installation and System Guide
Activating and Deactivating BIM-EPIC
•
Configuration Option Descriptions
If the IBM VSE Guest Server (VGS) is being used as the ACL manager (in a VSE
Guest environment), sublib can be any name. For consistency and ease of crossreference, we recommend using the server name specified in the LIBRCMS
SRVNAMES member entry for the VSE Guest. This member is on the VGINVHLP Adisk.
In all cases, we recommend that the sublibrary be used for ACL support only. In BIM-EPIC
documentation, the sublibrary is called the VSE ACL Inventory Management Library.
Related Configuration Options: ACLIBM
ACLLVLOO
In an IBM multiple-ACL environment where the ACL Leveling feature is used, determines
whether ACL Leveling is used for input and output, or for output only. This option is only
meaningful in a multiple ACL environment, and then only if at least two ACL’s have been
defined as Participates in ACL Leveling as described in Defining the BIM-EPIC Resource
Dataset (ERD) . The leveling process is described in ACL Leveling.
If ACLLVLOO=NO (the default), ACL cuu’s being used for input and output operations are
included in the ACL Leveling process.
If ACLLVLOO=YES, only ACL cuu’s being used for output operations are included in the
ACL Leveling process.
Related Configuration Options: ACLIBM
ACLMEM
Determines whether the Memorex Automatic Tape Library (ATL) is supported. If NO (the
default), the MEMOREX ATL is not supported.
If ACLMEM=YES, the Memorex ATL is supported. MSG088=YES is also required.
Related Configuration Options: ACLLIB, ACLRECS, ACLSRVRM, ACLTIME, ERDFILE,
MSG088, VM
ACLOPT
Determines whether BSI’s OPTI-TAPE is supported. If NO (the default), OPTI-TAPE is not
supported.
If ACLOPT=YES, OPTI-TAPE is supported. MSG088=YES is also required.
Related Configuration Options: ACLSRVRO, ERDFILE, MSG088, VM
ACLRECS
Specifies the number of records written to VSE ACL Inventory Management Library before
submission to an ACL for processing. The default is 100. Records are written to the library
from executions of TSIDMNT, TSIDVLT and TSIDUTL.
Related Configuration Options: ACLTIME
Chapter 5. Activating and Deactivating BIM-EPIC
5-9
Configuration Option Descriptions
ACLSRVRI
Activating and Deactivating BIM-EPIC
If IBM ACLs are supported using the IBM VSE Guest Server (VGS), ACLSRVRI specifies
the CMS Logon name of the VGS machine. If IBM ACLs are being supported using the IBM
Library Control Device Driver for VSE/ESA (LCDD), do not use the ACLSRVRI option.
Related Configuration Options: ACLIBM, VM
ACLSRVRM
If Memorex ACLs are supported, ACLSRVRM specifies the CMS Logon name of the
Memorex Library Management Software (LMS) server. Related Configuration Options:
ACLMEM, VM
ACLSRVRO
If BSI’s OPTI-TAPE is supported, ACLSRVRO specifies the server name. The value must be
OPTITAPE
Related Configuration Options: ACLOPT
ACLSRVRS
If STK ACLs are supported, ACLSRVRS specifies the STK Host Software Component (HSC)
server.
Related Configuration Options: ACLSTK, VM
ACLSTK
Determines whether the STK ACL is supported. If NO (the default), the STK ACL is not
supported.
If ACLSTK=YES, the STK ACL is supported. MSG088=YES is also required.
Related Configuration Options: ACLLIB, ACLRECS, ACLSRVRS, ACLTIME, ERDFILE,
MSG088, VM
ACLTIME
Specifies the number of seconds that can elapse since the last record was written to the VSE
ACL Inventory Management Library, before records are submitted to an ACL for processing.
The default is 180. Records are written to the library from executions of TSIDMNT,
TSIDVLT and TSIDUTL.
Related Configuration Options: ACLRECS
ALLMALL
Determines whether all disk messages are issued for every file.
If ALLMALL=YES,all disk messages are issued.
If ALLMALL=NO (the default), disk messages are not issued. ALLMALL=NO can be
overridden for a single disk dataset by using DLBL option ‘M’ or DD OPTION=ALLMSGS,
either of which cause all disk messages for the dataset to be issued for a single job step.
5-10
BIM-EPIC Installation and System Guide
Activating and Deactivating BIM-EPIC
Configuration Option Descriptions
Related Configuration Options: DISKALL
Related Special Options: EPS044
Related Messages: EP039, EP051, EP052, EP053, EP090
ALLMSG
Determines whether the disk allocation message EP039 ALLOCATED is issued for output
disk files.
If ALLMSG=YES (the default), EP039 is enabled regardless of any other settings.
If ALLMSG=NO, EP039 is disabled, and EP052 is also disabled unless special option
EPS044=YES has been specified. You can override ALLMSG=NO for a specific file by
using the DLBL ‘M’ option or DD OPTION=ALLMSGS.
Related Configuration Options: DISKALL
Related Special Options: EPS044
Related Messages: EP039, EP052
ALTMSGS
If ALTMSGS=YES, extended information (including the full dataset name and generation
number, if applicable) for the related messages is displayed typically occupying two display
lines.
If ALTMSGS=NO (the default), abbreviated information for the related messages is displayed
typically occupying one display line.
Related Messages: EP005, EP022, EP029, EP033, EP035, EP039, EP040, EP041, EP045,
EP047, EP048, EP051, EP052, EP053, EP059
AUTOATT
Activates the BIM-EPIC Autoattach feature. The default is NO. AUTOATT=YES should
only be specified when Autoattach has been properly installed. Refer to “Autoattach
Installation."
Related Configuration Options: VM
AUTOCAT
Determines whether output datasets are automatically cataloged. The CYCL and RETEN
options determine what retention criteria are put in the dataset definition.
Specify two values separated by a comma and enclosed in parentheses. The first value applies
to tape datasets. The second applies to disk.
If AUTOCAT=(YES,YES), all uncataloged datasets are cataloged automatically.
If AUTOCAT=(sysparm,sysparm), only uncataloged datasets processed in a job with sysparm
are automatically cataloged.
Chapter 5. Activating and Deactivating BIM-EPIC
5-11
Configuration Option Descriptions
Activating and Deactivating BIM-EPIC
If AUTOCAT=(NO,NO) (the default), no automatic cataloging is done.
Related Configuration Options: AUTOLOG, BYPEXT, CATRT1, CYCL, NCATDSK,
RETEN
Related Special Options: EPS018
AUTOLOG
Determines whether input tape datasets are automatically cataloged.
If AUTOLOG=YES, all uncataloged input tape datasets are cataloged automatically. The
CYCL and RETEN options determine what retention criteria are put in the dataset definition.
If AUTOLOG=NO (the default), no automatic cataloging is done.
If AUTOLOG=sysparm, only uncataloged input tape datasets processed in a job with sysparm
are cataloged automatically.
Related Configuration Options: AUTOCAT, CYCL
AUTOSTP
AUTOSTP=YES enables the AutoStop feature, which controls periodic Automatic Volume
Recognition (AVR) scanning for tapes. Default is NO (AutoStop is inactive).
Related Configuration Options: AUTSTPN, AUTSTPNO, AUTSTPT, AUTSTPTO,
ERDFILE, TAPE
Related Special Options: EPS078
AUTSTPN
Determines the number of times the AutoStop feature scans the tape drives before operator
intervention is required when looking for an input tape. The value specified must be a number
between 1 and 999. The default is 5. If AUTSTPNO=0, is specified, AUTSTPN also applies
to output tapes. Valid only with AUTOSTP=YES.
Related Configuration Options: AUTOSTP, AUTSTPNO, AUTSTPT, AUTSTPTO,
ERDFILE, TAPE
AUTSTPNO
Determines the number of times the AutoStop feature rescans the tape drives before operator
intervention is required when looking for an output tape. The value specified must be a
number between 0 and 999. If AUTSTPNO=0 (the default) is specified, then AUTSTPNO
defaults to using the AUTSTPN value.
Related Configuration Options: AUTOSTP, AUTSTPN, AUTSTPT, AUTSTPTO, ERDFILE,
TAPE
AUTSTPT
5-12
Determines the time interval (in seconds) between tape drive scans during AutoStop
processing when looking for an input tape. If AUTSTPTO=0 is specified, AUTSTPT also
BIM-EPIC Installation and System Guide
Activating and Deactivating BIM-EPIC
Configuration Option Descriptions
applies to output tapes. The value specified must be a number between 1 and 999. The
default is 10. Valid only with AUTOSTP=YES. If running under VM prior to VM/ESA, be
sure REALTIMER has been specified in the VM directory.
Related Configuration Options: AUTOSTP, AUTSTPN, AUTSTPNO, AUTSTPTO,
ERDFILE, TAPE
AUTSTPTO
Determines the time interval (in seconds) between tape drive scans during AutoStop
processing when looking for an output tape. The value specified must be a number between 0
and 999. If AUTSTPTO=0 (the default) is specified, then AUTSTPTO defaults to using the
AUTSTPT value. If running under VM prior to VM/ESA, be sure REALTIMER has been
specified in the VM directory.
Related Configuration Options: AUTOSTP, AUTSTPN, AUTSTPNO, AUTSTPT,
ERDFILE, TAPE
BYPEXT
Determines whether BIM-EPIC bypasses the DSN Catalog if a complete EXTENT statement
is specified.
If BYPEXT=YES, BIM-EPIC bypasses the DSN Catalog search at OPEN when you specify a
complete EXTENT for the file. It accesses the DSN Catalog only when there is no EXTENT
or when Start Track 1 datasets are used.
If BYPEXT=NO (the default), BIM-EPIC always accesses the DSN Catalog for disk files.
Related Configuration Options: AUTOCAT, DISKALL
CANMSG
Determines whether EP065 JOB CANCELLED is issued for cancelled jobs. EP065 requires
an operator response before EOJ processing can be completed, and ensures that Operations is
aware that the job was canceled.
If CANMSG=YES, EP065 is issued.
If CANMSG=NO (the default), EP065 is suppressed.
Related Messages: EP065
CATRT1
Determines whether Start Track 1 datasets are automatically cataloged. BIM-EPIC does not
issue EP023 for datasets cataloged in this manner.
If CATRT1=YES, Start Track 1 datasets are autocataloged. The dataset is defined as
WRK=YES. In addition, it specifies CYCL=0, unless you set EPS059 to YES which changes
it to CYCL=1. It also specifies RET=0, unless you set EPS062 to YES which changes it to
the value specified on the RETEN configuration option.
If you set CATRT1=YES, NCATDSK must be set to NO.
Chapter 5. Activating and Deactivating BIM-EPIC
5-13
Configuration Option Descriptions
Activating and Deactivating BIM-EPIC
If CATRT1=NO (the default), Start Track 1 datasets are not automatically cataloged.
Related Configuration Options: DISKALL, NCATDSK, RETEN
Related Special Options: EPS059, EPS062
Related Messages: EP023
CKDFACT
When using DD statements for a new disk dataset version and space is requested in cylinders
for a target pool containing FBA devices, CKDFACT will convert the cylinders value to a
corresponding tracks value before using the value specified in FBAFACT to convert the
allocation to FBA blocks. The default is 30. CKDFACT=0 indicates no conversion factor is
to be applied.
Related Configuration Options: FBAFACT
CMSTAPE
Indicates whether the DSN Catalog is shared with a CA-EPIC/CMS system.
Set CMSTAPE= YES if the DSN Catalog is shared. See “Multi-CPU Environments" in
Chapter 2 for catalog sharing requirements.
If CMSTAPE=NO (the default), the DSN Catalog can be shared with other VSE machines
only.
5-14
BIM-EPIC Installation and System Guide
Activating and Deactivating BIM-EPIC
CNTRL
Configuration Option Descriptions
Determines how BIM-EPIC responds to uncontrolled tape datasets.
If CNTRL=YES, BIM-EPIC issues the EP022 message to notify the operator that an
uncontrolled tape file is being accessed.
If CNTRL=NO (the default), BIM-EPIC does not issue the EP022 message, and the dataset is
processed as usual.
If CNTRL=CANCEL, BIM-EPIC issues the EP022 message and cancels the job.
Related Messages: EP022
CPUIDS
Indicates a specific one-character CPU ID character to be used for the common workfile and
CPU independence features. If this option is not specified, BIM-EPIC will use the last digit of
the CPU serial number as the CPU ID. Should this default be used in a shared environment,
ensure that each sharing BIM-EPIC system gives a unique CPU ID.
BIM-EPIC supports multiple forms of the CPUIDS configuration option. The possible
options are:
CPUID=x
CPUIDS=x
CPUIDS=(nnnnnn,x,nnnnnn,x,nnnnnn,x ...)
where nnnnnn is a real CPU ID and x is a CPU ID code.
CWDSPOL
Identifies the default disk pool to be used for Common Workfile datasets. When specified,
this disk pool is used instead of the disk pool associated with the BIM-EPIC dataset definition
(EDD). If there is insufficient space in the CWDSPOL disk pool, or if the pool packs are not
found, the EDD disk pool is used.
CYCL
Determines the value of the CYC parameter for autocataloged datasets. Valid only if
AUTOCAT or AUTOLOG is turned on. The default is 3.
Related Configuration Options: AUTOCAT, AUTOLOG
Chapter 5. Activating and Deactivating BIM-EPIC
5-15
Configuration Option Descriptions
DDERR
Activating and Deactivating BIM-EPIC
Determines how BIM-EPIC handles errors that it detects on BIM-EPIC DD statements.
DDERR can take one of the following three values:
When DDERR=...
BIM-EPIC...
CANCEL
Cancels the job if any error is found on a DD statement.
IGNORE
(Default) Ignores any unrecognized parameters and
subparameters. No message is issued, and BIM-EPIC
processes all parameters that it recognizes. IGNORE provides
maximum compatibility with MVS DD statements. Its
disadvantage is that misspelled parameters are ignored.
OPCORR
Issues a message identifying any errors and allows the operator
to enter a correction.
NOTE: If the VSE option JCANCEL is in effect, IGNORE and OPCORR are overridden, so
that the job is cancelled as if DDERR=CANCEL.
Related Configuration Options: JCANCEL (VSE)
DDGEN
Determines generation vs. work characteristic for a dataset autocataloged using BIM-EPIC
DD statements with the DISP=(,CATLG) parameter. The default is DDGEN=NO.
If DDGEN=NO:
•
•
Tape is autocataloged as generation
Disk is autocataloged as non-generation (work datasets) unless the DOS DD parameter
LABEL=RETPD is specified. In this case, the dataset is autocataloged as generation.
If DDGEN=YES:
•
•
Examples
Tape is autocataloged as generation only when a plus (+) sign is found in the dataset
name. Otherwise, tape is autocataloged as work.
Disk is autocataloged as generation only when a plus (+) sign is found in the dataset
name. Otherwise, disk is autocataloged as work.
In the following example, if DDGEN=NO, DISK.FILE is autocataloged as a work (nongeneration) file. If DDGEN=YES, DISK.FILE is autocataloged as a generation file.
* //DISKOUT DD DSN='DISK.FILE(+1)'
* //
DISP=(NEW,CATLG),
* //
UNIT=DISK
In the following example, if DDGEN=NO, TAPE.FILE is autocataloged as a generation file.
If DDGEN=YES, TAPE.FILE is autocataloged as a work file.
* //TAPEOUT DD DSN='TAPE.FILE'
* //
DISP=(NEW,CATLG),
* //
UNIT=TAPE
5-16
BIM-EPIC Installation and System Guide
Activating and Deactivating BIM-EPIC
Configuration Option Descriptions
DDGEN also affects the DISP DD parameter. See the DDGEN deletion table in Chapter 6 of
the BIM-EPIC User Reference.
DEBUG
Determines whether BIM-EPIC produces a dump (by causing an operation exception) when a
job is cancelled by BIM-EPIC or when the operator responds CANCEL to a BIM-EPIC
message. The default is DEBUG=NO.
Related Messages: EP065, EP094
DEFEXT
Specifies a default primary extent size for BIM-EPIC controlled disk datasets under the
following conditions:
•
•
When no extent size is indicated on the label for new datasets to be automatically
catalaloged.
When there is no primary size specified in the definition for datasets already in the
catalog.
Default is DEFEXT=0.
Related Configuration Options: AUTOCAT, DEFPOL
DEFPOL
Specifies a default disk pool for BIM-EPIC controlled disk datasets under the following
conditions:
•
•
When no disk pool is indicated on the label for new datasets to be automatically
catalaloged.
When there is no disk pool specified in the definition for datasets already in the catalog.
Related Configuration Options: AUTOCAT, DEFEXT, DEFWPOL
DEFTPL
Specifies a default tape pool ID character to be used for all dataset definitions where a unique
tape pool ID character has not been designated. The default is DEFTPL=NO which indicates
that there is no default tape pool ID character. This configuration option is typically used in
an ACL environment where tape pooling is suggested.
DEFWPOL
Defines a default disk pool to be used for WRK=YES datasets and Start Track 1 datasets.
Generation datasets use the default pool specified by the DEFPOL option. If DEFWPOL is
not specified, it defaults to the pool specified by the DEFPOL option.
Related Configuration Options: AUTOCAT, DEFPOL
DISKALL
Determines whether BIM-EPIC controls disk datasets. Must be NO if only BIM-EPIC tape
management is desired.
Chapter 5. Activating and Deactivating BIM-EPIC
5-17
Configuration Option Descriptions
Activating and Deactivating BIM-EPIC
Related Configuration Options: TAPE
DSKLUB
Determines how LUB allocation is handled for disk.
If DSKLUB=YES (the default), BIM-EPIC assigns SYS numbers beginning at SYS100.
If DSKLUB=n, BIM-EPIC assigns SYS numbers beginning with n. Choose a number that
cannot be reassigned by user JCL.
Specify DSKLUB=NO only if DISKALL=NO.
Related Configuration Options: DISKALL
DSKRET
Specifies a default retention period for Start Track 1 datasets. If DSKRET is not used, their
default retention period is seven (7) days.
Related Special Options: EPS060
DSNAME
Specifies the DTF name for the DSN Catalog. The default is DSNAME=IJSYSDS.
DSNWARN
Specifies when to issue EP402 n FREE RECORDS REMAINING. BIM-EPIC issues the
EP402 message when there are n free records left in the DSN Catalog. The default is
DSNWARN=200.
Related Configuration Options: DSNWMSG
Related Messages: EP402
DSNWMSG
Determines the interval for reissuing EP402 n FREE RECORDS REMAINING after the
DSNWARN value is reached. EP402 is reissued each time the number of remaining free
records decreases by n. For example, if DSNWARN=200 and DSNWMSG=10, EP402 is
issued at 200 free records, 190 free records, 180 free records, and so on. The default is
DSNWMSG=10.
Related Configuration Options: DSNWARN
Related Messages: EP402
EPICOFF
Prevents BIM-EPIC from becoming active in a static partition. Supply the ID of the partition
you want to exclude. For example, to exclude the BG partition, specify EPICOFF=BG.
BIM-EPIC cannot be deactivated for VSE/ESA dynamic partitions during system initiation.
You must execute TSIDDEB with an OPTION EPICOFF statement to deactivate BIM-EPIC
5-18
BIM-EPIC Installation and System Guide
Activating and Deactivating BIM-EPIC
Configuration Option Descriptions
in dynamic partitions, either in the partition initiation procedure or as a separate step in the
job.
ERDFILE
Specifies the 1 to 7-character name of the BIM-EPIC Resource Dataset (ERD).
An ERD is required to share tape devices (including ACLs) among multiple VSE machines
(physical or virtual).
Related Configuration Options: ACLMEM, ACLSRVR, AUTOSTP, AUTSTPxx, MSG088,
SHARE, VM
EURODAT
Enables European date format (dd/mm/yy) for display and reporting.
If EURODAT=NO (the default), U.S. date format (mm/dd/yy) is used.
FBAFACT
Determines how BIM-EPIC handles allocations to an FBA device when the allocation values
are specified on the label:
DD:
The target pool (in the VOL parameter) and allocation values (TRK or
CYL accompanied with a primary value and, optionally a secondary
value) are specified
VSE:
The 'O' option in the dataset name and the both a target pool and
allocation value in the associated EXTENT statement are specified
System/Manager:
Both the TRACKS and VOL parameters are specified
If FBAFACT=0 (the default) or the target pool is not an FBA device, BIM-EPIC will use the
allocations values as supplied.
If FBAFACT is greater than zero, BIM-EPIC multiplies the allocation value by the
FBAFACT value. For example, if the allocation value is 10 tracks and FBAFACT=90, BIMEPIC will allocate 900 FBA blocks.
Related Configuration Options: CKDFACT
FRAG
Determines whether extent fragmentation can be done automatically.
If FRAG=NO (default), you must explicitly allow fragmentation with a label option or by
answering FRAG to the insufficient space message.
Related Options: DLBL ‘H’, DD SPACE parameter (CONTIG subparameter)
GDI
Determines whether generic device independence is allowed. Must be YES to use most of the
BIM-EPIC batch utilities. The default is GDI=YES.
Chapter 5. Activating and Deactivating BIM-EPIC
5-19
Configuration Option Descriptions
GDIUR
Activating and Deactivating BIM-EPIC
Determines whether generic device independence is allowed for unit record devices. The
default is GDIUR=YES.
Related Messages: EPS069
JCLAC
Determines if DD statements with DISP=(NEW,CATLG) are autocatalogued. If YES (the
default) any dataset with a DISP=(NEW,CATLG) is autocatalogued. If NO, any dataset with
DISP=(NEW,CATLG) is treated as if the DISP parameter was (NEW,KEEP).
JCLLANG
JCLLANG=YES (the default) activates EPIC’s Job Management Control Language (JMCL).
JCLOPT
Determines whether alphabetic TLBL options are allowed and whether EP033 ACCESSING
and EP047 CATALOG COMPLETE can be issued. The default is JCLOPT=NO.
Related Special Options: EPS026, EPS042
Related Messages: EP033, EP047
JCLOVRDE
Updates an existing DSN Catalog entry for datasets defined with DD statements or with
System Manager JCL, if DISP=(x,CATLG) is specified. EPM32 UPDATED CATALOG is
issued when the update occurs. The default is JCLOVRDE=NO.
Related Messages: EPM32
JOBACCT
Activates job accounting. Job accounting information is logged in the Recorder File.
If JOBACCT=YES (the default), you must set JA=YES in the IPL SYS statement.
JOBACCT should be set to YES unless you are otherwise instructed by BIM-EPIC Technical
Support.
Related Configuration Options: RECORD
Related Programs: TSIDARP, TSIDBRP, TSIDJAC, TSIDJLD, TSIDTAC
JQNAME
Specifies the one to seven-character DTF name for the separate JOBQ File. Use this option
only when using a separate JOBQ File. If this option is not used, the JOBQ records are placed
in the DSN Catalog. We suggest using IJSYSJQ as the DTF name for the separate JOBQ file.
Related Messages: EP442
5-20
BIM-EPIC Installation and System Guide
Activating and Deactivating BIM-EPIC
JQWARN
Configuration Option Descriptions
Specifies when to issue EP402 n FREE RECORDS REMAINING. BIM-EPIC issues the
EP402 message when the number of free records left in the separate JOBQ File matches this
number. Use this option only when using a separate JOBQ File. The default is JQWARN=0.
Related Messages: EP402
JQWMSG
Determines the interval at which the EP402 message is reissued after the JQWARN value is
reached. The message is issued each time the number of free records in the JOBQ file is
decreased by the number you set. Use this option only when using a separate JOBQ file. The
default is JQWMSG=0.
Related Messages: EP402
MINDEX
Requests creation and use of master index for DSN Catalog.
MINDEX=YES indicates master index is used.
MINDEX=NO (the default) indicates that no master index is used.
Related Programs: TSIDCDK
MINRET
Defines the minimum retention period (in days) for Start Track 1 datasets. If the retention
period specified on the label statement is less than the value specified here, the retention
period is forced to this value. The default is MINRET=7.
MODE
MODE defines the default tape density to be used unless specified differently in the dataset
label, the BIM-EPIC DSN Catalog entry for the dataset, or an ASSGN statement override. If
MODE is provided, the TPAMODE configuration option cannot be used. The default is D0.
Related Configuration Options: TPAMODE
The following densities are supported for 3480/3490 devices:
00
08
20
28
Buffered write mode
Buffered write mode with IDRC
Unbuffered write mode
Unbuffered write mode with IDRC
The following densities are supported for 8809/9347 devices:
30
50
60
90
High speed / short gap
Low speed / long gap
Low speed / short gap
High speed / long gap
The following densities are supported for 3424/9348 devices:
Chapter 5. Activating and Deactivating BIM-EPIC
5-21
Configuration Option Descriptions
42
62
C2
E2
Activating and Deactivating BIM-EPIC
Buffered write mode 1600 bpi
Unbuffered write mode 1600 bpi
Buffered write mode 6250 bpi
Unbuffered write mode 6250 bpi
The following densities are supported for 3410/3420/3422/3430 devices:
D0 6250 bpi
C0 1600 bpi
C8 800 bpi
The following densities are supported for 3490E devices:
F0 Buffered write mode (3490E)
F8 Buffered write mode with IDRC (3490E)
Modes F0 and F8 are used internally by BIM-EPIC to distinguish 3490E tape cartridge drives
from 3480/3490. Because VSE/ESA does not support these modes directly, BIM-EPIC sends
mode 00 or 08 to the 3490E hardware whenever modes F0 or F8 are specified.
Related Special Options: EPS073, EPS075, EPS078
MSG088
Determines whether EP088 DISMOUNT CARTRIDGE is issued. If MSG088=NO (the
default), this message is not issued.
If MSG088=YES, EP088 is issued each time a tape volume is dismounted from a cartridge
device. The BIM-EPIC Resource Dataset (ERD) is updated at dismount time. MSG088=YES
is required if ACLIBM=YES or ACLMEM=YES are specified.
Related Configuration Options: ACLIBM, ACLMEM, ACLSRVR, ERDFILE, VM
Related Messages: EP088
MULTCPU
Specifies whether the DSN Catalog is shared between multiple CPUs. If you are sharing your
DSN Catalog, MULTCPU must be set to YES. The default is MULTCPU=NO.
If MULTCPU=YES, see 2-68 for more information on DSN Catalog sharing requirements.
NCATDSK
Specifies whether the DSN Catalog is searched when processing Start Track 1 datasets.
If NCATDSK=YES, the DSN Catalog is not searched if the starting track is 1. The file is
allocated using the information on the EXTENT statement alone. YES is valid only if
CATRT1 and the disk parameter of AUTOCAT are both set to NO.
If NCATDSK=NO (the default), BIM-EPIC searches the catalog. If there is an existing
dataset definition, that definition is used to allocate the dataset. If no definition exists, the
dataset is allocated using the information from the EXTENT statement.
Related Configuration Options: AUTOCAT, CATRT1
5-22
BIM-EPIC Installation and System Guide
Activating and Deactivating BIM-EPIC
NOGVIS
Configuration Option Descriptions
Determines how BIM-EPIC responds to insufficient partition GETVIS during an open. It
does not affect insufficient GETVIS for reblocking, generic device independence, or data
encryption.
If NOGVIS=CANCEL (the default), BIM-EPIC cancels the job.
If NOGVIS=IGNORE, BIM-EPIC ignores all processing in the partition. It does not control
or provide protection for any dataset opened.
ONLREWCD
Specifies the rewind code used when closing the offload tape after the file is reloaded for use
by a job. The default is RUN (unload) and can be changed to REW by the user.
PASSWD
Determines whether password protection is invoked for DSN Catalog management. To
invoke password protection, specify PASSWD=password.
PREFIX
Specifies the first two characters for BIM-EPIC error messages. Default is EP
PURBYP
Determines how disk files flagged for purge are handled if the job cancels.
If PURBYP=YES, the files are retained (the purge is bypassed).
If PURBYP=NO (the default), the files are purged.
RECORD
Specifies whether you want the Recorder to log all DSN Catalog activity. RECORD does not
turn on the Recorder. The default is RECORD=YES.
WARNING!
RECORD should always be set to YES. The Recorder logs information about your DSN
Catalog which is essential for full recovery in an emergency.
Related Configuration Options: JOBACCT, RECSHR
Related Programs: Job Accounting
RECSHR
Specifies whether the Recorder File is shared between VSE machines. The default is
RECSHR=NO.
RERUN
Determines whether RERUN is a valid response to the EP001 MOUNT message. The default
is RERUN=YES.
Related Messages: EP001, EP067
Chapter 5. Activating and Deactivating BIM-EPIC
5-23
Configuration Option Descriptions
RETEN
Activating and Deactivating BIM-EPIC
Specifies retention period (in days) to be used for autocataloged datasets. The default is
RETEN=7.
Related Configuration Options: AUTOCAT
RMNTPRT
Enables you to print dataset labels for tape datasets at open. The default is RMNTPRT=NO.
SHARE
Allows tape drives to be shared among physical VSE machines. The default is SHARE=NO.
Related Configuration Options: ERDFILE
Related Special Options: EPS008, EPS074
WARNING!
If you are sharing tape drives among physical CPUs, SHARE must be set to YES.
SLASIZE
Specifies the total number of labels for all static partitions combined. Label entries reside in
the Label Interface Table, which is allocated in system GETVIS (31-bit GETVIS if available).
Default is 300. An active label exists for each BIM-EPIC-controlled dataset opened by a
program that is still running. One table entry is required for every label. Each entry requires
227 bytes.
For each dynamic partition, there is a limitation of 256 labels which cannot be enlarged.
STRTRK
If you specify a number, this option determines what starting track or block address on an
EXTENT statement defines a Start Track 1 dataset. This value must be a number greater than
0. If STRTRK=NO, this option prohibits the use of Start Track 1 datasets, including
controlled uncataloged disk files defined by DD statements. The default is STRTRK=1.
Related Programs: Offload
TAPCUU
Indicates the address of your dummy tape device. See “Adding a Dummy Tape Device and
Modifying Tape Modes" for more information about the dummy tape device. The default is
TAPCUU=F00.
TAPE
Determines whether BIM-EPIC controls tape datasets. Must be NO if only BIM-EPIC disk
management is desired.
Related Configuration Options: DISKALL.
TAPLUB
5-24
Determines how LUB allocation is handled for tape files.
BIM-EPIC Installation and System Guide
Activating and Deactivating BIM-EPIC
Configuration Option Descriptions
If TAPLUB=YES (the default), LUB allocation is activated and BIM-EPIC assigns SYS
numbers beginning at SYS010.
If TAPLUB=NO, LUB allocation is inhibited. TAPLUB=NO is required in order to set
EPS032=YES.
If TAPLUB=number, LUB allocation is activated and BIM-EPIC assigns SYS numbers
beginning with number, which can be from 001 to 255.
Related Special Options: EPS032
TAPPOL
Specifies which tape pool group to activate when starting BIM-EPIC. Required for tape
pooling. You must define at least one tape pool group and assemble the TSIDPOL macro
before activating BIM-EPIC with the TAPPOL option. See 2-44 for further information. Do
not specify TAPPOL if you are not using tape pools.
TPAMODE
TPAMODE defines the default tape density to be used for TPA drives (3590s) unless
specified differently in the dataset label, the BIM-EPIC DSN Catalog entry for the dataset, or
an ASSGN statement override. If TPAMODE is provided, the MODE configuration option
cannot be used.
If TPAMODE is provided, the MODE configuration option cannot be used.
The following modes are supported for native 3590 devices (those that do not emulate
3490E’s)
Modes 00-0F are Buffered Write modes:
00
01
02
03
04
05
06
07
08
09
0A
0B
0C
0D
0E
0F
Device default format (this is not the VSE Default)
Model-dependent Format 1
Model-dependent Format 2
Model-dependent Format 3
Model-dependent Format 4
Model-dependent Format 5
Model-dependent Format 6
Model-dependent Format 7
Device default format with Data Compression (this is VSE Default from ADD nn,TPA
Format 1 with Data Compression
Format 2 with Data Compression
Format 3 with Data Compression
Format 4 with Data Compression
Format 5 with Data Compression
Format 6 with Data Compression
Format 7 with Data Compression
Modes 20-2F are Unbuffered Write modes and correspond to 00-0F.
Related Configuration Options: MODE
Chapter 5. Activating and Deactivating BIM-EPIC
5-25
Configuration Option Descriptions
TSTJOB
Activating and Deactivating BIM-EPIC
Defines the job name that activates the Testjob feature.
You can use wildcard characters(*) and (?) to define the TESTJOB name. A question mark
(?) specifies that any character in that position is a valid character. An asterisk (*) specifies
that all characters in that position and following are valid.
For example, if you specify TSTJOB=A*, all job names beginning with A activate the
TESTJOB feature. If you specify TSTJOB=A?AAAA, the job names ABAAAA, ACAAAA,
and AXAAAA activate the TESTJOB feature. If you specify TSTJOB=A?A*, the job names
ADAAJA, AFA, and AZAWS activate the TESTJOB feature.
UNCDSK
Determines whether LUB allocation, AVR, and device independence are invoked for
uncontrolled disk files. The default is UNCDSK=NO.
UNCTAP
Determines whether tape drives are released at close for uncontrolled tape files and if TLBL
options codes are honored for uncontrolled files. This includes both early drive release and
Autoattach’s DETACH. UNCTAP=YES is required to honor TLBL option codes for
uncontrolled files. The default is UNCTAP=NO.
Alternate ASSGN statements or the TLBL option 8 bypasses this feature (override
UNCTAP=YES).
Related Configuration Options: AUTOATT
Related Special Options: EPS063, EPS081
UNCTL
Specifies whether controlled scratch tapes can be used to write uncontrolled files. The default
is UNCTL=NO.
If UNCTL=YES and a controlled tape is used for an uncontrolled file, BIM-EPIC purges its
volume serial number from the DSN Catalog.
UNLABEL
UNLABEL=YES (the default) permits writing unlabeled tapes and ASCII tapes on BIMEPIC-controlled standard label tapes.
If UNLABEL=NO, unlabeled and ASCII output is not allowed on BIM-EPIC-controlled
standard label tapes. In addition, EPS064 has no effect.
Related Special Options: EPS058, EPS064
Related Messages: EP004
UNLOAD
5-26
Specifies default positioning for tape close.
BIM-EPIC Installation and System Guide
Activating and Deactivating BIM-EPIC
Configuration Option Descriptions
UNLOAD=YES causes tapes to be unloaded at close automatically, unless there is already a
TLBL option code 1 (rewind), 2 (unload) or 3 (no rewind) in effect. UNLOAD=YES
overrides any explicit or default rewind options by setting the DTF to rewind at open and
unload at close.
UNLOAD=NO (the default) causes BIM-EPIC to honor any rewind options specified in the
DTF unless they are specifically overridden by a TLBL option code.
VGSFTAPE
For IBM 3494 ACL’s controlled through VGS, set to YES or NO.
For IBM 3494 ACL’s controlled through LCDD, no need to specify.
For STK and Memorex ACL’s, no need to specify.
VGSFTAPE=YES (the default) specifies that a free ACL tape drive must be available for any
request that EPIC makes to the 3494 (Mount, Scratch, Eject). This was a requirement in the
original IBM RMS support for 3494’s. (Free means the drive is not attached to any VM Guest
Machine)
VGSFTAPE=NO specifies that an unused ACL tape drive does not need to be available for
non-mount requests made to the 3494 (Scratch, Eject). Do not code “NO” unless your
installation is using VM/ESA Version 2, Release 2 or above. Early versions of this release
level may require an IBM APAR to DFSMS RMS to be installed. If ACLAUTI=YES is also
specified, NO will be temporarily replaced with YES for ACL SYNC processing since a
cartridge may need to be mounted and initialized during synchronization processing.
VM
Activates VM support. The default is VM=NO.
VM support is required for Autoattach and JMCL CP command processing.
VM support is also recommended for VSE guest machines running under VM even if
autoattach is not being used. In this type of environment, VM support causes BIM-EPIC to
limit AVR scans to tape drives already attached to the VSE guest. Without VM support, tape
drives defined to the VSE guest but not attached to a real device must be “deviced down" to
prevent BIM-EPIC access during AVR scans. Failure to do so results in the VSE error
OP31A DVC NOT OP on any VSE tape drive not attached to a real device.
YES activates VM support with a supervisor call of 111.
n activates VM support with a supervisor call of your choice. Use this option if SVC 111 is
already being used for another call. Specify a free SVC number for n.
NOTE: If the SVC number activated is already in use, BIM-EPIC issues an error message. It
does not overlay existing SVC code. If this occurs, choose a new SVC number with the n
option.
NO deactivates VM support.
Related Configuration Options: ACLMEM, ACLSRVR, AUTOATT, ERDFILE, MSG088
Chapter 5. Activating and Deactivating BIM-EPIC
5-27
Configuration Option Descriptions
VSAM
5-28
Activating and Deactivating BIM-EPIC
Determines whether VSAM file activity is reported in the DSN Catalog. Information is
captured at file close. The default is VSAM=NO.
BIM-EPIC Installation and System Guide
Activating and Deactivating BIM-EPIC
Special Options
Special Options
Introduction
BIM-EPIC provides special configuration options to meet a wide range of special user
requirements. Please review each special option to determine whether it is needed at your site.
Special options can be used to implement the following types of features:
•
•
•
•
Submitting Special
Options
Format
Special BIM-EPIC Functions
IBM Product Interfaces
Non-IBM Product Interfaces
Conversions
Special configuration options are submitted on OPTION control statements to TSIDON or
TSIDDEB, just like regular configuration options.
Parameter
EPSnnn
Required?
No
Values
Default
YES or NO
NO
Example
// EXEC TSIDON
OPTION EPS002=YES,EPS003=YES
OPTION EPS005=YES
/*
Supported Uses
Special configuration options support the following operational categories:
Disk Management
EPS065
Tape Management
EPS009
EPS069
EPS008
EPS010
EPS012
EPS011
EPS014
EPS021
Start Track 1 Datasets
EPS015
EPS023
EPS059
EPS019
EPS024
EPS060
EPS020
EPS025
EPS062
EPS027
EPS041
EPS092
EPS028
EPS044
EPS032
Chapter 5. Activating and Deactivating BIM-EPIC
5-29
Activating and Deactivating BIM-EPIC
EPS033
EPS022
Conversions
EPS035
EPS026
CA-DYNAM®
EPS040
EPS036
EPS046
EPS042
EPS059
EPS047
EPS043
EPS062
EPS055
EPS045
EPS083
CA-Super-EPAT®
EPS058
EPS063
LUB Allocation
EPS048
EPS064
EPS001
EPS055
EPS067
EPS002
EPS071
EPS003
CA-System/Manager®
EPS073
EPS004
EPS049
EPS074
EPS030
EPS051
EPS075
EPS031
EPS052
EPS078
EPS039
EPS053
EPS081
EPS057
EPS054
EPS082
EPS061
EPS059
EPS084
EPS068
EPS062
EPS077
EPS087
EPS088
Non-IBM Product
Interfaces
EPS086
EPS090
EPS006
JCL, DD Statements
and JMCL
EPS007
EPS005
EPS029
EPS017
EPS072
IBM Tape
EPS066
EPS018
5-30
BIM-EPIC Installation and System Guide
Activating and Deactivating BIM-EPIC
Special Option Descriptions
Special Option Descriptions
EPS001
Permits LUB allocation for the DTF names UIN and UOUT.
EPS002
Permits LUB allocation for SORTWK DTF names.
EPS003
Permits LUB allocation for SORTIN or SORTOUT DTF names.
EPS004
Permits LUB allocation for non-standard SORTIN DTF names processed through TSIDSRT.
Related Program: TSIDSRT
EPS005
Prevents BIM-EPIC from honoring an ASSGN IGNORE for the SYS number used by the
DTF or EXTENT statement unless LUB allocation is also inhibited.
EPS006
Activate for compatibility with PSAM from Universal Software.
EPS007
Allows use of physical backup utilities to back up Start Track 1 datasets. EPS007=YES
bypasses the check for USRLABL=YES in the DTF and resolves VSE messages 4359I
INVALID EXTENT and 4342D NO MATCHING EXTENT when backing up Start Track 1
datasets. EPS007=YES is not required for backing up cataloged files. Products known to
require EPS007=YES include Westinghouse DUSP, Doctor D, and Blueline MAXBACK.
EPS008
If SHARE=NO, EPS008=YES allows use of tapes in open status by the job name that opened
the tape.
Related Configuration Options: SHARE
Related Special Options: EPS074
EPS009
EPS009=YES suppresses allocation of an EOF extent when the DLBL ‘N’ option is specified.
EPS010
Bypasses normal ISAM and DA checks for FBA devices. EPS010=YES suppresses EP070
DTF TYPE NOT SUPPORTED ON FBA when DTFIS or DTFDA is opened on an FBA disk
device. When EPS010=YES, BIM-EPIC allocates a direct access or ISAM file on an FBA
Chapter 5. Activating and Deactivating BIM-EPIC
5-31
Special Option Descriptions
Activating and Deactivating BIM-EPIC
device, even though VSE LIOCS does not support it. EPS010=YES can be required for some
software products using PIOCS, including ADR’s DATA-REPORTER.
Related Messages: EP070
EPS011
Searches every pool volume to delete any equal file IDs for cataloged non-generation files on
output. This is the same process BIM-EPIC uses for Start Track 1 datasets.
EPS011=YES can be necessary to prevent duplicate VTOC entries if you share your DSN
Catalog between machines, but your pool volumes are not defined as shared to all the VSE
machines with access to that DSN Catalog. This situation is encountered with some CADYNAM conversions.
WARNING!
EPS011=YES significantly increases BIM-EPIC overhead. As a more desirable alternative to
EPS011, we recommend that you define all BIM-EPIC pool volumes as shared to all VSE
machines accessing the same DSN Catalog.
EPS012
Allows tapes to be scratched at close (both output and input) when you specify TLBL option
4.
EPS014
EPS014=YES disallows tapes initialized by DITTO to be used as scratch tapes.
Related Special Options: EPS033 (mutually exclusive)
Related Messages: EP096
EPS015
EPS015=YES honors the rewind options on TLBL and DD statements for all multi-volume
tapes, both input and output, and prevents VSE from automatically unloading multi-volume
tapes at EOV.
EPS017
Causes the dataset name to default to the DTF name if no dataset name is specified. The
normal default is blanks.
EPS018
Reverses the way AUTOCAT=sysparm works. Normally, a dataset is cataloged when the
VSE SYSPARM matches the AUTOCAT value. With this option, the dataset is cataloged
when the VSE SYSPARM does not match the AUTOCAT sysparm.
Related Configuration Options: AUTOCAT
EPS019
5-32
Prevents tapes in open or conditional catalog status from being used as scratch tapes.
BIM-EPIC Installation and System Guide
Activating and Deactivating BIM-EPIC
EPS020
Special Option Descriptions
EPS020 determines which field takes priority when a TLBL contains both a dataset name and
a volume serial number.
When EPS020=YES, the dataset name is ignored and the volume serial number is used to
determine whether a dataset is controlled or uncontrolled.
When EPS020=NO (the default), the dataset name is used to determine if a dataset is
controlled or uncontrolled. If the dataset is controlled, the volume serial number must be a
valid version of that dataset, or the job is cancelled.
EPS021
Bypasses issuing of EP081 INVALID EXTENT when a requested extent is not found in the
VTOC. It forces EOF if the next extent sequence is not found in the VTOC, even though it is
shown in the DSN Catalog.
Related Messages: EP081
EPS022
Bypasses issuing of EP077 REBLOCK INVALID FOR UNBLOCKED DTF when BIM-EPIC
is not able to reblock the DTF. User programs can subsequently cancel with a wrong length
record error.
Use EPS022=YES only if EP077 is issued and cannot be circumvented.
Related Messages: EP077
EPS023
1. Permits reusing the same extent when the current extent has been truncated. This is valid
for a TYPEFLE=WORK DTF and a DLBL ‘S’ option.
2. Bypasses the truncation check when accessing a sequential file as direct access. This
option circumvents the EP046 FILE NOT FOUND message which is normally issued. When
accessing files with a DA label, EP046 occurs if the file was written with an SD DTF and
truncated at close. The proper solution is to inhibit truncation at close.
Related Messages: EP046
EPS024
Bypasses forced deblocking when CISIZE is specified.
EPS025
Bypasses checking and recalculation of CISIZE. Some programs perform logical opens but
do their own deblocking (similiar to PIOCS).
EPS026
EPS026=YES replaces a single ampersand (&) found in the dataset name on a TLBL with the
CPUID. You must also specify JCLOPT=YES. The proper solution is to code a single equal
sign (=).
Chapter 5. Activating and Deactivating BIM-EPIC
5-33
Special Option Descriptions
Activating and Deactivating BIM-EPIC
Related Configuration Options: JCLOPT
EPS027
EPS027=YES disables revolving tape control. This option bypasses EP085 REVOLVING
TAPE INVALID and allow non-revolving tapes to used for revolving datasets.
Related Messages: EP085
EPS028
EPS028=YES allows you to use single-digit owner IDs.
EPS029
Activates compatibility with CA’s ALERT product. EPS029=YES leaves the dataset name in
tape labels instead of clearing it to blanks. This allows ALERT to perform its security check
on the dataset. However, VSE issues the 4132D ERROR IN FILE-ID message every time you
process tape datasets that have been renamed or that were originally created under CA-SuperEPAT.
EPS031
Provides GDIUR support for CICS 1.7 pre-processor programs. Set EPS031=YES only if the
first record output to a GDIUR file by a CICS 1.7 pre-processor program contains binary
zeros.
Related Configuration Options: GDIUR
EPS032
Performs an AVR scan even if the ASSGN statement is specified. This prevents the issuing of
EP009 WRONG DATASET/VERSION if an ineligible tape was mounted on the assigned
drive. ACCEPT=NO and TAPLUB=NO must also be specified.
Related Configuration Options: ACCEPT, TAPLUB
Related Messages: EP009
EPS033
Allows only tapes with volume serial numbers entered in the DSN Catalog to be used as
scratch tapes. The tape does not have to contain a BIM-EPIC VOL1 label. If the tape volser
is entered in the DSN Catalog but the tape does not yet have a BIM-EPIC label, BIM-EPIC
allows it to be used for uncontrolled output. This option also prevents issuing of EP003
VERIFY SERIAL NUMBER. Normally, BIM-EPIC accepts any BIM-EPIC or DITTOinitialized tape and adds unknown volume serial numbers to the DSN Catalog.
Related Special Options: EPS014 (mutually exclusive)
Related Messages: EP003, EP004, EP096
5-34
BIM-EPIC Installation and System Guide
Activating and Deactivating BIM-EPIC
EPS035
Special Option Descriptions
Emphasizes the EP001 and EP002 mount messages. EPS035=YES rings the console bell and
sets non-deletable flags when these messages are issued after an unsuccessful AVR scan. Not
supported on ESA 2 and above.
Related Messages: EP001, EP002
EPS036
Displays JMCL and CP statements on the console and/or SYSLST (depending on OPTION
LOG settings). These statements are normally suppressed.
EPS039
Bypasses * CP commands after a cancellation. The * CP commands must appear in the job
stream before the /&.
Related Configuration Options: VM
EPS040
Does not search the catalog for the tape volser after you respond ACCEPT to EP009
INCORRECT DATASET/VERSION if the tape does not have BIM-EPIC VOL1/HDR1
labels.
Related Configuration Options: ACCEPT
Related Messages: EP009
EPS041
EPS041=YES changes BIM-EPIC calculations to correctly determine the high extent address
on minidisks that do not occupy a full volume and are in a BIM-EPIC pool. Normally, the
default number of alternate cylinders is subtracted from the total number of cylinders when
calculating the size of the disk volume. However, on a minidisk that does not occupy a full
volume, this can cause the calculated extent address to be lower than the actual usable high
extent number. EPS041=YES causes BIM-EPIC to use the actual number of alternate tracks
remaining.
EPS042
Enables the EP033 ACCESSING and EP047 CATALOG COMPLETE messages even though
the JCLOPT configuration option is set to NO. Use this option when you have tape dataset
names containing commas (which forces you to code JCLOPT=NO) but you still want these
messages issued.
Related Configuration Options: JCLOPT
Related Messages: EP033, EP047
Chapter 5. Activating and Deactivating BIM-EPIC
5-35
Special Option Descriptions
EPS043
Activating and Deactivating BIM-EPIC
EPS043=YES enables the EP005 LABEL message for work tapes.
Related Messages: EP005
EPS044
Enables issuing of message EP052 TRUNCATED TO regardless of any configuration option
settings.
Related Configuration Options: ALLMALL
Related Messages: EP052
Related Functions: DLBL, DD
EPS045
EPS045=YES prevents BIM-EPIC control (input verification or output qualification) of 7track tape drives that are already assigned using JCL. When EPS045=YES, 7-track tapes
must be controlled manually. This option is used primarily for printing subsystems attached as
7-track tape drives.
EPS046
Processes scratch tapes that have DYNAM/CMS VOL1 labels.
EPS047
Automatically changes EXEC TDYNASN to EXEC TSIDASS. EPS047=YES allows BIMEPIC to process scratch tapes with DYNAM/T (VSE) HDR1 labels.
Related Programs: TDYNASN, TSIDASS
EPS048
1. Processes scratch tapes with CA-Super-EPAT VOL1 labels.
2. Automatically changes EXEC DSCASSGN to EXEC TSIDASS and EXEC DSCTPTP to
EXEC TSIDDTD.
3. Moves the primary dataset name from the HDR1 record into the label for EPAT input
tapes. This circumvents the VSE message 4132D ERROR IN FILE ID which would normally
occur if CA-Super-EPAT options were specified when the tape was created.
Related Programs: TSIDASS, TSIDDTD
EPS049
5-36
EPS049=YES allows BIM-EPIC to process scratch tapes with CA-System/Manager HDR1
labels and automatically converts CA-System/Manager labels and step cards. To be effective,
this special option must be specified during initial BIM-EPIC start-up. It cannot be specified
as an OPTION to the TSIDDEB program.
BIM-EPIC Installation and System Guide
Activating and Deactivating BIM-EPIC
EPS051
Special Option Descriptions
If MULTCPU=YES is specified, EPS051=YES causes BIM-EPIC to append ".===" to the
end of all dataset names at JCL time if the CA-System/Manager label does not have a GEN or
KEEP parameter and there is no PIND parameter. If MULTCPU=NO is specified, “.==” is
appended instead of “.===”
Related Special Options: EPS077
EPS052
EPS052=YES causes BIM-EPIC to release the drive assignment when the REW parameter is
specified with the SYSnnn parameter on a CA-System/Manager TLBL. This differs from
normal CA-System/Manager operation which releases the assignment only if the RUN
parameter is specified with the SYSnnn parameter.
EPS053
EPS053=YES causes BIM-EPIC to release the drive assignment whenever the SYSnnn
parameter is specified on a CA-System/Manager TLBL statement, no matter what rewind
options are specified.
NOTE: To stack multiple files on the same tape with EPS053=YES, you must rewind to load
point after every file. BIM-EPIC automatically repositions the tape after rewind. However,
this can increase run time significantly.
EPS054
EPS054=YES causes the tape drive assignment to be held when NOREW is specified on a
CA-System/Manager TLBL.
EPS055
EPS055=YES supports &P, &&P, &P@, CPU--, @== and/or ==@ in the dataset name.
JCLOPT=YES is also required to support these variables on TLBL statements.
Related Configuration Options: JCLOPT
EPS057
EPS057=YES permits LUB allocation for direct access files.
EPS058
EPS058=YES allows BIM-EPIC to support 7-track tape drives.
EPS059
EPS059=YES forces CYC=1 retention for datasets automatically cataloged with the CATRT1
configuration option, with DD statements, or with non-generation disk datasets cataloged with
CA-System/Manager DLBLs (NEW datasets that do not have KEEP or GEN).
Related Configuration Options: CATRT1
Chapter 5. Activating and Deactivating BIM-EPIC
5-37
Special Option Descriptions
EPS060
Activating and Deactivating BIM-EPIC
EPS060=YES forces the retention period for Start Track 1 datasets to the DSKRET value.
The retention on the DLBL statement is ignored.
Related Configuration Options: DSKRET
EPS061
EPS061=YES forces LUB allocation for tapes even if the logical unit specification in the DTF
is available.
EPS062
EPS062=YES causes BIM-EPIC to use the period retention specified by the RETEN
configuration option, rather than a retention period of zero (0), when automatically cataloging
non-generation disk datasets with the CATRT1 configuration option, DD statements, or CASystem/Manager DLBLs. A retention period on the DLBL still overrides the default retention
period in the autocataloged dataset definition.
Related Configuration Options: CATRT1, RETEN
EPS063
EPS063=YES releases the tape drive on close for uncontrolled, unlabeled tapes when there is
no TLBL for the tape. Normally, the assignment is held until EOJ if no TLBL is specified.
UNCTAP must also be set to YES.
Related Configuration Options: UNCTAP
EPS064
If EPS064=YES and UNLABEL=YES, BIM-EPIC allows AVR to use BIM-EPIC-controlled
standard label scratch tapes when creating an unlabeled tape. If UNLABEL=NO, EPS064 has
no effect.
Related Configuration Options: UNLABEL
EPS065
EPS065=YES causes TVTO displays to default to tracks instead of cylinders.
EPS066
EPS066=YES allows BIM-EPIC to process scratch tapes with HDR1 labels created by the
IBM TAPE management product.
EPS067
Enables issuing of EP093 ACCESSING PRIOR VERSION.
If EPS067=YES, the message EP009 INCORRECT DATASET/VERSION is issued,
requiring operator response to continue. Set to YES when:
(a) primary access to subdatasets is random, and
5-38
BIM-EPIC Installation and System Guide
Activating and Deactivating BIM-EPIC
Special Option Descriptions
(b) multiple versions of the same subdataset reside on the same tape.
When EPS067=NO, BIM-EPIC does not issue the EP009 message when the volser of a
currently assigned, mounted and positioned tape is different from the volser of the version
requested through JCL. This permits the RERUN and ACCEPT features, used with the first
file opened, to control subsequent access of additional files on the tape. EP093 ACCESSING
PRIOR VERSION is issued when a different version of the requested dataset is accessed
automatically as a result of EPS067=NO. Set to NO when the primary access of subdatasets is
sequential.
Related Configuration Options: ACCEPT, RERUN
Related Messages: EP009, EP093
EPS068
Suppresses SYS number conflict detection and the following messages:
•
•
EP089 LOGICAL UNIT ALREADY IN USE
EP090 POOL LEVELING INHIBITED
SYS number conflict detection is only a consideration if the following are true:
•
•
EPS069
the VSE DASD file protect feature is active
LUB allocation is being inhibited
EPS069=YES changes print line length to 121 characters when routing SYSLST output from
BIM-EPIC utilities to disk with a VSE DLBL. When using EPIC’s GDIUR support,
EPS069=YES is not needed and the full 133-character print line can be redirected to disk.
Related Configuration Options: GDIUR
EPS071
Permits tapes ending in ‘S’ to be used with datasets that have been cataloged with
SIZ=LARGE (the default size).
EPS072
EPS072=YES bypasses updating BLKSIZE, LRECL and RECFM=UNDEF in version records
if the DTF was originally opened as RECFM=FIXBLK but the block size was not a multiple
of the LRECL.
EPS073
Bypasses 9348/3424 devices during AVR if mode is 00.
Related Configuration Options: MODE
Related Special Options: EPS075
Chapter 5. Activating and Deactivating BIM-EPIC
5-39
Special Option Descriptions
EPS074
Activating and Deactivating BIM-EPIC
If SHARE=NO and EPS008=YES, EPS074=YES allows tapes in conditional status to be
reused for output by the job name that originally created them.
Related Configuration Options: SHARE
Related Special Options: EPS008
EPS075
EPS075=YES uses the value in the MODE configuration option to set a default density for
uncontrolled datasets when only a response of cuu is given to EP011 UNASSIGNED
INPUT/OUTPUT or EP073 TAPE UNIT NOT READY. However, a mode that is explicitly
specified in the response (cuu,mm) overrides the default density.
Related Special Options: EPS073, EPS078
Related Messages: EP011, EP073
EPS077
EPS077=YES appends ".===" to the end of dataset names on CA-System/Manager labels if
KEEP or GEN is not specified. This special option works in conjunction with special option
EPS051. When EPS051 is specified, any dataset name with OLD specified will be checked
for in the DSN catalog prior to appending the ".===". If a matching name is found, the
".===" will not be appended. EPS077=YES bypasses this catalog check for OLD datasets
resulting in ".===" being appended to any dataset name if KEEP or GEN is not specified.
Related Special Options: EPS051
EPS078
EPS078=YES bypasses output tape AVR scan if there is no density specified in the TLBL (via
override), in the dataset definition (in the DSN catalog), or as the BIM-EPIC system default
(on the MODE option for TSIDON). When EPS078=YES, we recommend that the
AUTOSTP configuration option be set to NO.
Related Configuration Options: AUTOSTP, MODE
Related Special Options: EPS073, EPS075
EPS081
If EPS081 is set to YES, when a label mismatch is found on an uncontrolled input tape and
BIM-EPIC configuration option UNCTAP=YES, the IBM message 4132D is not issued.
Related Configuration Options: UNCTAP
EPS082
Determines whether a leading tapemark is written to unlabeled tapes only when using the
BIM-EPIC feature to dynamically change a standard-label DTF to an unlabeled DTFMT
(TSIDMNT LBL=NO or EOM UNLABEL=YES).
If EPS082=YES, unlabeled tapes are created with leading tapemarks.
5-40
BIM-EPIC Installation and System Guide
Activating and Deactivating BIM-EPIC
Special Option Descriptions
If EPS082=NO (the default), the unlabeled tapes are created without leading tapemarks.
EPS083
Changes “SORT" to “TSIDSRT" in EXEC statements. This is intended for use by conversion
sites that run CA-SORT or IBM’s SM-2 sort and have not converted their JCL. If
EPS083=YES, it is not possible to execute SORT directly unless BIM-EPIC is turned off in the
partition, or the sort program is relinked under a name other than SORT. But do not simply
rename SORT because all internal programs call it that, including TSIDSRT.
If both EPS083 and EPS089 are active, EPS083 will prevail causing EPS089 to be ignored.
Related Program: TSIDSRT
EPS084
Causes BIM-EPIC to function as it did before Version 5.1, as follows:
Beginning in Version 5.1, if a tape drive is owned by the partition at EOJ (/& or a new JOB
card), BIM-EPIC will RUN the tape and detach it if AUTOATTACH is in use.
Before Version 5.1, if at EOJ a tape drive was left assigned due to cancellation or user error,
the tape would stay attached and positioned as it was at EOJ. EPS084=YES causes BIMEPIC to continue to function this way in Version 6.3.
EPS085
Bypass EP001/EP002 mount messages until autostop completes.
EPS086
Causes all System Manager DSN's to autocatalog as WORK=YES.
EPS087
Causes EP037 AVR/REL Trace Messages to be issued.
EPS088
Use real ATTACH/DETACH commands instead of VATTACH/VDETACH.
EPS089
Changed "TSIDSRT" to "SORT" on EXEC statements. This is intended for users changing to
a SORT package which interfaces to BIM-EPIC. If both EPS083 and EPS089 are active,
EPS083 will prevail causing EPS089 to be ignored. See Sorting with BIM-EPIC in the User
Reference Guide.
EPS090
Autocatalog System Manager tape files as WRK=YES, CYC=1 if coded as NEW,KEEP. This
special option will be ignored if the EXP= parameter is specified on the label.
EPS092
Prevents BIM-EPIC from reblocking start-track-1 files based on VTOC blocksize information.
Chapter 5. Activating and Deactivating BIM-EPIC
5-41
Special Option Descriptions
Activating and Deactivating BIM-EPIC
EPS093
Store the 8-byte creating job name in the BIM-EPIC catalog as the concatenation of the
current date MM + the current date DD + the current date Y (units digit) + the last three
characters of the actual current job name only if the first five characters of the actual current
job name are numeric.
EPS094
EPS094=YES suppresses autocatalog related messages EP023 (autocatalog for VSE TLBL or
DLBL statements), and EPM30, EPM31, and EPM32 (autocatalog for BIM-EPIC DD
statements and BIM-EPIC support for native processing of CA-System/Manager TLBL and
DLBL statements).
EPS095
EPS095 is used in installations that have one or more IBM ACLs (Automatic Cartridge
Libraries).
If set to YES, when BIM-EPIC is ready to send a “set volser x to scratch” command to an
ACL, the following logic is applied:
Verify that “volser x” is in the current EPIC Tape Pool.
If it is not, the “set volser x to scratch” command will not be sent to the ACL even if
“volser x” is in the ACLs inventory.
If it is, the “set volser x to scratch” command will be sent to the ACL.
This logic is applied to scratch actions generated by TSIDMNT, EPIC Online Manager
(EOM) and to ACL SYNC processing.
If set to NO (the default), normal BIM-EPIC ACL logic will apply for scratch actions.
It is recommended that this special option only be considered only in IBM ACL environments
using VTS with the FASTREADY option and multiple BIM-EPIC catalogs.
EPS096
In a VM environment where the VSE Guest has only 3490 tape units, and all are of the same
type (all 3490 or all 3490-E), allow BIM-EPIC to use them for output operations without an
initial ATTACH/DETACH sequence having been done after a VSE/ESA IPL.
After a VSE/ESA IPL in a VM environment , BIM-EPIC is not aware of whether a tape
cartridge drive is a 3490 or a 3490-E until the cuu has been attached to the VSE Guest for the
first time. This is because the VSE PUB Extension is not completed until this has been done;
and means that during BIM-EPIC’s output AVR process, 3490 drives will not be recognized.
If set to YES, BIM-EPIC assumes that all tape cartridge devices are 3490's and will allow
them to be used for output even if an ATTACH/DETACH has not been done.
The default is NO.
5-42
BIM-EPIC Installation and System Guide
Activating and Deactivating BIM-EPIC
Special Option Descriptions
YES should not be used unless 3490’s are the only tape cartridge drives being used and
they are all the same type, i.e., all 3490 or all 3490-E . If it is specified in mixed cartridge
environments (3480, 3490, 3490-E), the results are unpredictable.
EPS097
If YES is specified and a tape-occupied cartridge cuu is owned at EOJ time, the cartridge will
be rewound but not unloaded. ERD ownership will be released.
EPS098
If YES is specified: When auto-cataloging a CATRT1 file EPIC will set the secondary extent
allocation to be the same as the primary extent allocation, instead of half of the primary
allocation
EPS099
If ALTMSGS=NO, EPS099=YES will emit the ALTMSG format for EP005 and EPS033
messages. This setting can be useful if a console manager truncates the last few characters of
the "normally” formatted” message
EPS100
This EPS is intended for use with COBOL/VSE and other LE/VSE-conforming program
products (PL/I, C, and HLASM).
When programs created with these compilers cancel, the LE will close all open files before
terminating the program. This is done to comply with ANSI standards and is a change from
previous compilers such as COBOL F.
The BIM-EPIC catalog entries for any output files that were closed in this manner will be
treated as "Version 1". There is no indication a cancellation has occurred and the probably
invalid tape or disk data can be inadvertently used as input to follow-on programs.
When a cancellation occurs in a non-LE program, the files are not closed, and their BIM-EPIC
catalog entries show as "OPEN" instead of "Version 1". This prevents them from being used
as input to follow-on jobs.
EPS100=NO, the default, does not alter the above description.
EPS100=YES causes the BIM-EPIC catalog entry to be shown as "OPEN", thereby
preventing the inadvertent use of the data. The files will still have been closed, however, so
VSE EOF indicators will be present on the tape or disk dataset.
EPS100 does not apply to "Start Track 1" disk datasets. This is because they do not have
entries in the BIM-EPIC catalog. These files will have the proper VSE EOF indicators and are
available for use by follow-on jobs.
It also does not apply to any BIM-EPIC controlled datasets in a CICS partition (usually,
there are no-BIM-EPIC controlled files in CICS partitions).
Chapter 5. Activating and Deactivating BIM-EPIC
5-43
Turning BIM-EPIC Off (TSIDOFF)
Activating and Deactivating BIM-EPIC
Turning BIM-EPIC Off (TSIDOFF)
Deactivation
Requirements
BIM-EPIC remains active until VSE is IPLed or until BIM-EPIC is deactivated with
TSIDOFF. You can deactivate BIM-EPIC as a whole or by partition. To deactivate BIMEPIC by partition, use TSIDDEB. TSIDOFF automatically deactivates both the BIM-EPIC
recorder and QDAS Subsystems.
Before deactivating BIM-EPIC, be sure to deactivate any systems software that was activated
after BIM-EPIC was activated, in the reverse order of their activation. You do not need to
IPL VSE.
Deactivate BIM-EPIC before reloading any phases loaded into the SVA for BIM-EPIC.
JCL Requirements
5-44
// EXEC TSIDOFF
/*
BIM-EPIC Installation and System Guide
Maintaining the BIM-EPIC Recorder File
TSIDRFS Program
Maintaining the BIM-EPIC Recorder File
TSIDRFS Program
Description
TSIDRFS is the Recorder File maintenance utility. It activates and deactivates the Recorder.
It also backs up and reformats the Recorder File, and logs user comments.
Control Statements
TSIDRFS functions are activated by control statements:
Statement
Action
START
Activates Recorder logging
END
Deactivates Recorder logging
BACKUP
Backs up the Recorder File
CLEAR
Initializes or clears the Recorder File
MAINT
Performs daily maintenance functions
RECORD
Records user comments in the Recorder File
The Recorder file is normally activated through the EPICON procedure and is normally
maintained through the DAILY1 (or DAILY2) SAMPJOB procedure. The DAILYn
SAMPJOB procedures are supplied on the BIM-EPIC distribution tape.
JCL Requirements
// TLBL RFBKUP,'recorder.backup.dataset'
// EXEC TSIDRFS
control-statements
/*
Dataset
Requirements
IJSYSDR identifies the Recorder File. It is required for all functions.
RFBKUP identifies the Recorder File backup dataset. It is required only with the BACKUP
and MAINT control statements.
Chapter 5. Activating and Deactivating BIM-EPIC
5-45
BACKUP
Maintaining the BIM-EPIC Recorder File
BACKUP
Description
The Recorder File must be backed up to tape or disk before it can be used to rebuild the DSN
Catalog or to create any reports. Before the Recorder File can be backed up, logging must be
deactivated with the END control statement. In addition, before you re-start the Recorder, you
should re-initialize the Recorder File with CLEAR.
BACKUP uses the DTF name RFBKUP to identify the backup.
For one-step backup processing, use the MAINT control statement.
WARNING!
The Recorder File must be backed up, cleared, and restarted at the same time the DSN Catalog
is backed up. If your DSN Catalog and Recorder backups are not synchronized, errors or
missing data can result when you do an emergency recovery of the DSN Catalog. TSIDRFS
BACKUP should be executed in the same job stream with, and in the step immediately
following, TSIDUTL BACKUP or FASTBU.
WARNING!
If you are running in a multi-CPU environment, you must use the TSIDRFS MAINT function
to maintain the Recorder File.
Syntax
BACKUP
Example
// JOB RFBACK
// TLBL RFBKUP,'RECORDER.BACKUP'
// EXEC TSIDRFS
END
BACKUP
/*
/&
5-46
BIM-EPIC Installation and System Guide
Maintaining the BIM-EPIC Recorder File
CLEAR
CLEAR
Description
CLEAR clears the Recorder File for the resumption of logging. It should be executed after
TSIDRFS BACKUP. Before the Recorder can be cleared, logging must be deactivated with
the END control statement.
Syntax
CLEAR
Example
// JOB RFCLEAR
// EXEC TSIDRFS
END
CLEAR
/*
/&
Chapter 5. Activating and Deactivating BIM-EPIC
5-47
END
Maintaining the BIM-EPIC Recorder File
END
Description
END deactivates the Recorder. DSN Catalog activity occurring while the Recorder is off will
not be logged.
Syntax
END
Example
// JOB RFOFF
// EXEC TSIDRFS
END
/*
/&
5-48
BIM-EPIC Installation and System Guide
Maintaining the BIM-EPIC Recorder File
MAINT
MAINT
Description
MAINT performs the regular Recorder maintenance routine in one step. It executes the END,
BACKUP, CLEAR, and START commands in order. It also provides essential protection in a
multi-CPU environment.
MAINT uses the DTF name RFBKUP to identify the backup dataset.
WARNING!
The Recorder File must be backed up, cleared, and restarted immediately after the DSN
Catalog is backed up. If your DSN Catalog and Recorder backups are not synchronized, you
will get errors or missing data will result when you do an emergency recovery of the DSN
Catalog. So, MAINT should be executed in the same job stream, in the step immediately
following, TSIDUTL BACKUP or FASTBU.
Syntax
MAINT
Example
// JOB RFMAINT
// TLBL RFBKUP,'RECORDER.BACKUP’
// EXEC TSIDRFS
MAINT
/*
/&
Chapter 5. Activating and Deactivating BIM-EPIC
5-49
RECORD
Maintaining the BIM-EPIC Recorder File
RECORD
Description
RECORD logs user comments in the Recorder File. The control statement must begin with
the keyword RECORD. However RECORD does not have to start in column 1. Begin the
user comment at least one space following RECORD: it can extend up to and including
column 80. For long comments, use multiple RECORD statements.
Syntax
RECORD user-comment
Example
This job logs the comment “IPL CAUSED BY POWER FAILURE".
// JOB RFREC
// EXEC TSIDRFS
RECORD IPL CAUSED BY POWER FAILURE
/*
/&
5-50
BIM-EPIC Installation and System Guide
Maintaining the BIM-EPIC Recorder File
START
START
Description
START activates Recorder logging after it has been deactivated with the END command.
START is required to restart the Recorder even if the RECORD configuration option is
specified as YES.
Syntax
START
Example
// JOB RFSTRT
// EXEC TSIDRFS
START
/*
/&
Chapter 5. Activating and Deactivating BIM-EPIC
5-51
Activating and Deactivating QDAS
Activating and Deactivating QDAS
TSIVON and
TSIVOFF
QDAS is activated using the TSIVON program and deactivated using the TSIVOFF program.
Activating QDAS
(TSIDON)
TSIVON activates QDAS. It is normally executed in the EPICON procedure, which was
created during installation.
TSIVON should be executed during IPL, after assignments are made to the volumes under
QDAS control, and after TSIDON and TSIDRFS are executed. QDAS remains active until it
is turned off with TSIVOFF or until VSE is IPLed. BIM-EPIC does not have to be active for
QDAS to run.
If you reinitialize any of your disk volumes, run TSIVON afterwards. QDAS then recreates
its maps.
WARNING!
When QDAS is active on a shared volume in one machine, it must be active for all machines
sharing that volume. If you fail to activate QDAS on all machines sharing the volume, you
will experience VTOC corruption.
JCL Requirements
// EXEC TSIVON
Deactivating QDAS
(TSIVOFF)
TSIVOFF deactivates QDAS. You can execute this program any time. You do not need to
IPL VSE after deactivation.
JCL Requirements
// EXEC TSIVOFF
5-52
BIM-EPIC Installation and System Guide
BIM-EPIC Dispatcher
BIM-EPIC Dispatcher
Introduction
The BIM-EPIC Dispatcher executes as a “never–ending” program in a VSE/ESA dynamic or
static partition. It accepts and processes various BIM-EPIC requests that may be long–
running. As work is being done, various subtasks are automatically initiated by the BIM-EPIC
Dispatcher. Once a subtask begins, it remains in the BIM-EPIC Dispatcher environment until
explicitly ended with an EP STname command or until the BIM-EPIC Dispatcher is ended.
BIM-EPIC must be started before starting the Dispatcher.
When BIM-EPIC is ended with the TSIDOFF program, the Dispatcher will also end as part of
OFF processing.
At present the BIM-EPIC Dispatcher is used only in an ACL environment
JCL Requirements
The JCL to initiate the BIM-EPIC Dispatcher is:
// JOB TSIDTASK
// SETPFIX LIMIT=100K
// EXEC TSIDTASK,SIZE=TSIDTASK
/&
EP Commands
Example
The following Attention Routine commands are available to manage the BIM-EPIC
Dispatcher environment:
Command
Action
EP TSTAT
Displays any work requests waiting to be processed by the
BIM-EPIC Dispatcher.
EP TRQ CANCEL n
Deletes a work request that has not been processed by the BIMEPIC Dispatcher. n is the identification number of the request
to be deleted. It is obtained using the EP TSTAT command.
EP END TASK
Ends BIM-EPIC Dispatcher processing
EP END STname
Terminates a BIM-EPIC Dispatcher subtask. This command
should be used only when directed by BIM-EPIC Technical
Support. name is the name of the subtask being ended. ACL
is a valid subtask name.
The following command ends the ACL support subtask.
EP END STACL
Chapter 5. Activating and Deactivating BIM-EPIC
5-53
General Requirements
BIM-EPIC ACL Support
BIM-EPIC ACL Support
General Requirements
Vendors Supported
BIM-EPIC provides support for Automatic Cartridge Loaders (ACL’s) for these vendors:
•
•
•
•
IBM
Memorex
OPTI-TAPE - Barnard Systems Inc. (BSI)
STK
A large part of the BIM-EPIC definition and processing requirements are the same for all of
these ACL’s and are described in this section of the manual. Vendor-unique definition and
processing requirements are described in these sections:
•
•
•
•
IBM ACL Support
Memorex ACL Support
STK ACL Support
OPTI-TAPE Support
Page 5-60
Page 5-63
Page 5-68
Page 5-73
ACL’s from more than one vendor can be in the same BIM-EPIC processing environment.
Definition
Requirements
The appropriate vendor’s ACL support environment must be installed and successfully
configured before the ACL can be defined to BIM-EPIC.
The BIM-EPIC Resource Dataset (ERD File) must be defined (described in section "Defining
the BIM-EPIC Resource Dataset" on page 2-25).
For IBM, Memorex and STK ACL’s the BIM-EPIC Task Dispatcher (described in the section
"BIM-EPIC Dispatcher" on page 2-25 must be active before any SCRATCH/RETAIN
requests can be sent to the ACL, and before any EP ACL command can be issued. Using a
POWER PRELEASE command at an appropriate point in the VSE IPL process is one way to
ensure that this is always done. The Task Dispatcher is not required if OPTI-TAPE is the only
ACL being used.
When a tape dataset is closed, BIM-EPIC always unloads/demounts it from an ACL drive
unless BIM-EPIC’s “hold assignment at close” option is specified in the dataset’s TLBL (8 or
H) or DD statement (FREE=END).
Revolving tape datasets cannot be present in an ACL.
The following BIM-EPIC startup configuration options are required. There are some
additional unique-to-vendor options that are described in the appropriate vendor ACL support
section.
•
•
•
•
5-54
ACLAUTI=YES|NO (or take the default)
ACLLIB=lib.sublib
ACLRECS=nn (or take the default)
ACLTIME=nn (or take the default)
BIM-EPIC Installation and System Guide
BIM-EPIC ACL Support
General Requirements
•
•
ERDFILE=erdname
MSG088=YES
If the ACL is in a VM environment, the BIM-EPIC Autoattach Feature must be installed, and
these additional startup configuration options must be specified:
•
•
AUTOATT=YES
VM=YES
Please refer to the OPTION CONTROL STATEMENT portion of this manual for descriptions
of these options.
The library and sublibrary used in the ACLLIB lib.sublib parameter must exist prior to BIMEPIC startup.
BIM-EPIC places requests for ACL volume status changes (scratch, retain, eject,
inventory …) into members of this sublibrary for use by the BIM-EPIC Task Dispatcher. We
recommend that it be reserved/used for ACL support only. And, to make it easier to apply
BIM-EPIC upgrades, it should NOT be the one used to contain BIM-EPIC members.
Synchronization of
BIM-EPIC and ACL
Active and Scratch
Tape Statuses
For IBM ACLs, BIM EPIC’s EP ACL SYNC command is used to reconcile the ACL cartridge
status inventory (active or scratch) with the BIM-EPIC DSN. It can be issued from the
console at any time. The EP ACL SYNC command is invalid for Memorex, OPTI-TAPE, and
STK ACL’s since they do not provide an Inventory function.
For all ACLs, whenever a TSIDUTL SCRATCH function is executed, TSIDUTL will
automatically start a synchronization process at the end of its processing if the appropriate
synchronization control statement is present (SYNCIBM, SYNCMEM, SYNCSTK) as
described in the TSIDUTL portion of this manual).
For IBM ACL’s, when the EP ACL SYNC command is issued or the SYNCIBM statement is
present, BIM-EPIC requests an inventory of all cartridges in the ACL. For each cartridge in
the inventory, the ACL-Reported status (scratch or active) is compared to the status recorded
in the BIM-EPIC catalog. If there is a difference, BIM-EPIC changes the status in the ACL to
be the same as the status in the EPIC catalog.
Memorex, OPTI-TAPE and STK ACL’s do not have an inventory function so no comparison
with the BIM-EPIC catalog is possible. When the TSIDUTL SYNCMEM, SYNCOPT or
SYNCSTK control statement is present, a SET VOL nnnnnn TO SCRATCH STATUS
command is sent to the ACL for each volser in the BIM-EPIC Scratch Report.
WARNING!
SYNCOPT should be used with caution, and probably not at all. Refer to the SYNCOPT
command for an explanation of why this is so.
Chapter 5. Activating and Deactivating BIM-EPIC
5-55
General Requirements
BIM-EPIC ACL Support
Example - IBM
Tape Pools and
ACL’s
EPIC Catalog
Status
Reported
ACL Status
New
ACL Status
Scratch
Scratch
Not Changed
Scratch
Active
Scratch
Active
Active
Not Changed
Active
Scratch
Active
An aclname parameter is available in the TSIDPOL macro when defining BIM-EPIC tape
pools.
If the parameter is not used, BIM-EPIC uses this logic when requesting tape mounts:
Output (Scratch):
Requests the ACL to mount a scratch. If the ACL does not have a scratch cartridge for
the requested pool, BIM-EPIC AVR’s non-ACL drives. If more than one ACL is present,
BIM-EPIC will issue the mount request to each ACL before going to non-ACL drives.
Input:
Asks the ACL if volser nnnnnn is in its inventory. If it is, a mount request is issued. If it
is not, BIM-EPIC AVR’s non-ACL drives. If more than one ACL is present in an
installation, the vendor’s ACL Manager sends the query request to each ACL before
returning to EPIC.
If the parameter is used, for an Output tape BIM-EPIC will only query the ACL specified in
aclname. If that ACL does not have the requested volume, BIM-EPIC will go to the non-ACL
drives for AVRing, bypassing any other ACL’s in the installation. The input logic is as
described, above.
If aclname is used for one pool, it must be used for all ACL-resident pools. When
aclname is present, BIM-EPIC will not check any other ACL for the output tape.
5-56
BIM-EPIC Installation and System Guide
BIM-EPIC ACL Support
Ejecting Cartridges from an ACL
Ejecting Cartridges from an ACL
Description
Cartridges can be ejected from an ACL on a “one-at-a-time” or a “many-at-a-time” basis.
Since cartridge ejection is very time–consuming, we recommend using the “many at a time"
method at times when other ACL processing is at a minimum.
Whichever method is used, BIM-EPIC reads the list of volume serial numbers contained in the
VSE sublibrary and submits the new status to the ACL.
Many-at-a-Time
Methods
When the TSIDVLT utility is executed, the volume serial number of any ACL–resident
cartridge that is moved from the main vault (Vault 0) is written to the ACL Inventory
Management Library.
Use the EP ACL EJECT command, EP ACL EJECT VAULT=n, or TSIDUTL’s ACLEJECT
control statement to eject these cartridges. This technique allows ejections to be scheduled at
an appropriate time. Refer to the User Reference for a full description of the vaulting process.
One-at-a-Time
Method
Use the EP ACL EJECT command (below) to eject the desired cartridge from the ACL. A
separate EP ACL EJECT command must be used for each cartridge that is to be ejected.
Status Changes to
ACL-Resident
Cartridges
Whenever a TSIDMNT command is used to change the DSN Catalog status of cartridges that
are resident in an ACL, the cartridge’s volume serial number and new status are written to the
VSE Library/Sublibrary designated for ACL use in the BIM-EPIC configuration options. The
status change request is not made to the ACL until one of the following occurs:
•
•
•
The time limit specified in ACLTIME configuration is reached.
The number of records specified in the ACLRECS configuration option has been
reached.
The EP ACL PROCESS command is issued.
Chapter 5. Activating and Deactivating BIM-EPIC
5-57
Ejecting Cartridges from an ACL
EP Commands
BIM-EPIC ACL Support
The following EP commands are used in the BIM-EPIC support process for IBM ACLs:
Command
Action
EP ACL EJECT
Causes ejection from the ACL of all cartridges that have
been written to the ACL Inventory Management Library by
the TSIDVLT program. Can be used in place of the
TSIDUTL ACLEJECT control statement. Only valid for
IBM, Memorex, and STK ACLs.
EP ACL EJECT
VAULT=n
As described in EP ACL EJECT above, TSIDVLT may have
placed volser's of cartridges to be ejected from an ACL into
the ACL Inventory Management Library. These volser's may
be from different vaults. This command will eject only those
cartridges that are in VAULT "n".
EP ACL EJECT volser
Causes the ejection from the ACL of the cartridge whose
serial number is specified in volser. Only valid for IBM,
Memorex, and STK ACLs.
EP ACL PROCESS
Reads the list of volume serial numbers and status change
requests from the VSE sublibrary designated for BIM-EPIC
ACL support in the ACLLIB configuration option and posts
the new status to the ACL.
EP ACL SYNC
For each IBM ACL in an installation, obtains an inventory of
all cartridges in an IBM ACL and does steps 1 through 3.
All steps are completed for one IBM ACL before beginning
the next IBM ACL. Only valid for IBM ACLs.
1. Obtains an inventory of all cartridges in the ACL.
2. Checks each ACL volume to see if it is in the DSN
Catalog.
Result—If the ACL volume is not in the DSN and the
ACLAUTI configuration option is “Y", the tape is initialized
with a VOL and HDR records and the serial number is added
to the DSN.
Result—If the ACL volume is not in the DSN Catalog and
the ACLAUTI configuration option is “N", no action is
taken.
3. If the ACL volume is in the DSN Catalog, its ACL status
is compared with its status in the DSN Catalog.
Result—If the ACL status is not the same as the DSN
Catalog status, the ACL status is set to be the same as
the DSN Catalog status.
EP ACL SYNC aclname
5-58
BIM-EPIC Installation and System Guide
Does the processing described above for a single IBM ACL.
aclname is the name of the IBM ACL to be processed.
ACL Leveling
ACL Leveling
When multiple IBM ACL’s are used in an installation it may be desirable to equalize (level)
the use of cuu’s amongst the ACL’s as much as possible. This feature is not available for
Memorex, OPTI-TAPE, or STK ACLs.
Although possible in any IBM multiple ACL environment, leveling may be most beneficial in
a multiple Virtual Tape Server (VTS) ACL environment because of the large number of
virtual tapes in a VTS environment.
For each ACL participating in the leveling process, BIM-EPIC will monitor of the number of
ACL cuu’s that are being used at any point in time for input and output activity.
When EPIC receives an Open Output for an ACL cuu, it will look for the ACL with lowest
number of in-use cuu’s .
If tape pools are used, the same pool(s) must be defined for each ACL in order for leveling to
work properly. An example: ACL 1 has one or more volser range definitions for Scratch Pool
C. ACL 2 must also have at least one volser range for Scratch Pool C in order for the leveling
process to work. There can be tape pool definitions that are unique to a single ACL, but there
must be at least one definition that is common to two or more of the ACL’s being leveled.
If an organization wishes to have the leveling process consider only those cuu’s that are
being used for output instead of all cuu’s being used in an ACL, the ACLLVLOO
configuration option can be used to accomplish this.
Chapter 5. Activating and Deactivating BIM-EPIC
5-59
General Requirements
IBM ACL Support
IBM ACL Support
General Requirements
Introduction
In this section, the term ACL refers to the IBM 3494 Tape Library Dataserver and to the IBM
Virtual Tape System (VTS). IBM provides two ACL support environments:
•
•
the LCDD environment uses the IBM Library Control Device Driver (LCDD) as the
ACL Manager for native VSE/ESA or VM/VSE. Not available for VTS.
the VGS environment uses IBM VSE Guest Server (VGS) as the ACL Manager for
VM/VSE. IF VGS is not used, LCDD can be used instead.
LCDD Environment
In this environment, the LCDD must be active before any BIM-EPIC support will be effective.
Refer to the appropriate IBM documentation for further information.
VGS Environment
A SETPFIX LIMIT=100K,PERM JCL statement must be present in each static and dynamic
partition’s ASI initialization. This is a requirement of the IBM interface.
The IBM VGS and Inventory servers must be active at the time BIM-EPIC is started. IBM’s
LIBRCMSV program must be active before any ACL inventory request or cartridge status
changes (Scratch, Retain, Delete, Eject...) are made. Refer to the appropriate IBM
documentation for more information.
Required
Configuration
Options
For both support environments, the following BIM-EPIC configuration options are required in
addition to those described on page 5-54:
•
ACLIBM=YES
For the VGS environment, the following options are also required:
•
•
ACLSRVRI=VGS-server-name
VM=YES
For more information on these options, see the OPTION CONTROL STATEMENT portion of
this manual.
Library
Requirements
5-60
In an LCDD environment, the sublib portion of the ACLLIB configuration parameter must
be the same as the LCDD LUNAME parameter. See the ACLLIB configuration option for
more information
BIM-EPIC Installation and System Guide
IBM ACL Support
General Requirements
For each ACL cartridge drive (cuu) defined in the BIM-EPIC Resource Dataset (ERD), the
ACLNAME parameter must be the same as the LCDD LUNAME. See 2-25 in this manual for
more information. In a VGS environment the ACLNAME parameter can be any name.
Chapter 5. Activating and Deactivating BIM-EPIC
5-61
BIM-EPIC Tape Pool Definitions
IBM ACL Support
BIM-EPIC Tape Pool Definitions
Introduction
If tape pools are used for cartridges residing in an ACL, they must meet the following criteria:
•
•
•
Non-ACL-resident cartridges cannot be part of the pool or pools designated for ACLresident cartridges.
For VSE/Guest environments, the pool names must be 1-9 or A-F.
For native VSE environments, the pool names must be 1-9 or A-V.
In both environments, SCRATCH0 is used as the “default scratch" category. If a scratch
volume serial number is not in a BIM-EPIC tape pool, it is assigned to SCRATCH0.
When the EP ACL SYNC command is used to reconcile the ACL contents with the DSN
Catalog, if a catalog entry for an ACL–resident volume has a BIM-EPIC tape pool ID outside
one of these ranges, a console message is displayed asking whether the cartridge is to be
ejected from the ACL, or whether EP ACL SYNC processing is to be cancelled.
5-62
BIM-EPIC Installation and System Guide
Memorex ACL Support
General Requirements
Memorex ACL Support
General Requirements
Introduction
When BIM-EPIC is running on a VSE Guest machine, support for the Memorex Automatic
Tape Library (ATL) is provided using the VM IUCV facility.
The Memorex Library Management Software (LMS) product must be operational as a CMS
Guest. Both LMS and the ATL must be active at the time BIM-EPIC is started.
Required
Configuration
Options
The following BIM-EPIC configuration options are required in addition to those described on
page 5-54:
•
•
•
ACLMEM=YES
ACLSRVRM=LMS-server-name
VM=YES
For further information, see the OPTION CONTROL STATEMENT portion of this manual.
Chapter 5. Activating and Deactivating BIM-EPIC
5-63
VM Directory Entry Requirements
Memorex ACL Support
VM Directory Entry Requirements
LMS Server
The VM Directory entry for the LMS server must allow an IUCV connection from the VSE
Guest(s) in which BIM-EPIC is executing. This can be done in either of the two ways
described below. The first method requires less VM Directory maintenance as VSE Guests
are added or deleted in the VM Directory.
Method 1
This method accepts IUCV communications from any virtual machine.
IUCV ALLOW MSGLIMIT n
n is the maximum number of messages that can be outstanding on any path connected to the
server. It should be at least one per VSE partition (including dynamic partitions). If the value
is too small, BIM-EPIC requests may be lost.
Method 2
This method accepts IUCV communications only from the userid virtual machine.
IUCV userid MSGLIMIT n
userid must be the name of the VSE guest in which BIM-EPIC is executing. If BIM-EPIC
is executing in more than one VSE Guest that requires ATL support, then an IUCV userid
entry is required for each VSE Guest.
n is the same as described in the preceding definition.
5-64
BIM-EPIC Installation and System Guide
Memorex ACL Support
VSE Guests
VSE Guests
Establishing an
IUCV Connection
The VM Directory for each VSE Guest must be able to make an IUCV connection to the LMS
server. This can be done in either of the two ways described below. Method 1 requires less
VM Directory maintenance as VSE Guests are added or deleted.
Method 1
This method can initiate an IUCV connection with any virtual machine.
IUCV ANY
Method 2
This method can initiate an IUCV communications only to the userid virtual machine.
userid is the id of the LMS Server.
IUCV userid
What If the IUCV
Path is Severed?
Occasionally, the IUCV Path between the VSE Guest and LMS Server machines may be
severed. The IUCV path can be re-established after it has been severed. However, every
effort should be made to determine the cause of the failure and to correct it.
Some causes of this include:
•
•
•
cycling the LMS Server machine
time-out by the LMS Server
processing errors by one of the IUCV partners
The severed path can be re-established by either of the following:
•
•
Turning BIM-EPIC off and then back on
Using the BIM-EPIC TSIDDEB utility
Turning BIM-EPIC off and on is the preferred method, but this may not be practical if
ongoing VSE processing requires BIM-EPIC services. In such cases, use the TSIDDEB
procedure below.
Chapter 5. Activating and Deactivating BIM-EPIC
5-65
VSE Guests
TSIDDEB
Procedure
Memorex ACL Support
When re-establishing the IUCV path with this method, TSIDDEB must be executed from the
VSE operator’s console.
Step
1
Action
From a “Pause" job on the VSE Operator’s console, enter:
// EXEC TSIDDEB
A list of selection choices will be displayed.
2
Select “F. RE-ESTABLISH IUCV PATH WITH ACL SERVER"
TSIDDEB will respond with “ENTER 'MEMSERVER=servername'"
3
5-66
Enter “MEMSERVER=servername" where servername is name of LMS
machine.
BIM-EPIC Installation and System Guide
Memorex ACL Support
BIM-EPIC and LMS Tape Pools
BIM-EPIC and LMS Tape Pools
Introduction
BIM-EPIC uses single-character tape pool names (A-Z and 0-9). LMS allows longer pool
names which are not recognized by BIM-EPIC. For this reason, each LMS tape pool that is to
be used by BIM-EPIC must be defined to LMS as a primary pool using the following format:
POOL-x
where “POOL-" is a constant. x is the one-character name of the corresponding BIM-EPIC
tape pool.
Examples
Synchronizing BIMEPIC and LMS
Scratch Pool
Inventories
BIM-EPIC
Tape Pool
LMS Primary
Pool
J
POOL-J
R
POOL-R
Memorex LMS does not provide notification of ACL cartridge insertion and ejection. This
means that the BIM-EPIC and LMS scratch cartridge inventories are not always synchronized.
To synchronize them, execute the SCRATCH, DSPLY SCRATCH, or TSCRATCH function
of the TSIDUTL program. See 6-7 in this manual for further information. The SYNCMEM
control must also be present. It is recommended that one of these functions be run at least
once a day, or after cartridges have been inserted into the ACL. DSPLY SCRATCH does not
enqueue the DSN Catalog, and can be run at any time without affecting other processing.
SCRATCH and TSCRATCH enqueue the BIM-EPIC Catalog during the scratch process, but
not during the synchronization process.
Chapter 5. Activating and Deactivating BIM-EPIC
5-67
General Requirements
STK ACL Support
STK ACL Support
General Requirements
Introduction
When BIM-EPIC is running on a VSE Guest machine, support for the STK ACL is provided
using the VM IUCV facility.
The STK Host Software Component (HSC) for VM must be operational as a CMS Guest.
Both HSC and the ACL must be active at the time BIM-EPIC is started.
Required
Configuration
Options
The following BIM-EPIC configuration options are required in addition to those described on
page 5-54:
•
•
•
ACLSTK=YES
ACLSRVRS=HSC-server-name
VM=YES|NO
For further information, see the OPTION CONTROL STATEMENT portion of this manual.
HSC Requirement
5-68
To allow BIM-EPIC to Eject cartridges from a Library Storage Module (LSM), the Host
Software Component (HSC) DIALOG Option must not be set to OFF. If OFF is the default
setting, the HSC command OPTION DIALOG (BOTH) must be issued before using the BIMEPIC EP ACL EJECT command. The option can be reset to OFF after the ejection process
has completed.
BIM-EPIC Installation and System Guide
STK ACL Support
VM Directory Entry Requirements
VM Directory Entry Requirements
HSC Server
The VM Directory entry for the HSC server must allow an IUCV connection from the VSE
Guest(s) in which BIM-EPIC is executing. This can be done in either of the two ways
described below. The first method requires less VM Directory maintenance as VSE Guests
are added or deleted in the VM Directory.
Method 1
This method accepts IUCV communications from any virtual machine.
IUCV ALLOW MSGLIMIT n
n is the maximum number of messages that can be outstanding on any path connected to the
server. It should be at least one per VSE partition (including dynamic partitions). If the value
is too small, BIM-EPIC requests may be lost.
Method 2
This method accepts IUCV communications only from the userid virtual machine.
IUCV userid MSGLIMIT n
userid must be the name of the VSE guest in which BIM-EPIC is executing. If BIM-EPIC
is executing in more than one VSE Guest that requires ACL support, then an IUCV userid
entry is required for each VSE Guest.
n is the same as described in the preceding definition.
HSC Authorization
Each VSE Guest that will use the ACL must have an AUTHORIZE (CMDS statement in the
HSC ACS SYSPROF member.
Chapter 5. Activating and Deactivating BIM-EPIC
5-69
VSE Guests
STK ACL Support
VSE Guests
Establishing an
IUCV Connection
The VM Directory for each VSE Guest must be able to make an IUCV connection to the HSC
server. This can be done in either of the two ways described below. Method 1 requires less
VM Directory maintenance as VSE Guests are added or deleted.
Method 1
This method can initiate an IUCV connection with any virtual machine.
IUCV ANY
Method 2
This method can initiate an IUCV communications only to the userid virtual machine.
userid is the id of the HSC Server.
IUCV userid
What If the IUCV
Path is Severed?
Occasionally, the IUCV Path between the VSE Guest and HSC Server machines may be
severed. The IUCV path can be re-established after it has been severed. However, every
effort should be made to determine the cause of the failure and to correct it.
Some causes of this include:
•
•
•
cycling the HSC Server machine
time-out by the HSC Server
processing errors by one of the IUCV partners
The severed path can be re-established by either of the following:
•
•
Turning BIM-EPIC off and then back on
Using the BIM-EPIC TSIDDEB utility
Turning BIM-EPIC off and on is the preferred method, but this may not be practical if
ongoing VSE processing requires BIM-EPIC services. In such cases, use the TSIDDEB
procedure below.
5-70
BIM-EPIC Installation and System Guide
STK ACL Support
TSIDDEB
Procedure
VSE Guests
Method 1: VSE Console
Step
1
Action
From a “Pause" job on the VSE Operator’s console, enter:
// EXEC TSIDDEB
A list of selection choices will be displayed.
2
Select “F. RE-ESTABLISH IUCV PATH WITH ACL SERVER"
TSIDDEB will respond with “ENTER 'STKSERVER=servername'"
3
Enter “STKSERVER=servername" where servername is name of HSC
machine.
Method 2: JCL
// JOB jobname
// EXEC TSIDDEB
STKSERVER=servername
/*
/&
Chapter 5. Activating and Deactivating BIM-EPIC
5-71
BIM-EPIC and HSC Tape Pools
STK ACL Support
BIM-EPIC and HSC Tape Pools
Introduction
BIM-EPIC uses single-character tape pool names (A-Z and 0-9). HSC allows longer pool
names which are not recognized by BIM-EPIC. For this reason, each HSC tape pool that is to
be used by BIM-EPIC must be defined to HSC as a pool using the following format:
EPICTAPEPOL-x
where “EPICTAPEPOL-" is a constant. x is the one–character name of the corresponding
BIM-EPIC tape pool.
Examples
Synchronizing BIMEPIC and HSC
Scratch Pool
Inventories
5-72
BIM-EPIC
Tape Pool
HSC Pool
J
EPICTAPEPOL-J
R
EPICTAPEPOL-R
STK HSC does not provide notification of ACL cartridge insertion and ejection. This means
that the BIM-EPIC and HSC scratch cartridge inventories are not always synchronized.
To synchronize them, execute the SCRATCH, DSPLY SCRATCH, or TSCRATCH function
of the TSIDUTL program. See 6-7 in this manual for further information. The SYNCSTK
control must also be present. It is recommended that one of these functions be run at least
once a day, or after cartridges have been inserted into the ACL. DSPLY SCRATCH does not
enqueue the DSN Catalog, and can be run at any time without affecting other processing.
SCRATCH and TSCRATCH enqueue the BIM-EPIC Catalog during the scratch process, but
not during the synchronization process.
BIM-EPIC Installation and System Guide
OPTI-TAPE Support
General Requirements
OPTI-TAPE Support
General Requirements
Introduction
Prior to Release 6.3, BIM-EPIC interfaced with the Barnard Systems Inc. OPTI-TAPE virtual
tape product through the BIM-EPIC STK interface. BIM-EPIC now has a separate interface
for OPTI-TAPE.
Required
Configuration
Options
The following BIM-EPIC configuration options are required in addition to those described on
page 5-54:
•
•
•
ACLOPT=YES
ACLSRVRO=OPTITAPE
If in a VM environment: VM=YES
For further information, see the OPTION CONTROL STATEMENT portion of this manual.
Other
Requirements
OPTI-TAPE phase BSOTEPIC must be in a VSE sub-library available to the BIM-EPIC
startup process. This can be done with a LIBDEF (recommended), or by copying BSOTEPIC
to the VSE sub-library containing the BIM-EPIC modules.
Chapter 5. Activating and Deactivating BIM-EPIC
5-73
General Requirements
5-74
BIM-EPIC Installation and System Guide
OPTI-TAPE Support
6
Additional BIM-EPIC Utilities
This chapter describes additional BIM-EPIC system maintenance utilities.
Chapter Contents
Maintaining the DSN Catalog (TSIDUTL) ....................................................................6-2
Formatting the DSN Catalog and Recorder File (TSIDCDK)......................................6-21
Rebuilding the DSN Catalog in an Emergency (TSIDBLD)........................................6-23
Reconfiguring BIM-EPIC Dynamically (TSIDDEB)...................................................6-24
Vaults and Vaulting Methods.......................................................................................6-38
Additional BIM-EPIC Macros .....................................................................................6-42
Coding the Label Print Subroutine...............................................................................6-45
User Exits.....................................................................................................................6-48
Displaying Tapes Required By a Job (TSIDLST)........................................................6-53
Updating VTOC Entries (TSIDVUT) ..........................................................................6-54
Combining Multiple DSN Catalogs into a Single DSN Catalog (TSIDCMRG) ..........6-70
6-1
Introduction
Maintaining the DSN Catalog (TSIDUTL)
Maintaining the DSN Catalog (TSIDUTL)
Introduction
Description
TSIDUTL is a general catalog maintenance utility. It performs functions related to the DSN
Catalog as a whole, specifically:
Command
Function
ACLEJECT
Ejects vaulted tape volumes from an ACL
BACKUP and FASTBU
Backs up the DSN Catalog
DSCRATCH
Scratches expired disk datasets only
DSPLY
Displays dataset and version entries
INDEX
Reorganizes the index
PSCRATCH
Reports datasets that will scratch on a specified date
RESTORE and FASTRS
Restores or moves the DSN Catalog
SCRATCH
Scratches all expired datasets
SYNCIBM
After the completion of a SCRATCH or TSCRATCH
function, causes an ACL synchronization to be done for all
IBM ACLs defined to BIM-EPIC
SYNCMEM
After the completion of a DSPLY SCRATCH function, causes
an ACL synchronization to be done for all Memorex ACLs
defined to BIM-EPIC
SYNCSTK
After the completion of a DSPLY SCRATCH function, causes
an ACL synchronization to be done for all Storage
Technology ACLs defined to BIM-EPIC
TSCRATCH
Scratches expired tape datasets only
TSIDUTL can be executed from a batch job or from the operator console. In batch mode,
control statements are read from SYSIPT. If it is executed from the console, statements are
entered at the console (SYSLOG).
UPSI Values
Only the DSPLY and scratch functions depend on UPSI values. These values are listed in the
individual sections describing the functions.
Dataset
Requirements
SORTWK1 identifies a work dataset required for the INDEX, RESTORE, SCRATCH,
PSCRATCH, TSCRATCH, and the DSPLY SEQ parameters.
6-2
BIM-EPIC Installation and System Guide
Maintaining the DSN Catalog (TSIDUTL)
Introduction
BACKUP identifies the DSN Catalog backup for BACKUP and RESTORE.
FASTDS identifies the DSN Catalog backup for FASTBU and FASTRS.
IJSYSDS identifies the DSN Catalog dataset, sometimes required for FASTBU and FASTRS.
WORK identifies a temporary dataset required by the scratch and restore functions
(SCRATCH, TSCRATCH, DSCRATCH, PSCRATCH, and RESTORE). Its size is
dependent on the number of tape volumes containing OFFLOAD, MCAT, or sub-dataset
versions. Allow 50 bytes per volume.
WARNING!
When using the VSE/VSAM Space Management for SAM feature to manage the WORK file
required by the RESTORE and SCRATCH functions, an additional consideration is necessary
to avoid failures ranging from minor annoyances to partial catalog corruption. See the
WORK File and VSE/VSAM Space Management For SAM discussion immediately following.
WORK File and
VSE/VSAM Space
Management for
SAM Feature
When using the VSE/VSAM Space Management for SAM Feature to manage the SAM file
(filename WORK) required by the EPIC utility TSIDUTL program for both the RESTORE
and SCRATCH functions, an additional consideration is necessary.
This WORK file is used as both output and input to accomplish the requested task and expects
only the data written from the current execution to be read back. In the case of the RESTORE
function, this file is used as a temporary storage area for data pertaining to each sub-dataset
restored to the DSN Catalog. In the case of the SCRATCH function, this file is used as a
temporary storage area for data pertaining to the scratching of all multi-dataset tape volume
serial numbers.
When this WORK file is specifically allocated to VTOC controlled space using typical DLBL
control statements reflecting the SD type of file label code (which is also the default if not
specified) and opened for output, standard VSE routines (LIOCS) assure that any previously
existing data found in the disk space is physically erased before the new data is actually
transferred to the disk device.
The VSE/VSAM Space Management for SAM Feature does not perform in exactly the same
manner but rather uses the DISP operand as a basis for many of its decisions. This DISP
operand can contain up to three positional keywords to tell VSAM how the dataset is to be
opened and disposed of given either normal or abnormal termination. The key difference here
is that VSAM ignores the fact that a dataset is being opened for output when the dataset
already exists and uses the first DISP keyword to determine if the existing should be erased
before new data is entered into the dataset (DISP=NEW) or append new data following the
existing data (DISP=OLD). Note that if the dataset is being opened for output and the dataset
does not already exist, use of either DISP=NEW or DISP=OLD will give identical results
since there is no existing data to be appended.
The problem arises only when a program uses the same DTF name (in this case WORK) for
both output and input in a single execution. Under this condition, only the DISP=OLD
operand can be specified which says do not erase any existing data but rather append new data
behind any old data that may already exist. If DISP=NEW was specified, the initial open for
output would automatically erase any existing data but failure would result when the attempt
to open the file for input was attempted (DISP=NEW and open for input are incompatible and
Chapter. 6 Additional BIM-EPIC Utilities
6-3
Introduction
Maintaining the DSN Catalog (TSIDUTL)
therefore not allowed by VSE). If the normal termination disposition keyword of DELETE
was specified in place of the default of KEEP, the file would be erased when it was closed for
output and we would fail when we attempted to open the file for input since it would no longer
exist.
There are a couple of solutions to this dichotomy. If unique dataset names without any
partition or partition/processor independence specifications (i.e., dataset name not prefixed by
% or %%) are used, merely supply an IDCAMS step to delete the file from the VSAM catalog
just prior to its use.
If your requirements dictate that partition or partition/processor independence dataset name(s)
be used, insert a job step similar to the following example just prior to the use of the dataset
which will erase any data that may already exist:
// DLBL IJSYSUC,'your.vsam.user.catalog',,VSAM
// DLBL ERASE,'%%your.vsam.esds.sam.file',,VSAM,
DISP=(OLD,DELETE),RECORDS=(500,250),
RECSIZE=50
// EXEC IDCAMS,SIZE=AUTO
REPRO IFILE (SYSIPT ENV(BLKSZ(80) RECFM(F))) OFILE (ERASE ENV(BLKSZ(50) RECFM(F)))
/*
*
*
Note the DISP operand on the DLBL control statement for ERASE. A
DISP=(OLD,DELETE) tells VSAM to allocate space if the file does not already exist and,
most importantly, to delete the file when it is closed. Now, no matter if the file previously
existed or not, it will be erased when the job step completes. (The IDCAMS control
statements accomplish nothing beyond opening and closing the dataset since the '/*' indicates
that no SYSIPT data has been presented.)
Control Statements
and Examples
6-4
TSIDUTL functions are dictated by control statements. You may specify as many functions
per execution as you wish. Individual control statements and TSIDUTL examples are
presented in the following sections.
BIM-EPIC Installation and System Guide
Maintaining the DSN Catalog (TSIDUTL)
ACLEJECT
ACLEJECT
Description
ACLEJECT ejects vaulted tape cartridges from an Automated Cartridge Library. It identifies
vaulted cartridges by reading the ACL Inventory Management Library maintained by BIMEPIC Dispatcher.
Syntax
ACLEJECT
UPSI Values
None
Dataset
Requirements
None
Example
This execution ejects vaulted cartridges from an ACL.
// JOB ACLEJECT
// DLBL SORTWK1,’$$$.SORTWK1,(D)'
// EXTENT SYS001
// DLBL WORK,’$$$.SCRATCH.WORK,(D)'
// EXEC TSIDUTL
ACLEJECT
/*
/&
Chapter. 6 Additional BIM-EPIC Utilities
6-5
BACKUP
Maintaining the DSN Catalog (TSIDUTL)
BACKUP
Description
BACKUP performs a logical record backup of the DSN Catalog. DSN Catalog access is
denied to other jobs while BACKUP is running. BACKUP tests record pointers to ensure
catalog integrity. If any errors are detected, a diagnostic report is produced.
After BACKUP is run, we recommend backing up and clearing the Recorder File. For
increased security, perform the two backups on separate tapes.
Catalogs backed up with the BACKUP function can only be restored with RESTORE.
RESTORE can be used to create a DSN Catalog with a different size and location.
See RESTORE
Syntax
BACKUP
UPSI Values
None
Dataset
Requirements
No label information for the DSN Catalog is needed. BACKUP accesses the currently active
catalog (the one that was opened when BIM-EPIC was started).
The backup dataset can be a controlled dataset, but it must be available even when BIM-EPIC
is not running, so be sure to manually record the volume serial number on which the backup is
written. A TLBL or DD statement for BACKUP is required.
WARNING!
The backup dataset must not be reblocked. A reblocked backup dataset cannot be used to
restore the DSN Catalog.
Example
This example produces a backup on tape.
// JOB BACKUP DSN CATALOG
// TLBL BACKUP,'DSN.CATALOG.BKUP'
// EXEC TSIDUTL
BACKUP
/*
/&
6-6
BIM-EPIC Installation and System Guide
Maintaining the DSN Catalog (TSIDUTL)
DSPLY and BDSPLY
DSPLY and BDSPLY
Description
DSPLY produces reports listing all datasets or groups of datasets in the DSN Catalog. In
most cases, a full report of each dataset’s catalog entry is produced, with the BIM-EPIC
dataset definition (EDD) highlighted for readability.
If a Memorex or STK ACL is in use, DSPLY SCRATCH is used to synchronize the BIMEPIC and the ACL scratch pool inventories. Refer to 5-67 for further information.
BDSPLY produces reports listing all datasets or groups of datasets in a DSN Catalog backup
dataset created by TSIDUTL BACKUP. BDSPLY runs faster than DSPLY because it
processes an image of the DSN Catalog, thus eliminating catalog contention.
For report examples, see “TSIDUTL Report Examples" in the User Reference.
UPSI Values
UPSI 1xxxxxxx prints dates in European format (DD/MM/YY).
UPSI x1xxxxxx suppresses EDD highlighting.
UPSI xxx1xxxx suppresses DSN Catalog update for the NEW subparameter.
UPSI xxxx1xxx bypasses CMS archive files.
Dataset
Requirements
If the SEQ parameter is used, SORTWK1 is required. If BDSPLY is used, DSPWORK is
required. DSPWORK can be any backup tape created by the BACKUP function (FASTBU
tapes are not allowed).
Syntax
DSPLY dataset-qualifier [,report-qualifier]
[,SEQ=sort-sequence]
BDSPLY dataset-qualifier [,report-qualifier]
[,SEQ=sort-sequence]
Chapter. 6 Additional BIM-EPIC Utilities
6-7
DSPLY and BDSPLY
Maintaining the DSN Catalog (TSIDUTL)
dataset-qualifier is required. It must be one of the following:
Qualifier
Causes printing of...
ACTIVE
Active datasets only
ALL
All datasets in the DSN Catalog
DISK
Disk datasets only
DSN='dataset-name'
dataset-name (not valid with BDSPLY)
(DSPLY only)
NEW
Dataset versions created since the last time a DSPLY
NEW report was run. NEW can be used to track the
datasets created within a given period of time. The DSN
Catalog is updated so that NEW reports only new
versions the next time it is run. To bypass this update and
continue accumulation of new versions for a future report,
execute TSIDUTL with UPSI xxx1x. Not valid with
BDSPLY.
(DSPLY only)
PULL
The latest version of all datasets
PULL,DSN='dataset-name'
The latest version of dataset-name (not valid with
BDSPLY)
(DSPLY only)
SCRATCH
Scratch tapes only
TAPE
Tape datasets only
TAPEPOOL
Tapes in each tape pool. Page breaks occur between tape
pools.
VAULT
Only tapes stored in offsite vaults.
report-qualifier is optional. If used, it must be one of the following:
6-8
Qualifier
Causes printing of...
OWNER=oid
Only datasets with the specified Owner ID
SYSID=sid
Only datasets with the specified System ID
TPL=tapepool
Only tapes within tapepool
USERID=uid
Only datasets with the specified User ID
VLT=vault
Only datasets stored in vault
BIM-EPIC Installation and System Guide
Maintaining the DSN Catalog (TSIDUTL)
DSPLY and BDSPLY
SEQ is optional. If it is not used, datasets are printed in the order in which they occur in the
index. If SEQ is used, it must be the last parameter on the statement. sort-sequence
must be one of the following:
Examples
Qualifier
Sorts by...
CDATE
Creation date
CJOB
Creation job name
DSN
Dataset name
ERROR
Total errors
SERIAL
Tape volume serial number
TAPEPOOL
Tape pool ID
VAULT
Vault and slot number. A page break occurs
between vault values.
XDATE
Expiration date
The following job produces a report listing all datasets belonging to the system ID TS and the
user ID MR. They are listed in the order in which they are found in the index.
// JOB DISPLAY DSN CATALOG
// EXEC TSIDUTL
DSPLY ALL,SYSID=TS,USERID=MR
/*
/&
The following job produce a report listing all vaulted tapes from a backup tape created two
cycles ago. Within each vault number, tapes are listed in dataset name sequence.
// JOB DISPLAY DSN CATALOG
// ASSGN SYS001,DISK,SHR
// DLBL SORTWK1,'===.SORTWK1,(X)'
// EXTENT SYS001
// TLBL DSPWORK,'DSN.CATALOG.BACKUP',,,,,3,2
// EXEC TSIDUTL
BDSPLY VAULT,SEQ=DSN
/*
/&
Chapter. 6 Additional BIM-EPIC Utilities
6-9
FASTBU
Maintaining the DSN Catalog (TSIDUTL)
FASTBU
Description
FASTBU performs a physical backup of the DSN Catalog. DSN Catalog access is denied to
other jobs while FASTBU is running. Because FASTBU does not check record pointers, it
should be used for problem determination only. Use the BACKUP function for daily backups.
To restore a catalog backed up with FASTBU, use FASTRS. FASTRS can be used to change
the location of the DSN Catalog, but not its size.
See FASTRS
Syntax
FASTBU
UPSI Values
None
Dataset
Requirements
A DLBL, fully qualified EXTENT, and ASSGN statements or a DD statement is required for
the DSN Catalog using the filename IJSYSDS.
The backup dataset can be a controlled dataset, but it must be available even when BIM-EPIC
is not running, so be sure to manually record the volume serial number on which the backup is
written. A TLBL or DD statement for FASTDS is required.
WARNING!
Example
6-10
The backup dataset must not be reblocked. A reblocked backup dataset cannot be used to
restore the DSN Catalog.
// JOB FAST BACKUP OF DSN Catalog
// TLBL FASTDS,'DSN.CATALOG.BKUP'
// DLBL IJSYSDS,’EPIC.VSE.CATALOG’,2099/366
// EXTENT SYS240,TSI150,1,0,3750,63
// ASSGN SYS240,DISK,VOL=TSI150,SHR
// EXEC TSIDUTL
FASTBU
/*
/&
BIM-EPIC Installation and System Guide
Maintaining the DSN Catalog (TSIDUTL)
FASTRS
FASTRS
Description
FASTRS restores the DSN Catalog from a dataset created with FASTBU. FASTRS does not
repair errors or reorganize the DSN Catalog. FASTRS can be used to change the location of
the catalog, but not its size.
If the catalog was backed up with the BACKUP function, the RESTORE function must be
used instead of FASTRS. See 4-8 for complete restore procedures in an emergency situation.
See FASTBU
Syntax
FASTRS
WARNING!
When running FASTRS, no other job or CPU should access the DSN Catalog.
UPSI Values
None
Dataset
Requirements
A DLBL, fully qualified EXTENT, and ASSGN statements or a DD statement is required for
the DSN Catalog using the filename IJSYSDS. This can be located in Standard Labels, or in
the Job Stream.
Example
// JOB RESTORE DSN CATALOG FROM FAST BACKUP
// DLBL IJSYSDS,’EPIC.VSE.CATALOG’,2099/366
// EXTENT SYS240,TSI150,1,0,3750,63
// TLBL FASTDS,'DSN.CATALOG.BKUP'
// EXEC TSIDUTL
FASTRS
/*
/&
Chapter. 6 Additional BIM-EPIC Utilities
6-11
INDEX
Maintaining the DSN Catalog (TSIDUTL)
INDEX
Description
INDEX reorganizes the index component of the DSN Catalog. Reorganization improves
performance when accessing the DSN Catalog and provides better sorting for reports that have
no sequence parameters (for instance, reports produced by TSIDMNT).
We recommend executing the INDEX function if a significant number of new datasets or
tapes have been added to, or deleted from, the DSN Catalog. Normally, running BIM-EPIC
with a stable DSN Catalog does not require an INDEX execution.
Syntax
INDEX
UPSI Values
None
Dataset
Requirements
SORTWK1 is required. It must be either a Start Track 1 or uncontrolled dataset.
Example
// JOB INDEX DSN CATALOG
// DLBL SORTWK1,'===.SORTWK1,(D)'
// EXTENT SYS001,SYSWK1,1,0,1,15
// EXEC TSIDUTL
INDEX
/*
/&
6-12
BIM-EPIC Installation and System Guide
Maintaining the DSN Catalog (TSIDUTL)
RESTORE
RESTORE
Description
RESTORE restores and reorganizes the DSN Catalog from a backup dataset created using
TSIDUTL BACKUP. RESTORE can be used to create a DSN Catalog with a different size
and location. See 4-8 for complete restore procedures in an emergency situation.
See BACKUP.
WARNING!
When running a RESTORE, no other job or CPU should access the DSN Catalog. Do not
attempt to back up and restore the DSN Catalog in the same TSIDUTL execution.
Syntax
RESTORE
UPSI Values
None
Dataset
Requirements
SORTWK1 is required. SORTWK1 must be specified as either Start Track 1 or uncontrolled.
SORTWK1 must be large enough to contain a 50-byte record for every dataset name and
volume serial number in the DSN Catalog.
BACKUP is required. Its tape volume serial number or disk location must be identified.
WORK is required. WORK must be specified as either Start Track 1 or uncontrolled.
WORK must be large enough to contain an 50-byte record for each subdataset (NSU) in the
DSN Catalog. For tape-only systems, if a VSAM/SAM dataset is used for the WORK dataset,
specify RECSIZE=50.
Example
// JOB RESTORE DSN CATALOG
// ASSGN SYS001,DISK,VOL=SYSWK1,SHR
// ASSGN SYS002,DISK,VOL=SYSWK2,SHR
// DLBL SORTWK1,'===.SORTWK1,(X)'
// EXTENT SYS001,SYSWK1,1,0,1,300
// DLBL WORK,'===.RESTORE.WORK,(X)'
// EXTENT SYS002,SYSWK2,1,0,1,15
// TLBL BACKUP,'DSN.CATALOG.BKUP'
// EXEC TSIDUTL
RESTORE
/*
/&
VSAM WORK
Dataset Example
// DLBL WORK,'%WORK',,VSAM,CAT=VSESPUC,DISP=OLD,
RECORDS=(500,250),RECSIZE=50
X
Please see discussion on WORK File and VSE/VSAM Space Management for SAM Feature
on page 6-3
Chapter. 6 Additional BIM-EPIC Utilities
6-13
Scratch Functions
Maintaining the DSN Catalog (TSIDUTL)
Scratch Functions
Description
BIM-EPIC does not automatically scratch datasets. When a dataset version has satisfied all its
retention criteria, it becomes eligible for scratch. For information about scratch eligibility, see
“Rules for Dataset Retention" in the User Reference.
Running a scratch through the entire catalog may not always be suitable, and there are
alternatives. If you wish to scratch a single dataset only, use the SCRATCH function of
TSIDMNT. If you want a list of current scratch tapes, you can use the DSPLY SCRATCH
function of TSIDUTL.
BIM-EPIC can now scratch backup/archive datasets created by CA-EPIC for CMS. CA-EPIC
for CMS is responsible for placing then in scratch status.
TSIDUTL Scratch
Functions
Function
Action
SCRATCH
Puts all eligible dataset versions in scratch status and produces a report
of all new scratch tapes.
DSCRATCH
Scratches disk datasets only.
TSCRATCH
Scratches tape datasets only and produces a report of all new scratch
tapes.
PSCRATCH
Produces a report projecting which datasets and tapes will be scratched
by any date you specify. PSCRATCH does not project the expiration of
disk datasets.
If Automatic Cartridge Libraries (ACL) are being supported, SCRATCH and TSCRATCH
will set scratched tape volumes to “scratched” status in the ACL inventory.
UPSI Values
Dataset
Requirements
Switch
Action
UPSI xx1xxxxx
Prevents scratch of open datasets.
UPSI xxxxx1xx
Prevents scratch of any dataset created today.
SORTWK1 is required. SORTWK1 must be large enough to contain a 300-byte record for
every tape volume serial number to be scratched or projected as scratch.
WORK is required. WORK must be large enough to contain an 50-byte record for every
multi-dataset tape volume serial number to be scratched or projected as scratch. For tape-only
systems, if a VSAM/SAM dataset is used for the WORK dataset, specify RECSIZE=50.
6-14
BIM-EPIC Installation and System Guide
Maintaining the DSN Catalog (TSIDUTL)
Syntax
Parameters
SCRATCH
Scratch Functions
[ SYSID=xx ][ ,USERID=yy ][ ,CPUID=z ][ ,TIME ][ ,NOTFND ]
[ ,THLDOPEN=nn ][ ,DHLDOPEN=nn ][ ,APURG=nnn ][ ,SCRCMS]
[ ,DLAHOLD=nn ]
DSCRATCH
[ SYSID=xx ][ ,USERID=yy ][ ,CPUID=z ][ ,TIME ][ ,NOTFND ]
[ ,DHLDOPEN=nn ][ ,DLAHOLD=nn ]
TSCRATCH
[ SYSID=xx ][ ,USERID=yy ][ ,CPUID=z ][ ,TIME ]
[ ,DLAHOLD=nn ][ ,THLDOPEN=nn ]
PSCRATCH
yyyyddd [ ,SYSID=xx ][ ,USERID=yy ][ ,CPUID=z ]
APURG deletes BIM-EPIC dataset definitions (EDDs) that do not have any versions
associated with them, if no versions of those datasets have been processed in the last nnn days.
If you do not use the APURG parameter, these definitions remain in the DSN Catalog.
TSIDUTL lists the deleted EDDs in the Scratch Report.
CPUID limits the selection to versions belonging to the single digit CPU specified in the
CPUID startup configuration option.
DHLDOPEN and THLDOPEN determine the number of days to hold (retain) datasets in open
status. Specify the number of days after their creation date you want open datasets to be
retained. DHLDOPEN applies to disk datasets. THLDOPEN applies to tape datasets.
DLAHOLD specifies the minimum number of days that must have passed since the date of last
access before a version will be considered available for scratching. The larger of the DLA
value from the EDD of a version or the DLAHOLD operand value will be used to determine
minimum retention.
NOTFND (valid with SCRATCH and DSCRATCH only) removes disk versions from the
DSN Catalog even if their VTOC entries have already been erased or if the disk volume is not
mounted. A warning message will be issued for each version affected.
SCRCMS allows scratching of tapes used for CA-EPIC for CMS backup/archive files. Using
this parameter creates an EDD named ‘*EPIC/CMS.SCRATCH.DSN*’ and adds a version for
every CA-EPIC for CMS tape scratched. This information will be used to clean up the CMS
minidisk area used for backup information.
SYSID limits the execution to datasets belonging to the specified system ID.
TIME forces a minimum retention of 24 hours for all generation datasets.
USERID limits the execution to datasets belonging to the specified user ID.
yyyyddd (or yyddd) is the julian date for which PSCRATCH projects which datasets and tape
volumes will be scratched.
Chapter. 6 Additional BIM-EPIC Utilities
6-15
Scratch Functions
Examples
Maintaining the DSN Catalog (TSIDUTL)
The following example scratches eligible datasets with the TR user ID. Disk versions will be
protected from scratching for 1 day after their creation dates.
// JOB DISPLAY DSN CATALOG
// DLBL SORTWK1,’$$$.SORTWK1,(D)'
// EXTENT SYS001
// DLBL WORK,’$$$.SCRATCH.WORK,(D)'
// EXEC TSIDUTL
SCRATCH,USERID=TR,DHLDOPEN=1
/*
/&
The following example prints a report of all datasets eligible to be scratched on January 1,
2000.
// JOB DISPLAY DSN CATALOG
// DLBL SORTWK1,’$$$.SORTWK1,(D)'
// EXTENT SYS001
// DLBL WORK,’$$$.SCRATCH.WORK,(D)'
// EXEC TSIDUTL
PSCRATCH 2000001
/*
/&
VSAM WORK
Example
// DLBL WORK,'%WORK',,VSAM,CAT=VSESPUC,DISP=OLD,
RECORDS=(500,250),RECSIZE=50
X
Please see discussion on WORK File and VSE/VSAM Space Management for SAM Feature
on page 6-3
6-16
BIM-EPIC Installation and System Guide
Maintaining the DSN Catalog (TSIDUTL)
SYNCIBM
SYNCIBM
Description
After the completion of a SCRATCH or TSCRATCH function., SYNCIBM causes an ACL
synchronization to be automatically done for all IBM ACL’s defined to BIM-EPIC.
When used, it must precede the SCRATCH or TSCRATCH function statement in the
job stream.
If it is not present, an automatic ACL synchronization is not done. The EP ACL SYNC
command can be entered from the Operator Console to synchronize one or all ACL’s.
Syntax
SYNCIBM
UPSI Values
None
Example
// JOB SCRATCH
// DLBL SORTWK1,’$$$.SORTWK1,(D)’
// EXTENT SYS001
// DLBL WORK,’$$$.SCRATCH.WORK,(D)’
// EXEC TSIDUTL
SYNCIBM
SCRATCH
/&
Chapter. 6 Additional BIM-EPIC Utilities
6-17
SYNCMEM
Maintaining the DSN Catalog (TSIDUTL)
SYNCMEM
Description
After the completion of a TSIDUTL SCRATCH, TSCRATCH or DSPLY function.,
SYNCMEM causes an ACL synchronization to be automatically done for all Memorex ACL’s
defined to BIM-EPIC.
When used, it must precede the SCRATCH or TSCRATCH function statement in the
job stream.
If it is not present, an automatic ACL synchronization is not done. The EP ACL SYNC
command cannot be used for Memorex ACL’s.
Syntax
SYNCMEM
UPSI Values
None
Example
// JOB SCRATCH
// DLBL SORTWK1,’$$$.SORTWK1,(D)’
// EXTENT SYS001
// DLBL WORK,’$$$.SCRATCH.WORK,(D)’
// EXEC TSIDUTL
SYNCMEM
DSPLY SCRATCH,SEQ=SERIAL
/&
6-18
BIM-EPIC Installation and System Guide
Maintaining the DSN Catalog (TSIDUTL)
SYNCOPT
SYNCOPT
Description
After the completion of a TSIDUTL SCRATCH, TSCRATCH or DSPLY function.,
SYNCOPT causes an ACL synchronization to be automatically done for OPTI-TAPE ACL
defined to BIM-EPIC.
When used, it must precede the SCRATCH, TSCRATCH, or DSPLY function statement in
the job stream.
If it is not present, an automatic ACL synchronization is not done.
The EP ACL SYNC command cannot be used for an OPTI-TAPE ACL.
SYNCOPT should be used with caution, and probably not at all. There should never be
a need to run a SYNCOPT to synchronize OPTI-TAPE and BIM-EPIC inventories,
because the normal EPIC SCRATCH runs will always tell OPTI-TAPE which volumes
are to be scratched.
For real ACLs, an out-of-synchronization inventory condition occurs because an operator
removes tape cartridges from the ACL and BIM-EPIC will not be aware of the removal.
Since OPTI-TAPE is a virtual ACL, volumes cannot be removed. When a SCRATCH
VOLUME nnnnnn command is received from BIM-EPIC, OPTI-TAPE deletes the VSAM file
that contains the data for the virtual tape volume. There may be a lag between the time the
SYNCOPT process begins and the time the SET VOL nnnnnn TO SCRATCH STATUS
command is received. The BIM-EPIC catalog may have already had the volume in scratch
status, and during the time lag, the volume could have been used for data. When the SET
VOL SCRATCH command is received, OPTI-TAPE will delete the just-written data and it
will be lost.
Syntax
SYNCOPT
UPSI Values
None
Example
// JOB SCRATCH
// DLBL SORTWK1,’$$$.SORTWK1,(D)’
// EXTENT SYS001
// DLBL WORK,’$$$.SCRATCH.WORK,(D)’
// EXEC TSIDUTL
SYNCOPT
DSPLY SCRATCH,SEQ=SERIAL
/&
Chapter. 6 Additional BIM-EPIC Utilities
6-19
SYNCSTK
Maintaining the DSN Catalog (TSIDUTL)
SYNCSTK
Description
After the completion of a TSIDUTL SCRATCH, TSCRATCH or DSPLY function.,
SYNCSTK causes an ACL synchronization to be automatically done for all Storage
Technology ACL’s defined to BIM-EPIC.
When used, it must precede the SCRATCH or TSCRATCH function statement in the
job stream.
If it is not present, an automatic ACL synchronization is not done. The EP ACL SYNC
command cannot be used for Storage Technology ACL’s.
Syntax
SYNCSTK
UPSI Values
None
Example
// JOB SCRATCH
// DLBL SORTWK1,’$$$.SORTWK1,(D)’
// EXTENT SYS001
// DLBL WORK,’$$$.SCRATCH.WORK,(D)’
// EXEC TSIDUTL
SYNCSTK
DSPLY SCRATCH,SEQ=SERIAL
/&
6-20
BIM-EPIC Installation and System Guide
Formatting the DSN Catalog and Recorder File (TSIDCDK)
Introduction
Formatting the DSN Catalog and Recorder File
(TSIDCDK)
Introduction
Description
TSIDCDK creates and formats the DSN Catalog and the Recorder File. Only one of these
files is formatted per execution. See the EPICCKD.Z sample JCL in the BIM-EPIC
installation library.
UPSI Values
None
Dataset
Requirements
IJSYSDS identifies the DSN Catalog. The DSNAME configuration option does not affect
this DTF name. If the DSN Catalog is to reside on an FBA device, specify CISIZE=4096.
IJSYSDR identifies the Recorder File. You may use the REC control statement to change this
DTF name if necessary. If the Recorder File is to reside on an FBA device, specify
CISIZE=2048.
See 2-17 for complete dataset requirements and recommendations.
Control Statements
You may specify only one control statement per execution. CAT creates the DSN Catalog.
BCAT creates a DSN Catalog with a Master Index. A DSN Catalog created with BCAT is
incompatible with BIM-EPIC systems that are earlier than Release 4.1. REC creates the
Recorder File.
Syntax
CAT [=dtfname]
BCAT [=dtfname]
REC=IJSYSDR
dtfname indicates the DTF name of the DSN Catalog. This parameter must match the value
on the DSNAME configuration option. The default is IJSYSDS. The Recorder File DTF
name must be IJSYSDR.
Chapter. 6 Additional BIM-EPIC Utilities
6-21
Introduction
Formatting the DSN Catalog and Recorder File (TSIDCDK)
CKD Example
*
CREATE BIM-EPIC DSN CATALOG
// ASSGN SYS240,150
// DLBL IJSYSDS,'EPIC.VSE.CATALOG',2099/366
// EXTENT SYS240,TSI150,1,0,3750,63
// EXEC TSIDCDK
CAT=IJSYSDS
/*
*
CREATE BIM-EPIC RECORDER
// ASSGN SYS241,155
// DLBL IJSYSDR,'EPIC.VSE.RECORDER',2099/366
// EXTENT SYS241,TSI155,1,0,3900,81
// EXEC TSIDCDK
REC=IJSYSDR
/*
FBA Example
// ASSGN SYS240,150
// DLBL IJSYSDS,'EPIC.VSE.CATALOG',2099/366,,CISIZE=4096
// EXTENT SYS240,TSI150,1,0,5700,1024
// EXEC TSIDCDK
CAT=IJSYSDS
/*
// ASSGN SYS241,155
// DLBL IJSYSDR,'EPIC.VSE.RECORDER',2099/366,,CISIZE=2048
// EXTENT SYS241,TSI155,1,0,5700,1024
// EXEC TSIDCDK
REC=IJSYSDR
/*
6-22
BIM-EPIC Installation and System Guide
Rebuilding the DSN Catalog in an Emergency (TSIDBLD)
The TSIDBLD Program
Rebuilding the DSN Catalog in an Emergency (TSIDBLD)
The TSIDBLD Program
Description
TSIDBLD uses the Recorder File backup dataset to rebuild the DSN Catalog in the emergency
recovery procedure. It updates the new DSN Catalog with activity that occurred since the last
DSN Catalog backup.
Do not execute TSIDBLD from the VSE operator console.
See 4-8 for complete recovery procedures.
JCL Requirements
UPSI Values
Dataset
Requirements
//
//
//
//
//
//
UPSI xxx
TLBL VSEBKUP,'VSE.recorder.backup'
TLBL CMSBKUP,'CMS.recorder.backup'
ASSGN SYS005,cuu
(VSEBKUP)
ASSGN SYS006,cuu
(CMSBKUP)
EXEC TSIDBLD
Switch
Action
1x
Use VSEBKUP as input
x1
Use CMSBKUP as input
VSEBKUP identifies the VSE Recorder File backup dataset.
CMSBKUP identifies the CMS Recorder File backup dataset.
Example
// UPSI 100
// UPSI 110
VSE Recorder File only
VSE and CMS Recorder Files
Chapter. 6 Additional BIM-EPIC Utilities
6-23
Introduction
Reconfiguring BIM-EPIC Dynamically (TSIDDEB)
Reconfiguring BIM-EPIC Dynamically (TSIDDEB)
Introduction
Description
The TSIDDEB utility performs the following functions:
•
•
•
Reporting on the operating environment
Deactivating and reactivating BIM-EPIC by partition and by job
Changing configuration option settings
TSIDDEB can be executed from the operator console or in a batch job. The TSIDDEB
Summary Report provides a comprehensive view of the operating environment.
JCL Requirements
6-24
// EXEC TSIDDEB
control-statements
/*
BIM-EPIC Installation and System Guide
Reconfiguring BIM-EPIC Dynamically (TSIDDEB)
Reporting Capabilities
Reporting Capabilities
Description
TSIDDEB can produce the following reports:
•
•
•
•
•
Summary Report
Module dump
Dump of a DSN Catalog entry
Dump of entire DSN Catalog
Dump VSE Label Cylinder contents for one or more DLBL/TLBL’s
The Summary Report provides a review of BIM-EPIC configuration options and
miscellaneous information about the operating environment.
All output is directed to SYSLST. Tape output may be created by assigning SYSLST to an
unlabeled tape before executing TSIDDEB.
Control Statements
Reports must be specifically requested using one of the following:
SUMMARY=YES requests a Summary Report. BIM-EPIC Technical Support requires this
report for service purposes.
MODS=module requests a dump. MODS=ALL requests a dump of all modules.
MODS=TSIDRVA dumps only the TSIDRVA module.
DSN=dataset-name prints the DSN Catalog records of one dataset entry.
DSN=ALL prints all DSN Catalog records.
DSN=*JOBQ* prints the JOBQ for the partition.
LBL=fname prints the Label Cylinder data for the 1-7 character file name of a DLBL/TLBL
in character and hexadecimal format.
LBLT=fname Same as LBL, but prints the output in 70 character lines for easier viewing on a
display terminal.
Chapter. 6 Additional BIM-EPIC Utilities
6-25
Deactivating and Reactivating BIM-EPIC by Partition
Reconfiguring BIM-EPIC Dynamically (TSIDDEB)
Deactivating and Reactivating BIM-EPIC by Partition
Description
TSIDDEB deactivates and reactivates BIM-EPIC by partition. It can also be used if it is
necessary to turn BIM-EPIC off to run a job. BIM-EPIC must be reactivated when the job is
finished.
EPICOFF deactivates BIM-EPIC in a partition. xx specifies the partition ID. If you don’t
specify a partition ID, BIM-EPIC is deactivated in the partition in which TSIDDEB is run.
For dynamic partitions, do not include the partition ID. Deactivation in dynamic partitions is
effective only until end of job.
EPICON activates BIM-EPIC in a partition. xx specifies the partition ID. If you don’t
specify a partition name, BIM-EPIC is activated in the partition in which TSIDDEB is run.
For dynamic partitions, do not include the partition ID.
Syntax
Examples
OPTION
EPICOFF=xx
OPTION
EPICON=xx
The following example deactivates BIM-EPIC in the BG partition.
// EXEC TSIDDEB
OPTION EPICOFF=BG
/*
The following example activates BIM-EPIC in the partition in which TSIDDEB is run.
// EXEC TSIDDEB
OPTION EPICON
/*
6-26
BIM-EPIC Installation and System Guide
Reconfiguring BIM-EPIC Dynamically (TSIDDEB)
Overriding Configuration Options
Overriding Configuration Options
Description
TSIDDEB can be used to override many configuration options when BIM-EPIC is active.
These overrides are active until BIM-EPIC is restarted, or until they are reset by another
execution of TSIDDEB.
Options That
TSIDDEB Cannot
Modify
The following configuration options cannot be overridden by TSIDDEB. They can be
redefined by modifying the option values in the ASI procedure and restarting BIM-EPIC.
Control Statements
Option
Description
ACLIBM
IBM ACL Tape Library Dataserver
support
ACLMEM
Memorex ACL support
ACLOPT
OPTI-TAPE ACL Support
ACLSRVRx
Vendor ACL Server Name
ACLSTK
STK ACL support
DISKALL
Disk control
DSNAME
DSN Catalog dataset name
ERDFILE
ERD DTF name
JOBACCT
Job accounting activation
JQNAME
JOBQ dataset name
PASSWD
Password protection
SLASIZE
Label interface table size
TAPE
Tape control
TAPPOL
Tape pool dataset name
VM
VM support
If you are executing TSIDDEB in a batch job, you must include the word OPTION followed
by at least one blank. You can specify more than one configuration option per statement, up
to column 72. Separate multiple configuration options by commas. You can use any number
of control statements in a single execution.
If you are executing TSIDDEB from the operator console, you only need to enter the
configuration option (for example, ACCEPT=NO instead of OPTION ACCEPT=NO). You
may enter as many options as you wish at this time. Enter a null response (EOB on an empty
line) to stop entering overrides.
Chapter. 6 Additional BIM-EPIC Utilities
6-27
Overriding Configuration Options
Example
6-28
Reconfiguring BIM-EPIC Dynamically (TSIDDEB)
// JOB OPTION OVERRIDES
// EXEC TSIDDEB
OPTION ACCEPT=YES
OPTION TAPLUB=NO,AUTOSTP=YES,CANMSG=YES
/*
/&
BIM-EPIC Installation and System Guide
Reconfiguring BIM-EPIC Dynamically (TSIDDEB)
Using the Operator Console
Using the Operator Console
Description
When TSIDDEB is executed from the operator console, the following menu is displayed:
***** TSIDDEB DEBUGGING UTILITY OPTION MENU *****
A. SUMMARY REPORT
E. MODULE DUMPS
C. DSN CATALOG DUMP
D. MODIFY PROCESSING OPTIONS
E. ERD SHARE FILE OPTIONS
F. RE-ESTABLISH IUCV PATH WITH ACL SERVER
ENTER LETTER OF REQUIRED OPTION OR (EOB) TO END
TSIDDEB Options
TSIDDEB requires a single-character response to activate processing. Processing options are
described in the following table:
Option
Action
A
Produces the Summary Report on SYSLST
B
Produces a module dump on SYSLST. Includes
submenus.
C
Produces a dump of one or all DSN Catalog entries on
SYSLST. Includes submenus.
D
Allows dynamic modification of configuration options
E
Allows printing of ERD options on SYSLST. Includes
submenus.
F
Allows re-establishment of the IUCV Path between
BIM-EPIC and an ACL server. See 5-65.
When TSIDDEB is executed in a batch job, BIM-EPIC automatically prints only the first page
of the TSIDDEB Summary Report. When TSIDDEB is executed from the operator console,
the Summary Report must be requested specifically.
Chapter. 6 Additional BIM-EPIC Utilities
6-29
Printing the Summary Report
Reconfiguring BIM-EPIC Dynamically (TSIDDEB)
Printing the Summary Report
Description
The TSIDDEB Summary Report displays information about the operating environment.
Report Page 1
The first page of the Summary Report displays the current status of the operating environment
in the following three areas:
6-30
Page 1 Area
Description
A. Processing Options
Available options and current settings
B. General Specifications
BIM-EPIC general environment and module
addresses. Also PTFs and Special Options in effect.
C. System Dataset Specifications
Characteristics of BIM-EPIC system datasets that are
active.
D. ACL Support Specifications
Characteristics and settings for BIM-EPIC ACL
support.
PTF History
The last 3 digits of each BIM-EPIC APAR applied.
Special Options in Effect:
Identifies each special configuration option that is
active.
BIM-EPIC Installation and System Guide
Reconfiguring BIM-EPIC Dynamically (TSIDDEB)
Printing the Summary Report
Report Page 1
TSIDDEB= 6.3
TIME
8:37:16
A.
E P I C
S U M M A R Y
R E P O R T
PAGE #
1
DATE 05/18/1998
PROCESSING OPTIONS:
ACCEPT
ACLAUTI
ACLIBM
ACLLIB
ACLLIB
ACLMEM
ACLRECS
ACLSRVR
ACLSTK
ACLTIME
ALLMALL
ALLMSG
ALTMSGS
AUTOATT
AUTOCAT
AUTOCAT
AUTOLOG
AUTOSTP
=
=
=
=
=
=
=
=
=
=
=
=
=
=
=
=
=
=
YES
NO
NO
EPTEST (LIB)
VGS3494 (SLIB)
NO
50
NO
50
YES
YES
NO
NO
NO
(TAPE)
NO
(DISK)
NO
(TAPE)
YES
AUTSTPN =
AUTSTPNO=
AUTSTPT =
AUTSTPTO=
BYPEXT =
CANMSG =
CATRT1 =
CKDFACT =
CMSTAPE =
CNTRL
=
CPUIDS =
CWDSPOL =
CYCL
=
DDERR
=
DDGEN
=
DEBUG
=
DEFEXT =
DEFPOL =
B. GENERAL SPECIFICATIONS:
SERIAL NUMBER 80508
VERSION
6.1B
SYSTEM IS ACTIVE
RECORDER SUBSYSTEM IS ACTIVE
QDAS SUBSYSTEM IS ACTIVE
PARTITION GETVIS 42848 BYTES
SLA TABLE SIZE
68102 BYTES
TSIDSVA LOAD ADDRESS
TSIDSRV LOAD ADDRESS
TSIDRVA LOAD ADDRESS
TSIDJCL LOAD ADDRESS
TSIDJCLM LOAD ADDRESS
TSIDOPE LOAD ADDRESS
TSIDDSN LOAD ADDRESS
TSIDDSNM LOAD ADDRESS
SLATABLE ADDR
PARTABLE ADDR
UCBTABLE ADDR
TSIDTAP LOAD ADDRESS
TSIDJOB LOAD ADDRESS
TSIDOSJ LOAD ADDRESS
TSIDSPM LOAD ADDRESS
TSIDSEC LOAD ADDRESS
TSIDPCS LOAD ADDRESS
2A45F0
216058
247698
23DEC0
2D71DE0
226C70
244338
2D7AE30
2D598A0
2D6A2C0
2D59140
23C520
2446D0
2297B8
23E098
2D1718
2D16C0
PTF HISTORY:
3
0
5
0
NO
NO
NO
30
NO
NO
2
3
IGNORE
YES
NO
0
DEFTPL =
DEFWPOL =
DISKALL =
DSKLUB =
DSKRET =
DSNAME =
DSNWARN =
DSNWMSG =
ERDFILE =
EURODAT =
FBAFACT =
FRAG
=
GDI
=
GDIUR
=
JCLAC
=
JCLLANG =
JCLOPT =
JCLOVRDE=
YES
100
7
IJSYSDS
200
10
IJSYSSP
NO
0
NO
YES
YES
YES
YES
YES
NO
JOBACCT =
JQNAME =
JQWARN =
JQWMSG =
MINDEX =
MINRET =
MODE
=
MSG088 =
MULTCPU =
NCATDSK =
NOGVIS =
ONLREWCD=
PREFIX =
PURBYP =
RECORD =
RECSHR =
RERUN
=
RETEN
=
C. SYSTEM DATASET SPECIFICATIONS:
--------- MASTER CATALOG --------DTFNAME
= IJSYSDS
DEVICE ADDRESS
=
142
DEVICE TYPE
=
9336
WARNING START
=
200
WARNING EVERY
=
10
MASTER INDEX
=
NO
START ADDRESS (CCHH/BLOCK) = 783862
NUMBER OF BLOCKS
=
5000
---------- JOBQ CATALOG ---------DTFNAME
= IJSYSJQ
DEVICE ADDRESS
=
400
DEVICE TYPE
=
FBAV
WARNING START
=
0
WARNING EVERY
=
0
MASTER INDEX
=
NO
START ADDRESS (CCHH/BLOCK) =
2
NUMBER OF BLOCKS
=
472
---------- RECORDER FILE ---------DTFNAME
= IJSYSDR
DEVICE ADDRESS
=
142
DEVICE TYPE
=
9336
START ADDRESS (CCHH/BLOCK) = 141566
NUMBER OF BLOCKS
=
998
-------- ERD SHARED FILE --------DTFNAME
= IJSYSSP
DEVICE ADDRESS
=
142
DEVICE TYPE
=
9336
START ADDRESS (CCHH/BLOCK) = 393218
NUMBER OF BLOCKS
=
228
YES
IJSYSJQ
0
0
NO
7
D0
YES
YES
NO
CANCEL
RUN
EP
NO
YES
YES
YES
7
RMNTPRT =
SHARE
=
SLASIZE =
STRTRK =
TAPCUU =
TAPE
=
TAPLUB =
TAPPOL =
TSTJOB =
UNCDSK =
UNCTAP =
UNCTL
=
UNLABEL =
UNLOAD =
VGSFTAPE=
VM
=
VSAM
=
NO
NO
300
1
F00
YES
10
TAPOLA
YES
YES
NO
NO
NO
YES
111
NO
D. ACL SUPPORT SPECIFICATIONS:
SUPPORT ACTIVE :
SUPPORT VIA VM :
TSIDIUCV ADDRESS:
TSIDIUCA ADDRESS:
TSIDMRXA ADDRESS:
TSIDIBMA ADDRESS:
TSIDSTKA ADDRESS:
MEMOREX ATL'S :
IBM
ATL'S :
STK
ATL'S :
ACL VSE LIBRARY:
ACL VSE SUBLIB :
REQUEST REGISTER:
IUCV PATH TABLE:
ACLTIME
:
ACLRECS
:
ACLAUTI
:
ACL SERVER ID
:
ACL LIBRY NAMES:
FREE TPDRIV REQD:
N
N
N
N
N
EPTEST
VGS3494
50
50
N
BIMSING
Y
SPECIAL OPTIONS IN EFFECT:
Chapter. 6 Additional BIM-EPIC Utilities
6-31
Printing the Summary Report
Report Page 2
Reconfiguring BIM-EPIC Dynamically (TSIDDEB)
This page displays the tape and disk pools defined to BIM-EPIC.
TSIDDEB= 6.3
TIME
8:37:16
E P I C
S U M M A R Y
R E P O R T
********** TSIDPOL SUMMARY
POOLID
POOL01
FBAVPL
POOL90
CKD001
FBA001
EPV400
FBAVER
FBAP11
FBAP12
FBAP13
FBAP14
FBAP15
CKDVER
CKDP11
CKDP12
CKDP13
CKDP14
CKDP15
TAPOLA
6-32
VOLSER
CKD001
EPV400
POOL01
CKD001
FBA001
EPV400
FBAP11
FBAP12
FBAP13
FBAP14
FBAP15
FBAP11
FBAP12
FBAP13
FBAP14
FBAP15
CKDP11
CKDP12
CKDP13
CKDP14
CKDP15
CKDP11
CKDP12
CKDP13
CKDP14
CKDP15
A
B
C
J
K
LOW
ADDRESS
1
1
1
800000
1
64
64
64
64
64
64
64
64
64
64
1
1
1
1
1
1
1
1
1
1
990000
990100
990200
KC1100
KC1000
POOL START ADDRESS
MAXIMUM MAP ENTRIES
ILIST ADDRESS
NLUBDTF ADDRESS
NLUBPGM ADDRESS
HIGH
VOLSER
LEVEL
ADDRESS
STATUS
(Y/N)
5728640
Y
239999
N
EQUATED
5728640
N
920115
N
239999
N
29525
Y
29525
29525
29525
29525
29525
N
29525
N
29525
N
29525
N
29525
N
5728640
Y
5728640
5728640
5728640
5728640
5728640
N
5728640
N
5728640
N
5728640
N
5728640
N
990099
TAPE POOL
990199
990299
KC1199
KC1099
BIM-EPIC Installation and System Guide
PAGE #
2
DATE 05/18/1998
**********
236D20
2044
237470
237467
23745E
ILIST
IJSYSRS
IJSYSR1
IJSYSR2
IJSYSR3
IJSYSR4
IJSYSRC
IJQFILE
IJDFILE
IJAFILE
IJSYSHF
EPICLIB
EPCVER
EPPVER
EPPTF
EXPLORE
PRD1
PRD2
ISMDEV
ISMINST
ISMLIB
ILDTF
NLUBDTF
NLUBDTF
NLUBPGM
KJNLUB
Reconfiguring BIM-EPIC Dynamically (TSIDDEB)
Report Page 3
TSIDDEB= 6.3
TIME
8:37:16
Printing the Summary Report
This page displays the current QDAS operating environment.
E P I C
S U M M A R Y
R E P O R T
PAGE #
3
DATE 05/18/1998
********** QDAS VOLSER SUMMARY **********
VOLSER
EPV400
CKD001
CKDP11
CKDP12
CKDP13
CKDP14
CKDP15
FBA001
FBAP11
FBAP12
FBAP13
FBAP14
FBAP15
Report Page 4
TSIDDEB= 6.3
TIME
8:37:16
$IJJHCVH START ADDRESS
TSIVSVA START ADDRESS
TSIVDEF START ADDRESS
MAPSIZE
MAPAREA&
2044
2D4E018
2044
2D4A028
2044
2D46038
2044
2D42048
2044
2D3E058
2044
2D3A068
2044
2D36078
2044
2D32088
2044
2D2E098
2044
2D2A0A8
2044
2D1F018
2044
2D1B028
2044
2D17038
138E20
248D38
248C20
STATUS
SHARED
SHARED
SHARED
SHARED
SHARED
SHARED
SHARED
SHARED
SHARED
SHARED
SHARED
SHARED
This page displays the current VSE operating environment.
E P I C
S U M M A R Y
R E P O R T
PAGE #
4
DATE 05/18/1998
********** OPERATING ENVIRONMENT **********
VSE/ESA RELEASE 2.3
VSE/AF RELEASE 6.3.0
EXECUTION IN MODE = ESA
CPUID
FF22222274900000
LPAR MODE NOT ACTIVE
TURBO DISPATCHER IS NOT ACTIVE
UNI-PROCESSOR SUPPORT
DASDSHR IS SUPPORTED
VSE SECURITY IS NOT ON
DASD FILE PROTECT NOT SUPPORTED
JOB ACCOUNTING IS SUPPORTED
CVT ADDRESS
LTA ADDRESS
PUB TABLE ADDRESS
TOTAL NUMBER OF PUBS GENED
SVA PHASE AREA
(LOW)
SVA PHASE AREA SIZE
(LOW)
SVA PHASE AREA
(HIGH)
SVA PHASE AREA SIZE
(HIGH)
SYSTEM GETVIS ADDRESS (LOW)
SYSTEM GETVIS SIZE
(LOW)
SYSTEM GETVIS ADDRESS (HIGH)
SYSTEM GETVIS SIZE
(HIGH)
EXTERNAL NEW PSW
SVC
NEW PSW
PROGRAM NEW PSW
7498
5570
32B0
254
97000
6372K
2700000
7168K
4E5000
1728K
2BDB000
2196K
B8D0
B51C
BB3C
Chapter. 6 Additional BIM-EPIC Utilities
6-33
Printing the Summary Report
Report Page 5
This page displays information about both the static and dynamic partitions defined to the
current operating environment.
TSIDDEB= 6.3
TIME
8:37:16
E P I C
PART
BG
FB
FA
F9
F8
F7
F6
F5
F4
F3
F2
F1
----- PARTITION ---START
SIZE
700000
1280K
700000
1024K
700000
1024K
700000
1024K
700000
2048K
700000
1024K
700000
1024K
700000
1024K
700000
3072K
700000
600K
700000
3072K
700000
1024K
CLASS
C
P
U
Y
Z
PART
9
10
10
8
3
PART
Z1
----- PARTITION ---START
SIZE
780000
1280K
6-34
Reconfiguring BIM-EPIC Dynamically (TSIDDEB)
NPGR
255
255
255
255
255
SIZE
01024K
01024K
01024K
01280K
01280K
S U M M A R Y
R E P O R T
********** STATIC PARTITIONS SUMMARY **********
------ GETVIS -----START
SIZE
COMREG
JOBNAME
NPGR
NSYS
LUBTAB
840000
4864K
5B8
NO NAME
255
050
1614
800000
1024K
49B0
NO NAME
255
050
2E88
800000
1024K
4880
NO NAME
255
050
2C26
800000
1024K
4750
NO NAME
255
050
29C4
900000
2048K
4620
NO NAME
255
050
2762
800000
1024K
44F0
NO NAME
255
050
2500
800000
1024K
43C0
NO NAME
255
050
229E
800000
1024K
4290
NO NAME
255
050
203C
A00000
3072K
4160
TSIDDEB
255
050
1DDA
796000
5544K
4030
NO NAME
255
050
1B78
A00000
17408K
3F00
NO NAME
255
050
1916
800000
1536K
3DD0
SNAPOWER
030
050
1876
********** DYNAMIC CLASS TABLE SUMMARY **********
ALLOC
SP-GVIS
PROFILE
MEMBER
STATUS
2M
512K
SNADYN2
DTR$DYN2
ENABLED
2M
512K
PWSPROF
DTR$DYN2
ENABLED
2M
512K
SNADYN2
DTR$DYN2
ENABLED
2M
512K
SNADYN2
DTR$DYN2
ENABLED
5M
512K
SNADYN2
DTR$DYN2
ENABLED
********** DYNAMIC PARTITIONS SUMMARY **********
------ GETVIS -----START
SIZE
COMREG
JOBNAME
8C0000
3328K
564520
FAQSMAIN
BIM-EPIC Installation and System Guide
PAGE #
5
DATE 05/18/1998
STASK
1
STASK
6
STATUS
EPIC IS ACTIVE
EPIC IS ACTIVE
EPIC IS ACTIVE
EPIC IS ACTIVE
EPIC IS ACTIVE
EPIC IS ACTIVE
EPIC IS ACTIVE
EPIC IS ACTIVE
EPIC IS ACTIVE
EPIC TURNED OFF
EPIC IS ACTIVE
EPIC IS ACTIVE
STATUS
EPIC IS ACTIVE
Reconfiguring BIM-EPIC Dynamically (TSIDDEB)
This page lists both tape and disk devices defined to the current operating environment.
Report Page 6
TSIDDEB= 6.3
TIME
8:37:16
CUU
140
141
142
143
144
145
146
147
160
161
162
163
164
165
172
173
174
178
179
17A
17B
17C
17D
400
580
581
582
583
584
590
600
601
602
603
604
620
621
622
F00
DEVICE TYPE
9336
9336
9336
9336
FBA
FBA
FBA
FBA
3390
3380
3380
3380
3380
3380
9336
9336
9336
9336
9336
9336
9336
9336
9336
FBAV
3422
3410
3410
3410
3410
3480
TPA
3490-E
3490-E
TPA
TPA
TPA
TPA
TPA
3420
Printing the Summary Report
E P I C
MODE/SER
ATTRIBUTES
DOSRES
SYSWK1
FBA001
FBA002
R
R
R
R
*
*
*
*
R
R
R
R
R
R
R
R
R
R
R
R
R
R
R
R
CKD001
CKDP11
CKDP12
CKDP13
CKDP14
CKDP15
VSEPWR
VSELBL
VSEPAG
VSEPW2
FBAP11
FBAP12
FBAP13
FBAP14
FBAP15
EPV400
6250
6250
6250
6250
6250
00
00
00
00
00
00
00
00
00
DOWN
A
A
A
M X
M
M
M
DOWN *
DOWN *
DOWN *
DOWN *
M
M
M
M
M
M
M
M
M
M
M
M
M
M
M
A
N
N
N
N
N
N
N
N
N
N
N
N
N
N
S U M M A R Y
R E P O R T
PUB
PUB2
PUBX
INDEX
32D0
32D8
32E0
32E8
32F0
32F8
3300
3308
3310
3318
3320
3328
3330
3338
33A0
33A8
33B0
33D0
33D8
33E0
33E8
33F0
33F8
3468
3498
34A0
34A8
34B0
34B8
34C0
34C8
34D0
34D8
34E0
34E8
34F0
34F8
3500
3520
6172C
6173C
6174C
6175C
6176C
6177C
6178C
6179C
617AC
617BC
617CC
617DC
617EC
617FC
618CC
618DC
618EC
6192C
6193C
6194C
6195C
6196C
6197C
61A58
61AB8
61B10
61B68
61BC0
61C18
61C70
61C8B
61CA6
61CC1
61CDC
61CF7
61D12
61D2D
61D48
61D8F
622CC
623B0
62494
62578
6265C
62740
62824
62908
629EC
62AD0
62BB4
62C98
62D7C
62E60
639F4
63AD8
63BBC
63F4C
64030
64114
641F8
642DC
643C0
64E94
653EC
654C8
655A4
65680
6575C
65838
65928
65A30
65B38
65C40
65D48
65E50
65F58
66060
663B0
4
5
6
7
8
9
A
B
C
D
E
F
10
11
1E
1F
20
24
25
26
27
28
29
37
3D
3E
3F
40
41
42
43
44
45
46
47
48
49
4A
4E
PAGE #
6
DATE 05/18/1998
ACLNAME
BIMSING
BIMSING
BIMSING
BIMSING
ATTRIBUTE VALUES
A=DEVICE IS ASSIGNED
M=DEVICE ADDED AS SHARED
N=NOAVR SET
R=RPS SUPPORT
S=DEVICE ADDED AS SWITCHABLE
X=DEVICE IS SYSRES
Y=DEVICE IS XAPI ELIGIBLE
Chapter. 6 Additional BIM-EPIC Utilities
6-35
Printing the Summary Report
Report Page 7
Reconfiguring BIM-EPIC Dynamically (TSIDDEB)
This page lists the information provided by all products who have identified themselves to the
current operating environment.
TSIDDEB= 6.3
TIME
8:37:16
COMPANY
B I MOYLE
SYNCSORT INC.
Report Page 8
E P I C
PRODUCT
BIM-GSS FOR VSE
SYNCSORT VSE
6-36
R E P O R T
VENDOR PRODUCTS IDENTIFIED
COMPANY
B I MOYLE
B I MOYLE
PAGE #
7
DATE 05/18/1998
PRODUCT
FAQS/ASO GSFAQS
BIM-EPIC
RELEASE
05000
06010B
This page lists the status, type, and other information relevant to various interfaces within the
current operating environment.
TSIDDEB= 6.3
TIME
8:37:16
INTERFACE
AR
PRE-OPEN
POST-OPEN
PRE-CLOSE
POST-CLOSE
EOX
EOV
VMSVC
IUCV
JOBEXIT
JOBACCT
SLA
CVH
LE/VSE
COBOL-II
RELEASE
05000
SS31C
S U M M A R Y
E P I C
STATUS
ACTIVE
ACTIVE
ACTIVE
ACTIVE
ACTIVE
ACTIVE
ACTIVE
ACTIVE
INACTIVE
ACTIVE
ACTIVE
ACTIVE
ACTIVE
ACTIVE
INACTIVE
TYPE
EXIT
EXIT
EXIT
EXIT
EXIT
EXIT
SWAP
SWAP
EPIC MOD
TSIDEAR
TSIDEO1
TSIDEO2
TSIDEC1
TSIDEC2
TSIDEOX
TSIDTAP
TSIDVMS
SWAP
SWAP
SWAP
SWAP
EXIT
TSIDJCL
TSIDJOB
TSIDDSN
TSIVSVA
TSIDELE
BIM-EPIC Installation and System Guide
S U M M A R Y
R E P O R T
SYSTEM INTERFACES
------------ ADDRESSES ----------PRIOR
NEW
CURRENT
80237520
82966268
829667B8
82966E18
82967498
82967AF0
0013BFA8
0023C520
0013BFA8
0059FB30
001483B0
001483A8
00105440
00138E20
0023DEC0
002446D0
00244338
0023DEC0
002446D0
00244338
00248D38
8023A510
PAGE #
8
DATE 05/18/1998
Reconfiguring BIM-EPIC Dynamically (TSIDDEB)
Printing the Summary Report
This page displays information attributable to the BIM-EPIC Dispatcher environment.
Report Page 9
TSIDDEB= 6.3
TIME
8:37:16
E P I C
S U M M A R Y
R E P O R T
PAGE #
9
DATE 05/18/1998
EPIC DISPATCHER ENVIRONMENT
ROLLING QUEUE
REQUEST QUEUE
TASK TABLE
00000000
00000000
002A4D5C
TASK/SUBTASK
TID
TASK
Report Page 10
E P I C
LOAD ADR
2CFF68
2AAEE0
2C8980
2B5E60
2AFEB0
2B0480
2B24E8
2BCD38
2B5F90
2B73D8
2B51C8
2A82F8
2C7AA0
2C9090
2B9378
2BEEE0
2A9290
2CF098
2B08A8
2BE978
2C9930
2B3180
2BAC00
2C9708
226C70
227288
225038
2268B8
220BC8
INACTIVE
This page provides addresses of many of the BIM-EPIC sub-modules.
TSIDDEB= 6.3
TIME
8:37:16
MODULE
ACLMNT
CANCEL
CATRE
CLEANTBL
CONSOLE
DECDLUB
DFASTIN
ERASELBL
FINDPOOL
GDIDKTP
GETVCE
GVTABE
ISSUEM1
JQRW
LBL2TAPE
MAKEMAN
PATARE2
RDBLKID
RECORDIT
REWTTLBL
SETMSG
ST1IN
TPOPEN1
VALIDX
TFVSEOPE
TFVSENR
$SYSIDNT
$USEREXI
$POLSCAN
STATUS
MODULE
ALLOCRE
CATAUTO
CATRR
CLODSN1
CVTOC
DECDTLB
DFCKREL
FINDDSN
FINDPUB
GDIOFF
GETVIS
IGNMOD
JIBIT
JQTPOPN
LCDSPLY
MODDTF
POSTOPN
READCON
RELEASE
RUNTAPE
SERVICE
SVAMAIN
TRUNK
VSAMDS
TFVSERD
TFVSEFR
$SYSGVIS
$ACLSRV
$JCLINFO
S U M M A R Y
R E P O R T
********** MODULE CROSS REFERENCE
LOAD ADR
MODULE
LOAD ADR
2C3A48
BLDDDSN
2B6458
2AE160
CATNR
2C8250
2C8580
CATRW
2C8718
2D0A20
CLOSEDSK
2B1A30
2B4BD0
DECDDTF
2AC3F0
2CDE88
DELEQUAL
2B5888
2C7008
DONTLAS
2C43D0
2AD290
FINDERR
2BE848
2AB328
FINDRIVE
2BB748
2CF440
GDITPDK
2C0AE8
2AB150
GETVSER
2C7848
2C6C40
INIT
2AA290
2B05E8
JQNR
2C8BF8
2CCD38
KEY0OFF
2AC2E0
2BFBC8
LOCBLK
2CF218
2BFF80
MT02I
2D0620
2CEE00
PROWNER
2C4A50
2B0118
READHDR
2BF8B8
2ABB08
REMVSER
2CE880
2AAD10
RWLBL2
2C2A58
2CEA48
SIEZE
2ABC88
2A5EB8
TFAST
2B9A30
2B3FC8
UNASSGN
2AF1C8
2C3EC0
WRITHDR
2BFD50
2271D8
TFVSERE
227234
2274C4
TFVSERR
2274D2
224D70
$SYSFVIS
224AC0
217EF8
$UCBSRV
2251F8
218158
$PARSE
21EDD0
**********
MODULE
BLDTDSN
CATNV
CATSVA
CLOSETAP
DECDLBL
DEVIND
DSPLY
FINDF1
FNDSPAC
GDIURTP
GINTER
INTVREQ
JQNV
KEY0ON
LSTPAT
OVTOC
PVTOC
REBLKDSK
RESERVE
SENSE
STARTIO
TFASTIN
UNCLUB
WRTF1LB
TFVSERW
TFVSESR
$PREOPEN
$SPINLOK
$SECURE
PAGE #
10
DATE 05/18/1998
LOAD ADR
2BDC40
2C83E8
2C8AC0
2BCE90
2B69B0
2B9008
2B36D8
2C2ED8
2C5680
2C6090
2C7D10
2CCF20
2C8D80
2AC1D0
2A8300
2B4D80
2B4738
2B96B0
2AB908
2ABF38
2B0380
2BA7D8
2AEB38
2B4478
227910
22810A
220DA8
222F50
2225B8
MODULE
CALCSPCE
CATRD
CHKHDR
CONLUBS
DECDDLB
DFAST
ENCODE
FINDLUB
FREER
GETLABEL
GVTAB
ISSUEMNT
JQRR
LBL2DISK
LUBALL
PATAREA
QUALTAP1
REBLOCK
REWTAPE
SETCONC
STRPDTF
TIMEOUT
UNSIEZE
XECBTF
TFVSENV
TFVSESC
$MNTINTF
$JQUPD
$SEXTUPD
Chapter. 6 Additional BIM-EPIC Utilities
LOAD ADR
2C5060
2C8848
2CD200
2B5640
2CD438
2B0D28
2C2158
2AFC28
2C32D0
2AC6A8
2A62F8
2BC510
2C8F08
2C08A8
2AF590
2A8560
2BAF58
2C1C68
2BEDB8
2B7068
2C91B8
2BE698
2ABE18
2AF080
2272E0
227344
21E8A0
21D810
2226E8
6-37
Introduction
Vaults and Vaulting Methods
Vaults and Vaulting Methods
Introduction
Description
The BIM-EPIC vaulting subsystem is configured using the VAULTDEF and METHOD
macros. You can change the vaulting configuration by re-assembling and linking these
macros. The changes are recognized the next time TSIDVLT is run. At that time, the Vault
Movement Report lists all tapes that must be moved to reflect the changes.
Standard IBM macro coding rules apply to both macros. All VAULTDEF and METHOD
macro statements must be assembled and link-edited together to create the TFVAULT
module. The TFVAULT module must be in a library which is accessible to BIM-EPIC utility
programs during execution.
Macro statements are restricted to 256 characters in length.
The TFVAULT module is created in three steps:
Step
6-38
Action
1
Define vault locations
2
Define vaulting methods
3
Assemble and link the VAULTDEF and METHOD macros
BIM-EPIC Installation and System Guide
Vaults and Vaulting Methods
Defining Vault Locations
Defining Vault Locations
Description
Define each automatically controlled vault with the VAULTDEF macro. The EPICVLT.Z
member contains samples for the VAULTDEF macro.
You can create as many as 65,535 automatically controlled vaults. Vaults are identified by
number. The main library is always vault 0 (zero). As each VAULTDEF macro is
encountered, BIM-EPIC identifies that vault with next ascending sequential number
(beginning with 1).
You can define the number of slots in each vault if you wish. If defined, the total number of
slots in all vaults is limited to 32,767.
Syntax
Parameters
VAULTDEF 'vault-name' [ ,ss,ns ][ ,AVAULTS= ]
Parameter
Required?
Values
Default
vault-name
Yes
1 to 24 characters
None
ss
No
Any number
None
ns
No
Any number
None
AVAULTS
No
1 to 65535
100
vault-name specifies the 1 to 24-character name of the vault being defined. Enclose the
name in apostrophes. You can define only one vault per VAULTDEF statement.
ss specifies the starting slot number. Use it to assign slot numbers to the vault. If ss and ns
are not supplied, there is no limit to the number of tapes the vault can contain.
ns specifies the number of slots in the vault. It must be supplied when you use the ss
parameter.
AVAULTS specifies the number of automatic vaults. Vaults with a number greater than the
number specified here are manually controlled vaults (see “Manually Controlled Vaults," in
the User Reference). AVAULTS is valid only when specified on the first VAULTDEF macro
statement.
Examples
The following statement defines the vault named ACME Vault-1. It has room for 2,000 tapes
and has slots numbered from 5000 to 6999.
VAULTDEF 'ACME VAULT-1',5000,2000
The following statement defines the KEARNEY vault and has no limit to the number of tapes
it can contain. The AVAULTS parameter specifies that automatic vaults can number up to
500. (Vaults numbered 501 and above are to be considered manually controlled vaults.) It is
valid if this is the first VAULTDEF statement.
VAULTDEF 'KEARNEY',AVAULTS=500
Chapter. 6 Additional BIM-EPIC Utilities
6-39
Defining Vaulting Methods
Vaults and Vaulting Methods
Defining Vaulting Methods
Description
Vaulting methods are defined with METHOD macro statements. The EPICVLT.Z member
contains samples of the METHOD macro.
You can define up to 255 vaulting methods. Specify vault method statements in ascending
order by method number without any gaps between numbers. If you specify statements out of
sequence or with gaps in the sequence, MNOTE errors will occur.
Syntax
Parameters
METHOD method,version1,version2,...,version198
Parameter
Required?
Values
Default
method
Yes
1-255
None
versionn
Yes
1-198
None
method specifies the number of the vaulting method being defined.
versionn specifies the number of the vault to which a dataset version is to be moved. Vault
location numbers are positional: the first specifies the vault location of the first version, the
second specifies the location of the second version, and so on. Only versions explicitly coded
in the method are vaulted. Tape versions exceeding the number you specify in the method are
returned to the main library.
Example
The following statement defines vaulting method number 2. Version 1 is located in the main
library. Version 2 is moved to vault number 1. Version 3 is kept in vault number 1; version 4
is moved to vault 3; version 5 is kept in vault 3; version 6 is moved back to the main library.
METHOD 2,0,1,1,3,3
6-40
BIM-EPIC Installation and System Guide
Vaults and Vaulting Methods
Assembling and Linking VAULTDEF and METHOD Macros
Assembling and Linking VAULTDEF and METHOD Macros
Description
Using the JCL below as an example to assemble and link-edit your VAULTDEF and
METHOD macros. This sample is also found as EPICVLT.Z in the BIM-EPIC installation
Sublibrary.
Example
* $$ JOB JNM=EPICVLT,LDEST=(,USERID)
// JOB EPICVLT
*
* THIS IS SAMPLE JCL TO ASSEMBLE AND CATALOG VAULTDEF AND METHOD MACROS
* TO THE BIM-EPIC SUBLIBRARY. MODIFY THIS SAMPLE TO SUIT YOUR
* INSTALLATION REQUIREMENTS. CONSULT THE BIM-EPIC INSTALLATION AND
* SYSTEM GUIDE FOR AN EXPLANATION OF ALL THE PARAMETERS FOR THESE
* MACROS. VALUES SURROUNDED BY ASTERISKS NEED TO BE MODIFIED.
*
// LIBDEF PHASE,CATALOG=*LIB.SUBLIB*
EPIC INSTALL LIBRARY
// LIBDEF *,SEARCH=*LIB.SUBLIB*
EPIC INSTALL LIBRARY
// OPTION CATAL
// EXEC ASSEMBLY
***********************************************************************
* VAULT 1 HAS 200 SLOTS NUMBERED 1 TO 200. VAULT 2 HAS 500 SLOTS
*
* NUMBERED 1 TO 500. VAULT 3 HAS 50 SLOTS NUMBERED 50 TO 99. METHOD *
* 1 WILL KEEP VERSION 2 IN VAULT 1, VERSION 3 IN VAULT 2, AND ALL
*
* OTHER VERSIONS IN THE MAIN LIBRARY. METHOD 2 WILL KEEP VERSION 1
*
* IN VAULT 1, VERSION 2 IN VAULT 2, VERSION 3 IN VAULT 3, AND ALL
*
* OTHER VERSIONS IN THE MAIN LIBRARY. METHOD 3 WILL KEEP VERSION 3
*
* IN VAULT 3, VERSION 4 IN VAULT 1, AND ALL OTHER VERISONS IN THE
*
* MAIN LIBRARY.
*
***********************************************************************
VAULTDEF 'VAULT 1',1,200
VAULTDEF 'VAULT 2',1,500
VAULTDEF 'VAULT 3',50,50
METHOD 1,0,1,2
METHOD 2,1,2,3,0
METHOD 3,0,0,3,1,0
END
/*
// EXEC LNKEDT
/&
* $$ EOJ
Chapter. 6 Additional BIM-EPIC Utilities
6-41
Sort Interface Macro (TSSRTDEF)
Additional BIM-EPIC Macros
Additional BIM-EPIC Macros
Sort Interface Macro (TSSRTDEF)
Description
The TSSRTDEF macro defines how BIM-EPIC’s TSIDSRT sort interface operates. It defines
default logical unit numbers for SORTIN, SORTOUT, and SORTWK and specifies whether
the EP242 RECORDS WRITTEN TO OUTPUT message is issued
A default macro is provided during installation. If you want to change the default options,
modify, re-assemble, and link-edit the TSSRTDEF macro.
You must update the macro if the default SYS numbers specified for your SORT package
differ from the macro’s defaults. The macro’s defaults are the same as the distributed defaults
for each SORT package:
•
•
•
SORTOUT=1
SORTIN1=2
SORTWK=Last SORTIN logical unit number +1
A sample job stream to assemble and catalog the TSSRTDEF macro is cataloged in the BIMEPIC installation Sublibrary as TSSRTDEF.Z.
Format
Parameters
TSSRTDEF BYPWRKO=NO,
PRINT=NO,
ROUTE=BOTH,
SORTCTL=NO,
SORTIN=(n,n,n,...),
SORTOUT=n,
SORTWK=(n,n,n,...)
Parameter
Required?
X
X
X
X
X
X
Values
Default
BYPWRKO
No
NO or YES
NO
PRINT
No
NO or YES
NO
ROUTE
No
BOTH, LST, or LOG
BOTH
SORTCTL
No
NO or YES
NO
SORTIN
No
1 to 255
2
SORTOUT
No
1 to 255
1
SORTWK
No
1 to 255
last + 1
BYPWRKO specifies whether TSIDSRT is to bypass the pre-open for SORTWK areas before
invoking SORT. If NO, TSIDSRT pre-opens the SORTWK areas to ensure that proper
6-42
BIM-EPIC Installation and System Guide
Additional BIM-EPIC Macros
Sort Interface Macro (TSSRTDEF)
assignments and extent information is available to the SORT. If YES, TSIDSRT bypasses the
pre-open check, and all SORTWK assignments and extents must be properly supplied.
PRINT specifies whether the EP242 message is to be issued. NO suppresses the message.
You can cause the message to be issued by supplying a SORT OPTION statement with
PRINT=ALL. YES causes the message to be issued. You can suppress the message by
supplying a SORT OPTION statement with PRINT=NONE or PRINT=CRITICAL.
ROUTE specifies where the EP242 message is to be issued. ROUTE=BOTH causes the
message to be issued on both SYSLST and SYSLOG. ROUTE=LST causes the message to
be issued only on SYSLST. ROUTE=LOG causes the message to be issued only on
SYSLOG.
SORTCTL specifies whether the SORT control statements are to be displayed on SYSLST.
NO suppresses display of the SORT control statements. YES enables display of the SORT
control statements. The messages will be prefixed with the message number EP246.
SORTCTL does not affect OPTION PRINT=ALL or your standard SORT configuration with
respect to displaying the SORT control statements.
SORTIN specifies the default logical unit numbers for SORTIN1 through SORTIN9. Supply
the logical unit number for SORTIN1 first, SORTIN2 second, etc. You can specify up to nine
logical unit numbers. SORT OPTION statements override these numbers.
SORTOUT specifies the default logical unit numbers for SORTOUT. You can specify one
logical unit number. SORT OPTION statements override this number.
SORTWK specifies the default logical unit numbers for SORTWK1 through SORTWK9.
Supply the logical unit number for SORTWK1 first, SORTWK2 second, etc. You can specify
up to nine logical unit numbers. SORT OPTION statements override these numbers.
Example
This example changes the default logical unit numbers to SYS010 through SYS016 for
SORTIN1 through SORTIN7, to SYS020 for SORTOUT, and to SYS030 through SYS032
for SORTWK1 through SORTWK3. The EP242 message will be issued on both SYSLST
and SYSLOG. SORT control statements will be displayed on SYSLST.
// OPTION CATAL
// EXEC ASSEMBLY
TSSRTDEF SORTOUT=20,
SORTIN=(10,11,12,13,14,15,16),
SORTWK=(30,31,32),
ROUTE=BOTH,
PRINT=YES,
SORTCTL=YES,
BYPWRKO=NO
END
/*
// EXEC LNKEDT
X
X
X
X
X
X
Chapter. 6 Additional BIM-EPIC Utilities
6-43
Job Scheduling Macro (TSIDFAV)
Additional BIM-EPIC Macros
Job Scheduling Macro (TSIDFAV)
Description
The TSIDFAV macro creates the TSIDFAVU phase containing user overrides of several
TSIDFAV options.
If the TSIDFAV macro is not coded and assembled, default values are used.
Format
TSIDFAV
TYPE=NAME,NAME='report-heading'
TYPE=LOC,LOC=column
TYPE=EOF,EOF=eof-characters
TYPE=SLI,SLI=sublibrary
TYPE=FINAL
Parameters
report-heading is limited to 20 characters. The default is spaces.
column is the location (column) of the input/output code on the TLBL or DLBL statement.
The default is 50. Possible code values are:
Value
Description
I
Input file
O
Output file
B
Both input and output. If B is specified, the next card column must contain the
correct code for the direction of the first open. BI is input first, BO is output
first.
eof-characters are the two characters in columns 1 and 2 indicating end-of-file. The
default is two dashes (--).
sublibrary is the default source statement sublibrary used when processing POWER SLIs
if no sublibrary is specified on the SLI statement. sublibrary must be identical to that
specified during POWER installation. The default is G.
TYPE=FINAL must be coded last.
Example
6-44
// OPTION CATAL
// EXEC ASSEMBLY
TSIDFAV TYPE=NAME,NAME='B I MOYLE ASSOCIATES'
TSIDFAV TYPE=SLI,SLI=K
TSIDFAV TYPE=FINAL
END
/*
// EXEC LNKEDT
BIM-EPIC Installation and System Guide
Coding the Label Print Subroutine
Introduction
Coding the Label Print Subroutine
Introduction
Description
You can use BIM-EPIC to create gummed dataset labels for output tapes automatically. A
BIM-EPIC program gathers information about a tape dataset when it is opened. You write a
subroutine that formats the information and prints the label.
Overview
When an output tape dataset is opened, BIM-EPIC creates the following 58-byte record:
Field
Length
Dataset name
17 bytes
Volume serial number
6 bytes
Job name
8 bytes
Partition ID
2 bytes
Date
8 bytes (mm/dd/yy)
Time
6 bytes (hhmmss)
Tape device number (cuu)
3 bytes
Density
2 bytes (C0, C8, D0, and so on)
CPUID
4 bytes (binary)
Tape volume sequence
2 bytes (binary)
BIM-EPIC then passes the record and control to your subroutine. Your subroutine formats
and prints the label, and then passes control back to BIM-EPIC.
You can print labels from CICS or in batch mode. Printing dataset labels in batch mode
requires a dedicated printer and, of course, a dedicated partition. To print dataset labels
online requires a dedicated printer and a dedicated terminal unless you start the transaction
through the PLT. If you start the transaction through the PLT, you must dedicate a printer
port to the transaction. That printer port can be freed by deleting the transaction from the PLT
or by entering the TPRE transaction in CICS.
The RMNTPRT configuration option must be set to YES.
You can write your subroutine in either COBOL or Assembler. You can use the copybook
record layout TSIDBPR.C or TSIDPRT.A. Sample Assembler and COBOL subroutines are
provided to demostrate the coding technique required to print tape labels in a batch partition.
These programs can be found in the BIM-EPIC installation library under the names
TSIDPR.C and TSIDPR.A (COBOL and Assembler respectively). Both Assembler and
COBOL subroutines should open the printer file (DTF) only once to avoid depletion of
Partition GETVIS. The COBOL subroutine program ID must be TSIDPR to avoid a conflict
with the entry point name which must be defined as TSIDPR1.
Chapter. 6 Additional BIM-EPIC Utilities
6-45
Printing Labels In Batch Mode
Coding the Label Print Subroutine
Printing Labels In Batch Mode
Procedure
If you are running under VM and processing with VIRTUAL=REAL (instead of
VIRTUAL=VIRTUAL), we recommend that you use CICS for your label printing.
Step
Action
1
Create your subroutine to format and print the label from the record passed by
TSIDBPR. Use the sample programs found in the BIM-EPIC installation library
as examples. Both an Assembler example, TSIDPR.A, and a COBOL example,
TSIDPR.C, are provided.
2
Assemble or compile your subroutine, and then catalog it into the BIM-EPIC
library as TSIDPR.OBJ.
3
Link TSIDPR with TSIDBPR and catalog the phase into the BIM-EPIC library.
TSIDBPR uses standard linkage conventions. The following JCL example can be
used to catalog the phase.
// JOB CATALOG TSIDBPR
// OPTION CATAL
ACTION CLEAR
INCLUDE TSIDBPR
INCLUDE TSIDPR
/*
// EXEC LNKEDT
/*
/&
6-46
4
Execute the TSIDBPR program in any available partition.
5
To terminate the label printing function, execute the TSIDPEN program in any
available partition.
BIM-EPIC Installation and System Guide
Coding the Label Print Subroutine
Printing Labels Using CICS
Printing Labels Using CICS
Procedure
Step
Action
1
Code your subroutine to format and print the label from the record passed by
TSIDPRT. Use the sample COBOL program TSIDLPRT.C in the BIM-EPIC
installation library. TSIDPRT passes the dataset record to your program through
the transient data file. It uses XECBs or XPCCs to communicate between
programs.
2
Compile your subroutine and catalog it into the BIM-EPIC installation library as
TSIDLPRT.OBJ.
3
Link TSIDLPRT and catalog the phase into the BIM-EPIC installation library.
TSIDPRT uses standard linkage conventions. The following JCL can be used to
catalog the phase.
// JOB CATALOG TSIDLPRT
// OPTION CATAL
ACTION CLEAR
INCLUDE TSIDLPRT
/*
// EXEC LNKEDT
/*
/&
4
The TPRT transaction must be installed to print labels online. If TPRT is not
installed, install it now. See 2-75 for procedures.
5
If you did not start the TSIDPRT program from the PLT table, then start the TPRT
transaction from any available terminal. (This terminal is not released until CICS
is cycled or when the batch program TSIDPEN is executed in any available
partition).
Chapter. 6 Additional BIM-EPIC Utilities
6-47
Interfacing to Your Security Package (TSIDSEC)
User Exits
User Exits
BIM-EPIC can extend the capabilities of security packages and job schedulers. BIM-EPIC
provides skeleton user exits for these interfaces, as well as a VSE Label utility.
Interfacing to Your Security Package (TSIDSEC)
Description
At activation, BIM-EPIC looks for module TSIDSEC in the SVA. If this module is found,
BIM-EPIC transfers control to TSIDSEC before opening disk dataset extents or tape dataset
volumes.
BIM-EPIC passes a parameter list containing information about the dataset and function
requested. The parameter list fields are defined in the EIM macro, which can be used as a
DSECT.
You must insert code into the BIM-EPIC skeleton user exit TSIDSEC. Your code accesses
your security package and requests it to determine whether the function is approved. Then
your security package must either cancel the job or pass a return code indicating what BIMEPIC is to do with the function.
TSIDSEC is written in ASSEMBLER. BIM-EPIC branches to TSIDSEC with Register 15
pointing to the entry point. It returns through Register 14. The address of the parameter list is
passed in Register 1. Register 13 points to a 9-doubleword save area.
See the expansion of the EIM macro for more information on the use of registers, fields and
values, and return codes.
WARNING!
6-48
Coding this user exit incorrectly can make BIM-EPIC inoperable. Do not undertake this task
without adequate knowledge of BIM-EPIC and your security package.
BIM-EPIC Installation and System Guide
User Exits
Procedure
Interfacing to Your Security Package (TSIDSEC)
Update the TSIDSEC exit as follows:
Step
Action
1
Punch the module TSIDSEC.A from the BIM-EPIC installation library.
2
Beginning at the area stating “ PLACE ASSEMBLER CODE HERE FOR YOUR
OWN SECURITY EXIT," call your security program and process as necessary.
3
If the function is approved, place a X'00' return code in the EIMRC field and pass
control back to TSIDSEC.
If the function is not approved, your security program should cancel the job. If
you want BIM-EPIC to cancel the job, place a X'10' in the EIMRC field.
4
Assemble and catalog TSIDSEC into the BIM-EPIC installation library.
5
Add the following entry to your SDL load procedure:
TSIDSEC,SVA
Chapter. 6 Additional BIM-EPIC Utilities
6-49
Interfacing to Your Job Scheduling Package (TSIDPCS)
User Exits
Interfacing to Your Job Scheduling Package (TSIDPCS)
Description
At activation, BIM-EPIC looks for the TSIDPCS module in the SVA. If this module is found,
BIM-EPIC transfers control to TSIDPCS at close for tape and disk datasets and tape volumes.
BIM-EPIC passes a parameter list containing information about the dataset or volume serial
number processed. The parameter list fields are defined in the EIM macro, which can be used
as a DSECT.
You must insert code into the BIM-EPIC skeleton user exit (TSIDPCS). Your code interfaces
with your job scheduling package and processes as necessary.
TSIDPCS is written in Assembler. BIM-EPIC branches to TSIDPCS with Register 15. It
returns through Register 14. The address of the parameter list is passed in Register 1.
Register 13 points to a 9-doubleword save area.
See the expansion of the EIM macro for more information on the use of registers, fields and
values, and return codes.
WARNING!
Coding this user exit incorrectly can make BIM-EPIC inoperable. Do not undertake this task
without adequate knowledge of BIM-EPIC and your scheduler.
Procedure
Update the TSIDPCS exit as follows:
Step
Action
1
Punch the module TSIDPCS.A from the BIM-EPIC installation library.
2
Beginning at the area stating “ PLACE ASSEMBLER CODE HERE FOR YOUR
OWN JOB SCHEDULING EXIT," call your scheduler and process as necessary.
3
Assemble and catalog TSIDPCS into the BIM-EPIC installation library.
4
Add the following entry to your SDL load procedure:
TSIDPCS,SVA
6-50
BIM-EPIC Installation and System Guide
User Exits
Reading and Modifying a VSE Label
Reading and Modifying a VSE Label
Description
BIM-EPIC provides the TSIDUXI label exit to read and update a VSE label.
Using TSIDUXI, any field in a VSE label can be modified except the following:
•
•
•
The 13-byte system code field
File name (DTF name)
Any field in the LPL
The TSIDUXI.A module is distributed as a basis for coding your exit routine.
Processing
The Label Exit must reside in 24-bit SVA. At activation, BIM-EPIC looks for module
TSIDUXI in the SVA. Later, BIM-EPIC transfers control to it during open processing when a
VSE label is retrieved from the Label Area. Standard calling conventions are used when
BIM-EPIC passes control to TSIDUXI.
Registers
TSIDUXI uses the following registers:
Register
EPLI Macro and
Parameter List
Points to...
1
Parameter list addressed by the EPLI macro
13
Save area
14
Return address
15
Base address
All communication between BIM-EPIC and the TSIDUXI exit uses a parameter list passed in
Register 1. BIM-EPIC provides the EPLI macro to define this parameter list. The parameter
list contains:
•
•
•
The function code indicating the type of call
The address of a work area
The address of the parameter list applicable to each exit call
Chapter. 6 Additional BIM-EPIC Utilities
6-51
Reading and Modifying a VSE Label
Installation
Procedure
User Exits
To install the TSIDUXI user exit routine, do the following steps:
Step
Action
1
Modify the TSIDUXI exit as desired.
2
Catalog TSIDUXI into a library which is available when the SVA is loaded.
3
Add the following statement to your SET SDL procedure:
TSIDUXI,SVA
4
6-52
IPL
BIM-EPIC Installation and System Guide
Displaying Tapes Required By a Job (TSIDLST)
The TSIDLST Program
Displaying Tapes Required By a Job (TSIDLST)
The TSIDLST Program
Description
The TSIDLST program displays the volume serial numbers of tapes required for the running
of a specific application. The input to this program consists of user-specifiable control
statements. TSIDLST obtains the volume serial numbers from the DSN Catalog based on the
dataset names in the D statements (see below). The TSIDLST parameters are:
•
•
•
•
TITLE=report-title
STEP=step-name
D='dataset-name' [ ,V=version-number ]
NOTE=user-comment
All of these parameters can be combined on the same control statement if you wish.
Example
* $$ JOB JNM=JOHNM,CLASS=A,PRI=3
* $$ LST CLASS=A,DEST=(*,JOHNM)
// JOB JOHN
// EXEC TSIDLST
TITLE=THIS IS A TITLE STATEMENT - TEST OF TSIDLST
NOTE=THIS IS A TEST STATEMENT
D='JOHN.NAME.DISK',V=1
D='JOHN.NAME.DISK',V=1
D='JOHN.NAME.DISK1',V=1
D='JOHN.NAME.TAPE1',V=1
/*
/&
* $$ EOJ
Chapter. 6 Additional BIM-EPIC Utilities
6-53
Introduction
Updating VTOC Entries (TSIDVUT)
Updating VTOC Entries (TSIDVUT)
Introduction
Description
TSIDVUT allows you to view and update existing VTOC entries. It performs the following
functions:
Function
Action
DELETE
Deletes the VTOC entry.
PACKSCAN
Displays VTOC entries and allows you to perform any TSIDVUT
update function from the operator console.
PERM
Changes the dataset's expiration date to 2099/366. This retains the
dataset permanently and makes the dataset ineligible for deletion with
the TSIDVUT ALL function or from the operator console.
RENAME
Changes the name in the VTOC entry.
RENUM
Increments the extent sequence by 1 (one). This is necessary to place
uncontrolled datasets under BIM-EPIC control.
RENUMB
Decrements the extent sequence by 1 (one). This is necessary when
taking datasets out of BIM-EPIC control.
RETAIN
Changes the dataset's expiration date to 2099/365.
TSIDVUT does no DSN Catalog processing. If it is used to update the entry of a cataloged
dataset, the DSN Catalog and the VTOC will not agree and the results are unpredictable. Use
Online Manager or TSIDMNT to update datasets in the DSN Catalog.
WARNING!
Use TSIDVUT to update the entries of uncataloged datasets only.
JCL Requirements
// EXEC TSIDVUT
control statements
/*
6-54
BIM-EPIC Installation and System Guide
Updating VTOC Entries (TSIDVUT)
OPTION Values
Introduction
If // OPTION LOG is not set, all control statements submitted will be printed on SYSLST
along with corresponding messages indicating success or failure.
If // OPTION NOLOG is set, only messages indicating failure will be printed on SYSLST.
UPSI Values
None
Dataset
Requirements
None
Control Statements
TSIDVUT functions are specified on control statements. They can be entered as SYSIPT data
or from the console.
All parameters are positional and must be separated by commas. All dataset names must be
enclosed in apostrophes. Except for the PACKSCAN command, all control statements must
include the following items:
command [device-number],volser,'dataset-name'[,G=n]
Chapter. 6 Additional BIM-EPIC Utilities
6-55
PACKSCAN Command
Updating VTOC Entries (TSIDVUT)
PACKSCAN Command
Description
Use the PACKSCAN command to display and update VTOC entries from the operator
console. You can perform any TSIDVUT update function, plus ADD, an additional function
available only with the PACKSCAN command. ADD reactivates VTOC entries that have
been marked as “deleted". Only datasets with less than four extents per volume can be
reactivated.
When PACKSCAN is executed, TSIDVUT issues messages on the operator console and wait
for operator responses. PACKSCAN processing is described below. See Messages and
Codes for descriptions of the messages issued.
Syntax
PACKSCAN
EP766 Message
When you issue the PACKSCAN command, TSIDVUT issues message EP766. At this stage
you identify the type of search you want (dataset or volid), or request the ADD function, or
exit PACKSCAN.
Respond with any of the following:
•
•
•
•
•
EP767 Message
SEARCH='dsn' (to display the requested dataset)
SEARCH='dsn.ALL' (to display all versions of the requested dataset)
volid (to display all the datasets on the volume)
ADD (to add a new VTOC entry)
END (to exit PACKSCAN)
Both SEARCH='dsn' and SEARCH='dsn.ALL' cause message EP767 to be issued. Respond
with any of the following:
•
•
•
volid (to identify the disk volume to search)
NEWFILE (to request a new PACKSCAN function)
END (to exit PACKSCAN)
If you entered a volid, see below. If you entered "NEWFILE", message EP766 will be issued
(see above).
Volid
When you enter a volid, TSIDVUT displays the VTOC entries from that volume. If you
entered SEARCH='dsn' previously, TSIDVUT searches only for the dataset you requested. If
you entered SEARCH='dsn.ALL' previously, TSIDVUT searches for all matching datasets.
If there is no match for your dataset name or there are no VTOC entries on this volume,
TSIDVUT issues EP767. See above for responses.
6-56
BIM-EPIC Installation and System Guide
Updating VTOC Entries (TSIDVUT)
PACKSCAN Command
If there is a VTOC entry or a matching VTOC entry, TSIDVUT issues messages EP771 and
EP772.
To change the VTOC entry, respond with any of the following:
•
•
•
•
•
DELETE
RENAME
RENUM
RENUMB
PERM
These commands perform the same function in PACKSCAN as they do when specified on a
TSIDVUT control statement. Please see the section that describes each individual command
for more information on its use.
If you don't want to change the entry, you can respond with any of the following:
•
•
•
[ENTER] to skip to the next match
NEWFILE to request a new PACKSCAN function
END to exit PACKSCAN
When all the matches or VTOC entries have been displayed, TSIDVUT issues message
EP792. See above for responses.
ADD
When you request the ADD function, TSIDVUT issues message EP767. You can respond
with any of the following:
•
•
•
volid (to identify the disk volume you want to add the entry to)
NEWFILE (to request a new PACKSCAN function)
END (to exit PACKSCAN)
If you enter a volume, TSIDVUT issues several messages requesting information about the
VTOC entry you want to create, beginning with message EP783. Enter the name of the
dataset.
Next TSIDVUT issues message EP784. Enter the volume sequence number (from 1 to 9) for
the volume.
If this is an FBA volume, TSIDVUT issues message EP790. Enter the number of blocks per
control interval.
Next TSIDVUT issues message EP785. Enter the three digit extent sequence number (from
000 to 255). If the dataset is controlled, the first extent sequence number is 001.
If this is an FBA volume, TSIDVUT issues message EP786. If not, TSIVUT issues message
EP791. In both cases, enter the starting and ending addresses of the extent.
Next TSIDVUT re-issues message EP785. If there is another extent, enter the extent sequence
number. If you have entered all the extents for this volume, enter PUTV.
When you enter PUTV, TSIDVUT creates the VTOC entry and issues message EP766. See
"PACKSCAN" (above) for responses.
Chapter. 6 Additional BIM-EPIC Utilities
6-57
DELETE Command
Updating VTOC Entries (TSIDVUT)
DELETE Command
Description
Use the DELETE command to remove an entry from the VTOC. This can be necessary when
a DSN Catalog controlled dataset version has been removed from the DSN Catalog but
remains in the VTOC. Because BIM-EPIC uses an expiration date of 2099/365 on all disk
versions created under its control, when the VTOC and the DSN Catalog do not agree for a
catalog controlled disk dataset, disk versions must be manually removed from the VTOC
using the DELETE command.
You can also use the DELETE command to remove a BIM-EPIC start-track-1 or non-BIMEPIC disk version which is no longer needed, regardless of it expiration date.
Syntax
DELETE
Parameters
,volid
,poolid
SYSnnn [ ,volid
X'cuu',volid
Parameter
,'dataset-name'
],'string.ALL'
Required?
[ ,G=n ]
Valid
Default
Specify only one of the following four (required):
volid
1 to 6 characters
None
poolid
1 to 6 characters
None
SYSnnn
000 to 254
None
X'cuu'
Any valid device address
None
Specify only one of the following two (required):
dataset-name
G=n
string.ALL
No
1 to 44 characters
None
1 to 999999
None
1 to 40 characters for the
string.
None
volid specifies the disk volume by volume serial number.
poolid specifies a disk pool. When specified, volumes defined as part of the poolid but in
quiesced or offline status will not be accessed nor will files residing outside the limits of the
poolid. If poolid is specified, do not specify either SYSnnn or X'cuu'.
SYSnnn specifies the disk volume by logical unit number. If this operand is used, the logical
unit number must already be assigned to the device. You can specify a volume in addition to
the SYSnnn parameter. If both are specified, TSIDVUT processes the command only if the
volume and logical unit number refer to the same volume.
6-58
BIM-EPIC Installation and System Guide
Updating VTOC Entries (TSIDVUT)
DELETE Command
X'cuu' specifies the disk volume by physical device address. You must also specify the
volume.
‘dataset-name’ specifies a single dataset by its full name (CPU and partition independence
characters may be specified in the dataset name).
G=n specifies the generation number of the dataset to be processed. Use the G=n parameter
in conjunction with the ‘dataset-name’ parameter when processing generation datasets.
'string.ALL' specifies all datasets beginning with string (CPU and partition independence
characters may be specified in string). From 1 to 40 characters may be specified for string.
Datasets with a permanent expiration date of 2099/366 will not be deleted when using the
string.ALL parameter.
Chapter. 6 Additional BIM-EPIC Utilities
6-59
PERM Command
Updating VTOC Entries (TSIDVUT)
PERM Command
Description
Use the PERM command to give a permanent retention (expiration date of 2099/366) to a
VTOC entry not controlled by the BIM-EPIC catalog. If the DSPLY response is given to
message EP038 INSUFFICIENT SPACE IN POOL, VTOC entries with permanent retention
will be listed by message EP043 but will not be available for deletion. The PERM command
should not be used for datasets identified in the BIM-EPIC catalog – use the BIM-EPIC
Online Manager or the TSIDMNT Catalog Management Utility to change retention for
datasets identified in the BIM-EPIC catalog.
,volid
,poolid
SYSnnn [ ,volid
X'cuu',volid
Syntax
PERM
Parameters
Parameter
,'dataset-name'
],'string.ALL'
Required?
[ ,G=n ]
Valid
Default
Specify only one of the following four (required):
volid
1 to 6 characters
None
poolid
1 to 6 characters
None
SYSnnn
000 to 254
None
X'cuu'
Any valid device address
None
Specify only one of the following two (required):
dataset-name
G=n
string.ALL
No
1 to 44 characters
None
1 to 999999
None
1 to 40 characters for the
string.
None
volid specifies the disk volume by volume serial number.
poolid specifies a disk pool. When specified, volumes defined as part of the poolid but in
quiesced or offline status will not be accessed nor will files residing outside the limits of the
poolid. If poolid is specified, do not specify either SYSnnn or X'cuu'.
SYSnnn specifies the disk volume by logical unit number. If this operand is used, the logical
unit number must already be assigned to the device. You can specify a volume in addition to
the SYSnnn parameter. If both are specified, TSIDVUT processes the command only if the
volume and logical unit number refer to the same volume.
X'cuu' specifies the disk volume by physical device address. You must also specify the
volume.
6-60
BIM-EPIC Installation and System Guide
Updating VTOC Entries (TSIDVUT)
PERM Command
‘dataset-name’ specifies a single dataset by its full name (CPU and partition independence
characters may be specified in the dataset name).
G=n specifies the generation number of the dataset to be processed. Use the G=n parameter
in conjunction with the ‘dataset-name’ parameter when processing generation datasets.
'string.ALL' specifies all datasets beginning with string (CPU and partition independence
characters may be specified in string). From 1 to 40 characters may be specified for string.
Datasets with a permanent expiration date of 2099/366 will not be deleted when using the
string.ALL parameter.
Chapter. 6 Additional BIM-EPIC Utilities
6-61
RENAME Command
Updating VTOC Entries (TSIDVUT)
RENAME Command
Description
Use RENAME to change the name in a dataset's VTOC entry.
WARNING!
You must be sure that the new name shown is not the same as the name of an existing dataset
on any volume within a poolid. The RENAME command checks for duplicate dataset names
only within a single volume and NOT across multiple volumes. Therefore, when using the
RENAME command specifying a poolid which contains space on more than one volume for a
dataset that has extents on more than one of those volumes, the rename will be successful on
each volume until a duplicate dataset name is found, at which point the rename command will
terminate with message EP793 RENAME FUNCTION INVALID. Such an occurrence could
result in only some extents of a dataset renamed and others not renamed.
Syntax
RENAME
Parameters
,volid
,poolid
SYSnnn [ ,volid
X'cuu',volid
Parameter
]
Required?
,'old-name','new-name'
Valid
Default
Specify only one of the following four (required):
volid
1 to 6 characters
None
poolid
1 to 6 characters
None
nnn
000 to 254
None
cuu
Any valid device address
None
old-name
Yes
1 to 44 characters
None
new-name
Yes
1 to 44 characters
None
volid specifies the disk volume by volume serial number.
poolid specifies a disk pool. When specified, volumes defined as part of the poolid but in
quiesced or offline status will not be accessed nor will files residing outside the limits of the
poolid. If poolid is specified, do not specify either SYSnnn or X'cuu'.
SYSnnn specifies the disk volume by logical unit number. If this operand is used, the logical
unit number must already be assigned to the device. You can specify a volume in addition to
the SYSnnn parameter. If both are specified, TSIDVUT processes the command only if the
volume and logical unit number refer to the same volume.
6-62
BIM-EPIC Installation and System Guide
Updating VTOC Entries (TSIDVUT)
RENAME Command
X'cuu' specifies the disk volume by physical device address. You must also specify the
volume.
‘old-name’ specifies the existing dataset name as currently shown in the VTOC. (CPU and
partition independence characters may be specified in old-name).
‘new-name’ specifies the new dataset name desired after the RENAME command has
completed. (CPU and partition independence characters may be specified in new-name).
Chapter. 6 Additional BIM-EPIC Utilities
6-63
RENUM Command
Updating VTOC Entries (TSIDVUT)
RENUM Command
Description
Use RENUM when you place existing, uncontrolled disk datasets under BIM-EPIC control.
BIM-EPIC disk extents start at one (1), so BIM-EPIC does not control datasets with extent
sequences beginning at zero (0). RENUM increments such disk extent sequences so that they
begin at one (1). RENUM is a conversion tool for new BIM-EPIC users.
Syntax
RENUM
Parameters
,volid
,poolid
SYSnnn [ ,volid
X'cuu',volid
Parameter
,'dataset-name'
],'string.ALL'
Required?
[ ,G=n ]
Valid
Default
Specify only one of the following four (required):
volid
1 to 6 characters
None
poolid
1 to 6 characters
None
SYSnnn
000 to 254
None
X'cuu'
Any valid device address
None
Specify only one of the following two (required):
dataset-name
G=n
string.ALL
No
1 to 44 characters
None
1 to 999999
None
1 to 40 characters for the
string.
None
volid specifies the disk volume by volume serial number.
poolid specifies a disk pool. When specified, volumes defined as part of the poolid but in
quiesced or offline status will not be accessed nor will files residing outside the limits of the
poolid. If poolid is specified, do not specify either SYSnnn or X'cuu'.
SYSnnn specifies the disk volume by logical unit number. If this operand is used, the logical
unit number must already be assigned to the device. You can specify a volume in addition to
the SYSnnn parameter. If both are specified, TSIDVUT processes the command only if the
volume and logical unit number refer to the same volume.
X'cuu' specifies the disk volume by physical device address. You must also specify the
volume.
‘dataset-name’ specifies a single dataset by its full name (CPU and partition independence
characters may be specified in the dataset name).
6-64
BIM-EPIC Installation and System Guide
Updating VTOC Entries (TSIDVUT)
RENUM Command
G=n specifies the generation number of the dataset to be processed. Use the G=n parameter
in conjunction with the ‘dataset-name’ parameter when processing generation datasets.
'string.ALL' specifies all datasets beginning with string (CPU and partition independence
characters may be specified in string). From 1 to 40 characters may be specified for string.
Datasets with a permanent expiration date of 2099/366 will not be deleted when using the
string.ALL parameter.
Chapter. 6 Additional BIM-EPIC Utilities
6-65
RENUMB Command
Updating VTOC Entries (TSIDVUT)
RENUMB Command
Description
Use RENUMB to remove controlled disk datasets from BIM-EPIC control. RENUMB
decrements disk extent sequences that begin at one (1) so that they begin at zero (0).
Syntax
RENUMB
Parameters
,volid
,poolid
SYSnnn [ ,volid
X'cuu',volid
Parameter
,'dataset-name'
],'string.ALL'
Required?
[ ,G=n ]
Valid
Default
Specify only one of the following four (required):
volid
1 to 6 characters
None
poolid
1 to 6 characters
None
SYSnnn
000 to 254
None
X'cuu'
Any valid device address
None
Specify only one of the following two (required):
dataset-name
G=n
string.ALL
No
1 to 44 characters
None
1 to 999999
None
1 to 40 characters for the
string.
None
volid specifies the disk volume by volume serial number.
poolid specifies a disk pool. When specified, volumes defined as part of the poolid but in
quiesced or offline status will not be accessed nor will files residing outside the limits of the
poolid. If poolid is specified, do not specify either SYSnnn or X'cuu'.
SYSnnn specifies the disk volume by logical unit number. If this operand is used, the logical
unit number must already be assigned to the device. You can specify a volume in addition to
the SYSnnn parameter. If both are specified, TSIDVUT processes the command only if the
volume and logical unit number refer to the same volume.
X'cuu' specifies the disk volume by physical device address. You must also specify the
volume.
‘dataset-name’ specifies a single dataset by its full name (CPU and partition independence
characters may be specified in the dataset name).
G=n specifies the generation number of the dataset to be processed. Use the G=n parameter
in conjunction with the ‘dataset-name’ parameter when processing generation datasets.
6-66
BIM-EPIC Installation and System Guide
Updating VTOC Entries (TSIDVUT)
RENUMB Command
'string.ALL' specifies all datasets beginning with string (CPU and partition independence
characters may be specified in string). From 1 to 40 characters may be specified for string.
Datasets with a permanent expiration date of 2099/366 will not be deleted when using the
string.ALL parameter.
Chapter. 6 Additional BIM-EPIC Utilities
6-67
RETAIN Command
Updating VTOC Entries (TSIDVUT)
RETAIN Command
Description
Use the RETAIN command to change a dataset’s VTOC expiration date to 2099/365.
Syntax
RETAIN
Parameters
,volid
,poolid
SYSnnn [ ,volid
X'cuu',volid
Parameter
,'dataset-name'
],'string.ALL'
Required?
[ ,G=n ]
Valid
Default
Specify only one of the following four (required):
volid
1 to 6 characters
None
poolid
1 to 6 characters
None
SYSnnn
000 to 254
None
X'cuu'
Any valid device address
None
Specify only one of the following two (required):
dataset-name
G=n
string.ALL
No
1 to 44 characters
None
1 to 999999
None
1 to 40 characters for the
string.
None
volid specifies the disk volume by volume serial number.
poolid specifies a disk pool. When specified, volumes defined as part of the poolid but in
quiesced or offline status will not be accessed nor will files residing outside the limits of the
poolid. If poolid is specified, do not specify either SYSnnn or X'cuu'.
SYSnnn specifies the disk volume by logical unit number. If this operand is used, the logical
unit number must already be assigned to the device. You can specify a volume in addition to
the SYSnnn parameter. If both are specified, TSIDVUT processes the command only if the
volume and logical unit number refer to the same volume.
X'cuu' specifies the disk volume by physical device address. You must also specify the
volume.
‘dataset-name’ specifies a single dataset by its full name (CPU and partition independence
characters may be specified in the dataset name).
G=n specifies the generation number of the dataset to be processed. Use the G=n parameter
in conjunction with the ‘dataset-name’ parameter when processing generation datasets.
6-68
BIM-EPIC Installation and System Guide
Updating VTOC Entries (TSIDVUT)
RETAIN Command
'string.ALL' specifies all datasets beginning with string (CPU and partition independence
characters may be specified in string). From 1 to 40 characters may be specified for string.
Datasets with a permanent expiration date of 2099/366 will not be deleted when using the
string.ALL parameter.
Chapter. 6 Additional BIM-EPIC Utilities
6-69
The TSIDCMRG Program
Combining Multiple DSN Catalogs into a Single DSN Catalog (TSIDCMRG)
Combining Multiple DSN Catalogs into a Single DSN
Catalog (TSIDCMRG)
The TSIDCMRG Program
Description
The TSIDCMRG program enables you to merge multiple DSN Catalog backup dataset
versions (each created by the TSIDUTL program BACKUP function) into one DSN Catalog
backup dataset version to be used as input to the TSIDUTL program RESTORE function.
This procedure is typically desired when two or more VSE systems each using a separate
BIM-EPIC DSN Catalog are combined into a single BIM-EPIC DSN Catalog and shared
among those VSE systems. This procedure is also typically desired when two or more VSE
systems each with its own BIM-EPIC DSN Catalog are consolidated into a single VSE system.
JCL Requirements
// TLBL INPUT
// TLBL OUTPUT,'NEW.BACKUP'
// EXEC TSIDCMRG,SIZE=TSIDCMRG
(SIZE=TSIDCMRG is suggested to maximize partition GETVIS.)
UPSI Values
None.
Dataset
Requirements
INPUT identifies the TSIDUTL program BACKUP function datasets. Notice that no 'file-id'
has been specified for the INPUT filename. This technique is shown under the assumption
that at least one of the TSIDUTL program BACKUP function tapes is not in the BIM-EPIC
Catalog on the VSE system where the TSIDCMRG program will be executing and not all
these tapes will reflect the same 'file-id'. With this technique, the message EP011
(UNASSIGNED INPUT . . . SYS004) will be issued as each INPUT tape is opened bypassing
BIM-EPIC control for all of these volumes. (See Typical SYSLOG Activity below which
reflects this technique).
OUTPUT identifies the tape dataset to accept the merged catalog data.
Usage Notes
6-70
1.
Any number of TSIDUTL program BACKUP function input dataset versions may be
processed.
2.
Each TSIDUTL program BACKUP function input dataset version is processed
individually.
3.
The TSIDUTL program BACKUP function input dataset versions may be processed in
any order.
BIM-EPIC Installation and System Guide
Combining Multiple DSN Catalogs into a Single DSN Catalog (TSIDCMRG)
4.
Conditions
Causing
Incompatibilities
The TSIDCMRG Program
Message EP800 will be issued after each TSIDUTL program BACKUP function input
dataset version has been read to control the number of TSIDUTL program BACKUP
function input dataset versions to be processed.
Each BIM-EPIC DSN Catalog dataset name must be unique. Therefore, if a dataset name is
encountered that duplicates a dataset name previously read, the duplicate dataset name and all
the versions (including tape volume serial numbers) associated with that duplicate dataset
name will be discarded. Each occurrence of a duplicate dataset name will be included on a
SYSLST output report.
Each tape volume serial number found in the BIM-EPIC DSN Catalog must also be unique,
regardless of which dataset name owns that volume serial number. Therefore, if a duplicate
tape volume serial number is encountered that duplicates a tape volume serial number
previously read, that tape volume serial number will be discarded. Each occurrence of a
duplicate tape volume serial number will be included on a SYSLST output report.
Up to three dataset names may be automatically defined in a BIM-EPIC Catalog that can
cause these incompatibilities:
•
*EPIC.EVENT.DSN* is automatically defined when the BIM-EPIC job scheduling
system is utilized. An entry under this dataset name is created when an event is posted
and that entry is removed when the event is deleted. To avoid this incompatibility, assure
there are no outstanding events (which appear as versions under this dataset name) prior
to creating the TSIDUTL program BACKUP function dataset,. When the TSIDCMRG
program processes the second (and subsequent, if any) occurrence of this dataset name, it
will discard each duplicate and no harm will be done.
•
** DSN DELETED ** is automatically defined when a dataset name containing tape
versions is deleted (not purged) from the BIM-EPIC Catalog. The delete function
removes a dataset from the BIM-EPIC Catalog and all tapes associated with that dataset
name become scratch tapes. Since the design of BIM-EPIC requires that every tape be
associated with a dataset name, these scratch tapes become associated with the ** DSN
DELETED ** dataset name. To avoid this incompatibility, rename the ** DSN
DELETED ** dataset to a different dataset name that will be unique among all the BIMEPIC Catalogs to be merged prior to creating the TSIDUTL program BACKUP function
dataset. Once the TSIDCMRG process has been completed and the merged catalog
backup has been restored, delete each of these renamed datasets.
•
***.VOLUME.DSN.** is automatically defined when the TSIDINIT program is run to
initialize new tape volumes. As each tape volume is successfully initialized, that tape
volume becomes a scratch tape associated with the ***.VOLUME.DSN.** dataset name.
To avoid this incompatibility, rename the ***.VOLUME.DSN.** dataset to a different
dataset name that will be unique among all the BIM-EPIC Catalogs to be merged prior to
creating the TSIDUTL program BACKUP function dataset,. Once the TSIDCMRG
process has been completed and the merged catalog backup has been restored, delete each
of these renamed datasets.
User defined datasets with names that are duplicated among the BIM-EPIC Catalogs and are
names not involved with a multi-dataset group can be renamed to a different dataset name that
will be unique among all BIM-EPIC Catalogs to be merged prior to creating the TSIDUTL
program BACKUP function dataset. Once the TSIDCMRG function has been completed and
Chapter. 6 Additional BIM-EPIC Utilities
6-71
The TSIDCMRG Program
Combining Multiple DSN Catalogs into a Single DSN Catalog (TSIDCMRG)
the merged catalog backup has been restored, transfer the versions under the renamed dataset
name into the desired dataset name. When all the verisons have been transferred out of the
renamed dataset name, delete the renamed dataset name.
User defined datasets with names that are duplicated among the BIM-EPIC Catalogs and are
names involved with a multi-dataset group must be carefully reviewed. The best technique
for these situations would be to purge all the datasets involved in such a multi-dataset group
from all but one of the BIM-EPIC catalogs and, once the TSIDCMRG function has been
completed and the merged catalog backup has been restored, add each purged version.
Typical SYSLOG
Activity
The following is a typical example of SYSLOG activity when running the TSIDCMRG
program using the JCL as outlined above:
F4 0004 // JOB TSIDCMRG MERGE TWO CATALOGS INTO ONE
DATE mm/dd/yyyy, CLOCK hh/mm/ss
F4-0004 EP011 UNASSIGNED INPUT
INPUT
SYS004
4 580
F4-0004 EP800 IS THERE ANOTHER CATALOG BACKUP TAPE (Y|N)?
4 y
F4-0004 EP011 UNASSIGNED INPUT
INPUT
SYS004
4 580
F4-0004 EP800 IS THERE ANOTHER CATALOG BACKUP TAPE (Y|N)?
4 n
F4 0004 EP801 NO ERRORS DETECTED
F4 0004 EOJ TSIDCMRG MAX.RETURN CODE=0000
DATE mm/dd/yyyy, CLOCK hh/mm/ss, DURATION hh/mm/ss
6-72
BIM-EPIC Installation and System Guide
Master Index
BOOK CODES:
(IS)
Installation and System Guide
(UR) User Reference
A
- - - suffix (UR) 1-14, 1-31
- - suffix (UR) 1-14, 1-31
$
$$$ datasets (UR) 7-31
$$BFCMUL (IS) 2-5
$DEFPROF user profile (UR) 2-12
$DEFSEC security profile (UR) 2-7, 2-8
$EPIC security profile (UR) 2-7, 2-8
$EPIC user profile (UR) 2-12
$JOBEXIT user exit (IS) 2-65
$SELECT file (IS) 3-15, 3-23
&
&&dsname (UR) 6-23
&dsname (UR) 6-23
&n parameter (UR) 9-12
*
** DSN DELETED ** (UR) 1-35, 2-29, 2-46, 3-22
**** AUTO CATALOGUE **** (UR) 1-19
***.VOLUME.DSN.** (UR) 2-40, 12-9
*EPIC.EVENT.DSN* (UR) 10-2
=
=== datasets (UR) 7-30
0
000000 volser (UR) 2-40
A option (UR) 5-10
Abend processing
DD statements (UR) 6-17
Abend-AID
start before BIM-EPIC (IS) 2-8
Absolute generation
accessing with DLBL option G (UR) 5-10
DD statements (UR) 6-22
Absolute track specification (UR) 6-30
ABSTR parameter (UR) 6-30
ACCEPT configuration option (IS) 5-8
Accepted Tapes Report (UR) 11-6, A-8, A-10
Accessing
absolute generation (UR) 5-10
detail records (UR) 4-11
disk volume (UR) 3-32
DSN Catalog (UR) 4-5
master records (UR) 4-11
Online Manager security (UR) 2-8
relative version (UR) 5-12
sequential and random (UR) 4-5
TOJA (UR) 11-15
VSE label area (UR) 8-21
Accounting statistics (UR) A-3
ACL support
ejecting after MOVE (UR) 3-30
ERD (IS) 2-25
no revolving tapes (UR) 1-12
overriding TSIDSMNT (IS) 2-29
scratching tapes (UR) 3-22
selecting tapes (UR) 2-41
space requirements (IS) 2-7
synchronizing scratch pools (IS) 6-7
ACL support (UR) 2-40
ACLAUTI configuration option (IS) 5-8
M-1
Master Index
ACLEJECT command (IS) 6-5
ACLIBM configuration option (IS) 5-8
ACLLeveling (IS) 5-59
ACLLIB configuration option (IS) 5-8
ACLLVLOO configuration option (IS) 5-9
ACLMEM configuration option (IS) 5-9
ACLOFFL control statement (IS) 2-27
ACLONL control statement (IS) 2-28
ACLOPT configuration option (IS) 5-9
ACLRECS configuration option (IS) 5-9
ACLSRVRI configuration option (IS) 5-10
ACLSRVRM configuration option (IS) 5-10
ACLSRVRO configuration option (IS) 5-10
ACLSRVRS configuration option (IS) 5-10
ACLSTK configuration option (IS) 5-10
ACLTIME configuration option (IS) 5-10
Activating
BIM-EPIC (IS) 5-2
IBM ACL support (IS) 5-60
Memorex ATL support (IS) 5-63
QDAS (IS) 5-52
Recorder (IS) 5-45
STK ACL support (IS) 5-68
Active records, number of (UR) 3-11
Active version (UR) 1-16
Activity Log Report
cross-reference (UR) A-8
TSIDARP (UR) 11-3
Activity Log Report (UR) A-6
Add a Tape Version panel (UR) 2-34
ADD command (UR) 1-30, 2-5, 2-34, 2-40, 3-8
ADD control statement (IS) 2-29
Adding
dummy tape device (IS) 2-61
EDDs (UR) 2-23
versions (UR) 2-34
ADDRESS EPIC
decoding output from (UR) 4-12
ADDRESS EPIC (UR) 4-11
After-hours support xii, xiii
AGP See Automatic generation purge
AGP configuration option (UR) 1-26
ALERT (IS) 2-9, 5-34
Align on cylinder boundary (UR) 6-30
ALLMALL configuration option
overriding with DLBL option M (UR) 5-11
overriding with OPTION (UR) 6-27
ALLMALL configuration option (IS) 5-10
ALLMSG configuration option
overriding with DLBL option M (UR) 5-11
overriding with OPTION (UR) 6-27
ALLMSG configuration option (IS) 5-11
M-2
(IS) = Installation & System Guide
ALLMSGS subparameter (UR) 6-27
Allocating
LUBs (UR) 1-28
Allocation Also see ALR and Disk allocation
by logical records (UR) 1-14
leveling (IS) 2-43
LUBS-inhibiting (IS) 2-48
on shared volumes (IS) 2-52
Allocation messages
DD statements (UR) 6-26
DLBL option M (UR) 5-11
Allocation size
by cylinders (UR) 6-30
by logical records (UR) 6-30
by tracks (UR) 6-30
DD statements (UR) 6-27
SPACE parameter (UR) 6-30
Alpha options on TLBLs (UR) 5-3
ALR
DLBL option R (UR) 5-11
ALTMSGS configuration option (IS) 5-11
ALX parameter (UR) 6-30
AMORG DD parameter (UR) 6-12
AMP parameter (UR) 6-7
AND condition (UR) 9-9
APAR information
commenting out (IS) 3-25
APURG (IS) 6-15
AR facility (UR) 12-5
ASI procedure
adding dummy devices (IS) 2-61
modifying for BIM-EPIC (IS) 2-57
partition size requirements (IS) 2-63
size card (IS) 2-63
updating SVA size (IS) 2-63
ASSGN statements
IGNORE (UR) 7-60
required with DLBL option I (UR) 5-11
TSIDASS (UR) 8-2
uncontrolled datasets (UR) 7-7
when required (UR) 7-7
ASSGN statements (UR) 7-7
Assigning
default pools (UR) 1-14
SYS number (UR) 1-28
Assigning vaulting method (UR) A-22
Assignments
holding (UR) 6-24
releasing (UR) 6-24
Assignments (UR) 12-4
ATL See Memorex ATL support
ATTACH (UR) 12-4
(UR) = User Reference
Attention Routine
BIM-EPIC Dispatcher (IS) 5-53
Attention Routine commands (UR) 12-5
AUTOATT configuration option (IS) 3-2, 5-11
AUTOATT configuration option (UR) 1-29
Autoattach
AUTOATT (IS) 2-94, 5-11
configuration options (IS) 3-2
for VM/ESA 370 (IS) 3-41
for VM/ESA Version 1 Release 1.1 (IS) 3-27
for VM/ESA Version 1 Release 2 (IS) 3-20
for VM/ESA Version 2 Release 2 (IS) 3-10
for VM/HPO (IS) 3-41
for VM/SP (IS) 3-41
for VM/XA (IS) 3-35
installation (IS) 3-1
overview (IS) 3-2
via Dynamic Command Definition (IS) 3-4
Autoattach (UR) 1-29, 12-4
AUTOCAT configuration option (IS) 5-11
AUTOCAT configuration option (UR) 1-4, 1-19
Autodetach restrictions (UR) 1-30
AUTOLOG configuration option (IS) 5-12
AUTOLOG configuration option (UR) 1-19
Automated Cartridge Library
IBM requirements (IS) 2-5
Memorex requirements (IS) 2-5
STK requirements (IS) 2-6
Automated Cartridge Library (ACL)
ACLLeveling (IS) 5-59
activating and deactivating (IS) 5-63, 5-68
configuration options (IS) 5-8
Definition Requirements (IS) 5-54
IBM ACL (IS) 5-60
Memorex ATL support (IS) 5-63
OPTI-TAPE ACL support (IS) 5-73
STK ACL support (IS) 5-68
vaulting (UR) 12-17
Vendors Supported (IS) 5-54
Automatic Cartridge Library See ACL support
Automatic cataloging
AUTOCAT (UR) 1-19
AUTOLOG (UR) 1-19
DD statements (UR) 6-17, 6-25
generation datasets (UR) 6-17, 6-22
SYSPARM (UR) 1-20
work datasets (UR) 6-17
Automatic cataloging (UR) 2-40
Automatic generation purge (UR) 1-26
Automatic volume recognition (UR) 1-29
Automatic Volume Recognition (UR) 12-4
AUTOSTP configuration option (IS) 5-12
Master Index
AUTOSTP configuration option (UR) 1-29
AUTSTPN configuration option (IS) 5-12
AUTSTPNO configuration option (IS) 5-12
AUTSTPT configuration option (IS) 5-12
AUTSTPTO configuration option (IS) 5-13
AUX control file (IS) 3-37
Available drives (UR) 12-4
Available tapes (UR) 12-4
AVAULTS (IS) 6-39
AVAULTS parameter (UR) 12-22
AVR See Automatic volume recognition
AVR (UR) 1-29
B
B option (UR) 5-10
Backed-up datasets
listing (UR) A-20
BACKUP
IDCAMS (UR) 7-43
LIBR (UR) 7-46
BACKUP command (IS) 6-6
BACKUP control statement
RFBKUP (IS) 5-46
synchronizing DSN Catalog and Recorder (IS) 5-46
BACKUP control statement (IS) 5-46
Backup/Offload (UR) 1-31
BACKUP/RESTORE (IS) 2-11
Batch catalog management (UR) 1-7
BCAT control statement (IS) 2-23, 6-21
BDSPLY command (IS) 6-7
BIM-BIM-EPIC
documentation xiii, xiv
BIM-EPIC
activating (UR) 1-34
configuration defaults (IS) 2-94
configuration options (UR) 1-2
configuring (IS) 5-2
dataset control (UR) 1-5
DD statements (UR) 6-1
deactivating (IS) 5-44
deactivating/reactivating (IS) 6-26
Dispatcher (IS) 5-53
DLBL enhancements (UR) 5-8
execution status (UR) 1-34
first-time installation (IS) 2-4
JCL enhancements (UR) 1-39
job cancellation (UR) 1-38
messages See Messages
request handling (IS) 5-53
restricting control (UR) 1-5
special options (IS) 5-31
M-3
Master Index
special options (UR) 1-22
starting (IS) 5-2
system files (IS) 2-12
TLBL enhancements (UR) 5-2
upgrading from previous release (IS) 2-3
using JCL (UR) 1-36
utility programs (UR) 8-1
vaulting (IS) 6-38
BIM-EPIC dataset definitions
allocation by logical records (UR) 1-14
automatic purge (UR) 1-26
block size (UR) 1-10
CISIZE (UR) 1-14
comment (UR) 1-9
creating (UR) 2-23
cycles retention (UR) 1-11
dataset name (UR) 1-9
days after last access (UR) 1-11
deleting (UR) 2-29, 2-39, 3-22
disk pool name (UR) 1-14
display format (UR) 2-13
displaying (UR) 2-19, 2-22
encryption password (UR) 1-9
generation dataset (UR) 1-10
locking (UR) 2-26
managing (UR) 2-21
modifying (UR) 3-43
number of secondary allocations (UR) 1-14
owner ID (UR) 1-12
password (UR) 1-9
primary extend size (UR) 1-14
prime dataset name (UR) 1-12
releasing (UR) 2-27
removing (UR) 3-33
retention (UR) 2-49
retention days (UR) 1-10
revolving tapes (UR) 1-12
secondary extent size (UR) 1-14
standard label (UR) 1-12
SYS number (UR) 1-10
System ID (UR) 1-9
tape density (UR) 1-12
tape pool ID (UR) 1-12
tape size (UR) 1-13
TSIDUTL report (UR) A-26
unlocking (UR) 2-28
updating (UR) 2-25
User ID (UR) 1-9
vault method number (UR) 1-13
BIM-EPIC Dataset Definitions
managing (UR) 2-18
BIM-EPIC dataset definitions (UR) A-17
M-4
(IS) = Installation & System Guide
BIM-EPIC Resource Dataset (IS) 2-25
BIM-FAQS/ASO
accessing Online Manager (UR) 2-3
installation (IS) 2-70
Online Manager security (UR) 2-7
BIM-FAQS/PCS (IS) 2-9
BIM-GSS
quick installation (IS) 2-2
BIM-GSS (UR) 4-11
Block size
BLKSIZE DD parameter (UR) 6-14
MAX (UR) 6-13
mutually exclusive with CISIZE (UR) 1-10
OPT (UR) 6-13
Block size (UR) 1-10
BUFSP DD parameter (UR) 6-12
Bypass datasets DD statements (UR) 6-41
BYPEXT configuration option (IS) 5-13
BYPWRKO parameter (IS) 6-42
C
C option (UR) 5-10
Caching (IS) 2-17
CA-DRIVER
start before BIM-EPIC (IS) 2-8
CA-DYNAM conversions See BIM-EPIC Conversion
Guide
CA-DYNAM conversions (IS) 5-32
CA-Easytrieve (IS) 2-9
CA-EPIC for CMS
catalog management requirements (UR) 3-5
sharing BIM-EPIC catalog (UR) 3-23, 3-27
sharing DSN Catalog on VSE (UR) 2-2
CA-LIBRARIAN (IS) 2-9
Called subroutines (UR) 10-9
Cancel codes See Job management control language
CANMSG configuration option (IS) 5-13
CAPACITY command (UR) 2-5, 3-11
CA-PANVALET (IS) 2-9
Card input (UR) 7-56
Cartridge tapes (UR) 1-30
CA-SORT (IS) 2-9, 2-11
CA-SORT (UR) 7-37
CA-Super-EPAT (IS) 5-34
CAT control statement (IS) 6-21
CAT subparameter (UR) 6-27
CATALOG
TSIDOFD (UR) 13-20
CATALOG command
REV (UR) 12-3
VLT parameter (UR) 12-19
(UR) = User Reference
CATALOG command (UR) 2-24, 2-47, 3-12
Catalog maintenance
SCRATCH (UR) 2-46
Catalog management
ADD (UR) 2-34, 2-40, 3-8
CAPACITY (UR) 3-11
CATALOG (UR) 3-12
CATALOG (UR) 2-24, 2-47
CLEAN (UR) 3-18
CLEAN (UR) 2-45
CLOSE (UR) 3-19
CLOSE (UR) 2-38
CYCLE (UR) 2-51, 3-20
DELETE (UR) 3-22
DELETE (UR) 2-29, 2-39
DEQ (UR) 3-23
DISPLAY (UR) 3-24
DISPLAY (UR) 2-21
ENQ (UR) 3-27
functions (UR) 3-3
LOCK (UR) 3-28
LOCK (UR) 2-26, 2-35
MCATALOG (UR) 3-29
MOVE (UR) 3-30
MOVE (UR) 12-22
online See Online Manager
PASSWORD (UR) 3-7
PURGE (UR) 3-33
PURGE (UR) 2-39, 2-44
RELEASE (UR) 3-35
RELEASE (UR) 2-27, 2-36
RENAME (UR) 3-36
RETAIN (UR) 3-37
RETAIN (UR) 2-49
SCRATCH (UR) 3-39
SCRATCH (UR) 2-46, 2-52
syntax (UR) 3-6
TRANSFER (UR) 3-41
UNLOCK (UR) 3-42
UNLOCK (UR) 2-28, 2-37
UPDATE (UR) 3-43
UPDATE (UR) 2-25, 2-48
vaulting (UR) 12-19
Catalog management (UR) 2-2
Catalog overrides
DD statements (UR) 6-9
Catalog recovery (IS) 4-8
Cataloging datasets
DD statements (UR) 6-9, 6-17, 6-25
CATLG DD parameter (UR) 6-17
CATMOVEn SAMPJOB (IS) 4-6
CATRT1 configuration option (IS) 5-13
Master Index
CATRT1 configuration option (UR) 1-4, 1-20
CBL RES option (IS) 2-67
Changing
EDD information (UR) 2-25
vault and slot location (UR) 3-30
version expiration date (UR) 3-37
Changing from
disk to tape (UR) 7-56
tape to disk (UR) 7-56
Check CPU See Job management control language
Check partition See JMCL
Checklists Also see Worksheets
initial installation (IS) 1-2
Pre-4.1 Upgrade (IS) 1-4
Checkpoint/restart
TSIDASS (UR) 8-4
Checkpoint/restart (UR) 7-54
Choosing offload datasets (UR) 13-17
CICS
accessing Online Manager (UR) 2-3
event posting entries (IS) 2-78
installation (IS) 2-78
label creation (UR) 12-16
PCT tables (IS) 2-76, 2-77
start-up JCL (IS) 2-86
TOJA (UR) 11-13
TOJA installation (IS) 2-87
transaction activation (IS) 2-94
transaction notes (IS) 2-84
CISIZE
DD parameter (UR) 6-26
mutually exclusive with block size (UR) 1-10
CISIZE (UR) 1-14
CISIZE subparameter (UR) 6-27
CKD devices
allocation on cylinder boundary (UR) 5-10
CKDFACT configuration option (IS) 5-14
CLEAN command (UR) 2-5, 2-43, 2-45, 3-18
CLEAR control statement (IS) 5-47
CLOSE command (UR) 2-5, 2-38, 3-19
CLOSE parameter (UR) 6-24
Close processing
disk files (UR) 1-43
CMDHELP command (UR) 2-16
CMS
accessing Online Manager (UR) 2-3
CMS, sharing catalog with (IS) 2-68
CMSTAPE configuration option (IS) 2-68, 5-14
CNTRL configuration option (IS) 5-15
CNTRL configuration option (UR) 1-5
COBOL
example (UR) 4-7
M-5
Master Index
Library Management Feature (IS) 2-67
TSIDACC2 (UR) 4-5
COBOL copybook (UR) 11-10
Coding
DD statements (UR) 6-2
Combining DSN Catalogs (IS) 6-70
Command help (UR) 2-16
Command syntax x, xi
Comment (UR) 1-9
Common work datasets
deleting (UR) 1-21
retention (UR) 1-21
Common work datasets (UR) 7-31
Compatibility with other software (IS) 2-8
Compiler work datasets (UR) 7-31, 7-33
Concatenating
not eligible for dataset drop (UR) 6-4
Concatenating datasets
DD statements (UR) 6-3
DLBL option E (UR) 5-10
multiple opens (UR) 5-12
Concatenating datasets (UR) 5-7, 7-35, 7-37
Concatenation
datasets example (UR) 7-61
DD statements (UR) 6-22
CONDCAT parameter (UR) 6-17, 7-64
Condition checking and branching See Job
management control language
Conditional cataloging
definition (UR) 1-16
DLBL option C (UR) 5-10
Conditional cataloging (UR) 5-7, 7-64
Conditionally cataloged
CONDCAT parameter (UR) 6-17
Conditions and IF (UR) 9-9
Configuration options
ACCEPT (IS) 5-8
ACLAUTI (IS) 5-8
ACLIBM (IS) 5-8
ACLLIB (IS) 5-8
ACLLVLOO (IS) 5-9
ACLMEM (IS) 5-9
ACLOPT (IS) 5-9
ACLRECS (IS) 5-9
ACLSRVRI (IS) 5-10
ACLSRVRM (IS) 5-10
ACLSRVRO (IS) 5-10
ACLSRVRS (IS) 5-10
ACLSTK (IS) 5-10
ACLTIME (IS) 5-10
AGP (UR) 1-26
ALLMALL (IS) 5-10
M-6
(IS) = Installation & System Guide
ALLMSG (IS) 5-11
ALTMSGS (IS) 5-11
AUTOATT (IS) 5-11
AUTOATT (UR) 1-29
Autoattach (IS) 3-2
AUTOCAT (IS) 5-11
AUTOCAT (UR) 1-4, 1-19
AUTOLOG (IS) 5-12
AUTOLOG (UR) 1-19
AUTOSTP (IS) 5-12
AUTOSTP (UR) 1-29
AUTSTPN (IS) 5-12
AUTSTPNO (IS) 5-12
AUTSTPT (IS) 5-12
AUTSTPTO (IS) 5-13
BYPEXT (IS) 5-13
CANMSG (IS) 5-13
CATRT1 (IS) 5-13
CATRT1 (UR) 1-4, 1-20
CKDFACT (IS) 5-14
CMSTAPE (IS) 2-68, 5-14
CNTRL (IS) 5-15
CNTRL (UR) 1-5
CPUIDS (IS) 5-15
CWDSPOL (IS) 5-15
CYCL (IS) 5-15
CYCL (UR) 1-20
DDERR (IS) 5-16
DDGEN (IS) 5-16
DDGEN (UR) 6-17, 6-22
DEBUG (IS) 5-17
defaults (IS) 2-94, 5-4
DEFEXT (UR) 1-20
DEFPOL (IS) 5-17
DEFPOL (UR) 1-14, 1-20
DEFTPL (IS) 5-17
DEFWPOL (IS) 5-17
DISKALL (IS) 5-17
DSKLUB (IS) 5-18
DSKRET (IS) 5-18
DSKRET (UR) 1-24
DSNAME (IS) 5-18
DSNWARN (IS) 5-18
DSNWMSG (IS) 5-18
EPICOFF (IS) 5-18
ERDFILE (IS) 2-25, 5-19
EURODAT (IS) 5-19
FBAFACT (IS) 5-19
FRAG (IS) 5-19
GDI (IS) 5-19
GDI (UR) 8-6, 8-9, 8-16
GDIUR (IS) 5-20
(UR) = User Reference
JCLAC (IS) 5-20
JCLLANG (IS) 5-20
JCLLANG (UR) 9-1
JCLOPT (IS) 5-20
JCLOVRDE (IS) 5-20
JCLOVRDE (UR) 6-9, 6-17
JOBACCT (IS) 5-20
JOBACCT (UR) 11-1
JQNAME (IS) 5-20
JQWARN (IS) 5-21
JQWMSG (IS) 5-21
Memorex ATL (IS) 5-63
MINDEX (IS) 5-21
MINRET (IS) 5-21
MINRET (UR) 1-4
MODE (IS) 5-21
MODE (UR) 1-30
MSG088 (IS) 5-22
MULTCPU (IS) 2-68, 5-22
NCATDSK (IS) 5-22
NCATDSK (UR) 1-4, 1-20
NOGVIS (IS) 5-23
ONLREWCD (IS) 5-23
OPTI-TAPE ACL support (IS) 5-73
overriding (IS) 6-27
PASSWD (IS) 5-23
PREFIX (IS) 5-23
PURBYP (IS) 5-23
PURBYP (UR) 1-26, 6-17
RECORD (IS) 5-23
RECORD (UR) 1-27, 11-1
Recorder File (UR) 1-27
RECSHR (IS) 5-23
RECSHR (UR) 1-27
RECWARN (UR) 1-27
RECWMSG (UR) 1-27
RERUN (IS) 5-23
RETEN (IS) 5-24
RETEN (UR) 1-20
RMNTPRT (IS) 5-24
RMNTPRT (UR) 12-16
SHARE (IS) 5-24
SHARE (UR) 1-29
SLASIZE (IS) 5-24
special (IS) 5-31
Start Track 1 datasets (UR) 1-4
STK ACL support (IS) 5-68
STRTRK (IS) 5-24
STRTRK (UR) 1-4, 13-5
syntax (IS) 5-4
TAPCUU (IS) 5-24
TAPE (IS) 5-24
Master Index
TAPLUB (IS) 5-24
TAPPOL (IS) 2-44, 5-25
TPAMODE (IS) 5-25
TSTJOB (IS) 5-26
UNCDSK (IS) 5-26
UNCDSK (UR) 1-5, 6-30
UNCTAP (IS) 5-26
UNCTAP (UR) 1-5, 1-29
UNCTL (IS) 5-26
UNCTL (UR) 1-5
UNLABEL (IS) 5-26
UNLOAD (IS) 5-26
VGSFTAPE (IS) 5-27
VM (IS) 5-27
VM (UR) 9-20
VSAM (IS) 5-28
VSAM (UR) 1-5, 7-28
worksheet (IS) 1-12
Configuration options (IS) 5-8
Configuration options (UR) 1-2
Confirmation options (UR) 2-15
Console (IS) 6-29
CONTIG parameter (UR) 6-30
Continuing with a dependent task (UR) 10-6
Controlled datasets (UR) 1-3
Controlled tapes (UR) 2-40, 2-41, 8-14
Conversion issues (IS) 2-8
Converting
to BIM-EPIC See BIM-EPIC Conversion Guide
uncontrolled to controlled (UR) 13-5
Copying and merging datasets (UR) 8-9
CP command table (IS) 3-31
CP commands (UR) 9-20
CP nucleus
Autoattach installation (IS) 3-1
backing up (IS) 3-28
CP nucleus (IS) 3-18, 3-26
CPU independence
disk pools (UR) 1-14, 1-31
CPU independence (UR) 7-30
CPU/partition-independent pools (UR) 1-31
CPUID (IS) 6-15
CPUIDS configuration option (IS) 5-15
Create Date/Time Activity Report (UR) A-24
Create Job/Time Activity Report (UR) A-13
Creating
EDD (UR) 3-12
EDDs (UR) 2-23
ERD (IS) 2-34
master index (IS) 2-23
Recorder History dataset (UR) 11-2
security profiles (UR) 2-8
M-7
Master Index
tape volume labels (UR) 1-30
Creation date
changing (UR) 3-37
report listing (UR) A-30
Creation date (UR) 1-18
Creation job
changing (UR) 3-37
report listing (UR) A-30
Creation job (UR) 1-18
Creation time (UR) 1-18
Cross-Reference Report (UR) 12-23
Cross-Reference Reports
input to TSIDBRP (UR) 11-3
Cross-Reference Reports (UR) A-8
CTL control statement (IS) 2-32
Current condition code See Job management control
language
Current utilization, displaying (UR) 3-11
Customer support xi, xii
Customized data displays (UR) 2-12
Customizing
BIM-EPIC processing (UR) 1-2
confirmation options (UR) 2-15
EDD display format (UR) 2-13
version display format (UR) 2-14
CWDS See Common work datasets
CWDSPOL configuration option (IS) 5-15
CYCL configuration option (IS) 5-15
CYCL configuration option (UR) 1-20
Cycle a Version panel (UR) 2-50
CYCLE command
difference from RETAIN (UR) 2-50
versions (UR) 2-50
CYCLE command (UR) 2-5, 2-51, 3-20
Cycles retention
overriding (UR) 3-20
Cycles retention (UR) 1-11
CYL parameter (UR) 6-30
D
D option (UR) 5-10
DA datasets
secondary allocation unavailable (UR) 13-3
DA datasets (IS) 5-37
DA datasets (UR) 1-5
Daily maintenance JCL (IS) 2-91
DAILYn SAMPJOB (IS) 4-2
DATA parameter (UR) 6-39, 9-8
Database utilities (UR) 7-35
DATA-REPORTER (IS) 5-31
Dataset defaults
M-8
(IS) = Installation & System Guide
overriding (UR) 6-9
Dataset definitions See BIM-EPIC dataset definitions
Dataset drop
TLBL option 16 (UR) 5-7
Dataset drop (UR) 6-3, 7-63
Dataset fragmentation (UR) 13-2
Dataset name
DSN DD parameter (UR) 6-22
specifying on DD statement (UR) 6-7
Dataset name (UR) 1-9
Dataset names
changing (UR) 3-36
Dataset to Tape Report (UR) 12-24, A-11
DATASET.NAME (UR) 1-43
dataset-name control statement (UR) 13-29
Datasets
assigning vaulting methods (UR) 12-19
cataloging (UR) 1-3
changing retention (UR) 1-25
concatenating (UR) 6-4
concatenating with DLBL option E (UR) 5-10
concatenating with multiple opens (UR) 5-12
control (UR) 1-5
copying and merging (UR) 8-9
defining (UR) 7-5
deleting (UR) 5-10
direct access (UR) 7-25
expiration rules (UR) 1-22
generation or work (UR) 1-10
ISAM (UR) 7-26
naming (UR) 1-9
onloading (UR) 13-27
renaming (UR) 3-36
restoring (UR) 13-27
revolving (UR) 12-3
rules for naming (UR) 1-9
scratching (UR) 1-35
sequential (UR) 7-25
Start Track 1 (UR) 1-4
uncontrolled (UR) 2-41
uncontrolled disk (UR) 6-30
Date formats
European (IS) 5-19
Date time activity report
creating (UR) A-24
Days after last access (DLA) (UR) 1-11
DCB parameter (UR) 6-7
DCT entries (IS) 2-88
DD names
special (UR) 6-5
DD names (UR) 6-2
DD statements
(UR) = User Reference
ABSTR parameter (UR) 6-30
additional parameters (UR) 6-2
allocation by logical record (UR) 6-30
ALX parameter (UR) 6-30
AMORG parameter (UR) 6-12
AMP (UR) 6-7
AMP parameter (UR) 6-12
BLKSIZE parameter (UR) 6-13
BUFSP parameter (UR) 6-12
catalog override example (UR) 6-9
cataloging (UR) 7-18
CATLG parameter (UR) 6-17
CLOSE parameter (UR) 6-24
CONDCAT parameter (UR) 6-17, 7-64
CONTIG parameter (UR) 6-30
continuations (UR) 6-3
CYL parameter (UR) 6-30
DATA parameter (UR) 6-39
dataset drop (UR) 7-63
dataset fragmentation (UR) 13-2
DCB (UR) 6-7
DCB parameter (UR) 6-13
DD name (UR) 6-2
default version (UR) 7-4
DELETE parameter (UR) 6-17
DEN parameter (UR) 6-13
DISP (UR) 6-7
DISP parameter (UR) 6-15
DROP option (UR) 6-3
DSN parameter (UR) 6-7, 6-22
DSORG parameter (UR) 6-14
dummy datasets (UR) 6-41
END parameter (UR) 6-24
fragmentation (UR) 6-30
FREE parameter (UR) 1-30, 6-8, 6-24
ignoring datasets (UR) 6-41
JOBCAT (UR) 6-5
KEEP parameter (UR) 6-17
LABEL (UR) 6-8
LABEL parameter (UR) 6-25
LRECL parameter (UR) 6-14
MOD subparameter (UR) 6-15
multi-dataset coding (UR) 6-6
MXIG parameter (UR) 6-30
NEW subparameter (UR) 6-15
OLD subparameter (UR) 6-15
OPTION (UR) 6-8, 6-26
OPTION parameter (UR) 6-38
OS concatenation (UR) 6-3
parameters (UR) 6-7
PASS parameter (UR) 6-17
pool request (UR) 6-35
Master Index
printer and punch datasets (UR) 6-38
PRIVATE parameter (UR) 6-35
REF (UR) 6-35
RETAIN parameter (UR) 6-35
RLSE parameter (UR) 6-30
ROUND parameter (UR) 6-30
secondary allocation (UR) 6-30
SER parameter (UR) 6-35
SHR subparameter (UR) 6-15
SPACE (UR) 6-8, 6-30
SPACE parameter (UR) 6-27, 13-4
special ddnames (UR) 6-5
specifying (UR) 6-2, 6-9
specifying for tape (UR) 6-9
Start Track 1 example (UR) 6-9
STEPCAT (UR) 6-5
syntax checking (UR) 6-3
SYSABEND (UR) 6-5, 6-6
SYSIN (UR) 6-5
SYSMDUMP (UR) 6-5, 6-6
SYSnnn parameter (UR) 6-27
SYSOUT parameter (UR) 6-38
SYSUDUMP (UR) 6-5, 6-6
TRK parameter (UR) 6-30
uncontrolled dataset example (UR) 6-9
uncontrolled datasets (UR) 6-9
uncontrolled disk (UR) 6-30
UNIT (UR) 6-8
UNIT parameter (UR) 6-7, 6-33, 6-38
unsupported ddnames (UR) 6-5
VOL parameter (UR) 6-7
volser request (UR) 6-35
VOLUME (UR) 6-8
VOLUME parameter (UR) 6-35
VSAM example (UR) 6-10
VSAM processing (UR) 6-10, 6-26
VSAM/SAM processing (UR) 6-10
DD statements (UR) 6-1
DDERR configuration option (IS) 5-16
DDGEN configuration option (IS) 5-16
DDGEN configuration option (UR) 6-17, 6-22
Deactivating
BIM-EPIC (IS) 5-44
IBM ACL support (IS) 5-60
Memorex ATL support (IS) 5-63
QDAS (IS) 5-52
Recorder (IS) 5-45
STK ACL support (IS) 5-68
TPRT transaction (UR) 12-16
TSIDBPR (UR) 12-16
DEBUG configuration option (IS) 5-17
Debugging (IS) 6-24
M-9
Master Index
Default profiles
$DEFPROF (UR) 2-12
$DEFSEC (UR) 2-7
$EPIC (UR) 2-7, 2-12
user (UR) 2-12
Defaults
density (UR) 1-12
disk pool (UR) 1-19
pools (UR) 1-14
security profiles (UR) 2-7
DEFEXT configuration option (IS) 5-17
DEFEXT configuration option (UR) 1-20
Define an EDD panel (UR) 2-23
DEFINE command (UR) 2-5
Defining
datasets (UR) 7-5
EDDs (UR) 2-23
vault locations (IS) 6-39
vaulting methods (IS) 6-40
DEFPOL configuration option (IS) 5-17
DEFPOL configuration option (UR) 1-14, 1-20
DEFTPL configuration option (IS) 5-17
DEFWPOL configuration option (IS) 5-17
DEL control statement (IS) 2-33
DELETE
DD parameter (UR) 6-17
DELETE command
TSIDVUT (IS) 6-58
DELETE command (UR) 2-5, 2-29, 2-39, 3-22
Deleting
EDD (UR) 2-29, 3-22, 3-33
EDDs (UR) 1-35
versions (UR) 3-33
volsers (UR) 3-33
VTOC entries (IS) 6-58
Deleting datasets
DD statements (UR) 6-17
DELETE DD parameter (UR) 6-17
DLBL option D (UR) 5-10
TSIDDEL (UR) 8-7
Density
DEN DD parameter (UR) 6-13
DEQ command (UR) 3-23
DETACH (UR) 12-4
Detail display (UR) A-17
Detail records
ADDRESS EPIC (UR) 4-12
Detail records (UR) 4-5
Detail report
TSIDMNT (UR) A-17
Device address (UR) 1-18
Device down (UR) 3-31
M-10
(IS) = Installation & System Guide
Device type request
DD statements (UR) 6-33
Device type, choosing (UR) 7-56
DFSORT (IS) 2-10
DFSORT (UR) 7-37
DHLDOPEN (IS) 6-15
DHLDOPEN (UR) 1-22, 1-38
Direct access datasets
DD statements (UR) 6-14
Direct access datasets (UR) 7-25
Disk allocation
aligning on cylinder boundary (UR) 5-10
defining volumes to QDAS (IS) 2-55
leveling (IS) 2-43
Disk datasets
close processing (UR) 1-43
converting to controlled (UR) 13-5
grouping (UR) 1-9
names (UR) 1-9
open processing (UR) 1-42
placing on specific volumes (UR) 13-6
removing from BIM-EPIC control (IS) 6-66
scratching (UR) 1-35, 1-38
Disk pool name (UR) 1-14
Disk pools
CPU-independent (UR) 1-14, 1-31
creating (IS) 2-39, 2-42
default pool (UR) 1-19
defining (IS) 2-43
design (IS) 2-40
leveling (IS) 2-43
leveling (UR) 1-31
locating (UR) 1-42
partition-independent (UR) 1-14, 1-31
Disk pools (UR) 1-28, 1-31
Disk space
freeing (UR) 3-22
Disk to tape (UR) 7-56
Disk volumes
dismounting (UR) 3-31
sharing (IS) 2-52, 2-68
DISKALL configuration option (IS) 5-17
Dismounting a disk volume (UR) 3-31
DISP parameter (UR) 6-7, 6-15
DISP=(x,CATLG) (UR) 1-19
Dispatcher
EP commands (IS) 5-53
Dispatcher (IS) 5-53
Display active report listing (UR) A-30
DISPLAY command (UR) 2-21, 3-24
Display NEW report listing (UR) A-30
Display PULL report listing (UR) A-30
(UR) = User Reference
Display PULL, DSN report listing (UR) A-30
Display scratch report listing (UR) A-33
Display vault report listing (UR) A-30
Displaying
DSN Catalog entries (UR) 3-24, 4-2
EDDs (UR) 2-19, 2-22
online VTOC (UR) 13-11
tape information (UR) 2-42
tapes required by a job (IS) 6-53
version attributes (UR) 2-33
version information (UR) 2-30
VTOC entries (IS) 6-56
VTOC entries (UR) 1-31, A-15
Distribution tape
loading library modules (IS) 2-12
DITTO (IS) 5-32
DITTO (UR) 7-35, 7-47
DL/1 datasets (UR) 13-4
DLAHOLD (IS) 6-15
DLAUPD= (UR) 13-23
DLBL option codes
A align on cylinder boundary (UR) 5-10
B=n reblocking (UR) 5-10, 8-9
C conditional catalog (UR) 5-10, 7-64
D delete after closed as input (UR) 5-10
E concatenation with one open (UR) 5-10
F fragmentation (UR) 5-10
G=n access absolute generation (UR) 5-10
H override FRAG=YES (UR) 5-10
I override BIM-EPIC control (UR) 5-11
L no LUB allocation (UR) 5-11
M issue allocation messages (UR) 5-11, 6-27
N inhibit truncation feature (UR) 5-11
O use EXTENT size (UR) 5-11
P purge at EOJ (UR) 5-11
R=nnn allocation by logical records (UR) 5-11
S reuse same space (UR) 5-12
T dataset drop (UR) 5-12, 7-63, 8-9
V=n access a relative version (UR) 5-12
X delete at close or EOJ (UR) 5-12
DLBL option codes (UR) 5-10
DLBL statements
automatic truncation (UR) 13-4
BIM-EPIC enhancements (UR) 5-8
default version (UR) 7-4
F option (UR) 13-2
inhibiting truncation (UR) 13-4
DLBL statements (UR) 5-8
Do not rewind (UR) 5-7
Doctor D (IS) 5-31
Documentation xiii, xiv
Master Index
DOS cancel code See Job management control
language
DOS label See VSE label
DOSCC parameter (UR) 9-9
Drive assignments (UR) 1-29
DROP options
DD statements (UR) 6-3
DSKLUB configuration option
assigning SYS number (UR) 1-28
DSKLUB configuration option (IS) 5-18
DSKRET configuration option (IS) 5-18
DSKRET configuration option (UR) 1-24
DSN Catalog
accessing (UR) 4-5, 4-11
capacity (UR) 3-11
Combining (IS) 6-70
controlled tapes (UR) 2-40
creating (IS) 2-17
daily maintenance JCL (IS) 2-91
dataset name sequence (UR) A-11
dequeuing (UR) 3-23
EDD information (UR) 1-6
efficiency (IS) 2-23
efficiency (UR) 1-4
emergency recovery (IS) 4-8
enlarging (IS) 6-13
enqueuing (UR) 3-27
entries (UR) 1-6
fast backup (IS) 6-10
fast restore (IS) 6-11
formatting (IS) 2-23, 6-21
IJSYSDS (IS) 5-2
in volume sequence (UR) A-23
labels (IS) 2-58
location (IS) 2-19
maintaining (IS) 6-2
maintenance (UR) A-5
managing in batch mode (UR) 3-1
master index (IS) 2-23
moving or changing size (IS) 4-6
online management See also Online Manager
rebuilding (IS) 6-23
record structure (UR) 4-5
removing versions (UR) 1-35
resequencing (UR) 4-5
scratching datasets automatically (IS) 6-14
searching (UR) 2-19
sequential and random access (UR) 4-5
sharing (IS) 2-68
size requirements (IS) 2-19
statistics (UR) 2-5
upgrading from version 2.x (IS) 2-92
M-11
Master Index
version information (UR) 1-6
DSN Catalog (UR) 1-3
DSN Catalog entries (UR) 1-3, 2-41
DSN DD parameter (UR) 6-22
DSN parameter (UR) 6-7
DSN/JOB Cross-Reference Report (UR) 11-6, A-8
DSNAME (IS) 6-11
DSNAME configuration option (IS) 5-18
DSNWARN configuration option (IS) 5-18
DSNWMSG configuration option (IS) 5-18
DSORG DD parameter (UR) 6-14
DSPLY command
VAULT (UR) 12-21
VLT (UR) 12-21
DSPLY command (IS) 6-7
DSPLY command (UR) 4-2
DTF names
default dataset name (IS) 5-32
excluding from BIM-EPIC control (UR) 1-5
in TLBLs (UR) 5-2
inhibiting LUB allocation (IS) 2-47, 2-48
RFBKUP (IS) 5-49
TSIDDMP (UR) 8-16
TSIDDTD (UR) 8-9
uncontrolled (IS) 1-11, 2-47
unit record (UR) 6-2
DTFCD (UR) 6-2, 7-56
DTFCP (UR) 7-56
DTFDI (UR) 7-56
DTFPR (UR) 6-2, 7-56
DTFs
TYPEFLE=WORK (UR) 7-32
DUMMY parameter (UR) 6-41
Dummy tape device (IS) 2-61
DUSP (IS) 2-11, 5-31
DVCDN (UR) 3-31
Dynamic space GETVIS (IS) 2-63
E
E option (UR) 5-10
Early Drive Release (UR) 1-30
EDD See BIM-EPIC dataset definitions
EDD Information panel (UR) 2-22
Efficiency considerations
disk allocation (UR) 1-31
master index (IS) 2-23
Start Track 1 datasets (UR) 1-4
Emergency catalog recovery (IS) 4-8
Emergency recovery
rebuilding DSN Catalog (IS) 6-23
Emergency support xii, xiii
M-12
(IS) = Installation & System Guide
Encryption password (UR) 1-9
END control statement (IS) 5-48
END parameter (IS) 2-48
END parameter (UR) 6-24
End-of-extent processing
disk (UR) 1-42
End-of-volume processing (UR) 1-40
ENQ command (UR) 3-27
EOF extent (IS) 5-31
EOF extent (UR) 1-17
EP commands
Dispatcher (IS) 5-53
EP009 message
ACCEPT response (UR) 11-6
EP038 message
DISPLAY response (IS) 6-60
FRAG response (UR) 5-10, 13-2
EP930 message (UR) 12-5
EPAT conversions See BIM-EPIC Conversion Guide
EPIC transaction (IS) 2-83
EPICAA PARTCAT file (IS) 3-23
EPICFLOW command (UR) 2-16
EPICOFF (IS) 6-26
EPICOFF configuration option (IS) 5-18
EPICON (IS) 5-52, 6-26
EPICON procedure (IS) 5-2
EPICREC.OAL (UR) 4-12
EPICTAPEPOL-x (IS) 5-72
EPLI macro (IS) 6-51
EPS022 special option (UR) 7-47
EPS043 special option (UR) 12-4
EPVAULT See Vaulting
ERD See BIM-EPIC Resource Dataset
ERDFILE configuration option (IS) 2-25, 5-19
EURODAT configuration option (IS) 5-19
European date format (IS) 5-19
Event posting
executing in batch (UR) 10-8
releasing TSIDREL AND TSIDCREL (UR) 10-4
SYSPARM value (UR) 10-8
TSIDCHK and TSIDCCHK (UR) 10-6
TSIDLOC and TSIDCLOC (UR) 10-5
TSIDUNL and TSIDCUNL (UR) 10-7
Event posting (UR) 10-11
Event posting entries (IS) 2-78
Examples
SPACE parameter (UR) 6-30
EXCLUDE (UR) 11-3
Excluding
DTF names (UR) 1-5
Executing
in batch (UR) 10-8
(UR) = User Reference
in CICS (UR) 10-11
standard processing subroutines (UR) 10-9
Exiting
Online Manager (UR) 2-4
TOJA (UR) 11-15
Expiration
LABEL parameter (UR) 6-25
Expiration date
changing (UR) 3-37
overriding (UR) 1-25
report listing (UR) A-30
EXPORT (UR) 7-45
EXTEND/VSE
start before BIM-EPIC (IS) 2-8
Extending a tape
MOD subparameter (UR) 6-15
Extent statement
reusing space (UR) 7-10
Extent statements
overriding (UR) 7-8
EXTENT statements
controlled dataset (UR) 7-25
overriding EDD size (UR) 5-11
required with DLBL option I (UR) 5-11
Start Track 1 dataset (UR) 7-25
Start Track 1 datasets (UR) 1-4
F
F option (UR) 5-10
FASTBU command (IS) 6-10
FASTRS
restrictions (IS) 6-11
FASTRS command (IS) 6-11
FAVER (UR) 7-43
FBA CISIZE (UR) 6-26
FBAFACT configuration option (IS) 5-19
FCOBOL (IS) 2-5
FCT Table (IS) 2-87
Field help (UR) 2-16
First-time installation (IS) 2-4
FMT control statement (IS) 2-34
Forced initialization (UR) 12-10
Formatting
ERD (IS) 2-34
FORTRAN (UR) 7-35
FRAG configuration option
overriding with DLBL option H (UR) 5-10
FRAG configuration option (IS) 5-19
FRAG configuration option (UR) 13-2
Fragmentation
DD statements (UR) 6-30
Master Index
DLBL option F (UR) 5-10
FREE command (UR) 12-6
FREE DD parameter (UR) 6-8
FREE parameter (UR) 1-30, 6-24
Free records, number of (UR) 3-11
G
G option (UR) 5-10
GDI
example (UR) 7-59
GDI (UR) 7-56
GDI configuration option
TSIDDMP (UR) 8-16
TSIDDTD (UR) 8-9
GDI configuration option (IS) 5-19
GDI configuration option (UR) 8-6
GDI/GDIUR (UR) 7-56
GDIUR
DD statement reset (UR) 6-26
ending (UR) 6-27
GDIUR (UR) 7-56
GDUIR configuration option (IS) 5-20
Generation datasets
autocatalog with DD statements (UR) 6-17, 6-22
dataset name in JCL (UR) 7-6
DD statements (UR) 6-22
Generation datasets (UR) 1-10
Generation number (UR) 1-16
GETVIS
dynamic space (IS) 2-63
partition size requirements (IS) 2-63
releasing (UR) 4-9
system (IS) 2-63
Global constants See Job management control
language
GOTO parameter (UR) 9-7, 9-9
GSMTA (IS) 2-9
H
H option (UR) 5-10
HCPMDLAT macro (IS) 3-29, 3-37
HDR1 labels
expiration (UR) 12-2
retention (UR) 12-2
Help, online (UR) 2-16
Highest condition code See Job management control
language
High-level assembler (IS) 3-31
HOLD parameter (UR) 9-5
Holding assignment
FREE statement (UR) 6-24
M-13
Master Index
Holding drive assignment with TLBL option 8 (UR) 57
HSC pool definitions (IS) 5-72
I
I option (UR) 5-11
IBL ACL
requirements (IS) 2-5
IBM ACL
ERD (IS) 2-25
IBM ACL support
activating and deactivating (IS) 5-60
IBM utilities
checkpoint/restart (UR) 7-54
DITTO (UR) 7-47
IBM utilities (UR) 7-35
IDCAMS
backup and restore (UR) 7-43
example (UR) 6-27
import and export (UR) 7-45
REPRO (UR) 7-44
IDCAMS (UR) 7-35
IGNORE (UR) 7-60
Ignoring datasets
DD statements (UR) 6-41
IJSYS files (UR) 7-7
IJSYSDR (IS) 2-58, 5-45, 6-21
IJSYSDS (IS) 2-58, 5-2, 6-10, 6-11, 6-21
IJSYSJQ (IS) 2-58
IJSYSNR (UR) 1-5
IJSYSPC (UR) 1-5
IJSYSSP (IS) 2-58
IJSYSxx datasets (UR) 7-33
ILIST parameter
excluding DTF names (UR) 1-5
ILIST parameter (IS) 2-48
IMODs (UR) 4-12
IMODTBP (UR) 7-43
IMPORT (UR) 7-45
INCLUDE
TSIDOFD (UR) 13-20
Increasing
partition GETVIS (IS) 2-63
system GETVIS (IS) 2-63
INDEX (IS) 6-12
INDEX (UR) 4-5
Index, resequencing (UR) 4-5
Indexed sequential
DD statements (UR) 6-14, 6-22, 6-30
Inhibiting LUB allocation
DLBL option L (UR) 5-11
M-14
(IS) = Installation & System Guide
TLBL option 64 (UR) 5-7
with SYS number (UR) 1-10
Inhibiting LUB allocation (UR) 7-7
Inhibiting truncation (UR) 5-11
Initial Installation Checklist (IS) 1-2
Initializing tapes (UR) 1-30, 2-40, 12-9
Initiating
subtasks (IS) 5-53
Input DTF names
TSIDDMP (UR) 8-16
TSIDDTD (UR) 8-9
Installation
BIM-GSS (IS) 2-2
first-time (IS) 2-4
for conversions See BIM-EPIC Conversion Guide
Installation files
VM/ESA Version 1 Release 1.1 (IS) 3-27
VM/ESA Version 1 Release 2 (IS) 3-20
VM/ESA Version 2 Release 2 (IS) 3-10
Installation procedures (IS) 2-15
Installation requirements
VM/ESA 1.1 (IS) 3-27
Installing CICS (IS) 2-78
Interactive Partition GETVIS VSE/ICCF (UR) 7-52
IOMDTRT (UR) 7-43
ISAM See Indexed sequential
ISAM datasets (UR) 1-5, 7-26
IUCV connection (IS) 5-65, 5-70
IUCV Path (IS) 5-65, 5-70
J
JCL
BIM-EPIC enhancements (UR) 1-39
BIM-EPIC maintenance (IS) 2-91
DD statements (UR) 6-9
specifying DD statements (UR) 6-2
JCL enhancements (UR) 7-15
JCLAC configuration option (IS) 5-20
JCLLANG configuration option (IS) 5-20
JCLLANG configuration option (UR) 9-1
JCLOPT configuration option
TLBL alpha options (UR) 5-3
JCLOPT configuration option (IS) 5-20
JCLOVRDE configuration option (IS) 5-20
JCLOVRDE configuration option (UR) 6-9, 6-17
JMCL See Job management control language
SCAN (UR) 6-3
JMCL parameters
AND (UR) 9-9
DATA (UR) 9-8
DOSCC (UR) 9-9
(UR) = User Reference
GOTO (UR) 9-7, 9-9
HOLD (UR) 9-5
NAME (UR) 9-7
OR (UR) 9-9
RESET (UR) 9-13
SETC (UR) 9-11
SETG (UR) 9-11
TIME (UR) 9-5
TYPRUN (UR) 9-6
Job accounting
activation (IS) 2-94
by CPU (UR) A-24
by CPU and by job (UR) A-13
by date and time (UR) A-24
database (UR) 11-13
database creation (IS) 2-85
installation (IS) 2-85
online installation (IS) 2-84
POWER (UR) 7-48
supervisor requirements (IS) 2-5
TOJA installation (IS) 2-87
TSIDJAC (UR) 11-8
TSIDJLD (UR) 11-10
TSIDTAC (UR) 11-9
Job accounting database (UR) A-3
Job cancellation (UR) 1-38
Job execution
TIME limit (UR) 9-5
Job management control language
&n (UR) 9-12
condition checking and branching (UR) 9-7
conditions and IF (UR) 9-9
CP commands (UR) 9-20
CPUID (UR) 9-9
current time (UR) 9-9
current time date (UR) 9-9
DOS cancel code (UR) 9-9
global constants (UR) 9-9
highest condition code (UR) 9-9
job cancel options and syntax checking (UR) 9-5
parameters (UR) 9-2
partition ID (UR) 9-9
preventing EOJ after cancel (UR) 9-5
symbolic replacements (UR) 9-12
Job management control language (UR) 9-1
Job Overview panel (UR) 11-13, A-3
Job scheduling
programs (IS) 6-50
TSIDFAV macro (IS) 6-44
Job scheduling (UR) 10-4
Job Selection panel (UR) 11-13
Job Time Activity Report (UR) A-13
Master Index
JOBACCT configuration option
required with DLBL option P (UR) 5-11
required with DLBL option X (UR) 5-12
JOBACCT configuration option (IS) 5-20
JOBACCT configuration option (UR) 11-1
JOBCAT statements
overriding (UR) 6-27
JOBCAT statements (UR) 6-5
JOBLIB statements
unsupported (UR) 6-5
JOBQ
creating (IS) 2-17
location (IS) 2-24
Jobs
running (UR) 7-1
Jobs in the POWER queues (UR) 10-4
JQNAME configuration option (IS) 5-20
JQWARN configuration option (IS) 5-21
JQWMSG configuration option (IS) 5-21
K
KEEP DD parameter (UR) 6-17
L
L option (UR) 5-11
Label creation (UR) 12-16
LABEL DD parameter (UR) 6-8
LABEL parameter
retention days (UR) 6-25
LABEL parameter (UR) 6-25
Label printing
installation (IS) 2-84
sample Assembler batch subroutine (IS) 6-46
sample Assembler online subroutine (IS) 6-47
sample COBOL batch subroutine (IS) 6-46
sample COBOL online subroutine (IS) 6-47
Labels
batch printing (IS) 6-46
online printing (IS) 6-47
print subroutine (IS) 6-45
Labels, disk (UR) 12-2
Labels, tape See Tape labels
Large tapes (UR) 12-3
Leveling a disk pool (UR) 1-31
LIBDEF procedures (IS) 2-64
LIBR (UR) 7-46
Library
modules (IS) 2-12
search chains (IS) 2-64
License code
in activation procedure (IS) 2-94
M-15
Master Index
Listing tapes to be moved (UR) A-35
Listing the datasets to be backed up (UR) A-19
Listing the datasets to be offloaded (UR) A-19
LMS pool definitions (IS) 5-67
Local Version Vector Table (IS) 3-15, 3-23
LOCALMOD disk (IS) 3-10, 3-20, 3-27
LOCK command (UR) 2-5, 2-26, 2-35, 3-28
Locked status (UR) 1-16
Locking
EDD (UR) 2-26
version (UR) 2-35
Locking a dataset or version (UR) 3-28
LOG option (UR) 3-4
Logging
VSAM datasets (UR) 7-28
Logical IOCS (UR) 1-17
LOGSRC option (UR) 5-4
LUB allocation
direct access files (IS) 5-37
DTFPH (UR) 7-7
inhibiting (IS) 2-47, 2-48
inhibiting with DD statements (UR) 6-27
inhibiting with DLBL option L (UR) 5-11
inhibiting with SYS number (UR) 1-10
inhibiting with TLBL option 64 (UR) 5-7
physical IOCS (UR) 7-7
SORTIN/SORTOUT (IS) 5-31
SORTWK (IS) 5-31
TSIDASS (UR) 7-7
TSIDMAP (UR) 7-7
UIN/UOUT (IS) 5-31
warning (UR) 7-7
LUB allocation (UR) 1-28, 7-7
M
M option (UR) 5-11
Main vault (UR) 3-30
MAINT
multi-CPU environment (IS) 5-46
MAINT control statement (IS) 5-49
Maintenance JCL (IS) 2-91
Maintenance procedures
DSN Catalog (IS) 6-2
Maintenance procedures (IS) 4-2, 4-7
Manage EDDs panel (UR) 2-21
Manage Tape Volumes panel (UR) 2-43
Manage Versions panel (UR) 2-32
Managing
EDDs (UR) 2-21
tape information (UR) 2-43
vaults (UR) 12-17
M-16
(IS) = Installation & System Guide
versions (UR) 2-30
Manual cataloging
explanation (UR) 1-7
Manual cataloging (UR) 2-2
Manually controlled vaults (UR) 12-22
Master index
MINDEX configuration option (IS) 5-21
Master index (IS) 2-23
Master records
ADDRESS EPIC (UR) 4-11
Master records (UR) 4-5
MAX block size (UR) 6-13
MAXBACK (IS) 2-11, 5-31
Maximum secondaries (UR) 1-14
MCAT alias (UR) 3-29
MCAT status (UR) 1-16
MCATALOG command (UR) 2-5, 3-29
Memorex ACL
ERD (IS) 2-25
requirements (IS) 2-5
Memorex ATL
configuration options (IS) 5-63
LMS definitions (IS) 5-67
scratch pools (IS) 6-7
Memorex ATL support
activating and deactivating (IS) 5-63
Merging datasets, TSIDDTD (UR) 8-9
Messages Also see Messages and Codes
allocation (UR) 6-26
TSIDVUT (IS) 6-56
METHOD macro Also see Vaulting
assembling and linking (IS) 6-41
METHOD macro (IS) 6-40
METHOD macro (UR) 12-17
Methods, vaulting (IS) 6-40
MINDEX configuration option (IS) 5-21
MINRET configuration option (IS) 5-21
MINRET configuration option (UR) 1-4
MOD subparameter (UR) 6-15
MODE configuration option
default density (UR) 1-12
MODE configuration option (IS) 5-21
MODE configuration option (UR) 1-30
Mode setting
DEN DD parameter (UR) 6-13
Modeling
security profiles (UR) 2-8
user profiles (UR) 2-12
Modifying
confirmation options (UR) 2-15
EDD display format (UR) 2-13
EDD information (UR) 2-25
(UR) = User Reference
expiration date (UR) 3-37
security profiles (UR) 2-8
standard labels (IS) 2-58
tape modes (IS) 2-61
version display format (UR) 2-14
Modifying VSE labels
TSIDGLB and TSIDPLB (UR) 8-21
Mounting tapes for output
uncontrolled (UR) 12-7
MOVE command (UR) 2-43, 3-30
MOVESER control statement (UR) 12-20
MOVESLT control statement (UR) 12-20
Moving
JCL (UR) 6-1
Moving the DSN Catalog See Maintenance procedures
Moving the Recorder File See Maintenance
procedures
MSES/E service procedures (IS) 3-27
MSG088 configuration option (IS) 5-22
MTC (UR) 7-12
MULTCPU configuration option
CPU independence (UR) 6-23
MULTCPU configuration option (IS) 2-68, 5-22
MULTCPU configuration option (UR) 3-27
Multi-CPU environment (IS) 5-46, 5-49, 5-63, 5-68
Multi-dataset groups
prime dataset name (UR) 1-12
Multi-dataset processing
autocatalog with DD statements (UR) 6-17
examples (UR) 7-18
FREE DD statement (UR) 6-24
refer-back with DD statements (UR) 6-35
scratching multi-dataset tapes (UR) 7-15
Multiple job exits (IS) 2-65
Multi-volume
DD statements (UR) 6-35
processing limits (UR) 7-13
MVS
compatibility (UR) 6-3, 6-33
dataset drop not valid under (UR) 6-3
JCL (UR) 6-1
MXIG parameter (UR) 6-30
N
N option (IS) 5-31
N option (UR) 5-11
NAME parameter (UR) 9-7
NCATDSK configuration option (IS) 5-22
NCATDSK configuration option (UR) 1-4, 1-20
NEW subparameter (UR) 6-15
NLUBDTF parameter (IS) 2-48
Master Index
NLUBPGM
worksheet (IS) 1-11
NLUBPGM parameter (IS) 2-48
No automatic cataloging (UR) 1-20
No options in effect (UR) 5-6
NOGVIS configuration option (IS) 5-23
NOLOG option (UR) 3-4
Non-BIM-EPIC datasets
deleting (IS) 6-58
Non-generation datasets See Work datasets
NOREW subparameter (UR) 6-27
NOREWIND
DD statements (UR) 6-35
NOTFND (IS) 6-15
O
O option (UR) 5-11
OF2 parameter (UR) 3-37
OFFLINE command (UR) 2-6, 3-31
Offload status (UR) 1-16
Offload system
consolidating versions (UR) 13-34
offloading datasets (UR) 13-22
onloading datasets (UR) 13-27
selecting offload datasets (UR) 13-17
OFFLOAD.DATA.SET (UR) 13-23
Offload/Backup (UR) 1-31
Offloaded datasets listing (UR) A-20
Offloading datasets (UR) 13-22
OLD subparameter (UR) 6-15
OMIT
TSIDOFD (UR) 13-20
One use only (UR) 3-35
Online access to job accounting database
TOJA (UR) 11-13
Online catalog management See Online Manager
ONLINE command (UR) 2-6, 3-32
Online Flow panel (UR) 2-16
Online help (UR) 2-4
Online Manager
accessing security (UR) 2-8
BIM-FAQS/ASO installation (IS) 2-70
catalog management (UR) 3-3
CICS installation (IS) 2-72
exiting (UR) 2-4
help (UR) 2-4, 2-16
installation requirements (IS) 2-2
Primary Option Menu (UR) 2-4
scratch tapes (UR) 12-2
user profiles (UR) 2-12
using (UR) 2-3
M-17
Master Index
VTAM access (IS) 2-71
Online Manager (UR) 1-7
Online VTOC displays (UR) 13-11
Onloaded datasets
listing (UR) A-21
Onloading datasets (UR) 13-27
ONLREWCD configuration options (IS) 5-23
OPEN command
TSIDASS (UR) 8-2
OPEN not issued (UR) 7-35
OPEN parameters (UR) 8-3
Open version (UR) 1-16
Operating system requirements (IS) 2-5
Operator console (IS) 6-29
Operator console commands (UR) 12-5
OPT block size (UR) 6-13
OPTION control statement
special options (IS) 5-29
OPTION control statement (IS) 5-4
OPTION parameter
ALLMSGS (UR) 6-27
CAT (UR) 6-27
CISIZE (UR) 6-27
NOREW (UR) 6-27
RESET (UR) 6-27
REW (UR) 6-27
RUN (UR) 6-28
SPACE (UR) 6-28
SYSnnn (UR) 6-29
TPL (UR) 6-29
OPTION parameter (UR) 6-8, 6-26, 6-38
OPTION SYSPARM (UR) 10-8
Options, special (IS) 5-29
OPTI-TAPE ACL
configuration options (IS) 5-73
OPTI-TAPE ACL support (IS) 5-73
OR condition (UR) 9-9
OS concatenation See Concatenating datasets
Output
prime dataset (UR) 2-41
subdataset (UR) 2-41
Output DTF names
TSIDDMP (UR) 8-16
TSIDDTD (UR) 8-9
Overriding
configuration options (IS) 6-27
cycles retention (UR) 3-20
dataset defaults (UR) 6-9
extent statements (UR) 7-8
revolving tape control (IS) 5-34
tape density (UR) 1-12
Overriding normal cycles retention (UR) 1-25
M-18
(IS) = Installation & System Guide
Overriding the DSN Catalog
block size (UR) 7-2
extent size (UR) 7-2
retention criteria (UR) 7-2
tape density (UR) 7-2
Owner ID
single-digit (IS) 5-34
Owner ID (UR) 1-12, 12-3
Ownership (UR) 12-3
P
P option (UR) 5-11
PACCT (UR) 7-48
PACKSCAN command (IS) 6-56
Panel help (UR) 2-16
Panel navigation help (UR) 2-16
Parameter tables xi, xii
Partition GETVIS (IS) 2-63
Partition independence
disk pools (UR) 1-14, 1-31
Partition independence (UR) 7-30
Partitions
deactivating BIM-EPIC in (IS) 5-18
deactivating/reactivating by (IS) 6-26
dynamic (IS) 5-18
starting/stopping (UR) 1-32
PASS parameter (UR) 6-17
PASSWD configuration option (IS) 5-23
PASSWD configuration option (UR) 3-7
PASSWORD command (UR) 3-7
Passwords
EDD and version use (UR) 1-9
security (UR) 2-9
PCT tables (IS) 2-76, 2-77
PDISPLAY,POFFLOAD,Printer/Punch Tape Spooling
POWER (UR) 7-49
Performance
master index (IS) 2-23
PERM command (IS) 6-60
Permanent retention (UR) 1-10
Physical IOCS
inhibiting LUB allocation (UR) 5-7, 5-11
Physical IOCS (UR) 1-17, 1-37, 7-35
Placing datasets on specific volumes (UR) 13-6
PLTPI Table (IS) 2-90
Pool ID specification
DD statements (UR) 6-35
Pool names (UR) 1-14, 1-31, 6-29
Pools See Disk pools and Tape pools
default (UR) 1-14
tape (IS) 2-39
(UR) = User Reference
POOL-x (IS) 5-67
POOL-x (UR) 2-40
Posted events See Event posting
Post-installation procedures (IS) 2-91
POWER
queued jobs (UR) 10-4
POWER (IS) 2-9
POWER job accounting (UR) 7-48
POWER PDISPLAY,POFFLOAD, Printer/Punch Tape
Spooling (UR) 7-49
Pre-4.1 Upgrade Checklist (IS) 1-4
PREFIX configuration option (IS) 5-23
Pre-Installation Worksheet (IS) 1-6
Pre-open assignment checking
TSIDSRT (UR) 8-6
Pre-open assignment checking (UR) 1-37
Pre-open checking (UR) 6-27
Pre-open processing
TSIDASS (UR) 8-2
Prevent tape rewind
DD statements (UR) 6-35
Preventing BIM-EPIC from releasing the tape drive
(UR) 5-7
Preventing rewind with TLBL option 3 (UR) 5-7
Primary extent size (UR) 1-14
Primary Option Menu (UR) 2-4
Prime datasets (UR) 1-12, 7-14
Print options
TSIDMNT (UR) 3-4
PRINT parameter (IS) 6-42
Printer datasets
DD statements (UR) 6-38
Printer output (UR) 7-56
Printing dataset labels (UR) 12-16
Printing datasets
TSIDDMP (UR) 8-16
Printing external volume labels (UR) 12-14
Printing labels See Labels
PRIVATE DD parameter (UR) 6-35
Processing multiple datasets
dataset drop (UR) 7-63
Processing options See Configuration options
Profiles
$DEFPROF (UR) 2-12
$DEFSEC (UR) 2-7
$EPIC (UR) 2-7, 2-12
security (UR) 2-7
user (UR) 2-12
Program Audit panel (UR) 11-14, A-5
Program names
no LUB allocation (IS) 1-11
reblocking with Undefined Record Format (IS) 1-11
Master Index
Program Overview panel (UR) 11-13, A-4
Programs
inhibiting LUB allocation (IS) 2-47
Projected Scratch (PSCRATCH) Report (UR) A-34
PROJSER control statement (UR) 12-20
PROJSLT control statement (UR) 12-20
PRT control statement (IS) 2-35
PSAM (IS) 5-31
PSCRATCH (UR) 1-21
Punch datasets
DD statements (UR) 6-38
PURBYP configuration option (IS) 5-23
PURBYP configuration option (UR) 1-26
PURGE command (UR) 2-5, 2-39, 2-43, 2-44, 3-33
Purging
EDD (UR) 3-33
tape volumes (UR) 2-44
versions (UR) 3-33
volsers (UR) 3-33
with DD statements (UR) 6-17
Purging (UR) 1-35
Purging datasets with JMCL (UR) 9-5
Q
QDAS
access during open/EOX (UR) 1-42
activating (IS) 5-52
and space holder records (UR) 1-43
deactivating (IS) 5-52
space requirements (IS) 2-7
TSIVDEF macro (IS) 2-55
TSIVOFF (IS) 5-52
TSIVON (IS) 5-52
QDAS (IS) 2-52, 5-44
Quick allocation with QDAS (UR) 1-42
QUIESCE command (UR) 2-6, 3-34
R
R option (UR) 5-11
Random access (UR) 4-5, 4-8
Random initialization
example (UR) 12-12
Random initialization (UR) 12-9
RBLKPGM parameter (IS) 2-48
Reading multiple datasets (UR) 7-61
Reading VSE labels
TSIDGLB and TSIDPLB (UR) 8-21
Reblocking
BLKSIZE DD parameter (UR) 6-14
datasets processed by PIOCS (UR) 7-35
DLBL option B (UR) 5-10
M-19
Master Index
EDD block size (UR) 1-10
REC control statement (IS) 6-21
Recatalog a deleted version (UR) 3-8
RECMOVEn SAMPJOB (IS) 4-7
RECORD configuration option (IS) 5-23
RECORD configuration option (UR) 1-27, 11-1
RECORD control statement (IS) 5-50
Record length
LRECL DD parameter (UR) 6-14
Recorder
activating (IS) 5-45
activation (IS) 2-94
deactivating (IS) 5-45
Recorder File
BACKUP (IS) 5-46
comments (UR) 1-27
configuration options (UR) 1-27
creating (IS) 2-17
creation of job accounting database (IS) 2-85
daily maintenance JCL (IS) 2-91
formatting (IS) 2-23, 6-21
history dataset (UR) 11-2
job accounting reports (UR) 11-1
labels (IS) 2-58
location (IS) 2-21
maintaining (IS) 5-45
moving or changing size (IS) 4-7
multi-CPU environment (IS) 5-46
sharing (IS) 2-68
size requirement (IS) 2-21
Recorder File (UR) 1-27
Recorder subsystem (UR) 1-27
RECOVERn SAMPJOB (IS) 4-8
RECSHR configuration option (IS) 5-23
RECSHR configuration option (UR) 1-27
RECWARN configuration option (UR) 1-27
RECWMSG configuration option (UR) 1-27
REF parameter (UR) 6-35
Refer-back
multi-dataset processing (UR) 6-35
space allocation (UR) 6-27
subdatasets (UR) 6-35
Regular maintenance (IS) 4-2
Re-initializing tapes (UR) 1-30
Relative version
DD statements (UR) 6-22
RELEASE command (UR) 2-5, 2-27, 2-36, 3-35
Release unused disk space
DD statements (UR) 6-30
Releasing
EDD (UR) 2-27
GETVIS (UR) 4-9
M-20
(IS) = Installation & System Guide
jobs from POWER queue (UR) 10-4
Releasing assignment
FREE statement (UR) 6-24
Remote print, installation (IS) 2-88, 2-89, 2-90
Removing
disk dataset from BIM-EPIC control (IS) 6-66
EDD (UR) 3-33
version information (UR) 2-29
versions (UR) 3-33
volsers (UR) 3-33
RENAME command
TSIDVUT (IS) 6-62
RENAME command (UR) 2-5, 3-36
Renaming datasets (UR) 3-36
RENUM command (IS) 6-64
RENUMB command (IS) 6-66
REPORT
TSIDOFD (UR) 13-20
Report listing
creation date (UR) A-30, A-33
creation job (UR) A-30
creation job sequence (UR) A-33
display active (UR) A-30, A-33
display NEW (UR) A-33
display NEW report (UR) A-30
display PULL (UR) A-33
display PULL report (UR) A-30
display PULL, DSN report (UR) A-30
display scratch report (UR) A-33
display vault report (UR) A-30
expiration date (UR) A-30, A-33
Report writers (UR) 7-35
Reports
Activity Log Report (UR) A-6
Create Date/Time Activity (UR) A-24
Create Job/Time Activity (UR) A-13
creating (UR) 1-33
customized (UR) A-2
Dataset to Tape (UR) A-11
Dataset to Tape Report (UR) 12-24
offload tape datasets (UR) 13-27
online VTOC (UR) 13-11
Projected Scratch (PSCRATCH) (UR) A-34
Tape to Dataset (UR) A-23
Tape to Dataset Report (UR) 12-25
TSIDBRP (UR) A-8
TSIDDEB (IS) 6-25
TSIDDIS (UR) A-11
TSIDJAC (UR) A-13
TSIDLVT (UR) A-15
TSIDMNT (UR) A-17
TSIDOFD (UR) A-19
(UR) = User Reference
TSIDOFL (UR) A-20
TSIDONL (UR) A-21
TSIDPRV (UR) A-22
TSIDSDS (UR) A-23
TSIDTAC (UR) A-24
TSIDUTL (IS) 6-7
TSIDUTL (UR) 4-2
TSIDVLT (UR) A-35
vaulting cross-reference (UR) 12-18
Vaulting Cross-Reference (UR) A-22
Vaulting Cross-Reference Report (UR) 12-23
VTOC (UR) 13-7
REPRO (UR) 7-44
Request handling (IS) 5-53
Requirement for DTFDA datasets (UR) 7-10
Requirements, operating system (IS) 2-5
RERUN configuration option (IS) 5-23
Resequencing dataset extents (UR) 13-5
Resequencing index (UR) 4-5
RESET parameter (UR) 9-13
RESET subparameter (UR) 6-27
Resizing the DSN Catalog See Maintenance
procedures
Resizing the Recorder File See Maintenance
procedures
RESTART subparameter (UR) 9-6
Restarting from a checkpoint (UR) 7-54
Restarting job
TYPRUN=RESTART (UR) 9-6
RESTORE
IDCAMS (UR) 7-43
LIBR (UR) 7-46
RESTORE command (IS) 6-13
Restoring datasets (UR) 13-27
Restricting BIM-EPIC control (UR) 1-5
RETAIN
TSIDVUT (IS) 6-68
Retain a Version panel (UR) 2-49
RETAIN command
difference from CYCLE (UR) 2-50
RETAIN command (UR) 2-5, 2-49, 3-37
RETAIN parameter (UR) 6-35
RETEN configuration option (IS) 5-24
RETEN configuration option (UR) 1-20
Retention
tape (UR) 12-2
Retention
concepts (UR) 2-46
cycles (UR) 1-11
days after last access (DLA) (UR) 1-11
HDR1 labels (UR) 12-2
LABEL parameter (UR) 6-25
Master Index
overriding (UR) 1-25
PERM (UR) 1-10
rules for Start Track 1 datasets (UR) 1-24
Start Track 1 datasets (UR) 1-4
TLBL statement (UR) 5-4
types of (UR) 1-10
Retention criteria
modifying (UR) 1-25
SCRATCH (UR) 1-21
Retention criteria (UR) 2-46
Retention days
LABEL parameter (UR) 6-25
Retention days (UR) 1-10
Reusing same extent
MOD subparameter (UR) 6-15
Reusing the same space (UR) 7-10
REV parameter (UR) 12-3
Revolving tape datasets (UR) 12-3
Revolving tapes (UR) 1-12
REW subparameter (UR) 6-27
Rewind and unload with TLBL option 2 (UR) 5-7
Rewind options
overriding (UR) 6-27, 6-28
Rewind tape DD statements (UR) 6-35
Rewind with TLBL option 1 (UR) 5-6
RFBKUP (IS) 5-45
RLSE parameter (UR) 6-30
RMNTPRT (IS) 2-94
RMNTPRT configuration option (IS) 5-24, 6-45
RMNTPRT configuration option (UR) 12-16
ROUND parameter (UR) 6-30
ROUTE parameter (IS) 6-42
RPG-II (UR) 7-56
RSTRT (UR) 7-54
RSTRT parameters (UR) 8-4
Rules for dataset retention
multiple criteria (UR) 1-23
open tapes (UR) 1-23
work datasets (UR) 1-23
Rules for dataset retention (UR) 1-22
RUN subparameter (UR) 6-28
Running
TVTO (UR) 13-11
Running TSIDLVT (UR) A-15
S
S option (IS) 5-33
S option (UR) 5-12
SAM datasets (UR) 1-5, 7-28
Sample jobs (IS) 2-16
SCAN subparameter (UR) 9-6
M-21
Master Index
Scanning JCL
TYPRUN parameter (UR) 6-3
Scheduling dependent tasks (UR) 10-6
Scheduling programs (IS) 6-50
SCRATCH
TSIDUTL (UR) 1-21
SCRATCH command (IS) 6-14
SCRATCH command (UR) 2-5, 2-52, 3-39
Scratch pools
synchronizing (IS) 5-67, 5-72, 6-7
Scratch processing
work datasets (UR) 1-21
Scratch processing (UR) 1-35
Scratch status (UR) 1-16, 2-41
Scratch tapes (UR) 12-2
Scratched tape versions (UR) 3-24
Scratching
ACL cartridges (UR) 3-22
at close with TLBL option 4 (IS) 5-32
at close with TLBL option 4 (UR) 5-7
DD statements (UR) 6-17
old tape versions (UR) 1-10
open versions (UR) 1-38
tapes (UR) 3-22
versions (UR) 2-52
work datasets (UR) 1-22
Scratching (UR) 2-46
Scratching a version
DD statements (UR) 6-17
Search Catalog panel (UR) 2-19, 2-30
Searching the catalog (UR) 2-19
Secondary allocations
at close (UR) 1-43
DD statement (UR) 6-35
DD statements (UR) 6-30
Secondary allocations (UR) 13-3
Secondary extent size (UR) 1-14
Secondary extents
at close (UR) 1-43
fragmentation (UR) 13-2
Secondary pooling. See Owner ID
Secured Users panel (UR) 2-8
Security
accessing (UR) 2-8
Online Manager (UR) 2-7
Security profiles
$DEFSEC (UR) 2-7
$EPIC (UR) 2-7
creating (UR) 2-8
Security profiles (UR) 2-7
Security programs (IS) 6-48
Selecting
M-22
(IS) = Installation & System Guide
offload datasets (UR) 13-17
SYS number (UR) 1-28
tapes (UR) 2-41
versions (UR) 2-32
SEQ parameter
VAULT (UR) 12-21
Sequential access
terminating
(UR) 4-9
Sequential access (UR) 4-5, 4-9
Sequential datasets
DD statements (UR) 6-14
Sequential datasets (UR) 7-25
Sequential initialization (UR) 12-9
SER DD parameter (UR) 6-35
Serial numbers (UR) 12-2
Set condition code to zero See RESET
SETC parameter (UR) 9-11
SETG parameter (UR) 9-11
SHARE configuration option (IS) 5-24
SHARE configuration option (UR) 1-29
Share files, QDAS (IS) 2-52, 2-68
Sharing a DSN Catalog (UR) 2-2
Sharing disk volumes (IS) 2-52
Sharing resources (IS) 5-63, 5-68
SHR subparameter (UR) 6-15
Sign-On panel (UR) 2-10
Silent mode (IS) 3-2
Size See Tape size
Skip JCL See Job management control language
SLASIZE configuration option (IS) 5-24
Slots
current (UR) 1-18
SM2 See Sort packages
SM-2 (UR) 7-37
Small tapes (UR) 12-3
Software compatibility (IS) 2-8
SOL/VSE
Tape Output Functions (UR) 7-51
SORT files (UR) 7-7
Sort interface
TSIDSRT (UR) 8-6
SORT packages
add dummy tape device (IS) 2-61
Sort programs
CA-SORT (UR) 7-40
DFSORT (UR) 7-40
SYNCSORT (UR) 7-40
TSSRTDEF SORT macro (IS) 6-42
Sort programs (UR) 7-35, 7-37
SORTIN
non-standard (IS) 5-31
(UR) = User Reference
SORTIN (IS) 5-31
SORTOUT (IS) 5-31
SORTWK datasets
LUB allocation (IS) 5-31
SORTWRK datasets (UR) 7-31
SPACE DD parameter (UR) 6-27
Space holder records (UR) 1-43
SPACE parameter
example (UR) 6-30
secondary extent size (UR) 13-3
SPACE parameter (UR) 6-8, 6-30
Space requirements (IS) 2-7
SPACE subparameter (UR) 6-28
Special DD names (UR) 6-5
Special options
descriptions (IS) 5-31
EPS022 (UR) 7-47
EPS043 (UR) 12-4
Special options (IS) 5-29
Special terms x, xi
Specifying
DD statements (UR) 6-2
JMCL parameters (UR) 9-2
tape size (UR) 12-3
Standard Label Area (IS) 2-37
Standard labels (IS) 2-58
Standards
JCL (UR) 7-5
START control statement (IS) 5-51
START control statement (UR) 13-29
Start Track 1 datasets
7-day default retention (UR) 1-4
backing up (IS) 5-31
configuration options (UR) 1-4
converting to controlled (UR) 13-5
DD statements (UR) 6-9
DSKRET retention (IS) 5-38
extent sequence number (UR) 7-25
TYPEFLE=WORK
(UR) 7-32
VOLUME parameter (UR) 6-27
Start Track 1 datasets (UR) 1-4, 1-24, 7-9, 8-15
Starting
BIM-EPIC (IS) 5-2
IBM ACL support (IS) 5-60
Memorex ATL support (IS) 5-63
STK ACL support (IS) 5-68
Starting and stopping partitions (UR) 1-32
Start-up options See Configuration options
Status
device down (UR) 3-31
STATUS command (UR) 12-6
Master Index
STEPCAT statements
overriding (UR) 6-27
STEPCAT statements (UR) 6-5
STEPLIB statements
unsupported (UR) 6-5
STK ACL
configuration options (IS) 5-68
HSC definitions (IS) 5-72
requirements (IS) 2-6
STK ACL support
activating and deactivating (IS) 5-68
STOP
TSIDINIT (UR) 12-10
Stopping
IBM ACL support (IS) 5-60
Memorex ATL support (IS) 5-63
STK ACL support (IS) 5-68
STRTRK configuration option (IS) 5-24
STRTRK configuration option (UR) 1-4, 13-5
Subdataset status (UR) 1-16
Subdatasets
autocatalog with DD statements (UR) 6-17
FREE DD statement (UR) 6-24
limitations (UR) 7-15
refer-back with DD statements (UR) 6-35
retention criteria (UR) 7-15
Subdatasets (UR) 1-12, 7-15
Subtasks
initiating (IS) 5-53
Summary display (UR) A-17
Summary report
TSIDMNT (UR) A-17
Summary Report
BIM-EPIC upgrade (IS) 2-3
Summary Report (IS) 6-30
SVA
size (IS) 2-62, 2-63
space requirements (IS) 2-7
Symbolic replacements (UR) 9-12
Synchronizing scratch pools (IS) 5-67, 5-72, 6-7
SYNCIBM command (IS) 6-17
SYNCMEM command (IS) 6-18
SYNCOPT command (IS) 6-19
SYNCSORT (IS) 2-10
SYNCSORT (UR) 7-37
SYNCSTK command (IS) 6-20
SYS number (UR) 1-10
SYS numbers
assigned by BIM-EPIC (UR) 1-28
SYS000 (UR) 7-7
SYS00n (UR) 7-33
SYSABEND statements (UR) 6-5, 6-6
M-23
Master Index
SYSCHK statements
unsupported (UR) 6-5
SYSCKEOV statements
unsupported (UR) 6-5
SYSID (IS) 6-15
SYSIN statements (UR) 6-5
SYSIPT (UR) 7-56, 7-59
SYSIPT data
JMCL parameter (UR) 9-5
SYSLNK (UR) 7-33
SYSLST (UR) 7-56, 7-59
SYSMDUMP statements (UR) 6-5, 6-6
SYSnnn DD parameter (UR) 6-27
SYSnnn subparameter (UR) 6-29
SYSOUT parameter (UR) 6-6, 6-38
SYSOUT statements
unsupported (UR) 6-5
SYSPCH (UR) 7-56, 7-59
SYSPRINT statements
unsupported (UR) 6-5
SYSSTORE macro (IS) 3-22, 3-28
System datasets
DD statements (UR) 6-26
example (UR) 6-27
open across job boundaries (UR) 5-11
VSE device independence (UR) 7-59
System GETVIS (IS) 2-63
System ID
searching by (UR) 2-19
System ID (UR) 1-9
System logical units
ASSGN (UR) 8-2
System Manager conversions See BIM-EPIC
Conversion Guide
System messages See Messages
System options See Configuration options
System performance
master index (IS) 2-23
SYSUDUMP statements (UR) 6-5, 6-6
T
T option (UR) 5-12
TAID transaction (IS) 2-82
TAPCUU configuration option (IS) 5-24
Tape
ownership (UR) 12-3
positioning (UR) 7-12
TAPE configuration option (IS) 5-24
Tape configuration options (UR) 1-29
Tape datasets
grouping (UR) 1-9
M-24
(IS) = Installation & System Guide
listing (UR) A-29
names (UR) 1-9
scratching (UR) 1-35
updating from CMS (UR) 2-2
Tape density (UR) 1-12
Tape drives
7-track (IS) 5-37
adding in ASI procedure (IS) 2-61
availability (UR) 1-29, 12-4
Tape drives (UR) 1-29
Tape error count (UR) 1-18
Tape labels
valid volume serial numbers (UR) 12-2
Tape Output Functions
SQL/VSE (UR) 7-51
Tape pool group (IS) 2-45
Tape pool ID
searching by (UR) 2-19
Tape pool ID (UR) 1-12
Tape pools
creating (IS) 2-39
DD statements (UR) 6-29
HSC definitions (IS) 5-72
LMS definitions (IS) 5-67
new datasets (UR) 6-29
TSIDPOL syntax (IS) 2-45
worksheet (IS) 1-10
Tape pools (IS) 2-44
Tape pools (UR) 2-40, 12-3
Tape Pools Worksheet (IS) 1-10
Tape processing
adding dummy tape device (IS) 2-61
label printing (IS) 2-84
labeled (UR) 7-11
multi-dataset tapes (UR) 7-15
unlabeled (UR) 7-11
Tape size (UR) 1-13, 12-3
Tape to Dataset Report (UR) 12-25, A-23
Tape to disk (UR) 7-56
Tape use count (UR) 1-18
Tape vaulting. See Vaulting
Tape Volume Information panel (UR) 2-42
Tapes
by current location/destination (UR) A-35
cartridge (UR) 1-30
cataloging (UR) 2-40
close processing (UR) 1-41
displaying information about (UR) 2-42
end-of-volume processing (UR) 1-40
error count (UR) 3-18
initializing (UR) 1-30, 2-40, 12-9
managing catalog information (UR) 2-43
(UR) = User Reference
manually controlled vaulting (UR) 12-22
moving to next vault (UR) 12-20, A-35
open processing (UR) 1-40
open status (IS) 5-31
open status (UR) 1-22
printing dataset labels (UR) 12-16
purging (UR) 2-39, 2-44
recording cleaning (UR) 2-45
reporting vault locations (UR) 12-21
required by a job (IS) 6-53
revolving (UR) 12-3
scratch (UR) 12-2
scratching (UR) 3-22
synchronizing scratch pools (IS) 6-7
use count (UR) 3-18
using Online Manager (UR) 2-40
volume labels (UR) 1-30
Tapes, output
controlled and uncontrolled (UR) 12-7
TAPLUB configuration option
assigning SYS number (UR) 1-28
TAPLUB configuration option (IS) 5-24
TAPPOL configuration option (IS) 2-44, 5-25
TCT Table (IS) 2-89
Technical support xi, xii
Terminating
sequential access (UR) 4-9
Termination options
DISP DD parameter (UR) 6-17
Test environment (IS) 2-4
Test jobs (UR) 7-64
TFVAULT See Vaulting
THLDOPEN (IS) 6-15
THLDOPEN (UR) 1-22, 1-38
TIME (IS) 6-15
TIME parameter (UR) 9-5
TLBL option codes
0 no options in effect (UR) 5-6
1 or W rewind at close (UR) 5-6
16 or D dataset drop (UR) 5-7, 7-63
2 or U unload at close (UR) 5-7
3 do not rewind (UR) 5-7
32 conditional catalog (UR) 5-7, 7-64
4 or R scratch work tape (UR) 5-7
48 concatenation (UR) 5-7
64 no LUB allocation (UR) 5-7
8 or H hold assignment (UR) 1-30, 5-7
TLBL option codes (UR) 5-6
TLBL statements
BIM-EPIC differences (UR) 5-2
default version (UR) 7-4
TLBL statements (UR) 5-2
Master Index
TOJA
navigating in (UR) 11-15
report examples (UR) A-3
TOJA transaction
installation (IS) 2-84
TOJA transaction (IS) 2-79
TOJA transaction (UR) 11-10, 11-13
Total capacity (UR) 3-11
TPAMODE configuration option (IS) 5-25
TPL subparameter (UR) 6-29
TPRE transaction (UR) 12-16
TPRT transaction
activating (IS) 2-84
activating (UR) 12-16
DCT entry (IS) 2-88
deactivating (UR) 12-16
installation (IS) 2-84
PLT entry (IS) 2-90
TPRT transaction (IS) 2-80, 6-47
TRANSFER command (UR) 2-5, 3-41
TRK parameter (UR) 6-30
Truncation
inhibiting with DLBL option N (UR) 13-4
requesting with DD statements (UR) 13-4
RLSE parameter (UR) 6-30
TSICMNT See also Catalog management
TSIDAC2
calling procedure (UR) 4-6
search arguments and calls (UR) 4-8
TSIDAC2 (UR) 4-5
TSIDAR (UR) 12-5
TSIDARP
report (UR) A-6
TSIDARP (UR) 11-3
TSIDASS
DITTO (UR) 7-47
dummy device in ASI procedure (IS) 2-61
inhibiting LUB allocation (UR) 5-7, 5-11
RSTRT (UR) 8-4
use device independence (UR) 7-59
TSIDASS (UR) 7-35, 8-2
TSIDBLD (IS) 6-23
TSIDBPR
deactivating (UR) 12-16
TSIDBPR (IS) 6-46
TSIDBPR (UR) 12-16
TSIDBRP
reports (UR) A-8
TSIDBRP (UR) 11-6
TSIDCCHK (UR) 10-6, 10-11
TSIDCDK
BCAT (IS) 2-23, 6-21
M-25
Master Index
CAT (IS) 6-21
examples (IS) 2-23
REC (IS) 6-21
TSIDCDK (IS) 4-6, 4-7, 6-21
TSIDCHK (UR) 10-6, 10-8, 10-9
TSIDCLN (IS) 2-92
TSIDCLOC (UR) 10-5, 10-11
TSIDCMRG (IS) 6-70
TSIDCREL (UR) 10-4, 10-11
TSIDCUNL (UR) 10-7, 10-11
TSIDDEB
BIM-EPIC upgrade (IS) 2-3
deactivating/reactivating BIM-EPIC (IS) 6-26
exceptions (IS) 6-27
reporting capabilities (IS) 6-25
Summary Report (IS) 6-30
TSIDDEB (IS) 5-2, 5-44, 6-24
TSIDDEL (UR) 8-7
TSIDDIS (UR) 12-24, A-11
TSIDDMP (UR) 7-47, 8-16
TSIDDTD (UR) 7-47, 8-9, 11-2
TSIDFAV (UR) 10-15
TSIDFAV macro (IS) 6-44
TSIDGLB (UR) 8-21
TSIDINIT See Tape initialization
VOLSER statements (UR) 12-11
TSIDINIT (UR) 1-30, 12-9
TSIDJAC
report (UR) A-13
TSIDJAC (UR) 11-8
TSIDJAC report examples (UR) A-13
TSIDJLD (IS) 2-85
TSIDJLD (UR) 11-10, 11-13
TSIDLBL
example (UR) 12-14
TSIDLBL (UR) 1-30, 12-14
TSIDLOC (UR) 10-5, 10-8, 10-9
TSIDLST (IS) 6-53
TSIDLVT
control statements (UR) 13-8
report (UR) A-15
VTOC data in batch (UR) A-15
TSIDLVT (UR) 1-31, 13-8
TSIDMAP
phase creation (IS) 2-39
worksheet (IS) 1-11
TSIDMAP macro
END parameter (IS) 2-48
example (IS) 2-50
ILIST parameter (IS) 2-48
ILIST parameter (UR) 1-5
NLUBDTF parameter (IS) 2-48
M-26
(IS) = Installation & System Guide
NLUBPGM parameter (IS) 2-48
RBLKPGM parameter (IS) 2-48
syntax (IS) 2-47
TSIDMAP macro (IS) 2-47
TSIDMNT See also Catalog management
JCL requirements (UR) 3-4
OFFLINE (UR) 3-31
ONLINE (UR) 3-32
print options (UR) 3-4
QUIESCE (UR) 3-34
reports (UR) A-17
TSIDOFC
examples (UR) 13-36, 13-37
TSIDOFC (UR) 13-34
TSIDOFD
CATALOG (UR) 13-20
report (UR) A-19
REPORT (UR) 13-20
report examples (UR) A-19
TSIDOFD (UR) 13-17
TSIDOFF (IS) 5-44
TSIDOFL
examples (UR) 13-25
report (UR) A-20
report examples (UR) A-20
TSIDOFL (UR) 13-22
TSIDOJA.C (UR) 11-10
TSIDON
example (IS) 2-94
OPTION (IS) 5-4
TSIDON (IS) 5-2
TSIDONL
examples (UR) 13-30
report (UR) A-21
report examples (UR) A-21
TSIDONL (UR) 13-27
TSIDPCS (IS) 6-50
TSIDPEN (UR) 12-16
TSIDPLB (UR) 8-21
TSIDPOL
designing pools (IS) 2-40
examples (IS) 2-43
phase creation (IS) 2-39
statement creation (IS) 2-40
syntax (IS) 2-42
tape pool syntax (IS) 2-45
TSIDPOL phase
TSIDMAP macro (IS) 2-47
TSIDPR (IS) 6-46
TSIDPRT (IS) 6-47
TSIDPRT (UR) 12-16
TSIDPRV
(UR) = User Reference
report (UR) A-22
report examples (UR) A-22
TSIDPRV (UR) 12-18, 12-23
TSIDREC.C (UR) A-2
TSIDREL (UR) 10-4, 10-8, 10-9
TSIDRFS
BACKUP (IS) 5-46
CLEAR (IS) 5-47
comments (UR) 1-27
END (IS) 5-48
MAINT (IS) 4-2, 5-49
moving/changing Recorder File (IS) 4-7
RECORD (IS) 5-50
required maintenance (IS) 4-2
START (IS) 5-51
TSIDRFS (IS) 5-45
TSIDSDS
report example (UR) A-23
TSIDSDS (UR) 12-25
TSIDSEC (IS) 6-48
TSIDSMNT
CTL (IS) 2-32
DEL (IS) 2-33
FMT (IS) 2-34
JCL examples (IS) 2-36
PRT (IS) 2-35
TSIDSMNT (IS) 2-26
TSIDSMNT program
ACLOFFL (IS) 2-27
ACLONL (IS) 2-28
ADD (IS) 2-29
TSIDSRT
non-standard SORTIN (IS) 5-31
TSIDSRT (UR) 7-35, 8-6
TSIDTAC
report (UR) A-24
TSIDTAC (UR) 11-9
TSIDUNL (UR) 10-7, 10-8, 10-9
TSIDUTL
ACLEJECT (IS) 6-5
BACKUP (IS) 6-6
BDSPLY (IS) 6-7
dataset requirements (IS) 6-2
DSPLY (IS) 6-7
DSPLY (UR) 4-2, 12-21, 12-23
DSPLY SCRATCH (UR) 12-2
DSPLY. Also see Reports
FASTBU (IS) 6-10
FASTRS (IS) 6-11
INDEX (IS) 6-12
INDEX (UR) 4-5
projected scratch tapes (IS) 6-14
Master Index
PSCRATCH (UR) 1-21, 12-2
reporting locations of vaulted tapes (UR) 12-23
RESTORE (IS) 6-13
SCRATCH (IS) 4-2, 6-14
SCRATCH (UR) 1-10, 1-21, 12-2
SYNCIBM (IS) 6-17
SYNCMEM (IS) 6-18
SYNCOPT (IS) 6-19
SYNCSTK (IS) 6-20
VAULT (UR) 12-23
VLT parameter (UR) 12-23
TSIDUTL (IS) 4-2, 6-2
TSIDUXI (IS) 6-51
TSIDVLT
excludes from Recorder (UR) 1-27
reports (UR) A-35
TSIDVLT (UR) 12-17, 12-20
TSIDVUT
DELETE (IS) 6-58
PACKSCAN (IS) 6-56
PERM (IS) 6-60
RENAME (IS) 6-62
RENUM (IS) 6-64
RENUM (UR) 7-47
RENUMB (IS) 6-66
resequencing extents (UR) 13-5
RETAIN command (IS) 6-68
TSIDVUT (IS) 6-54
TSIDVUT (UR) 1-25, 1-31
TSIVCLR, creating QDAS share files (IS) 2-53
TSIVDEF
defining (IS) 2-55
example (IS) 2-56
TSIVOFF (IS) 5-52
TSIVON (IS) 5-52
TSPR installation (IS) 2-89
TSSRTDEF sort macro (IS) 6-42
TSTJOB configuration option (IS) 5-26
TSTJOB configuration option (UR) 7-64
Turning off
BIM-EPIC (IS) 5-44
IBM ACL support (IS) 5-60
Memorex ATL support (IS) 5-63
QDAS (IS) 5-52
Recorder (IS) 5-45
STK ACL support (IS) 5-68
Turning on
BIM-EPIC (IS) 5-2
IBM ACL support (IS) 5-60
Memorex ATL support (IS) 5-63
QDAS (IS) 5-52
Recorder (IS) 5-45
M-27
Master Index
STK ACL support (IS) 5-68
TVTO (UR) 1-31, 13-11
TVTO installation (IS) 2-84
TVTO transaction (IS) 2-81
TYPEFLE=WORK
control on disk only (UR) 1-5
DLBL option N required (UR) 5-11
do not use DLBL option F (UR) 5-10
secondary allocation unavailable (UR) 13-3
TYPEFLE=WORK (IS) 5-33
TYPEFLE=WORK (UR) 7-32
TYPRUN parameter
SCAN (UR) 6-3
TYPRUN parameter (UR) 9-6
U
UIN (IS) 5-31
UIN (UR) 7-7
UNCDSK configuration option
ISAM limitation (UR) 7-26
uncontrolled DA datasets (UR) 7-25
UNCDSK configuration option (IS) 5-26
UNCDSK configuration option (UR) 1-5, 6-30, 7-34
Uncontrolled datasets
DD statement example (UR) 6-9
DD statements (UR) 6-9, 6-30
DTF names (IS) 1-11
SAM (UR) 7-28
specifying (IS) 2-47
using DD statements (UR) 6-30
VSAM (UR) 7-28
Uncontrolled datasets (UR) 2-41, 7-34
Uncontrolled tapes
Early Drive Release (UR) 1-29
UNCTAP configuration option
Early Drive Release (UR) 1-29
UNCTAP configuration option (IS) 5-26
UNCTAP configuration option (UR) 1-5, 7-34, 12-7
UNCTL configuration option (IS) 5-26
UNCTL configuration option (UR) 1-5, 7-34
Unit Control Blocks (IS) 2-25
UNIT DD parameter (UR) 6-7
UNIT parameter (UR) 6-8, 6-33, 6-38
Unit record
DD statements (UR) 6-26
DTF (UR) 6-2
UNLABEL configuration option (IS) 5-26
Unlabeled status (UR) 1-16
UNLOAD configuration option (IS) 5-26
Unload tape
DD statements (UR) 6-35
M-28
(IS) = Installation & System Guide
UNLOCK command (UR) 2-5, 2-28, 2-37, 3-42
Unlocking
datasets or versions (UR) 3-35
EDD (UR) 2-28
Unsupported ddnames (UR) 6-5
Unsupported processing
DITTO (UR) 7-2
IJSYSNR (UR) 7-2
IJSYSPC (UR) 7-2
POWER LST (UR) 7-2
POWER offload (UR) 7-2
xxJSYSRS (UR) 7-2
UOUT (IS) 5-31
UOUT (UR) 7-7
Update an EDD panel (UR) 2-25
UPDATE command
VLT parameter (UR) 12-19
UPDATE command (UR) 2-5, 2-25, 2-48, 3-43
Updating
confirmation options (UR) 2-15
EDD display format (UR) 2-13
EDD information (UR) 2-25
version display format (UR) 2-14
VTOC entries (IS) 6-54, 6-56
VTOC entries (UR) 1-31
Updating SVA size (IS) 2-62, 2-63
Upgrading
DSN Catalog (IS) 2-92
over more than one release (IS) 2-3
preparation (IS) 2-3
UPSI values (IS) 6-2
Use device independence (UR) 7-59
User exits
supporting multiple job exits (IS) 2-65
User exits (IS) 6-48
User ID
searching by (UR) 2-19
User ID (UR) 1-9
User profiles
$DEFPROF (UR) 2-12
$EPIC (UR) 2-12
confirmation options (UR) 2-15
EDD display format (UR) 2-13
version display format (UR) 2-14
User profiles (UR) 2-12
User Profiles panel (UR) 2-12
User Security panel (UR) 2-9
USERID (IS) 6-15
V
V option (UR) 5-12
(UR) = User Reference
VATTACH (IS) 3-2
VATTACH (UR) 1-29
VATTACH, VDETACH See Autoattach
Vault locations (UR) 12-17
Vault method number (UR) 1-13
Vault Method Report (UR) 12-23
VAULT parameter (UR) 12-21
VAULT sequence (UR) 12-21
VAULTDEF macro Also see Vaulting
assembling and linking (IS) 6-41
AVAULTS (UR) 12-22
VAULTDEF macro (IS) 6-39
VAULTDEF macro (UR) 12-17
Vaulting
assembling and linking macros (IS) 6-41
assigning vaulting methods (UR) 12-19
creating methods (IS) 6-40
creating vaults (IS) 6-39
cross-reference report (UR) 12-18
Cross-Reference Report (UR) 12-23
METHOD macro (IS) 6-40
METHOD macro (UR) 12-17
MOVE (UR) 3-30
MOVESER (UR) 12-20
MOVESLT (UR) 12-20
PROJSER (UR) 12-20
PROJSLT (UR) 12-20
reporting tape location (UR) 12-21
reports (UR) A-35
TSIDVLT (UR) 12-20
VAULTDEF macro (IS) 6-39
VAULTDEF macro (UR) 12-17
Vaulting (IS) 6-38
Vaulting Cross-Reference Report (UR) 12-23, A-22
Vaulting method assignment (UR) A-22
Vaulting methods (UR) 12-17
Vaults
current (UR) 1-18
manually controlled (UR) 12-22
VDETACH (IS) 3-2
VDETACH (UR) 1-29
Version attributes
block count (UR) 1-17
block size (UR) 1-17
creating job and device (UR) 1-18
creation date and time (UR) 1-18
current vault and slot (UR) 1-18
expiration date (UR) 1-18
extent number and address (UR) 1-17
file sequence number (UR) 1-17
generation number (UR) 1-16
last access (UR) 1-18
Master Index
record format (UR) 1-17
record length (UR) 1-17
reel number (UR) 1-17
status (UR) 1-16
tape error count (UR) 1-18
tape use count (UR) 1-18
version number (UR) 1-16
volume serial number (UR) 1-17
Version Information panel (UR) 2-33
Version specification
DD statements (UR) 6-22
Version status
active (UR) 1-16
conditional catalog (UR) 1-16
lock (UR) 1-16
MCAT (UR) 1-16
offload (UR) 1-16
open (UR) 1-16
scratch (UR) 1-16
subdataset (UR) 1-16
unlabeled (UR) 1-16
work (UR) 1-16
Version-level data (UR) 1-16, A-26
Versions
adding (UR) 2-34, 3-8
changing dataset name (UR) 3-41
closing (UR) 2-38
CYCLE (UR) 2-50
default (UR) 7-4
deleting (UR) 3-22
display format (UR) 2-14
displaying (UR) 2-30, 2-33
locking (UR) 2-35
moving (UR) 3-41
online management (UR) 2-30
releasing (UR) 2-36
removing (UR) 2-39, 3-33
removing from catalog (UR) 2-29
resequencing (UR) 2-46
retention (UR) 2-49
scratching (UR) 2-52
selecting from a list (UR) 2-32
unlocking (UR) 2-37
VGSFTAPE configuration option (IS) 5-27
Viewing
job accounting database (UR) A-3
VLT parameter (UR) 12-21
VM
IUCV facility (IS) 5-63, 5-68
modifications See Autoattach
SVA requirement (IS) 2-62
VSE guests (IS) 5-65, 5-70
M-29
Master Index
VM configuration option
CP commands (UR) 9-20
VM configuration option (IS) 3-2, 5-27
VM Directory
HSC server entry (IS) 5-69
LMS server entry (IS) 5-64
VOL DD parameter (UR) 6-7
VOL parameter (UR) 6-35
VOL1 labels (UR) 12-2
Volser
TSIDLBL (UR) 12-14
VOLSER statements
TSIDINIT (UR) 12-11
VOLUME DD parameter (UR) 6-35
VOLUME parameter
number of secondary extents (UR) 13-3
Start Track 1 datasets (UR) 6-27
VOLUME parameter (UR) 6-8
Volume serial number
vault sequences (UR) A-29
Volume serial numbers
000000 (UR) 2-40
printing labels (UR) 12-14
ranges (UR) 2-40
unique (UR) 2-40
Volume serial numbers (UR) 12-2
Volume serial request DD statements (UR) 6-35
Volumes
removing
(UR) 3-33
VSAM configuration option (IS) 5-28
VSAM configuration option (UR) 1-5, 7-28
VSAM datasets
AMORG DD parameter (UR) 6-12
AMP DD parameter (UR) 6-12
BUFSP DD parameter (UR) 6-12
DD statements (UR) 6-10, 6-26
extent information (UR) 1-5
not eligible for dataset drop (UR) 6-3
VSAM datasets (UR) 7-28
VSAM/SAM datasets
DD statements (UR) 6-26
VSE
Attention Routine (UR) 12-5
DASDSHR parameter (IS) 2-5
guest machine (IS) 5-60, 5-63, 5-65, 5-68, 5-70
JA parameter (IS) 2-5
LOGSRC option (UR) 5-4
Operator console commands (UR) 12-5
system utilities (UR) 7-35
VSE label (IS) 6-51
VSE label area
M-30
(IS) = Installation & System Guide
accessing (UR) 8-21
TSIDGLB (UR) 8-21
TSIDPLB (UR) 8-21
VSE Label Area (UR) 1-40
VSE/ESA 1.3
space requirements (IS) 2-7
VSE/ESA 2.x
space requirements (IS) 2-7
VSE/ICCF Interactive Partition GETVIS (UR) 7-52
VTAM
accessing Online Manager (IS) 2-71
VTOC
access during open/EOX (UR) 1-42
generation datasets (UR) 1-16
space holder records (UR) 1-43
Start Track 1 datasets (UR) 1-4
updates during close (UR) 1-43
VTOC (UR) 1-42
VTOC entries
deleting (IS) 6-58
display and update (IS) 6-56
displaying (UR) 1-31, A-15
updating (IS) 6-54
VTOC online report, installing (IS) 2-84
VTOC utilities
batch reports (UR) 13-7
TVTO (UR) 13-11
VTOC utilities (UR) 1-31
W
Warnings
TIME overridden by SETIME (UR) 9-5
WARNINGS
ACCEPT=YES lets operator select tapes (UR) 12-8
ADD does not recover a VTOC entry (UR) 3-8
BIM-GSS must be installed before BIM-EPIC (IS)
2-2
Do not delete encrypted versions (UR) 1-9, 3-22
Do not issue VSE DVCUP for dummy device (IS)
2-61
Do not purge encrypted versions (UR) 3-33
Do not reblock a backup dataset (IS) 6-6
Do not reblock backup dataset (IS) 6-10
Do not rename prime or offload datasets (UR) 3-36
Do not use PURGE for routine deletion (UR) 3-33
EPS011=YES significantly increases BIM-EPIC
overhead (IS) 5-32
Install BIM-GSS before BIM-EPIC (IS) 1-6
Keep Recorder active (UR) 1-27
MAP values when SHARE=YES (IS) 2-55
MOVEs not shown on TSIDVLT reports (UR) 3-30
(UR) = User Reference
MOVEs nullified by auto vaulting (UR) 3-30
MULTCPU=YES to share catalog (IS) 5-22
Must have QDAS Share File on shared volume (IS)
2-53, 5-55, 6-19
No concatenation code on last label statement (UR)
7-61
No other job or CPU during FASTRS (IS) 6-11
QDAS must be active for all sharing machines (IS)
5-52
RENAME won’t check for duplicate names (IS) 662
Reset Recorder whenever catalog backed up (IS) 42
SHARE=YES to share among physical CPUs (IS)
5-24
Tape reuse before scratch (UR) 1-22
TSIDPLB doesn't validate label data (UR) 8-22
TSIDVUT for updating uncataloged only (IS) 6-54
UPSI x1 restores oldest as version 1 (UR) 13-23
Use different devices for DSN Catalog and Recorder
File (IS) 2-20
Use RECORD=YES (IS) 5-23
Without version specified, DSN concatenates (UR)
6-22
Work dataset status (UR) 1-16
Work datasets
Master Index
autocatalog with DD statements (UR) 6-17
DD statements (UR) 6-22
scratching (UR) 1-22
temporary datasets (UR) 7-29
Work datasets (UR) 1-10, 1-21
Work files
deleting (UR) 8-7
Worksheets Also see Checklists. Also see Checklists
configuration options (IS) 1-12
Initial Installation Checklist (IS) 1-2
no LUB allocation (IS) 1-11
Pre-4.1 Upgrade Checklist (IS) 1-4
Pre-Installation (IS) 1-6
tape pools (IS) 1-10
TSIDMAP (IS) 1-11
uncontrolled DTF names (IS) 1-11
X
X option (UR) 5-12
xJSYSRS (UR) 1-5
Z
Zeroing use and error counts (UR) 3-18
M-31