1
Safety • Assembly • Operation • Tips & Techniques • Maintenance • Troubleshooting • Parts Lists • Warranty
A
OF
O
AL
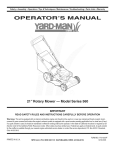
21" Rotary Mower-
Model Series 580
iMPORTANT
READ SAFETY
RULES AND iNSTRUCTiONS
CAREFULLY
BEFORE
OPERATION
Warning: This unit is equippedwithan internalcombustionengineand shouldnot be usedon or nearany unimprovedforest-covered,brushcoveredor grass-coveredland unlesstheengine'sexhaustsystemis equippedwith a sparkarrestermeetingapplicablelocalor statelaws(if any).
If a sparkarresteris used,it shouldbe maintainedin effectiveworkingorder by the operator.In theState of Californiathe aboveis requiredbylaw
(Section4442 of the CaliforniaPublicResourcesCode). Otherstatesmay havesimilarlaws.Federallaws applyon federallands.A sparkarrester
for the muffleris availablethroughyour nearestengineauthorizedservicedealeror contactthe servicedepartment,RO. Box361131Cleveland,
Ohio 44136-0019.
PRINTEDIN U.S.A.
MTD LLC, P.O. BOX 361131 CLEVELAND, OHIO 44136-0019
FORMNO. 769-02310
12/2005
This Operator's Manual is an important part of your new lawn mower, it will help you assemble,
prepare and maintain the unit for best performance.
Please read and understand what it says.
Table of Contents
Slope Gauge .......................................................
Safe Operation Practices ...................................
Setup and Adjustment .......................................
Operating Your Lawn Mower ..............................
Maintaining Your Lawn Mower .........................
3
4
6
8
10
Trouble Shooting ..............................................
Safety Labels ....................................................
Parts List ...........................................................
12
13
14
Warranty ............................................................
16
Finding and Recording Model Number
BEFOREYOU START ASSEMBLING
YOUR NEW EQUIPMENT,
please locate the model plate on the equipment and copy the
information to the sample model plate provided to the right.
You can locate the model plate by standing at the operating
position and looking down at the rear of the deck. This
information will be necessary to use the manufacturer's web
site and/or obtain assistancefrom the Customer Support
Department or an authorized service dealer.
Model Number
Serial Number
MTD LLC
P.O= BOX
CLEVELAND,
330-220-4683
800-800-7310
www.mtdproducts.com
361131
OH 44136
Customer Support
Please do NOTreturn
purchased,
without
the unit to the retailer from which it was
first contacting
Customer
Support.
If you have difficulty assembling this product or have any questions regarding the controls, operation, or maintenanceof this
unit, you can seek help from the experts. Choose from the options below:
1. Visit mtdproducts.com.
Click on the Service & Support menu option.
2. Phone a Customer Support Representative at 1 (800) 800-7310.
3. The engine manufacturer is responsible for all engine-related issues with regards to performance, power-rating,specifications, warranty and service. Please refer to the engine manufacturer's Owner's/Operator's Manual, packedseparately with
your unit, for more information.
MTD _n_r_tic_
Aw_4
Winning ?red_ts
C,@n_ac_U_
@r Company
Ser,,,ice
Product
2
8: Suppo_±
Registration
i
_rivacy P'd_y'
O
Sight and hold this levelwith a vertical tree...
o
o
>:.
(13
O3
(13
(13
OO
O
(-O5
E
also
O
(13
(13
o3
(13
OO
o3
I
(13
E
(]3
(13
o
o5
(13
OO
O3
(13
-5
C5
O3
('5
O
O3
O5
(13
O
E
t"b
(13
O9
15°
WARNING: Engine Exhaust, some of its constituents, and certain vehicle components contain or emit chemicals known to State of Californiato cause cancer and
birth defects or other reproductiveharm.
DANGER: This machine was built to be operated according to the rules for safe operation in this
manual. As with any type of power equipment, carelessness or error on the part of the operator can
result in serious injury. This machine is capable of amputating hands and feet and throwing objects.
Failureto observe the following safety instructions could result in serious injury or death.
Children
WARNING
This symbol points
out importantsafety
instructionswhich, if
not followed,could
endangerthe personal
i safety and/or property
I ofyourselfand others.
Read and follow all
instructionsin this
manual beforeattemptingto operate
i this machine. Failure
I to comply with these
instructionsmay result
i in personalinjury.When
you see this symbol.
i HEED ITS WARNING!
Your Responsibility
Restrictthe use
of this power machine
to personswho read,
_ understand
ano follow the warnings
and instructions
in this manual
and on the machine.
Tragicaccidentscan occur if operatoris not alert to presence
of children.Childrenare oftenattractedto mowerand mowing
activity.Theydo not understandthe dangers.Neverassume
thatchildrenwill remainwhereyou lastsawthem.
1. Keepchildrenout of the mowingareaand underwatchful
careof a responsibleadultotherthanthe operator.
2. Be alert andturn moweroff if a childentersthe area.
3. Beforeand whilemovingbackwards,look behindanddown
forsmallchildren.
4. Useextremecare when approachingblind corners,
doorways,shrubs,trees,or otherobjectsthat may obscure
yourvisionof a child whomay run intothe mower.
5. Keepchildrenawayfrom hot or runningengines.Theycan
sufferburnsfrom a hot muffler.
6. Neverallowchildrenunder14 yearsoldto operatea power
mower.Children14 yearsoldand overshouldreadand
understandoperationinstructionsandsafetyrulesinthis
manualandshouldbe trainedandsupervisedbya parent.
General
Operation
1. Readthis operator'smanualcarefullyin its entiretybefore
attemptingto assemblethis machine.Read,understand,
andfollowall instructionson the machineandin the
manual(s)beforeoperation.Be completelyfamiliar with
the controls andthe proper useof this machinebefore
operatingit. Keepthis manualin a safe place forfuture
and regularreferenceand for orderingreplacementparts.
2. This machineis a precision pieceof powerequipment,
not a plaything.Therefore,exerciseextremecautionat all
times.Yourunit has beendesignedto performonejob: to
mowgrass. Do not use it for any otherpurpose.
3. Neverallow childrenunder 14yearsold to operatethis
machine.Children 14yearsold and overshould readand
understandthe instructionsinthis manualandshould
be trainedand supervisedby a parent.Onlyresponsible
individualswho arefamiliar withthese rulesof safe
operationshould be allowedto usethis machine.
4. Thoroughlyinspectthe area wherethe equipmentis to
be used. Removeall stones,sticks,wire, bones,toys
andotherforeignobjects, whichcould be trippedover or
picked up andthrown bythe blade.Thrownobjects can
causeseriouspersonalinjury.Plan your mowingpattern
to avoid dischargeof materialtoward roads,sidewalks,
bystandersandthe like.Also,avoid dischargingmaterial
againsta wall or obstruction,whichmay causedischarged
materialto ricochetback towardthe operator.
5. Tohelp avoid bladecontact or a thrown objectinjury,
stay inoperatorzone behindhandlesand keepchildren,
bystanders,helpersand pets at least 75 feetfrom mower
whileit is inoperation.Stop machineif anyoneenters
area.
4
6. Alwayswearsafetyglasses or safetygogglesduringoperation andwhile performingan adjustmentor repairto protect
youreyes. Thrownobjectswhich ricochetcan causeserious
injury to the eyes.
7. Wearsturdy, rough-soledworkshoesand close-fitting
slacksandshirts. Shirtsand pantsthatcoverthe arms and
legs andsteel-toedshoesare recommended.Neveroperate
this machinein bare feet,sandals, slipperyor light-weight
(e.g. canvas)shoes.
8. Do not put hands or feet near rotatingparts or undercutting
deck. Contactwithblade can amputatehands andfeet.
9. A missingor damageddischargecovercan cause blade
contactor thrownobject injuries.
10. Manyinjuriesoccuras a resultof the mowerbeing pulled
overthe foot duringa fall causedby slippingor tripping.
Do not hold on to the mower if you are falling; releasethe
handle immediately.
11. Neverpullthe mowerback towardyou whileyou are
walking.If you must backthe mowerawayfrom a wall or
obstructionfirst look down and behindto avoid trippingand
thenfollowthese steps:
a. Stepback from mowerto fully extend yourarms.
b. Be sure youare well balancedwithsurefooting.
c. Pullthe mowerback slowly,no morethan half way
toward you.
d. Repeatthesesteps as needed.
12. Do not operatethe mowerwhileunderthe influenceof
alcoholor drugs.
13. Do not engagethe self-propelledmechanismon unitsso
equippedwhilestartingengine.
14. The bladecontrol handle is a safetydevice.Neverattempt
to bypassits operation.Doingso makesthe safetydevice
inoperativeandmay result in personalinjurythrough
contactwiththe rotatingblade. The bladecontrol handle
mustoperateeasily in bothdirectionsandautomatically
returnto the disengagedpositionwhen released.
15. Neveroperate the mowerinwet grass. Alwaysbe sure of
yourfooting. A slip and fall can causeseriouspersonal
injury.If you feel you are losing yourfooting,releasethe
bladecontrol handle immediatelyand the bladewill stop
rotatingwithinthreeseconds.
16. Mowonly in daylightor good artificial light. Walk,never run.
17. Stopthe bladewhen crossinggraveldrives, walksor roads.
18. If the equipmentshouldstartto vibrateabnormally,stop the
engineand check immediatelyfor the cause.Vibrationis
generallya warningof trouble.
19.Shut the engine off andwait untilthe bladecomesto a
completestop before removingthe grasscatcheror unclogging the chute.
The cuttingbladecontinuesto rotatefor a fewseconds after
the engine is shut off. Neverplaceany part of the bodyin
the bladearea untilyou are surethe blade hasstopped
rotating.
20. Neveroperate mowerwithoutpropertrail shield, discharge
cover,grass catcher,bladecontrol handleor othersafety
protectivedevices in placeand working.Neveroperate
mowerwithdamagedsafetydevices.Failureto do so can
resultin personalinjury.
21. Mufflerandengine becomehot andcan causea burn.Do
not touch.
7. Extinguishall cigarettes,cigars, pipesand othersources
of ignition.
8. Neverfuel machineindoorbecauseflammablevapors will
accumulatein the area.
9. Neverremovegas cap or add fuel whileengine is hot or
running. Allow engineto cool at least two minutesbefore
refueling.
10. Neveroverfill fuel tank. Filltank to no morethan Y2inch
below bottomof filler neckto providefor fuel expansion.
11. Replacegasoline cap andtighten securely.
12. If gasolineis spilled,wipe it off the engine and equipment.
Moveunit to another area.Wait 5 minutesbeforestarting
engine.
13. Neverstorethe machineor fuel containernear an open
flame,sparkor pilot light as on a water heater,space
heater,furnace, clothesdryeror othergas appliances.
14. Toreducefire hazard,keepmowerfree of grass, leaves,
or other debrisbuild-up.Clean up oil or fuel spillage and
removeany fuel soakeddebris.
15. Allow a mowerto cool at least5 minutesbeforestoring.
22. Only use parts and accessoriesmadefor this machineby
manufacturer.Failureto do so can result inpersonalinjury.
23. If situationsoccurwhich are not coveredin this manual,
use careand goodjudgment. Contactyourdealerfor
assistance.Telephone1-800-800-7310for the name of your
nearestdealer.
Operation
General Service:
Slope Operation
1. Neverrun an engine indoorsor in a poorlyventilatedarea.
Engineexhaustcontainscarbonmonoxide,an odorlessand
deadlygas.
2. Beforecleaning,repairing,or inspecting,makecertainthe
bladeandall movingparts havestopped.Disconnectthe
sparkplug wire andgroundagainstthe engineto prevent
unintendedstarting.
3. Checkthe bladeandengine mountingbolts atfrequent
intervalsfor propertightness.Also,visuallyinspectbladefor
damage(e.g.,bent,cracked,worn) Replacebladewiththe
originalequipmentmanufacture's(O.E.M.)bladeonly,listed
inthis manual."Use of partswhichdo not meetthe original
equipmentspecificationsmay leadto improperperformance
andcompromisesafety!"
4. Mowerbladesare sharp andcan cut.Wrap the bladeor wear
gloves,anduse extracautionwhen servicingthem.
5. Keepall nuts,bolts, andscrewstight to be surethe equipmentis insafe workingcondition.
6. Nevertamperwithsafetydevices.Checktheir proper operation regularly.
7. Afterstrikinga foreignobject,stop the engine,disconnect the sparkplug wire andgroundagainstthe engine.
Thoroughlyinspectthe mowerfor any damage.Repairthe
damagebeforestartingandoperatingthe mower.
8. Neverattemptto makea wheel or cuttingheightadjustment
whilethe engine is running.
9. Grasscatchercomponents,dischargecover,andtrail
shield aresubjectto wear anddamagewhichcould expose
movingparts or allowobjectsto be thrown.For safety
protection,frequentlycheck componentsandreplaceimmediatelywithoriginal equipmentmanufacturer's(O.E.M.)
parts only,listed inthis manual."Use of parts which do
not meetthe original equipmentspecificationsmaylead to
improperperformanceandcompromisesafety!"
10. Do not changethe enginegovernorsettingor over-revthe
engine.The governorcontrolsthe maximumsafe operating
speedof the engine.
11. Maintainor replacesafetylabels,as necessary.
12. Observeproperdisposallawsand regulations.Improper
disposalof fluidsand materialscan harmthe environment.
Slopesare a majorfactor relatedto slip andfallaccidents,which
can resultinsevereinjury.Operationon slopes requiresextra
caution.If you feel uneasyon a slope,do not mow it.For your
safety,usethe slope gaugeincludedas part of this manualto
measureslopes beforeoperatingthis unit on a slopedor hilly
area.If the slope is greaterthan 15degrees,do not mowit.
Do:
1. Mowacrossthe face of slopes;neverup anddown.Exercise
extremecautionwhenchangingdirectionon slopes.
2. Watchfor holes,ruts,rocks, hiddenobjects,or bumpswhich
can causeyouto slip or trip. Tallgrass can hide obstacles.
3. Alwaysbe sure of yourfooting.A slip andfall can cause
serious personalinjury.If you feel you are losingyour
balance,releasethe bladecontrol handle immediately,and
the bladewill stop rotatingwithin 3 seconds.
Do Not:
1. Donot mownear drop-offs, ditchesor embankments,you
could loseyour footing or balance.
2. Donot mowslopes greaterthan 15degrees asshown on
the slope gauge.
3. Donot mowon wetgrass. Unstablefooting could cause
slipping.
Service
Safe Handling Of Gasoline:
1. To avoid personalinjury or propertydamage useextreme
care inhandlinggasoline. Gasolineis extremelyflammable
and the vapors are explosive.Serious personalinjury can
occur when gasolineis spilled on yourself or your clothes,
which can ignite.
2. Wash yourskin andchangeclothesimmediately.
3. Useonly an approvedgasolinecontainer.
4. Neverfill containers insidea vehicle or on a truckor trailer
bedwitha plasticliner.Alwaysplace containerson the
ground awayfrom yourvehicle beforefilling.
5. Removegas-poweredequipmentfromthe truck or trailer
and refuel it on the ground.If this is not possible,then refuel
such equipmenton a trailer witha portablecontainer,rather
than from a gasoline dispensernozzle.
6. Keepthe nozzlein contactwiththe rim of the fuel tank or
container openingat all times until fuelingis complete.Do
not use a nozzle lock-opendevice.
5
WARNING
This symbol points
out important safety
instructions, which if
not followed, could
endangerthe personal
safety and/or property
of yourselfand others.
Read and follow all
instructions in this manual before attempting to
operate this machine.
Failureto comply with
these instructions may
result in personal injury.
When you see this
symbol.
HEED
IT'S WARNING!
Your Responsibility
Restrictthe use
of this power machine
to persons who read.
understand
and follow the warnings
and instructions
in this manua
and on the machine.
1. Removeanypackingmaterialwhich may be between
upperand lowerhandles.
a. Pull up and backon upperhandleas shownin
Step 1.Makecertainthe lowerhandleis seated
securelyintothe handle mountingbrackets.
b. Tightenhandknobs securingupperhandleto
lowerhandle.Make surethat eachcarriagebolt is
seatedproperlyin the handle.
2. Locatehairpinclip in one holeon the weldpin on each
sideof lowerhandle.
Adjustment
a. Removehairpinclipfrom this hole.Usinga pair of
pliers,insert hairpinclip intothe other holeon the
weldpin. Repeaton otherside.
b. Inserta carriagebolt fromthe hardwarepack into
the upperhole on the handle mountingbracket.
Securewith one plasticwing nut,also included
in the hardwarepack.Repeaton other sidewith
remainingitemsfrom hardwarepack.
Step 1
.
HardwarePack
a. Holdblade controlhandleagainstupper handle.
NOTE: Stand behind
b. Pull starterropeout of the engine.Releaseblade
controlhandle.
the mower as il you
Wing Nuts (2)
c. Slip starterrope into ropeguide.
were
going
operate
it. Your
righttohand
correspondsto the right
i side of the mower; your
d. Tightenwingnut.
.
left hand corresponds
to the left side of the
mower.
Insertpost on cable ties intoholes providedon the
lowerhandle.Pull cabletie tight and trim excess.
5. Installrear wheelsas followsin Step5: (maybe
alreadyinstalled)
a. Placerearof the mowerdeck on raisedblocks.
b. Removelock nutfrom pivot armassembly(on
selectmodels,these may be includedseparately
in a plasticbag).
iMPORTANT
i This unit is shipped
without gasoline or
oil in the engine. Fill
up gasoline and oil
as instructed in the
i accompanying engine
manual BEFORE
The ropeguide is attachedto the right sideof the
upperhandle.Loosenthe wingnut which securesthe
rope guide.
c. Slidewheel, with hollowsidein, ontopivot armand
securewith lock nut.
Step 2
d. Assemblethe other sidein the samemanner.
operating your mower.
Step 3
Step 4
6
.m_
J
CUTTING
Step 5
Step8
Step 6
6. An adjustingplateand thumb leverat each wheel
positionprovidescuttingheightadjustment.
All Wheelsmust be
placed in the same
a. Depresslevertowardswheel.
relative pos!tionl
b. Moveit to anyof the ninepositionsfor desired
cutting height.SeeStep 6.
Step 7
Make certain bag is
turned right side out
before assembling
(waming labe! will be
on the outside):
c. Releaselevertowardsmowerdeck.
7. Followstepsbelowto assemblethe grasscatcher:
a. Placebag overframe sothat its black plasticside
is at the bottom.
b. Slip plasticchannelof grass bagoverhooks on the
frame.See Step7.All the plasticchannelsexcept
centertop of bagattachfrom outsideof bag.
c. Attachcentertop of bag from insideof bag.
8. Followstepsbelowto attachgrass catcher:
a. Lift rear dischargedoor.
J
b. Placegrass catcheron thepivot rod. Letgo
of dischargedoor sothat it restson thegrass
Step 7
catcher.See Step8.
To removegrass catcheror convertto a mulcher,lift rear
dischargedooron the moweras shownin Step8. Lift
grass catcherup and out of the pivot rod.Releaserear
dischargedoorto allow it to close rear openingof mower.
......................................
Never operate mower
unless the hooks on
the grass catcher are
firmly seated on the
p vot
rod;
andthe
_
rear discharge door
rests firmly against
unless the hooks on the grass
ARNING: Never operate mower
catcher are firmly seated on the
pivot rod, and the rear discharge
door rests firmly against top of
the grass catcher.
topofthegrass
Step 8
7
Know Your Lawn Mower
--,
Blade Control
Upper Handle
Recoil
Starter
Lower Handle
Oil Fill
Starter Ro
Grass Catcher
Cutting Height
Adjustment Lever
(for each wheel)
WARNING
The blade control
mechanism is a
safety device. Never
attempt to bypass its
operations.
Gasoline Fill
Use extreme care
Primer
i when handhng
gasoline. Gasoline is
extremely flammable
and the vapors are
explosive. Never fuel
the machine indoors
or while the engine
is hot or running.
Extinguish cigarettes,
cigars, pipes and
other sources of
ignition.
Figure 1
Recoil
Now that you have set up your lawn mower for operation, get aquainted with its controls and features.
These are described below and illustrated on this
page. This knowledge will allow you to use your
new equipment to its fullest potential.
Gas and Oil Fill-Up
1. Check oil level and add oil if necessary. Follow engine
manual for this. See Figure 1 above for location of the
oil fill.
Blade Control
The blade control is attached to the upper handle
of the mower. Depress and squeeze it against the
upper handle to operate the unit. Release it to stop
engine and blade.
__
Cutting
2. Servicethe enginewith gasolineas instructedin the
enginemanual. See Figure1 abovefor locationof
gasfill.
nism is a safetydevice. Never attempt
WARNING:This blade control mechato bypass its operations.
Height
Adjustment
Starter
The recoil starter is attached to the right upper
handle. Stand behind the unit and pull the recoil
starter rope to start the unit.
_
Levers
One adjustment lever is located on each wheel and
is used to adjust the cutting height. All four levers
have to be at the same relative position to ensure a
uniform cut.
8
dling gasoline.Gasoline is extremely
ARNING:Useextreme
hanflammable
and the vaporscarewhen
are explosive.
Never fuel the machine indoorsor while
the engine is hot or running. Extinguish
cigarettes, cigars, pipesand other
sources of ignition.
WARNING:The operationof any lawn
mowercan result in foreign objects
being thrownintothe eyes,whichcan
damageyoureyesseverely. Always
wearsafety glasseswhileoperating
the mower, or while performingany
adjustments or repairson it.
Starting
Engine
Mower
WARNING:Be sure no one otherthan
the operatoris standing near the lawn
mower while starting engine or operating mower. Never run engine indoors
or in enclosed, poorly ventilated areas.
Engine exhaust contains carbon
monoxide, an odorless and deadly
gas. Keep hands, feet, hair and loose
clothing away from any moving partson
engine and lawn mower.
1. Pushprimerthreetimes.Wait abouttwo seconds
betweeneachpush. See Figure2. Intemperature
around550F or below,primefive times.Do not prime
to restarta warm engine.
Figure 2
_klL
2. Standingbehindthe mower,squeezethe bladecontrol
againstupper handle.See Figure2.
object,stop the engine.Remove
ARNING:if you strike a foreign
wire from the spark plug,thoroughly
inspect mower for any damage, and
repair damage before restarting and
operating. Extensive vibration of
mower during operation is an indication of damage. The unit should be
promptlyinspectedand repaired.
3. Holdingthesetwo handlestogetherfirmly,grasp recoil
starterhandleand pull ropeout with a rapid,continu1. Forbest results,do notcut wet grass.
ous, full arm stroke.See Figure2. Keepinga firm
grip on the starterhandle,let the rope rewindslowly.
2. Fora healthierlawn, nevercut off morethan oneRepeatuntil enginecranks.Letthe roperewindeach
thirdof the total lengthof the grass.
time slowly.
Using
as Mulcher
Formulchinggrass,removethe grasscatcherfrom the
mower.The rear dischargedoor shouldbe closed.
,_
__
Stopping
completely before doing any work
WARNING:Wait for the blade to stop
on the mower or to removethe grass
catcher.
2. Newor thick grassmay requirea narrowercut.
Adjustgroundspeedaccordingto conditionof lawn.
3. If thegrass has beenallowedto growin excessof
4 inches,mulchingis not recommended.Usethe
grasscatcherto bag clippingsinstead.
Engine
2. Disconnectsparkplug wirefrom spark plug and
groundagainstthe engine.
,__k
The operation of any
lawn mower can result
in foreign objects
being thrown into
the eyes, which can
damage your eyes
severely. Always wear
safety glasses while
operating the mower,
or while performing
any adjustments or
repairs on it.
1. Foreffectivemulching,do notcut wet grass.
1. Releasebladecontrol to stop theengineand blade.
UsingYour
WARNING
Using
Grass Catcher
Youcan usethe grass catcherto collectclippingswhile
youare operatingthe mower.
Lawn Mower
1. Attachgrasscatcherfollowinginstructionson page
7. Grass clippingswill automaticallycollectin the
bag as you runthe mower.Operatethe mowertill the
grass bag is full.
without either the rear door or the entire
WARNING:Never operate your mower
grass catcher assembly firmly secured.
2. Stopenginecompletelyby releasingthe blade
controlhandle.Makesurethat the unit hascometo
a completestop.
Be surelawnis clearof stones,sticks,wire,or other
objectswhich coulddamagelawnmoweror engine.
Such objectscouldbe accidentlythrownby the mower
in anydirectionand cause seriouspersonalinjuryto the
operatorand others.
3. Lift dischargedoor and pull grassbag up and away
fromthe mowerto disposeof the grass clippings.
9
Be sure no one other
than the operator is
standing near the lawn
mower while starting
engine or operating
mower. Never run
engine indoors or
n enclosed, poorly
ventilated areas. Engine exhaust contains
carbon monoxide, an
odorless and deadly
gas. Keep hands, feet,
hair and loose clothing
away from any moving
parts on engine and
lawn mower.
Deck Care
Clean underside of the mower deck after each use
to prevent build-up of grass clippings or other debris.
Follow steps below for this job.
1. Disconnectsparkplug wire. Draingasolinefrom lawn
mower,or placea pieceof plasticunderthe gas cap.
2. Tip mowersothat itrestson the housing.Keepthe
sidewith the air cleanerfacingup. Hold mowerfirmly.
Maintaining
,_
--
more
than 90
degrees
in any
WARNING"
Never
tip the
mower
directions and do not leave the
mower tipped for any length of
time. Oil can drain intothe upper
part of the engine causing a
starting problem.
3. Scrapeand clean the undersideof the deck with a
suitabletool. Do notspraywith water.
General
WARNING
Always stop engine,
disconnect spark
plug, and ground
against engine before
cleaning, lubricating
or doing any kind of
maintenance on your
_ machine.
i Never tip the mower
more than 90 degrees
in any directions
and do not leave the
mower tipped for any
length of time. Oil can
drain into the upper
part of the engine
causing a starting
problem.
Recommendations
1. Alwaysobservesafetyruleswhen performing
anymaintenance.
4. Putthe mowerback on itswheelson the ground.If
youhad putplasticunderthe gas capearlier,make
sureto removeit now.
2. Thewarrantyon this lawnmowerdoesnot cover
itemsthat havebeen subjectedto operatorabuse
or negligence.To receivefull valuefromwarranty,
operatormustmaintainthelawn moweras
instructedhere.
NOTE: Wedo not recommendthe use of pressure
washersor garden hoseto cleanyourunit. Thesemay
causedamageto electriccomponents,spindles,pulleys,
bearings,or theengine.Theuse of waterwill result in
shortenedlife and reduceserviceability.
3. Changingof engine-governedspeedwill void
enginewarranty.
Engine Care
4. All adjustmentsshouldbe checkedat leastonce
eachseason.
5. Periodicallycheckall fastenersand makesurethese
are tight.
__
disconnect
spark plug,
ARNING: Always
stopand
engine,
ground against engine before
cleaning, lubricating or doing
any kind of maintenanceon your
machine.
Lubrication
1. Lubricatepivot pointson theblade controlhandleat
least oncea seasonwith lightoil. The bladecontrol
mustoperatefreely inboth directions.See Figure3.
A list of key enginemaintenancejobs requiredfor good
performanceby the moweris given below.Followthe
accompanyingengine manualfor a detailedlist and
instructions.
1. Maintainoil levelas instructed
in enginemanual.
2. Serviceair cleanerevery25 hoursundernormal
conditions.Cleaneveryfew hoursunderextremely
dustyconditions.Poorengineperformanceand
floodingusuallyindicatesthat the air cleanershould
be serviced.Toservicethe air cleaner,referto the
enginemanual.
3. Cleansparkplug and resetthegap once a season.
Sparkplug replacementis recommendedat the start
of eachmowingseason.Checkenginemanualfor
correctplugtype and gap specifications.
4. Cleanengineregularlywith a cloth or brush. Keepthe
coolingsystem(blowerhousingarea) cleanto permit
properair circulation.Removeall grass,dirt and
combustibledebrisfrom mufflerarea.
2. Lubricatethe wheelsat least oncea seasonwith
lightoil (or motoroil). If wheelsare removedfor any
reason,lubricatesurfaceof the pivotarm and inner
surfaceof thewheelwith light oil. See Figure3.
3. Lubricatethe torsionspringand pivot pointon the
rear dischargedoor periodicallywith lightoil to
preventrust.See Figure3.
4. Followtheaccompanyingengine manualfor lubrication scheduleand instruction
for engine lubrication.
10
Blade Care
cutting
blade
for sharpening
or
ARNING:
When
removing the
replacement, protect your hands
with a pair of heavy gloves or use
a heavy rag to hold the blade.
_
Maintaining
Yo ur LaWn
ow er
Periodicallyinspectthe bladeadapterfor cracks,
especiallyif youstrikea foreignobject. Replacewhen
necessary.Followthe stepsbelowfor blade service.
1. Disconnectsparkplug wirefrom spark plug.Turn
moweron itsside makingsurethat the air filter and
the carburetorare up.
Figure 4
2. Removethe boltand the bladebell supportwhich
hold the bladeand the bladeadapterto the engine
crankshaft.See Figure4.
3. Removebladeand adapterfromthe crankshaft.
4. The bladecan be sharpenedwith a fileor on a grindingwheel.Do notattemptto sharpenthe blade whileit
is still on the mower.
WARNING
5. Whensharpeningthe blade,followthe originalangle
of grind. Grindeachcuttingedge equallyto keepthe
blade balanced.
.
Removebladefrom the adapterfor testingbalance.
7. Balancethe bladeon a roundshaftscrewdriverto
check. Removemetalfrom the heavysideuntil it
balancesevenly.
Figure 5
Replacing
,__
will
cause excessive
vibration
WARNING:
An unbalanced
blade
when rotating at high speeds, it
may cause damage to mower, and
could break causing personal
injury.
8. Lubricatetheenginecrankshaftand the inner surface
of the blade adapterwith lightoil. Slide the blade
adapteronto the enginecrankshaft.
9. Placethe bladeon the adaptersuch that the side
of the blade marked"Bottom"(or with part number)
facesthe groundwhenthe mowerisin theoperating
position.Makesurethat the blade isalignedand
seatedon the bladeadapterflanges.
10.Placeblade bell supporton the blade.Align notches
on the bladebell supportwith smallholesin blade.
11.Replacehex boltand tightenhex boltto torque:450
in.Ibs. rain.,600 in.Ibs.max.
Toensuresafe operationof yourmower,periodically
checkthe blade boltfor correcttorque.
Rear Flap
1. To removerearflap, cut off the flat end of the wire
rod which securesit to the deck.See Figure5.
2. Attachthe newflapand newrod to deck,bending
the endsof the newrod overto secureto deck.
Off-Season
Storage
Thefollowingstepsshouldbe takento prepareyour
lawnmowerfor storage.
1. Cleanand lubricatemowerthoroughlyas described
in the lubricationinstructions.
2. Wedo not recommendthe use of a pressurewasher
or garden hoseto cleanyourunit.
3. Referto engine manualforcorrectengine
storageinstructions.
4. Coat mower'scuttingblade with chassisgreaseto
preventrusting.
5. Storemowerin a dry, cleanarea. Donot storenext
to corrosivematerials,suchas fertilizer.
Whenstoringanytype of powerequipmentin a poorly
ventilatedor metal storageshed, careshouldbe taken
to rust-prooftheequipment.Usinga lightoil or silicone,
coat theequipment,especiallycablesand all moving
parts of yourlawnmowerbeforestorage.
11
When removing
the cutting blade
for sharpening or
replacement, protect
your hands with a
pair of heavy gloves
or use a heavy rag to
hold the blade.
An unbalanced blade
will cause excessive
vibration when rotating at high speeds, it
may cause damage
to mower, and could
break causing personal injury.
Problem
Cause
Engine fails to Start
i. Blade controldisengaged.
spark p!ug wiredisconnected:
3. Fueltank empty or stale fuel.
4. Enginenot choked.
6.
Enginerunserratic
5: Faultyspark pug
BlOCked
fuel linel
7: Engineflooded.
1. Sparkplug wire loose.
2. Blockedfuel lineor stale fuel.
3.
4.
5.
6.
repairs
beyondEngine overheats
1 Engineoil levellow.
2....A r fow restr cted
3. Carburetornot adjustedpropery.
theminor
adjustments
listed here, contact
an authorized service
_i
_
i ii _ii__ii_
I
1. Fillcrankcasewith proper oil.
I 2 Removeb owerhousng and c ean
3• Referto engne manua.
1. Resetgapto .030-inchor replace
spark p ug.
2. Referto engine manual.
3. Referto engine manual.
i
2 Carburetorimproperlyadjusted
3. Dirtyair cleaner.
1. Cuttingbladeloose or unbalanced.
1. Tighten bladeandadapter.Balance
blade.
2. Bentcutting blade.
2. See an authorizedservicedealer.
1 Wetgrass•
1. Donot mowwhen grass is wet wait
2. Excessivelyhigh grass.
until laterto cut.
2. Mowonce at a high cutting height,
then mowagainat desiredheight or
3. Du bade.
1. Wheelsnot positionedcorrectly.
2. Dull blade.
i_ i_ _i!: _
5. Referto engine manual.
6. Referto engine manual.
1. Sparkplug fouled, faulty or gaptoo wide.
Uneven cut
!
1. Connect andtighten sparkplug wire.
2. Clean fuel line; fill tank withclean,
fresh gasoline.
3. Clear vent.
4. Drainfuel tank. Refillwithfresh fuel.
Idles poorly
,
i ¸
4. Choke engineas instructedinthe
OPe[atingYOU[Lawn Mower section•
5, Clean, adjustgap, or replace.
6,
cieanfueliinel
7: Wait afew minutesto iestart, but do
I
notprime:
1. Adjust gapto .030-inch.
2. Referto engine manual.
Mower will not mulch grass
i i
Engage biadecontrol
conBect Wireto Sparkp!ug_
3. Fi Itank with clean,fresh gasoline.
1. Sparkplug gap too close.
2. Carburetoridlemixtureadjustment
improperlyset.
Excessive Vibration
ii _ _ i _
I
Occasional skips
(hesitates) at high speed
.
_iiii _
Ventingas cap plugged.
Wateror dirt infuel system.
Dirtyair cleaner.
Carburetorout of adjustment.
Remedy
!
iiiii_
12
I
makea narrowercutting path.
, 3. Sharpenor replaceblade.
1. Placeall four wheelsin same
heightposition.
2. Sharpenor replaceblade.
iii
i_
ii i _iI_ii
13
_
iiii
\
14
747-1161A Blade ControlHandle
720-0426
AdjustmentLeverKnob
Spring Lever
2
749-1092A UpperHandle
29
732-0404
3
747-04080
30
738-0507B ShoulderScrew
4
749-0928A LowerHandle
31
734-2005A FrontWheel,8" x 2.125"
5
720-0279
32
710-04371
Grass CatcherFrame
Wing Nut
Screw,1/4-15x 1.250
i¸¸I
£NUIN£
_FACTORY
6
710-1205
RopeGuide
33
746-1130
ControlCable- 40.00"
7
710-1174
CarriageBolt ,5/16-18x 2
34
731-04998
Trailshield
8
664-04007A Grass BagAssembly
35
732-0700
TrailshieldWire
9
720-04072
Star Knob
36
712-0397
Wing Nut,1/4-20
10
710-0599
Screw,1/4-20x .500
37
747-0996
Rear DoorPivotRod
11
726-0240
CableTie
38
732-0866
Spring Lever
12 _ 710-0703 Carriage Bolt ,1/4-20
13
731-04134A Rear DischargeDoor
14
750-04162
15
•732-04089A
Spacer
1'800,800-7310
orviait
www:mtdproducts:com
AB Screw
16
732-04090A TorsionSpring- RH
42
710-0654A TT SeresScrew,3/8-16x 1.0
17
734-04093
43
687-02099A Ht. Adj.Assy. Front- LH
18
731-04150C RearBaffle
19
720-0312
Spring LeverGrip
20
787-01276
Deck- 21"
21
782-5002B Front Baffle
22
748-0377C Blade Adapter
23
742-0741
MulchingBlade
24
710-1257
Hex Screw, 3/8-24x 2.5
25
RearWheel, 12"x 2.125"
contact
687-02075A PivotArm Assembly- LH
710-1652
687-02100A Ht. Adj.Assy. Front- RH
44
687-02057
Rear HandleBracketAssy.- LH
687-02056
Rear HandleBracketAssy.- RH
45
712-04065
FlangeLock Nut,3/8-16
46
687-02192
HandleBracketAssembly- RH
687-02191
HandleBracketAssembly- LH
47
710-0216
Hex Screw,3/8-16x 0.75
687-02077A PivotArm Assembly-RH
48
731-2626
DeluxeBail Cover
687-02076A PivotArm Assembly- LH
49
736-0182
SpringWasher
26
736-0524B Blade Bell Support
50
731-0981A RadialSpokeHubcap
27
787-01290
FrontAdjustmentPlate
15
PARTS
To order replacement
39 _ 687-02074A_ PivotArm Assembly- RH
40
i
ii i _iI_ ii
MANUFACTURER'S
LiMiTED WARRANTY
The limitedwarrantyset forth belowisgivenby MTDLLCwith respect
to newmerchandisepurchasedand usedin the UnitedStates,its
possessionsand territories.
"MTD"warrantsthis productagainstdefectsin materialand workmanshipfor a periodof two (2) years commencingon the date of original
purchaseand will, at its option,repairor replace,freeof charge,any
part foundto be defectiveinmaterialsor workmanship.This limitedwarranty shallonlyapply if this product hasbeen operatedand maintained
inaccordancewith the Operator'sManualfurnishedwith the product,
and has notbeen subjectto misuse,abuse,commercialuse, neglect,
accident,impropermaintenance,alteration,vandalism,theft, fire, water,
or damagebecauseof otherperil or naturaldisaster.Damageresulting
fromthe installationor useof any part, accessoryor attachmentnot
approvedby MTDfor use with the product(s)coveredbythis manual
willvoid yourwarrantyas to any resultingdamage.
Normalwearparts are warrantedto be free fromdefects in materialand
workmanshipfor a periodof thirty (30) days fromthe dateof purchase.
Normalwearparts include,butare notlimitedto itemssuch as: batteries,belts,blades,blade adapters,grass bags, riderdeck wheels,seats,
snowthrowerskid shoes,shaveplates,auger spiralrubberand tires.
NOW TO OBTAIN SERVICE: Warranty service is available, WITH
PROOF OF PURCHASE, through your local authorized service
dealer. To locate the dealer in your area, check your Yellow Pages,
or contact MTD LLC at RO. Box 361131,Cleveland, Ohio 441360019, or call 1-800-800-7310 or 1-330-220-4683 or log on to our
Web site at www.mtdproducts.com.
This limitedwarrantydoesnot providecoverageinthe followingcases:
a. Theengineor componentparts thereof.These itemsmaycarry a
separatemanufacturer'swarranty.Referto applicablemanufacturer's
warrantyfor termsand conditions.
b. Log splitterpumps,valves,and cylindershavea separateone year
warranty.
c. Routinemaintenanceitemssuch as lubricants,filters, blade
sharpening,tune-ups,brakeadjustments,clutchadjustments,deck
adjustments,and normaldeteriorationof the exteriorfinish due to
useor exposure.
FOR
e. MTDdoesnot extendanywarrantyfor productssoldor exported
outsideof the UnitedStates,its possessionsand territories,except
those soldthroughMTD'sauthorizedchannelsof export distribution.
f. Replacementparts that are notgenuine MTDparts.
g. Transportationchargesand servicecalls.
No impliedwarranty,includingany impliedwarranty of merchantabilityof fitness for a particular purpose,applies after the
applicable periodof express written warranty above as to the
parts as identified.No otherexpresswarranty, whetherwritten or
oral, except as mentioned above, givenby any personor entity,
includinga dealeror retailer, with respect to any product,shall
bind MTD.Duringthe periodof the warranty,the exclusiveremedy
is repairor replacementof the productas set forth above.
The provisionsas set forth in this warrantyprovidethe sole and
exclusiveremedy arising from the sale. MTDshallnot be liable
for incidentalor consequentialloss or damage including,without
limitation, expensesincurredfor substituteor replacementlawn
careservicesor for rentalexpensesto temporarily replacea
warranted product.
Somestatesdo notallowthe exclusionor limitationof incidentalor
consequentialdamages,or limitations
on howlong an impliedwarranty
lasts,sothe aboveexclusionsor limitations
maynot applyto you.
In no event shallrecoveryof any kindbe greaterthanthe amountof the
purchasepriceof the productsold.Alterationof safety features of
the product shallvoid this warranty. Youassumethe risk and liability
for loss,damage,or injuryto you and yourpropertyand/orto others and
theirpropertyarisingout of the misuseor inabilityto usethe product.
This limitedwarrantyshallnot extendto anyoneotherthan theoriginal
purchaseror to the personfor whomitwas purchasedas a gift.
HOWSTATELAWRELATESTOTHIS WARRANTY: This limited
warrantygivesyou specificlegal rights,and youmay alsohaveother
rightswhich vary from stateto state.
IMPORTANT:OwnermustpresentOriginal Proofof Purchaseto obtain
warrantycoverage.
d. Servicecompletedby someoneotherthanan authorizedservice
dealer.
MTD LLC, P.O. BOX 361131 CLEVELAND,
OHIO 44136=0019; Phone: 1=800=800=7310, 1=330=220=4683