1
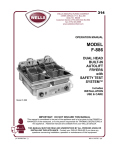
ELECTRIC FRYER MODELS
WITH STS SAFETY TEST SYSTEM
MODELS F-55, F-556, F-85; F-856, F-101, F-1016, F-1725
AUTOFRY MODELS
WITH STS SAFETY TEST SYSTEM
MODELS F-88, F-S86
• OPERATION • INSTALLATION .
MAINTENANCE MANUAL
WELLS MANUFACTURING COMPANY
P.O. BOX 280 VERDI, NEVADA 89439
(702) 345-0444® FAX (702) 345-0569
ITEM NO. 47814
REV. 8/98
TABLE OF CONTENTS
DESCRIPTION
PAGE
Warranty
Shipping Damage Claim Procedure
Warnings!
Features
Installation Instructions
Operating Instructions
Cleaning Instructions
STS Safety Test System
Warranty Exclusions
3
4
5
6
7
8
9
10
11
page 2
WARRANTY STATEMENT
All commercial cooking equipment manufactured by WELLS is warranted against defects in materials and workmanship for a
period of one year from the date of original installation or 18 months from the date of shipment from our factory, whichever comes
first and is for the benefit of the original purchaser only, except that;
a. with respect to the stainless steel frypots for gas fryers, model number WFG-40-2, the stainless steel frypot is
warranted to be free from defects that could cause shortening leaks for five (5) years from date of purchase, except
that after one (1) year replacement of frypot only is covered at 75% of list price of kettle assembly. Fry kettle
includes new shrouds, insulation, flue vent burners, thermostats and attaching hardware; travel and labor not
included. Frypots which fail due to abuse are not covered by standard or five (5) year warranty - items include but
not limited to firing of burners without shortening or other cleaning solution in the fry kettle at proper level.
b. with respect to Lite Line Products, warranty is one (1) year parts and labor on carry-in portable models.
THIS WARRANTY IS THE COMPLETE AND ONLY WARRANTY, EXPRESSED OR IMPLIED IN LAW OR FACT, INCLUDING
BUT NOT LIMITED TO, WARRANTIES OF MERCHANTABILITY OR FITNESS FOR ANY PARTICULAR PURPOSE. AND/OR
FOR DIRECT, INDIRECT OR CONSEQUENTIAL DAMAGES IN CONNECTION WITH WELLS' PRODUCTS. This warranty is
void if it is determined that upon inspection by an Authorized Service Agency that the equipment has been modified, misused,
misapplied, improperly installed, or dam aged in transit or by fire, flood or "Act of God", It also does not apply if the serial
nameplate has been removed or service is performed by unauthorized personnel. The prices charged by Wells for its products are
based upon the limitations in this warranty. Seller's obligation under this warranty is limited to the repair of defects without charge
by a WELLS' Factory Authorized Service Agency or one of its sub-service agencies and i s limited to a 60 mile radius to the
nearest Authorized Service Agency or one of its sub-service agencies. This service will be provided on customer's premises for
non-portable models. Portable models (a device with a cord and plug) must be taken or shipped to the closest Authorized Service
Agency, transportation charges prepaid for service. In addition to restrictions contained in this warranty, specific limitations are
shown in the Service Policy and Procedure Guide. WELLS' Authorized Service Agencies are located in principal cities. This
warranty is valid in the United States and Canada and void elsewhere. Please consult your classified telephone directory, your
foodservice equipment dealer or write the Factory Service Department, Wells Manufacturing Company, P.O. Box 280, Verdi,
Nevada 89439, phone (702) 345-0444, for information and other detail concerning warranty.
page 3
SHIPPING CLAIM PROCEDURE:
For your protection, please note that equipment in this shipment was carefully inspected and packed by skilled personnel before
leaving the factory. The transportation company assumes full responsibility for safe delivery upon acceptance of this shipment.
IF SHIPMENT ARRIVES DAMAGED:
1. VISIBLE LOSS OR DAMAGE - Be certain this is noted on freight bill or express receipt and signed by person delivering.
2. FILE CLAIM FOR DAMAGES IMMEDIATELY - Regardless of extent of damage.
3. CONCEALED LOSS OR DAMAGE - If damage is unnoticed until merchandise is unpacked, notify transportation company
or carrier immediately, and file "concealed damage" claim with them. This should be done within (15) days of date of
delivery is made to you. Be sure to retain container for inspection.
We cannot assume responsibility for damage or loss incurred in transit. We will, however, be glad to furnish you with the
necessary documents to support your claim.
page 4
WARNINGS!!
IMPORTANT!!
Make sure incoming voltage is the same as unit is rated for. An electrical specification plate specifying rated
voltage, wattage, Hz and phase of unit is attached to the front panel.
Plugging unit into greater voltage than unit is rated for may cause severe damage to the thermostatic
control, elements and other components. Plugging unit into less voltage than unit is rated for may cause
significant decrease in performance.
CAUTION
DO NOT SUBMERGE UNIT IN WATER.
DO NOT SPLASH OR POUR WATER ONTO CONTROL PANELS OR WIRING. POSSIBLE SHOCK
HAZARD MAY RESULT.
CAUTION
Normal operation and cleaning of Fryer involves contact with 375°F oil. Use extra care when operating,
cleaning, or maintaining equipment.
page 5
ELECTRIC FRYER FEATURES:
1.
2.
3.
4.
5.
6.
7.
8.
9.
10.
11.
12.
13.
14.
Power Switch: Turns electric power "ON" and "OFF". This switch should be turned "OFF"
before raising heating elements or when unit is not in use. Amber light in switch glows when switch in "ON".
Temperature Control: Automatically regulates temperature of frying oil and eliminates an over and under-heating condition.
Temperature control is adjustable from "OFF" to 375°F. NOTE: Models F-85, F-856, F-88, F-886 are equipped with dual
controls, each independent of the other, to regulate the temperature for each frypot.
Temperature Light: Turns "ON" when temperature control dial is turned to the heating position. Light turns "OFF" when oil
reaches desired temperature. During use, the light periodically turns o n and off indicating that the desired temperature of the
oil is being maintained.
Baskets: Baskets are fine mesh, heavy-duty, nickel plated construction, and interchangeable on right or left hand side.
Frypots: Heavy-duty, nickel-plated, with handles. Completely removable, may be taken to sink and washed.
Stainless Steel Finish: Wipe down daily with a damp, clean cloth.
Optional Crumb Cradle: Crumb Cradle catches food particles and sediment. To use, raise heating elements, grasp crumb
cradle handles with a cloth and remove, clean and then replace.
Heating Elements: Heating Elements are heavy-duty, flat-blade design (for Model F-1725
elements are heavy-duty, tubular design) located under each frying basket. This allows hot fat to rise through the food to
assure uniform frying.
Element Lift Handle-Basket Support: Supports each frying basket while in the drain position. It is also used to raise heating
elements out of the frypot. The heating elements are spring loaded to stay in the up position during the cleaning process.
NOTE: The power switch should be turned "OFF" before raising heating elements to avoid personnel injury and fire
hazard.
Safety Control: Safety "fire-guard" control turns "OFF" the power in the event of primary thermostat failure and overtemperature oil.
Adjustable Legs on Countertop Models: Compensates for irregularities in countertop or table.
STS Safety Test System with Test Switch: See Operation Instructions for details. Includes terminal block for connecting to
flame sensing fire suppression system.
Automatic Basket Lift on Autofry Models: Lowers frying basket into frypot then raises basket to the drain position when
the frying cycle is complete.
Automatic Reset Timer on Autofry Models: May be set for any frying time from 1 to 15 minutes, Helps maintain
consistency in product cooking.
page 6
INSTALLATION INSTRUCTIONS:
1.
2.
3.
4.
5.
6.
Remove unit carefully from carton.
IMPORTANT: Read all Installation Instructions carefully BEFORE starting installation. For built-in fryers see specification
sheets for installation requirements.
It is the responsibility of the installer to comply with local codes.
Select suitable countertop or table for installation.
CAUTION: OIL TEMPERATURE REACH 375°F IN FRYPOT. DO NOT LOCATE COUNTERTOP FRYERS CLOSE TO
EDGE OF TABLE OR COUNTERTOP.
MAKE SURE THAT INCOMING VOLTAGE IS THE SAME AS UNIT IS RATED FOR.
Any installation not matching the specifications discussed in this manual will void the units warranty.
Electrical Connections:
The heavy-duty fry kettle has been supplied with conduit knock-outs at the rear of the enclosures. Before connecting unit to the
power supply, check nameplate voltage and wattage. The connecting block is furnished within the appliance shell. After
connecting, if unit does not heat properly or blows fuses, check electrical hook-up. Supply wires and clearances must be in
accordance with labels attached to the unit. See specification sheets for models F-556, F-856, F-886, F-1016 for recommended
installation information.
All STS Safety Test System fryers include an additional terminal block for connecting to flame sensing fire suppression system.
(See wiring diagram for additional information.)
Safety High-Limit Thermostat:
Fryers are equipped with a safety high-limit thermostat designed to automatically shut "OFF" the fryer element if the temperature
of the oil exceeds 440°F. The red trouble light will glow indicating that the oil has overheated. If this happens, turn the
temperature control dial to the "OFF" position and allow the oil to cool. Press the red re-set button located on the back of the
element control housing and turn the temperature control knob to the desired setting. If a high-limit condition re-occurs, have the
fryer checked by a qualified Wells Service Agent.
page 7
OPERATING INSTRUCTIONS:
1.
2.
3.
Pour liquid oil into the frypot to the top of the smaller expansion zone. Upper area is for oil expansion and foaming during the
frying process (Model F-1725 has oil fill marks on inside of frypot). Turn power switch "ON" and rotate thermostat dial to the
proper temperature setting. IMPORTANT: If using solid shortening, make certain sufficient shortening is added to the frying
pot to ensure heating elements are fully covered at all times.
Load product into one or both frying baskets to half full, and place baskets into frying oil. The temperature light will turn "OFF"
to indicate that the oil has reached the proper frying temperature.
After placing one or both baskets into the frying oil for the proper amount of time, remove and attach to the basket support
rod for draining.
Operating Instructions for Autofrv Models:
1.
2.
3.
4.
Pour liquid oil into the frypot to the top of the smaller expansion zone. Upper area is for oil
expansion and foaming during the frying process. Turn power switch "ON" and rotate thermostat dial to the proper
temperature setting.
IMPORTANT: If using solid shortening, make certain sufficient shortening is added to the frying pot to ensure heating
elements are fully covered at all times.
Load product into one or both frying baskets to half full, and place baskets onto automatic basket lift rods, The temperature
light will turn "OFF" to indicate that the oil has reached the proper frying temperature.
To set the push button basket tim er, rotate the timer knob clockwise to the desired minutes for
frying time. To start the frying cycle, push the red button, and the basket will lower into the oil for the number of minutes set
on the timer. When time has expired, the basket will automatically raise to the drain position. To change the minutes of frying
time. rotate the timer knob to the new number of minutes of frying time desired and repeat the operation above.
NOTE: To return the basket to the drain position before the end of the frying cycle (for example:
incorrect frying time set on timer), rotate the timer knob counterclockwise to "O".
CAUTION: Keep the timer knob, push-button, and surrounding assemblies clean and free of grease at all time to insure
satisfactory operation.
Important Operating Tips:
1.
2.
3.
4.
5.
6.
7.
DO NOT overload fry baskets. Fill only to half full.
Never set thermostat dial to a higher temperature than is required for the particular food to be fried.
To save power and oil, turn the thermostat dial to the 200°F mark during idle frying periods. The fryer will return to the frying
temperature in a matter of minutes when needed.
Use a good quality, commercial shortening made especially for frying. It will prove to be less expensive in the long run.
Completely drain and filter frying oil daily.
Add at least 15% fresh oil to the kettle daily, and maintain proper oil level during operation.
Keep the equipment clean at all times. Always rinse baskets and frypot thoroughly to prevent oil contamination.
page 8
CLEANING INSTRUCTIONS:
Daily Cleaning:
1.
2.
3.
4.
5.
At the end of the day, turn the power switch to the "OFF" position. Remove the baskets from support rod, and swing heating
elements up and out of the frying pot.
CAUTION: Turn "OFF" the power supply before raising elements. Heating elements are spring loaded and must be locked
in the raised position.
Allow the oil to cool down to a safe handling temperature.
Using a cloth or other suitable insulation, grasp the frypot handles and pull frypot up and out of
the appliance shell, and drain into suitable receptacle. Frying pot should then be washed in the
sink as would any other pot or container.
CAUTION: DO NO SUBMERGE FRYER OR SPLASH/POUR WATER ONTO CONTROL PANEL WIRING. POSSIBLE
SHOCK HAZARD MAY RESULT. USE EXTRA CARE WHEN CARRYING OR EMPTYING FRYPOT.
Clean exterior surfaces with a mild detergent or non-abrasive cleaner with a wet cloth or sponge. Rinse and dry thoroughly.
Replace frying pot into fryer shell and lower heating elements. Refill frying pot with liquid oil or solid shortening and fryer is
ready for use.
Periodic Cleaning of Heating Elements:
Carbonization will eventually discolor the heating elements and frying pot. To remove carbonization, periodically (once a month or
more often as required) fill the frying pot with water and add a good commercial fry kettle cleaner. Turn heating elements "ON" and
"OFF" and let mixture stand over night.
The next day, raise the elements, loosen carbonization with a stiff brush, and remove frypot and empty. Replace pot and fill with
clean water plus vinegar or other neutralizing agent. Final rinse with plain water.
NOTE: Wells does not recommend that heating elements be turned "ON" while in the up position, as this will cause additional
carbonization and greatly reduce heating elements life; in addition, cause a personnel hazard.
page 9
STS SAFETY TEST SYSTEM:
The STS Safety Test System enables a check of the operation of the secondary fire guard control. The fire guard control is a
factory pre-set, (approximately 440°F) high-limit thermostat, which in the event of primary thermostat failure, will
automatically limit the maximum temperature of the frying oil. When the control is activated, the trouble light on the element
control housing will glow red and all power to the unit will be interrupted.
To Operate the STS Safety Test System:
1.
2.
3.
Clip the special STS thermometer to the side of the frying basket.
NOTE: Frypot must be filled with correct amount of oil. Use fresh oil to prevent excessive smoking.
Adjust temperature control knob to maximum setting and then turn "ON" power switch. Heat oil to where the thermometer
pointer reads "Start Test" (350°F) on the dial.
Depress the red "Test Switch" for no more that 2 1/2 minutes. During this time the oil will reach a temperature of 40O°F to
440°F (thermometer pointer will be in the "Test Zone"), and the secondary fire guard control will activate. When this occurs
the trouble light will glow red.
CAUTION: If the trouble light does not glow red and the thermometer pointer goes beyond the test zone, TURN OFF THE
POWER TO THE FRYER and call the nearest Wells Authorized Service Agency.
To Re-Set the Secondary "Fire Guard" Control:
1.
*
After checking the operation of the STS System, wait approximately 5 minutes for oil to cool below 40u°F, and push the red
manual re-set button located on the rear of the Element Control Housing. The trouble light should turn "OFF" .
IMPORTANT: If the re-set button continues to trip after re-setting, this indicates failure of the primary thermostat, TURN
"OFF" THE POWER TO THE FRYER and call the nearest Wells Authorized Service Agency.
STS Safety Test System is a registered Trade name of Wells Manufacturing Company.
page 10
WELLS MANUFACTURING COMPANY SERVICE
POLICY AND PROCEDURE GUIDE ADDITIONAL
WARRANTY EXCLUSIONS
1.
Resetting the safety thermostats, circuit breakers, overload protectors, or fuse replacements unless warranted conditions are
the cause.
2.
All problems due to operation at voltages other than specified on equipment nameplates conversion to correct voltage
must be the customer's responsibility.
3.
All problems due to electrical connections not made in accordance with electrical code requirements and wiring
diagrams supplied with the equipment.
4.
Calibration of heat controls after the first sixty (60) days on original components. Replacement of items subject to normal
wear to include such items as knobs, light bulbs, baskets, grids, mechanical tim ers and thermocouples. Normal
maintenance functions including lubrication, adjustments of airflow, thermostats, door mechanisms, microswitches, burners
and pilot burners and replacement of fuses and indicating lights are not covered by warranty.
5.
All frypots welded in the field.
6.
Deterioration of aluminum vessels due to insertion of food product or use of abrasive cleaners is not covered by warranty.
7.
Full use, care, and maintenance instructions are supplied with each machine. Those miscellaneous adjustments noted are
customer responsibility. Proper attention will prolong the life of the machine.
8.
Travel mileage is limited to sixty (60) miles from an Authorized Service Agency or one of its sub-service agencies.
9.
All labor shall be performed during regular working hours. Overtime premium
will be charged to the buyer.
10. All genuine Wells replacement parts are warranted for ninety (90) days from date of purchase on non-warranty equipment.
This parts warranty is limited only to replacements of the defective part. Any use of non-genuine Wells parts completely
voids any warranty.
11. Installation, labor, and job check-outs are not considered warranty.
page 11
CONTACTORS
(2)