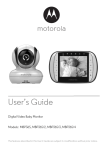
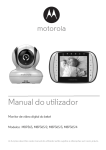
1
User’s Guide
MBP701, MBP702, MBP703, MBP704
MFV701, MFV702, MFV703, MFV704
Digital Photo Frame
with Video-in-Picture
The features described in this user's
guide are subject to modifications
without prior notice.
Welcome...
to your new Motorola Digital Photo Frame with Video-In-Picture!
Thank you for purchasing the Motorola product - the Digital Photo Frame with Video-In-Picture is more than just a
Photo Frame. It's a multimedia trip down memory lane, and with the addition of the Wireless Camera and Live
Video Feed, it's also a way of protecting what matters most.
Please retain your original dated sales receipt for your records. For warranty service of your Motorola product, you
will need to provide a copy of your dated sales receipt to confirm warranty status. Registration is not required for
warranty coverage.
For product-related questions, please call:
UK
0845 218 0890
ROI
08187 62092
On the Web: www.motorola.com
This User's Guide provides you with all the information you need to get the
most from your product.
Before you use the digital photo frame, please read the Safety Instructions on
page 7 before you install the units.
Got everything?
•
•
•
•
•
1 x Digital photo frame
1 x Camera unit**
1 x Remote control
1 x Power adapter for the Digital photo frame
1 x Power adapter for the Camera unit**
** In multi-camera packs, you will find one or more additional camera units with power adapters.
Overview of your Digital photo frame
Rear panel
4
Front panel
1
5
6
2
1
1
Link Indicator
On when the digital photo frame is powered on and
linked to a camera unit.
Flashes when the digital photo frame is out of range
of the selected camera unit.
Off when the digital photo frame is powered off.
3
1
ON/OFF 0
2
Navigation LR+- and OK/Play/Pause :II
3
Video ON/OFF V
4
Remote control
For remote control functions, please refer to page 15
5
Memory card slot
For inserting an SD, SDHC, MMC memory card that
contains the photos or music you want to play.
6
USB connector
For inserting a USB memory drive that contains
photos or music you want to play.
Note
This digital photo frame supports memory cards and USB
drives with a memory capacity of 2GB or up to 16GB.
Overview of your Camera unit
2
3
10
1
2
3
4
9
8
1
5
6
7
Infrared Lights
4 IR LEDs for night vision (Note: the picture will be in
black and white.)
WARNING
IR emitted from this product. Do not stare directly into
the IR LEDs.
Camera
Power Indicator
On steadily when the camera unit is switched on and
linked to the digital photo frame.
Flashes quickly when the camera unit is in
registration mode.
Flashes slowly when the camera unit is out of range
or not registered to the digital photo frame.
Off when the camera unit is switched off.
4 Volume + >
Press to increase the speaker volume.
5 Power 0
Press to power on the camera unit.
Press and hold to power off the camera unit.
6 Volume - <
Press to decrease the speaker volume.
7 Stop ;
During melody playback, press to stop the melody
playback.
8 Play :
Press to play the selected melody.
9 Melody M
Press to play the selected melody.
During melody playback, press to change to another
melody.
10 Light Detector
Photo-detector to sense when night vision required.
Important guidelines for installing our Digital photo frame
• To use your camera unit and digital photo frame together, you must be able to establish a radio link between them, and
the range will be affected by environmental conditions.
• Any large metal object, like a refrigerator, a mirror, a filing cabinet, a metallic door or reinforced concrete, between the
camera unit and digital photo frame may block the radio signal.
• The signal strength may also be reduced by other solid structures, like walls, or by radio or electrical equipment, such
as TVs, computers, cordless or mobile phones, fluorescent lights or dimmer switches.
• If the signal is poor, try moving the digital photo frame and/or the camera unit to different positions in the rooms.
1. SAFETY INSTRUCTIONS ................................... 7
2. GETTING STARTED............................................ 8
2.1
2.2
2.3
2.4
2.5
2.6
Connecting Camera unit to power...................... 8
Connecting Digital Photo Frame to power.......... 9
Inserting a memory card..................................... 9
Removing a memory card ................................ 10
Connecting a USB device ................................ 10
Replacing the remote control battery ............... 10
3. USING YOUR DIGITAL PHOTO FRAME.......... 12
3.1 Using the control buttons.................................. 12
3.2 Using the remote control .................................. 15
3.3 Melody.............................................................. 16
3.3.1 Play/stop the melody from the
camera unit ........................................... 16
3.4 Temperature..................................................... 16
3.5 Switching monitoring camera unit .................... 17
3.6 Registering a camera unit ................................ 17
4. USING THE MENUS .......................................... 18
4.1
4.2
4.3
4.4
4.5
4.6
6
Using the Home Menu...................................... 18
Using the Photo menu...................................... 18
Using the Music Player menu........................... 19
Using the Calendar menu................................. 20
Using the VideoFeed Setting menu.................. 20
Using the Tools menu ...................................... 21
5. DISPOSAL OF THE DEVICE
(ENVIRONMENT)............................................... 25
6. CLEANING......................................................... 25
7. TROUBLESHOOTING ....................................... 26
8. GENERAL INFORMATION................................ 27
9. TECHNICAL SPECIFICATIONS........................ 30
DECLARATION OF CONFORMITY .................. 31
1. SAFETY INSTRUCTIONS
WARNING:
STRANGULATION HAZARD - Keep the adapter cord
out of the baby's reach.
NEVER place the camera unit or its cord within the cot.
Secure the cord some distance away from the baby's
reach.
Never use extension cords with AC Adapters. Only use
the AC Adapters provided.
CAMERA SET UP & USE:
• Determine a location for the CAMERA that will provide
the best view of the area you want to view.
• Place the CAMERA on a flat surface, such as a dresser,
bureau, or shelf, or wall-mount the Camera using the
keyhole slots in the underside of the Camera base.
• NEVER place camera or cords within the cot.
• Secure the cord to the wall to keep it away from the
baby's reach.
WARNING
This digital photo frame and the camera units are compliant
with all relevant standards regarding electromagnetic fields
and are, when handled as described in the User's Guide,
safe to use. Therefore, always read the instructions in this
User's Guide carefully before using the device.
SAFETY INSTRUCTIONS
• Adult assembly is required. Keep small parts away from
children when assembling.
• This product is not a toy. Do not allow children to play
with it.
• This video in picture function of the digital photo frame
is not a substitute for responsible adult supervision.
• Keep this User's Guide for future reference.
• Do not cover the camera unit with a towel or blanket.
• Never use extension cords with power adapters. Use
only the power adapters provided.
• Test this Digital Photo Frame and all its functions so that
you are familiar with it prior to actual use.
• Use only the power adapters provided. Other power
adapters may damage the device.
• Do not touch the plug contacts with sharp or metal objects.
• Do not place your Digital Photo Frame in the bathroom
or other humid areas.
• Do not place your Digital Photo Frame near sources of
heat and extreme temperatures, such as fluorescent
lighting, microwave ovens, heating appliances and
direct sunlight.
• If the LCD screen breaks, do not touch the glass or liquid.
Contact Motorola customer support for assistance.
7
Care and maintenance
• Wipe the frame and the LCD screen gently with a soft,
clean, dry cloth.
• To remove fingerprints on the LCD screen, wipe gently
with a soft, lint-free cloth. Do not use cleaning solutions
unless they are designed specifically for LCD screens.
CAUTION
In order to reduce the risk of fire or electrical shock, do not
expose the device to water or excessive humidity. Never
disassemble the device. Opening the casing is dangerous
and will invalidate the warranty. Always switch off and
disconnect the power adapter before cleaning the Digital
Photo Frame.
2. GETTING STARTED
2.1
Connecting Camera unit to power
DC SOCKET
DC PLUG
1. Insert the small plug of the power adapter into the side
of the camera unit.
2. Plug the other end of the power adapter into a mains
socket.
3. When the camera unit is off, press 0 to power it on.
The Power Indicator will turn on.
NOTE
Only use the provided power adapter.
8
GETTING STARTED
2.2
Connecting Digital Photo Frame to
power
NOTE
Only use the provided power adapter.
2.3
Inserting a memory card
On the side of the Digital Photo Frame, you can also insert
a memory card or a USB flash drive containing the content
you want to show on this unit. Your Digital Photo Frame
supports SD, SDHC and MMC memory cards with a
memory capacity of 2GB or up to 16GB.
PO
POWER PLUG
W
1. Insert the small plug of the power adapter into the DC
socket at the bottom of the stand of the digital photo
frame.
2. Plug the other end of the power adapter into a mains
socket.
3. When the digital photo frame is powered off, press and
hold the power key at the back of digital photo frame
until the Link Indicator is on. When the power is on
then it will search for and link with the camera unit.
GETTING STARTED
To insert a memory card, push the card firmly into the
memory card slot in the direction as indicated above, with
the metal contacts of the card facing towards the picture
frame.
9
2.4
Removing a memory card
Simply pull the card out of the slot gently.
NOTE
Do not insert a micro or mini memory card without an
adapter.
2.5
Connecting a USB device
To insert the USB drive flash drive, push the drive firmly
into the USB slot as indicated below.
NOTE
The USB port on the display unit cannot be used to connect
to a computer.
10
NOTE
• After you insert a photo-loaded memory card or USB
flash drive and connect the Digital Photo Frame to
power, the Digital Photo Frame will automatically start to
display photos in slideshow mode.
• Both ports support hot swap function which allows for
swapping cards and drives while the unit is powered on.
• This frame can play images in JPEG format (.jpg).
Video files are not supported.
2.6
Replacing the remote control battery
The supplied remote control comes installed with a
CR2025 lithium battery - NOTE: Before using the remote
for the first time, you must remove the insulating mylar strip
from the battery compartment, by pulling the clear plastic
strip gently out of the battery holder located at the bottom
edge of the remote control. When you need to replace the
battery, follow the steps below.
GETTING STARTED
1. Push and hold the locking tab to the right.
3. Insert the new battery into the battery holder. The
battery must be placed with the positive pole facing
upwards in the illustrated position.
3
1
2. Pull out the battery holder.
4. Slide the battery holder back into the remote control.
2
GETTING STARTED
4
WARNING
• Protect the battery from overheating or excessive
moisture.
• Failure to replace the battery in the correct manner may
result in damage to the battery.
• Use only the approved specified batteries.
• Properly recycle or dispose of used batteries according
to local guidelines and regulations.
• Do not throw batteries into fire. This may result in an
explosion.
• If the battery is completely drained or the remote control
is not in use for a long time, remove the battery to
prevent leakage.
11
3. USING YOUR DIGITAL PHOTO
FRAME
No.
Function
1
UP: Moves up/goes back to the previous page.
Please read these instructions carefully, and be aware that
the video function featured with the digital photo frame is
only intended as an aid if used as a baby monitor. It is not
a substitute for responsible, correct parental supervision.
2
DOWN: Moves down/goes to next page.
3
RIGHT: Moves right/increases the volume.
4
LEFT: Moves left/decreases the volume.
NOTE
If you place the digital photo frame and camera units too
close together, you may hear a high pitched noise, this is
normal. The units are designed to be located at a distance
from one another, e.g. in separate rooms.
5
:II OK/Play/Pause
3.1
Using the control buttons
• Enters / confirms a selection, or starts/pauses
the playback
• Switches to the next registered camera
• Returns to the HOME screen (press and hold)
6
7
0 ON/OFF button
Turns on/off the power (press and hold).
V Video ON/OFF: Enters/exits video feed mode.
Note: The video size is 3.8" diagonally and does
not take up the whole viewing area.
12
USING YOUR DIGITAL PHOTO FRAME
When using the Home Menu
When playing a slideshow
Button
Function
Button
UP
Selects USB or Memory Card.
UP
Goes back to the previous photo.
DOWN
Selects USB or Memory Card.
DOWN
Goes to the next photo.
LEFT
Selects Calendar, Picture, VideoFeed, Music or Tools
menu.
RIGHT
Increases the background music volume.
RIGHT
Selects Calendar, Picture, VideoFeed, Music or Tools
menu.
LEFT
Decreases the background music volume.
P
P
Enters sub-pages of VideoFeed, Music or Tools
menu, or starts slideshow from Picture, or
opens the Calendar/Clock screen.
Starts/pauses the playback.
Press and hold to return to HOME screen.
V
Enters Video Feed mode.
V
Enters Video Feed mode.
When browsing/playing Music in Music folder
Button
Function
Function
When browsing photos in thumbnail view
UP
Moves up.
Button
Function
DOWN
Moves down.
UP
Moves up.
RIGHT
Increases the music playback volume.
DOWN
Moves down.
LEFT
Decreases the music playback volume.
RIGHT
Moves right.
LEFT
Moves left.
P
P
Displays the currently selected photo in
Single Photo view, and starts the slideshow.
Press and hold to return to HOME screen.
Starts/pauses the playback of selected
music on the folder.
Press and hold to return to HOME screen.
V
Enters Video Feed mode.
USING YOUR DIGITAL PHOTO FRAME
13
When Video Feed is on
When using the Tools menu
Button
Function
Button
RIGHT
Increases the audio volume.
UP
Moves up the menu or submenu list.
LEFT
Decreases the audio volume
DOWN
Moves down the menu or submenu list.
P
V
Switches to the next registered camera.
RIGHT
Moves right through the submenu option
choices.
LEFT
Moves left through the submenu option
choices.
P
Enters submenu or enter/confirm/change
the settings.
Press and hold to return to HOME screen.
Exits Video Feed mode
When using the VideoFeed Settings menu
Button
Function
UP
Moves up the menu list.
DOWN
Moves down the menu list.
RIGHT
Moves right through the menu option
choices.
LEFT
Moves left through the menu option
choices.
P
Press and hold to return to HOME screen.
14
Function
USING YOUR DIGITAL PHOTO FRAME
3.2
Using the remote control
The following table describes the buttons and their functions
that are available on the supplied remote control.
USING YOUR DIGITAL PHOTO FRAME
No. Description
1
ON/OFF
• Press to turn the digital photo frame on or off.
2
UP U
• Move up.
• Select previous picture when viewing pictures.
3
LEFT/PREVIOUS
Move left or decrease the volume.
4
DOWN D
• Move down.
• Select next picture when viewing pictures.
5
ZOOM
Zoom into the photo in browse mode from 100% to
125%, 150%, 175%, 200%, 225%.
Note: Use U,
, D and
to move round a
zoomed photo.
6
DISPLAY ASPECT
Adjust the display aspect in photo browse mode Fit to Screen, Crop to Fill and Full Screen.
7
EXIT
Go back to the previous page.
8
OK/PLAY/PAUSE
Enter or confirm a selection, or start/pause the
playback.
Switch to the next registered camera.
15
9
RIGHT/NEXT
Move right or increase the Volume.
10
VideoFeed V
Enter or exit video feed mode.
Note: The video size is 3.8" diagonally and does
not take up the whole viewing area.
11
ROTATE
Press repeatedly to rotate the selected photo
counterclockwise in increments of 90 degrees in
browse mode.
12
MENU
Return to the HOME screen.
13
SnapShot
Capture a picture while in video feed mode and
store directly in the memory card or USB drive.
NOTE
ZOOM, DISPLAY ASPECT and ROTATE may not be
possible with some pictures.
16
3.3
Melody
There are 3 melodies available to play at the camera unit,
either repeating one melody or repeating through all three
melodies.
3.3.1
Play/stop the melody from the camera unit
1. Press M on the camera unit to start playing the
selected melody.
OR
Press : on the camera unit to start playing the
selected melody.
2. During playback, press M to step through the different
melodies.
3. During playback, press ; to stop playing.
3.4
Temperature
The flexible "tail" at the back of the camera unit is a
temperature sensor that constantly monitors the
temperature near the camera unit, and displays the reading
on the screen in the Video Feed mode.
USING YOUR DIGITAL PHOTO FRAME
3.5
Switching monitoring camera unit
The system allows registering up to four camera units. You
can switch the monitoring camera unit by one-touch key or
by menu settings:
By one-touch key:
Press the P button at the back of the digital photo frame
or the
button on the remote control when the digital
photo frame is in video monitoring mode. The digital photo
frame will switch to the next registered camera unit and
show the video from it after a few seconds. You can switch
to other registered camera units by further pressing P or
if necessary, with each registered camera unit being
selected in turn.
By menu settings:
The system also allows the digital photo frame to be set to
automatically switch through among all the camera units,
with each registered camera unit being selected in turn at
about 30 second intervals. Refer to section 4.6 for the
related instructions of how to set the digital photo frame to
scan through all the camera units automatically.
USING YOUR DIGITAL PHOTO FRAME
3.6
Registering a camera unit
IMPORTANT
When you purchase your digital photo frame system, all
cameras are already registered to the digital photo frame,
so you do not need to register them.
Camera registration is only necessary if one has become
faulty or if you buy a new one.
You can register up to 4 cameras to the digital photo frame.
To register a camera unit:
1. Refer to section 4.6 to access the submenu Registration.
2. Press P to confirm. The digital photo frame will
display Registration Mode, and then display Registering... which
indicates it has entered the registration mode.
3. Press and hold > on the camera unit until its power
indicator starts to flash quickly.
4. The digital photo frame will display Registered when the
registration is successfully completed, and the camera
will be assigned a camera unit number, which can be
checked from the digital photo frame.
17
4. USING THE MENUS
In the Home Menu, you can:
4.1
• Press the LEFT or RIGHT button to select the Calender,
Picture, VideoFeed, Music or Tools menu.
• Press the UP or DOWN button to select either the USB or
Memory Card.
Using the Home Menu
When powered on, photos will play in slideshow mode
automatically if available on a connected memory card or
USB drive.
• If a memory card or USB drive has been inserted,
photos in the device will play in slideshow mode
automatically.
• If no memory card or USB drive is inserted, the screen
will stay at the Home Menu.
To exit slideshow mode, press and hold the P button on
the back of the Digital Photo Frame to return to the Home
Menu.
4.2
Using the Photo menu
NOTE
The Digital Photo Frame only supports JPEG (*.jpg) image
file format.
1. In the Home Menu, press the LEFT or RIGHT button
to select the Picture menu.
2. Press the UP or DOWN button to select the USB or SD
memory.
3. Press the P button to enter photo slideshow mode
from the selected memory device, or to enter the
Thumbnail or Browse mode if Thumbnail or Browse has
been selected in the Tools/Picture Setup/Display Mode option
(see page 20).
18
USING THE MENUS
4. If the Thumbnail option has been selected, it will
display your photos in thumbnail view (both photos and
folders may display, depending on the content stored in
the device).
4.3
Using the Music Player menu
NOTE
The Digital Photo Frame only supports MP3 (*.mp3) audio
file format.
1. In the Home Menu, press the LEFT or RIGHT button
to select the Music menu.
2. Press the UP or DOWN button to select the USB or SD
memory.
3. Press the P button to enter Music Player.
• To select the song, press the UP or DOWN button.
• To play the selected song, press the P button.
• To change the volume, press the LEFT or RIGHT
button.
5. To select a photo, use the UP, DOWN, LEFT or RIGHT
buttons.
6. Press the P button to display the selected photo in
browse mode.
7. To switch to the previous or next photo in browse
mode, press the UP or DOWN button.
8. To start running a slideshow from the selected photo,
press the P button again.
9. Press and hold the P button to stop the slideshow
and return to the HOME screen.
USING THE MENUS
19
During music playback mode,
• Press UP to go to the previous song.
• Press DOWN to go to the next song.
• Press P to play/pause.
• Press RIGHT to increase the playback volume.
• Press LEFT to decrease the playback volume.
4.4
Using the Calendar menu
1. In the Home Menu, press the LEFT or RIGHT button
to select the Calendar menu.
2. Press the P button to enter the Calendar mode. You can
display either the monthly calendar view or clock view
on screen (see page 22) and a slideshow will run on
the right side of the screen if a USB or SD memory with
pictures is installed.
4.5
Using the VideoFeed Setting menu
1. In the Home Menu, press the LEFT or RIGHT button
to select the VideoFeed menu.
2. Press the P button to enter the VideoFeed menu.
• To move up or down the VideoFeed menu list, press the
UP or DOWN button.
• To change the setting of a function, press the LEFT or
RIGHT button.
• To go back to the HOME screen, press and hold the
P button.
VideoFeed
Menu
Background
Options
Description/Function
Slideshow
Selects the mode to be
shown with the video
feed, if opened from the
Tools/Monitor Setup
menu.
Calendar
3. You can display the video feed by pressing the Video
On/Off button at the back of the digital photo frame or
the VideoFeed button on the remote control.
SnapShot
Storage
Memory
Card
USB
20
Selects memory to be
used for storing a still
picture snap shot.
USING THE MENUS
4.6
Using the Tools menu
Aspect
1. In the Home Menu, press the LEFT or RIGHT button
to select the Tools menu.
Fit to
Screen
Optimises photos to fit
the whole screen.
Crop to Fill
Crop the photos to fit
the whole screen.
Full Screen
Stretch the photo to fit
the whole screen.
5 Sec.
Selects the speed of
the slideshow.
2. Press the P button to enter the Tools menu.
• To move up or down the Tools menu list, press the UP
or DOWN button.
• To apply the settings you have selected, press the P
button.
• To change the setting of a function, press the LEFT or
RIGHT button.
• To go back to the HOME screen, press and hold the
P button.
You can control the function settings of the Digital Photo
Frame from the Tools menu. Refer to the table below for
more information.
Picture Setup
Sub-menu
Options
Description/Function
Display Mode
Slideshow
Selects the photo
display mode.
Thumbnail
Frequency
15 Sec.
30 Sec.
60 Sec.
5 Min.
15 Min.
Slideshow
Repeat
Once
Repeat
Sets the slideshow
playback repeat mode.
Browse
Mode
USING THE MENUS
21
Slideshow Effect
Random
Snake
Partition
Selects the transition
effect to be applied in
the slideshow.
Calendar Setup
Sub-menu
Options
Description/Function
Display mode
Monthly
Calendar
Sets the calendar
display mode.
Erase
Clock
Blinds
Random
lines
Grid
Cross
Spiral
Rect
On
Off
-
Allows you to set up the
date, month and year.
Time Format
24-hour
12-hour
Sets 24-hour or 12-hour
time mode.
Clock Time
-
Sets the clock time.
Alarm Status
On
Enables/disables the
Alarm options.
Off
Close
Background
Music
Date
Sets whether
background music
plays during the
slideshow.
Alarm Time
-
Sets the alarm time.
Alarm Tone
Alarm 1
Sets the alarm melody.
Alarm 2
Alarm 3
Alarm Frequency Mon. to Fri.
Weekend
Sets the alarm
frequency.
Once
Everyday
22
USING THE MENUS
Music Setup
Sub-menu
Play Mode
Show Spectrum
System Setup
Sub-menu
Languages
Backlight
USING THE MENUS
Options
Description/Function
Brightness
Repeat
current
Repeat
Random
Once
On
Off
Sets the music
playback mode.
Contrast
Options
Description/Function
English
Francais
Espanol
Deutsch
Italiano
Portugues
Nederlands
Svenska
1, 2, ......, 5
Selects the OSD (OnScreen display)
language.
Saturation
Auto On
Enables/disables the
graphic display of the
volume level.
Sets the display
backlight intensity level.
Auto On Time
Auto Off
1, 2, ......, 16 Sets the display
brightness level.
1, 2, ......, 16 Sets the display
contrast level.
1, 2, ......, 16 Sets the display colour
saturation level.
Yes
Enables/disables the
Auto power on option.
No
Sets the time for the
Photo Frame to
automatically turn on.
Yes
Enables/disables the
Auto power off option.
No
Auto Off Time
-
Auto On Off
Frequency
Mon. to Fri.
Weekend
Once
Everyday
0, 1, 2, ......, Sets the audio playback
8
volume level.
Volume
Sets the time for the
Photo Frame to
automatically turn off.
Sets the frequency for
the digital photo frame to
automatically turn on/off.
23
Reset Default
Setting
Wallpaper
Yes
Resets the Photo Frame
to its default settings.
No
Cancels the task.
Wallpaper 1 Selects the pre-loaded
Wallpaper 2 wallpaper.
Wallpaper 3
De-Registration
Registration
Monitor Setup
Sub-menu
Select Camera
Options
Description/Function
Camera 1
Selects the desired
camera unit to display.
Camera 2
All Cameras NOTES
Only camera units
registered will be
shown in the list.
Camera 1
Selects the camera unit
you want to deregister.
Camera 2
All Cameras NOTE
Only camera units
registered will be
shown in the list.
Registers a camera unit
to the digital photo
frame. Refer to 3.6 for
how to put the camera
unit into registration
mode and complete the
registration.
When All Cameras is
selected, the screen of
the digital photo frame
will automatically switch
through all the
registered camera
units, with each camera
unit being selected in
turn at about 30 second
intervals.
24
USING THE MENUS
5. DISPOSAL OF THE DEVICE
(ENVIRONMENT)
At the end of the product lifecycle, you should
not dispose of this product with normal
household waste. Take this product to a
collection point for the recycling of electrical
and electronic equipment. The symbol on the
product, user's guide and/or box indicates this.
Some of the product materials can be reused if you take them to a recycling point. By reusing some
parts or raw materials from used products you make an
important contribution to the protection of the environment.
Please contact your local authorities in case you need
more information on the collection points in your area.
Dispose of the battery pack in an environmentally-friendly
manner according to your local regulations.
DISPOSAL OF THE DEVICE (ENVIRONMENT)
6. CLEANING
Clean your Motorola product with a slightly damp cloth or
with an anti-static cloth. Never use cleaning agents or
abrasive solvents.
Cleaning and care
• Do not clean any part of the product with thinners or
other solvents and chemicals - this may cause
permanent damage to the product which is not covered
by the warranty.
• Keep your Motorola product away from hot, humid
areas or strong sunlight, and do not let it get wet.
• Every effort has been made to ensure high standards of
reliability for your Motorola product. However, if
something does go wrong, please do not try to repair it
yourself - contact Customer Service for assistance.
25
7. TROUBLESHOOTING
Link light on the digital photo frame does not come
on
• Check whether the digital photo frame is powered on.
Link light on the digital photo frame flashes
• The digital photo frame and the camera unit may be out
of range of each other. Reduce the distance between
the units, but not closer than 2 metres.
• The camera unit may be switched off. Press the
key to switch on the camera unit
The digital photo frame beeps
• Lost connection with the camera unit. Reduce the
distance between the digital photo frame and the
camera unit, but not closer than 2 metres.
• The camera unit may be switched off. Press the
key to switch on the camera unit.
Cannot view the video image of the object from the
digital photo frame
• Video feed maybe turned off. Activate the video feed by
pressing V.
• The digital photo frame and the camera unit may be out
of range of each other. Reduce the distance between
the units, but not closer than 2 metres.
26
Cannot hear sound from the digital photo frame
• The volume level in the digital photo frame may be set
too low, increase the volume level of the digital photo
frame.
• The digital photo frame and the camera unit may be out
of range of each other. Reduce the distance between
the units, but not closer than 2 metres.
The digital photo frame system produces a highpitched noise
• The digital photo frame and the camera unit are too
close to each other. Make sure the digital photo frame
and camera unit are at least 2 metres away from each
other.
• The speaker volume of the digital photo frame maybe
set too high. Decrease the volume of the digital photo
frame.
Cannot switch to the next registered camera
• The digital photo frame and the next registered camera
unit may be out of range with each other. Reduce the
distance between the units, but not closer than 2 metres.
• The next registered camera unit may be turned off.
Press the
key on the camera unit, having first made
sure its adapter is correctly connected to mains power,
to switch on the camera unit.
TROUBLESHOOTING
Some images are not displayed
• The image file is not supported by this device.
Cannot read SD/MMC/SDHC card
• Check the SD/MMC/SDHC card is inserted properly.
• Check that the memory card capacity is 2GB - 16GB.
Cannot read USB flash drive
• Check the USB flash drive is inserted properly.
• Check that the USB flash drive capacity is 2GB - 16GB.
8. GENERAL INFORMATION
If your product is not working properly...
1. Read this User's Guide.
2. Visit our website: www.motorola.com
3. Contact Customer Service at:
UK
0845 218 0890
ROI
08187 62092
Consumer Products and Accessories
Limited Warranty ("Warranty")
Thank you for purchasing this Motorola branded product
manufactured under license by Binatone Electronics
International LTD ("BINATONE").
What Does this Warranty Cover?
Subject to the exclusions contained below, BINATONE
warrants that this Motorola branded product ("Product") or
certified accessory ("Accessory") sold for use with this
product that it manufactured to be free from defects in
materials and workmanship under normal consumer usage
for the period outlined below. This Warranty is your
exclusive warranty and is not transferable.
Who is covered?
This Warranty extends only to the first consumer
purchaser, and is not transferable.
GENERAL INFORMATION
27
What will BINATONE do?
BINATONE or its authorised distributor at its option and
within a commercially reasonable time, will at no charge
repair or replace any Products or Accessories that does not
conform to this Warranty. We may use functionally
equivalent reconditioned/ refurbished/ pre-owned or new
Products, Accessories or parts.
What Other Limitations Are There?
ANY IMPLIED WARRANTIES, INCLUDING WITHOUT
LIMITATION THE IMPLIED WARRANTIES OF
MERCHANTABILITY AND FITNESS FOR A PARTICULAR
PURPOSE, SHALL BE LIMITED TO THE DURATION OF
THIS LIMITED WARRANTY, OTHERWISE THE REPAIR
OR REPLACEMENT PROVIDED UNDER THIS EXPRESS
LIMITED WARRANTY IS THE EXCLUSIVE REMEDY OF
THE CONSUMER, AND IS PROVIDED IN LIEU OF ALL
OTHER WARRANTIES, EXPRESS OR IMPLIED. IN NO
EVENT SHALL MOTOROLA OR BINATONE BE LIABLE,
WHETHER IN CONTRACT OR TORT (INCLUDING
NEGLIGENCE) FOR DAMAGES IN EXCESS OF THE
PURCHASE PRICE OF THE PRODUCT OR ACCESSORY,
OR FOR ANY INDIRECT, INCIDENTAL, SPECIAL OR
CONSEQUENTIAL DAMAGES OF ANY KIND, OR LOSS
OF REVENUE OR PROFITS, LOSS OF BUSINESS, LOSS
OF INFORMATION OR OTHER FINANCIAL LOSS
ARISING OUT OF OR IN CONNECTION WITH THE
28
ABILITY OR INABILITY TO USE THE PRODUCTS OR
ACCESSORIES TO THE FULL EXTENT THESE
DAMAGES MAY BE DISCLAIMED BY LAW.
Some jurisdictions do not allow the limitation or exclusion
of incidental or consequential damages, or limitation on the
length of an implied warranty, so the above limitations or
exclusions may not apply to you. This Warranty gives you
specific legal rights, and you may also have other rights
that vary from one jurisdiction to another.
Products Covered Length of Coverage
Consumer
Products
One (1) year from the date of the
products original purchase by the first
consumer purchaser of the product.
Consumer
Accessories
Ninety (90) days from the date of the
accessories original purchase by the
first consumer purchaser of the
product.
Consumer
Products and
Accessories that
are Repaired or
Replaced
The balance of the original
warranty or for ninety (90) days
from the date returned to the
consumer, whichever is longer.
GENERAL INFORMATION
Exclusions
Normal Wear and Tear. Periodic maintenance, repair and
replacement of parts due to normal wear and tear are
excluded from coverage.
Batteries. Only batteries whose fully charged capacity falls
below 80% of their rated capacity and batteries that leak
are covered by this Warranty.
Abuse & Misuse. Defects or damage that result from: (a)
improper operation, storage, misuse or abuse, accident or
neglect, such as physical damage (cracks, scratches, etc.)
to the surface of the product resulting from misuse; (b)
contact with liquid, water, rain, extreme humidity or heavy
perspiration, sand, dirt or the like, extreme heat, or food; (c)
use of the Products or Accessories for commercial
purposes or subjecting the Product or Accessory to
abnormal usage or conditions; or (d) other acts which are
not the fault of MOTOROLA or BINATONE, are excluded
from coverage.
Use of Non-Motorola branded Products and
Accessories. Defects or damage that result from the use
of Non-Motorola branded or certified Products or
Accessories or other peripheral equipment are excluded
from coverage.
GENERAL INFORMATION
Unauthorised Service or Modification. Defects or
damages resulting from service, testing, adjustment,
installation, maintenance, alteration, or modification in any
way by someone other than MOTOROLA, BINATONE or
its authorised service centres, are excluded from coverage.
Altered Products. Products or Accessories with (a) serial
numbers or date tags that have been removed, altered or
obliterated; (b) broken seals or that show evidence of
tampering; (c) mismatched board serial numbers; or (d)
nonconforming or non-Motorola branded housings, or
parts, are excluded from coverage.
Communication Services. Defects, damages, or the
failure of Products or Accessories due to any
communication service or signal you may subscribe to or
use with the Products or Accessories is excluded from
coverage.
How to Obtain Warranty Service or Other
Information?
To obtain service or information, please call:
UK
0845 218 0890
ROI
08187 62092
You will receive instructions on how to ship the Products or
Accessories at your expense and risk, to a BINATONE
Authorised Repair Centre.
29
To obtain service, you must include: (a) the Product or
Accessory; (b) the original proof of purchase (receipt)
which includes the date, place and seller of the Product; (c)
if a warranty card was included in your box, a completed
warranty card showing the serial number of the Product; (d)
a written description of the problem; and, most importantly;
(e) your address and telephone number.
9. TECHNICAL SPECIFICATIONS
These terms and conditions constitute the complete
warranty agreement between you and BINATONE
regarding the Products or Accessories purchased by you,
and supersede any prior agreement or representations,
including representations made in any literature
publications or promotional materials issued by
BINATONE or representations made by any agent
employee or staff of BINATONE, that may have been made
in connection with the said purchase.
30
Screen size
7" diagonal TFT LCD
Aspect ratio
16:9
Panel resolution
480 (H) x 234 (V) pixels
Brightness
200 cd/m2
Contrast ratio
500:1
Viewing angle in
landscape
(Top/Bottom/Left/Right)
80º / 80º / 80º / 80º
SD, SDHC, MMC
Supported memory
card types
(greater than 2GB and up
to 16GB memory
capacity)
USB Host
Supported
USB Port Output
<0.2A
Supported image file
format
JPEG (*.jpg)
TECHNICAL SPECIFICATIONS
BINATONE TELECOM PLC
________________________________________
1 Apsley Way London NW2 7HF,United Kingdom.
Tel: +44(0) 20 8955 2700 Fax: +44(0) 20 8344 8877
e-mail: [email protected]
.
EC Declaration of Conformity
We the manufacturer / Importer :
Binatone Telecom Plc
1 Apsley Way London
NW2 7HF, United Kingdom.
Digital Photo Frame with remote camera unit
MFV701, MFV702, MFV703, MFV704
MBP701, MBP702, MBP703, MBP704
China
Motorola
Declare under our sole responsibility that the following product
Type of equipment:
Model Name:
Country of Origin:
Brand:
RF frequency band
1881.792 MHz - 1897.344 MHz
Channels
10
f 3.6mm, F 2.4
IR LED
4 pcs
Operating temperature
5ºC - 45ºC
Power adapter for
Digital Photo Frame
• AC input: 100-240V; 50/60 Hz;
0.3A
• DC output: 5V, 1A
<Tenpao S006MV0500100 /
S006MB0500100 EU / UK>
• AC input: 100-240V; 50/60Hz;
0.15A
• DC output: 6V, 600mA
<Tenpao S004LV0600060 /
S004LB0600060 EU / UK>
Manufacturer / Importer
(Signature of authorized person)
Image sensor
Signature: (Paul Tsui/ Product Operation
Director)
Place & Date :
London, 11 Mar 12
Power adapter for
Camera Unit
The product is labelled with the European Approval Marking CE as shown. Any Unauthorized
modification of the product voids this Declaration.
Electrical Safety:
EMC (photo frame):
Lens
EN301406 V2.1.1 (2009-07)
EN301489-1 V1.8.1 (2008-04)
EN301489-6 V1.3.1 (2008-08)
EN60950-1:2006+A11:2009
EN55022: 2006+A1:2007
EN55024: 1998+A1: 2001+A2: 2003
EN61000-3-2: 2006+A1+A2: 2009
EN61000-3-3: 2008
Colour CMOS 0.3M Pixels
complies with the essential protection requirements of R&TTE Directive 1999/5/EC on the
approximation of the laws of the Member States relating to Radio Spectrum Matters, the
Council Directive 2004/108/EC on the approximation of the laws of the Member States
relating to electromagnetic compatibility (EMC) and the European Community Directive
2006/95/EC relating to Electrical Safety.
Assessment of compliance of the product with the requirements relating to the essential
requirements according to Article 3 R&TTE was based on Annex III of the Directive
1999/5/EC and the following standard:
MP3 (*.mp3)
Radio Spectrum:
EMC:
Supported audio file
format
31
TECHNICAL SPECIFICATIONS
Specifications are subject to change without prior notice.
Manufactured, distributed or sold by Binatone
Electronics International LTD., official licensee
for this product. MOTOROLA and the Stylized
M Logo are trademarks or registered
trademarks of Motorola Trademark Holdings,
LLC. and are used under license. All other
trademarks are the property of their respective
owners.
© 2012 Motorola Mobility, Inc. All rights
reserved.
Version 2.0
Printed in China