1
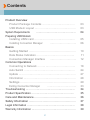
Dual Mode USB Modem User Manual Contents Product Overview Product Package Contents ……………………………… USB Modem Layout ……………………………………… System Requirements ……………………………………… Preparing USB Modem Installing USIM card ……………………………………… Installing Connection Manager ………………………… Basics Getting Started …………………………………………… Data Status Indication …………………………………… Connection Manager Interface ………………………… Common Operations Connecting to Network …………………………………… Auto Switch ………………………………………………… Update ……………………………………………………… Information ………………………………………………… Settings …………………………………………………… Exiting Connection Manager …………………………… Troubleshooting ……………………………………………… Product Specification ………………………………………… Care and Maintenance ……………………………………… Safety Information …………………………………………… Legal Information ……………………………………………… Warranty Information ………………………………………… 2 03 03 04 05 06 10 11 12 18 24 27 28 29 33 34 35 36 37 38 39 Product Overview Product Package Contents USB Modem User Manual USB Modem Layout LED status indicator Rear cover USB connector 3 System Requirements CPU & memory Interface Pentium IV Processor or faster, 128MB RAM or more USB 2.0 Supported OS Windows XP / Windows Vista / Windows 7 Free HD space 80MB or more 4 Preparing USB Modem Installing USIM card ▶ Remove the Rear Cover of your USB Modem by gently sliding it to the arrow indicated below. ▶ Carefully slide the USIM card into your modem until it lies flat in the USIM holder with gold-colored contacts facing down. USIM USIM 5 Preparing USB Modem Installing Connection Manager ▶ ▶ ▶ ▶ ▶ Turn on your computer. Close all other applications. Insert your USB modem into a USB port of your computer. Your computer will recognize the modem and automatically start the installation. Click “WIMAX Installation Disk”. Choose a language used for the installation process.(Optional) * The language selected here will become the default language for the Connect Manage interface. 6 Preparing USB Modem Installing Connection Manager ▶ If the installation program does not launch automatically, go to My Computer. Select „WiMAX Installation Disk‟ and double click it. [Desktop] ▶ [My Computer] ▶ [WiMAX Installation Disk] 7 Preparing USB Modem Installing Connection Manager ▶ Or you click the RIGHT mouse button on WiMAX CD drive. Select „Install WiMAX device‟ and then the installation sequence will begin. [Desktop] ▶ [My Computer] ▶ [WIMAX Installation Disk (right mouse button)] ▶ [Install WiMAX device (Select)] ▶ Or select OPEN at the popup menu. Double click „Launcher.exe‟. It will start the installation process. 8 Preparing USB Modem Installing Connection Manager ▶ After installation is properly completed, you can see the two devices in the „Device Manager‟. [Desktop] ▶ [My Computer(click right mouse button)] ▶ [Device Manager] ▶ ▶ [Properties] If your device manager shows an exclamation mark (!) on top of the icon as seen below, please go to Troubleshooting (see page 34). 9 Basics Getting started ▶ To start Seowonintech Connection Manager, Double click on the Seowonintech CM icon on your desktop. Click [Seowonintech CM] ▶ Or click on the Windows Start menu and select „Seowonintech CM‟ from the list of programs. [Start] ▶ [Program] ▶ [Seowonintech] 10 ▶ [Seowonintech CM] Basics Data Status Indication WiMAX – RED, BLUE. HSDPA – RED, ORANGE You can find the network connection status of your modem by referring to a multi-colored LED status indicators as seen the below chart. LED color indication Status WiMAX HSDPA Powered on RED RED Stand by RED RED Connected BLUE ORANGE 11 Basics Connection Manager Interface The Main Window layout ▶ Title Bar – has the “Minimize” icon( _ ) and the “Miniaturize” icon ( x ) ▶ Menu Bar – has the “Menu” and the “Help”. ▶ WiMAX Area – has “Connect” button, and other Text and Icon indicating „WiMAX network connection status.‟ ▶ HSDPA Area – has “Connect” button, and other Text and Icon indicating „ HSDPA network connection status.‟ * Clicking on WiMAX or HSDPA Area expands or reduces a relevant interface Area. (see page 18) <Default> Title Bar Menu Bar WiMAX Area HSDPA Area <WiMAX Area, expanded> <HSDPA Area, expanded> 12 Basics Connection Manager Interface Function Buttons Produces a short menu: “INFORMATION”, “SETTINGS” Produces a short menu: “Manual” Minimizes CM to the Windows Taskbar. Miniaturize CM to the System Tray. Connects to the Network (WiMAX or HSDPA). Cancels Connecting task (applicable only in WiMAX). Indicates “Connect (and Cancel)” is temporarily disabled: this status is usually seen when CM is connecting/ disconnecting to HSDPA network or when your host system fails to detect USB Modem. Disconnects from Network (WiMAX or HSDPA). 13 Basics Connection Manager Interface Instructional Icons on CM Signal strength indicator Connection Status Indicator – “Ready to connect” Connection Status Indicator – “Connected to the network” Connection Status Indicator – “Unable to connect” Data Sent – The amount of data sent since the current network connection was initiated (in bytes). Data Rcd – The amount of data received since the current network connection was initiated(in bytes). NSP Name / Network – The name of Network service provider (WiMAX/HSDPA) Elapsed Time – The amount of time that has elapsed since the current network connection was initiated. 14 Basics Connection Manager Interface Miniature CM Icons in the System Tray Device not found – USB Modem is unplugged into Ready to connect – USB Modem is ready to connect to WiMAX or HSDPA network. WiMAX Connected – USB Modem is connected to WiMAX network. HSDPA Connected – USB Modem is connected to HSDPA network. 15 Basics Connection Manager Interface Minimizing the Main Window ▶ You can place the Connection Manager in the Windows Taskbar if you click„ ‟ icon at the upper-right corner of the main window. ▶ Or click „ ‟ icon next to „ ‟ icon to reduce the main Window to a Miniature CM icon in the System Tray. 16 Basics Connection Manager Interface Restoring the Main Window ▶ You can restore Main Window by clicking the CM icon in the Windows Taskbar. ▶ You can restore the Main Window by clicking the miniature CM Icon in the System Tray. ▶ Or click the RIGHT mouse button on the miniature CM Icon in the System Tray and select “Open” in menu. 17 Common Operations Connecting to Network Select your preferred type of network ▶ ▶ If you want to connect to WiMAX network, click WiMAX Area (Upper). If you want to connect to HSDPA network, click HSDPA Area. (Lower). 18 Common Operations Connecting to Network Connect to WiMAX Network ▶ Enter User ID/Password in the WiMAX tab of the Settings (see page 31). ● ● ● ● Click [Connect] in the WiMAX Area in the Main Window. The messages such as „Connecting‟ and „WiMAX Connected‟ will appear. HSDPA turns to the sleep mode, waiting for a future connection. When HSDPA is successfully connected, you can see below figures. 19 Common Operations Connecting to Network Disconnect from WiMAX Network ▶ Click [Disconnect] in the WiMAX Area in the Main Window. WiMAX connection is disabled and HSDPA turns „Ready to connect‟. 20 Common Operations Connecting to Network Connect to HSDPA Network ▶ Create/edit HSDPA profiles in the HSDPA tab of the Settings (see page 31). Click [Connect] of the HSDPA area in the Main Window. The message such as „Connecting‟ and „HSDPA Connected‟ will appear. ● WiMAX turns into the sleep mode, waiting for a future connection. ● When WiMAX network is properly established, following figures will appear. ● ● 21 Common Operations Connecting to Network Disconnect from HSDPA Network ▶ Click [Disconnect] in the HSDPA area of the Main Window. HSDPA connection is disabled. Then, WiMAX Area turns into „Ready to connect‟ mode. ● ● 22 Common Operations Connecting to Network Unlock USIM card (HSDPA) ▶ If your USIM card‟s Lock is set, a text of “USIM card is lock” reads in HSDPA Area as seen in 1) figure below. To unlock USIM, you enter the PIN as follows. If a valid PIN is input, you are allowed to connect to HSDPA 1) Click the marked area. It will open a pop-up window as seen at 2) figure. 2) Input the PIN and click [OK]. 4) Ready to connect to HSDPA 3) Your USIM card is now unlocked. · See page 32 for more info on PIN 23 Common Operations Auto Switch Auto-Switch notification ▶ When WiMAX (or HSDPA) is disconnected, if „Auto Switch‟ is checked in Settings, a dialogue box of „Auto Switch‟ will automatically appear as seen below. If you click [Yes], your USB Modem starts to connect to HSDPA (or WiMAX) network. 24 Common Operations Auto Switch WiMAX HSDPA (when WiMAX is connected) ▶ When you are in areas with weak WiMAX signals, you may lose WiMAX connection. Then, a dialogue box of “Auto Switch” will automatically appear as seen below. If you click [Yes], your USB Modem starts to connect to HSDPA network. 25 Common Operations Auto Switch HSDPA WiMAX (when HSDPA is connected) ▶ When USB Modem detects WiMAX signal over the set threshold (see page 30) or when HSDPA signal is so weak that you may lose the HSDPA connection, A dialogue box of “Auto Switch” will automatically appear as seen below. If you click [Yes], USB Modem starts to connect to WiMAX network. 26 Common Operations Update Update by OTA (Optional) ▶ ▶ Upon connecting to WiMAX network each time, the Connection Manager checks for any F/W updates. When updates found available, the Connection Manager produces a dialogue like below. If you select [Yes], the relevant updates will begin. 27 Common Operations Information ▶ Click Menu in the menu bar of the Main Window. Select Information. It produces a new window with three tabs: WiMAX, HSDPA and Application. ● ● ● WiMAX Tab includes info about WiMAX Device, SW, Network, etc. HSDPA Tab includes info about HSDPA Device, USIM Card, etc. Application Tab includes info about Application Version. 28 Common Operations Settings ▶ Click Menu in the menu bar of the Main Window. It will produce a new window appears with three tabs: Application, WiMAX and HSDPA. Settings allows you to configure many individual preference features in each tab. 29 Common Operations Settings ▶ Application Tab ● ● Auto run on Windows start-up : allows the Connection Manager to auto-launch when Windows starts. Auto connect to network: allows the Connection Manager to auto-establish network connection when it launches. * Auto-Connect is independent of AutoSwitch feature. ● ● Auto Switching: allows network connection to be auto-switched between WiMAX and HSPDA. Prompt before auto switching connection: allows the Connection Manager to auto-open a dialogue box that asks if you approve the switching to the suggested network. * When unchecked, switching is done without notification. ● WiMAX threshold (0, 1, 2, 3, 4) determines the level of WiMAX antenna strength by which Autowitching condition is judged and accordingly conducted. Ex) The WiMAX threshold value „3‟ means: 1) WiMAX HSDPA : when WiMAX signal strength found less than (<) 3 during WiMAX connection 2) WiMAX HSDPA : when WiMAX signal strength found greater than or equal to (≥) 3 during HSDPA connection * The default threshold value is 0. („WiMAX threshold‟ operates, when unchecked, on the default setting. ● WiMAX wake up timer (5mins, 3mins, 1min, 30secs) determines a time interval that the Connection Manager tries to connect to WiMAX network while HSDPA network is connected. * The default interval is 5 minutes. („WiMAX wake up timer‟ operates, when unchecked, on the default setting. Ex) When set as 3 minutes, access to WiMAX network is tried for about 5 seconds every 3 minutes. ● Select language (English, etc) 30 Common Operations Settings ▶ WiMAX Tab ● ▶ allows you to enter your User ID and Password for Authentication HSDPA Tab ● allows you to create/edit profiles of User name, Password, Phone Number, and APN for HSDPA connection. - To ensure that your USB Modem properly establishes Network connection, please configure User‟s network information at first - The user configuration information may differ with the network supplier and network types. 31 Common Operations Settings ▶ HSDPA Tab (USIM PIN) ● You can enable or disable the Lock feature of your USIM card. - If “PIN enable” is selected, you are prompted to enter a PIN to start your USB Modem 1) Enable/Disable - Select your preferred radio button. - Click [Apply]. - Enter your PIN and click [OK]. 2) Change PIN - Click [Change PIN code] - Click [Apply]. - Enter your current PIN and new PIN. - Click [OK]. 32 Common Operations Exiting Connection Manager ▶ In the Main Window of the Connection Manager, Click [Menu] and select [Exit]. ● ▶ Or in the Windows System Tray, Click the RIGHT mouse button on a miniature CM icon and select [Exit]. ● 33 Troubleshooting ● If you are having trouble with your USB Modem, try the below troubleshooting procedures before contacting a service professional of Seowonintech ([email protected]). ● The Connection Manager fails to detect USB Modem. - Remove and re-insert your USB Modem into the USB port of your computer. - If still unrecognized, try plugging it into another USB port (if available). - If unsuccessful despite the above trials, remove your USB Modem, reboot your computer, and re-plug it to the USB port. ● HSDPA Area in the Connection Manager says ‘USIM card not found’. - Install your USIM card to its holder inside of USB Modem. ● I clicked [Connect] in WiMAX Area in the Connection Manager, but my USB Modem is not trying to connect to the WiMAX network. - Check WiMAX‟s signal strength indicator in the Connection Manager. - If it is displayed as LOW, try moving to another location. ● I clicked [Connect] in HSDPA Area in the Connection Manager, but USB Modem is not trying to connect to the HSDPA network. - Check HSDPA‟s signal strength indicator in the Connection Manager. - If it is displayed as LOW, try moving to another location. - Check if you correctly created profile at of HSDPA tab. (See page 31) - If you are not sure of what to enter for the profile, ask your service provider. ● My USB Modem is connected to the network, but I cannot browse any web pages. - Check if you have any conflicting configuration at Connection Settings of your browser. - Try disable any applications such as Windows Firewall, Anti-Virus software that may be restricting your access to the Internet. 34 Product Specification Item Standards Specification IEEE 802.16e-2005 for WiMAX Mode Frequency Band Channel Bandwidth WiMAX HSDPA SWU-6400 SWU-6200 2.3GHz 2.5GHz 3.5GHz 5, 8.75, 10MHz 5, 10MHz 3.5, 5, 7, 8.75,10MHz Size 35.5mm x 89mm x 12mm Weight 43.5g Max Output Power Operating Temperature 2.1GHz (WCDMA, HSDPA) 900/1800MHz (GPRS, EDGE) 10MHz WiMAX : 200mW (23dBm) WCDMA/HSDPA : 200mW (23dBm) GPRS900 : 2W (33dBm) GPRS1800 : 1W (30dBm) EDGE900 : 500mW (27dBm) EDGE1800 : 400mW (26dBm) - 10°C ~ 50°C 35 Care and Maintenance Read following instructions carefully. It will help you protect your warranty coverage. ● Use the device in clean and dry areas. The device is not water-resistant. Dusty environments could affect electronic components. ● Do not disassemble the device. In need of help or repair, contact an authorized service center. ● Do not drop/bend the device. Keep it from colliding with other objects in the event of operation, storage, and transportation. ● Do not attempt to make any changes on the design, parts, and performance of the device unless authorized. ● Use only the supplied or an approved replacement antenna. Unauthorized antennas, modification could damage the device or cause legal problems. 36 Safety Information Caution ● Do not use the device in any potentially explosive/inflammable area. Abide by all instructions and signs. ● Do not use the device where using wireless devices is prohibited or may cause interference or danger, such as in hospitals and airplanes. ● Do not store the device near electronic appliances that generate strong magnetic or electric fields. ● Keep the device and its accessories out of the reach of children. Children could damage the device or may mistakenly swallow the components of the device and its accessories. 37 Legal Information EU Regulatory Conformance Hereby, SEOWON INTECH Co., Ltd. declares that this device is in compliance with the essential requirements and other relevant provisions of Directive 1999/5/EC. For the declaration of conformity, visit the Web site http://www.seowonintech.co.kr/en/customer/regulatory.asp 1588 Reduction of Hazardous Substances This device is compliant with the EU Registration, Evaluation, Authorization and Restriction of Chemicals (REACH) Regulation (Regulation No 1907/2006/EC of the European Parliament and of the Council) and the EU Restriction of Hazardous Substances (RoHS) Directive (Directive 2002/95/EC of the European Parliament and of the Council). WEEE Notice The disposal of this device is subject to the Waste from Electrical and Electronic Equipment (WEEE) Directive of the European Union. The Directive aims to promote environmentally-friendly handling of WEEE by ecological disposal or reuse/refurbishment of the collected WEEE. This WEEE symbol on the product or its box signifies that the device must not be discarded with normal household garbage. Separating WEEE from other waste helps minimize any of their hazardous effects on environment and human beings. You are liable to dispose of all your electronic or electrical waste equipment by relocating it over to a certified collection point at the end of its life. For more information, please contact a municipal office or the retail stores where you purchased this device. 38 Warranty Information Quality Warranty This product is the result of high-class craftsmanship based on strict quality control procedures. ● ● ● ● ● In case of Product failure or malfunction during normal usage, your product will be repaired free of charge within the Limited Warranty period. The Consumer shall bear any labor or parts charges not covered by this Limited Warranty. At the request for repair, you must provide the proof of purchase and the warranty. Keep the warranty in a safe location because it is not reissued. This USB modem is for use only with compatible UL Listed Product that have limited power source of the USB output connector. Purchase date Quality warranty period 1(one) year Seller Telephone number Name Address Consumer Telephone number E-mail The Consumers shall have no coverage or benefits under this Limited Warranty if the Product has been: ● ● ● Subjected to inappropriate use, improper storage, unauthorized repair, unauthorized modifications, neglect abuse, inadequate installation, misuse, damage caused by shipping, etc. Damaged from fire, flooding, windstorm, lighting, earthquake, theft, blown fuse, internet viruses, worms, Trojan Horses, etc. Treated with its Product Serial # removed or defaced. 39 Memo ... Memo ... Memo ... SEOWON INTECH.CO.,LTD. R&D Center 689-47, Kumjung-Dong, Kunpo-City, Kyunggi-Do,435-862, Korea TEL 82-31-428-9531 FAX 82-31-428-9599 E-mail [email protected] www.seowonintech.co.kr