1
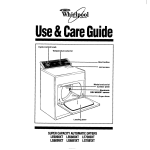
ORDER # 33001259
AUTOMATIC
DRYER
D-4
TABLE OF CONTENTS
Page
For Future Reference .........................................................................................................................
Safety Instructions .........................................................................................................................
1
1-3
Exhausting The Dryer .......................................................................................................................
3
Energy Saving Tips ..........................................................................................................................
3
Reversing The Door ..........................................................................................................................
3
Operating
Instructions ...................................................................................................................
• Select Drying Temperature ..................................................................................................
• Select the Cycle .............................................................................................................
4
4-5
• Start the Dryer ..................................................................................................................
5
•
Indicator
5
•
Drum Light ........................................................................................................................
Lights ..................................................................................................................
Using The Dryer ...........................................................................................................................
Caring
4-5
5
6-7
• Check the Lint Filter ...........................................................................................................
6
•
Load the Dryer ..................................................................................................................
6
• What Cannot Be Dried ......................................................................................................
6
•
7
Drying Rack Accessory ......................................................................................................
For The Dryer .......................................................................................................................
7
Before You Call For Service ...............................................................................................................
8
Consumer
Publications
8
Warranty
.....................................................................................................................................
.....................................................................................................................
10
FOR FUTURE REFERENCE
Congratulations on your choice of a Maytag
dryer! Your satisfaction is very important to us. On
the following pages you will find information
related to proper use and care of your new
appliance. The MAYTAG LAUNDERING GUIDE
contains additiona! tips on proper washing and
drying techniques. By following these instructions
carefully, you will be able to achieve excellent
results with your dryer.
Should you have any questions about using your
Maytag dryer, please contact us. Be sure to
provide the model and serial numbers.
MAYTAG
CONSUMER EDUCATION
ONE DEPENDABILITYSQUARE
NEWTON, IOWA 50208
(515) 791_8911
(Mon.-Fri., 8am-5pm CST)
NOTE: For service and warranty information see
pages 8 & 10.
For future reference we suggest you retain this
manual after recording the model number and
serial number of this automatic dryer in the spaces
provided. This information can be found on the
data plate located in the lower right corner of the
door opening_
Model Number
Important
Seriat Number
WARNING:Foryour safety the
informationin this manual mustbe
followed to minimizethe risk of fire
or explosionor to prevent property
damage, personalinjury or death.
- Do not storeor use gasolineor
other flammable vapors and liquids
in the vicinityof thisor any other
appliance.
- WHATTO DO IF YOU SMELLGAS
• Do not try to light any appliance.
• Do not touchany electrical
switch;do not useany phonein
your building.
• Clear the room, buildingor area
of all occupants.
• Immediatelycall your gas
supplierfrom a neighbor's
phone. Followthe gas supplier's
instructions.
• If you cannotreach your gas
supplier,call the fire department.
Installationand servicemustbe
performed by a qualified installer,
serviceagencyor the gas supplier.
Safety Notice & Warning
The California Safe Drinking Water and Toxic Enforcement Act of 1986 (Proposition 65) requires the
Governor of California to publish a list of substances known to the State of California to cause cancer or
reproductive harm, and requires businessesto warn customers of potential exposures to such substances.
Users of this appliance are hereby warned that the burning of gas can result in low-level exposure to some
of the listed substances, including benzene, formaldehyde and soot, due primarily to the incomplete
combustion of natural gas or liquid petroleum (LP)fuels. Exhaust ducts should be kept free of obstructions
and properly exhausted dryers will minimize exposure.
PAGE 1
IMPORTANT
PERSONAL SAFETY INSTRUCTIONS
Warning m Toreduce the risk of fire, electric
shock or in ury to personswhen using your
appliance, follow basic precautions, including the
followmg:
1. Read all instructions before using the
appliance.
2. To avoid the possibility
of fire or explosion:
a. Do not dry items that have been previously
cleaned in, washed in, soaked in, or
spotted with gasoline, dry_deaning
solvents, other flammable or explosive
substances as they give off vapors that
could ignite or explode. Any material on
which you have used a cleaning solvent,
or which is saturated with flammable
liquids or solids, should not be placed in
the dryer, until all traces of these
flammable liquids or solids and their fumes
have been removed. There are many
highly flammable items used in homes,
such as: acetone, denatured alcohol,
gasoline, kerosene, some liquid household
cleaners, some spot removers, turpentine,
waxes and wax removers.
b. Itemscontaining foam rubber (may be
labeled latex foam) or similarly textured
rubber-like materials must not be dried on
a heat setting. Foam rubber materials
when heated, can under certain
circumstance produce fire by spontaneous
combustion.
3. Do not allow children to play on or in the
appliance. Close supervision of children is
necessary when the appliance is used near
children.
4. Before the appliance is removed from service
or discarded, remove the door to the drying
compartment.
5. Do not reach into the appliance if the drum is
moving.
6. Do not install or store this appliance where it
wiII be exposed to the weather.
7. Do not tamper with controls.
8. Do not repair or replace any part of the
appliance or attempt any servicing unless
specifically recommended in published userrepair instructions that you understand and
have the skills to carry out.
PAGE 2
Do not use fabric softeners or products to
eliminate static unless recommended by the
manufacturer of the fabric softener or
product.
10. Clean the lint screen before or after each
load.
.
11. Keep the area around the exhaust opening
and surrounding areas free from lint
accumulation, dust and dirt.
12. The interior of the dryer and exhaust duct
should be cleaned periodically by qualified
service personnel.
13. This appliance must be properly grounded.
Never plug the appliance cord into a
receptacle which is not grounded adequately
and in accordance with local and national
codes. See installation instructions for
grounding this appliance.
WARNING
Do not place intoyour dryer items that have been
spottedor soaked with vegetable oil or cooking
oil. Evenafter being washed, theseitemsmay
contain significantamounts of these oils. The
remaining ol can ignite spontaneously.The
potential for spontaneousignition increaseswhen
the itemscontainingvegetable oil or cooking oil
are exposed to heat. Heat sources, such as your
clothesdryer, can warm these items, allowing an
oxidation reaction in the oil to occur.Oxidation
creates heat. If this heat cannot escape, the items
can become hot enough to catch fire. Piling,
stackingor storing thesekinds of items may
prevent heat from escaping and can create a fire
hazard.
All washed and unwashed fabrics that contain
vegetable ol! or cooking oll can be dangerous.
Washing these items in hot water with extra
detergent will reduce, but will not eliminate, the
hazard. Always use the "cool down" cycle for
these itemsto reduce the items' temperature.
Never remove theseitemsfrom the clothesdryer
hot or interrupt the drying cycleuntil the items
have run through the "cool down" cycle. Never
pile or stack these itemswhen they are hot.
t
Save These Instructions
Appliances with the (_) symbol on the data plate
have been listedwith Underwriters' Laboratories,
Inc. Those with a CSA Monogram on the data
plate have been certified by the CSA Testing
Laboratories as complying with Canadian
Standards Association requirements. Gas dryers
with an AGA symbol on the data plate have been
design certified with the American Gas
Association; those with a CGA symbol on the
data plate have been approved by the Canadian
Gas Association. Nevertheless, as with any
equipment using electricity and having moving
parts, there are potential hazards. To use this
appliance safely, the operator should become
familiar with the instructions for operation of the
Appliance and always exercise care when
using it.
EXHAUSTING
THE DRYER
A proper exhaust system is critical for good
drying results. Restricted airflow affects dryer
performance and results in longer drying times.
Exhaust duclwork guidelines:
• Use 4" diameter rigid metal exhaust duct. Do
not use smaller duct. Minimize the length of
duct and the number of elbows. Secure joints
with duct tape. Do not use screws.
• Never use plastic or nonmetal flexible duct. This
can kink, cause lintbuildup and reduce airflow
which creates service problems.
• If flexible duct must be used, use only the type
with a stiff sheet metal wall Do not kink or
crush the duct. Do not use flexible duct with a
thin foil wall.
• Clean out previously used exhaust duct.
Replace kinked or crushed sections. Be sure
exhaust vent hood flap opens and closes freely.
loads of heavy, hard_to_dryitems with
lightweight ones.
Properly select and check exhaust venting. Four
inch rigid _netal ducting is recommended to
prevent lint collection and improve dryer
operation. Periodically check the ductwork for
any obstructions that could reduce the airflow
and efficiency.
Remove items from the dryer as soon as
tumbling stops for best results and efficiency.
This reduces wrinkling and ironing.
REVERSING
THE DOOR
The dryer door is designed with flexibility in mind.
It can be mounted on the dryer front so as to open
from left to right, or reversed and open from right
to left. This provides flexibility for the dryer located
in a cramped area or for the person preferring a
different door swing. Simply follow the steps as
listed.
1)
Remove hinge hole covers and cover from
latch. These will be re-used.
2)
Rest door on knee for support.
3)
Remove 4 screws holding hinges to front
panel.
4)
Turn door upside down.
5)
Support on knee.
6)
Insert screw in the small round hole first and
start by hand.
7)
Tighten screw to position door.
8)
Insert top screw of other hinge and tighten.
9)
Insert and tighten remaining
10)
screws.
Replace hinge hole covers and door latch
cover in opposite side.
HINGEHOLE
COVERS
• Refer to the installation instructions for
additional dryer exhaust information.
ENERGY SAVING
•
TIPS
Clean the lint filter after each cycle for greater
efficiency and performance.
• Avoid overloading the dryer. A proper wash
load is a proper dryer load. Do not combine
loads. Avoid drying very small loads or mixed
LATCH
COVER
PAGE 3
OPERATING INSTRUCTIONS
Features may vary
Select Drying Temperature
Turn the temperature selector knob to the proper
drying temperature. The choices are:
REGULAR-- Use for drying sturdy cottons or
regular garments and those items labeled "Tumble
Dry," etc.
MEDIUM -- (Not on all models) Use for
permanent press, synthetics and lightweight
cottons and those items labeled "Tumble Dry
Medium," etc.
DELICATE-- Use for drying those heot_sensitive
items labeled "Tumble Dry Low," "Tumble Dry
Warm," etc.
AIR FLUFF-- Use this no heat cycle to fluff
decorator items in air at room temperature.
Select the Cycle
The ElectronicDry Control cycles include: Regular
Fabrics and Permanent Press.These cycles
provide automatic sensing of the moisture amount
in the load and shut off when the selected dryness
is reached. The time required to reach that
dryness will vary for each load according to the
size of the load, the weight of the fabric, lengthof
venting, etc. For these cycles, set the pointer to the
desired dryness setting for the cycle. The Time Dry
PAGE 4
rmmll
cycle does not sense the moisture, but rather, dries
items by setting a desired time on the dial.
NOTE: The dial is designed to turn in either
direction.
REGULARFABRICS-- Use this cycle for nonpermanent press loads such as towels, underwear,
etc. At the end of the cycle there is an automatic
cool down of approximately 6 minutes and a
momentary buzzer.
PERMANENT PRESS-- Use this cycle for
permanent press loads or no-iron fabrics such as
nylon, acrylic, polyester or blends. At the end of
the cycle there is an automatic coo! down of
approximately 13 minutes. The buzzer will sound
two to three times during the cool down to let you
know the cycle is nearly over.
The Press Care feature in this cycle extends the
cool down portion. It provides an additional 20
minutes of tumbling in unheated air. A buzzer will
sound at the end of the cycle.
TIME DRY -- This cycle may be used for any load
when Electronic Dry is not preferred. Set the dial
to the amount of time desired. This will be
followed by approximately 5 minutes of cool
down and a momentary buzzer.
WRINKLE RELEASE-- Found in the Time Dry
portion of the dial, use this cycle to release
wrinkles from items that are clean and dry but
_ccordlngto model.
slightly wrinkled
from a crowded
closet or suitcase
or from sitting in the dryer after the cycle is
complete.
It provides
10 minutes of heated
tumbling and 5 minutes of cool down.
DAMP DRY -- To partially dry items to a damp
state, select "Damp Dry" on the Time Dry portion
of the controls. The clothes will tumble in heated
air for approximately 20 minutes, then cool air for
5 minutes.
AIR FLUFF-- Turn the temperature selector knob
to AIR FLUFFand set the desired number of
minutes on the Time Dry portion of the dial. This
provides tumbling without heat.
NOTE:
The dial will not advance at a specific
rate during the cycle. At first, the dial
may not advance at all. Toward the end
of the cycle (when the articles begin to
dry) the dial will advance at a more
regular rate and much more quickly. This
is normal operation and is not a reason
for concern.
Push the Button to Start
Indicator
Lights
DRYNESSMONITOR
Indicator lights in the dryness monitor will display
when an electronic dry cycle is in operation. The
top light wilt blink on and off. As loads dry, there
will be longer pauses between each blink. No
lights will display during Time Dry.
The bottom light in the monitor will remain on until
the cool down portion of the cycle starts. During
cool down the dryer continues to tumble the toad
in unheated air to help minimize wrinkling.
NOTE: The top monitor light may not blink when
small loads of heavy, bulky items are
dried, such as large rugs or sweaters.
ON LIGHT (Not on at! models)
This indicator light stays on throughout the cycle to
let you know the dryer is operating.
Drum Light
(Not on oil models)
The drum light comes on whenever the door is
opened. Close the door to turn off the light.
To change the drum light, follow these steps:
This dryer is designed so that it will not operate
when the door is open. If the door is opened
before the cycle is complete, the door must be
closed and the start button pushed.
1. Unplug or disconnect the dryer.
2. Unscrew the bulb by turning counterclockwise.
3. Replace it with a 7 watt, 120 volt candelabra
base bulb (7C7).
4.
Reconnect the power to the dryer.
PAGE 5
USING THE DRYER
Check the Lint Filter
Load the Dryer
Clean the lint filter after each load. It's best to
A proper washer load is a proper dryer load, Do
check this when the dryer is empty to prevent lint
not combine
from falling onto items inside the dryer.
or mixed loads of heavy, hard-to-dry
To clean, pull the filter out and remove any lint.
(See illustration below.) Failure to clean the filter
will cause loads to take longer to dry and make
the dryer operate less efficiently.
lightweight
efficiently.
loads. Avoid drying very small loads
ones, Normal
items and
sized loads dry most
(A full load is shown below.)
Replace the filter by pressing it firmly into position.
NOTE: Do not operate the dryer without the lint
filter in place.
NOTE: If you are using a dryer-added fabric
softener,it should be added now. Adding
one after the load is warm can cause
greasy-loaking softener stains. Refer to
the Maytag Laundering Guide for
removing dryer-added fabric softener
stains.
What Cannot Be Dryer Dried
The following items should not be dried in a dryer
unless specifically recommended by the
manufacturer on the care label.
1. Fiber glass items (curtains, draperies,
bedspreads, etc.)
2. Woolens
3.
Rubber-coated items, plastics and items with
plastic trim (on a heat setting)
For specific drying instructions, please refer to the
Operating Instructions section on pages 4 and 5
or the MAYTAG LAUNDERING GUIDE.
PAGE 6
CARING FOR THE DRYER
Drying Rack Accessory
(Not on all models)
Control Panel Care
The drying rack accessory (part #LAX1000AXX)
allows items to dry inside the dryer without
tumbling. The rack remains stationary, but the
drum rotates.(Make sure nothing hangs over the
edges of the rack.)
Items ideal for use with this rack include: sneakers,
washable
sweaters, stuffed toys or pillows, etc.
Clean the control panel with a soft damp cloth. Do
not use any abrasive powders or cleaning pads.
Cabinet Care
Simply wipe off any marks with soap and water,
followed with an appliance wax if desired.
SUGGESTEDTEMP.
SUGGESTED
ITEMS
SEI"rlNGS
Washable SweaterstBbck to
shape & lay flat on rack)
Heat
pen or other item inadvertently
polyesterfiber fllIed)
Air Huff
*Foam rubber pillows
Air Fluff
Sneakers
Air Huff or Heat
with
heat may
ink
left in a garment,
clean the tumbler with an all purpose cleaner
*Stufbd _oys (foam or rubber filled)
Drying
Care
If the tumbler becomes stained by a crayon,
Stuffed toys or pilbws (cotton or
*Warning:
Tumbler
Heat
damage
foam
rubber,
plastic
such as: Fantastik, Soft Scrub or Formula 409 ®*.
Then tumble old towels or rags to remove any
excess stalin
or rubber
and will be a fire h_szard. Check care labels for specific temperature
Exhaust System Cleaning
recommenclat_ons.
To Use the
1)
2)
3)
Rack:
Open the dryer door.
Position the drying rack in the tumbler with the
front of the rack toward you. The legs will rest
on the front ledge and back of the drum.
Place wet items on the rack, leaving a space
between them so air can reach all surfaces.
While the lint filter will catch most of the lint from
the load, some will get through and may buildup
in the duc_ork_ It is important to completely
inspect and clean all lint accumulation from the
interior of the ducb,,vorkonce a year to maintain
drying performance. The exhaust hood at the
outside of the home should be cleaned more
4) Close the dryer door.
frequently to ensure the damper opens and
closes freely,
5)
Select the Timed Dry cycle and set the desired
Refer to the Installation
time according
the item.
on proper exhausting.
to the moisture and weight of
6)
Push the start button.
7)
Reset the timer if a longer drying time is
needed.
To Remove
the
Instructions for more details
*Brand names are trademarks of the respective
manufacturers.
Rack:
1) Open the dryer.
2) Lift the rack straight up and out.
PAGE 7
BEFORE YOU CALL FOR SERVICE
Check these points if the
dryer...
Does
not
• Exhaust duct is too long, smaller than 4 inch
diameter, uses too many elbows or is made of
plastic flexible material. Replace with metal.
• Sort heavy items from lightweight items.
run
• Opening the door during operation stops the
dryer. Close the door, select a cycle and press
the start button.
• Plug the cord into a live outlet.
Light Blinks
On and
Off
• This is a normal function of the top light of the
dryness monitor during electronic dry. tt
indicates that the load is drying to a selected
level. (Refer to page 5 for more details.)
• Check the fuse or reset the circuit breaker.
Does not
• Washer spin cycle may not be extracting water
properly.
heat
• Check the fuse or reset the circuit breaker.
Is noisy
• Select a heat setting; not air-fluff.
• On a gas dryer, check that the gas supply is on.
• Clean the lint screen and exhaust duct if the
heat shuts off early.
• Check to see if there are any foreign objects
such as coins, buttons, or nails which could
damage clothes as well as the dryer. Remove
promptly.
• Push in only one temperature button.
Dial Advancement
Doesn't
• The dial will not advance at a specific rate
during the cycle. At first, the dial may not
advance at all. Toward the end of the cycle
(when the articles begin to dry) the dial witl
advance at a more regular rate and much more
quickly. This is normal operation and is not a
reason for concern,
dry
clothes
properly
• Select a heat setting; not air-fluff.
• On a gas dryer, check that the gas supply is on.
• Clean the lint screen and the exhaust system.
• Be sure the exhaust hood damper opens and
closes freely.
• Push only one temperature button in.
• Do not overload. One washer load equals one
dryer load.
NOTE: For further assistancecontactyour
Maytag dealer or call Maytag Customer
Service:
U.S.
1-800-688-9900
Canada
1-800-688-2002
CONSUMER PUBLICATIONS
For additional information on laundering and purchasing other major appliances, order the following
booklets from Maytag at the prices indicated. Please send your name, address, booklet title, form number
and payment to: Maytag, Consumer Education Department, One Dependabili_/Square, Newton, IA
50208. Allow 4-6 weeks for delivery.
The Facts of the Laundry -- 181YG ............................................................
Stain Removal Guide -- ] 9YG ..................................................................
50¢
50¢
Choosing
50¢
the Right Detergent --
Energy Saving Tips -Appliance
392YG
...................................................................
Buying Guides ..........................................................................
Washer --
2 ] ] YG; Dryer --
Electric Range -Refrigerator
PAGE 8
] 84YG .....................................................
--
2 ] 2YG; Dishwasher
2 ] 4YG; Gas Range --
276YG
215YG;
-- 213YG;
50¢
50¢
NOTES
PAGE 9
AUTOMATIC
DRYER WARRANTY
Full One Year Warranty
For one(1) year from the date of original retail purchase,any part which fails in normal home usewill be repaired or replaced
free of charge.
Limited Parts Warranty
After the first year from date of original retail purchase,through the time periods listed below, the designated parts which fail
in normal home usewil! be repaired or replaced flee of charge for the part itself, with the owner paying ail other costs,
including labor.
Second Year
All Parts
Third Through Fifth Year
All parts of the solid statecontrols (if so equipped).
Additional Limited Warranty Against Rust
Shouldany of the parts listed below rust during the five year period starting from the date of retail purchase,repair or
replacementwill be made free of charge during the firstyear. After the first and through the fifth year, repair or replacement
will be made free of charge for the part itself,with the owner paying all other costs, including labor. Partscovered by this
warranty are the exterior cabinet, including door, tumbler and tumbler front and back.
Thisfult warranty and the limited warranties apply when the appliance is located in the United Statesor Canada. Appliances
located elsewhereare covered by the limited warranties only, which includesparts which fail during the first year.
Canadian
Residents
This warranty covers only those appliances installed in Canada that have been listed with Canadian Standards Association
unless the appliances are brought into Canada due to transfer of residence from the United States to Canada.
This Warranty gives you specific legai rights, and you may also have other rights which vary from state to state.
TO RECEIVEWARRANTY SERVICE
First:
To locate an authorized servicecompany in your area, contact the Maytag dealer from whom your appliance was
purchased or cal! Maytag CustomerService:
US
CANADA
1-800-688-9900
1-800-688-2002
or check in your telephonedirectory yellow pages.
Second:
Should you not receive satisfactorywarranty servicefrom the dealer or authorized servicefirm, or need further
assistance,call or write:
Maytag CustomerService
P.O. Box 2370
Cleveland,TN 3731 ]
US
1-800-688-9900
CANADA
1-800-688-2002
When contacting CustomerServicebe sureto provide the model and seriaI numberof your appliance, the name and
addressof the deater from whom you purchased the appliance, and the date of purchase.
Should
you still have a problem,
write to: Maior Appliance
Consumer Action Panel, 20 North Wacker Drive_ Chicago, IIJinois 60606.
MACAP is an industry sponsored but independent group of consumer experts who receive and act on complaints from appliance owners.
NOTE:
When writing about an unsolved service problem, please include the following information:
(a) Your name, address, and telephone number;
(b) Model number and serial number (found on the lower right corner of the door recess) of your appliance;
(c) Nameandaddressofyourdeateranddatetheappliancewasbought;
(d) A clear description of the ploblern you are having,
MAYTAG
Form No. 192TM-0594
* One Dependability
Part No. 3-t 57820
Square
• Newton,
Iowa 50208
MP
Printed in U.S.A.