1
Introduction & Installation
Introduction
Congratulations! You have invested in one of the
world's premier subwoofers.
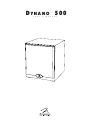
The MartinLogan Dynamo 500 represents the extension
of an intensive, dedicated team research program directed toward establishing a world class line of reference
subwoofers using leading-edge technology, without compromising durability, reliability, craftsmanship or aesthetics.
The Dynamo 500 subwoofer uses a 10-inch high-excursion driver to achieve deep, tight, well-defined bass. A
proprietary amplifier is used to drive the output stage with
precision and extremely high efficiency. Low-pass filtering
and phase control have been designed to make integrating the Dynamo 500 subwoofer with MartinLogan and
non-MartinLogan products both seamless and simple.
The materials in your new Dynamo 500 subwoofer are
of the highest quality and will provide years of enduring
enjoyment and deepening respect. The cabinet is constructed from the finest composite material for acoustical
integrity and is finished with an attractive custom coating.
This User's Manual will explain in detail the operation of
your Dynamo 500 subwoofer and the philosophy applied
to its design. A clear understanding will insure that you
obtain maximum performance and pleasure from this most
exacting subwoofer.
in
Brief
Installation in Brief
We know that you are eager to hear your new Dynamo
500 subwoofer, so this section is provided to allow fast
and easy set up. Once you have it operational, please
take the time to read, in depth, the rest of the information in this manual. It will give you perspective on how
to attain the greatest possible performance from this most
exacting subwoofer system.
If you experience any difficulties in setup or operation of
the Dynamo 500, please refer to the Placement, Room
Acoustics and Connections and Control Settings sections.
Should you encounter a persistent problem that cannot
be resolved, please contact your authorized MartinLogan
dealer. They will provide you with the appropriate technical
analysis to alleviate the situation.
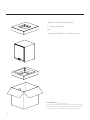
Step 1: Unpacking
Remove your new subwoofer from its packing.
Step 2: Placement
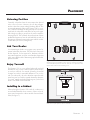
Ideally, place the Dynamo 500 in a corner near the front
of the room. This is a good place to start. Please see the
Placement section (page 9) of this manual for more details.
Step 3: Signal Connection
Use the best cables you can. High quality cables, available
from your specialty dealer, are recommended and will
give you superior performance.
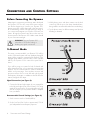
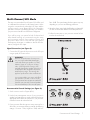
Attach your preamplifier/processor outputs through cables
to the signal input area located on the Dynamo 500’s rear
panel. Please see the Connections and Control Settings
section (pages 6–8) of this manual for more details.
Step 4: Power Connection (AC) (see warning)
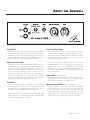
Make sure the level knob is set at 'Min'. Plug the Dynamo
500 subwoofer into a wall outlet. Review the AC Power
Connection section (page 8) of this manual for more details.
Step 5: Setting the Controls
Set the level knob to a medium volume position (12 o'clock).
Set the power switch to ‘Auto On'.
Step 6: Listen and Enjoy
Now, you may adjust your system and enjoy!
4
Introduction & Installation in Brief