1
Owner’s Manual
Bedienungsanleitung
Mode d’emploi
Manual de instrucciones
For information on assembling the keyboard stand, refer to the instructions at the end of this manual.
IMPORTANT — Check your power supply —
Make sure that your local AC mains voltage matches the voltage specified on the name plate on the bottom panel. In some areas a voltage
selector may be provided on the bottom panel of the main keyboard unit near the power cord. Make sure that the voltage selector is set for
the voltage in your area. The voltage selector is set at 240V when the unit is initially shipped.
To change the setting use a “minus” screwdriver to rotate the selector dial so that the correct voltage appears next to the pointer on the
panel.
Weitere Informationen über die Montage des Keyboard-Ständers erhalten Sie in den Anweisungen am Ende dieses Handbuchs.
WICHTIG — Überprüfen Sie Ihren Netzanschluss —
Vergewissern Sie sich, dass die Spannung in Ihrem örtlichen Stromnetz mit der Spannung übereinstimmt, die auf dem Typenschild auf der
Unterseite des Instruments angegeben ist. In bestimmten Regionen ist auf der Unterseite des Keyboards in der Nähe des Netzkabels ein
Spannungswähler angebracht. Vergewissern Sie sich, dass der Spannungswähler auf die Spannung Ihres lokalen Stromnetzes eingestellt
ist. Dieser Spannungswähler ist bei Auslieferung auf 240 V eingestellt. Sie können die Einstellung mit einem Schlitzschraubenzieher ändern.
Drehen Sie dazu den Wählschalter, bis der Pfeil auf dem Instrument auf die richtige Spannung zeigt.
Pour obtenir des informations sur l'assemblage du support du clavier, reportez-vous aux instructions à la fin de ce manuel.
IMPORTANT — Contrôler la source d'alimentation —
Vérifiez que la tension spécifiée sur le panneau inférieur correspond à la tension du secteur. Dans certaines régions, l'instrument peut être
équipé d'un sélecteur de tension situé sur le panneau inférieur du clavier à proximité du cordon d'alimentation. Vérifiez que ce sélecteur est
bien réglé en fonction de la tension secteur de votre région. Le sélecteur de tension est réglé sur 240 V au départ d'usine. Pour modifier ce
réglage, utilisez un tournevis à lame plate pour tourner le sélecteur afin de mettre l'indication correspondant à la tension de votre région vis
à vis du repère triangulaire situé sur le panneau.
Para información sobre el montaje del soporte del teclado, consulte las instrucciones al final de este manual.
IMPORTANTE — Verifique la alimentación de corriente —
Asegúrese de que tensión de alimentación de CA de su area corresponde con la tension especificada en la placa de características del
panel inferior. En algunas zonas puede haberse incorporado un selector de tensión en el panel inferior de la unidad del teclado principal,
cerca del cable de alimentación. Asegúrese de que el selector de tensión esté ajustado a la tensión de su área. El selector de tension se
ajusta a 240V cuando la unidad sale de fábrica. Para cambiar el ajuste, emplee un destornillador de cabeza ”recta” para girar el selector de
modo que aparezca la tensión correcta al lado del indicador del panel.
EN
DE
FR
ES
Introduction
SPECIAL MESSAGE SECTION
PRODUCT SAFETY MARKINGS: Yamaha electronic
products may have either labels similar to the graphics
shown below or molded/stamped facsimiles of these graphics on the enclosure. The explanation of these graphics
appears on this page. Please observe all cautions indicated
on this page and those indicated in the safety instruction section.
CAUTION
RISK OF ELECTRIC SHOCK
DO NOT OPEN
CAUTION: TO REDUCE THE RISK OF ELECTRIC SHOCK.
DO NOT REMOVE COVER (OR BACK).
NO USER-SERVICEABLE PARTS INSIDE.
REFER SERVICING TO QUALIFIED SERVICE PERSONNEL.
See bottom of Keyboard enclosure for graphic symbol markings.
The exclamation point within the equilateral triangle is intended to alert the
user to the presence of important operating and maintenance (servicing) instructions in the literature accompanying the
product.
The lightning flash with arrowhead symbol, within the equilateral triangle, is
intended to alert the user to the presence
of uninsulated “dangerous voltage”
within the product’s enclosure that may
be of sufficient magnitude to constitute a
risk of electrical shock.
IMPORTANT NOTICE: All Yamaha electronic products
are tested and approved by an independent safety testing
laboratory in order that you may be sure that when it is properly installed and used in its normal and customary manner,
all foreseeable risks have been eliminated. DO NOT modify
this unit or commission others to do so unless specifically
authorized by Yamaha. Product performance and/or safety
standards may be diminished. Claims filed under the
expressed warranty may be denied if the unit is/has been
modified. Implied warranties may also be affected.
ENVIRONMENTAL ISSUES: Yamaha strives to produce
products that are both user safe and environmentally
friendly. We sincerely believe that our products and the production methods used to produce them, meet these goals. In
keeping with both the letter and the spirit of the law, we
want you to be aware of the following:
Battery Notice: This product MAY contain a small nonrechargeable battery which (if applicable) is soldered in
place. The average life span of this type of battery is approximately five years. When replacement becomes necessary,
contact a qualified service representative to perform the
replacement.
Warning: Do not attempt to recharge, disassemble, or incinerate this type of battery. Keep all batteries away from children. Dispose of used batteries promptly and as regulated by
applicable laws. Note: In some areas, the servicer is required
by law to return the defective parts. However, you do have
the option of having the servicer dispose of these parts for
you.
Disposal Notice: Should this product become damaged
beyond repair, or for some reason its useful life is considered to be at an end, please observe all local, state, and federal regulations that relate to the disposal of products that
contain lead, batteries, plastics, etc.
NOTICE: Service charges incurred due to lack of knowledge relating to how a function or effect works (when the
unit is operating as designed) are not covered by the manufacturer’s warranty, and are therefore the owners responsibility. Please study this manual carefully and consult your
dealer before requesting service.
NAME PLATE LOCATION: The graphic below indicates
the location of the name plate. The model number, serial
number, power requirements, etc., are located on this plate.
You should record the model number, serial number, and the
date of purchase in the spaces provided below and retain this
manual as a permanent record of your purchase.
SPECIFICATIONS SUBJECT TO CHANGE: The
information contained in this manual is believed to be correct at the time of printing. However, Yamaha reserves the
right to change or modify any of the specifications without
notice or obligation to update existing units.
Model
Serial No.
92-469- ➀
2
Owner’s Manual
Purchase Date
FCC INFORMATION (U.S.A.)
1. IMPORTANT NOTICE: DO NOT MODIFY THIS UNIT!
This product, when installed as indicated in the instructions contained in this manual, meets FCC requirements. Modifications not
expressly approved by Yamaha may void your authority, granted by
the FCC, to use the product.
2. IMPORTANT: When connecting this product to accessories and/
or another product use only high quality shielded cables. Cable/s
supplied with this product MUST be used. Follow all installation
instructions. Failure to follow instructions could void your FCC
authorization to use this product in the USA.
3. NOTE: This product has been tested and found to comply with the
requirements listed in FCC Regulations, Part 15 for Class “B” digital
devices. Compliance with these requirements provides a reasonable level of assurance that your use of this product in a residential
environment will not result in harmful interference with other electronic devices. This equipment generates/uses radio frequencies
and, if not installed and used according to the instructions found in
the users manual, may cause interference harmful to the operation
of other electronic devices. Compliance with FCC regulations does
not guarantee that interference will not occur in all installations. If
this product is found to be the source of interference, which can be
determined by turning the unit “OFF” and “ON”, please try to eliminate the problem by using one of the following measures:
Relocate either this product or the device that is being affected by
the interference.
Utilize power outlets that are on different branch (circuit breaker or
fuse) circuits or install AC line filter/s.
In the case of radio or TV interference, relocate/reorient the
antenna. If the antenna lead-in is 300 ohm ribbon lead, change the
lead-in to co-axial type cable.
If these corrective measures do not produce satisfactory results,
please contact the local retailer authorized to distribute this type of
product. If you can not locate the appropriate retailer, please contact
Yamaha Corporation of America, Electronic Service Division, 6600
Orangethorpe Ave, Buena Park, CA90620
The above statements apply ONLY to those products distributed by
Yamaha Corporation of America or its subsidiaries.
* This applies only to products distributed by YAMAHA CORPORATION OF AMERICA.
IMPORTANT NOTICE FOR THE UNITED KINGDOM
Connecting the Plug and Cord
IMPORTANT. The wires in this mains lead are coloured in accordance with the following code:
BLUE
: NEUTRAL
BROWN : LIVE
As the colours of the wires in the mains lead of this apparatus may
not correspond with the coloured makings identifying the terminals
in your plug proceed as follows:
The wire which is coloured BLUE must be connected to the terminal which is marked with the letter N or coloured BLACK.
The wire which is coloured BROWN must be connected to the terminal which is marked with the letter L or coloured RED.
Making sure that neither core is connected to the earth terminal of
the three pin plug.
• This applies only to products distributed by
Yamaha Music U.K. Ltd.
(class B)
Die Seriennummer dieses Produkts befindet sich an der
Unterseite des Geräts. Sie sollten die Nummer des Modells, die
Seriennummer und das Kaufdatum an den unten vorgesehenen
Stellen eintragen und diese Anleitung als Dokument Ihres Kaufs
aufbewahren.
Modellnr.
Seriennr.
Vous pouvez trouver le numéro de série de ce produit sur le bas de
l'unité. Notez ce numéro de série dans l'espace fourni ci-dessous et
conservez ce manuel en tant que preuve permanente de votre achat
afin de faciliter l'identification du produit en cas de vol.
(2 wires)
N˚ de modèle
N˚ de série
COMPLIANCE INFORMATION STATEMENT
(DECLARATION OF CONFORMITY PROCEDURE)
Responsible Party : Yamaha Corporation of America
Address : 6600 Orangethorpe Ave., Buena Park, Calif.
90620
Telephone : 714-522-9011
Type of Equipment : Digital Piano
Model Name : YDP-V240
This device complies with Part 15 of the FCC Rules.
Operation is subject to the following two conditions:
1) this device may not cause harmful interference, and
2) this device must accept any interference received including
interference that may cause undesired operation.
See user manual instructions if interference to radio reception is
suspected.
* This applies only to products distributed by
YAMAHA CORPORATION OF AMERICA.
El número de serie de este producto se encuentra en la parte
inferior de la unidad. Debe tomar nota del número de serie en el
espacio proporcionado a continuación y conservar este manual
como registro permanente de su adquisición; todo ello facilitará
la identificación en caso de robo.
Modelo nº
Serie nº
(bottom)
(FCC DoC)
Owner’s Manual
3
PRECAUTIONS
PLEASE READ CAREFULLY BEFORE PROCEEDING
* Please keep this manual in a safe place for future reference.
WARNING
Always follow the basic precautions listed below to avoid the possibility of serious injury or even death from electrical
shock, short-circuiting, damages, fire or other hazards. These precautions include, but are not limited to, the following:
Power supply/Power cord
Water warning
• Only use the voltage specified as correct for the instrument. The required voltage
is printed on the name plate of the instrument.
• Check the electric plug periodically and remove any dirt or dust which may have
accumulated on it.
• Use only the supplied power cord/plug.
• Do not place the power cord near heat sources such as heaters or radiators, and
do not excessively bend or otherwise damage the cord, place heavy objects on
it, or place it in a position where anyone could walk on, trip over, or roll anything
over it.
• Do not expose the instrument to rain, use it near water or in damp or wet
conditions, or place containers on it containing liquids which might spill into
any openings. If any liquid such as water seeps into the instrument, turn off the
power immediately and unplug the power cord from the AC outlet. Then have the
instrument inspected by qualified Yamaha service personnel.
• Never insert or remove an electric plug with wet hands.
Fire warning
• Do not put burning items, such as candles, on the unit.
A burning item may fall over and cause a fire.
Do not open
• Do not open the instrument or attempt to disassemble the internal parts or
modify them in any way. The instrument contains no user-serviceable parts. If it
should appear to be malfunctioning, discontinue use immediately and have it
inspected by qualified Yamaha service personnel.
If you notice any abnormality
• If the power cord or plug becomes frayed or damaged, or if there is a sudden
loss of sound during use of the instrument, or if any unusual smells or smoke
should appear to be caused by it, immediately turn off the power switch,
disconnect the electric plug from the outlet, and have the instrument inspected
by qualified Yamaha service personnel.
CAUTION
Always follow the basic precautions listed below to avoid the possibility of physical injury to you or others, or damage
to the instrument or other property. These precautions include, but are not limited to, the following:
Power supply/Power cord
Location
• When removing the electric plug from the instrument or an outlet, always hold
the plug itself and not the cord. Pulling by the cord can damage it.
• Remove the electric plug from the outlet when the instrument is not to be used
for extended periods of time, or during electrical storms.
• Do not expose the instrument to excessive dust or vibrations, or extreme cold or
heat (such as in direct sunlight, near a heater, or in a car during the day) to
prevent the possibility of panel disfiguration or damage to the internal
components.
• Do not connect the instrument to an electrical outlet using a multiple-connector.
Doing so can result in lower sound quality, or possibly cause overheating in the
outlet.
• Do not use the instrument in the vicinity of a TV, radio, stereo equipment, mobile
phone, or other electric devices. Otherwise, the instrument, TV, or radio may
generate noise.
• Do not place the instrument in an unstable position where it might accidentally
fall over.
Assembly
• Before moving the instrument, remove all connected cables.
• Read carefully the attached documentation explaining the assembly process.
Failure to assemble the instrument in the proper sequence might result in
damage to the instrument or even injury.
• When setting up the product, make sure that the AC outlet you are using is easily
accessible. If some trouble or malfunction occurs, immediately turn off the
power switch and disconnect the plug from the outlet. Even when the power
switch is turned off, electricity is still flowing to the product at the minimum
level. When you are not using the product for a long time, make sure to unplug
the power cord from the wall AC outlet.
(1)B-13
4
Owner’s Manual
1/2
Connections
• Before connecting the instrument to other electronic components, turn off the
power for all components. Before turning the power on or off for all components,
set all volume levels to minimum. Also, be sure to set the volumes of all
components at their minimum levels and gradually raise the volume controls
while playing the instrument to set the desired listening level.
Maintenance
• When cleaning the instrument, use a soft, dry or slightly damp cloth. Do not use
paint thinners, solvents, cleaning fluids, or chemical-impregnated wiping
cloths.
• During extreme changes in temperature or humidity, condensation may occur
and water may collect on the surface of the instrument. If water is left, the
wooden parts may absorb the water and be damaged. Make sure to wipe any
water off immediately with a soft cloth.
• Do not use the instrument/device or headphones for a long period of time at a
high or uncomfortable volume level, since this can cause permanent hearing
loss. If you experience any hearing loss or ringing in the ears, consult a
physician.
Using the bench (If included)
• Do not place the bench in an unstable position where it might accidentally fall
over.
• Do not play carelessly with or stand on the bench. Using it as a tool or stepladder or for any other purpose might result in accident or injury.
• Only one person should sit on the bench at a time, in order to prevent the
possibility of accident or injury.
• If the bench screws become loose due to extensive long-term use, tighten them
periodically using the included tool.
Saving data
Saving and backing up your data
Handling caution
• Take care that the key cover does not pinch your fingers, and do not insert a
finger or hand in any gaps on the key cover or instrument.
• Never insert or drop paper, metallic, or other objects into the gaps on the key
cover, panel or keyboard. If this happens, turn off the power immediately and
unplug the power cord from the AC outlet. Then have the instrument inspected
by qualified Yamaha service personnel.
• The panel settings and some other types of data are not retained in memory
when you turn off the power to the instrument. Save data you want to keep to the
Registration Memory (page 90.)
Saved data may be lost due to malfunction or incorrect operation. Save
important data to a USB storage device/or other external device such as a
computer (pages 98, 99, 109).
• Do not place vinyl, plastic or rubber objects on the instrument, since this might
discolor the panel or keyboard.
Backing up the USB storage device/external media
• Do not rest your weight on, or place heavy objects on the instrument, and do not
use excessive force on the buttons, switches or connectors.
• To protect against data loss through media damage, we recommend that you
save your important data onto two USB storage devices/external media.
Yamaha cannot be held responsible for damage caused by improper use or modifications to the instrument, or data that is lost or destroyed.
Always turn the power off when the instrument is not in use.
The illustrations and LCD screens as shown in this manual are for instructional purposes only, and may appear somewhat different from those on your
instrument.
● Trademarks
• The bitmap fonts used in this instrument have been provided by and are the property of Ricoh Co., Ltd.
• Windows is a registered trademark of Microsoft® Corporation in the United States and other countries.
• The company names and product names in this manual are the trademarks or registered trademarks of their respective companies.
(1)B-13
2/2
Owner’s Manual
5
Copyright Notice
The followings are the titles, credits and copyright notices for three (3) of the songs pre-installed in this
electronic keyboard:
Mona Lisa
from the Paramount Picture CAPTAIN CAREY, U.S.A.
Words and Music by Jay Livingston and Ray Evans
Copyright © 1949 (Renewed 1976) by Famous Music Corporation
International Copyright Secured All Rights Reserved
Composition Title : Against All Odds
Composer’s Name : Collins 0007403
Copyright Owner’s Name : EMI MUSIC PUBLISHING LTD
AND HIT & RUN MUSIC LTD
All Rights Reserved, Unauthorized copying, public performance and broadcasting are strictly prohibited.
Can’t Help Falling In Love
from the Paramount Picture BLUE HAWAII
Words and Music by George David Weiss,
Hugo Peretti and Luigi Creatore
Copyright © 1961 ; Renewed 1989 Gladys Music (ASCAP)
Worldwide Rights for Gladys Music Administered by Cherry Lane
Music Publishing Company, Inc.
International Copyright Secured All Rights Reserved
This product incorporates and bundles computer programs and contents in which Yamaha owns copyrights or with respect to which it
has license to use others’ copyrights. Such copyrighted materials include, without limitation, all computer software, style files, MIDI
files, WAVE data, musical scores and sound recordings. Any unauthorized use of such programs and contents outside of personal use
is not permitted under relevant laws. Any violation of copyright has legal consequences. DON’T MAKE, DISTRIBUTE OR USE
ILLEGAL COPIES.
Copying of the commercially available musical data including but not limited to MIDI data and/or audio data is strictly prohibited
except for your personal use.
Logos
GM System Level 1
“GM System Level 1” is an addition to the MIDI standard which ensures that any GM-compatible music
data can be accurately played by any GM-compatible tone generator, regardless of manufacturer. The GM
mark is affixed to all software and hardware products that support GM System Level.
XGlite
As its name implies, “XGlite” is a simplified version of Yamaha’s high-quality XG tone generation format.
Naturally, you can play back any XG song data using an XGlite tone generator. However, keep in mind that
some songs may play back differently compared to the original data, due to the reduced set of control
parameters and effects.
XF
The Yamaha XF format enhances the SMF (Standard MIDI File) standard with greater functionality and
open-ended expandability for the future. The instrument is capable of displaying lyrics when an XF file containing lyric data is played.
STYLE FILE
The Style File Format is Yamaha’s original style file format which uses a unique conversion system to provide high-quality automatic accompaniment based on a wide range of chord types.
USB
USB is an abbreviation for Universal Serial Bus. It is a serial interface for connecting a computer with
peripheral Devices. It allows “hot swapping” (connecting peripheral devices while the power to the computer is on).
6
Owner’s Manual
Congratulations and thank you for purchasing
the Yamaha Digital Piano!
Please read this owner’s manual carefully before using the instrument
in order to take full advantage of its various features.
Make sure to keep this manual in a safe and handy place even after you finish reading,
and refer to it often when you need to better understand an operation or function.
About this Owner’s Manual and Data List
The documentation and reference materials for this instrument consist of the following: Owner’s Manual
(this book)
■ Introduction (page 2):
Please read this section first.
■ Reference (page 70):
This section explains how to make detailed settings for the instrument’s various functions.
■ Appendix (page 110):
This section introduces reference material.
Data List
You can download various MIDI-related reference materials, such as the MIDI Data Format and MIDI
Implementation Chart, from the Yamaha Manual Library.
Connect to the Internet, visit the following website, type the model name of your instrument (such as
“YDP-V240”) in the Model Name text box, then click the Search button.
Yamaha Manual Library
http://www.yamaha.co.jp/manual/
Accessories
The package includes the following items. Please check that you have them all.
• Accessory CD-ROM
• Accessory CD-ROM for Windows Installation Guide
• Owner’s manual (this book)
• Bench
* A bench may be included or optional, depending on your locale.
• My Yamaha Product User Registration
* The PRODUCT ID on the sheet will be needed when you fill out the User Registration form.
Owner’s Manual
7
Special Features
GHS (Graded Hammer Standard) keyboard
with matte black keytops
Graded Hammer Standard keyboard with matte black keytops on the instrument, feature graded key
weight and response throughout the keyboard range. They respond to a heavier touch in the low range
of the keyboard and a lighter touch in the higher range of the keyboard, thus providing natural grandpiano type playability. The matte finish of the black keys enhances keyboard’s luxurious appearance.
The Graded Hammer keyboard also offers superb playability for tremolo and other repetitive-striking
techniques.
■ Performance assistant technology
Page 39
Play along with a song on the instrument’s keyboard and produce a perfect
performance every time ... even if you play wrong notes! All you have to do
is play on the keyboard—alternately on the left- and right-hand ranges of the
keyboard, for example—and you’ll sound like a pro as long as you play in
time with the music.
And if you can’t play with both hands, you can still play the melody simply
by tapping one key.
■ Play a Variety of Instrument Voices
All you need is
one finger!
Page 17
The instrument voice that sounds when you play the keyboard can be
changed to violin, flute, harp, or any of an extensive range of voices. You can
change the mood of a song written for piano, for example, by using violin to
play it instead. Experience a whole new world of musical variety.
■ Play Along with Styles
Page 27
Want to play with full accompaniment? Try the auto-accompaniment Styles.
The accompaniment styles provide the equivalent of a full backing band covering wide variety of styles from waltzes to 8-beat to euro-trance … and
much more. Select a style that matches the music you want to play, or experiment with new styles to expand your musical horizons.
■ Easy Performance with Music Notation Display
When you play back a song, the corresponding score will be shown on the
display as the song plays. This is a great way to learn how to read music. If
the song contains lyric and chord data*, the lyrics and chords will also appear
on the score display.
* No lyrics or chords will appear on the display if the song you are using with the score display function does not contain the appropriate lyric and chord data.
8
Owner’s Manual
Page 37
Contents
Introduction
Backup and Initialization
Copyright Notice ....................................................................... 6
Logos........................................................................................ 6
About this Owner’s Manual and Data List ................................ 7
Accessories .............................................................................. 7
Special Features ...................................................................... 8
Setting Up
10
Key Cover............................................................................... 10
Music Rest.............................................................................. 10
Connecting to a Computer (USB TO HOST terminal) ............ 11
Turning the Power On ............................................................ 11
Using Headphones ................................................................. 12
Maintenance ........................................................................... 13
Panel Controls and Terminals
14
Front Panel ............................................................................. 15
Pedals, Jacks and Terminals ................................................. 15
Quick Guide
Changing the Display Language
16
Try Playing a Variety of Instrument Voices
17
Select and Play a Voice—MAIN ............................................. 17
Play Two Voices Simultaneously—DUAL .............................. 18
Play Different Voices with the Left and Right Hands—SPLIT 19
Play the Grand Piano Voice ................................................... 20
Using the Pedals .................................................................... 21
Fun Sounds
22
Drum Kits................................................................................ 22
Sound Effects ......................................................................... 22
The Metronome
23
Start the Metronome............................................................... 23
Adjusting the Metronome Tempo ........................................... 23
Setting the Number of Beats per Measure,
and the Length of Each Beat............................................. 24
Setting the Click bell sound .................................................... 25
Adjusting the Metronome Volume .......................................... 25
Playing Styles
26
Select a Style Rhythm ............................................................ 26
Play Along with a Style ........................................................... 27
Playing Auto-accompaniment Chords .................................... 31
Using Songs
32
Play the Demo song ............................................................... 32
Select and Listen to a Song ................................................... 33
Song Fast Forward, Fast Reverse, and Pause ...................... 34
Change the Song Tempo ....................................................... 34
Song List ................................................................................ 35
Types of Songs ...................................................................... 36
Displaying the Song Score ..................................................... 37
Display the Lyrics ................................................................... 38
The Easy Way to Play Piano
39
CHORD Type—Play with Both Hands.................................... 40
CHORD/FREE Type—
Applying the Chord Type to the Left Hand Only................ 42
MELODY Type—Play with One Finger .................................. 44
CHORD/MELODY—
Chord Type with the Left Hand, Melody with the Right ..... 46
Select a Song For a Lesson
50
Lesson 1—Waiting ................................................................. 51
Lesson 2—Your Tempo ......................................................... 54
Lesson 3—Minus One ............................................................ 55
Practice Makes Perfect—Repeat and Learn .......................... 56
Play Using the Music Database
Change a Song’s Style
57
58
Try Out the Easy Song Arranger ............................................ 58
Using the Easy Song Arranger ............................................... 58
Record Your Own Performance
60
Recording Procedure ............................................................. 61
Song Clear—Deleting User Songs ......................................... 63
Track Clear—Deleting a Specified Track from a User Song .. 64
65
Backup.................................................................................... 65
Initialization ............................................................................. 65
Basic Operation
66
Basic Operation ...................................................................... 66
The Displays ........................................................................... 68
MAIN Display Items ................................................................ 69
Reference
Play with a Variety of Effects
70
Adding Harmony ..................................................................... 70
Adding Reverb ........................................................................ 71
Adding Chorus ........................................................................ 72
Adding DSP ............................................................................ 73
Adding Sustain ....................................................................... 74
Handy Performance Features
75
Tap Start ................................................................................. 75
Touch Response Sensitivity ................................................... 75
One Touch Setting.................................................................. 76
Select a Sound Type .............................................................. 77
Pitch Controls ......................................................................... 78
Style (Auto-accompaniment) Functions
79
Pattern Variation (Sections).................................................... 79
Setting the Split Point ............................................................. 82
Play a Style with Chords but No Rhythm
(Stop Accompaniment) ...................................................... 83
Adjusting the Style Volume..................................................... 83
Chord Basics .......................................................................... 84
Playing Styles Using the Entire Keyboard .............................. 86
Looking Up Chords Using the Chord Dictionary ..................... 87
Song Settings
88
Song Volume .......................................................................... 88
A-B Repeat ............................................................................. 88
Muting Independent Song Parts ............................................. 89
Change the Melody Voice ...................................................... 89
Memorize Your Favorite Panel Settings
90
Saving to the Registration Memory ........................................ 90
Recalling a Registration Memory............................................ 91
The Functions
92
Selecting and Setting Functions ............................................. 92
Saving and Loading Data
95
Connecting a USB Flash Memory .......................................... 95
Formatting USB Flash Memory .............................................. 97
Saving Registration Memory data to USB Flash Memory ...... 98
Save a User Song to USB Flash Memory .............................. 99
Loading Files from a USB Flash Memory ............................. 100
Deleting Data from a USB Flash Memory ............................ 101
Delete User Data from the Instrument .................................. 102
Playing Files Located on a USB Flash Memory ................... 102
Connections
103
Connectors ........................................................................... 103
Connecting a Personal Computer ........................................ 104
Transferring Performance Data to and from a Computer ..... 105
Remote Control of MIDI Devices .......................................... 106
Initial Send ............................................................................ 107
Transferring Data Between the Computer and Instrument ... 107
Appendix
Troubleshooting .................................................................... 110
Messages ............................................................................. 112
Keyboard Stand Assembly............................... 114
Index ..................................................................................... 118
Scores .................................................................................. 120
Voice List .............................................................................. 126
Drum Kit List ......................................................................... 132
Style List ............................................................................... 134
Music Database List ............................................................. 135
Songs Provided On the Supplied CD-ROM.......................... 136
Harmony Type List ............................................................... 137
Effect Type List ..................................................................... 138
Specifications ....................................................................... 144
Owner’s Manual
9
Setting Up
Key Cover
■ To open the key cover:
CAUTION
Lift the cover slightly, then push and slide it open.
• Hold the cover with both hands when opening or closing it. Do not
release it until it is fully opened or closed. Be careful to avoid
catching fingers (yours or others, especially children’s) between
the cover and main unit.
■ To close the key cover:
Slide the cover toward you and gently lower the cover
over the keys.
CAUTION
• Do not place objects, such as a piece of metal or paper, on top of
the key cover. Small objects placed on the key cover may fall
inside the unit when the cover is opened and may be nearly
impossible to remove. This could cause electric shock, short circuit, fire or other serious damage to the instrument.
CAUTION
• Be careful to avoid catching your
fingers when opening or closing
the cover.
Music Rest
■ To raise the music rest:
1
2
3
Pull the music rest up and toward yourself
as far as it will go.
Flip down the two metal supports at the left
and right on the rear of the music rest.
Lower the music rest so that it rests on the
metal supports.
■ To lower the music rest:
1
2
3
Pull the music rest toward yourself as far as
it will go.
Raise the two metal supports (at the rear of
the music rest).
Gently lower the music rest backward until
it is all the way down.
CAUTION
• Do not try to use the music rest in a half-raised position. When
lowering the music rest, do not release your hands from the music
rest until it is all the way down.
10
Owner’s Manual
Setting Up
Connecting to a Computer (USB TO HOST terminal)
Computer
Connect the instrument’s USB TO HOST terminal to
the USB terminal of a computer, and you can transfer
performance data and song files between the two (page
104). To use the USB data-transfer features you’ll need
to do the following:
USB TO HOST
terminal
USB
TO HOST
• First, make sure the POWER switch on the instrument is set to OFF, then use an AB type USB cable
to connect the instrument to the computer. After
making the connections, turn the instrument’s
power on.
• Install the USB-MIDI driver on your computer.
USB cable
Installation of the USB-MIDI driver is described on the
“Accessory CD-ROM Installation Guide”.
Turning the Power On
Power switch
Power indicator
1
2
3
Turn down the volume by turning the [MASTER VOLUME] control to the left.
Check the power cord to make sure it is
connected properly. (See page 116.)
Press the power switch to turn on the
power.
Press the power switch again to turn the power OFF.
NOTE
Power indicator
• If you forget to turn off the power to the instrument and close the key
cover, the power indicator will remain lit, indicating that the power is still
on.
Backup data in the flash memory is loaded to the instrument when the power is turned on. If no backup data
exists on flash memory, all instrument settings are
restored to the initial factory defaults when the power is
turned on.
CAUTION
• Even when the switch is in the “off” position, electricity is still
flowing to the instrument at the minimum level. When you are not
using the instrument for a long time, make sure you unplug the AC
power cord from the wall AC outlet.
CAUTION
• Never attempt to turn the power off when a “WRITING!” message
is shown in the display. Doing so can damage the flash memory
and result in a loss of data.
Owner’s Manual
11
Setting Up
Using Headphones
Connect a pair of headphones to one of the [PHONES]
jacks.
Two [PHONES] jacks are provided.
You can connect two sets of standard stereo headphones. (If you are using only one pair of headphones,
you can plug them into either jack.)
PHONES
Bottom surface
Standard stereo phone plug
Using the Headphone Hanger
A headphone hanger is included in the package so
that you can hang the headphoneson this instrument.
Install the headphone hanger using the included two
screws (4 x 10mm) as shown in the figure.
CAUTION
• Do not hang anything other than the headphones on the
hanger. Otherwise, this instrument or the hanger may be damaged.
12
Owner’s Manual
Setting Up
Maintenance
To keep your instrument in optimum condition, we recommend that you periodically follow the maintenance points
below.
■ Instrument and Bench Maintenance
■ Tuning
When cleaning the instrument, use a soft, dry or slightly
damp cloth.
Unlike an acoustic piano, the instrument does not need
to be tuned. It always stays perfectly in tune.
CAUTION
• Do not use paint thinners, solvents, cleaning fluids, or chemicalimpregnated wiping cloths.
Tighten the screws of the instrument and bench periodically.
■ Pedal Cleaning
As with an acoustic piano, pedals may become tarnished across the ages. When this occurs, polish the
pedal with a compound designed for piano pedals.
Before using the compound, make sure to read the
instructions for proper usage.
■ Transporting
If you move to another location, you can transport the
instrument along with other belongings. You can move
the unit as it is (assembled) or you can disassemble the
unit down to the condition it was in when you first took
it out of the box. Transport the keyboard horizontally.
Do not lean it up against a wall or stand it up on its side.
Do not subject the instrument to excessive vibration or
shock.
When transporting the assembled instrument, make sure
all screws are properly tightened and have not been
loosened by moving the instrument.
CAUTION
• Do not use paint thinners, solvents, cleaning fluids, or chemicalimpregnated wiping cloths. Otherwise, the pedal may become discolored or degraded.
Owner’s Manual
13
Panel Controls and Terminals
Front Panel
w
e
t
r
o
y
u
i
!2
!1
!0
!3
#9
!4
!5
!6
!7
!8
PHONES
q
#6
#8
PEDAL
#7
USB
$0
TO HOST
14
Owner’s Manual
q
Voice Category List (page 126)
Style Category List (page 134)
Song Category List (page 35)
Music Database List (page 135)
!9
Panel Controls and Terminals
¸
Display (pages 68, 69)
@0
@1
@8
@2
@3
@4
@5
@9
#0
#1
#2
@6
#3
#4
@7
#5
Front Panel
i
o
!0
!1
!2
!3
!4
!5
!6
!7
[FUNCTION] button .........................pages 68, 92
[METRONOME ON/OFF] button .............page 23
[TEMPO/TAP] button.......................pages 34, 75
LESSON [L], [R], [START] buttons.........page 51
SONG MEMORY
[REC], [1]–[5], [A] buttons ......................page 61
[REPEAT & LEARN]/
[ACMP ON/OFF] button ..................pages 56, 27
[A-B REPEAT]/
[INTRO/ENDING/rit.] button............pages 88, 79
[REW]/[MAIN/AUTO FILL] button ...pages 34, 79
[FF]/[SYNC STOP] button ...............pages 34, 81
[PAUSE]/[SYNC START] button......pages 34, 80
!8 [START/STOP] button ...............pages 26, 33, 67
@0
@1
@2
@3
@4
@5
@6
@7
[CONTRAST] knob ................................. page 69
[EXIT] button........................................... page 68
[SONG] button ........................................ page 33
[EASY SONG ARRANGER] button ....... page 58
[STYLE] button ....................................... page 26
[VOICE] button........................................ page 17
Dial....................................................pages 67, 92
CATEGORY [ ] and [ ]
buttons .............................................pages 67, 92
@8 Number buttons [0]–[9],
[+] and [-] buttons............................pages 67, 92
r
Power switch ( ) ...................................page 11
[MASTER VOLUME] control ...........pages 11, 66
[DEMO] button.........................................page 32
FILE CONTROL [MENU],
[EXECUTE] buttons.......................pages 95–101
t [LYRICS] button.......................................page 38
y [SCORE] button.......................................page 37
u [P.A.T. ON/OFF] button............................page 40
f
q
w
e
r
@9
#0
#1
#2
#3
#4
[SPLIT ON/OFF] button .......................... page 19
[DUAL ON/OFF] button .......................... page 18
[HARMONY ON/OFF] button ................. page 70
[DSP ON/OFF] button............................. page 73
[PIANO RESET] button .......................... page 20
REGIST MEMORY
[MEMORY/BANK], [1], [2] buttons......... page 90
#5 Drum Kit .................................................. page 22
The illustrations above each key indicate the drum and
percussion instruments assigned to the keys when
“Standard Kit 1” is selected.
!9 [MUSIC DATABASE] button....................page 57
Pedals, Jacks and Terminals
#6 Pedals.......................................................page 21
#7 [PEDAL] jack..........................................page 116
#8 [PHONES] jacks.......................................page 12
#9 USB TO DEVICE terminal....................... page 96
$0 USB TO HOST terminal ........................ page 104
Owner’s Manual
15
Changing the Display Language
Quick Guide
This instrument allows you to select English or Japanese as the display
language. The default display language is English, but if you switch to
Japanese the lyrics, file names, demo display, and some messages will be
displayed in Japanese where appropriate.
2
Press the CATEGORY [ ] and [ ] buttons a number of
times until the “Language” item appears.
r
Press the [FUNCTION] button.
f
1
The currently selected display language will appear below the “Language” item.
When highlighted you can use the [+] and [-] buttons to select the language as required.
Language item
The currently selected
language
3
Select a display language.
The [+] button selects English and the [-] button selects Japanese.
The language selection will be stored in the internal flash memory so
that it is retained even when the power is turned off.
4
16
Press the [EXIT] button to return to the MAIN display.
Owner’s Manual
Try Playing a Variety of Instrument Voices
In addition to piano, organ, and other “standard” keyboard instruments,
this instrument has a large range of voices that includes guitar, bass,
strings, sax, trumpet, drums and percussion, sound effects … a wide variety of musical sounds.
Select and Play a Voice—MAIN
This procedure selects the main voice you will play on the keyboard.
1
Press the [VOICE] button.
The main voice selection display will appear.
The currently selected voice number and name will be highlighted.
The currently
selected voice number and name
2
Select the voice you want to play.
While watching the highlighted voice name rotate the dial. The available voices will be selected and displayed in sequence. The voice
selected here becomes the main voice.
For this example select the “106 Flute” voice.
Select 106 Flute
3
Play the keyboard.
Adjusts volume.
Try selecting and playing a variety of voices.
Press the [EXIT] button to return to the MAIN display.
Owner’s Manual
17
Try Playing a Variety of Instrument Voices
Play Two Voices Simultaneously—DUAL
You can select a second voice which will play in addition to the main voice when you play the keyboard.
The second voice is known as the “dual” voice.
1
Press the [DUAL ON/OFF] button.
The [DUAL ON/OFF] button turns the dual voice on or off.
When turned on the dual voice “DUAL” will appear in the MAIN display. The currently selected dual voice will sound in addition to the
main voice when you play the keyboard.
Voice Number
2
Press and hold the [DUAL ON/OFF] button for longer than
a second.
The dual voice selection display will appear.
Dual voice selection display
The currently selected dual voice
Hold for longer
than a second
3
18
Select the desired dual voice.
Watch the displayed dual voice and rotate the dial until the voice you
want to use is selected. The voice selected here becomes the dual voice.
For this example try selecting the “124 Vibraphone” voice.
Owner’s Manual
Try Playing a Variety of Instrument Voices
4
Play the keyboard.
Two voices will sound at the same time.
Try selecting and playing a range of dual voices.
Press the [EXIT] button to return to the MAIN display.
Play Different Voices with the Left and Right Hands—SPLIT
In the split mode you can play different voices to the left and right of the keyboard “split point”. The main
and dual voices can be played to the right of the split point, while the voice played to the left of the split
point is known as the “split voice”. The split point setting can be changed as required (page 82).
Split point (default value is 054)
021
(A-1)
024
(C0)
036
(C1)
048
(C2)
060
(C3)
Split voice
1
072
(C4)
084
(C5)
096
(C6)
108
(C7)
Main voice and dual voice
Press the [SPLIT ON/OFF] button.
The [SPLIT ON/OFF] button turns the split voice on or off. When
turned on the split voice “SPLIT” will appear in the MAIN display. The
currently selected split voice will sound to the left of the keyboard split
point.
Voice Number
2
Press and hold the [SPLIT ON/OFF] button for longer than
a second.
The split voice selection display will appear.
Split voice selection display
The currently selected split
voice
Hold for longer
than a second
Owner’s Manual
19
Try Playing a Variety of Instrument Voices
3
Select the desired split voice.
4
Play the keyboard.
Watch the highlighted split voice and rotate the dial until the voice you
want to use is selected. The voice selected here becomes the split voice
which will play to the left of the keyboard split point. For this example
try selecting the “042 Folk Guitar” voice.
Try selecting and playing a range of split voices.
Press the [EXIT] button to return to the MAIN display.
Play the Grand Piano Voice
When you just want to play piano, all you have to do is press one convenient button.
Press the [PIANO RESET] button.
The “001 Natural! Grand Piano” voice will be selected.
NOTE
• When you press the [PIANO
RESET] button all settings other
than touch sensitivity are turned
off. The dual and split voices will
also be turned off, so only the
Grand Piano voice will play over
the entire keyboard.
20
Owner’s Manual
Try Playing a Variety of Instrument Voices
Using the Pedals
The instrument has three foot pedals that produce a
range of expressive effects similar to those produced
by the pedals on an acoustic piano.
NOTE
• The pedal functions do not
affect Split voice.
NOTE
Damper (Right) Pedal
The damper pedal functions in the same way as a damper pedal on an
acoustic piano. When the damper pedal is pressed, notes sustain longer.
Releasing the pedal immediately stops (damps) any sustained notes.
The damper pedal also features a naturally expressive half-pedal function.
• If the damper pedal doesn’t
work, make sure that the pedal
cord is properly plugged into the
jack (page 116).
NOTE
Half-pedal:
• While playing the piano with
Sustain and you want to slightly
mute the sustained sound,
release the damper pedal from
maximum position to half position.
When you press the damper
pedal here, the notes you play
before you release the pedal
have a longer sustain.
Sostenuto (Center) Pedal
If you play a note or chord on the keyboard and press the sostenuto pedal
while the note(s) are held, those notes will sustain as long as you hold the
pedal (as if the damper pedal had been pressed) but all subsequently played
notes will not be sustained. This makes it possible to sustain a chord, for
example, while other notes are played “staccato.”
NOTE
• Organ, string and choir voices
will continue to sound for as
long as the sostenuto pedal is
depressed.
When you press the sostenuto
pedal here while holding the
note, the note will sustain as
long as you hold the pedal.
Soft (Left) Pedal
The soft pedal reduces the volume and slightly changes the timbre of notes
played while the pedal is pressed. The soft pedal will not affect notes that
are already playing when it is pressed.
Owner’s Manual
21
Fun Sounds
This instrument includes a range of drum kits and unique sound effects you can
use for entertainment. Laughter, babbling brooks, jet fly-bys, eerie effects, and
much more. These sounds can be a great way to enhance the mood at parties.
Drum Kits
Drum kits are collections of drum and percussion instruments. When you select a violin or other
normal instrument main voice, for example, all keys produce the sound of the same violin, only at
different pitches. If you select a drum kit as the main voice, however, each key produces the sound
of a different drum or percussion instrument.
◆ Drum Kit Selection Procedure ➔ (refer to steps 1 and 2 on page 17)
1 Press the [VOICE] button.
2 Use the dial to select “132 Standard Kit 1”.
3 Try out each key and enjoy the drum and percussion sounds!
Try out each key and enjoy the drum and percussion sounds! Don’t forget the black keys! You’ll
hear a triangle, maracas, bongos, drums ... a
comprehensive variety of drum and percussion
sounds. For details on the instruments included
in the drum kit voices (voice numbers 132 to
143), see the “Drum Kit List” on page 132.
Sound Effects
The sound effects are included in the drum kit voice group (voice numbers 142 and 143). When
either of these voices are selected you will be able to play a range of sound effects on the keyboard.
◆ Sound Effect Selection Procedure ➔ (refer to steps 1 and 2 on page 17)
1 Press the [VOICE] button.
2 Use the dial to select “143 SFX Kit 2”.
3 Try out each key and enjoy the sound effects!
As you try out the various keys you’ll hear the sound of a
submarine, a telephone bell, a creaking door, and many
other useful effects. “142 SFX Kit 1” includes lightning,
running water, dogs barking, and others. Some keys do
not have assigned sound effects, and will therefore produce no sound.
For details on the instruments included in the SFX kit
voices, see “SFX Kit 1” and “SFX Kit 2” in the “Drum
Kit List” on page 133.
22
Owner’s Manual
The Metronome
The instrument includes a metronome with adjustable tempo and
time signature. Play and set the tempo that is most comfortable
for you.
Start the Metronome
Turn the metronome on and start it by pressing the [METRONOME ON/OFF] button.
To stop the metronome, press the [METRONOME ON/OFF] button
again.
4/4
Current setting
Adjusting the Metronome Tempo
1
Press the [TEMPO/TAP] button to call up the tempo setting.
Tempo
2
Use the dial to select a tempo from 5 to 280.
Owner’s Manual
23
The Metronome
Setting the Number of Beats per Measure, and the Length of Each Beat
In this example we’ll set up a 5/8 time signature.
1
Press and hold the [METRONOME ON/OFF] button for
longer than a second to select the function “Time Signature–Numerator”.
Hold for longer
than a second
Numerator
(Number of
beats per
measure.)
Denominator
(The length of
one beat.)
The available range is from 1 through 60. Select 5 for this example.
A bell accent will be sounded at the first beat of each measure.
3
Press the CATEGORY [ ] and [ ] buttons as many times
as necessary to select the beat length function “Time Signature–Denominator”.
4
Use the dial to select the beat length.
24
r
NOTE
• The metronome time signature
will synchronize to a style or
song that is playing, so these
parameters cannot be changed
while a style or song is playing.
f
2
Use the dial to select the number of beats per measure.
Select the required length for each beat: 2, 4, 8, or 16 (half note, quarter
note, eighth note, or 16th note). Select 8 for this example.
Owner’s Manual
The Metronome
Setting the Click bell sound
This allows you to select whether the click sound has a bell accent, or plays only a click sound.
2
Use the CATEGORY [ ] and [ ] buttons to select the Bell
item.
3
You can then use the [+] and [-] buttons to turn the bell
sound on or off.
r
Press the [FUNCTION] button.
f
1
Adjusting the Metronome Volume
2
Use the CATEGORY [ ] and [ ] buttons to select the Metronome Volume item.
r
Press the [FUNCTION] button.
f
1
Metronome volume
3
Use the dial to set the metronome volume as required.
Owner’s Manual
25
Playing Styles
This instrument has an auto accompaniment feature that produces
accompaniment (rhythm + bass + chords) in the style you choose to
match chords you play with your left hand. You can select from 160 different styles covering a range of musical genres and time signatures
(see page 134 for a complete list of the available styles).
In this section we’ll learn how to use the auto accompaniment features.
Select a Style Rhythm
Most styles includes a rhythm part. You can select from a wide variety of rhythmic types—rock, blues, Euro
trance, and many, many more. Let’s begin by listening to just the basic rhythm. The rhythm part is played
using percussion instruments only.
1
Press the [STYLE] button.
The style select display will appear. The currently selected style number
and name will be highlighted.
NOTE
• When you play the style, set the
Sound Type to “Style.” Doing
this a more natural, enhanced
sound over the internal speakers (see page 77). However,
when using the headphones,
normal sound is applied.
The currently selected style
2
Select a style.
3
Press the [START/STOP] button.
26
Use the dial to select the style you want to use.
A list of all the available styles is provided on page 134.
The style rhythm will start playing.
Press the [START/STOP] button a second time when you want to stop
playback.
Owner’s Manual
NOTE
• Style files transferred from a
computer or stored on a USB
flash memory device connected
to the instrument can be
selected and used in the same
way as the internal Styles (Style
numbers 161–). File transfer
instructions are provided on
page 107.
NOTE
• Style numbers 131, 143–160
have no rhythm part and therefore no rhythm will play if you
use them for the above example. For these styles first turn
auto accompaniment on as
described on page 27, press the
[START/STOP] button, and the
accompaniment bass and chord
parts will begin playing when
you play a key to the left of the
keyboard split point.
Playing Styles
Play Along with a Style
You learned how to select a style rhythm on the preceding page.
Here we’ll see how to add bass and chord accompaniment to the basic rhythm to produce a full, rich accompaniment that you can play along with.
1
2
Press the [STYLE] button and select the desired style.
Turn automatic accompaniment on.
Press the [ACMP ON/OFF] button.
Pressing this button a second time will turn automatic accompaniment
off.
This icon appears when
automatic accompaniment is on.
NOTE
● When automatic accompaniment is on ...
The area of the keyboard to the left of the split point (054: F#2) becomes
the “auto accompaniment region” and is used only for specifying the
accompaniment chords.
• The keyboard split point can be
changed as required: refer to
page 82.
Split point (054: F#2)
Auto accompaniment region
3
Turn sync start on.
Press the [SYNC START] button to turn the sync start function on.
Flashes when sync start
is on.
Owner’s Manual
27
Playing Styles
When sync start is on, the bass and chord accompaniment included in a
style will start playing as soon as you play a note to left of the keyboard
split point. Press the button a second time to turn the sync start function
off.
4
Play a left-hand chord to start the style.
You can still “play” chords even if you don’t actually know any chords.
This instrument will recognize even a single note as a chord. Try playing from one to three notes at the same time to the left of the split point.
The accompaniment will change according to the left-hand notes you
play.
Try this!
Scores for some chord progressions are provided on page 29. These
examples should help you get a feel for what types of chord progressions sound good with the styles.
Split point
Auto accompaniment region
5
Play a variety of left-hand chords while playing a melody
with your right hand.
Split point
Auto accompaniment region
6
Press the [START/STOP] button to stop style playback
when you’re done.
You can switch style “sections” to add variety to the accompaniment.
Refer to “Pattern Variation (Sections)” on page 79.
28
Owner’s Manual
Playing Styles
Styles Are More Fun When You Understand Chords
Chords, created by playing multiple notes at the same time, are the basis for harmonic accompaniment.
In this section we’ll take a look at sequences of different chords played one after another, or “chord
sequences.” Since each chord has it’s own unique “color”—even if it’s different fingerings of the same
chord—the chords you choose to use in your chord progressions have a huge influence on the overall
feel of the music you play.
On page 27 you learned how to play colorful accompaniments using styles. Chord progressions are vital
to creating interesting accompaniments, and with a little chord know-how you should be able to take
your accompaniments to a new level.
On these pages we’ll introduce three easy-to-use chord progressions. Be sure to try them out with the
instrument’s accompaniment styles. The style will respond to the chord progression you play, effectively
creating a complete song.
■Playing the Chord Progressions
● ● ● ● ● ● ● ● ● ● ● ● ● ● ● ● ● ● ● ● ● ● ● ● ● ● ● ● ●
Play the scores with the left hand.
Before playing the scores follow steps 1 through 3 of “Play Along with a Style” on page 27.
* The scores provided here are not standard song scores, but rather simplified scores that indicate which notes to play to
produce the chord progressions.
Split point
Play to the left of the split point.
Recommended Style
041 Euro Trance
—Dance music with simple chords—
Press the [INTRO/ENDING/rit.] button.
F
C
G
Am
This is a simple-but-effective chord progression. When you play through to the end of the score, start
again from the beginning. When you’re ready to stop playing press the [INTRO/ENDING/rit.] button
and the auto accompaniment function will create a perfect ending.
Owner’s Manual
29
Playing Styles
Recommended Style
148 Piano Boogie
—3-chord boogie-woogie—
Press the [INTRO/ENDING/rit.] button.
C
F
C
G
F
C
Press the [INTRO/ENDING/rit.] button.
This progression provides varied harmonic backing with just three chords. When you get a feel for the
progression in the score, try changing the order of the chords!
Recommended Style
096 Bossa Nova
—Bossa nova with jazz-style chords—
Press the [INTRO/ENDING/rit.] button.
Dm
Bm7 5
G7
CM7
FM7
E7
Am
A7
This progression includes jazzy “two-five” (II-V) changes. Try playing it through several times. When
you’re ready to stop playing press the [INTRO/ENDING/rit.] button.
30
Owner’s Manual
Playing Styles
Playing Auto-accompaniment Chords
There are two ways of playing auto-accompaniment chords:
● Easy Chords
● Standard Chords
The instrument will automatically recognize the different chord types. The function is called Multi Fingering.
Press the [ACMP ON/OFF] button to turn auto-accompaniment on (page 27). The keyboard to the left of the
split point (default: 054/F#2) becomes the “accompaniment range”. Play the accompaniment chords in this
area of the keyboard.
Split point (default: 054/F#2)
Db Eb
F# G# Bb
Db Eb
F#
C D E F GA B C D E F
Accompaniment
range
Root notes and the corresponding keys
■Easy Chords
● ● ● ● ● ● ● ● ● ● ● ● ● ● ● ●
This method lets you easily play chords in the
accompaniment range of the keyboard using only
one, two, or three fingers.
■Standard Chords ● ● ● ● ● ● ● ● ● ● ● ● ●
This method lets you produce accompaniment by
playing chords using normal fingerings in the
accompaniment range of the keyboard.
● How to play Standard Chords [Example for “C” chords]
C
(9)
C
C
C M7
C M7
(9)
C6
C6
C sus4
Cm
Cm
(b5)
)
C
(
C M7aug
C m6
C m7
C mM7
C mM7
(
)
C aug
)
(
(9)
(11)
C m7
(9)
(b5)
C m7
C mM7
C7
C7
)
(9)
C7
)
)
C7
(13)
(
(
)
C 7aug
(b13)
(b9)
(#9)
C7
)
C 7sus4
(b5)
C7
C7
)
(
(#11)
C7
C dim7
C dim
(
(b5)
(
)
(
)
(
(
)
(
)
C m7
)
• To play a minor seventh chord
Press the root note together with the
nearest white and black keys to the left
of it (three keys altogether).
(9)
(
C m7
)
C M7
• To play a seventh chord
Press the root note together with the
nearest white key to the left of it.
C M7
(
(
(b5)
C7
(#11)
(9)
)
• To play a minor chord
Press the root note together with the
nearest black key to the left of it.
(
Cm
(
(
)
)
• To play a major chord
Press the root note of the chord.
C sus2
* Notes enclosed in parentheses ( ) are optional; the chords
will be recognized without them.
Owner’s Manual
31
Using Songs
With this instrument the term “song” refers the data that makes up a
piece of music. You can simply enjoy listening to a demo song and 29
internal songs, or use them with just about any of the many functions
provided—the performance assistant technology feature, lessons, and
more. The songs are organized by category.
In this section we’ll learn how to play a demo song and select other
songs, and briefly describe the demo song and 29 songs provided.
Song
Listen
Lesson
Play the Demo song
1
Press the [DEMO] button
The demo song will start playing.
To stop demo play back at any time, press the [DEMO] button or
[START/STOP] button.
or
32
Owner’s Manual
Record
Using Songs
Select and Listen to a Song
1
Press the [SONG] button
The song selection display will appear.
The currently selected song number and name will be highlighted.
The currently selected song
number and name
2
NOTE
Select a song.
Select a song after referring to the preset song category list on page 35.
Use the dial to select the song you want to listen to.
• You can also play songs you
have recorded yourself (User
Songs) or songs that have been
transferred to the instrument
from a computer in the same
way that you play the internal
songs.
The song highlighted here
can be played
3
001–030
Built in Songs (See page 35)
031–035
User Songs (Songs you record yourself).
036–
Songs transferred from a computer (pages 107–109) or Songs in a
USB flash memory connected to the instrument (page 95)
Listen to the song.
Press the [START/STOP] button to begin playback of the selected song.
You can stop playback at any time by pressing the [START/STOP] button again.
Song start!
Owner’s Manual
33
Using Songs
Song Fast Forward, Fast Reverse, and Pause
These are just like the transport controls on a cassette deck or CD player, letting you fast forward [FF],
rewind [REW] and pause [PAUSE] playback of the song.
REW
Press the fast
reverse button to
rapidly return to an
earlier point in the
song.
FF
Press the fast forward button to rapidly skip ahead to
a later point in the
song.
PAUSE
Press the pause
button to pause
playback.
Change the Song Tempo
You can change the song tempo as required. Press the [TEMPO/TAP] button. The tempo display will
appear and you can use the dial, the [+] and [-] buttons, or the [0] to [9] number buttons to set to tempo to
anywhere from 5 and 280 quarter-note beats per minute.
You can return to the original tempo by simultaneously pressing the [+] and [-] buttons.
Press the [EXIT] button to return to the MAIN display.
34
Owner’s Manual
Using Songs
Song List
These 30 songs include songs that effectively demonstrate the instrument’s Easy Song Arranger feature,
songs that are ideally suited for use with the performance assistant technology feature, and more. The “Suggested Uses” column provides some ideas as to how the songs can most effectively used.
Category
Main Demo
Voice Demo
Function Demo
Piano Solo
Piano Ensemble
Piano
Accompaniment
CHORD
No.
Name
Suggested Uses
1
CHORD
Mozart Piano Sonata No.13, K333
This song showcases the beautiful piano sound.
2
CHORD
Winter Serenade
3
CHORD
Take off
The songs in this category have been created to give
you an idea of the advanced capabilities of this
instrument. They’re great for listening, or for use with
the various features.
4
CHORD
Live! Grand Demo
5
CHORD
Live! Orchestra Demo
6
CHORD
Cool! RotorOrgan Demo
7
CHORD
Cool! Galaxy Electric Piano Demo
8
CHORD
ModernHarp & Sweet Soprano Demo
9
CHORD
Hallelujah Chorus
10
CHORD
Ave Maria
11
CHORD
Nocturne op.9-2
12
For Elise
13
Maple Leaf Rag
14
Jeanie with the Light Brown Hair
15
CHORD
Amazing Grace
16
CHORD
Mona Lisa (Jay Livingston and Ray Evans)
17
Piano Concerto No.21 2nd mov.
18
CHORD
Scarborough Fair
19
CHORD
Old Folks at Home
20
CHORD
Ac Ballad (Against All Odds: Collins 0007403)
21
CHORD
Ep Ballad
22
CHORD
Boogie Woogie
23
CHORD
Rock Piano
24
CHORD
Salsa
25
CHORD
Country Piano
26
CHORD
Gospel R&B
27
CHORD
Medium Swing
28
CHORD
Jazz Waltz
29
CHORD
Medium Bossa
30
CHORD
SlowRock (Can’t Help Falling In Love: George
David Weiss, Hugo Peretti and Luigi Creatore)
These songs features some of the instrument’s many
useful voices. They make maximum use of the
characteristics of each voice, and might serve as
inspiration for your own compositions.
Use these songs to experience some of the
instrument’s advanced features: song number 9 for
the easy song arranger, and songs 10 and 11 for the
performance assistant technology feature.
The lesson function cannot be used with songs 10
and 11.
These piano solo pieces are ideally suited for use as
lesson songs.
A selection of piano ensemble songs that are also
well suited for use as lesson songs.
When you need to practice backing (accompaniment)
patterns, these are the songs to do it with. This is
ability you’ll need if you’re invited to play with a band.
These songs allow you to practice backing parts one
hand at a time, which can be the easiest way to
master this important skill.
: Includes chord data.
The scores for the internal songs—except for songs 1–11, and song 16, 20 and 30 which is copyrighted, are provided in the Song
Book on the CD-ROM. The scores for songs 9–11 are provided in this manual.
Some of the classic and/or traditional songs have been edited for length or for ease in learning, and may not be exactly the same
as the original.
Owner’s Manual
35
Using Songs
Types of Songs
The following three types of songs can be used by this instrument.
● Demo Song and Preset songs
(the 30 songs built into the instrument) ........................................ Song numbers 001–030.
● User Songs (recordings of your own performances) ..................Song numbers 031–035.
● External song files (song data transferred from a computer*) ...Song numbers 036–.
* The Accessory CD-ROM includes a selection of 70 MIDI songs. See page 108 for instructions on how
to transfer the songs to the instrument.
The chart below shows the basic processes flow for using the preset songs, user songs, and external song
files from storage to playback.
Computer
Your own
performance
USB flash memory
Song
Song
Record
Transfer
(page 60)
(page 107)
Connect
(page 103)
Song Storage locations
Preset Songs
(001–030)
The 30 songs built
into the instrument.
User Songs
(031–035)
External Songs (loaded Song)
(036–)
Song
Song
Save
Play
NOTE
• User songs cannot produce score display as they are. If you convert a user song file
to SMF and save it to USB flash memory, however, it becomes capable of producing
score display and can be used with the lesson features.
NOTE
• Different flash memory areas are used to store user songs and external song files
transferred from a computer. User songs cannot be directly transferred to the flash
memory area for the external song, and vice versa.
36
Owner’s Manual
USB
(036–)
Song
Load
Using Songs
Displaying the Song Score
This instrument is capable of display the scores of songs.
Scores are displayed for the 30 internal preset songs as well as songs in SMF format stored in a USB fl ash
memory or the instrument’s internal flash memory.
1
2
Select a song.
Follow steps 1 and 2 of the procedure described on page 33.
Press the [SCORE] button and a single-staff score will
appear.
There are two types of score display: single-staff and double-staff.
These are alternately selected each time the [SCORE] button is pressed.
NOTE
• The score is created from the
recorded song data, and it may
not be exactly the same as original score.
• Both chords and lyrics will be
shown in single-staff score display of a song that includes
chord and lyric data.
• When there are many lyrics they
may be displayed in two rows a
measure.
• Some lyrics or chords may be
abbreviated if the selected song
has a lot of lyrics.
Single-staff
Marker
Melody score
• Small notes that are hard to
read may be easier to read after
you use the quantize function
(page 94).
Chord
Lyrics
NOTE
Double-staff
3
Press the [START/STOP] button.
4
Press the [EXIT] button to return to the MAIN display.
• No chords or lyrics are shown
on the double-staff.
The song will begin playing. The triangular will move across the top of
the score to indicate the current location.
Owner’s Manual
37
Using Songs
Display the Lyrics
If a song contains lyric data, the lyrics can be made to appear on the display.
No lyrics will be displayed for a song that contains no lyric data even if the [LYRICS] button is pressed.
1
Select a song.
2
Press the [LYRICS] button.
Select a song between 16, 20, and 30 by performing steps 1 and 2
described on page 33.
The title, lyricist, and composer of the song will appear on the display.
NOTE
• Songs downloaded from the
Internet or commercially available song files, including XF format files (page 6), are
compatible with the lyrics display features as long as they are
standard MIDI file format files
containing lyric data. Lyrics display may not be possible with
some files.
NOTE
• If the lyrics display shows garbled characters, try changing
the display language (page 16).
Song title, lyricist,
and composer.
3
Press the [START/STOP] button.
The song will play back while the lyrics and chords are shown on the
display.
The lyrics will be highlighted to show the current location in the song.
Lyrics and chord
display
■ Preset Songs That Can be Used For Lyrics Display
Number
38
Name
016
Mona Lisa (Jay Livingston and Ray Evans)
020
Against All Odds (Collins 0007403)
030
Can’t Help Falling In Love (George David Weiss, Hugo Peretti and Luigi Creatore)
Owner’s Manual
The Easy Way to Play Piano
This instrument includes a performance assistant technology feature
that lets you play along with a song and sound like a great pianist (even
though you might be making lots of mistakes)! In fact, you can play any
notes and still sound good! You could even just tap one key and the
results would be a beautiful melody. So even if you can’t play piano and
can’t read a note of music, you can have some musical fun.
Performance assistant technology offers four selectable types. Select the type that produces the best results
for you.
● Chord ...................... No matter where or what you play, the result will be musical, well-balanced sound. This type offers the greatest freedom, allowing you to play
anything with both your left and right hands.
● Chord/Free........... If you can play simple right-hand melodies but have trouble with lefthand chords, this is the type for you. The Chord type applies to only the
left-hand section of the keyboard, allowing you to easily play chords to
support the melody you are playing with your right hand.
Split point
Play your own melody with the right hand.
● Melody ................... This type lets you play the melody of the selected song by playing any
keys with just one finger. Start playing melodies right away, even if you’ve
never played a keyboard instrument before!
● Chord/Melody .... Play the melody of the selected song with one finger on the right-hand
section of the keyboard, and play chords on the left-hand section of the
keyboard using the Chord type.
Split point
Refer to page 48 for more information on using performance assistant technology to help you play.
Owner’s Manual
39
The Easy Way to Play Piano
CHORD Type—Play with Both Hands
1
Press the [P.A.T. ON/OFF] button.
This turns on the performance assistant technology feature.
The currently selected type is shown in the MAIN display when the performance assistant technology feature is on.
The currently
selected type
2
Select the CHORD type.
Hold for longer than a second
Select Chord
Press and hold the [P.A.T. ON/OFF] button for longer than a second so
that the performance assistant technology type appears. Select the
Chord type by using the dial.
3
Select a song.
Press the [SONG] button, and the Song Select display appears. Select a
song by using the dial. For this example try selecting the “010 Ave
Maria”.
When the Chord type is selected, features only available for this song
can be seen in the display!
NOTE
• Using Songs (page 32)
The song displayed here will
be played.
● What is a Song?
You know the normal meaning of this word, but in this instrument the term
“Song” refers to the data that makes up a complete song. The performance
assistant technology features uses the chord and melody data, and should
always be used with a song (page 32).
40
Owner’s Manual
The Easy Way to Play Piano
4
Press the [START/STOP] button.
Song playback will begin.
The basic pattern will play repeatedly. Listen to the basic pattern for
four measures while getting a feel for the basic pattern, then begin playing yourself from the fifth measure. The keys you should play will be
shown in the display.
5
Play on the keyboard.
Before
After
Try playing the score on the left with both hands. You can even play the
same keys over and over: C, E, G, C, E, G, C, E. You’ll notice that at
measure five the notes will come out according to the score on the right.
Keep playing, and performance assistant technology Chord type will
continue to “correct” the notes that you play.
This is the performance assistant technology Chord type.
NOTE
• The score for Ave Maria is provided on page 122.
You can stop song playback at any time by pressing the [START/STOP]
button.
6
Press the [P.A.T. ON/OFF] button to turn the performance
assistant technology feature off.
“...” will appear on the display where the performance assistant technology type is normally shown.
Owner’s Manual
41
The Easy Way to Play Piano
CHORD/FREE Type—Applying the Chord Type to the Left Hand Only
1
Press the [P.A.T. ON/OFF] button.
This turns on the performance assistant technology feature.
The currently selected type is shown in the MAIN display when the performance assistant technology feature is on.
The currently
selected type
2
Select the CHORD/FREE type.
Hold for longer
than a second
Select
Chord/Free
Press and hold the [P.A.T. ON/OFF] button for longer than a second so
that the performance assistant technology type appears. Select the
Chord/Free type by using the dial.
3
Select a song.
Press the [SONG] button, and the Song Select display appears. Select a
song by using the dial. For this example try selecting the “011 Nocturne”.
NOTE
• Using Songs (page 32)
The song displayed here will
be played.
42
Owner’s Manual
The Easy Way to Play Piano
4
Press the [START/STOP] button.
Song playback will begin.
The left-hand keys you should play will be shown on the display.
5
Play on the keyboard.
Play to the right of the split point with your right hand, and to the left of
the split point with your left hand.
Split point
With this type notes played on the
left-hand side of the split point will
actually sound an octave higher.
Play the Nocturne melody with your right hand. Continually play an FA-C arpeggio with your left hand as indicated by the score shown in the
display. Although you’re repeatedly playing the same notes with your
left hand, the actual notes produced will change to match the music.
This is the performance assistant technology Chord/Free type.
NOTE
• The score for Nocturne is provided on page 124.
Press the [SCORE] button if you want to see the score for the right-hand
part in the display.
You can stop song playback at any time by pressing the [START/STOP]
button.
6
Press the [P.A.T. ON/OFF] button to turn the performance
assistant technology feature off.
“...” will appear on the display where the performance assistant technology type is normally shown.
Owner’s Manual
43
The Easy Way to Play Piano
MELODY Type—Play with One Finger
See page 48 for some hints on how to play melodies.
1
Press the [P.A.T. ON/OFF] button.
This turns on the performance assistant technology feature.
The currently selected type is shown in the MAIN display when the performance assistant technology feature is on.
The currently
selected type
2
Select the MELODY type.
Select Melody
Hold for longer than a second
Press and hold the [P.A.T. ON/OFF] button for longer than a second so
that the performance assistant technology type appears. Select the Melody type by using the dial.
3
Select a song.
Press the [SONG] button, and the Song Select display appears. Select a
song by using the dial.
NOTE
• Using Songs (page 32)
The song displayed here will
be played.
44
Owner’s Manual
The Easy Way to Play Piano
4
Press the [START/STOP] button.
Song playback will begin.
Because the Melody type has been selected, the song melody will not
sound. You can enjoy playing the melody yourself (step 5).
Song start!
5
Play on the keyboard.
To begin, try to feel the rhythm of the song. Then tap a key with one finger of your right hand in time with the music. You can play any key. If
you want to play the melody with the melody score, press the [SCORE]
button to call up the melody score in the display.
Sounds like a
melody!
How does it sound? You’ve played the melody using only one finger
thanks to the performance assistant technology Melody type!
You can stop song playback at any time by pressing the [START/STOP]
button.
6
Press the [P.A.T. ON/OFF] button to turn the performance
assistant technology feature off.
“...” will appear on the display where the performance assistant technology type is normally shown.
Owner’s Manual
45
The Easy Way to Play Piano
CHORD/MELODY—Chord Type with the Left Hand, Melody with the Right
1
Press the [P.A.T. ON/OFF] button.
This turns on the performance assistant technology feature.
The currently selected type is shown in the MAIN display when the performance assistant technology feature is on.
The currently
selected type
2
Select the CHORD/MELODY type.
Hold for longer than a second
Select
Chord/Melody
Press and hold the [P.A.T. ON/OFF] button for longer than a second so
that the performance assistant technology type appears. Select the
Chord/Melody type by using the dial.
3
Select a song.
Press the [SONG] button, and the Song Select display appears. Select a
song by using the dial.
NOTE
• Using Songs (page 32)
The song displayed here will
be played.
46
Owner’s Manual
The Easy Way to Play Piano
4
Press the [START/STOP] button.
Song playback will begin.
The basic pattern will repeat. Listen to eight measures while memorizing the basic pattern. It’s your turn to play the part from the ninth measure.
5
Play on the keyboard.
Play to the right of the split point with your right hand, and to the left of
the split point with your left hand.
Split point
With this type notes played on the
left-hand side of the split point will
actually sound an octave higher.
Play along with the rhythm of the song melody with your right hand.
You can play any keys as long as you’re playing to the right of the split
point. At the same time play accompaniment-like chords and phrases
with your left hand. No matter what you play, you’ll produce the song
melody with your right hand and beautiful chords and phrases with your
left hand.
This is the performance assistant technology Chord/Melody type.
If you want to play the melody with the melody score, press the
[SCORE] button to call up the melody score in the display.
You can stop song playback at any time by pressing the [START/STOP]
button.
6
Press the [P.A.T. ON/OFF] button to turn the performance
assistant technology feature off.
“...” will appear on the display where the performance assistant technology type is normally shown.
Owner’s Manual
47
The Easy Way to Play Piano
Use the Performance Assistant to Play Like a Pro!
Here are a few hints for using the Chord type.
If you select Chord/Free or Chord/Melody, the left-hand section of the
keyboard becomes the Chord type section, so use these hints on the lefthand section of the keyboard.
To begin, try to feel the rhythm of the song. Then, with your hands
spread as shown in the illustration, simply play the keyboard alternately
with your left and right hands (any notes will do).
The chord information
included in the song is
displayed in the lower
area of the MAIN display.
You will get even better
results if you match your
left-hand rhythm to rhythm
of the chord indicator in
the display.
Sounds like you’re
playing the right
notes!
How does it sound? You’ll get acceptable results no matter where you
play thanks to the performance assistant technology Chord type!
Next try the three playing methods illustrated below. Different ways of
playing produce different results.
● Play with the left and right hands
at the same timing—type 1.
Play 3 notes at once
with your right hand.
● Play with the left and right hands
at the same timing—type 2.
Play 1 note at a time with your right
hand (for example: index finger →
middle finger → ring finger).
Once you get a feel for it, try playing chords with your left hand and a
melody with your right ... or any other combination.
48
Owner’s Manual
● Play alternately with the left
and right hands—type 3.
Play 3 notes at once
with your right hand.
The Easy Way to Play Piano
Make Use of the Score in the Melody Type.
If you want to play the melody with the correct rhythm, use the onscreen
score feature.
Displaying the Score.
After performing steps 1 to 4 on page 44, press the [SCORE] button.
The melody score will appear.
Appears when the performance
assistant technology is on
Marker
Chord
Melody
The marker will indicate the current position in the score during playback.
If you play a key each time the marker appears above a note in the score
you will be able to play the melody with the correct “original” rhythm.
Play while watching the
marker
● Songs That Can Be Used With the performance assistant technology.
When the Chord type is selected the performance assistant technology can only be used with songs that
include chord data. When the Melody type is selected the performance assistant technology will only
work with songs that include melody data. In order to find out if a song includes the required data, first
select the song and then press the [SCORE] button. If chords appear on the display when you press the
[SCORE] button you can use the Chord type or any combination type that includes the Chord type. If
melody appear on the display when you press the [SCORE] button you can use the Melody type or any
combination type that includes the Melody type.
● External Songs and the performance assistant technology.
Songs downloaded from the Internet can also be used with the performance assistant technology as
long as they include the required chord and/or melody data.
See page 108 for instructions on how to transfer the songs to the instrument.
Owner’s Manual
49
Select a Song For a Lesson
Yamaha Education Suite
You can select song you like and use it for a left-hand, right-hand, or
both-hands lesson. You can also use songs (only SMF format 0/1)
transferred to the instrument from a computer. (page 107) During the
lesson you can play as slowly as you like, and you can even play
wrong notes. Song playback will slow down to a speed you can handle. It’s never too late to start learning!
Lesson Flow:
Select a song from the Piano Solo, Piano Ensemble category!
Select the
song you
want to learn.
Select the part you
want to work on
(right hand, left
hand, both hands).
Select lesson
1, 2, or 3.
Lesson
start!
The practice methods:
● Lesson 1 ..............Learn to play the correct notes.
● Lesson 2 ..............Learn to play the correct notes with the correct timing.
● Lesson 3 ..............Learn to play the correct notes at the correct timing along with the song.
NOTE
• Song numbers 10 and 11 are
function demos for performance assistant. The lesson
function cannot be used with
them.
50
Owner’s Manual
Select a Song For a Lesson
Lesson 1—Waiting
In this lesson, try playing the correct notes. Play the note shown in the display. The song will wait until you
play the right note.
1
Select a song for your lesson.
2
Press [EXIT] button to return to the MAIN display.
3
Select the part you want to practice.
Press the [SONG] button, and rotate the dial to select the song you want
to use for your lesson. As listed on page 35 there are a variety of song
types.
Press the [R] button for a right-hand lesson, [L] button for a left-hand
lesson, or press both the [R] and [L] buttons simultaneously for a bothhands lesson. The currently selected part is shown in the upper right corner of the display.
Select R for right-hand lesson.
Select L for left-hand lesson.
Select LR for bothhands lesson.
Owner’s Manual
51
Select a Song For a Lesson
4
Start Lesson 1.
Press the LESSON [START] button to select Lesson 1. Each time the
LESSON [START] button is pressed the lesson modes are selected in
sequence: Lesson 1 → Lesson 2 → Lesson 3 → Off → Lesson 1 ... An
explanation of the selected lesson will appear on the display for a few
seconds before the lesson begins.
In this case the “R1” indicates that righthand lesson 1 has been selected.
(Lesson 1)
(Lesson 2)
(Lesson 3)
(Song Lesson off)
Song playback will begin automatically when you select
Lesson 1.
Play the notes shown in the on-screen score. The next note to be played
is indicated by a dot (●) on the appropriate key of the graphic on-screen
keyboard. When you play the correct note the marker will move to the
next key to be played. Playback will pause and wait for you to play the
correct note. The triangular marker (▼) above the score indicates playback progress.
▼ Marker
Left-hand part
● Marker
52
Owner’s Manual
Right-hand part
(In the case of a right-hand lesson)
Select a Song For a Lesson
● Shifting the keyboard left or right.
The hidden (
) areas of the keyboard can be brought into view by
pressing the [+] or [-] button.
The displayed range (61 keys)
Actual keyboard range is 88 keys
61 keys of the keyboard’s range are shown on the display. This instrument
actually have 88 keys. In some songs that include very high or low notes,
those notes may fall outside the displayed range and may not be shown on
the display. In such cases an “over” indicator appear to the left or right of
the graphic keyboard. Use the [+] or [-] button to shift the keyboard left or
right so you can see the notes (the ● marker will appear on the appropriate
key in the display). Notes that actually fall outside the keyboard’s range
cannot be used in the lesson.
5
Stop the Lesson mode
You can stop the Lesson mode at any time by pressing the [START/
STOP] button.
Once you’ve mastered Lesson 1, move on to Lesson 2.
■See How You’ve Done
● ● ● ● ● ● ● ● ● ● ● ● ● ● ● ● ● ● ● ● ● ● ● ● ●
When the lesson song has played all the way
through your performance will be evaluated in 4
levels: OK, Good, Very Good, or Excellent.
“Excellent!” is the highest evaluation.
After the evaluation display has appeared, the lesson will start again
from the beginning.
NOTE
• The evaluation feature can be
turned off via the FUNCTION
Grade item (page 94).
Owner’s Manual
53
Select a Song For a Lesson
Lesson 2—Your Tempo
Learn to play the correct notes with the correct timing. Song playback tempo will vary to match the speed
you are playing at. The song will slow down when you play wrong notes, so you can learn at your own
pace.
1
Select the song and part you want to practice (steps 1 and
3 on page 51).
2
Start Lesson 2.
Each time the LESSON [START] button is pressed the lesson modes are
selected in sequence: Lesson 1 → Lesson 2 → Lesson 3 → Off → Lesson 1 ...
In this case the “R2” indicates
that right-hand lesson 2 has
been selected.
Song playback will begin automatically when Lesson 2 is
selected.
The triangular marker will appear in the score display, and will move to
indicate the current note in the song. Try to play the notes at the correct
timing. As you learn to play the right notes at the right timing the tempo
will increase until eventually you’ll be playing at the song’s original
tempo.
Play while following the
score marker
Left-hand part
Right-hand part
(In the case of a right-hand lesson)
3
Stop the Lesson mode.
You can stop the Lesson mode at any time by pressing the [START/
STOP] button.
Once you’ve mastered Lesson 2, move on to Lesson 3.
54
Owner’s Manual
Select a Song For a Lesson
Lesson 3—Minus One
Here’s where you can perfect your technique. The song will play at the normal tempo, minus the part you
have chosen to play. Play along while listening to the song.
1
Select the song and part you want to practice (steps 1 and
3 on page 51).
2
Start Lesson 3.
Each time the LESSON [START] button is pressed the lesson modes are
selected in sequence: Lesson 1 → Lesson 2 → Lesson 3 → Off → Lesson 1 ...
In this case the “R3” indicates
that right-hand lesson 3 has
been selected.
Song playback will begin automatically when Lesson 3 is
selected.
Play along while listening to the song. The score marker and keyboard
marker in the display will indicate the notes to play.
▼ Marker
Left-hand part
● Marker
3
Right-hand part
(In the case of a right-hand lesson)
Stop the Lesson mode.
You can stop the Lesson mode at any time by pressing the [START/
STOP] button.
Owner’s Manual
55
Select a Song For a Lesson
Practice Makes Perfect—Repeat and Learn
Use this feature when you want to start again just ahead of a section on which you made a mistake, or to
repeatedly practice a section you find difficult.
Press the [REPEAT & LEARN] button during a lesson.
The song location will move back four measures from the point at
which you pressed the button, and playback will begin after a one-measure count-in. Playback will continue up to the point at which you
pressed the [REPEAT & LEARN] button, and then jump back four measures and begin again after a count-in. This process will repeat, so all
you have to do is press the [REPEAT & LEARN] button when you
make a mistake in order to repeat practice of that section until you get it
right
e Jump back 4 measures and
repeat playback
q
w
Song playback
direction
Oops!
A mistake!
56
Owner’s Manual
Press immediately
NOTE
• You can change the number of
measures the Repeat and learn
function jumps back by pressing
a number button [1]–[9] during
repeat playback.
Play Using the Music Database
You want to play music in your favorite style, but you’re not sure how to
select the best voice and style for the type of music you want to play ...
simply select the appropriate style from the Music Database. The panel
settings will automatically be adjusted for the ideal combination of
sounds and style!
1
Press the [MUSIC DATABASE] button.
A Music Database list will appear in the display.
2
Select a Music Database.
3
Play the chords with your left hand and melody with your
right.
Referring to the list on the panel or Music Database List on page 135 of
the manual, use the dial to select a music database. Select one that
matches the image of the song you intend to play.
For this example select the “158 Patrol”.
NOTE
• Music Database (MDB) files
transferred from a computer or
stored on a USB flash memory
device connected to the instrument can be selected and used
in the same way as the internal
Music Databases (MDB numbers 301–). File transfer instructions are provided on page 107.
The jazz style will start playing when you play a left-hand chord to the
left of the split point (page 27). Refer to pages 29–31 for information
about playing chords.
Split Point
If you press the [EXIT] button to return to the MAIN display at this
point you can check the assigned voice and style.
4
Press the [START/STOP] button to stop playback.
Owner’s Manual
57
Change a Song’s Style
In addition to each song’s default style, you can select any other style to
play the song with the Easy Song Arranger feature. This means that you
can play a song that is normally a ballad, for example, as a bossa nova,
as a hip-hop tune, etc. You can create totally different arrangements by
changing the style with which a song is played.
You can also change the song’s melody voice and the keyboard voice for
a complete change of image.
Try Out the Easy Song Arranger
You can try out the Easy Song Arranger feature using the internal Hallelujah Chorus song.
Press the [SONG] button and use the dial to select “009
Hallelujah Chorus.” Press the [START/STOP] button begin
playback of the song. An explanation of the Easy Song
Arranger feature will appear on the display.
As the song progresses the styles will change, changing the overall
image of the song.
Keep in mind that you can enjoy using Easy Song Arranger with other
songs as well—any songs that include chord data.
NOTE
• The score for Hallelujah Chorus
is provided on page 120.
Using the Easy Song Arranger
1
Press the [EASY SONG ARRANGER] button.
The Song Select display will appear. The currently selected song name
and number will be highlighted.
The currently selected song
number and name are displayed here.
2
58
Select a Song.
Use the dial to select the song you want to arrange.
Owner’s Manual
Change a Song’s Style
3
Listen to the song.
NOTE
Press the [START/STOP] button to begin playback of the song. Move
on to the next step while the song is playing.
• When playing song numbers
010, 011, and 020 to 030 while
using the Easy Song Arranger,
melody tracks will be automatically muted and no melody will
sound. In order to hear the melody tracks you will need to press
the SONG MEMORY buttons [3]
to [5].
Song start!
4
Press the [EASY SONG ARRANGER] button.
The Style Select display will appear. The currently selected style name
and number will be highlighted.
The currently selected style
number and name are displayed here.
5
Select a style.
6
Select a voice part.
Rotate the dial and listen to how the song sounds with different styles.
As you select different styles the song will remain the same while only
the styles change.
NOTE
• Because the Easy Song
Arranger uses song data you
can’t specify chords by playing
in the accompaniment range of
the keyboard. The [ACMP ON/
OFF] button will not function.
• If the time signature of the song
and style are different, the time
signature of the song will be
used.
If you press and hold the [VOICE] button for longer than a second a
voice list will appear. The Melody R and Melody L displays will be
selected alternately each time you press the [VOICE] button.
The Melody R and Melody
L displays will be selected
alternately each time you
press the [VOICE] button.
The currently selected melody voice will be displayed.
Hold for longer
than a second
7
Select a voice you want to play as a song melody.
Use the dial to change the melody voice. As you select different melody
voices the song will remain the same while only the melody voice
changes.
NOTE
• If you press the [INTRO/ENDING/rit.] button during style playback, the style will stop but the
song will continue playing. Use
the [START/STOP] button to
stop playback completely.
Owner’s Manual
59
Record Your Own Performance
You can record up to 5 of your own performances and save them as
user songs 031 through 035. Once your performances have been saved
as user songs they can be played in the same way as the internal
songs. User songs can also be saved to a USB flash memory device, as
described on page 99.
■ Recordable Data
5 melody tracks and 1 Style (chord) track can be recorded. To record your own
performance, first use the SONG MEMORY [1]–[5] and [A] buttons to specify the track(s) you want to record on.
• User songs are saved as SMF
(Standard MIDI File) format 0
files. Refer to page 107 for information on SMF files.
● SONG MEMORY (Track) [1]–[5]
Record the melody parts.
● SONG MEMORY (Track) [A]
Records the style pattern and chord parts.
Melody
Chords
Specify track(s)
and record
Track
1
Track
2
Track
3
Track
4
Track
5
Track
A
■ Track Mute
This instrument allows you to choose whether recorded tracks will play back
while you are recording or playing back other tracks (page 89).
60
Owner’s Manual
NOTE
• Up to approximately 30,000
notes can be recorded for the
five user songs if you record
only to the melody tracks.
Record Your Own Performance
Recording Procedure
1
From the MAIN display press the [SONG] button, then use
the dial to select the user song number (031–035) you
want to record to.
Rotate the dial to select a
song number between 031
and 035.
2
Select the track(s) you want to record to and confirm your
selection on the display.
◆ Record a Melody Track and the Accompaniment Track
Together
Press the melody track button [1]–[5] you want to record to while holding the [REC] button.
Next, press the [A] button while holding the [REC] button.
The selected tracks will be highlighted in the display.
CAUTION
• If you record to track that contains previously-recorded
data the previous data will be
overwritten and lost.
NOTE
• Style accompaniment is automatically turned on when you
select the style track [A] for
recording.
• Style accompaniment cannot
turned on or off while recording
is in progress.
Press and hold
◆ Record a Melody track
Press the melody track button [1]–[5] you want to record to while holding the [REC] button. Select button [1]–[3] if you want to record a dual
voice. Split voices cannot be recorded.
The selected track will be highlighted in the display.
NOTE
• If style accompaniment is on
and track [A] has not yet been
recorded, the style track [A] will
automatically be selected for
recording when a melody track
is selected. If you only want to
record a melody track, be sure
to turn the style track [A] off.
To cancel recording to a selected track, press that track button a second time. Style accompaniment cannot be turned on or off while
recording is in progress.
Owner’s Manual
61
Record Your Own Performance
3
Recording will start when you play on the keyboard.
You can also start recording by pressing the [START/STOP] button.
The current measure will be shown on the display during recording.
Current measure
NOTE
• If the memory becomes full during recording a warning message will appear and recording
will stop automatically. Use the
song clear or track clear (page
63) function to delete unwanted
data and make more room available for recording, then do the
recording again.
Recording
starts
4
Stop recording by pressing the [START/STOP] or [REC]
button.
NOTE
• If you press the [INTRO/ENDING/rit.] button while recording
a style track, an appropriate
ending pattern will play and then
recording will stop.
or
When recording stops the current measure number will return to 001
and the recorded track numbers in the display will be shown in a box
border.
5
Save the song.
When recording is stopped a message asking if you want to save
the song will appear. Press the [+/YES] button to save the song, or
the [-/NO] button if you don’t want to save the song. If saved, the
song will be stored as a MIDI file in song number 031–035.
If you press the [-/NO] button in response to the confirmation message
the song will not be saved as a MIDI file but will remain in the instrument’s memory until the power is turned off, so you have the option of
converting the song to a MIDI file and saving it later. To do this press
and hold the [REC] button until the save confirmation message appears,
then press the [+/YES] button.
62
Owner’s Manual
CAUTION
• The recorded Song data will
be lost if you turn the power
to the instrument off without
executing the Save operation.
Record Your Own Performance
● To Record Other Tracks
Repeat steps 2 through 5 to record any of the remaining tracks.
By selecting an unrecorded track—SONG MEMORY buttons [1]–[5],
[A]—you can record the new track while listening to previously recorded
tracks (the border around the track number will appear in the display). You
can also mute previously recorded tracks (the border around the track
number disappears in the display) while recording new tracks.
● To Re-record a Track
Simple select the track you want to re-record for recording in the normal
way.
The new material will overwrite the previous data.
6
When the recording is done ...
◆ To Play Back a User Song
User songs are played back in the same way as regular songs (page 32).
1 Press the [SONG] button from the MAIN display.
2 The current song number/name will be highlighted—use the dial
to select the user song (031–035) you want to play.
3 Press the [START/STOP] button to start playback.
◆ To save a User Song to USB flash memory ➔ page 99.
● Data that cannot be recorded
• Split voice
• The following items are recorded at the beginning of the track. Changes
made during the song will not be recorded.
Time signature, Style number, Style volume
Song Clear—Deleting User Songs
This function clears an entire user song (all tracks).
1
2
NOTE
From the SONG SELECT display select the user song
(031–035) you want to clear.
• If you only want to clear a specific track from a user song use
the Track Clear function.
Press and hold the SONG MEMORY [1] button for longer
than a second while holding the SONG MEMORY [A] button.
A confirmation message will appear on the display.
You can cancel the clear operation by pressing the [-] button.
Hold for longer
than a second
Press and hold
Owner’s Manual
63
Record Your Own Performance
3
Press the [+] button to clear the song.
The clear-in-progress message will appear briefly on the display while
the song is being cleared.
Track Clear—Deleting a Specified Track from a User Song
This function lets you delete a specified track from a user song.
1
2
From the SONG SELECT display select the user song
(031–035) you want to clear.
Press and hold the SONG MEMORY track button ([1]–[5],
[A]) corresponding to the track you want to clear for
longer than a second.
A confirmation message will appear on the display.
You can cancel the clear operation by pressing the [-] button.
Hold for longer
than a second
3
64
Press the [+] button to clear the track.
The clear-in-progress message will appear briefly on the display while
the track is being cleared.
Owner’s Manual
Backup and Initialization
Backup
The following settings are always backed up, and are maintained even when the power is turned off. If you
want to initialize the settings, use the Initialize operation as explained below.
● The Backup Parameters
• Registration Memory
• FUNCTION Settings: Tuning, Split Point, Touch Sensitivity, Style Volume, Song Volume,
Metronome Volume, Grade, Demo Cancel, Language Selection,
Sustain, Sound Type, Chord Fingering
Initialization
This function erases all backup data in the instrument’s flash memory and restores the initial default settings. The following initialization procedures are provided.
■Backup Clear ● ● ● ● ● ● ● ● ● ● ● ● ● ● ● ● ● ● ● ● ● ● ● ● ● ● ● ● ● ● ● ●
To clear data backed up to the internal flash memory—panel user setting, registration memory—turn the power on by pressing the power
switch while holding the highest white key on the keyboard. The backed
up data will be erased and the default values restored.
Power switch
■Flash Clear
● ● ● ● ● ● ● ● ● ● ● ● ● ● ● ● ● ● ● ● ● ● ● ● ● ● ● ● ● ● ● ● ●
To clear User Songs as well as Song, Style, and Music Database files
that have been transferred to the internal flash memory from a computer,
turn the power on by pressing the power switch while simultaneously
holding the highest white key on the keyboard and the three highest
black keys.
CAUTION
• When you execute the Flash
Clear operation, data you
have purchased will also be
cleared. Be sure to save data
you want to keep to a computer.
Power switch
Owner’s Manual
65
Basic Operation
Basic Operation
Overall control is based on the following simple operations.
1 Press a button to select a basic function.
2 Use the dial to select an item or value.
3 Start a function.
3 Start a function.
1 Select a basic function.
2 Select an item or value.
Display (pages 68, 69)
● Volume Adjustment
Adjusts the volume of the sound heard via the
instrument’s speakers or a pair of headphones
plugged into the PHONES jack.
Rotate counterclockwise to lower
the volume.
Rotate clockwise to
increase the volume.
1 Press a button to select a basic function.
Select a song you want to listen to or a song you want to use for a lesson.
Select an auto-accompaniment style.
Select a voice you want to play on the keyboard.
66
Owner’s Manual
Basic Operation
2 Use the dial to select an item or value
When you select a basic function, the item corresponding to that function will be listed in the display.
You can then use the dial or the number buttons [0]–[9] to select the desired item.
The currently selected item is highlighted in the display. In this example the
[VOICE] button has been pressed.
■Changing Values ● ● ● ● ● ● ● ● ● ● ● ● ● ● ● ● ● ● ● ● ● ● ● ● ● ● ● ● ● ● ● ● ● ● ● ● ● ● ● ● ● ● ●
r
Jump to the first item
in the next or previous category.
r
Increase
f
Decrease
The CATEGORY [ ] and [ ] buttons are useful for selecting categorized items, as in the example below.
Example: VOICE SELECT Display
r
] mark.
f
CATEGORY button [
CATEGORY button [
Press briefly
to decrement.
Press briefly
to increment.
Select the category shown
here.
The first voice in the selected
category is selected.
In a display in which a category appears, selection is easy if
you first use the CATEGORY [ ] and [ ] buttons to select
the category containing the desired item, then use the dial or
[+] and [-] buttons to select the item. This can be particularly
handy when you have to select from a large number of voices.
f
● Number Buttons [0]–[9]
The number buttons can be used to directly enter a song number or parameter value.
Hundreds or tens digits that are “0” can be omitted (see
below).
Example: Song number “003”
can be entered in three ways.
• [0] → [0] → [3]
• [0] → [3]
(“003” will appear on the display after a brief delay)
• [3]
(“003” will appear on the display after a brief delay)
Press number buttons
[0], [0], [3].
] mark.
r
● [+] and [-] Buttons
Press the [+] button briefly to increment the value by 1, or press the [-]
button briefly to decrement the
value by 1. Press and hold either
button to continuously increment or
decrement the value in the corresponding direction.
● CATEGORY [ ] and [ ]
buttons
When selecting a song, style, or voice,
you can use these buttons to jump to the
first item in the next or previous category.
f
● Dial
Rotate the dial clockwise to
increase the value of the selected
item, or counterclockwise to
decrease it’s value. Rotate the dial
continuously to continuously
increase or decrease the value.
In most procedures described throughout this owner’s
manual the dial is recommended for selection simply
because it is the easiest and most intuitive selection
method. Please note however, that most items or values
that can be selected using the dial can also be selected
using the [+] and [-] buttons.
3 Start a function.
This is the [START/STOP] button.
Press the [START/STOP] button after pressing the [SONG] or [STYLE]
button to start playback of the selected song or style (rhythm).
Owner’s Manual
67
Basic Operation
The Displays
● Display Names
All operations are carried out while watching the display. A number of display types are provided for different modes and functions. The name of the current display appears at the top of the display.
● MAIN Display
Title
To Return To the MAIN Display
Most basic operations are carried out from the instrument’s MAIN
display.
You can return to the MAIN display from any other display by pressing the
[EXIT] button near the lower right corner of the display panel.
r
f
● FUNCTION Display (page 92)
The FUNCTION display provides access to 49 utility functions.
The FUNCTION display appears when the [FUNCTION] button is pressed. In the FUNCTION display you
can use the CATEGORY [ ] and [ ] buttons (page 67) to select 49 different groups of functions. Press the
CATEGORY button(s) as many times as necessary until the required function appears. You can then use the
dial, the [+] and [-] buttons, or the number [0]–[9] buttons to adjust the value of the function as required.
Function item
Value
The “Press & Hold” Symbol
The “
” symbol that appears next to some buttons indicates that
the button can be pressed and held for longer than a second to call
up a related function. This provides convenient direct access to a
range of functions.
68
Owner’s Manual
Basic Operation
MAIN Display Items
The MAIN display shows all of the current basic settings: song, style, voice.
It also includes a range of indicators that show the on/off status of a range of functions.
* Adjust the LCD CONTRAST control on
the panel of the instrument for optimum
display legibility.
A-B Repeat
Tempo
Appears when repeat
playback is engaged.
Measure Number
Transpose
Function ON/Off Icons
Dual
Appears when the Dual Voice is
on. When this icon is showing a
second voice is “layered” on and
played with the main voice.
Chord
Display
Split
Style (Auto-accompaniment)
Status (page 27)
Registration Memory
Status (page 90)
Appears when the Split Voice is
on. When this icon is showing
different voices can be played to
the left and right of the keyboard
split point.
Performance assistant technology
Appears when the [ACMP ON/
OFF] button is pressed to turn
accompaniment on after selecting
a style. When showing the keyboard range to the left of the split
point is used for accompaniment
chord recognition.
Shows the selected bank
number.
Shows the memory numbers that contain data. A
border appears around
the selected number.
Appears when the synchro-stop
function is engaged.
The style pattern name.
Song Track Status
(pages 60, 89)
Appears when the performance
assistant technology is on.
Harmony
Appears when Harmony is on.
When this icon is showing harmony notes will be added to the
main voice.
File Control
When this icon is showing you
can control file operations.
Highlighted during user song
recording.
The track(s) selected for
recording are highlighted during user-song recording. Only
tracks that contain data are displayed. A border appears
around a selected track that is
being played. No border
appears around a Muted track.
Owner’s Manual
69
Reference
Play with a Variety of Effects
Adding Harmony
This feature adds harmony notes to the main voice.
1 Press the [HARMONY ON/OFF] button
to turn Harmony feature on.
To turn Harmony off, press the [HARMONY
ON/OFF] button again.
The currently selected harmony type
3 Use the dial to select a harmony type.
When harmony
is on the harmony icon will
appear in the
display.
Refer to the Effect Type List on page 137 for
information about the available harmony types.
Try playing the keyboard with the harmony
function. The effect and operation of each Harmony Type is different-refer to the below section
“How to sound each Harmony Type” as well as
the Effect Type List for details.
NOTE
• When you press the [HARMONY ON/OFF] button to turn this feature
on, the appropriate harmony type for the currently selected main
voice is automatically selected.
2 Press and hold the [HARMONY ON/
OFF] button for longer than a second.
The currently selected harmony type will be
displayed.
NOTE
• The harmony notes can be added only to the Main Voice, not to Dual
or Split Voices.
• The keys left of the Split Point of the keyboard produce no harmony
notes when the auto accompaniment is on (ACMP ON is lit).
Hold for longer
than a second.
● How to sound each Harmony Type
• Harmony type 19 to 22 (Tremolo)
• Harmony type 01 to 10, 13
Keep holding
down the keys.
Press the right-hand keys while playing chords in the
auto accompaniment range of the keyboard when the
Auto Accompaniment is on (page 27).
Hold down two
keys.
• Harmony type 15 to 18 (Echo)
Keep holding
down the keys.
70
Owner’s Manual
• Harmony type 23 to 26 (Trill)
You can adjust the Harmony Volume in the Function
Settings (page 94).
Play with a Variety of Effects
Adding Reverb
Reverb lets you play with a rich concert hall type ambience.
When you select a style or song the optimum reverb type for the voice used is automatically selected. If you
want to select a different reverb type, use the procedure described below. Refer to the Effect Type List on
page 138 for information about the available reverb types.
1 Press the [FUNCTION] button to call up
the FUNCTION display.
2 Use the CATEGORY [
3 Use the dial to select a reverb type.
You can check how the selected reverb type
sounds by playing on the keyboard.
r
f
] and [ ] buttons to select the Reverb Type item.
Selected reverb type.
Refer to the Effect Type List on page 138 for
information about the available reverb types.
Reverb Type item
● Adjusting the Reverb Level
You can individually adjust the amount of reverb
that is applied to the main, dual, and split voices.
(See page 93).
Owner’s Manual
71
Play with a Variety of Effects
Adding Chorus
The chorus effect creates a thick sound that is similar to many of the same voices being played in unison.
When you select a style or song the optimum chorus type for the voice used is automatically selected. If
you want to select a different chorus type, use the procedure described below.
1 Press the [FUNCTION] button to call up
the FUNCTION display.
2 Use the CATEGORY [
3 Use the dial to select a chorus type.
You can check how the selected chorus type
sounds by playing on the keyboard.
r
f
] and [ ] buttons to select the Chorus Type item.
Selected chorus type.
Chorus Type item
● Adjusting the Chorus Level
You can individually adjust the amount of chorus
that is applied to the main, dual, and split voices.
(See page 93).
72
Owner’s Manual
Play with a Variety of Effects
Adding DSP
DSP is term of abbreviated form of Digital Signal Processor. The DSP effect can be added to the Main and
Dual Voices. These range from reverb-like ambience effects to distortion and other dynamic processing
tools that let you enhance the sound, or completely transform it.
1 Use the [DSP ON/OFF] button to turn
the DSP function on.
The indicator lights when DSP is on.
To turn DSP off, press the [DSP ON/OFF] button again.
3 Use the dial to select a DSP type.
Refer to the DSP Type List on page 140 for
information about the available DSP types.
NOTE
• When DSP is turned on, the optimum DSP type for the current Voice
is automatically selected.
• The volume of the currently playing Voice changes when turning
DSP on or off. This is not a malfunction. The amount of change differs depending on the selected Voice.
• The DSP type is an overall setting–only one type can be selected.
For this reason, when you play a newly loaded Song or Style, for
example, the currently playing Voices may not sound as expected.
This is normal, since the Song or Style has its own DSP type which
replaces any selection you’ve made before loading. A similar phenomenon occurs when you use the [FF], [REW] buttons or A-B
Repeat function during song playback.
2 Press and hold the [DSP ON/OFF] button for longer than a second.
The currently selected DSP type will be displayed.
Currently selected DSP type.
● Adjusting the DSP Level
You can individually adjust the amount of DSP that
is applied to the main and dual voices.
(See page 93).
Hold for longer
than a second
DSP Type
Owner’s Manual
73
Play with a Variety of Effects
Adding Sustain
This function adds sustain to the keyboard voices. Use it when you want to add sustain to the voices at all
times, regardless of damper operation. The sustain function does not affect split voice.
1 Press the [FUNCTION] button to call up
the FUNCTION display.
3 You can then use the [+] and [-] buttons
to turn sustain on or off.
NOTE
• The sustain of some voices may not be markedly affected when the
sustain function is turned on.
2 Use the CATEGORY [
74
Owner’s Manual
r
f
] and [ ] buttons to select the Sustain item.
The current setting is displayed.
Handy Performance Features
Tap Start
You can start the song/style by simply tapping the [TEMPO/TAP] button at the required tempo—4 times
for time signatures in 4, and three times for time signatures in 3. You can change the tempo during song
playback by pressing the button just twice.
Touch Response Sensitivity
You can adjust the keyboard’s sensitivity to dynamics in three steps.
1 Press the [FUNCTION] button.
The currently selected function will appear in
the display.
3 Use the dial to select a touch sensitivity
setting between 1 and 3. Higher values
produce greater (easier) volume variation in response to keyboard dynamics
—i.e. greater sensitivity.
A setting of “4” results in a fixed touch
response, or no level change no matter how
hard or how soft you play the keys.
NOTE
• The initial default touch sensitivity setting is “2”.
2 Use the CATEGORY [
r
f
] and [ ] buttons to select the Touch Sensitivity
item.
The currently selected touch sensitivity will be
displayed.
Touch Sensitivity item
Owner’s Manual
75
Handy Performance Features
One Touch Setting
Sometimes selecting the ideal voice to play with a song or style can be confusing. The One Touch Setting
feature automatically selects a well-balanced voice for you when you select a style or song. Simply select
voice number “000” to activate this feature.
1 Select voice number “000” (steps 1 to 2
on page 17).
4 Use the dial to change songs, then play
the keyboard and listen to the voice.
You should hear a different keyboard voice
than you played in step 3. Watch the display
while changing songs and you will see that different voices are selected for each song.
Use the dial to select
voice number 000.
2 Select and play back any song (steps 1
to 3 on page 33).
3 Play the keyboard and remember the
sound of the voice.
If you have stopped playback at some point
during this procedure press the [START/STOP]
button to start playback again.
76
Owner’s Manual
Handy Performance Features
Select a Sound Type
Select a sound type for the internal speakers from piano sound or style sound.
1 Press and hold the [PIANO PRESET]
button for longer than a second.
Hold for longer
than a second.
The currently selected sound type will appear.
The currently selected
sound type.
2 Use the dial to select the desired Sound
Type.
Select Piano when you want to play only a
piano sound, or select Style when you want to
play a style.
NOTE
• When using headphones the normal sound is applied.
This function can also be set by using the
[FUNCTION] button (see page 93).
Owner’s Manual
77
Handy Performance Features
Pitch Controls
◆ Large Pitch Changes (Transpose)
The overall pitch of the instrument can by shifted
up or down by a maximum of 1 octave in semitone
increments.
◆ Small Pitch Changes (Tuning)
The overall tuning of the instrument can by shifted
up or down by a maximum of 100 cents in 1-cent
increments (100 cents = 1 semitone).
1 Press the [FUNCTION] button.
1 Press the [FUNCTION] button.
2 Use the CATEGORY [
2 Use the CATEGORY [
Transpose item
Tuning item
Can be set between -12 and +12
3 Use the dial to set the transpose value
between -12 and +12 as required.
NOTE
• The pitch of Drum Kits voices cannot be changed.
78
Owner’s Manual
r
] and [ ] buttons to select the Tuning item.
f
r
f
] and [ ] buttons to select the Transpose item.
Can be set between -100 and +100
3 Use the dial to set the tuning value
between -100 and +100 as required.
NOTE
• The pitch of Drum Kits voices cannot be changed.
Style (Auto-accompaniment) Functions
Basic operation of the Style (auto-accompaniment) feature is described on page 26 of
the Quick Guide.
Here are some other ways you can play the styles, the style volume adjustment procedure, how you can play chords using the styles, and more.
Pattern Variation (Sections)
This instrument features a wide variety of style “sections” that allow you to vary the arrangement of the
accompaniment to match the song you are playing.
Intro
Main A/B
Ending
Auto fill
● INTRO section
This is used for the beginning of the Song. When the intro finishes playing, accompaniment shifts to the
main section. The length of the intro (in measures) differs depending on the selected Style.
● MAIN section
This is used for playing the main part of the Song. It plays a main accompaniment pattern, and repeats
indefinitely until another section’s button is pressed. There are two variations on the basic pattern (A
and B), and the Style playback sound changes harmonically based on the chords you play with your left
hand.
● Fill-in section
This is automatically added before changing to section A or B.
● ENDING section
This is used for the ending of the Song. When the ending is finished, the auto accompaniment stops
automatically. The length of the ending (in measures) differs depending on the selected Style.
Owner’s Manual
79
Style (Auto-accompaniment) Functions
1 Press the [STYLE] button and then
select a style.
4 Press the [MAIN/AUTO FILL] button.
2 Press the [ACMP ON/OFF] button to
turn auto accompaniment on.
The name of the selected section—MAIN A or MAIN B—will
be displayed.
5 Press the [INTRO/ENDING/rit.] button.
Appears when auto
accompaniment is on.
3 Press the [SYNC START] button to turn
synchro start on.
The indicator will flash when the
synchro start standby mode will
be engaged.
You’re now ready to play the intro.
6 As soon as you play a chord with your
left hand, the Intro of the selected Style
starts.
For this example, play a C major chord (as
shown below). For information on how to enter
chords, see “Playing Auto-accompaniment
Chords” on page 31.
Split point
Accompaniment range
● Synchro Start
When the synchro start standby mode is engaged,
style playback will begin as soon as you play a
chord in the accompaniment range of the
keyboard. You can disengage the synchro-start
standby mode by pressing the [SYNC START]
button again.
80
Owner’s Manual
Style (Auto-accompaniment) Functions
7 Press the [MAIN/AUTO FILL] button.
● Synchro Stop
When this function is selected the accompaniment
style will only play while you are playing chords
in the accompaniment range of the keyboard.
Style playback will stop when you release the
keys. To turn the function on, press the [SYNC
STOP] button.
When the fill-in is finished, it leads smoothly
into the selected main section A/B.
8 Press the [INTRO/ENDING/rit.] button.
This switches to the ending section.
When the ending is finished, the auto accompaniment stops automatically. You can have the
ending gradually slow down (ritardando) by
pressing the [INTRO/ENDING/rit.] button
again while the ending is playing back.
The style will play
while you are playing
the keys
Style playback will
stop when you
release the keys
Owner’s Manual
81
Style (Auto-accompaniment) Functions
Setting the Split Point
The initial default split point is key number 054 (the F#2 key), but you can change it to another key using
the procedure described below.
Split point (054: F#2)
021
(A-1)
024
(C0)
036
(C1)
048
(C2)
060
(C3)
072
(C4)
084
(C5)
096
(C6)
108
(C7)
Main voice
Split voice
1 Press the [FUNCTION] button.
3 Use the dial to set the split point to any
key from 021(A-1) through 108 (C7).
NOTE
• When you change the split point the auto-accompaniment split point
also changes.
• The split point cannot be changed during a song lesson.
• The split voice sounds when the split-point key is played.
NOTE
2 Use the CATEGORY [
82
Owner’s Manual
r
f
] and [ ] buttons to select the Split point item.
r
f
• You can also access the Split Point item by pressing the [FUNCTION]
button and using the CATEGORY [ ] and [ ] buttons to locate the
item (page 92).
Style (Auto-accompaniment) Functions
Play a Style with Chords but No Rhythm (Stop Accompaniment)
When auto accompaniment is on (the ACMP ON icon is showing) and Synchro Start is off, you can play
chords in the left-hand accompaniment range of the keyboard while the style is stopped and still hear the
accompaniment chords. This is “Stop Accompaniment”, and any of the chord fingerings recognized by the
instrument can be used (page 31).
Press the [ACMP ON/OFF] button to turn
auto accompaniment on after pressing the
[STYLE] button.
Accompaniment range
Appears when auto
accompaniment is
on
Adjusting the Style Volume
2 Use the CATEGORY [
r
] and [ ] buttons to select the Style Volume item.
f
Press the [STYLE] button to engage the
style function.
1 Press the [FUNCTION] button.
3 Use the dial to set the style volume
between 000 and 127.
Owner’s Manual
83
Style (Auto-accompaniment) Functions
Chord Basics
Two or more notes played together constitute a “chord”.
The most basic chord type is the “triad” consisting of three notes: the
root, third, and fifth degrees of the corresponding scale. A C major triad,
for example, is made up of the notes C (the root), E (the third note of the
C major scale), and G (the fifth note of the C major scale).
3rd
3rd
Root
In the C major triad shown above, the lowest note is the “root” of the
chord (this is the chord’s “root position” ... using other chord notes for
the lowest note results in “inversions”). The root is the central sound of the chord, which supports and
anchors the other chord notes.
The distance (interval) between adjacent notes of a triad in root position is either a major or minor third.
Major third–four half steps (semitones)
Minor third–three half steps (semitones)
The lowest interval in our root-position triad (between the root and the third) determines whether the triad
is a major or minor chord, and we can shift the highest note up or down by a semitone to produce two additional chords, as shown below.
Minor chord
Cm
Major chord
CM
Minor 3rd
Major 3rd
Augmented chord
C aug
Minor 3rd
Major 3rd
Major 3rd
Major 3rd
Diminished chord
C dim
Minor 3rd
Minor 3rd
The basic characteristics of the chord sound remain intact even if we change the order of the notes to create
different inversions. Successive chords in a chord progression can be smoothly connected, for example, by
choosing the appropriate inversions (or chord “voicings”).
● Reading Chord Names
Chord names tell you just about everything you need to know about a chord
(other than the inversion/voicing). The chord name tells you what the root of the
chord is, whether it is a major, minor, or diminished chord, whether it requires a
major or flatted seventh, what alterations or tensions it uses ... all at a glance.
Cm
Root note
Chord type
● Some Chord Types (These are just some of the “Standard” chord types recognized by this instrument.)
Suspended 4 th
7 th
C sus4
Perfect 5 th
Perfect 4 th
Minor/major 7 th
Flatted 7 th
84
Owner’s Manual
Minor chord
Major chord
Flatted 7 th
C M7
Minor chord
Minor 7 th, flatted 5 th
(b5)
(b5)
C m7
C7
Flatted 5 th
Major 7 th
C m7
7 th, flatted 5 th
C mM7
Major 7 th
Minor 7 th
C7
7 th chord
Flatted 5 th
Minor 7 th chord
Major 7 th
Major chord
7 th, suspended 4 th
C 7sus4
Flatted 7 th
Suspended
4 th chord
Style (Auto-accompaniment) Functions
■Recognized Standard Chords ● ● ● ● ● ● ● ● ● ● ● ● ● ● ● ● ● ● ● ● ● ● ● ● ● ● ● ● ● ● ● ● ● ● ●
All chords in the chart are “C-root” chords.
Chord Name/[Abbreviation]
Normal Voicing
Chord (C)
Major [M]
1-3-5
C
Add ninth [(9)]
1-2-3-5
C
Sixth [6]
1 - (3) - 5 - 6
C6
Sixth ninth [6(9)]
1 - 2 - 3 - (5) - 6
C6
Major seventh [M7]
1 - 3 - (5) - 7
C M7
Major seventh ninth [M7(9)]
1 - 2 - 3 - (5) - 7
C M7
Major seventh add sharp eleventh [M7(#11)]
1 - (2) - 3 - #4 - 5 - 7 or
1 - 2 - 3 - #4 - (5) - 7
C M7
Display
C
(9)
C9
C6
(9)
C 69 *
CM7
(9)
C M79 *
(#11)
CM7#11 *
(b5)
Cb5 *
(b5)
Flatted fifth [(b5)]
1 - 3 - b5
Major seventh flatted fifth [M7b5]
1 - 3 - b5 - 7
C M7
CM7b5 *
Suspended fourth [sus4]
1-4-5
C sus4
Csus4
Augmented [aug]
1 - 3 - #5
C aug
Caug
Major seventh augmented [M7aug]
1 - (3) - #5 - 7
C M7aug
CM7aug *
Minor [m]
1 - b3 - 5
Cm
Cm
Minor add ninth [m(9)]
1 - 2 - b3 - 5
Cm
Cm9
Minor sixth [m6]
1 - b3 - 5 - 6
C m6
Cm6
Minor seventh [m7]
1 - b3 - (5) - b7
C m7
Minor seventh ninth [m7(9)]
1 - 2 - b3 - (5) - b7
C m7
Minor seventh add eleventh [m7(11)]
1 - (2) - b3 - 4 - 5 - (b7)
C m7
Cm711 *
Minor major seventh [mM7]
1 - b3 - (5) - 7
C mM7
CmM7
Minor major seventh ninth [mM7(9)]
1 - 2 - b3 - (5) - 7
C mM7
Minor seventh flatted fifth [m7b5]
Minor major seventh flatted fifth [mM7b5]
1 - b3 - b5 - b7
1 - b3 - b5 - 7
C
(9)
(9)
(11)
(9)
(b5)
C m7
Cdim7
1 - b3 - b5
C dim7
Seventh flatted ninth [7(b9)]
1 - b3 - b5 - 6
1 - 3 - (5) - b7 or
1 - (3) - 5 - b7
1 - b2 - 3 - (5) - b7
Seventh add flatted thirteenth [7(b13)]
1 - 3 - 5 - b6 - b7
C7
Seventh add sharp eleventh [7(#11)]
Seventh add thirteenth [7(13)]
Cm7b5
CmM7b5 *
Diminished [dim]
Seventh ninth [7(9)]
CmM79 *
C mM7
C dim
(b5)
Diminished seventh [dim7]
Seventh [7]
Cm7
Cm79
C7
Cdim
C7
(b9)
C7b9
C7
(b13)
C7b13
(9)
C 79
(#11)
C7#11
(13)
C713
(#9)
1 - 2 - 3 - (5) - b7
1 - (2) - 3 - #4 - 5 - b7 or
1 - 2 - 3 - #4 - (5) - b7
C7
1 - 3 - (5) - 6 - b7
C7
C7
Seventh sharp ninth [7(#9)]
1 - #2 - 3 - (5) - b7
C7
C7#9
Seventh flatted fifth [7b5]
1 - 3 - b5 - b7
C 7b5
C7b5 *
Seventh augmented [7aug]
1 - 3 - #5 - b7
C 7aug
C7aug
Seventh suspended fourth [7sus4]
1 - 4 - 5 - b7
C 7sus4
C7sus4
Suspended second [sus2]
1-2-5
C sus2
Csus2 *
* These chords are not shown in the Dictionary function.
NOTE
• Notes in parentheses can be omitted.
• Playing two same root keys in the adjacent octaves produces accompaniment based only on the root.
• A perfect fifth (1 + 5) produces accompaniment based only on the root
and fifth which can be used with both major and minor chords.
• The chord fingerings listed are all in “root” position, but other inversions
can be used—with the following exceptions: m7, m7b5, 6, m6, sus4,
aug, dim7, 7b5, 6(9), sus2.
NOTE
• Inversion of the m7(11) chords are not recognized if the notes shown in
parentheses are omitted.
• The auto accompaniment will sometimes not change when related
chords are played in sequence (e.g. some minor chords followed by the
minor seventh).
• Two-note fingerings will produce a chord based on the previously played
chord.
Owner’s Manual
85
Style (Auto-accompaniment) Functions
Playing Styles Using the Entire Keyboard
In “Play Along with a Style” on page 27 we described a method of playing styles in which chords were
detected only to the left of the keyboard split point. By making the settings described below, however,
chord detection for style accompaniment occurs over the entire range of the keyboard, allowing for even
more dynamic style performance. In this mode only chords played in the normal way (page 31) can be
detected.
1 Press and hold the [ACMP ON/OFF] button for longer than a second to select
the function “Chord Fingering”.
Hold for longer
than a second
86
Owner’s Manual
2 Use the dial to select 2 “FullKeyboard”.
Style (Auto-accompaniment) Functions
Looking Up Chords Using the Chord Dictionary
The Dictionary function is essentially a built-in “chord book” that shows you the individual notes of chords.
It is ideal when you know the name of a certain chord and want to quickly learn how to play it.
1 Press and hold the LESSON [START]
button for longer than a second.
Hold for longer
than a second
3 Press the “M7” (major seventh) key in
the section of the keyboard labeled
“CHORD TYPE”. (The note doesn’t
sound.) The notes you should play for
the specified chord (root note and
chord type) are shown in the display,
both as notation and in the keyboard
diagram.
Notation of chord
Chord name (root and type)
2 As an example, we’ll learn how to play a
GM7 (G major seventh) chord. Press the
“G” key in the section of the keyboard
labeled “ROOT”. (The note doesn’t
sound.) The root note you set is shown
in the display.
Individual notes of chord (keyboard)
To call up possible inversions of the chord,
press the [+]/[-] buttons.
NOTE
• About major chords: Simple major chords are usually indicated only
by the root note. For example, “C” refers to C major. However, when
specifying major chords here, make sure to select “M” (major) after
pressing the root note.
• Be aware that the chord types explained here are the left-hand
notes applied to various styles and different from the one for the performance assistant technology feature.
4 Try playing a chord in the auto accom-
paniment section of the keyboard,
checking the indications in the display.
When you’ve played the chord properly,
a bell sound signals your success and
the chord name in the display flash.
Press the [EXIT] button to return to the MAIN
display.
Owner’s Manual
87
Song Settings
Song Volume
1 Press the [FUNCTION] button.
Song volume item
Can be set between 000 and 127
2 Use the CATEGORY [
f
r
] and [ ] buttons to select the Song Volume item.
3 Use the dial to set the song volume
between 000 and 127.
NOTE
• Song volume can be adjusted while a song is selected.
A-B Repeat
You can specify a section of a song—“A” is the
start point and “B” is the end point—for repeat
playback.
A
2 Press the [A-B REPEAT] button a sec-
ond time at the end of the section you
want to repeat (the “B” point).
B
1 Play the song (page 32) and press the
[A-B REPEAT] button at the beginning
of the section you want to repeat (the
“A” point).
3 The specified A-B section of the song
will now play repeatedly.
You can stop repeat playback at any time by
pressing the [A-B REPEAT] button.
NOTE
• Repeat start and end points cannot be specified within the same
measure While the song is stopped.
• The current measure number is shown in the display during playback.
• If you want to set the start point “A” at the very beginning of the song
press the [A-B REPEAT] button before starting playback of the song.
88
Owner’s Manual
Song Settings
Muting Independent Song Parts
Each “track” of a song plays a different part of the
song—melody, percussion, accompaniment, etc.
You can mute individual tracks and play the muted
part on the keyboard yourself, or simply mute
tracks other than the ones you want to listen to. To
mute a track, press the appropriate track button
(TRACK [1]–[5], [A]) button. Press the same button a second time to disengage track muting.
No track number ... no data.
Track number without border
... track contains data but is muted.
Track number with border ... track contains data and is not muted.
Change the Melody Voice
You can change a song’s melody voice to any other voice you prefer.
Press the lesson [L] and [R] buttons simultaneously so that “LR” appears in the
upper right corner of the MAIN display.
Select the song and play it.
2 Use the dial to select the voice.
As you select different melody voices, only the
melody voice changes while the song will
remain the same.
1 Press the [VOICE] button for longer
than a second.
The VOICE SELECT (MELODY R or MELODY L) display will appear so you can select
the Melody R or Melody L voice. Pressing the
[VOICE] button alternates between VOICE
SELECT MELODY R and MELODY L.
Hold for longer
than a second
Owner’s Manual
89
Memorize Your Favorite Panel Settings
This instrument has a Registration Memory feature that lets you save your favorite settings for easy recall whenever they’re needed. Up to 16 complete setups can be saved
(8 banks of two setups each).
8 Banks
Memory 1
Memory 2
Up to 16 presets (eight
banks of two each) can
be memorized.
Saving to the Registration Memory
1 Set the panel controls as required—
select a voice, accompaniment style,
etc.
2 Press the [MEMORY/BANK] button. A
4 Press the REGIST MEMORY [1] or [2]
button while holding the [MEMORY/
BANK] button to store the current panel
settings to the specified registration
memory.
bank number will appear in the display
when you release the button.
Press the [EXIT] button to return to the MAIN
display in order to check the bank and registration memory numbers.
Bank number
3 Use the dial or the [1]–[8] number but-
tons to select a bank number from 1 to
8.
Bank number
NOTE
• You can also save your panel settings memorized to registration
memory button into USB flash memory as the user file or to a computer as the backup file.
NOTE
NOTE
• Data cannot be saved to the registration memory during song playback.
• If you select a Registration Memory number that already contains
data, the previous data is deleted and overwritten by the new data.
CAUTION
• Do not turn off the power while saving settings to the registration memory, otherwise the data may be damaged or lost.
90
Owner’s Manual
Memorize Your Favorite Panel Settings
Recalling a Registration Memory
1 Press the [MEMORY/BANK] button. A
bank number will appear in the display
when you release the button.
● Settings That Can be Saved to the Registration Memory
• Style settings*
Style number, Auto Accompaniment ON/OFF,
Split Point, Style settings (Main A/B),
Style Volume, Tempo, Chord Fingering
Bank number
2 Use the dial or the [1]–[8] number buttons to select bank you want to recall.
• Voice settings
Main Voice setting (Voice number, Volume,
Octave, Pan, Reverb Level, Chorus Level, DSP
Level),
Dual Voice settings (Dual ON/OFF, Voice
number, Volume, Octave, Pan, Reverb Level,
Chorus Level, DSP Level),
Split Voice settings (Split ON/OFF,
Voice number, Volume, Octave, Pan,
Reverb Level, Chorus Level)
• Effect settings
Reverb Type, Chorus Type,
Sustain ON/OFF, DSP ON/OFF, DSP Type
• Harmony settings
Harmony ON/OFF, Harmony Type,
Harmony Volume
• Other settings
Transpose
* Style settings are not available for Registration Memory when
using the Song features.
You can check whether the panel settings are
stored in registration memory 1 or 2 by pressing the [EXIT] button to return to the MAIN
display.
3 Press the REGIST MEMORY button, [1]
or [2], containing the settings you want
to recall. The panel controls will be
instantly set accordingly.
Owner’s Manual
91
The Functions
The “Functions” provide access to a range of detailed instrument parameters for tuning, setting the split point, and adjusting the voices and effects. Take a look at the function list starting on the opposite page. There are 49 function parameters in all.
When you locate a function you want to set up, simply select the function’s display
name and adjust as required.
Selecting and Setting Functions
1 Find the function you want to set in the
list that begins on page 93.
2 Press the [FUNCTION] button.
4 Use the dial, the [+] and [-] buttons, or
the [0]–[9] number buttons to set the
selected function as required.
The [+] and [-] buttons are used to make ON/
OFF type settings: [+] = ON, [-] = OFF.
In some cases the [+] button will initiate execution of the selected function, and the [-] will
cancel the selection.
Direct numeric
entry.
3 Select a function.
Function category
Previous item
r
f
Press the CATEGORY [ ] and [ ] buttons as
many times as necessary until the function’s
display name appears in the display.
Next item
The selected function
Value
92
Owner’s Manual
• Decrement value by 1.
• OFF
• Cancel
• Increment value by 1.
• ON
• Execute
Press simultaneously to
recall the default setting.
Some Function settings are stored in memory
as soon as they are changed. See “The Backup
Parameters” on page 65 for information on the
function settings that are stored on the instrument.
To restore all initial factor default settings perform the “Backup Clear” procedure described
in the “Initialization” section on page 65.
The Functions
● Function Setting List
Category
Function Item
Range/Settings
Description
Style Volume
000–127
Determines the volume of the Style.
Song Volume
000–127
Determines the volume of the Song.
Transpose
-12–+12
Determines the pitch of the instrument by semitone increments.
Tuning
-100–+100
Sets the pitch of the instrument’s sound in 1-cent increments.
Split Point
021(A-1)–108(C7)
Determines the highest key for the Split voice and sets the Split “point”—in
other words, the key that separates the Split (lower) and Main (upper)
voices. The Split Point setting and Accompaniment Split Point setting are
automatically set to the same value.
Touch Sensitivity
1(Soft), 2(Medium),
3(Hard), 4 (Off)
Determines the sensitivity of the feature.
Chord Fingering
1(Multi Finger),
2(FullKeyboard)
Sets the chord detection mode. In the Multi Finger mode both normal
chords and simple chords played to the left of the split point are detected. In
the Full Keyboard mode normal chords played anywhere on the keyboard
will be detected, and the notes played will be sound as well.
Main Volume
000–127
Determines the volume of the Main voice.
Main Octave
-2–+2
Determines the octave range for the Main voice.
Main Pan
000 (left)–
64 (center)–
127 (right)
Determines the pan position of the Main voice in the stereo image. The
value “0” results in the sound being panned full left; the value “127” results
in the sound being panned full right.
Main Reverb Level
000–127
Determines how much of the Main voice’s signal is sent to the Reverb
effect.
Main Chorus Level
000–127
Determines how much of the Main voice’s signal is sent to the Chorus
effect.
Main DSP Level
000–127
Determines how much of the Main voice’s signal is sent to the DSP effect.
Dual Volume
000–127
Determines the volume of the Dual voice.
Dual Octave
-2–+2
Determines the octave range for the Dual voice.
Dual Pan
000 (left)–
64 (center)–
127 (right)
Determines the pan position of the Dual voice in the stereo image. The
value “0” results in the sound being panned full left; the value “127” results
in the sound being panned full right.
Dual Reverb Level
000–127
Determines how much of the Dual voice’s signal is sent to the Reverb
effect.
Dual Chorus Level
000–127
Determines how much of the Dual voice’s signal is sent to the Chorus
effect.
Dual DSP Level
000–127
Determines how much of the Dual voice’s signal is sent to the DSP effect.
Split Volume
000–127
Determines the volume of the Split voice.
Split Octave
-2–+2
Determines the octave range for the Split voice.
Split Pan
000 (left)–
64 (center)–
127 (right)
Determines the pan position of the Split voice in the stereo image. The
value “0” results in the sound being panned full left; the value “127” results
in the sound being panned full right.
Split Reverb Level
000–127
Determines how much of the Split voice’s signal is sent to the Reverb effect.
Split Chorus Level
000–127
Determines how much of the Split voice’s signal is sent to the Chorus
effect.
VOLUME
OVERALL
MAIN VOICE
DUAL VOICE
SPLIT VOICE
Reverb Type
01–36
Determines the Reverb type, including off. (See the list on page 138)
Chorus Type
01–45
Determines the Chorus type, including off. (See the list on page 139)
DSP Type
001–239
Determines the DSP type, including off. (See the list on page 140)
Sustain
ON/OFF
Determines whether or not sustain is always applied to the MAIN/DUAL
voices. It is applied continuously when ON, or not applied when OFF. (page
74)
Sound Type
Piano/Style
Determines the sound type, optimizing it either for a simple, pure piano
sound, or for a wide, dynamic multi-instrument style sound.
EFFECT
Owner’s Manual
93
The Functions
Category
Function Item
Range/Settings
Description
Harmony Type
01–26
Determines the Harmony type. (See the list on page 137)
Harmony Volume
000–127
Determines the volume of the Harmony effect.
PAT
P.A.T. Type
CHORD,
CHORD/FREE,
MELODY,
CHORD/MELODY
Determines the performance assistant technology feature type. (See the list
on page 39)
PC
PC Mode
PC1/PC2/OFF
Optimizes the MIDI settings when you connect to a computer (page 105).
Local
ON/OFF
Determines whether the instrument’s keyboard controls the internal tone
generator (ON) or not (OFF). (page 105)
External Clock
ON/OFF
Determines whether the instrument synchronizes to the internal clock
(OFF) or an external clock (ON). (page 105)
Keyboard Out
ON/OFF
Determines whether keyboard performance data of the instrument is
transmitted (ON) or not (OFF).
Style Out
ON/OFF
Determines whether Style data is transmitted (ON) via USB or not (OFF)
during Style playback.
Song Out
ON/OFF
Determines whether User Song is transmitted (ON) via USB or not (OFF)
during Song playback.
Initial Setup
YES/NO
Lets you send the data of the panel settings to a computer. Press [+] to
send, or press [-] to cancel.
Time Signature Numerator
01–60
Determines the time signature of the Metronome.
Time Signature Denominator
2, 4, 8, 16
Sets the length of each metronome beat.
Bell
ON/OFF
Determines whether a bell accent will be sounded (ON) or not (OFF).
Metronome Volume
000–127
Determines the volume of the Metronome.
Quantize
1(1/4 note),
2(1/4 note triplet),
3(1/8 note),
4(1/8 note triplet),
5(1/16 note),
6(1/16 note triplet),
7(1/32 note),
8(1/32 note triplet)
Depending on the song data, you can make the score more readable by
adjusting the timing of the notes.
This determines the minimum timing resolution used in the song. For
example, if there are both quarter notes and eighth notes in the song, you
should set this value to “eighth note”. Any notes or rests shorter than this
value will not be shown in the score.
Right-Part
GuideTrack 1–16
Determines the guide track number for your right hand lesson. The setting
is effective for songs in SMF format 0 and 1 transferred from a computer.
Left-Part
GuideTrack 1–16
Determines the guide track number for your left hand lesson. The setting is
effective for songs in SMF format 0 and 1 transferred from a computer.
Grade
ON/OFF
Determines whether the Grade function is on or off.
Demo Cancel
ON/OFF
Determines whether Demo cancel is enabled or not. When this is set to ON,
the Demo Song will not play, even if the [DEMO] button is pressed.
English/Japanese
Determines the display language for the demo displays, song file names,
lyrics and certain display messages. All other messages and names are
displayed in English. When this is set to Japanese, the file names are
displayed in the Japanese font. The lyrics display follows the language
setting originally made in the song data; however, when no such setting
exists, the setting here is used.
HARMONY
MIDI
METRONOME
SCORE
LESSON
UTILITY
LANGUAGE
Language
* All these settings can be conveniently reset to their initial default values by pressing the [+] and [-] buttons simultaneously.
(The exception to this is Initial Send, which is an operation, not a setting.)
94
Owner’s Manual
Saving and Loading Data
USB flash memory is a memory medium used for storing data.
When a USB flash memory is inserted in this instrument’s USB TO DEVICE terminal,
registered settings can be saved from or loaded into the instrument. USB flash memory can also be used to transfer Song, Style, and Music Database files to the instrument, where they can be selected and used in the same way as the internal data.
In this section we’ll look at the procedures for setting up and formatting USB flash
memory devices, as well as for saving and loading data to and from them.
Before using a USB device, read through the “Precautions when using the USB TO
DEVICE terminal” section on page 96.
Connecting a USB Flash Memory
1 Connect a USB flash memory to the
USB TO DEVICE terminal, being careful
to insert it with the proper orientation.
2 Check that the file control icon is shown
in the MAIN display.
Appears while the
memory device is
being mounted.
File Control Icon
A message (information or confirmation dialog)
sometimes appears on the display to facilitate
operation. Refer to the “Messages” on page 112
for an explanation of each message.
You can go to the FILE CONTROL display
from which you can access file operations by
pressing the [MENU] button from this display.
(Do not press this button now, but only when
instructed to in the sections below.)
Menu
Reference Page
Format
97
User File Save
98
User Song Save
99
Load
100
USB Delete
101
User Delete
102
NOTE
• No sound will be produced if you play the keyboard while the FILE
CONTROL display is showing. Also, in this state only buttons related
to file functions will be active.
NOTE
• The FILE CONTROL display will not appear in any of the following
cases:
• During style or song playback.
• During a lesson.
• While data is being loaded from a USB flash memory.
Owner’s Manual
95
Saving and Loading Data
■ Precautions when using the USB TO DEVICE terminal
This instrument features a built-in USB TO DEVICE terminal. When connecting a USB device to the terminal, be sure to
handle the USB device with care. Follow the important precautions below.
NOTE
• Although CD-R/RW drives can be used to read data to the instrument, they cannot be used for saving data.
● Compatible USB devices
• USB storage devices (flash memory, floppy disk drive)
The instrument does not necessarily support all commercially available USB devices. Yamaha cannot guarantee
operation of USB devices that you purchase. Before purchasing a USB device for use with this instrument, please
visit the following web page:
● Using USB Storage Devices
By connecting the instrument to a USB storage device, you
can save data you’ve created to the connected device, as
well as read data from the connected device.
NOTE
• Although CD-R/RW drives can be used to read data to the instrument, they cannot be used for saving data.
http://music.yamaha.com/download/
NOTE
• Other USB devices such as a computer keyboard or mouse cannot
be used.
● Connecting USB device
• When connecting a USB device to the USB TO DEVICE
terminal, make sure that the connector on the device is
appropriate and that it is connected in the proper direction.
The number of USB storage device to be used
Only one USB storage devices can be connected to the
USB TO DEVICE terminal.
Formatting USB storage media
When a USB storage device is connected or media is
inserted, a message may appear prompting you to format
the device/media. If so, execute the Format operation (page
97).
CAUTION
CAUTION
• Do not close the key cover when a USB device is connected to
the USB TO DEVICE terminal. Doing so can damage the USB
device.
• Though the instrument supports the USB 1.1 standard,
you can connect and use a USB 2.0 storage device with
the instrument. However, note that the transfer speed is
that of USB 1.1.
• The format operation overwrites any previously existing data.
Make sure that the media you are formatting does not contain
important data.
To protect your data (write-protect)
To prevent important data from being inadvertently erased,
apply the write-protect provided with each storage device
or media. If you are saving data to the USB storage device,
make sure to disable write-protect.
Connecting/removing USB storage device
Before removing the media from the device, make sure that
the instrument is not accessing data (such as in the Save
and Delete operations).
CAUTION
• Avoid frequently turning the power on/off to the USB storage
device, or connecting/disconnecting the device too often.
Doing so may result in the operation of the instrument “freezing” or hanging up. While the instrument is accessing data
(such as during Save, Delete, Load and Format operations) or
is mounting the USB storage device (shortly after the connection), do NOT unplug the USB connector, do NOT remove the
media from the device, and do NOT turn the power off to either
device. Doing so may corrupt the data on either or both
devices.
96
Owner’s Manual
Saving and Loading Data
Formatting USB Flash Memory
New USB flash memory must be formatted before they can be used by this instrument.
5 Press the [EXECUTE] button again, or
CAUTION
• If you format a USB flash memory that already contains data, all of
the data will be erased. Be careful not to erase important data
when using the format function.
the [+] button, and the format operation
will begin.
CAUTION
1
After connecting the USB flash memory
to be formatted to the instrument’s USB
TO DEVICE terminal, check that the
icon is showing in the MAIN display.
• Once the format-in-progress message appears on the display
the format operation cannot be canceled. Never turn off the
power or remove the USB flash memory during this operation.
6 A message will appear on the display to
inform you that the operation has finished.
Press the [EXIT] button to return to the MAIN
display.
2
NOTE
Press the FILE CONTROL [MENU] button.
3 Use the CATEGORY [
• If the USB flash memory has been write-protected, an appropriate
message will appear on the display and you will not be able to execute the operation.
r
f
] and [ ] buttons to select the Format item.
The display prompts you for confirmation.
4 Press the [EXECUTE] button and the
display prompts you for confirmation.
You can press the [-] button at this point to cancel the operation.
Owner’s Manual
97
Saving and Loading Data
Saving Registration Memory data to USB Flash Memory
This operation saves Registration Memory data as a “User File” to a USB flash memory device. The User
File name will have a “.usr” extension which will not appear in the instrument’s display.
1 Make sure that a properly formatted
USB flash memory has been properly
connected to the instrument’s USB TO
DEVICE terminal, and that the icon is
showing in the MAIN display.
r
f
2 Press the FILE CONTROL [MENU] button.
3 Use the CATEGORY [ ] and [ ] but-
Cursor left
tons to locate the Regist Save item.
A default file name will automatically be created.
Delete character
The dial selects
characters
Cursor right
Cursor
6 Press the [EXECUTE] button. The dis● To Overwrite an Existing File
If you want to overwrite a file that already exists
on the USB flash memory, use the dial or the
[+] and [-] buttons to select the file, then skip
ahead to step 6.
NOTE
• Up to 100 user files can be saved to a single USB flash memory.
• If the USB flash memory has been write-protected, an appropriate
message will appear on the display and you will not be able to execute the operation.
• If there is not enough capacity left on the USB flash memory to save
the data an appropriate message will appear on the display and you
will not be able to save the data. Erase unwanted files from the USB
flash memory to make more memory available (page 101), or use a
different USB flash memory.
• Refer to the “Messages” list on page 112 for other possible errors
that might prevent you from completing the operation.
4 Press the [EXECUTE] button. A cursor
will appear below the first character in
the file name.
5 Change the file name as necessary.
• The [-] button moves the cursor to the left,
and the [0] button moves it to the right.
• Use the dial to select a character for the current cursor location.
• The [+] button deletes the character at the
cursor location.
98
Owner’s Manual
7
play prompts you for confirmation.
You can cancel the save operation at this point
by pressing the [-] button.
Press the [EXECUTE] button again, or
the [+] button, and the save operation
will begin.
The file will be stored to the USER FILE folder
in the USB flash memory.
CAUTION
• Once the save-in-progress message appears on the display the
operation cannot be canceled. Never turn off the power or
remove the USB flash memory during this operation.
8 A message will appear on the display to
inform you that the operation has finished.
Press the [EXIT] button to return to the MAIN
display.
NOTE
• If an existing filename is specified the display prompts you for confirmation. Press [EXECUTE] or [+] if it is OK to overwrite the file, or [-]
to cancel.
• The amount of time it will take to perform the save operation will
depend on the condition of the USB flash memory.
Saving and Loading Data
Save a User Song to USB Flash Memory
This operation saves a user song (song numbers 031–035) to USB flash memory.
1 Make sure that a properly formatted
USB flash memory has been properly
connected to the instrument’s USB TO
DEVICE terminal, and that the icon is
showing in the MAIN display.
7 Change the file name as necessary.
Refer to “Saving Registration Memory data to
USB Flash Memory” on page 98 for filename
entry.
2 Press the FILE CONTROL [MENU] button.
3 Use the CATEGORY [
r
f
] and [ ] buttons to locate the User Song Save item.
The SOURCE FILE—a user song name—will
be highlighted.
Cursor
The name of the file to
be saved
8 Press the [EXECUTE] button. The dis-
play prompts you for confirmation.
You can cancel the save operation at this point
by pressing the [-] button.
9 Press the [EXECUTE] button again, or
The source user song name.
the [+] button, and the save operation
will begin.
The user song will be stored to the USER FILE
folder in the USB flash memory.
CAUTION
4 Use the dial to select the source user
song.
You can press the [+] and [-] buttons simultaneously to select the first user song.
5 Press the [EXECUTE] button.
The DESTINATION SONG will be highlighted, and a default name will automatically
be created.
● To Overwrite an Existing File
If you want to overwrite a file that already exists
on the USB flash memory, use the dial or the
[+] and [-] buttons to select the file, then skip
ahead to step 7.
• Once the save-in-progress message appears on the display the
operation cannot be canceled. Never turn off the power or
remove the USB flash memory during this operation.
10
A message will appear on the display
to inform you that the operation has
finished.
Press the [EXIT] button to return to the MAIN
display.
NOTE
• If an existing filename is specified the display prompts you for confirmation. Press [EXECUTE] or [+] if it is OK to overwrite the file, or [-]
to cancel.
• The amount of time it will take to perform the save operation will
depend on the condition of the USB flash memory.
6 Press the [EXECUTE] button.
A cursor will appear below the first character in
the file name.
Owner’s Manual
99
Saving and Loading Data
Loading Files from a USB Flash Memory
User files as well as Style, Song, and Music Database files residing on a USB flash memory can be loaded
into the instrument.
4 Use the dial to select the file you want
CAUTION
• If you load a User File registration memory data will be overwritten
by the newly loaded data. Save important data to a USB flash
memory before loading data that will overwrite it.
1 With the USB flash memory containing
the file you want to load connected to
the USB TO DEVICE connector, check
that the File Control icon is shown in
the MAIN display.
to load.
All user files in the USB flash memory will be
displayed first, followed by the style files, song
files and music database files.
Files must be located in the “User Files” folder
in the USB flash memory. Files located outside
of that folder will not be recognized.
5 Press the [EXECUTE] button. The dis-
play prompts you for confirmation.
You can cancel the load operation at this point
by pressing the [-] button.
6 Press the [EXECUTE] button again, or
2 Press the FILE CONTROL [MENU] button.
3 Use the CATEGORY [
r
f
] and [ ] buttons to locate the Load item.
the [+] button, and the load operation
will begin.
CAUTION
• Once the load-in-progress message appears on the display the
operation cannot be canceled. Never turn off the power or
remove the USB flash memory during this operation.
7 A message will appear on the display to
inform you that the operation has finished.
Press the [EXIT] button to return to the MAIN
display.
100
Owner’s Manual
Saving and Loading Data
Deleting Data from a USB Flash Memory
This procedure deletes User, Style, Song, and Music Database files from a USB flash memory.
1 Make sure that the USB flash memory
containing the file(s) you want to delete
has been properly connected to the
instrument’s USB TO DEVICE terminal,
and that the icon is showing in the
MAIN display.
4 Use the dial to select the file you want
to delete.
All User files in the USB flash memory will be
displayed first, followed by the style files, song
files and music database files.
Files must be located in the “User Files” folder
in the USB flash memory. Files located outside
of that folder will not be recognized.
5 Press the [EXECUTE] button. The dis2 Press the FILE CONTROL [MENU] button.
3 Use the CATEGORY [
r
f
] and [ ] buttons to locate the USB Delete item.
play prompts you for confirmation.
You can cancel the delete operation at this
point by pressing the [-] button.
6 Press the [EXECUTE] button again, or
the [+] button, and the delete operation
will begin.
CAUTION
• Once the delete-in-progress message appears on the display
the operation cannot be canceled. Never turn off the power or
remove the USB flash memory during this operation.
7 A message will appear on the display to
inform you that the operation has finished.
Press the [EXIT] button to return to the MAIN
display.
NOTE
• If the USB flash memory has been write-protected, an appropriate
message will appear on the display and you will not be able to execute the operation.
Owner’s Manual
101
Saving and Loading Data
Delete User Data from the Instrument
This procedure deletes the User Song as well as Style, Song, and Music Database files transferred from an
external device such as a computer. This operation does not erase the preset data.
r
f
1 Press the FILE CONTROL [MENU] button.
2 Use the CATEGORY [ ] and [ ] buttons to locate the User Delete item.
Only “User Delete” can be selected if no USB
flash memory is connected to the instrument.
All user songs will be displayed first, followed
by the song, style and music database files.
4 Press the [EXECUTE] button. The display prompts you for confirmation.
You can cancel the delete operation at this
point by pressing the [-] button.
5 Press the [EXECUTE] button again, or
the [+] button, and the delete operation
will begin.
CAUTION
• Once the delete-in-progress message appears on the display
the operation cannot be canceled.
6 A message will appear on the display to
inform you that the operation has finished.
Press the [EXIT] button to return to the MAIN
display.
3 Use the dial to select the file you want
to delete.
Playing Files Located on a USB Flash Memory
IMPORTANT
• In order to play data copied to a USB flash memory from a computer or other device, the data must be stored either in the USB
flash memory’s root directory or a first-level/second-level folder in
the root directory.
Data stored in third-level-folders created inside a second-level
folder cannot be selected and played by this instrument.
1 Make sure that the USB flash memory
containing the file you want to play has
been properly connected to the instrument’s USB TO DEVICE terminal, and
that the icon is showing in the MAIN
display.
USB flash memory (Root)
Song
File
Song
File
Can be selected/played.
2 Press the [SONG], [STYLE] or [MUSIC
DATABASE] button. Files of the corresponding type will be displayed.
Song
File
Song
File
3 Use the dial to select the file you want
Cannot be selected/played.
to play.
4 Play the selected file in the same way
the internal files are played: press the
[START/STOP] button, or play on the
keyboard.
102
Owner’s Manual
Connections
Connectors
q
w
USB
TO HOST
q USB TO DEVICE terminal
This terminal allows connection to USB storage devices. Refer to “Precautions when using
the USB TO DEVICE terminal” on page 96.
w USB TO HOST terminal
This terminal allows direct connection to a personal computer. Refer to “Connecting a Personal Computer” on page 104 for more
information.
Owner’s Manual
103
Connections
Connecting a Personal Computer
The following functions become available when this instrument is connected to a computer.
● Performance data can be transferred between the instrument and the computer (page 105).
● Files can be transferred between the instrument and the computer (page 107).
The connection procedure is as follows:
1 Install the USB-MIDI driver on your com-
puter.
The USB-MIDI driver is included on the CD-ROM.
Installation of the USB-MIDI driver is described on
the “Accessory CD-ROM Installation Guide”.
2 Connect the USB terminal of the computer to
the USB terminal on the instrument using an
AB type USB cable (USB cable sold separately).
The supplied CD-ROM also includes a Musicsoft
Downloader application that allows you to transfer
song files from your computer to the instrument’s
flash memory. For instructions about how to install
Musicsoft Downloader (refer to included “Accessory CD-ROM Installation Guide”) and how to
transfer song files (refer to page 107).
USB TO HOST
terminal
Computer
USB
TO HOST
USB cable
104
Owner’s Manual
■ Precautions when using the USB TO
HOST terminal
When connecting the computer to the USB TO
HOST terminal, make sure to observe the following points. Failing to do so risks freezing the computer and corrupting or losing the data. If the
computer or the instrument freezes, restart the
application software or the computer OS, or turn
the power to the instrument off then on again.
CAUTION
• Use an AB type USB cable of less than about 3 meters.
• Before connecting the computer to the USB TO HOST terminal,
exit from any power-saving mode of the computer (such as suspended, sleep, standby).
• Before turning on the power to the instrument, connect the computer to the USB TO HOST terminal.
• Execute the following before turning the power to the instrument
on/off or plugging/unplugging the USB cable to/from the [USB TO
HOST] terminal.
• Quit any open application software on the computer.
• Make sure that data is not being transmitted from the instrument. (Data is transmitted whenever you play on the keyboard
or play back a song, etc.)
• While the computer is connected to the instrument, you should
wait for six seconds or more between these operations:
(1) when turning the power of the instrument off then on again, or
(2) when alternately connecting/disconnecting the USB cable.
Connections
Transferring Performance Data to and from a Computer
By connecting the instrument to a computer, the instrument’s performance data can be used on the computer, and performance data from the computer can be played on the instrument.
● When the instrument is connected with computer, it transmits/receives performance
data.
USB TO HOST terminal
USB terminal
Computer
USB
TO HOST
USB cable
■MIDI settings ● ● ● ● ● ● ● ● ● ● ● ● ● ● ● ● ● ● ● ● ● ● ● ● ● ● ● ● ● ● ● ● ● ● ● ● ● ● ● ● ● ● ● ● ● ● ● ●
These settings pertain to performance data transmission and reception.
Item
Range/Settings
Description
Local
ON/OFF
Local control determines whether or not notes played on the instrument are sounded by its internal
tone generator system: the internal tone generator is active when local control is on, and inactive when
local control is off.
External Clock
ON/OFF
These settings determine whether the instrument is synchronized to its own internal clock (OFF), or to
a clock signal from an external device (ON).
Keyboard Out
ON/OFF
These settings determine whether keyboard performance data of the instrument is transmitted (ON) or
not (OFF).
Style Out
ON/OFF
These settings determine whether Style data is transmitted (ON) or not (OFF) during Style playback.
Song Out
ON/OFF
These settings determine whether User Song is transmitted (ON) or not (OFF) during Song playback.
NOTE
1 Press the [FUNCTION] button.
• If you can’t get any sound out of the instrument, this most likely may be
caused by Local Control being set to off.
NOTE
• If External Clock is ON and no clock signal is being received from an
external device, the song, style, and metronome functions will not start.
2 Use the CATEGORY [
r
f
] and [ ] buttons
to select the item you want to change its
value.
3 Use the dial to select ON or OFF.
Owner’s Manual
105
Connections
■PC Mode
● ● ● ● ● ● ● ● ● ● ● ● ● ● ● ● ● ● ●
A number of MIDI settings need to be made when
you want to transfer performance data between the
computer and the instrument. The PC Mode item
can conveniently make multiple settings for you in
one operation. Three settings are available: PC1,
PC2, and OFF.
This setting is not necessary when transferring
song or backup files between the computer and the
instrument.
1 Press and hold the [DEMO] button for
longer than a second so that the PC
Mode item appears.
Hold for longer
than a second.
* Set the PC mode to PC2 when using Digital Music Notebook.
PC1
PC2*
Local
OFF
OFF
OFF
ON
External Clock
ON
OFF
OFF
Song Out
OFF
OFF
OFF
Style Out
OFF
OFF
OFF
Keyboard Out
OFF
ON
ON
2 Use the dial to select PC1, PC2, or OFF.
NOTE
• When the PC2 setting is selected the instrument’s style, song, demo,
song recording, and lesson features cannot be used.
NOTE
r
f
• You can also access the PC Mode item by first pressing the [FUNCTION] button and then using the CATEGORY [ ] and [ ] buttons to
locate it (page 92).
Remote Control of MIDI Devices
You can also use this instrument as a remote control device for the Digital Music Notebook application on
your computer (via the USB connection)—controlling playback, stop and transport functions from the
panel.
■Remote control keys ● ● ● ● ● ● ● ● ● ●
To use the remote control functions, simultaneously hold down the lowest two keys on the keyboard (A-1 and A#-1) and press the appropriate
key (shown below).
A#-1
A-1
C7: Fast forward
B6: Start
A6: Stop
G6: Rewind
F6: Top (move to the beginning of the song)
E6: Metronome ON/OFF
106
Owner’s Manual
NOTE
• Remote control of MIDI devices will function independently of the PC2
mode.
Connections
Initial Send
This function lets you send the panel setup data to a computer. Before you record performance data to a
sequencer application running on your computer, it is a good idea to first send and record the panel setup
data before the actual performance data.
1 Press the [FUNCTION] button.
2 Use the CATEGORY [
3 Press [+/YES] to send, or press [-/NO]
to cancel.
r
f
] and [ ] buttons
to select the Initial Send item.
Transferring Data Between the Computer and Instrument
Songs, styles, or Music Database files residing on a
computer or the supplied CD-ROM, can be transferred to the instrument. Backup file can also be
transferred from the instrument to the computer
and back.
In order to transfer files between your computer
and the instrument you will need to install the
Musicsoft Downloader application and the USBMIDI Driver included on the Accessory CD-ROM
on your computer. Refer to the included “Accessory CD-ROM Installation Guide” for installation
details.
● Data that can be transferred from a computer
to this instrument.
• Data Capacity: 1895KB
502 files total for the Song, Style and Music
Database.
• Data Format
Song: .mid SMF format 0/1
Style: .sty
Music Database: .mfd
Backup File: 09DP88.BUP
● What is SMF (Standard MIDI File)?
The SMF (Standard MIDI File) format is one
of the most common and widely compatible
sequence formats used for storing sequence
data. There are two variations: Format 0 and
Format 1. A large number of MIDI devices are
compatible with SMF Format 0, and most
commercially available MIDI sequence data is
provided in SMF Format 0.
■With the Musicsoft
Downloader You Can.
● ● ● ● ● ● ● ● ●
● Transfer files from the computer to the instrument’s flash memory.
⇒ refer to the procedure described on
page 108.
The procedure for transferring songs included
on the Accessory CD-ROM from your computer to the instrument is given as an example.
● Backup file can be transferred from the instrument to a computer and back.
⇒ refer to the procedure described on
page 109.
Use the Musicsoft Downloader application with
Internet Explorer 5.5 or higher.
Owner’s Manual
107
Connections
■Use Musicsoft Downloader
To Transfer Songs From the
Accessory CD-ROM To the
Instrument’s flash memory ● ● ● ● ●
NOTE
• If a song or style is being played, stop playback before proceeding.
1 Install the Musicsoft Downloader and
USB-MIDI driver to your computer, then
connect the computer and the instrument (refer to “Accessory CD-ROM
Installation Guide”).
At this point you can select a Style or Music Database file on the computer or CD-ROM and transfer
it to the instrument in the same way as a song file.
6 A copy of the selected MIDI song file
will appear in the “List of files stored
temporarily” at the top of the window.
The memory medium will also be displayed at
the bottom of the window to specify the destination for the transfer. Click “Instrument”, and
then “Flash memory”.
2 Insert the included CD-ROM into the
CD-ROM drive.
A start window will appear automatically.
3 Double-click the Musicsoft Downloader
shortcut icon that is created on the
desktop.
This will launch the Musicsoft Downloader
application and the main window will appear.
NOTE
• The instrument cannot be operated while the Musicsoft Downloader
is running.
4 Click the “Add File” button and the Add
File window will appear.
5 Click the button to the right of “Look in”
and select the CD-ROM drive from the
drop-down menu that appears. Doubleclick the “SampleData” Folder on the
window. Select the file from the “SongData” Folder you want to transfer to the
instrument, and click “Open”.
q Click the CD-ROM drive
q Click the “Electronic Musical Instruments”,
and then “Flash Memory”
7 After selecting the file in the “List of
files stored temporarily”, click the
downward [Move] button and a confirmation message will appear. Click [OK]
and the song will be transferred from
the “List of files stored temporarily” to
the instrument’s memory.
NOTE
• Files transferred to a USB flash memory root directory using the
Musicsoft Downloader—any location outside the USER FILES folder
on the USB flash memory device—cannot be deleted via the instrument’s file control display. Use the Musicsoft Downloader delete button to delete such files.
w Double-click “SampleData” Folder ➝ “SongData” Folder, and click a song file.
108
Owner’s Manual
e Click “Open”
Connections
8 Close the window to end the Musicsoft
Downloader.
NOTE
• End the Musicsoft Downloader to playback the file transferred from
your computer.
9 To playback a song stored in flash
memory, press the [SONG] button.
Use the dial to select the song you want
to play, then press the [START/STOP]
button to start playback.
CAUTION
• Do not unplug the USB cable during a data transfer. Not only
will the data not be transferred and saved, but operation of the
memory media may become unstable and its contents may disappear completely when the power is turned on or off.
■Transfer a Backup file from
the instrument to a computer ● ● ●
You can use the Musicsoft Downloader to transfer
“Backup” files containing Registration Memory and
FUNCTION settings (page 65) to a computer. If you
click “Electronic Musical Instruments” in the
Musicsoft Downloader display, and then “System
Drive”, a file named “09DP88.BUP” will appear in
the lower right corner of the Musicsoft Downloader
display. This is the backup file. For details about
how to transfer backup files using the Musicsoft
Downloader application, refer to the Online help
“Transferring Data Between the Computer and
Instrument (for unprotected data)” in the application.
NOTE
• Preset Song data cannot be transmitted from the instrument.
CAUTION
• Store data can be lost due to equipment malfunction or
improper operation. For safety we recommend that you keep a
copy of all important data stored on your computer.
CAUTION
• Do not rename the backup file on the computer. If you do so it will
not be recognized when transferred to the instrument.
r
f
● To Use transferred Songs For Lessons...
In order to use songs (only SMF format 0 and 1)
transferred from a computer for lessons it is
necessary to specify which channels are to be
played back as the right-hand and left-hand parts.
1 Press the [SONG] button and select the song
(036–) residing in flash memory for which you
want to set the guide track.
2 Press the [FUNCTION] button.
3 Use the CATEGORY [ ] and [ ] buttons to
select the R-Part or L-Part item.
4 Use the dial to select the channel you want to
play back as the specified right- or left-hand part.
CAUTION
• The backup file is transmitted/received as a single file. As a result,
all registration memory data will be overwritten every time you
transmit or receive. Keep this in mind when transferring data.
We recommend that you select channel 1 for the
right-hand part and channel 2 for the left-hand part.
Owner’s Manual
109
Appendix
Troubleshooting
■ For the Instrument
Problem
Possible Cause and Solution
When the instrument is turned on or off, a popping
sound is temporarily produced.
This is normal and indicates that the instrument is receiving electrical
power.
When using a mobile phone, noise is produced.
Using a mobile phone in close proximity to the instrument may produce interference. To prevent this, turn off the mobile phone or use it
further away from the instrument.
Check that nothing is connected to the [PHONES] jack on the bottom. When a set of headphones is plugged into this jack, no sound is
output.
There is no sound even when the keyboard is
played or when a song or style is being played
back.
Check the Local Control on/off. (See page 105.)
Is the FILE CONTROL display showing? The instrument’s keyboard,
etc., will not produce any sound while the FILE CONTROL display is
showing. Press the [EXIT] button to return to the MAIN display.
Playing keys in the right hand area of the keyboard
does not produce any sound.
When using the Dictionary function (page 87), the keys in the right
hand area are used only for entering the chord root and type.
The style or song does not play back when the
[START/STOP] button is pressed.
Is External Clock set to ON? Make sure External Clock is set to OFF;
refer to “External Clock” on page 105.
Make sure that the Style Volume (page 93) is set to an appropriate
level.
The style does not sound properly.
Is the split point set at an appropriate key for the chords you are playing? Set the split point at an appropriate key (page 82).
Is the “ACMP” indicator showing in the display? If it is not showing
press the [ACMP ON/OFF] button so that it does show.
No rhythm accompaniment plays when the
[START/STOP] button is pressed after selecting
style number 131 or a style between 143–160
(Pianist).
This is not a malfunction. Style number 131 and style numbers 143–
160 (Pianist) have no rhythm parts, so no rhythm will play. The other
parts will begin playing when you play a chord in the accompaniment
range of the keyboard if style playback is turned on.
Not all of the voices seem to sound, or the sound
seems to be cut off.
The instrument is polyphonic up to a maximum of 64 notes. If the
Dual voice or Split voice is being used and a style or song is playing
back at the same time, some notes/sounds may be omitted (or “stolen”) from the accompaniment or song.
The damper pedal has no effect even when
damper pedal is pressed.
The pedal cord may not be properly connected. Make sure securely
insert the pedal cord into the [PEDAL] jack (page 116).
The sound of the voice changes from note to note.
This is normal. The AWM tone generation method uses multiple
recordings (samples) of an instrument across the range of the keyboard; thus, the actual sound of the voice may be slightly different
from note to note.
The Demo display is shown in Japanese, and/or
there are Japanese characters in the display messages.
Make sure the Language setting in the FUNCTION display is set to
English. (See page 16)
The appropriate display does not appear when the
[SONG], [EASY SONG ARRANGER], [STYLE], or
[VOICE] button is pressed.
Is another display showing? Try pressing the [EXIT] button to return
to the MAIN display, and then pressing one of the mentioned buttons.
110
Owner’s Manual
Troubleshooting
Problem
Possible Cause and Solution
The wrong notes sound when the keyboard is
played.
Perhaps the performance assistant technology is turned on.
Press the [PERFORMANCE ASSISTANT] button to turn it off.
The ACMP indicator does not appear when the
[ACMP ON/OFF] button is pressed.
Is the [STYLE] button lit? Always press the [STYLE] button first when
you are going to use any style-related function.
There is no harmony sound.
The harmony effects (01–26) behave differently according to their
type. Types 01–10, 13 function when style playback is on, chords are
played in the accompaniment range of the keyboard, and a melody is
played in the right-hand range. Types 15–26 will function whether
style playback is on or off. For types 23–26 you need to play two
notes at the same time.
The “OverCurrent” message is shown in the upper
area of the MAIN display and the USB device
does not respond.
Communication with the USB device has been shut down because of
the overcurrent to the USB device. Disconnect the device from the
USB TO DEVICE terminal, then turn on the power of the instrument.
Owner’s Manual
111
Messages
LCD Message
Comment
Access error!
Indicates the failure in reading or writing from/to the media or the flash
memory.
All Memory Clearing...
Displayed while erasing all data in the flash memory. Never turn the power
off during data transmission.
Are you sure?
Confirms whether Song Clear or Track Clear is executed or not.
Backup Clearing...
Displayed while clearing the back-up data in the flash memory.
Cancel
Displayed when the transmission of Initial Send is cancelled.
Can’t clear TrackA.
Displayed when a track clear error occurs.
Clearing...
Displayed while executing Song Clear or Track Clear of the user songs.
Com Mode
Displayed when the Musicsoft Downloader is started on the PC connected
to the keyboard. This will not be displayed while the instrument is played
back.
Completed
Indicates the specified job completion such as data saving and transmission.
Create Directory
Displayed while creating a folder in the Musicsoft Downloader application.
Data Error!
Displayed when the user song contains illegal data.
Delete File
Displayed while deleting a file in the Musicsoft Downloader.
Delete OK ?
Confirms whether the Delete job is executed or not.
Delete Directory
Displayed while deleting a folder in the Musicsoft Downloader.
Deleting...
Displayed while the delete function is engaged.
End
Displayed when the transmission of Initial Send has been completed.
Error!
Displayed when writing has failed.
Exit.
Displayed when the record standby mode is exited because an inappropriate style has been selected during style record standby.
“File information area is not large enough.”
Indicates that saving data in the media cannot be executed since the total
number of files have become too many.
File is not found.
Indicates there is no file.
“File too large. Loading is impossible.”
Indicates that loading data cannot be executed since the file data is too
large.
Flash Clearing...
Displayed while clearing the song or style data transmitted to the internal
flash memory.
Format OK ? [EXECUTE]
Confirms whether formatting the media is executed or not.
Formatting...
Displayed while formatting.
Load OK ?
Confirms whether loading is executed or not.
Loading...
Displayed while loading data.
Media is not inserted.
Displayed when accessing the media while it is not inserted.
Media capacity is full.
Displayed when saving data cannot be executed since the media memory
becomes full.
Memory Full
Displayed when the internal memory becomes full during song recording.
“MIDI receive buffer overflow.”
Displayed when too much MIDI data was received at one time and failed to
proceed.
Move File
Displayed while moving a file in the Musicsoft Downloader.
“Now Writing...
(Don’t turn off the power now, otherwise
the data may be damaged.)”
Displayed while writing data in the memory. Never turn the power off while
writing. Doing so may result in data loss.
112
Owner’s Manual
Messages
LCD Message
Comment
OverCurrent
Communication with the USB device has been shut down because of the
overcurrent to the USB device. Disconnect the device from the USB TO
DEVICE terminal, then turn on the power of the instrument.
Overwrite ?
Confirms whether overwriting is executed or not.
Please Wait...
Displayed when executing the jobs that take some time, such as displaying
scores and lyrics, or stopping recording.
Rename File
Displayed while rewriting the file name in the Musicsoft Downloader.
Save OK ?
Confirms whether saving is executed or not.
Saved data is not found.
Displayed when the data to be saved doesn’t exist.
Saving...
Displayed while saving data in the memory. Never turn the power off while
saving. Doing so may result in data loss.
Send OK?
Confirms whether the data transmission is executed or not.
Sending...
Displayed while transmitting data.
“Since the media is in use now, this
function is not available.”
Indicates that the file control function is currently unavailable since the
media is being accessed.
Style data is too large to load.
Indicates that style data cannot be loaded since the style data is too large.
Sure ? [YES/NO]
Reconfirms whether each operation is executed or not.
“The limit of the media has been reached.”
Indicates that saving data cannot be executed since the folder/directory
structure has become too complicated.
The media is not formatted.
Indicates the inserted media has not been formatted.
“The media is write-protected.”
Indicates that the inserted media cannot be written since it is write-protected. Set to the write-protect switch to the “overwrite” position before use.
“The song data is too large to be
converted to notation.”
Indicates that the score cannot be displayed since the song data is too
large.
There are too many files.
Indicates that saving data cannot be executed since the total number of files
exceeds the capacity.
“This function is not available now.”
Indicates the designated function is not available since the instrument is
executing another job.
[nnn] “file name”
Indicates the file name of the currently transmitting. “nnn” indicates the
receiving block.
NOTE
• Not all the messages are listed in the table: the messages necessary to be explained only.
Owner’s Manual
113
Keyboard Stand Assembly
CAUTION
• Be careful not to confuse parts, and be sure to install all parts in the correct direction. Please assemble in accordance with the
sequence given below.
• Assembly should be carried out by at least two persons.
• Assemble the stand on a hard and flat floor with ample space.
• Be sure to use the included screws only, and insert screws of the correct size in the correct hole locations. Do not use any other
screws. Use of incorrect screws can cause damage or malfunction of the product.
• Be sure to tighten up all screws upon completing assembly of each unit.
• To disassemble, reverse the assembly sequence given below.
Have a Phillips-head (+) screwdriver ready
Remove all parts from the package and make sure you have all of the items.
6 x 20 mm long screws (x 4)
A
6 x 16 mm short screws (x 4)
4 x 12 mm thin screws (x 2)
Foamed styrol pads
4 x 20 mm tapping screws (x 4)
B
4 x 10 mm thin screws (x 2)
C
AC power cord (x 1)
Bundled pedal cord inside
Headphone hanger (x 1)
D
E
Cord holders (x 2)
Adjuster (x 1)
114
Owner’s Manual
Keyboard Stand Assembly
1
3
Attach the adjuster to C.
1-1 Align the tip of the adjuster with the screw
hole, then screw in the adjuster all the way
until it stops turning.
You will adjust the height of the adjuster in
Step 8.
1-2 Untie and straighten out the bundled cord.
Attach B.
3-1 Place the lower side of B on each foot of D and
E, then attach the upper side to D and E.
3-2 Attach the top of B to D and E by finger-tight-
ening the thin screws (4 x 12mm).
3-3 While pushing the lower outside part of D and
E towards each other, secure the bottom of B
at each end using two tapping screws (4 x
20mm).
Don’t discard the vinyl tie, you’ll need it later
in Step 7.
3-4 Insert the other two tapping screws (4 x
20mm) into the other two screw holes to
secure B.
1-1
1-2
3-5 While pushing D and E towards each other,
securely tighten the screws that were fingertightened in Step 3-2.
C
2
3-2
3-5
Attach (finger-tighten) D and E to C.
2-1 Align D and E with each end of C.
E
2-2 Attach D and E to C by finger-tightening the
long screws (6 x 20mm).
D
B
E
3-3
2-2
3-4
D
C
4
Secure C.
4-1 Securely tighten the screws on C that were
attached in Step 2-2.
D
B
E
C
4-1
Owner’s Manual
115
Keyboard Stand Assembly
5
7
Mount A.
5-1 Place your hands at least 15 cm from either
end of A when positioning it.
Connect the pedal cord and the power
cord.
7-1 Insert the pedal cord plug to the pedal connec-
tor from the rear.
7-2 Attach the cord holders to B, then clip the cord
into the holders.
7-3 Use a vinyl tie to bundle the pedal cord.
A
7-4 For models that feature a voltage selector: Set
the voltage selector to an appropriate voltage.
E
D
At least 15 cm
6
Secure A.
6-1 Adjust the position of A so that the left and
right ends of A will project beyond D and E
equally when seen from the front.
6-2 Secure A by tightening the short screws (6 x
16mm) from the front.
Voltage Selector
Before connecting the AC power cord, check the
setting of the voltage selector which is provided in
some areas. To set the selector for 110V, 127V,
220V or 240V main voltages, use a “minus” screwdriver to rotate the selector dial so that the correct
voltage for your region appears next to the pointer
on the panel. The voltage selector is set at 240V
when the unit is initially shipped. After the proper
voltage has been selected, connect the AC power
cord to the AC INLET and an AC wall outlet. A
plug adaptor may be also provided in some areas to
match the pin configuration of the AC wall outlets
in your area.
WARNING
• An improper voltage setting can cause serious damage to
this instrument or result in improper operation.
7-5 Insert the AC power cord plug into the AC
6-1
A
INLET.
Projection of A
L
DA
PE
7-1
A
6-2
7-3
7-5
116
Owner’s Manual
7-4
7-2
Keyboard Stand Assembly
8
Set the adjuster.
■ After completing the assembly, please
check the following.
8-1 Rotate the adjuster until it comes in firm con-
tact with the floor surface.
• Are there any parts left over?
➔ Review the assembly procedure and correct any errors.
• Is this instrument clear of doors and other movable
fixtures?
➔ Move the instrument to an appropriate location.
• Does this instrument make a rattling noise when you
shake it?
➔ Tighten all screws.
• Does the pedal box rattle or give way when you step
on the pedals?
➔ Turn the adjuster so that it is set firmly against the floor.
9
Attach the headphone hanger.
9-1 Install the headphone hanger using included
two screws (4 x 10mm) as shown in the figure.
• Are the pedal and power cords inserted securely into
the sockets?
➔ Check the connection.
• If the main unit creaks or is otherwise unsteady when
you play on the keyboard, refer to the assembly diagrams and retighten all screws.
CAUTION
• When moving the instrument after assembly, always hold the
bottom of the main unit.
Do not hold the key cover or top portion. Improper handling
can result in damage to the instrument or personal injury.
Do not hold here.
■ Remove the protective tapes
Open the key cover and remove the protective tape
on each side of the keyboard.
Hold here.
Owner’s Manual
117
Index
Panel controls and terminals
118
Owner’s Manual
r
f
+/– .................................................. 15, 67
........................................................ 68
0–9 .................................................. 15, 67
A-B REPEAT ................................. 15, 88
ACMP ON/OFF ............................. 15, 27
CATEGORY [ ] and [ ] ........... 15, 67
DEMO ............................................ 15, 32
Dial ................................................. 15, 67
DSP ON/OFF ................................. 15, 73
DUAL ON/OFF ............................. 15, 18
EASY SONG ARRANGER .......... 15, 58
EXECUTE ...................................... 15, 97
EXIT ............................................... 15, 68
FF ................................................... 15, 34
FILE CONTROL ........................... 15, 95
FUNCTION .................................... 15, 92
HARMONY ON/OFF .................... 15, 70
INTRO/ENDING/rit. ...................... 15, 79
LCD CONTRAST ................................ 69
LESSON L, R ................................. 15, 51
LESSON START ........................... 15, 50
LYRICS .......................................... 15, 38
MAIN/AUTO FILL ........................ 15, 79
MASTER VOLUME ........................... 15
MEMORY/BANK, 1, 2 ................. 15, 90
MENU ............................................ 15, 95
METRONOME ON/OFF ............... 15, 23
MUSIC DATABASE ..................... 15, 57
P.A.T. ON/OFF ........................ 15, 40, 48
PAUSE ........................................... 15, 34
PC ....................................................... 106
PEDAL ................................................. 15
PHONES .............................................. 15
PIANO RESET .............................. 15, 20
REC, 1–5, A ................................... 15, 60
REGIST. MEMORY ...................... 15, 90
REPEAT & LEARN ...................... 15, 56
REW ............................................... 15, 34
SCORE ........................................... 15, 37
SONG ............................................. 15, 33
SONG MEMORY .......................... 15, 61
SPLIT ON/OFF .............................. 15, 19
STANDBY/ON .................................... 15
START/STOP ................................ 15, 67
STYLE ............................... 15, 26–30, 79
SYNC START ......................... 15, 27, 80
SYNC STOP .................................. 15, 81
TEMPO/TAP ...................... 15, 23, 34, 75
USB TO DEVICE ........................ 15, 103
USB TO HOST ............................ 15, 104
VOICE ............................................ 15, 17
Alphabetical order
A
E
A-B Repeat ...........................................88
Accessories .............................................7
ACMP ...................................................27
Auto Accompaniment Range ................27
Auto-Accompaniment ..............27, 29, 31
Easy Chords ......................................... 31
Easy Song Arranger ............................. 58
Effect Type List ................................. 138
External Clock .............................. 94, 105
External Song ....................................... 36
B
F
Backup ..........................................65, 109
Bell ........................................................25
File Control .......................................... 95
File Name ............................................. 98
Flash Memory ...................................... 36
Format (File Control) ........................... 97
Function ................................... 68, 92–94
Function Display .................................. 68
C
CD-ROM ............................................144
Chord ..................................29–31, 84–85
Chord Dictionary ..................................87
Chord Fingering ..............................31, 86
Chord root .............................................87
Chord type (Chord Dictionary) .............87
Chord type (performance
assistant technology) ...................39–40
Chord/Free type (performance
assistant technology) ...................39, 42
Chord/Melody type (performance
assistant technology) ...................39, 46
Chorus ...................................................72
Chorus Type .......................................139
Computer ............................104–105, 107
G
Grade .................................................... 53
H
Harmony ............................................... 70
Harmony Type ................................... 138
Harmony Volume ................................. 94
Headphones .......................................... 12
I
Initial Send ......................................... 107
Initialization ......................................... 65
D
Default Setting ......................................92
Delete (Song Track) ..............................64
Delete (USB flash memory) ...............101
Delete (User Data) ..............................102
Delete (User Song) ...............................63
Demo ....................................................32
Demo Cancel ........................................94
Display ............................................68–69
Double-Staff Score ...............................37
Drum Kit ...............................................22
Drum Kit List ......................................132
DSP .......................................................73
DSP Type ......................................73, 140
Dual Chorus Level ................................93
Dual Octave ..........................................93
Dual Pan ...............................................93
Dual Reverb Level ................................93
Dual Voice ............................................18
Dual Volume .........................................93
K
Keyboard Out ............................... 94, 105
Keyboard Stand Assembly ................. 114
L
Language .............................................. 16
Lesson .................................................. 50
Load ................................................... 100
Local ............................................. 94, 105
L-Part ........................................... 94, 109
Lyric ..................................................... 38
M
Main Chorus Level ............................... 93
MAIN Display ...................................... 68
Main Octave ......................................... 93
Main Pan .............................................. 93
Main Reverb Level ............................... 93
Main Voice ........................................... 17
Main Volume ....................................... 93
Measure ................................................ 69
Melody ........................................... 37, 49
Index
Melody Score ....................................... 37
Melody type (performance
assistant technology) .................. 39, 44
Melody Voice ................................. 59, 89
Messages ............................................ 112
Metronome ........................................... 23
MIDI ................................................... 105
MIDI Data Format .................................. 7
MIDI Implementation Chart ................... 7
Music Database .................................... 57
Music Rest ............................................ 10
Mute ..................................................... 89
N
notation ................................................. 69
O
One Touch Setting ................................ 76
P
P.A.T. Type .................................... 39, 94
PC Mode ............................................. 106
Pedal ..................................................... 21
performance assistant technology ........ 39
Preset Song ............................... 32, 35–36
Q
Quantize ............................................... 94
R
Recording ............................................. 60
Registration Memory ........................... 90
Remote control ................................... 106
Repeat ............................................. 56, 88
Reverb .................................................. 71
Reverb Type ....................................... 138
R-Part ........................................... 94, 109
Specifications ......................................144
Split Chorus Level ................................93
Split Octave ..........................................93
Split Pan ................................................93
Split Point .......................................19, 82
Split Reverb Level ................................93
Split Voice ............................................19
Split Volume .........................................93
Standard Chords ...................................31
Style ..........................................26, 29, 79
Style File .............................................100
Style List .............................................134
Style Out .......................................94, 105
Style Volume ........................................83
Sustain ............................................74, 93
Synchro Start ..................................27, 80
Synchro Stop .........................................81
T
Tempo .............................................34, 75
TimeSignature
(Denominator, Numerator) ...............24
Touch Response ....................................75
Touch Sensitivity ..................................75
Track .....................................................60
Track Clear ...........................................64
Transfer .......................................105, 107
Transpose ..............................................78
Troubleshooting ..................................110
Tuning ...................................................78
U
USB ....................................................103
USB-MIDI driver .................................11
User file ........................................98, 100
User File Save .......................................98
User Song .......................................36, 60
V
S
Save (User File) .................................... 98
Save (User Song) .................................. 99
Score ....................................... 37, 49, 120
Single-Staff Score ................................ 37
SMF (Standard MIDI File) ................. 107
Song ...................................................... 33
Song Clear ............................................ 63
Song List .............................................. 35
Song Memory ................................. 60–61
Song Out ....................................... 94, 105
Song Volume ........................................ 88
Sound Type .................................... 77, 93
Voice .....................................................17
Voice List ...........................................126
X
XF .....................................................6, 38
XGlite .....................................................6
Owner’s Manual
119
Scores
Scores / Noten / Partitions / Partituras
This demo is an example of how the Easy Song Arranger can be used to change styles throughout a piece.
Song No.
9
q =123
(Function Demo for Easy Song Arranger)
Hallelujah Chorus
120
Owner’s Manual / Bedienungsanleitung / Mode d’emploi / Manual de instrucciones
Scores / Noten / Partitions / Partituras
Owner’s Manual / Bedienungsanleitung / Mode d’emploi / Manual de instrucciones
121
Scores / Noten / Partitions / Partituras
This score is provided with the intent that the pitch will be corrected by the performance assistant technology feature. If you play the “Play These Notes” part using the performance assistant technology feature, the
part will be corrected and played so that it matches the backing part.
Song No.
10
q =61
(Function Demo for performance assistant technology)
Ave Maria
P.A.T.
Type =CHORD
Your Turn.
Repeatedly Play the Same Key.
122
Owner’s Manual / Bedienungsanleitung / Mode d’emploi / Manual de instrucciones
Scores / Noten / Partitions / Partituras
Owner’s Manual / Bedienungsanleitung / Mode d’emploi / Manual de instrucciones
123
Scores / Noten / Partitions / Partituras
This score is provided with the intent that the pitch will be corrected by the performance assistant technology feature. If you play the “Play These Notes” part using the performance assistant technology feature, the
part will be corrected and played so that it matches the backing part.
Song No.
11
q =108
(Function Demo for performance assistant technology)
Nocturne op.9-2
P.A.T.
Type =CHORD/FREE
124
Owner’s Manual / Bedienungsanleitung / Mode d’emploi / Manual de instrucciones
Scores / Noten / Partitions / Partituras
Owner’s Manual / Bedienungsanleitung / Mode d’emploi / Manual de instrucciones
125
Voice List
Voice List / Voice-Liste / Liste des voix / Lista de voces
■ Maximum Polyphony ● ● ● ● ● ● ● ● ● ● ● ● ● ● ● ● ● ●
The instrument has 64-note maximum polyphony. This means
that it can play a maximum of up to 64 notes at once, regardless of what functions are used. Auto accompaniment uses a
number of the available notes, so when auto accompaniment
is used the total number of available notes for playing on the
keyboard is correspondingly reduced. The same applies to the
Split Voice and Song functions. If the maximum polyphony is
exceeded, earlier played notes will be cut off and the most
recent notes have priority (last note priority).
■ Maximale Polyphonie ● ● ● ● ● ● ● ● ● ● ● ● ● ● ● ● ●
Das Instrument verfügt über eine maximale Polyphonie von
64 Noten. Dies bedeutet, daß das Instrument unabhängig von
den aktivierten Funktionen maximal 64 Noten gleichzeitig
spielen kann. Eine bestimmte Anzahl der verfügbaren Noten
wird von der automatischen Begleitung belegt; bei deren Einsatz verringert sich somit die Anzahl der für das Spiel auf der
Klaviatur verfügbaren Noten entsprechend. Das Gleiche gilt
für Split Voices und Song-Funktion. Wenn die maximale
Polyphonie überschritten wird, werden die am frühesten
gespielten Noten ausgeschaltet und die zuletzt gespielten
Noten haben Vorrang (Last Note Priority).
■ Polyphonie maximale ● ● ● ● ● ● ● ● ● ● ● ● ● ● ● ● ●
Le YDP-V240 dispose d’une polyphonie maximale de 64
notes. Cela signifie que l’instrument peut reproduire un nombre maximal de 64 voix à la fois, indépendamment des fonctions utilisées. L’accompagnement automatique fait appel à un
certain nombre de notes disponibles. Il s’ensuit que lorsque
l’accompagnement automatique est utilisé, le nombre total de
notes disponibles pour l’interprétation au clavier est réduit en
conséquence. Cela s’applique aussi aux fonctions Split Voice
(Voix partagées) et Song (Morceau). Lorsque la polyphonie
maximale est dépassée, les notes jouées en premier ne produisent aucun son ; seules les notes interprétées en dernier sont
audibles (priorité à la dernière note).
■ Polifonía máxima ● ● ● ● ● ● ● ● ● ● ● ● ● ● ● ● ● ● ● ●
El instrumento tiene una polifonía máxima de 64 notas. Esto
significa que puede tocar un máximo de 64 notas a la vez,
independientemente de las funciones que se usen. El acompañamiento automático utiliza una parte de las notas disponibles, de forma que cuando éste se utiliza el número de notas
disponibles se reduce proporcionalmente. Lo mismo puede
aplicarse a las funciones Split Voice (Voz de división) y Song
(Canción). Si se excede la polifonía máxima, las notas tocadas
con anterioridad se cortan y se da prioridad a las notas más
recientes (prioridad de la última nota).
126
Owner’s Manual / Bedienungsanleitung / Mode d’emploi / Manual de instrucciones
NOTE
• The Voice List includes MIDI program change numbers for
each voice. Use these program change numbers when
playing the instrument via MIDI from an external device.
• Program change numbers are often specified as numbers
“0–127.” Since this list uses a “1–128” numbering system,
in such cases it is necessary to subtract 1 from the transmitted program change numbers to select the appropriate
sound: e.g. to select No. 2 in the list, transmit program
change number 1.
• Some voices may sound continuously or have a long
decay after the notes have been released while the
damper pedal is held.
HINWEIS
• In der Voice-Liste sind für jede Voice MIDI-Programmwechselnummern enthalten. Verwenden Sie diese Programmwechselnummern, wenn Sie das Instrument über
MIDI von einem externen Gerät aus ansteuern.
• Die Programmnummern 001 bis 128 hängen direkt mit
den MIDI-Programmwechsel-Nummern 000 bis 127
zusammen. Das bedeutet: Programmnummern und Programmwechsel-Nummern unterscheiden sich mit einem
Wert von 1. Denken Sie bei diesen Überlegungen daran.
• Einige Voices klingen fortwährend, oder klingen sehr
lange aus, nachdem die Tasten losgelassen wurden, während das Dämpferpedal gedrückt ist.
NOTE
• La liste des voix comporte des numéros de changement
de programme MIDI pour chaque voix. Utilisez ces derniers pour commander le YDP-V240 à partir d’un périphérique MIDI.
• Les numéros de programme 001 à 128 correspondent aux
numéros de changement de programme MIDI
000 à 127. Cela signifie que les numéros de programme
et les numéros de changement de programme sont décalés de 1. N’oubliez pas de tenir compte de cet écart.
• Certaines voix peuvent être entendues en continu ou présenter une longue atténuation une fois que les notes ont
été relâchées et tandis que la pédale de maintien est
enfoncée.
NOTA
• La lista de voces incluye números de cambio de programa
MIDI para cada voz. Utilice estos números de cambio de
programa cuando toque el instrumento a través del MIDI
desde un dispositivo externo.
• Números de programa de 001 a 128 directamente relacionados con los números de cambio de programa MIDI de
000 a 127. Esto quiere decir que los números de programa y los números de cambio de programa difieren en
un valor de 1, elemento que se debe tener en cuenta.
• Después de soltar las notas, algunas voces podrían sonar
de forma continuada o presentar una larga disminución
mientras se mantiene pisado el pedal amortiguador.
Voice List / Voice-Liste / Liste des voix / Lista de voces
● Panel Voice List / Verzeichnis der BedienfeldVoices / Liste des voix de panneau /
Lista de voces del panel
Voice
No.
001
002
003
004
005
006
007
008
009
010
011
012
013
014
015
016
017
018
019
020
021
022
023
024
025
026
027
028
029
030
031
032
033
034
035
036
037
038
039
040
041
042
043
044
045
046
047
048
049
050
051
052
053
054
055
056
057
058
Bank Select
MIDI
Program
Voice Name
MSB LSB
Change#
(0–127) (0–127)
(1–128)
PIANO
000
122
001
Natural! Grand
000
113
001
Live! Grand Piano
000
114
001
Live! Warm Grand Piano
000
112
001
Grand Piano
000
112
002
Bright Piano
000
112
007
Harpsichord
000
112
004
Honky-tonk Piano
000
112
003
MIDI Grand Piano
000
113
003
CP 80
E.PIANO
000
114
005
Cool! Galaxy Electric Piano
000
118
005
Cool! Suitcase Electric Piano
000
119
005
Cool! Electric Piano
000
120
005
Phase Electric Piano
000
113
006
Hyper Tines
000
112
005
Funky Electric Piano
000
112
006
DX Modern Electric Piano
000
114
006
Venus Electric Piano
000
113
005
Tremolo Electric Piano
000
114
008
E.Clavichord
000
112
008
Clavi
000
113
008
WahClavi
ORGAN
000
118
019
Cool! Organ
000
117
019
Cool! Rotor Organ
000
112
017
Jazz Organ 1
000
113
017
Jazz Organ 2
000
112
019
Rock Organ
000
114
019
Purple Organ
000
112
018
Click Organ
000
116
017
Bright Organ
000
127
019
Theater Organ
000
121
020
16'+2' Organ
000
120
020
16'+4' Organ
000
113
020
Chapel Organ
000
112
020
Church Organ
000
112
021
Reed Organ
ACCORDION
000
112
022
Musette Accordion
000
113
022
Traditional Accordion
000
113
024
Bandoneon
000
113
023
Modern Harp
000
112
023
Harmonica
GUITAR
000
112
025
Classical Guitar
000
112
026
Folk Guitar
000
112
027
Jazz Guitar
000
117
028
60’s Clean Guitar
000
113
026
12Strings Guitar
000
112
028
Clean Guitar
000
113
027
Octave Guitar
000
112
029
Muted Guitar
000
112
030
Overdriven Guitar
000
112
031
Distortion Guitar
BASS
000
112
034
Finger Bass
000
112
033
Acoustic Bass
000
112
035
Pick Bass
000
112
036
Fretless Bass
000
112
037
Slap Bass
000
112
039
Synth Bass
000
113
039
Hi-Q Bass
000
113
040
Dance Bass
Voice
No.
059
060
061
062
063
064
065
066
067
068
069
070
071
072
073
074
075
076
077
078
079
080
081
082
083
084
085
086
087
088
089
090
091
092
093
094
095
096
097
098
099
100
101
102
103
104
105
106
107
108
109
110
111
112
113
114
115
116
117
Bank Select
MIDI
Program
Voice Name
MSB LSB
Change#
(0–127) (0–127)
(1–128)
STRINGS
000
116
050
Live! Orchestra
000
112
049
String Ensemble
000
112
050
Chamber Strings
000
113
050
Slow Strings
000
112
045
Tremolo Strings
000
112
051
Synth Strings
000
112
046
Pizzicato Strings
000
112
041
Violin
000
112
043
Cello
000
112
044
Contrabass
000
112
047
Harp
000
112
106
Banjo
000
112
056
Orchestra Hit
CHOIR
000
112
053
Choir
000
113
053
Vocal Ensemble
000
112
055
Air Choir
000
112
054
Vox Humana
SAXOPHONE
000
117
067
Sweet! Tenor Sax
000
113
065
Sweet! Soprano Sax
000
114
072
Sweet! Clarinet
000
118
067
Growl Sax
000
112
067
Tenor Sax
000
112
066
Alto Sax
000
112
065
Soprano Sax
000
112
068
Baritone Sax
000
114
067
Breathy Tenor Sax
000
112
072
Clarinet
000
112
069
Oboe
000
112
070
English Horn
000
112
071
Bassoon
TRUMPET
000
115
057
Sweet! Trumpet
000
117
058
Sweet! Trombone
000
114
060
Sweet! Muted Trumpet
000
112
057
Trumpet
000
112
058
Trombone
000
113
058
Trombone Section
000
112
060
Muted Trumpet
000
112
061
French Horn
000
112
059
Tuba
BRASS
000
112
062
Brass Section
000
113
062
Big Band Brass
000
113
063
80’s Brass
000
119
062
Mellow Horns
000
114
063
Techno Brass
000
112
063
Synth Brass
FLUTE
000
114
074
Sweet! Flute
000
113
076
Sweet! Pan Flute
000
112
074
Flute
000
112
073
Piccolo
000
112
076
Pan Flute
000
112
075
Recorder
000
112
080
Ocarina
SYNTH LEAD
000
112
081
Square Lead
000
112
082
Sawtooth Lead
000
115
082
Analogon
000
119
082
Fargo
000
112
099
Star Dust
000
112
086
Voice Lead
000
112
101
Brightness
Owner’s Manual / Bedienungsanleitung / Mode d’emploi / Manual de instrucciones
127
Voice List / Voice-Liste / Liste des voix / Lista de voces
Voice
No.
118
119
120
121
122
123
124
125
126
127
128
129
130
131
132
133
134
135
136
137
138
139
140
141
142
143
Bank Select
MIDI
Program
Voice Name
MSB LSB
Change#
(0–127) (0–127)
(1–128)
SYNTH PAD
000
118
089
SweetHeaven
000
112
092
Xenon Pad
000
112
095
Equinox
000
112
089
Fantasia
000
113
090
Dark Moon
000
113
101
Bell Pad
PERCUSSION
000
112
012
Vibraphone
000
112
013
Marimba
000
112
014
Xylophone
000
112
115
Steel Drums
000
112
009
Celesta
000
112
011
Music Box
000
112
015
Tubular Bells
000
112
048
Timpani
DRUM KITS
127
000
001
Standard Kit 1
127
000
002
Standard Kit 2
127
000
009
Room Kit
127
000
017
Rock Kit
127
000
025
Electronic Kit
127
000
026
Analog Kit
127
000
113
Dance Kit
127
000
033
Jazz Kit
127
000
041
Brush Kit
127
000
049
Symphony Kit
126
000
001
SFX Kit 1
126
000
002
SFX Kit 2
● XGlite Voice/XGlite Optional Voice* List / Liste
der XGlite-Voices/optionale XGlite-Voices* / Voix
XGlite/liste des voix* XGlite en option / Lista de
voces de XGlite/voces opcionales de XGlite*
Voice
No.
144
145
146
147
148
149
150
151
152
153
154
155
156
157
158
*159
160
161
162
163
164
165
166
167
168
169
170
171
172
173
174
175
176
177
178
179
180
181
182
183
184
185
186
187
188
189
190
191
192
193
194
195
196
197
198
199
200
201
202
128
Bank Select
MIDI
Program
Voice Name
MSB LSB
Change#
(0–127) (0–127)
(1–128)
XG PIANO
000
000
001
Grand Piano
000
001
001
Grand Piano KSP
000
040
001
Piano Strings
000
041
001
Dream
000
000
002
Bright Piano
000
001
002
Bright Piano KSP
000
000
003
Electric Grand Piano
000
001
003
Electric Grand Piano KSP
000
032
003
Detuned CP80
000
000
004
Honky-tonk Piano
000
001
004
Honky-tonk Piano KSP
000
000
005
Electric Piano 1
000
001
005
Electric Piano 1 KSP
000
032
005
Chorus Electric Piano 1
000
000
006
Electric Piano 2
000
001
006
Electric Piano 2 KSP
000
032
006
Chorus Electric Piano 2
000
041
006
DX + Analog Electric Piano
000
000
007
Harpsichord
000
001
007
Harpsichord KSP
000
035
007
Harpsichord 2
000
000
008
Clavi
000
001
008
Clavi KSP
XG CHROMATIC
000
000
009
Celesta
000
000
010
Glockenspiel
000
000
011
Music Box
000
064
011
Orgel
000
000
012
Vibraphone
000
001
012
Vibraphone KSP
000
000
013
Marimba
000
001
013
Marimba KSP
000
064
013
Sine Marimba
000
097
013
Balimba
000
098
013
Log Drums
000
000
014
Xylophone
000
000
015
Tubular Bells
000
096
015
Church Bells
000
097
015
Carillon
000
000
016
Dulcimer
000
035
016
Dulcimer 2
000
096
016
Cimbalom
000
097
016
Santur
XG ORGAN
000
000
017
Drawbar Organ
000
032
017
Detuned Drawbar Organ
000
033
017
60’s Drawbar Organ 1
000
034
017
60’s Drawbar Organ 2
000
035
017
70’s Drawbar Organ 1
000
037
017
60’s Drawbar Organ 3
000
040
017
16+2'2/3
000
064
017
Organ Bass
000
065
017
70’s Drawbar Organ 2
000
066
017
Cheezy Organ
000
067
017
Drawbar Organ 2
000
000
018
Percussive Organ
000
024
018
70’s Percussive Organ
000
032
018
Detuned Percussive Organ
000
033
018
Light Organ
000
037
018
Percussive Organ 2
000
000
019
Rock Organ
Owner’s Manual / Bedienungsanleitung / Mode d’emploi / Manual de instrucciones
Voice List / Voice-Liste / Liste des voix / Lista de voces
Voice
No.
203
204
205
206
207
208
209
210
211
212
213
214
215
216
217
218
219
220
221
222
223
224
225
226
227
228
229
230
231
232
233
234
235
236
237
238
239
240
241
242
243
244
245
246
247
248
249
250
251
252
253
254
255
256
257
258
259
260
261
262
263
264
265
266
267
Bank Select
MIDI
Program
Voice Name
MSB LSB
Change#
(0–127) (0–127)
(1–128)
000
064
019
Rotary Organ
000
065
019
Slow Rotary
000
066
019
Fast Rotary
000
000
020
Church Organ
000
032
020
Church Organ 3
000
035
020
Church Organ 2
000
040
020
Notre Dame
000
064
020
Organ Flute
000
065
020
Tremolo Organ Flute
000
000
021
Reed Organ
000
040
021
Puff Organ
000
000
022
Accordion
000
000
023
Harmonica
000
032
023
Harmonica 2
000
000
024
Tango Accordion
000
064
024
Tango Accordion 2
XG GUITAR
000
000
025
Nylon Guitar
000
043
025
Velocity Guitar Harmonics
000
096
025
Ukulele
000
000
026
Steel Guitar
000
035
026
12-string Guitar
000
040
026
Nylon & Steel Guitar
000
041
026
Steel Guitar with Body Sound
000
096
026
Mandolin
000
000
027
Jazz Guitar
000
032
027
Jazz Amp
000
000
028
Clean Guitar
000
032
028
Chorus Guitar
000
000
029
Muted Guitar
000
040
029
Funk Guitar
000
041
029
Muted Steel Guitar
000
045
029
Jazz Man
000
000
030
Overdriven Guitar
000
043
030
Guitar Pinch
000
000
031
Distortion Guitar
000
040
031
Feedback Guitar
000
041
031
Feedback Guitar 2
000
000
032
Guitar Harmonics
000
065
032
Guitar Feedback
000
066
032
Guitar Harmonics 2
XG BASS
000
000
033
Acoustic Bass
000
040
033
Jazz Rhythm
000
045
033
Velocity Crossfade Upright Bass
000
000
034
Finger Bass
000
018
034
Finger Dark
000
040
034
Bass & Distorted Electric Guitar
000
043
034
Finger Slap Bass
000
045
034
Finger Bass 2
000
065
034
Modulated Bass
000
000
035
Pick Bass
000
028
035
Muted Pick Bass
000
000
036
Fretless Bass
000
032
036
Fretless Bass 2
000
033
036
Fretless Bass 3
000
034
036
Fretless Bass 4
000
000
037
Slap Bass 1
000
032
037
Punch Thumb Bass
000
000
038
Slap Bass 2
000
043
038
Velocity Switch Slap
000
000
039
Synth Bass 1
000
040
039
Techno Synth Bass
000
000
040
Synth Bass 2
000
006
040
Mellow Synth Bass
000
012
040
Sequenced Bass
000
018
040
Click Synth Bass
Voice
No.
*268
269
270
271
272
273
274
275
276
277
278
279
280
281
282
283
284
285
286
287
288
289
290
291
292
293
294
295
296
297
298
299
300
301
302
303
304
305
306
307
308
309
310
311
312
313
314
315
316
317
318
319
320
321
322
323
324
325
326
327
328
329
330
Bank Select
MIDI
Program
Voice Name
MSB LSB
Change#
(0–127) (0–127)
(1–128)
000
019
040
Synth Bass 2 Dark
000
040
040
Modular Synth Bass
000
041
040
DX Bass
XG STRINGS
000
000
041
Violin
000
008
041
Slow Violin
000
000
042
Viola
000
000
043
Cello
000
000
044
Contrabass
000
000
045
Tremolo Strings
000
008
045
Slow Tremolo Strings
000
040
045
Suspense Strings
000
000
046
Pizzicato Strings
000
000
047
Orchestral Harp
000
040
047
Yang Chin
000
000
048
Timpani
XG ENSEMBLE
000
000
049
Strings 1
000
003
049
Stereo Strings
000
008
049
Slow Strings
000
035
049
60’s Strings
000
040
049
Orchestra
000
041
049
Orchestra 2
000
042
049
Tremolo Orchestra
000
045
049
Velocity Strings
000
000
050
Strings 2
000
003
050
Stereo Slow Strings
000
008
050
Legato Strings
000
040
050
Warm Strings
000
041
050
Kingdom
000
000
051
Synth Strings 1
000
000
052
Synth Strings 2
000
000
053
Choir Aahs
000
003
053
Stereo Choir
000
032
053
Mellow Choir
000
040
053
Choir Strings
000
000
054
Voice Oohs
000
000
055
Synth Voice
000
040
055
Synth Voice 2
000
041
055
Choral
000
064
055
Analog Voice
000
000
056
Orchestra Hit
000
035
056
Orchestra Hit 2
000
064
056
Impact
XG BRASS
000
000
057
Trumpet
000
032
057
Warm Trumpet
000
000
058
Trombone
000
018
058
Trombone 2
000
000
059
Tuba
000
000
060
Muted Trumpet
000
000
061
French Horn
000
006
061
French Horn Solo
000
032
061
French Horn 2
000
037
061
Horn Orchestra
000
000
062
Brass Section
000
035
062
Trumpet & Trombone Section
000
000
063
Synth Brass 1
000
020
063
Resonant Synth Brass
000
000
064
Synth Brass 2
000
018
064
Soft Brass
000
041
064
Choir Brass
XG REED
000
000
065
Soprano Sax
000
000
066
Alto Sax
000
040
066
Sax Section
000
000
067
Tenor Sax
Owner’s Manual / Bedienungsanleitung / Mode d’emploi / Manual de instrucciones
129
Voice List / Voice-Liste / Liste des voix / Lista de voces
Voice
No.
331
332
333
334
335
336
337
338
339
340
341
342
343
344
345
346
347
348
349
350
351
352
353
354
355
356
357
358
359
360
361
362
363
364
365
366
367
368
369
370
371
372
373
374
375
376
377
378
379
380
381
382
383
384
385
386
387
388
389
390
391
392
393
130
Bank Select
MIDI
Program
Voice Name
MSB LSB
Change#
(0–127) (0–127)
(1–128)
000
040
067
Breathy Tenor Sax
000
000
068
Baritone Sax
000
000
069
Oboe
000
000
070
English Horn
000
000
071
Bassoon
000
000
072
Clarinet
XG PIPE
000
000
073
Piccolo
000
000
074
Flute
000
000
075
Recorder
000
000
076
Pan Flute
000
000
077
Blown Bottle
000
000
078
Shakuhachi
000
000
079
Whistle
000
000
080
Ocarina
XG SYNTH LEAD
000
000
081
Square Lead
000
006
081
Square Lead 2
000
008
081
LM Square
000
018
081
Hollow
000
019
081
Shroud
000
064
081
Mellow
000
065
081
Solo Sine
000
066
081
Sine Lead
000
000
082
Sawtooth Lead
000
006
082
Sawtooth Lead 2
000
008
082
Thick Sawtooth
000
018
082
Dynamic Sawtooth
000
019
082
Digital Sawtooth
000
020
082
Big Lead
000
096
082
Sequenced Analog
000
000
083
Calliope Lead
000
065
083
Pure Lead
000
000
084
Chiff Lead
000
000
085
Charang Lead
000
064
085
Distorted Lead
000
000
086
Voice Lead
000
000
087
Fifths Lead
000
035
087
Big Five
000
000
088
Bass & Lead
000
016
088
Big & Low
000
064
088
Fat & Perky
000
065
088
Soft Whirl
XG SYNTH PAD
000
000
089
New Age Pad
000
064
089
Fantasy
000
000
090
Warm Pad
000
000
091
Poly Synth Pad
000
000
092
Choir Pad
000
066
092
Itopia
000
000
093
Bowed Pad
000
000
094
Metallic Pad
000
000
095
Halo Pad
000
000
096
Sweep Pad
XG SYNTH EFFECTS
000
000
097
Rain
000
065
097
African Wind
000
066
097
Carib
000
000
098
Sound Track
000
027
098
Prologue
000
000
099
Crystal
000
012
099
Synth Drum Comp
000
014
099
Popcorn
000
018
099
Tiny Bells
000
035
099
Round Glockenspiel
000
040
099
Glockenspiel Chimes
000
041
099
Clear Bells
Voice
No.
394
395
396
397
398
399
400
401
402
403
404
405
406
407
408
409
410
411
412
413
414
415
416
417
418
419
420
421
422
423
424
425
426
427
428
429
430
431
432
433
434
435
436
437
438
439
440
441
442
443
444
445
446
447
448
449
450
451
452
453
454
455
456
457
Bank Select
MIDI
Program
Voice Name
MSB LSB
Change#
(0–127) (0–127)
(1–128)
000
042
099
Chorus Bells
000
065
099
Soft Crystal
000
070
099
Air Bells
000
071
099
Bell Harp
000
072
099
Gamelimba
000
000
100
Atmosphere
000
018
100
Warm Atmosphere
000
019
100
Hollow Release
000
040
100
Nylon Electric Piano
000
064
100
Nylon Harp
000
065
100
Harp Vox
000
066
100
Atmosphere Pad
000
000
101
Brightness
000
000
102
Goblins
000
064
102
Goblins Synth
000
065
102
Creeper
000
067
102
Ritual
000
068
102
To Heaven
000
070
102
Night
000
071
102
Glisten
000
096
102
Bell Choir
000
000
103
Echoes
000
000
104
Sci-Fi
XG WORLD
000
000
105
Sitar
000
032
105
Detuned Sitar
000
035
105
Sitar 2
000
097
105
Tamboura
000
000
106
Banjo
000
028
106
Muted Banjo
000
096
106
Rabab
000
097
106
Gopichant
000
098
106
Oud
000
000
107
Shamisen
000
000
108
Koto
000
096
108
Taisho-kin
000
097
108
Kanoon
000
000
109
Kalimba
000
000
110
Bagpipe
000
000
111
Fiddle
000
000
112
Shanai
XG PERCUSSIVE
000
000
113
Tinkle Bell
000
096
113
Bonang
000
097
113
Altair
000
098
113
Gamelan Gongs
000
099
113
Stereo Gamelan Gongs
000
100
113
Rama Cymbal
000
000
114
Agogo
000
000
115
Steel Drums
000
097
115
Glass Percussion
000
098
115
Thai Bells
000
000
116
Woodblock
000
096
116
Castanets
000
000
117
Taiko Drum
000
096
117
Gran Cassa
000
000
118
Melodic Tom
000
064
118
Melodic Tom 2
000
065
118
Real Tom
000
066
118
Rock Tom
000
000
119
Synth Drum
000
064
119
Analog Tom
000
065
119
Electronic Percussion
000
000
120
Reverse Cymbal
XG SOUND EFFECTS
000
000
121
Fret Noise
000
000
122
Breath Noise
Owner’s Manual / Bedienungsanleitung / Mode d’emploi / Manual de instrucciones
Voice List / Voice-Liste / Liste des voix / Lista de voces
Voice
No.
458
459
460
461
462
463
464
465
466
467
468
469
470
471
472
473
474
475
476
477
478
479
480
481
482
483
484
485
486
487
488
489
490
491
492
493
494
495
496
497
498
499
500
501
502
503
504
Bank Select
MIDI
Program
MSB LSB
Change#
(0–127) (0–127)
(1–128)
000
000
123
000
000
124
000
000
125
000
000
126
000
000
127
000
000
128
064
000
001
064
000
002
064
000
004
064
000
017
064
000
033
064
000
034
064
000
035
064
000
036
064
000
037
064
000
038
064
000
049
064
000
050
064
000
051
064
000
056
064
000
065
064
000
066
064
000
067
064
000
068
064
000
069
064
000
070
064
000
071
064
000
081
064
000
082
064
000
083
064
000
084
064
000
085
064
000
086
064
000
087
064
000
088
064
000
089
064
000
090
064
000
091
064
000
097
064
000
098
064
000
099
064
000
100
064
000
101
064
000
113
064
000
114
064
000
115
064
000
116
Voice Name
Seashore
Bird Tweet
Telephone Ring
Helicopter
Applause
Gunshot
Cutting Noise
Cutting Noise 2
String Slap
Flute Key Click
Shower
Thunder
Wind
Stream
Bubble
Feed
Dog
Horse
Bird Tweet 2
Maou
Phone Call
Door Squeak
Door Slam
Scratch Cut
Scratch Split
Wind Chime
Telephone Ring 2
Car Engine Ignition
Car Tires Squeal
Car Passing
Car Crash
Siren
Train
Jet Plane
Starship
Burst
Roller Coaster
Submarine
Laugh
Scream
Punch
Heartbeat
Footsteps
Machine Gun
Laser Gun
Explosion
Firework
The voice number with an asterisk (*) is XGlite optional voice.
Voice-Nummern mit einem Stern (*) sind optionale Xglite-Voices.
Le numéro de voix porteur d’un astérisque (*) est une voix XGlite
en option.
El número de voz con un asterisco (*) es una voz opcional de
XGlite.
Owner’s Manual / Bedienungsanleitung / Mode d’emploi / Manual de instrucciones
131
Drum Kit List
Drum Kit List / Drum Kit-Liste / Liste des kits de
• “
” indicates that the drum sound is the same as “Standard Kit 1”.
• Each percussion voice uses one note.
• The MIDI Note # and Note are actually one octave lower than keyboard
Note # and Note. For example, in “132: Standard Kit 1”, the “Seq Click H”
(Note# 36/Note C1) corresponds to (Note# 24/Note C0).
• Key Off: Keys marked “O” stop sounding the instant they are released.
• Voices with the same Alternate Note Number (*1 ... 4) cannot be played
simultaneously. (They are designed to be played alternately with each
other.)
Voice No.
MSB (0–127) / LSB (0–127) / PC (1–128)
Keyboard
MIDI
Key Alternate
Note#
C#0
D0
E0
F0
D#0
F#0
G0
G#0
A0
B0
C1
A#0
C#1
D1
E1
F1
D#1
F#1
G1
G#1
A1
B1
C2
A#1
C#2
D2
E2
F2
D#2
F#2
G2
G#2
A2
B2
C3
A#2
C#3
D3
E3
F3
D#3
F#3
G3
G#3
A3
B3
C4
A#3
C#4
D4
E4
F4
D#4
F#4
G4
G#4
A4
B4
C5
A#4
C#5
D5
E5
F5
D#5
F#5
G5
G#5
A5
B5
C6
A#5
C#6
D6
E6
F6
G6
D#6
F#6
25
26
27
28
29
30
31
32
33
34
35
36
37
38
39
40
41
42
43
44
45
46
47
48
49
50
51
52
53
54
55
56
57
58
59
60
61
62
63
64
65
66
67
68
69
70
71
72
73
74
75
76
77
78
79
80
81
82
83
84
85
86
87
88
89
90
91
92
93
94
95
96
97
98
99
100
101
102
103
132
Note
C#
D
D#
E
F
F#
G
G#
A
A#
B
C
C#
D
D#
E
F
F#
G
G#
A
A#
B
C
C#
D
D#
E
F
F#
G
G#
A
A#
B
C
C#
D
D#
E
F
F#
G
G#
A
A#
B
C
C#
D
D#
E
F
F#
G
G#
A
A#
B
C
C#
D
D#
E
F
F#
G
G#
A
A#
B
C
C#
D
D#
E
F
F#
G
0
0
0
0
0
0
0
0
0
0
0
1
1
1
1
1
1
1
1
1
1
1
1
2
2
2
2
2
2
2
2
2
2
2
2
3
3
3
3
3
3
3
3
3
3
3
3
4
4
4
4
4
4
4
4
4
4
4
4
5
5
5
5
5
5
5
5
5
5
5
5
6
6
6
6
6
6
6
6
Note#
13
14
15
16
17
18
19
20
21
22
23
24
25
26
27
28
29
30
31
32
33
34
35
36
37
38
39
40
41
42
43
44
45
46
47
48
49
50
51
52
53
54
55
56
57
58
59
60
61
62
63
64
65
66
67
68
69
70
71
72
73
74
75
76
77
78
79
80
81
82
83
84
85
86
87
88
89
90
91
Note
C#
D
D#
E
F
F#
G
G#
A
A#
B
C
C#
D
D#
E
F
F#
G
G#
A
A#
B
C
C#
D
D#
E
F
F#
G
G#
A
A#
B
C
C#
D
D#
E
F
F#
G
G#
A
A#
B
C
C#
D
D#
E
F
F#
G
G#
A
A#
B
C
C#
D
D#
E
F
F#
G
G#
A
A#
B
C
C#
D
D#
E
F
F#
G
-1
-1
-1
-1
-1
-1
-1
-1
-1
-1
-1
0
0
0
0
0
0
0
0
0
0
0
0
1
1
1
1
1
1
1
1
1
1
1
1
2
2
2
2
2
2
2
2
2
2
2
2
3
3
3
3
3
3
3
3
3
3
3
3
4
4
4
4
4
4
4
4
4
4
4
4
5
5
5
5
5
5
5
5
Off
assign
3
3
4
4
O
O
O
1
1
1
O
O
O
2
2
• „
“ bedeutet, dass der Schlagzeugklang gleich „Standard Kit 1“ ist.
• Jede Perkussionsnote belegt eine Note.
• Die MIDI-Note # und Note sind in Wirklichkeit eine Octave tiefer als hier
aufgeführt. Beispiel: In „132: Standard Kit 1“ entspricht die „Seq Click H“
(Note# 36/Note C1) der Note (Note# 24/Note C0).
• Key Off: Mit „O“ bezeichnete Tasten hören sofort auf zu klingen, sobald sie
losgelassen werden.
• Stimmen mit derselben Alternate Note Number (*1 ... 4) können nicht
gleichzeitig gespielt werden. (Diese Stimmen sind dazu gedacht, wechselweise gespielt zu werden.)
132
127/000/001
133
127/000/002
134
127/000/009
135
127/000/017
136
127/000/025
137
127/000/026
Standard Kit 1
Standard Kit 2
Room Kit
Rock Kit
Electronic Kit
Analog Kit
Surdo Mute
Surdo Open
Hi Q
Whip Slap
Scratch H
Scratch L
Finger Snap
Click Noise
Metronome Click
Metronome Bell
Seq Click L
Seq Click H
Brush Tap
Brush Swirl
Brush Slap
Brush Tap Swirl
Snare Roll
Castanet
Snare Soft
Sticks
Kick Soft
Open Rim Shot
Kick Tight
Kick
Side Stick
Snare
Hand Clap
Snare Tight
Floor Tom L
Hi-Hat Closed
Floor Tom H
Hi-Hat Pedal
Low Tom
Hi-Hat Open
Mid Tom L
Mid Tom H
Crash Cymbal 1
High Tom
Ride Cymbal 1
Chinese Cymbal
Ride Cymbal Cup
Tambourine
Splash Cymbal
Cowbell
Crash Cymbal 2
Vibraslap
Ride Cymbal 2
Bongo H
Bongo L
Conga H Mute
Conga H Open
Conga L
Timbale H
Timbale L
Agogo H
Agogo L
Cabasa
Maracas
Samba Whistle H
Samba Whistle L
Guiro Short
Guiro Long
Claves
Wood Block H
Wood Block L
Cuica Mute
Cuica Open
Triangle Mute
Triangle Open
Shaker
Jingle Bells
Bell Tree
Reverse Cymbal
Reverse Cymbal
Snare Roll 2
Snare Soft 2
Snare Noisy
Open Rim Shot H Short
Kick Tight Short
Kick Short
Hi Q 2
Hi Q 2
Snare Snappy Electro Snare Noisy 4
Kick Tight 2
Kick 3
Kick Tight 2
Kick 2
Kick Gate
Kick Gate
Kick Gate Heavy
Kick Analog Short
Kick Analog
Side Stick Analog
Snare Analog
Snare Short
Snare Snappy
Snare Rock
Snare Noisy 2
Snare Tight H
Snare Tight Snappy
Tom Room 1
Snare Rock Rim
Tom Rock 1
Snare Noisy 3
Tom Electro 1
Tom Room 2
Tom Rock 2
Tom Electro 2
Tom Room 3
Tom Rock 3
Tom Electro 3
Tom Room 4
Tom Room 5
Tom Rock 4
Tom Rock 5
Tom Electro 4
Tom Electro 5
Tom Room 6
Tom Rock 6
Tom Electro 6
Owner’s Manual / Bedienungsanleitung / Mode d’emploi / Manual de instrucciones
Snare Analog 2
Tom Analog 1
Hi-Hat Closed Analog
Tom Analog 2
Hi-Hat Closed Analog 2
Tom Analog 3
Hi-Hat Open Analog
Tom Analog 4
Tom Analog 5
Crash Analog
Tom Analog 6
Cowbell Analog
Conga Analog H
Conga Analog M
Conga Analog L
Maracas 2
Claves 2
Scratch H 2
Scratch L 2
Scratch H 2
Scratch L 3
percussion / Lista de juegos de batería
• «
» indique que les sonorités de percussion sont identiques à celles de « Standard Kit 1 ».
• Chaque voix de percussion utilise une note unique.
• Le numéro de note MIDI (Note #) et la note MIDI se situent en réalité à une
octave inférieure à celle qui est indiquée dans la liste. Par exemple, dans
« 132 : Standard Kit 1 », « Seq Click H » (Note# 36/Note C1) correspond à
(Note# 24/Note C0).
• Key Off : pour les touches signalées par « O », l’émission de sons s’arrête
instantanément aussitôt que les touches sont relâchées.
• Les voix portant un même numéro de note alternative (*1 ... 4) ne peuvent
pas être jouées simultanément. (Elles sont en effet conçues pour être
interprétées en alternance).
Voice No.
MSB (0–127) / LSB (0–127) / PC (1–128)
Keyboard
MIDI
Key Alternate
Note#
C#0
D0
E0
F0
D#0
F#0
G0
G#0
A0
B0
C1
A#0
C#1
D1
E1
F1
D#1
F#1
G1
G#1
A1
B1
C2
A#1
C#2
D2
E2
F2
D#2
F#2
G2
G#2
A2
B2
C3
A#2
C#3
D3
E3
F3
D#3
F#3
G3
G#3
A3
B3
C4
A#3
C#4
D4
E4
F4
D#4
F#4
G4
G#4
A4
B4
C5
A#4
C#5
D5
E5
F5
D#5
F#5
G5
G#5
A5
B5
C6
A#5
C#6
D6
E6
F6
G6
D#6
F#6
25
26
27
28
29
30
31
32
33
34
35
36
37
38
39
40
41
42
43
44
45
46
47
48
49
50
51
52
53
54
55
56
57
58
59
60
61
62
63
64
65
66
67
68
69
70
71
72
73
74
75
76
77
78
79
80
81
82
83
84
85
86
87
88
89
90
91
92
93
94
95
96
97
98
99
100
101
102
103
Note
C#
D
D#
E
F
F#
G
G#
A
A#
B
C
C#
D
D#
E
F
F#
G
G#
A
A#
B
C
C#
D
D#
E
F
F#
G
G#
A
A#
B
C
C#
D
D#
E
F
F#
G
G#
A
A#
B
C
C#
D
D#
E
F
F#
G
G#
A
A#
B
C
C#
D
D#
E
F
F#
G
G#
A
A#
B
C
C#
D
D#
E
F
F#
G
0
0
0
0
0
0
0
0
0
0
0
1
1
1
1
1
1
1
1
1
1
1
1
2
2
2
2
2
2
2
2
2
2
2
2
3
3
3
3
3
3
3
3
3
3
3
3
4
4
4
4
4
4
4
4
4
4
4
4
5
5
5
5
5
5
5
5
5
5
5
5
6
6
6
6
6
6
6
6
Note#
13
14
15
16
17
18
19
20
21
22
23
24
25
26
27
28
29
30
31
32
33
34
35
36
37
38
39
40
41
42
43
44
45
46
47
48
49
50
51
52
53
54
55
56
57
58
59
60
61
62
63
64
65
66
67
68
69
70
71
72
73
74
75
76
77
78
79
80
81
82
83
84
85
86
87
88
89
90
91
Note
C#
D
D#
E
F
F#
G
G#
A
A#
B
C
C#
D
D#
E
F
F#
G
G#
A
A#
B
C
C#
D
D#
E
F
F#
G
G#
A
A#
B
C
C#
D
D#
E
F
F#
G
G#
A
A#
B
C
C#
D
D#
E
F
F#
G
G#
A
A#
B
C
C#
D
D#
E
F
F#
G
G#
A
A#
B
C
C#
D
D#
E
F
F#
G
-1
-1
-1
-1
-1
-1
-1
-1
-1
-1
-1
0
0
0
0
0
0
0
0
0
0
0
0
1
1
1
1
1
1
1
1
1
1
1
1
2
2
2
2
2
2
2
2
2
2
2
2
3
3
3
3
3
3
3
3
3
3
3
3
4
4
4
4
4
4
4
4
4
4
4
4
5
5
5
5
5
5
5
5
Off
assign
3
3
4
4
O
O
O
1
1
1
O
O
O
2
2
• “
” indica que el sonido de batería es el mismo que el
“Standard Kit 1”.
• Cada sonido de percusión utiliza una nota.
• La nota MIDI # y la nota son en realidad una octava menos de lo que aparece en la lista. Por ejemplo, en “132: Standard Kit 1”, el “Seq Click H”
(Nota# 36/Nota C1) corresponde a (Nota# 24/Nota C0).
• Tecla desactivada: las teclas marcadas con “O” dejan de sonar en el
momento en que se sueltan.
• Los sonidos con el mismo número alterno de nota (*1 ... 4) no pueden
tocarse simultáneamente. (Están diseñados para tocarse alternativamente
el uno con el otro.)
132
127/000/001
138
127/000/113
139
127/000/033
140
127/000/041
141
127/000/049
142
126/000/001
143
126/000/002
Standard Kit 1
Dance Kit
Jazz Kit
Brush Kit
Symphony Kit
SFX Kit 1
SFX Kit 2
Surdo Mute
Surdo Open
Hi Q
Whip Slap
Scratch H
Scratch L
Finger Snap
Click Noise
Metronome Click
Metronome Bell
Seq Click L
Seq Click H
Brush Tap
Brush Swirl
Brush Slap
Brush Tap Swirl
Snare Roll
Castanet
Snare Soft
Sticks
Kick Soft
Open Rim Shot
Kick Tight
Kick
Side Stick
Snare
Hand Clap
Snare Tight
Floor Tom L
Hi-Hat Closed
Floor Tom H
Hi-Hat Pedal
Low Tom
Hi-Hat Open
Mid Tom L
Mid Tom H
Crash Cymbal 1
High Tom
Ride Cymbal 1
Chinese Cymbal
Ride Cymbal Cup
Tambourine
Splash Cymbal
Cowbell
Crash Cymbal 2
Vibraslap
Ride Cymbal 2
Bongo H
Bongo L
Conga H Mute
Conga H Open
Conga L
Timbale H
Timbale L
Agogo H
Agogo L
Cabasa
Maracas
Samba Whistle H
Samba Whistle L
Guiro Short
Guiro Long
Claves
Wood Block H
Wood Block L
Cuica Mute
Cuica Open
Triangle Mute
Triangle Open
Shaker
Jingle Bells
Bell Tree
Reverse Cymbal
Hi Q 2
Snare Techno
Kick Techno Q
Rim Gate
Kick Techno L
Kick Techno
Side Stick Analog
Snare Clap
Snare Dry
Tom Analog 1
Hi-Hat Closed Analog3
Tom Analog 2
Hi-Hat Closed Analog 4
Tom Analog 3
Hi-Hat Open Analog 2
Tom Analog 4
Tom Analog 5
Crash Analog
Tom Analog 6
Cowbell Analog
Conga Analog H
Conga Analog M
Conga Analog L
Maracas 2
Snare Jazz H
Brush Slap 2
Kick Soft 2
Gran Cassa
Gran Cassa Mute
Kick Jazz
Kick Small
Snare Jazz L
Brush Slap 3 Band Snare
Snare Jazz M
Tom Jazz 1
Brush Tap 2 Band Snare 2
Tom Brush 1 Tom Jazz 1
Tom Jazz 2
Tom Brush 2 Tom Jazz 2
Tom Jazz 3
Tom Brush 3 Tom Jazz 3
Tom Jazz 4
Tom Jazz 5
Tom Brush 4 Tom Jazz 4
Tom Brush 5 Tom Jazz 5
Hand Cymbal
Tom Brush 6 Tom Jazz 6
Hand Cymbal Short
Tom Jazz 6
Cutting Noise
Phone Call
Cutting Noise 2 Door Squeak
Door Slam
String Slap
Scratch Cut
Scratch H 3
Wind Chime
Telephone Ring 2
Flute Key Click Car Engine Ignition
Car Tires Squeal
Car Passing
Car Crash
Siren
Hand Cymbal 2
Train
Jet Plane
Hand Cymbal 2 Short
Starship
Burst
Roller Coaster
Submarine
Shower
Thunder
Wind
Stream
Bubble
Feed
Laugh
Scream
Punch
Heartbeat
Footsteps
Dog
Horse
Bird Tweet 2
Machine Gun
Laser Gun
Explosion
Firework
Claves 2
Scratch H 2
Scratch L 3
Maou
Owner’s Manual / Bedienungsanleitung / Mode d’emploi / Manual de instrucciones
133
Style List
Style List / Style-Liste / Liste des styles / Lista de estilos
Style No.
1
2
3
4
5
6
7
8
9
10
11
12
13
14
15
16
17
18
19
20
21
22
23
24
25
26
27
28
29
30
31
32
33
34
35
36
37
38
39
40
41
42
43
44
45
46
47
48
49
50
51
52
53
54
55
134
Style Name
8BEAT
ChartPianoPop
BritPopRock
8BeatModern
Cool8Beat
Classic8Beat
60’sGuitarPop
8BeatAdria
60’s8Beat
BubblegumPop
BritPopSwing
OffBeat
60’sRock
HardRock
RockShuffle
8BeatRock
16BEAT
16Beat
PianoPopShufle
PopShuffle1
PopShuffle2
GuitarPop
16BeatUptempo
KoolShuffle
JazzRock
HipHopLight
BALLAD
ChartPianoBld
PopGtrBallad
80’sBallad
PianoBallad
LoveSong
6-8ModernEP
6-8SlowRock
6-8OrchBallad
OrganBallad
PopBallad
16BeatBallad1
16BeatBallad2
DANCE
ClubBeat
Electronica
FunkyHouse
MellowHipHop
EuroTrance
Ibiza
DreamDance
TechnoPolis
Clubdance
ClubLatin
Garage
UKPop
HipHopGroove
HipShuffle
HipHopPop
DISCO
70’sDisco1
70’sDisco2
LatinDisco
DiscoPhilly
Style No.
56
57
58
59
60
61
62
63
64
65
66
67
68
69
70
71
72
73
74
75
76
77
78
79
80
81
82
83
84
85
86
87
88
89
90
91
92
93
94
95
96
97
98
99
100
101
102
103
104
105
106
107
108
109
110
Style Name
SaturdayNight
DiscoChocolate
DiscoHands
SWING&JAZZ
TradJazzPiano1
TradJazzPiano2
PianoBarBlues
BigBandFast
BigBandMedium
BigBandBallad
BigBandShuffle
JazzClub
Swing1
Swing2
OrchestraSwing
Five-Four
JazzBallad
Dixieland
Ragtime
AfroCuban
Charleston
R&B
Soul
DetroitPop1
60’sRock&Roll
6-8Soul
CrocoTwist
Rock&Roll
DetroitPop2
BoogieWoogie
ComboBoogie
6-8Blues
COUNTRY
70’sCountry
Country8Beat
CountryPop
CountrySwing
CountryBallad
Country2-4
CowboyBoogie
CountryShuffle
Bluegrass
LATIN
BrazilianSamba
BossaNova
PopBossa
Tijuana
DiscoLatin
Mambo
Salsa
Beguine
GuitarRumba
RumbaFlamenco
RumbaIsland
Reggae
BALLROOM
VienneseWaltz
EnglishWaltz
Slowfox
Foxtrot
Owner’s Manual / Bedienungsanleitung / Mode d’emploi / Manual de instrucciones
Style No.
111
112
113
114
115
116
117
118
119
120
121
122
123
124
125
126
127
128
129
130
131
132
133
134
135
136
137
138
139
140
141
142
143
144
145
146
147
148
149
150
151
152
153
154
155
156
157
158
159
160
Style Name
Quickstep
Tango
Pasodoble
Samba
ChaChaCha
Rumba
Jive
TRADITIONAL
USMarch
6-8March
GermanMarch
PolkaPop
OberPolka
Tarantella
Showtune
ChristmasSwing
ChristmasWaltz
ScottishReel
Hawaiian
WALTZ
ItalianWaltz
MariachiWaltz
GuitarSerenade
SwingWaltz
JazzWaltz1
JazzWaltz2
CountryWaltz
OberWaltzer
Musette
CHILDREN
Learning2-4
Learning4-4
Learning6-8
Fun 3-4
Fun 4-4
PIANIST
Stride
PianoBlues1
PianoBlues2
PianoRag
PianoRock&Roll
PianoBoogie
PianoJazzWaltz
PianoJazzBld
Arpeggio
Musical
Habanera
SlowRock
8BtPianoBallad
PianoMarch
6-8PianoMarch
PianoWaltz
PianoBeguine
PianoSwing
Music Database List
Music Database List / Musikdatenbankliste / Liste des bases de données musicales /
Lista de la base de datos musical
MDB No.
MDB Name
ALL TIME HITS
1
Jude Hey
2
New UK
3
MyLoving
4
All OK
5
Buttercp
6
JustCall
7
CheepChp
8
Daddy's
9
Dance?
10
GetBack
11
GtrWheel
12
HighTide
13
IWasBorn
14
Sailing
15
BluJeans
16
Holiday
17
Imagine
18
LoveMe
19
LetItBld
20
LdyMdona
21
YelowSub
22
Marriage
23
MovinOut
24
My Shell
25
NowNever
26
DoLoveMe
27
TcktRide
28
SeeClear
29
Masachus
30
Hard Day
31
USA Pie
32
Norway
33
YesterBd
MODERN POP
34
Watches
35
SoundMPH
36
Hold Us
37
Unfound
38
NeedSome
39
PrtTmLvr
40
MoonShdw
41
NikitSng
42
Sure of
43
Off Day
44
Tell Her
45
GirlsMne
46
NeedLove
POP CLASSICS
47
Standing
48
RainLaff
49
Sunshine
50
ForNamdo
51
ThankFor
52
ManPiano
53
CoinLane
54
LovesYou
55
Tmbourin
56
Alone
57
GldField
58
Raindrop
59
SultanSw
60
Life'sWk
61
TopWorld
MDB No.
MDB Name
62
WatchGrl
POP BALLAD
63
WnderLnd
64
CanIStop
65
EvryTime
66
IvoryAnd
67
TheWorld
68
LovWoman
69
Dolannes
70
Madigan
71
Paradise
72
Whisper
BALLAD
73
AllOdds
74
AtonalFl
75
Hero
76
Woman
77
RunToYou
78
LoveOfAl
79
CndleWnd
80
Cavatina
81
Cherish
82
ToLoveMe
83
YouKnow
84
Evrythng
85
EyesOfBl
86
Hello
87
BeThere
88
FlyAway
89
LoveYou
90
NeverLet
91
JustOnce
92
IfYouGo
93
SavingAl
94
InTheDrk
95
LovePwr
96
Vision
97
Beautifl
98
AllAlone
99
Opposite
100
BeHonest
101
SayYou
102
SayNthng
103
Stranger
104
OneDay
105
TheBayou
106
ThisSong
107
Distance
108
ThisWay
109
LoveGone
110
Inspirng
111
TrueColr
ROCK & ROLL
112
ShakenUp
113
Beethovn
114
HurryLov
115
BeCruel
116
Jumping
117
Countdwn
118
SuePeggy
119
Champion
120
Jailhous
121
BlueShoe
122
Rockin24
MDB No.
MDB Name
123
Shouting
124
Rock&Rll
125
HonkyTnk
OLDIES
126
Daydream
127
Sumertme
128
Diana's
129
Uptown
130
Apache
131
IGotIt
132
Tonight
133
MyPillow
134
NoRain
135
FinalDance
136
SlpnLion
137
Ghetto
138
LipsLcky
139
PrettyWm
140
TikiGtr
141
TurnThre
142
Sherry
DANCE & DISCO
143
Babylon
144
Goodbye
145
Catch22
146
DISCO
147
Survival
148
TheNavy
149
DontHide
150
Celebrat
151
LondonRU
152
10,2 Sun
153
ShakeYou
154
Believe
155
BoySumer
156
I'mSexy
157
StuffHot
SWING & JAZZ
158
Patrol
159
Charles
160
GiveLove
161
Rhythm
162
LOVE
163
LeroyBad
164
Caraban
165
Misbehav
166
Safari
167
Smiling
168
SoWhatIs
169
TimeGone
170
TasteHny
171
Sandman
172
Tunisian
173
TwoFoot
174
MyBaby
R&B
175
AsPlayed
176
BabyGrov
177
Highwy66
178
SweetCHI
179
JustU&Me
180
ManLoves
181
OurLove
182
Wish I
MDB No.
MDB Name
COUNTRY
183
OnTheRd
184
Breathe
185
InMyMind
186
ContryHw
187
GreenGrs
188
EverNeed
189
Lonesome
190
Lucille
191
HomeRng
192
Tennesse
LATIN
193
Bananabt
194
DanceMng
195
DntWorry
196
Jamaica
197
FleaSpa
198
I'mPola
199
MamboJm
200
OneNote
201
PasoCani
202
SayNoMor
203
Beguine
204
Tijuana
205
Picture
ENTERTAINMENT
206
OnTheHil
207
Barnacle
208
Califrag
209
DadClock
210
DanceLd
211
DnceFire
212
BigCntry
213
Cabaret
214
OdeToJoy
215
Mi-Re-Do
216
MyPrince
217
Necesary
218
NoBuiz
219
NoisyOld
220
Sleigh
221
RockBaby
222
Magnifiq
223
Magnfcnt
224
SilentNt
225
Nabucco
226
Standing
227
SummerPl
228
Christms
229
Favorite
230
Tubbie
231
Turkish
232
12OClock
WALTZ & TRADITIONAL
233
Blk&Whte
234
CanCan
235
Charmain
236
Musicbox
237
Clementn
238
Doodah!
239
Dreamer
240
EnterRag
241
Birthday
242
MaryLamb
MDB No.
MDB Name
243
Donald's
244
MoonWlz
245
MoulinHt
246
Sunshine
247
PieceOf
248
GreenSlv
249
TakeFour
250
TexRose
251
ThePolka
252
Scarboro
253
Edelweis
254
AroundWd
255
Whatever
256
Yankee's
WORLD
257
Hawaii
258
D'amor
259
ElCondor
260
GoodbyRm
261
ILandOn
262
ItalyBel
263
Cucarumb
264
Puntuali
265
Cielito
266
ItalySun
267
SantaLuc
268
Trumpetr
269
VanMass
PIANIST
270
ItalySun
271
BeGood
272
Chaie's
273
Flower
274
Frenetic
275
Highwy66
276
Leaves
277
Miload
278
Cabaret
279
Wonderfl
280
Submarin
281
Mi-Re-Do
282
MoreRhum
283
NoBuiz
284
BeatifulSn
285
OhBlah
286
Charades
287
Sally's
288
Nabucco
289
Spanish
290
SunnyStr
291
MistyFln
292
LdnBridg
293
GrndClck
294
Importnc
295
Snowman
296
Favorite
297
SugerSpn
298
Washngtn
299
ThisWay
300
ZipperD
Owner’s Manual / Bedienungsanleitung / Mode d’emploi / Manual de instrucciones
135
Songs Provided On the Supplied CD-ROM
Songs Provided On the Supplied CD-ROM / Songs auf der beiliegenden CD-ROM / Morceaux
disponibles sur le CD-ROM fourni / Canciones incluidas en el CD-ROM proporcionado
File Name
001Nutcr.mid
002Orphe.mid
003Slavo.mid
004Prima.mid
005Medit.mid
006Guill.mid
007Fruhl.mid
008Ungar.mid
009Fruhl.mid
010Dolly.mid
011Cande.mid
012Arabe.mid
013Pasto.mid
014Petit.mid
015Innoc.mid
016Progr.mid
017Taren.mid
018Cheva.mid
019Etude.mid
020Marci.mid
021Turki.mid
022Valse.mid
023Menue.mid
024Momen.mid
025Enter.mid
026Prelu.mid
027Violl.mid
028Angel.mid
029Saraf.mid
030Ameri.mid
031Brown.mid
032Lomon.mid
033Bonni.mid
034Londo.mid
035Banjo.mid
036Vogle.mid
037Lorel.mid
038Funic.mid
039Turke.mid
040Campt.mid
041Jingl.mid
042Muss.mid
043Liebe.mid
044Jesu.mid
045Joy.mid
046Pearl.mid
047Gavot.mid
048Seren.mid
049Menue.mid
050Canon.mid
051Vogel.mid
052Piano.mid
053Surpr.mid
054WildR.mid
055Chans.mid
056Babbi.mid
057RowRo.mid
058Smoky.mid
059WeWis.mid
060ImMai.mid
061Chris.mid
062MaryH.mid
063TenLi.mid
064PopGo.mid
065Twink.mid
066Close.mid
067Cucko.mid
068Augus.mid
069Londo.mid
070Three.mid
Song Name
Danse des Mirlitons from “The Nutcracker”
“Orphée aux Enfers” Ouverture
Slavonic Dances op.72-2
La Primavera (from Le Quattro Stagioni)
Méditation (Thaïs)
Guillaume Tell
Frühlingslied
Ungarische Tänze Nr.5
Frühlingsstimmen
Dolly’s Dreaming and Awakening
La Candeur
Arabesque
Pastorale
Petite Réunion
Innocence
Progrès
Tarentelle
La Chevaleresque
Etude op.10-3 “Chanson de l’adieu”
Marcia alla Turca
Turkish March
Valse op.64-1 “Petit Chien”
Menuett
Moments Musicaux op.94-3
The Entertainer
Prelude (Wohltemperierte Klavier 1-1)
La Viollette
Angels Serenade
Krasnyj Sarafan
America the Beautiful
Little Brown Jug
Loch Lomond
My Bonnie
Londonderry Air
Ring de Banjo
Wenn ich ein Vöglein wär ?
Die Lorelei
Funiculi Funicula
Turkey in the Straw
Camptown Races
Jingle Bells
Muss i denn
Liebesträume Nr.3
Jesu, Joy Of Man’s Desiring
Ode to Joy
Pearl Fisher
Gavotte
Serenade/Haydn
Menuett BWV. Anh.114
Canon in D
Der Vogelfänger Bin Ich Ja “Die Zauberflöte”
Piano Sonate No.14 op.27-2 “Mondschein”
The “Surprise” Symphony No.94
To a Wild Rose
Chanson du Toreador
O Mio Babbino Caro
Row Row Row Your Boat (DUET)
On Top of Old Smoky (DUET)
We Wish You A Merry Christmas (DUET)
Im Mai (DUET)
O Christmas Tree (DUET)
Mary Had a Little Lamb (DUET)
Ten Little Indians (DUET)
Pop Goes The Weasel (DUET)
Twinkle Twinkle Little Star (DUET)
Close Your Hands, Open Your Hands (DUET)
The Cuckoo (DUET)
O du lieber Augustin (DUET)
London Bridge (DUET)
Three Blind Mice (DUET)
Composer
P.I. Tchaikovsky
J. Offenbach
ˇ
A. Dvorák
A. Vivaldi
J. Massenet
G. Rossini
F. Mendelssohn
J. Brahms
J. Strauss II
T.Oesten
J.F.Burgmüller
J.F.Burgmüller
J.F.Burgmüller
J.F.Burgmüller
J.F.Burgmüller
J.F.Burgmüller
J.F.Burgmüller
J.F.Burgmüller
F.Chopin
L.v. Beethoven
W.A. Mozart
F.Chopin
L. Boccherini
F. Schubert
S. Joplin
J.S. Bach
L.Streabbog
Traditional
Traditional
S.A. Ward
Traditional
Traditional
Traditional
Traditional
S.C. Foster
Traditional
F. Silcher
L. Denza
Traditional
S.C. Foster
J.S. Pierpont
F. Silcher
F. Liszt
J.S. Bach
L.v. Beethoven
G. Bizet
F.J. Gossec
F.J. Haydn
J.S. Bach
J. Pachelbel
W.A. Mozart
L.v. Beethoven
F.J. Haydn
E.A. MacDowell
G. Bizet
G. Puccini
Traditional
Traditional
Traditional
Traditional
Traditional
Traditional
S. Winner
Traditional
Traditional
J.J. Rousseau
Traditional
Traditional
Traditional
Traditional
The easy song arranger can only be used with songs that include chord data.
Easy Song Arranger kann nur zusammen mit Songs verwendet werden, die Akkorddaten enthalten.
La fonction Easy Song Arranger ne s’utilise qu’avec des morceaux comportant des données d’accord.
La función Easy Song Arranger (arreglos sencillos de canciones) sólo puede utilizarse con canciones que incluyan datos de acordes.
136
Owner’s Manual / Bedienungsanleitung / Mode d’emploi / Manual de instrucciones
Harmony Type List
Harmony Type List / Liste der Harmony-Typen / Liste des types d’harmonie / Lista de tipos de armonías
No.
Harmony Type
1
01(Standard Duet)
2
02(Standard Trio)
3
03(Full Chord)
4
04(Rock Duet)
5
05(Country Duet)
6
06(Country Trio)
7
07(Block)
8
08(4-Way Close 1)
9
09(4-Way Close 2)
10
10(4-Way Open)
11
11(1+5)
12
12(Octave)
13
13(Strum)
14
14(Multi Assign)
15
15(Echo 1/4)
16
16(Echo 1/6)
17
17(Echo 1/8)
18
18(Echo 1/12)
19
19(Tremolo 1/8)
20
20(Tremolo 1/12)
21
21(Tremolo 1/16)
22
22(Tremolo 1/32)
23
23(Trill 1/12)
24
24(Trill 1/16)
25
25(Trill 1/24)
26
26(Trill 1/32)
Description
Harmony types 01–10, 13 are pitch-based and add one-, two- or three-note harmonies to the
single-note melody played in the right hand. These types sound when chords are played in the
auto accompaniment range of the keyboard. These Harmony types will also work when playing
songs that contain chord data.
Die Harmony-Typen 01 bis 10, 13 sind Tonhöheneffekte und bereichern eine monophon im
rechten Tastaturbereich gespielte Melodie um ein-, zwei- oder dreistimmige Harmonien. Diese
Typen werden nur erzeugt, wenn Akkorde im Tastaturbereich für die Begleitung gespielt werden.
Les types d’effets Harmony 01–10, 13 sont des effets basés sur la hauteur et ajoutent des harmonies à une, deux ou trois notes à la mélodie à une seule note jouée de la main droite. Ces
effets ne sont audibles que lorsque des accords sont joués dans la section d’accompagnement
automatique du clavier.
Los tipos de armonía 01–10, 13 se basan en el tono y añaden armonías de una, dos o tres
notas a la melodía de una sola nota tocada en la parte de la mano derecha. Estos tipos sólo
suenan cuando se tocan acordes en la sección del acompañamiento automático del teclado.
Types 15–26 are rhythm-based effects and add embellishments or delayed repeats in time with
the auto accompaniment. These types sound whether the auto accompaniment is on or not;
however, the actual speed of the effect depends on the Tempo setting (page 34). The individual
note values in each type let you synchronize the effect precisely to the rhythm. Triplet settings
are also available: 1/6 = quarter-note triplets, 1/12 = eighth-note triplets, 1/24 = sixteenth-note
triplets.
• The Echo effect Types (15–18) create delayed repeats of each note played.
• The Tremolo effect Types (19–22) repeat all held notes (up to four).
• The Trill effect Types (23–26) create two-note trills (alternating notes) when two notes are
held.
Die Harmony-Typen 15 bis 26 sind Rhythmuseffekte und erzeugen im Takt zur Begleitautomatik
Verzierungen oder verzögerte Wiederholungen. Der jeweilige Harmony-Effekt wird sowohl bei
eingeschalteter als auch bei ausgeschalteter automatischer Bass/Akkord-Begleitung erzeugt;
die Effektgeschwindigkeit hängt jedoch stets von der aktuellen Tempoeinstellung ab (Seite 34).
Dank der spezifischen Notenwerte der einzelnen Harmony-Typen können Sie den Effekt präzise
mit dem Rhythmus synchronisieren. Es gibt auch Triolen-Einstellungen: 1/6 = Viertelnotentriolen, 1/12 = Achtelnotentriolen, 1/24 = Sechzehntelnotentriolen.
• Die Echo-Effekttypen (15 bis 18) erzeugen verzögerte Wiederholungen jeder gespielten Note.
• Mit den Tremolo-Effekttypen (19 bis 22) werden alle gehaltenen Noten (maximal vier Töne)
wiederholt.
• Die Triller-Effekttypen (23 bis 26) erzeugen Triller (zwei Töne in schnellem Wechsel), wenn
zwei Tasten gehalten werden.
Les types 15–26 sont des effets reposant sur le rythme qui ajoutent des embellissements ou
des répétitions retardées synchronisées avec l’accompagnement automatique. Ces types
d’effets sont audibles que l’accompagnement automatique soit activé ou non. Cependant, la
vitesse réelle de l’effet dépend du réglage du tempo (page 34). La valeur individuelle des notes
pour chaque type vous permet de synchroniser avec précision l’effet sur le rythme. Des réglages de triolet sont également disponibles : 1/6 = triolets de noires, 1/12 = triolets de croches, 1/
24 = triolets de doubles croches.
• Les types d’effets Echo (15–18) créent des répétitions retardées de chaque note jouée.
• Les types d’effets Tremolo (19–22) répètent toutes les notes maintenues (jusqu’à quatre
notes).
• Les types d’effet Trill (23–26) créent des trilles à deux notes (notes alternées) lorsque deux
notes sont maintenues enfoncées.
Los tipos 15 a 26 son efectos basados en el ritmo y añaden embellecimientos o repeticiones
retardadas en sincronización con el acompañamiento automático. Estos tipos suenan tanto si
el acompañamiento automático está activado como si no; sin embargo, la velocidad real del
efecto depende del ajuste de tempo (página 34). Los valores de las notas individuales en cada
tipo le permiten sincronizar el efecto y el ritmo con una gran precisión. También hay disponibles
ajustes de tresillos: 1/6 = tresillos de notas negras, 1/12 = tresillos de corcheas, 1/24 = tresillos
de semicorcheas.
• Los tipos de efectos de eco (15 a 18) crean repeticiones retardadas de cada nota tocada.
• Los tipos de efectos de trémolo (19 a 22) repiten todas las notas que se mantienen pulsadas
(hasta cuatro).
• Los tipos de efectos de trino (23 a 26) crean trinos de dos notas (notas alternadas) cuando se
mantienen pulsadas dos teclas.
Owner’s Manual / Bedienungsanleitung / Mode d’emploi / Manual de instrucciones
137
Effect Type List
Effect Type List / Effekttypliste / Liste des types
● Reverb Types / Reverb-Typen / Types d’effets Reverb / Tipos de reverberación
No.
1
2
3
4
5
6
7
8
9
10
11
12
13
14
15
16
17
18
19
20
21
22
23
24
25
26
27
28
29
30
31
32
33
34
35
36
138
Type
HALL1
HALL2
HALL3
HALL4
HALL5
HALL M
HALL L
BASIC HALL
LARGE HALL
ATMO HALL
ROOM1
ROOM2
ROOM3
ROOM4
ROOM5
ROOM6
ROOM7
ROOM S
ROOM M
ROOM L
ACOSTIC ROOM
DRUMS ROOM
PERC ROOM
STAGE1
STAGE2
STAGE3
STAGE4
PLATE1
PLATE2
PLATE3
GM PLATE
TUNNEL
CANYON
BASEMENT
WHITE ROOM
NO EFFECT
Description
Reverb simulating the acoustics of a hall.
Reverb simulating the acoustics of a room.
Reverb suitable for a solo instrument.
Reverb simulating a plate reverb unit.
Simulates a cylindrical space expanding to left and right.
A hypothetical acoustic space which extends without limit.
A bit of initial delay followed by reverb with a unique resonance.
A unique short reverb with a bit of initial delay.
No effect.
Owner’s Manual / Bedienungsanleitung / Mode d’emploi / Manual de instrucciones
MSB
1
1
1
1
1
1
1
1
1
1
2
2
2
2
2
2
2
2
2
2
2
2
2
3
3
3
3
4
4
4
4
17
18
19
16
0
LSB
0
16
17
18
1
6
7
30
31
23
16
17
18
19
0
1
2
5
6
7
20
21
22
16
17
0
1
16
17
0
7
0
0
0
0
0
d’effets / Lista de tipos de efectos
● Chorus Types / Chorus-Typen / Types d’effets Chorus / Tipos de coro
No.
1
2
3
4
5
6
7
8
9
10
11
12
13
14
15
16
17
18
19
20
21
22
23
24
25
26
27
28
29
30
31
32
33
34
35
36
37
38
39
40
41
42
43
44
45
Type
CHORUS1
CHORUS2
CHORUS3
CHORUS4
CHORUS5
CHORUS6
CHORUS7
CHORUS8
CHORUS FAST
CHORUS LITE
GM CHORUS1
GM CHORUS2
GM CHORUS3
GM CHORUS4
FB CHORUS
CELESTE1
CELESTE2
SYMPHONIC1
SYMPHONIC2
FLANGER1
FLANGER2
FLANGER3
FLANGER4
FLANGER5
GM FLANGER
ROTARY SP1
ROTARY SP2
ROTARY SP3
ROTARY SP4
ROTARY SP5
ROTARY SP6
ROTARY SP7
2WAY ROT SP
AUTO PAN1
AUTO PAN2
EP AUTOPAN
T_AUTO PAN1
TREMOLO1
TREMOLO2
TREMOLO3
EP TREMOLO
GT TREMOLO1
GT TREMOLO2
T_TREMOLO
NO EFFECT
Description
Conventional chorus program with rich, warm chorusing.
A 3-phase LFO adds modulation and spaciousness to the sound.
Adds more stages to the modulation of Celeste.
Creates a sound reminiscent of a jet airplane.
Simulates a rotary speaker.
Several panning effects that automatically shift the sound position (left, right, front, back).
Tempo synchronized Auto PAN.
Rich Tremolo effect with both volume and pitch modulation.
No effect.
MSB
66
66
66
66
65
65
65
65
65
65
65
65
65
65
65
66
66
68
68
67
67
67
67
67
67
69
71
71
70
66
69
71
86
71
71
71
121
70
71
70
70
71
70
120
0
LSB
17
8
16
1
2
0
1
8
16
17
3
4
5
6
7
0
2
16
0
8
16
17
1
0
7
16
17
18
17
18
0
22
0
16
0
21
0
16
19
0
18
20
19
0
0
Owner’s Manual / Bedienungsanleitung / Mode d’emploi / Manual de instrucciones
139
Effect Type List / Effekttypliste / Liste des types d’effets / Lista de tipos de efectos
● DSP Types / DSP Typen / Types de DSP / Tipos de DSP
No.
1
2
3
4
5
6
7
8
9
10
11
12
13
14
15
16
17
18
19
20
21
22
23
24
25
26
27
28
29
30
31
32
33
34
35
36
37
38
39
40
41
42
43
44
45
46
47
48
49
50
51
52
53
54
55
56
57
58
59
60
61
62
63
Type
HALL1
HALL2
HALL3
HALL4
HALL5
HALL M
HALL L
BASIC HALL
LARGE HALL
ATMO HALL
ROOM1
ROOM2
ROOM3
ROOM4
ROOM5
ROOM6
ROOM7
ROOM S
ROOM M
ROOM L
ACOSTIC ROOM
DRUMS ROOM
PERC ROOM
STAGE1
STAGE2
STAGE3
STAGE4
PLATE1
PLATE2
PLATE3
GM PLATE
TUNNEL
CANYON
BASEMENT
WHITE ROOM
CHORUS1
CHORUS2
CHORUS3
CHORUS4
CHORUS5
CHORUS6
CHORUS7
CHORUS8
CHORUS FAST
CHORUS LITE
GM CHORUS1
GM CHORUS2
GM CHORUS3
GM CHORUS4
FB CHORUS
CELESTE1
CELESTE2
SYMPHONIC1
SYMPHONIC2
ENS DETUNE1
ENS DETUNE2
KARAOKE1
KARAOKE2
KARAOKE3
ER1
ER2
GATE REVERB
REVERS GATE
64
EQ DISCO
65
EQ TEL
66
67
2BAND EQ
3BAND EQ
140
Description
Reverb simulating the acoustics of a hall.
Reverb simulating the acoustics of a room.
Reverb suitable for a solo instrument.
Reverb simulating a plate reverb unit.
Simulates a cylindrical space expanding to left and right.
A hypothetical acoustic space which extends without limit.
A bit of initial delay followed by reverb with a unique resonance.
A unique short reverb with a bit of initial delay.
Conventional chorus program with rich, warm chorusing.
A 3-phase LFO adds modulation and spaciousness to the sound.
Adds more stages to the modulation of Celeste.
Chorus effect without modulation, created by adding a slightly pitch-shifted sound.
Echo for karaoke.
This effect isolates only the early reflection components of the reverb.
Simulation of gated reverb.
Simulation of gated reverb played back in reverse.
Equalizer effect that boosts both high and low frequencies, as is typical in most disco
music.
Equalizer effect that cuts both high and low frequencies, to simulate the sound heard
through a telephone receiver.
A stereo EQ with adjustable LOW and HIGH. Ideal for drum Parts.
A mono EQ with adjustable LOW, MID, and HIGH equalizing.
Owner’s Manual / Bedienungsanleitung / Mode d’emploi / Manual de instrucciones
MSB
1
1
1
1
1
1
1
1
1
1
2
2
2
2
2
2
2
2
2
2
2
2
2
3
3
3
3
4
4
4
4
17
18
19
16
66
66
66
66
65
65
65
65
65
65
65
65
65
65
65
66
66
68
68
87
87
20
20
20
9
9
10
11
LSB
0
16
17
18
1
6
7
30
31
23
16
17
18
19
0
1
2
5
6
7
20
21
22
16
17
0
1
16
17
0
7
0
0
0
0
17
8
16
1
2
0
1
8
16
17
3
4
5
6
7
0
2
16
0
0
16
0
1
2
0
1
0
0
76
16
76
17
77
76
0
0
Effect Type List / Effekttypliste / Liste des types d’effets / Lista de tipos de efectos
No.
68
69
70
71
72
73
74
75
76
77
78
79
80
81
82
83
84
85
86
87
88
89
90
91
92
93
94
95
96
97
98
99
100
101
102
103
104
105
106
107
108
109
110
111
112
113
114
115
116
117
118
119
120
121
122
123
124
125
126
127
128
129
130
131
132
133
134
Type
ST 3BAND EQ
HM ENHANCE1
HM ENHANCE2
FLANGER1
FLANGER2
FLANGER3
FLANGER4
FLANGER5
GM FLANGER
V_FLANGER
TEMPO FLANGER
DELAY LCR1
DELAY LCR2
DELAY LR
ECHO
CROSS DELAY
TEMPO DELAY
TEMPO ECHO
TEMPO CROSS
V_DST ROCA
V_DST FUSION
V_DST CRUNC
V_DST VINTAG
V_DST HARD2
V_DST HEAVY
V_DST HARD1
V_DST SOFT
DIST HARD1
DIST HARD2
DIST SOFT1
DIST SOFT2
DIST HEAVY
OVERDRIVE1
OVERDRIVE2
ST DIST
ST OD
ST DIST HARD
ST DIST SOFT
AMP SIM1
AMP SIM2
ST AMP1
ST AMP2
ST AMP3
ST AMP4
ST AMP5
ST AMP6
DST+DELAY1
DST+DELAY2
OD+DELAY1
OD+DELAY2
CMP+DST+DLY1
CMP+DST+DLY2
CMP+OD+DLY1
CMP+OD+DLY2
V_DST H+DLY
V_DST S+DLY
DST+TDLY
OD+TDLY
COMP+DIST1
COMP+DIST2
CMP+DST+TDLY
CMP+OD+TDLY1
CMP+OD+TDLY2
CMP+OD+TDLY3
CMP+OD+TDLY4
CMP+OD+TDLY5
CMP+OD+TDLY6
Description
Stereo EQ with adjustable LOW, MID and HIGH equalization.
Adds new harmonics to the input signal to make the sound stand out.
Creates a sound reminiscent of a jet airplane.
Flanger which simulates vintage tube and fuzz sounds.
Tempo synchronized flanger.
Produces three delayed sounds: L, R and C (center).
Produces two delayed sounds: L and R. Two feedback delays are provided.
Two delayed sounds (L and R), and independent feedback delays for L and R.
The feedback of the two delayed sounds is crossed.
Tempo synchronized delay.
Tempo synchronized delay.
Tempo synchronized L&R delay.
Vintage Distortion.
Hard-edge distortion.
Soft, warm distortion.
Heavy distortion.
Adds mild distortion to the sound.
Stereo distortion.
Stereo Overdrive.
Hard-edge stereo distortion.
Soft, warm soft distortion.
A simulation of a guitar amp.
Stereo amp simulator.
Distortion and Delay are connected in series.
Overdrive and Delay are connected in series.
Compressor, Distortion and Delay are connected in series.
Compressor, Overdrive and Delay are connected in series.
V Distortion and Delay are connected in series.
Distortion and Tempo Delay are connected in series.
Overdrive and Tempo Delay are connected in series.
Compressor and Distotion are connected in series.
Compressor, Distotion and Tempo Delay are connected in series.
Compressor, Overdrive and Tempo Delay are connected in series.
MSB
76
81
81
67
67
67
67
67
67
104
107
5
5
6
7
8
21
21
22
103
103
98
98
98
98
98
98
75
75
75
75
73
74
74
73
74
75
75
75
75
75
75
75
75
75
75
95
95
95
95
96
96
96
96
98
98
100
100
73
73
101
101
101
101
101
101
101
LSB
18
16
0
8
16
17
1
0
7
0
0
16
0
0
0
0
0
8
0
18
19
28
29
30
31
0
2
16
22
17
23
0
0
9
8
8
18
19
0
1
20
21
8
24
25
26
16
0
17
1
16
0
17
1
1
3
0
1
16
1
0
1
16
17
18
19
20
Owner’s Manual / Bedienungsanleitung / Mode d’emploi / Manual de instrucciones
141
Effect Type List / Effekttypliste / Liste des types d’effets / Lista de tipos de efectos
No.
135
136
137
138
139
140
141
142
Type
V_DST H+TDL1
V_DST H+TDL2
V_DST S+TDL1
V_DST S+TDL2
COMP MED
COMP HEAVY
COMP MELODY
COMP BASS
143
MBAND COMP
144
COMPRESSOR
145
146
147
148
149
150
151
152
153
154
155
156
157
158
159
160
161
162
163
164
165
166
167
168
169
170
171
172
173
174
175
176
177
178
179
180
181
182
183
184
185
186
187
188
189
190
191
192
193
194
195
196
197
198
199
200
201
202
NOISE GATE
VCE CANCEL
AMBIENCE
TALKING MOD
ISOLATOR
PHASER1
PHASER2
PHASER3
T_PHASER1
T_PHASER2
EP PHASER1
EP PHASER2
EP PHASER3
PITCH CHG1
PITCH CHG2
PITCH CHG3
DUAL ROT BRT
D ROT BRT F
DUAL ROT WRM
D ROT WRM F
DUAL ROT SP1
DUAL ROT SP2
ROTARY SP1
ROTARY SP2
ROT SP2 FAST
ROTARY SP3
ROT SP3 FAST
ROTARY SP4
ROT SP4 FAST
ROTARY SP5
ROT SP5 FAST
ROTARY SP6
ROTARY SP7
ROT SP7 FAST
ROTARY SP8
ROT SP8 FAST
ROTARY SP9
ROT SP9 FAST
2WAY ROT SP
DST+ROT SP
DST+2ROT SP
OD+ROT SP
OD+2ROT SP
AMP+ROT SP
AMP+2ROT SP
AUTO PAN1
AUTO PAN2
AUTO PAN3
EP AUTOPAN
T_AUTO PAN1
T_AUTO PAN2
TREMOLO1
TREMOLO2
TREMOLO3
EP TREMOLO
GT TREMOLO1
GT TREMOLO2
VIBE VIBRATE
142
Description
V Distotion and Tempo Delay are connected in series.
Holds down the output level when a specified input level is exceeded. A sense of attack
can also be added to the sound.
Multi-band compressor that allows you to adjust the compression effect for individual frequency bands.
Holds down the output level when a specified input level is exceeded. A sense of attack
can also be added to the sound.
Gates the input when the input signal falls below a specified level.
Attenuates the vocal part of a CD or other source.
Blurs the stereo positioning of the sound to add spatial width.
Adds a vowel sound to the input signal.
Controls the level of a specified frequency band of the input signal.
Cyclically modulates the phase to add modulation to the sound.
Changes the pitch of the input signal.
Rotary speaker simulation with speed switching.
Simulates a rotary speaker.
Distortion and rotary speaker connected in series.
Distortion and 2-way rotary speaker connected in series.
Overdrive and rotary speaker connected in series.
Overdrive and 2-way rotary speaker connected in series.
Amp simulator and rotary speaker connected in series.
Amp simulator and 2-way rotary speaker connected in series.
Several panning effects that automatically shift the sound position (left, right, front, back).
Tempo synchronized pan.
Rich Tremolo effect with both volume and pitch modulation.
Vibraphone effect.
Owner’s Manual / Bedienungsanleitung / Mode d’emploi / Manual de instrucciones
MSB
103
103
103
103
83
83
105
105
LSB
0
17
1
16
16
17
16
17
105
0
83
0
84
85
88
93
115
72
72
72
108
108
72
72
72
80
80
80
99
99
99
99
99
99
69
71
71
71
71
70
70
66
66
69
71
71
69
69
69
69
86
69
86
69
86
69
86
71
71
71
71
121
121
70
71
70
70
71
70
119
0
0
0
0
0
0
8
19
0
16
17
18
16
16
0
1
16
30
17
31
0
1
16
17
23
18
24
17
20
18
19
0
22
25
17
18
19
20
0
1
1
2
2
3
3
16
0
1
21
0
1
16
19
0
18
20
19
0
Effect Type List / Effekttypliste / Liste des types d’effets / Lista de tipos de efectos
No.
203
204
205
206
207
208
209
210
211
212
213
214
215
216
217
218
219
220
221
222
223
224
225
226
227
228
229
230
231
232
233
234
235
236
237
238
239
Type
T_TREMOLO
AUTO WAH1
AUTO WAH2
AT WAH+DST1
AT WAH+DST2
AT WAH+OD1
AT WAH+OD2
TEMPO AT WAH
TOUCH WAH1
TOUCH WAH2
TOUCH WAH3
TC WAH+DST1
TC WAH+DST2
TC WAH+OD1
TC WAH+OD2
WH+DST+DLY1
WH+DST+DLY2
WH+DST+TDLY
WH+OD+DLY1
WH+OD+DLY2
WH+OD+TDLY1
WH+OD+TDLY2
CLVI TC WAH1
CLVI TC WAH2
EP TC WAH1
EP TC WAH2
PEDAL WAH
PEDAL WH+DST
P.WH+DIST HD
P.WH+DIST HV
P.WH+DIST LT
PEDAL WH+OD
P.WH+OD HD
P.WH+OD HV
P.WH+OD LT
NO EFFECT
THRU
Description
Tempo synchronized tremolo.
Cyclically modulates the center frequency of a wah filter.
The output of an Auto Wah can be distorted by Distortion.
The output of an Auto Wah can be distorted by Overdrive.
Tempo synchronized auto wah.
Changes the center frequency of a wah filter according to the input level.
The output of an Touch Wah can be distorted by Distortion.
The output of an Touch Wah can be distorted by Overdrive.
Wah, Distortion and Delay are connected in series.
WAH, Distortion and Tempo Delay are connected in series.
Wah, Overdrive and Delay are connected in series.
WAH, Overdrive and Tempo Delay are connected in series.
Clavinet Touch Wah.
EP Touch Wah.
Pedal position changes the center frequency of the wah filter.
Distortion applied to the pedal wah output.
Overdrive (distortion) applied to the pedal wah output.
No effect.
Bypass without applying an effect.
MSB
120
78
78
78
78
78
78
79
82
82
82
82
82
82
82
97
97
102
97
97
102
102
82
82
82
82
122
122
122
122
122
122
122
122
122
0
64
LSB
0
16
0
17
1
18
2
0
0
8
20
16
1
17
2
16
0
0
17
1
1
16
18
28
19
29
0
1
21
23
25
2
22
24
26
0
0
Owner’s Manual / Bedienungsanleitung / Mode d’emploi / Manual de instrucciones
143
Specifications
Specifications / Technische Daten /
Spécifications techniques / Especificaciones
Dimensions
[W x D x H]
1,369mm x 502mm x 852mm (53-7/8" x 19-3/4" x 33-9/16")
With music rest [W x D x H]
1,369mm x 502mm x 1,006mm (53-7/8" x 19-3/4" x 39-5/8")
Weight
Keyboard
49kg (108 lbs.)
Type
GHS (Graded Hammer Standard) keyboard with matte black keytops
Number of keys
88
Touch Sensitivity
Soft/Medium/Hard/Off
Size and Type
320 x 240 dots LCD display (backlit)
Pedal
Damper (with half-pedal effect), Sostenuto, Soft
Display
Cabinet
Voices
Effects
Styles
Songs
Score, Lyrics
Yes
Contrast
Yes
Key Cover Style
Sliding
Music rest
Yes
Tone Generation Technology
AWM Dynamic Stereo Sampling
Number of Dynamic Steps
3
Number of Polyphony (Max.)
64
Number of Voices
131panel voices + 12 drum/SFX kits + 361 XGlite voices
Reverb
35 types
Chorus
44 types
Harmony
26 types
DSP
238 types
Dual
Yes
Split
Yes
Number of Styles
160 Preset styles + External files
Fingering
Multi fingering/Full keyboard
One Touch Setting
Yes
Number of Songs
30 Preset songs + 5 User songs + 70 External songs (CD-ROM)
Recording
5 User Songs
Easy Song Arranger
Yes
Lesson
Yes
Music Data Base
Number of MDB
300 Preset MDB + External files
Storage
USB device
Yes
Range
5–280
Tempo
Metronome
Registration Memory
Other Functions
Connectivity
Amplifiers/Speakers
Accessories
Optional Accessories
Yes
8 Banks x 2
Piano Reset
Yes
Performance Assistant Technology
Yes
Transpose, Tuning
Yes
Headphones
2
USB TO HOST
Yes
USB TO DEVICE
Yes
Amplifiers
20W + 20W
Speakers
12cm x 2
Included Accessories
Accessories CD-ROM for Windows Installation Guide, My Yamaha Product
User Registration, Bench (included or optional depending on locale),
Owner’s Manual
Headphones
HPE-150
Floppy Disk Drive
UD-FD01
* Specifications and descriptions in this owner’s manual are for information purposes only. Yamaha Corp. reserves the right to change or modify products or specifications at any time without prior notice. Since specifications, equipment or options may not be the same in every locale, please check
with your Yamaha dealer.
* Die technischen Daten und Beschreibungen in dieser Bedienungsanleitung dienen nur der Information. Yamaha Corp. behält sich das Recht vor,
Produkte oder deren technische Daten jederzeit ohne vorherige Ankündigung zu verändern oder zu modifizieren. Da die technischen Daten, das
Gerät selbst oder Sonderzubehör nicht in jedem Land gleich sind, setzen Sie sich im Zweifel bitte mit Ihrem Yamaha-Händler in Verbindung.
* Les caractéristiques techniques et les descriptions du mode d’emploi ne sont données que pour information. Yamaha Corp. se réserve le droit de
changer ou modifier les produits et leurs caractéristiques techniques à tout moment sans aucun avis. Du fait que les caractéristiques techniques, les
équipements et les options peuvent différer d’un pays à l’autre, adressez-vous au distributeur Yamaha le plus proche.
* Las especificaciones y descripciones de este manual del propietario tienen sólo el propósito de servir como información. Yamaha Corp. se reserva
el derecho a efectuar cambios o modificaciones en los productos o especificaciones en cualquier momento sin previo aviso. Puesto que las especificaciones, equipos u opciones pueden no ser las mismas en todos los mercados, solicite información a su distribuidor Yamaha.
144
Owner’s Manual / Bedienungsanleitung / Mode d’emploi / Manual de instrucciones
Owner’s Manual / Bedienungsanleitung / Mode d’emploi / Manual de instrucciones
145
146
Owner’s Manual / Bedienungsanleitung / Mode d’emploi / Manual de instrucciones
Information for Users on Collection and Disposal of Old Equipment
This symbol on the products, packaging, and/or accompanying documents means that
used electrical and electronic products should not be mixed with general household
waste.
For proper treatment, recovery and recycling of old products, please take them to
applicable collection points, in accordance with your national legislation and the
Directives 2002/96/EC.
By disposing of these products correctly, you will help to save valuable resources and
prevent any potential negative effects on human health and the environment which
could otherwise arise from inappropriate waste handling.
For more information about collection and recycling of old products, please contact
your local municipality, your waste disposal service or the point of sale where you
purchased the items.
[For business users in the European Union]
If you wish to discard electrical and electronic equipment, please contact your dealer
or supplier for further information.
[Information on Disposal in other Countries outside the European Union]
This symbol is only valid in the European Union. If you wish to discard these items,
please contact your local authorities or dealer and ask for the correct method of
disposal.
Verbraucherinformation zur Sammlung und Entsorgung alter Elektrogeräte
Befindet sich dieses Symbol auf den Produkten, der Verpackung und/oder
beiliegenden Unterlagen, so sollten benutzte elektrische Geräte nicht mit dem
normalen Haushaltsabfall entsorgt werden.
In Übereinstimmung mit Ihren nationalen Bestimmungen und den Richtlinien 2002/96/
EC, bringen Sie alte Geräte bitte zur fachgerechten Entsorgung, Wiederaufbereitung
und Wiederverwendung zu den entsprechenden Sammelstellen.
Durch die fachgerechte Entsorgung der Elektrogeräte helfen Sie, wertvolle
Ressourcen zu schützen und verhindern mögliche negative Auswirkungen auf die
menschliche Gesundheit und die Umwelt, die andernfalls durch unsachgerechte
Müllentsorgung auftreten könnten.
Für weitere Informationen zum Sammeln und Wiederaufbereiten alter Elektrogeräte,
kontaktieren Sie bitte Ihre örtliche Stadt- oder Gemeindeverwaltung, Ihren
Abfallentsorgungsdienst oder die Verkaufsstelle der Artikel.
[Information für geschäftliche Anwender in der Europäischen Union]
Wenn Sie Elektrogeräte ausrangieren möchten, kontaktieren Sie bitte Ihren Händler
oder Zulieferer für weitere Informationen.
[Entsorgungsinformation für Länder außerhalb der Europäischen Union]
Dieses Symbol gilt nur innerhalb der Europäischen Union. Wenn Sie solche Artikel
ausrangieren möchten, kontaktieren Sie bitte Ihre örtlichen Behörden oder Ihren
Händler und fragen Sie nach der sachgerechten Entsorgungsmethode.
Owner’s Manual / Bedienungsanleitung / Mode d’emploi / Manual de instrucciones
147
Information concernant la Collecte et le Traitement des déchets d’équipements
électriques et électroniques.
Le symbole sur les produits, l’emballage et/ou les documents joints signifie que les
produits électriques ou électroniques usagés ne doivent pas être mélangés avec les
déchets domestiques habituels.
Pour un traitement, une récupération et un recyclage appropriés des déchets
d’équipements électriques et électroniques, veuillez les déposer aux points de
collecte prévus à cet effet, conformément à la réglementation nationale et aux
Directives 2002/96/EC.
En vous débarrassant correctement des déchets d’équipements électriques et
électroniques, vous contribuerez à la sauvegarde de précieuses ressources et à la
prévention de potentiels effets négatifs sur la santé humaine qui pourraient advenir
lors d’un traitement inapproprié des déchets.
Pour plus d’informations à propos de la collecte et du recyclage des déchets
d’équipements électriques et électroniques, veuillez contacter votre municipalité,
votre service de traitement des déchets ou le point de vente où vous avez acheté les
produits.
[Pour les professionnels dans l’Union Européenne]
Si vous souhaitez vous débarrasser des déchets d’équipements électriques et
électroniques veuillez contacter votre vendeur ou fournisseur pour plus d’informations.
[Information sur le traitement dans d’autres pays en dehors de l’Union
Européenne]
Ce symbole est seulement valables dans l’Union Européenne. Si vous souhaitez vous
débarrasser de déchets d’équipements électriques et électroniques, veuillez
contacter les autorités locales ou votre fournisseur et demander la méthode de
traitement appropriée.
Información para Usuarios sobre Recolección y Disposición de Equipamiento Viejo
Este símbolo en los productos, embalaje, y/o documentación que se acompañe
significa que los productos electrónicos y eléctricos usados no deben ser mezclados
con desechos hogareños corrientes.
Para el tratamiento, recuperación y reciclado apropiado de los productos viejos, por
favor llévelos a puntos de recolección aplicables, de acuerdo a su legislación nacional
y las directivas 2002/96/EC.
Al disponer de estos productos correctamente, ayudará a ahorrar recursos valiosos y
a prevenir cualquier potencial efecto negativo sobre la salud humana y el medio
ambiente, el cual podría surgir de un inapropiado manejo de los desechos.
Para mayor información sobre recolección y reciclado de productos viejos, por favor
contacte a su municipio local, su servicio de gestión de residuos o el punto de venta
en el cual usted adquirió los artículos.
[Para usuarios de negocios en la Unión Europea]
Si usted desea deshacerse de equipamiento eléctrico y electrónico, por favor contacte
a su vendedor o proveedor para mayor información.
[Información sobre la Disposición en otros países fuera de la Unión Europea]
Este símbolo sólo es válidos en la Unión Europea. Si desea deshacerse de estos
artículos, por favor contacte a sus autoridades locales y pregunte por el método
correcto de disposición.
148
Owner’s Manual / Bedienungsanleitung / Mode d’emploi / Manual de instrucciones
Explanation of Graphical Symbols
The lightning flash with arrowhead symbol
within an equilateral triangle is intended to alert
the user to the presence of uninsulated
“dangerous voltage” within the product’s
enclosure that may be of sufficient magnitude to
constitute a risk of electric shock to persons.
CA U TI ON
RISK OF ELECTRIC SHOCK
DO NOT OPEN
The exclamation point within an equilateral
triangle is intended to alert the user to the
presence of important operating and
maintenance (servicing) instructions in the
literature accompanying the product.
CAUTION: TO REDUCE THE RISK OF
ELECTRIC SHOCK, DO NOT REMOVE
COVER (OR BACK). NO USER-SERVICEABLE
PARTS INSIDE. REFER SERVICING TO
QUALIFIED SERVICE PERSONNEL.
The above warning is located on the bottom of the unit.
IMPORTANT SAFETY INSTRUCTIONS
1
2
3
4
5
6
7
8
9
10
Read these instructions.
Keep these instructions.
Heed all warnings.
Follow all instructions.
Do not use this apparatus near water.
Clean only with dry cloth.
Do not block any ventilation openings. Install in
accordance with the manufacturer’s instructions.
Do not install near any heat sources such as radiators,
heat registers, stoves, or other apparatus (including
amplifiers) that produce heat.
Do not defeat the safety purpose of the polarized or
grounding-type plug. A polarized plug has two blades
with one wider than the other. A grounding type plug
has two blades and a third grounding prong. The wide
blade or the third prong are provided for your safety. If
the provided plug does not fit into your outlet, consult
an electrician for replacement of the obsolete outlet.
Protect the power cord from being walked on or pinched
particularly at plugs, convenience receptacles, and the
point where they exit from the apparatus.
11
12
13
14
Only use attachments/accessories specified by the
manufacturer.
Use only with the cart, stand,
tripod, bracket, or table specified
by the manufacturer, or sold with
the apparatus. When a cart is
used, use caution when moving
the cart/apparatus combination
to avoid injury from tip-over.
Unplug this apparatus during
lightning storms or when unused for long periods of
time.
Refer all servicing to qualified service personnel.
Servicing is required when the apparatus has been
damaged in any way, such as power-supply cord or plug
is damaged, liquid has been spilled or objects have
fallen into the apparatus, the apparatus has been
exposed to rain or moisture, does not operate normally,
or has been dropped.
WARNING
TO REDUCE THE RISK OF FIRE OR ELECTRIC SHOCK, DO NOT EXPOSE THIS APPARATUS TO RAIN OR MOISTURE.
(UL60065_03)
Owner’s Manual / Bedienungsanleitung / Mode d’emploi / Manual de instrucciones
149
For details of products, please contact your nearest Yamaha
representative or the authorized distributor listed below.
Pour plus de détails sur les produits, veuillez-vous adresser à Yamaha ou
au distributeur le plus proche de vous figurant dans la liste suivante.
NORTH AMERICA
CANADA
Yamaha Canada Music Ltd.
135 Milner Avenue, Scarborough, Ontario,
M1S 3R1, Canada
Tel: 416-298-1311
U.S.A.
Yamaha Corporation of America
6600 Orangethorpe Ave., Buena Park, Calif. 90620,
U.S.A.
Tel: 714-522-9011
CENTRAL & SOUTH AMERICA
MEXICO
Die Einzelheiten zu Produkten sind bei Ihrer unten aufgeführten
Niederlassung und bei Yamaha Vertragshändlern in den jeweiligen
Bestimmungsländern erhältlich.
Para detalles sobre productos, contacte su tienda Yamaha más cercana
o el distribuidor autorizado que se lista debajo.
THE NETHERLANDS/
BELGIUM/LUXEMBOURG
Yamaha Music Europe Branch Benelux
Clarissenhof 5-b, 4133 AB Vianen, The Netherlands
Tel: 0347-358 040
FRANCE
Yamaha Musique France
BP 70-77312 Marne-la-Vallée Cedex 2, France
Tel: 01-64-61-4000
ITALY
Yamaha Musica Italia S.P.A.
Viale Italia 88, 20020 Lainate (Milano), Italy
Tel: 02-935-771
SPAIN/PORTUGAL
Yamaha de México S.A. de C.V.
Calz. Javier Rojo Gómez #1149,
Col. Guadalupe del Moral
C.P. 09300, México, D.F., México
Tel: 55-5804-0600
BRAZIL
Yamaha Musical do Brasil Ltda.
Rua Joaquim Floriano, 913 - 4' andar, Itaim Bibi,
CEP 04534-013 Sao Paulo, SP. BRAZIL
Tel: 011-3704-1377
ARGENTINA
Yamaha Music Latin America, S.A.
Sucursal de Argentina
Olga Cossettini 1553, Piso 4 Norte
Madero Este-C1107CEK
Buenos Aires, Argentina
Tel: 011-4119-7000
PANAMA AND OTHER LATIN
AMERICAN COUNTRIES/
CARIBBEAN COUNTRIES
Yamaha Music Latin America, S.A.
Torre Banco General, Piso 7, Urbanización Marbella,
Calle 47 y Aquilino de la Guardia,
Ciudad de Panamá, Panamá
Tel: +507-269-5311
EUROPE
THE UNITED KINGDOM/IRELAND
Yamaha Music U.K. Ltd.
Sherbourne Drive, Tilbrook, Milton Keynes,
MK7 8BL, England
Tel: 01908-366700
GERMANY
Yamaha Music Europe GmbH
Siemensstraße 22-34, 25462 Rellingen, Germany
Tel: 04101-3030
SWITZERLAND/LIECHTENSTEIN
Yamaha Music Europe GmbH
Branch Switzerland in Zürich
Seefeldstrasse 94, 8008 Zürich, Switzerland
Tel: 01-383 3990
AUSTRIA
Yamaha Music Europe GmbH Branch Austria
Schleiergasse 20, A-1100 Wien, Austria
Tel: 01-60203900
CZECH REPUBLIC/SLOVAKIA/
HUNGARY/SLOVENIA
Yamaha Music Europe GmbH Branch Austria
Schleiergasse 20, A-1100 Wien, Austria
Tel: 01-602039025
POLAND/LITHUANIA/LATVIA/ESTONIA
Yamaha Music Europe GmbH
Branch Sp.z o.o. Oddzial w Polsce
ul. 17 Stycznia 56, PL-02-146 Warszawa, Poland
Tel: 022-868-07-57
Yamaha Música Ibérica, S.A.
Ctra. de la Coruna km. 17, 200, 28230
Las Rozas (Madrid), Spain
Tel: 91-639-8888
GREECE
Philippos Nakas S.A. The Music House
147 Skiathou Street, 112-55 Athens, Greece
Tel: 01-228 2160
SWEDEN
Yamaha Scandinavia AB
J. A. Wettergrens Gata 1, Box 30053
S-400 43 Göteborg, Sweden
Tel: 031 89 34 00
DENMARK
YS Copenhagen Liaison Office
Generatorvej 6A, DK-2730 Herlev, Denmark
Tel: 44 92 49 00
FINLAND
ASIA
THE PEOPLE’S REPUBLIC OF CHINA
Yamaha Music & Electronics (China) Co.,Ltd.
2F, Yunhedasha, 1818 Xinzha-lu, Jingan-qu,
Shanghai, China
Tel: 021-6247-2211
HONG KONG
Tom Lee Music Co., Ltd.
11/F., Silvercord Tower 1, 30 Canton Road,
Tsimshatsui, Kowloon, Hong Kong
Tel: 2737-7688
INDIA
Yamaha Music India Pvt. Ltd.
5F Ambience Corporate Tower Ambience Mall Complex
Ambience Island, NH-8, Gurgaon-122001, Haryana, India
Tel: 0124-466-5551
INDONESIA
PT. Yamaha Music Indonesia (Distributor)
PT. Nusantik
Gedung Yamaha Music Center, Jalan Jend. Gatot
Subroto Kav. 4, Jakarta 12930, Indonesia
Tel: 21-520-2577
KOREA
Yamaha Music Korea Ltd.
8F, 9F, Dongsung Bldg. 158-9 Samsung-Dong,
Kangnam-Gu, Seoul, Korea
Tel: 080-004-0022
MALAYSIA
Yamaha Music Malaysia, Sdn., Bhd.
Lot 8, Jalan Perbandaran, 47301 Kelana Jaya,
Petaling Jaya, Selangor, Malaysia
Tel: 3-78030900
PHILIPPINES
Yupangco Music Corporation
339 Gil J. Puyat Avenue, P.O. Box 885 MCPO,
Makati, Metro Manila, Philippines
Tel: 819-7551
F-Musiikki Oy
Kluuvikatu 6, P.O. Box 260,
SF-00101 Helsinki, Finland
Tel: 09 618511
SINGAPORE
NORWAY
Norsk filial av Yamaha Scandinavia AB
Grini Næringspark 1, N-1345 Østerås, Norway
Tel: 67 16 77 70
ICELAND
Skifan HF
Skeifan 17 P.O. Box 8120, IS-128 Reykjavik, Iceland
Tel: 525 5000
RUSSIA
Yamaha Music Asia Pte., Ltd.
#03-11 A-Z Building
140 Paya Lebor Road, Singapore 409015
Tel: 747-4374
TAIWAN
Yamaha KHS Music Co., Ltd.
3F, #6, Sec.2, Nan Jing E. Rd. Taipei.
Taiwan 104, R.O.C.
Tel: 02-2511-8688
THAILAND
Yamaha Music (Russia)
Office 4015, entrance 2, 21/5 Kuznetskii
Most street, Moscow, 107996, Russia
Tel: 495 626 0660
OTHER EUROPEAN COUNTRIES
Yamaha Music Europe GmbH
Siemensstraße 22-34, 25462 Rellingen, Germany
Tel: +49-4101-3030
AFRICA
Yamaha Corporation,
Asia-Pacific Music Marketing Group
Nakazawa-cho 10-1, Naka-ku, Hamamatsu,
Japan 430-8650
Tel: +81-53-460-2312
MIDDLE EAST
TURKEY/CYPRUS
Siam Music Yamaha Co., Ltd.
4, 6, 15 and 16th floor, Siam Motors Building,
891/1 Rama 1 Road, Wangmai,
Pathumwan, Bangkok 10330, Thailand
Tel: 02-215-2626
OTHER ASIAN COUNTRIES
Yamaha Corporation,
Asia-Pacific Music Marketing Group
Nakazawa-cho 10-1, Naka-ku, Hamamatsu,
Japan 430-8650
Tel: +81-53-460-2317
OCEANIA
AUSTRALIA
Yamaha Music Australia Pty. Ltd.
Level 1, 99 Queensbridge Street, Southbank,
Victoria 3006, Australia
Tel: 3-9693-5111
NEW ZEALAND
Yamaha Music Europe GmbH
Siemensstraße 22-34, 25462 Rellingen, Germany
Tel: 04101-3030
OTHER COUNTRIES
Yamaha Music Gulf FZE
LOB 16-513, P.O.Box 17328, Jubel Ali,
Dubai, United Arab Emirates
Tel: +971-4-881-5868
Music Works LTD
P.O.BOX 6246 Wellesley, Auckland 4680,
New Zealand
Tel: 9-634-0099
COUNTRIES AND TRUST
TERRITORIES IN PACIFIC OCEAN
Yamaha Corporation,
Asia-Pacific Music Marketing Group
Nakazawa-cho 10-1, Naka-ku, Hamamatsu,
Japan 430-8650
Tel: +81-53-460-2312
HEAD OFFICE Yamaha Corporation, Pro Audio & Digital Musical Instrument Division
Nakazawa-cho 10-1, Naka-ku, Hamamatsu, Japan 430-8650
Tel: +81-53-460-3273
EKB50
Yamaha Home Keyboards Home Page
http://music.yamaha.com/homekeyboard/
Yamaha Manual Library
http://www.yamaha.co.jp/manual/
U.R.G., Pro Audio & Digital Musical Instrument Division, Yamaha Corporation
© 2009 Yamaha Corporation
WR86780 XXXPOXXX.X-01A0
Printed in Indonesia
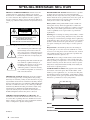


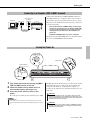


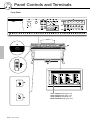


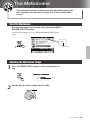


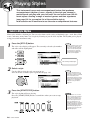
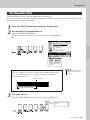
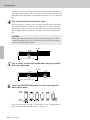
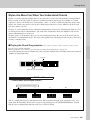
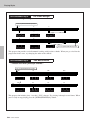
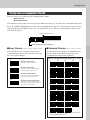

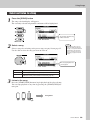
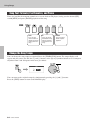
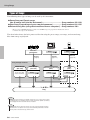
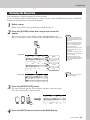

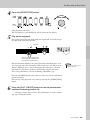


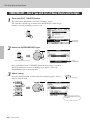


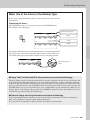

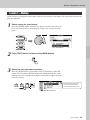
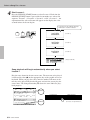

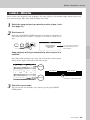
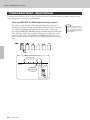


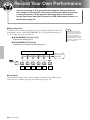
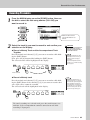
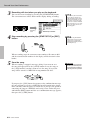
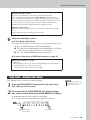
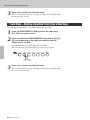

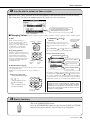

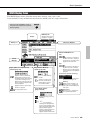
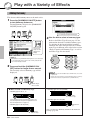

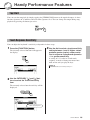
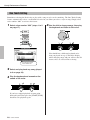


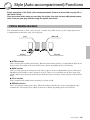
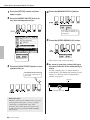
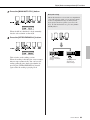

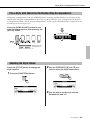
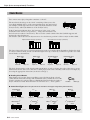
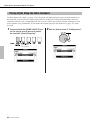
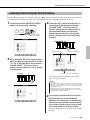


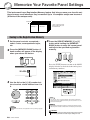
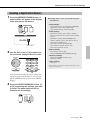

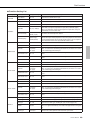


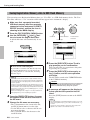


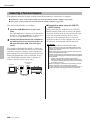
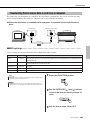

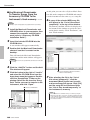


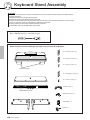

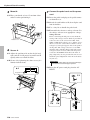
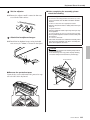

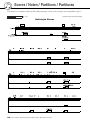
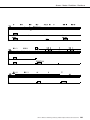


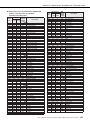


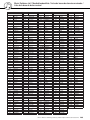
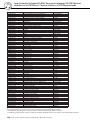
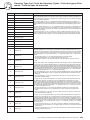
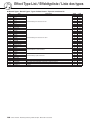


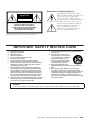


![Press the [FUNCTION] button.](http://vs1.manualzilla.com/store/data/005738170_1-cd4fded3b03c9e88548afe52897345e1-150x150.png)