1
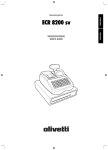
ECR 7100
USER'S GUIDE
ENGLISH
Cash Register
PUBLICATION ISSUED BY:
Olivetti S.p.A.
www.olivetti.com
Copyright © 2009, Olivetti
All rights reserved
Your attention is drawn to the following actions that could compromise
the characteristics of the product:
Het is belangrijk te weten dat de volgende acties nadelige gevolgen kunnen
hebben voor de goede werking van het product:
•
incorrect electrical supply;
•
het verkeerd aansluiten van een stroombron;
•
incorrect installation; incorrect or improper use, or, in any case, not in
accordance with the warnings given in the User Manual supplied with
the product;
•
onjuiste installatie; onjuist of oneigenlijk gebruik, of handelingen die
worden uitgevoerd zonder inachtneming van de waarschuwingen in
de handleiding bij het product;
•
replacement of original components or accessories with others of a
type not approved by the manufacturer, or carried out by unauthorized
personnel.
•
vervanging van originele onderdelen of accessoires door onderdelen
of accessoires van een type dat niet is goedgekeurd door de fabrikant,
of vervanging die wordt uitgevoerd door onbevoegd personeel.
Nous attirons votre attention sur les actions suivantes qui peuvent
compromettre la conformité attestée ci-dessus et les caractéristiques du
produit:
Chamamos a sua atenção para as seguintes acções que podem
comprometer o desempenho do produto:
•
abastecimento de corrente não adequado;
•
Alimentation électrique erronée;
•
•
Installation ou utilisation erronée ou non conforme aux indications
exposées dans le manuel d'utilisation fourni avec le produit;
instalação incorrecta, utilização incorrecta ou indevida, ou não
respeitando os avisos descritos no Manual do Utilizador que é fornecido
com o produto;
•
Replacement de composants ou d'accessoires originaux par des
pièces non approuvées par le constructeur, ou effectué par du personnel
non autorisé.
•
substituição de componentes originais ou acessórios por outros de
tipo não aprovado pelo fabricante, ou substituição realizada por
pessoal não autorizado.
Wir möchten Sie darauf hinweisen, daß folgende Aktionen die oben
bescheinigte Konformität und die Eigenschaften des Produkts
beeinträchtigen können:
Vær opmærksom på, at følgende handlinger kan beskadige
produktet:
•
Forkert strømforsyning.
•
Falsche Stromversorgung;
•
•
Installations- oder Bedienungsfehler bzw. Nichtbeachtung der Hinweise
in der Bedienungsanleitung, die mit dem Produkt geliefert wurde;
Forkert installation, ukorrekt eller forkert brug eller, som under alle
omstændigheder, ikke er i overensstemmelse med advarslerne i den
medfølgende Brugervejledning.
•
Das Auswechseln von Bauteilen oder Originalzubehör durch Unbefugte
oder das Ersetzen durch Teile, die nicht vom Hersteller anerkannt
werden.
•
Udskiftning af originale dele eller tilbehør med andre typer, som ikke
er godkendt af fabrikanten, eller foretaget af uautoriseret personer.
Prestar mucha atención a las siguientes acciones que pueden
comprometer la conformidad arriba certificada y, obviamente, las
características del producto:
Vi önskar fästa din uppmärksamhet på verksamheterna
som anges nedan, eftersom dessa kan kompromittera produktens
egenskaper:
•
Alimentación eléctrica errónea;
•
oriktig strömförsörjning;
•
Installación o uso erróneos, improprios o no conformes con las
advertencias detalladas en el manual de uso suministrado con el
producto;
•
oriktig installation; oriktig eller olämplig användning, eller som i alla
falli inte överensstämmer med de varningar som ges i
användarhandboken som levereras tillsammans med produkten;
•
Sustitución de componentes o accesorios originales con otros no
aprovados por el fabricante o bien efectuada por parte personal no
autorizado.
•
byte av originalkomponenter eller tillbehör mot annan typ
som ej godkänts av tillverkaren, eller som utförts av obehörig
personal.
FIGURES - IMAGES
ABBILDUNGEN - FIGURAS
AFBEELDINGEN - FIGURAS
FIGURER - BILDER
6
7
1
1
2
21
3
4
5
6
7
8
20
8
2
19
18
17
16
9
10
4
3
5
15 14
13
12
11
SAFETY INFORMATION
INFORMATIONS DE SECURITE
SICHERHEITSVORSCHRIFTEN
INFORMACIÓN DE SEGURIDAD
VEILIGHEIDSINFORMATIE
INFORMAÇÃO SOBRE SEGURANÇA
SIKKERHEDSFORANSTALTNINGER
SÄKERHETSINFORMATION
1. Connect the power cord to an electrical outlet that is near the product and easily accessible.
2. Install your cash register on a flat and stable surface, at a location where no one can step on
or trip over the power cord.
3. Do not use your cash register near water, or with wet hands.
4. Do not expose your cash register to rain or moisture.
5. Unplug your cash register from the electrical outlet before cleaning.
1. Brancher le cordon d’alimentation à la prise électrique qui se trouve près du produit et facilement
accessible.
2. Initialiser la caisse enregistreuse sur une surface plaine et stable, dans une place où il n’y pas le
risque de presser ou de heurter le cordon.
3. Ne pas utiliser la caisse enregistreuse près de l’eau, ou avec les mains mouillées.
4. Ne pas exposer la caisse enregistreuse à la pluie ou à l’humidité.
5. Débrancher la caisse enregistreuse de la prise électrique avant de la nettoyer.
1. Das Netzkabel an eine Steckdose anschließen, die in der Nähe der Maschine und leicht zugänglich ist.
2. Die Registrierkasse auf einer ebenen stabilen Fläche installieren. Darauf achten, dass keiner über
das Netzkabel stolpern oder auf es treten kann.
3. Die Kasse nicht in der Nähe von Wasser oder mit nassen Händen benutzen.
4. Die Kasse nicht Regen oder Feuchtigkeit aussetzen.
5. Vor Reinigungsarbeiten die Kasse vom Stromnetz trennen.
1. Conecte el cable de alimentación a una toma eléctrica que se encuentre cerca del producto y que
tenga un fácil acceso.
2. Instale su caja registradora en una superficie plana y estable, en un emplazamiento en el que nadie
pueda pisar el cable de alimentación o tropezar con él.
3. No utilice la caja registradora cerca del agua ni si tiene las manos húmedas.
4. No exponga la caja registradora a la lluvia o la humedad.
5. Desconecte la caja registradora de la toma eléctrica antes de la limpieza.
1. Sluit het netsnoer aan op een stopcontact dat zich in de buurt van het kasregister bevindt en vrij
toegankelijk is.
2. Installeer uw kasregister op een plat en stabiel oppervlak, op een plaats waar niemand op het
netsnoer kan trappen of erover struikelen.
3. Gebruik uw kasregister niet in de buurt van water, of met natte handen.
4. Stel uw kasregister niet bloot aan regen of vocht.
5. Trek de stekker uit het stopcontact voordat u het kasregister gaat schoonmaken.
1. Ligue o cabo de alimentação a uma tomada eléctrica que esteja perto da máquina e seja de fácil acesso.
2. Instale a caixa registadora sobre uma superfície plana e estável, num local onde ninguém possa chocar
com ela ou tropeçar no cabo de alimentação.
3. Não utilize a caixa registadora perto de água, nem a manuseie se tiver as mãos molhadas.
4. Não exponha a caixa registadora a chuva ou humidade.
5. Desligue a caixa registadora da tomada de corrente antes de a limpar.
1. Tilslut de elektriske kabel til elnettet, som er ved siden af produktet og nemt tilgængelig.
2. Placér Deres kasseapparat på en flad, sikker og stabil overflade, et sted hvor ingen kan gå eller trampe
over det elektrisk kabel.
3. Brug ikke Deres kasseapparat i nærheden af vand, eller med våde hænder.
4. Deres kasseapparat må ikke udsættes for regn eller fugtighed.
5. Slut Deres kasseapparat fra elnettet inden de går i gang med rengøring.
1. Stoppa in nätsladdens stickkontakt i ett lättåtkomligt vägguttag nära apparaten.
2. Installera kassaregistret på en jämn och stabil yta där ingen kan trampa på eller snubbla
över nätsladden.
3. Använd inte kassaregistret nära vatten eller med våta händer.
4. Utsätt inte kassaregistret för regn eller fukt.
5. Dra ut stickkontakten från vägguttaget före rengöringen.
HOW DO I PROCEED?
COMMENT
DOIT-PROCEDER?
STARTJEUP
START UP
VORGEHENSWEISE
START
UP - ASTART
UP
¿QUÉ
DEBO HACER
CONTINUACIÓN?
HOE
GA
IK
TE
WERK?
START UP - START UP
O QUE DEVO FAZER?
START UP - START UP
FREMGANGSMÅDE?
HUR GÅR JAG VIDARE?
1. Plug the cash register into an electrical outlet and insert the batteries.
2. Load the paper.
3. Proceed with Quick Start Programming.
4. Perform basic sales transactions.
5. Get to know your cash register in depth.
1.
2.
3.
4.
5.
Brancher la caisse enregistreuse à la prise électrique et insérer les batteries.
Charger le papier.
Procéder avec la fonction Vite Démarre de Programmation.
Exécuter les transactions de ventes basiques.
Prendre confiance avec la caisse enregistreuse.
1. Die Kasse an eine Netzsteckdose anschließen und die Batterien einsetzen.
2. Papier laden.
3. Die Quick Start Programmierung durchführen.
4. Einfache Verkaufsvorgänge ausführen.
5. Sich mit allen Funktionen der Kasse vertraut machen.
1. Enchufe la caja registradora en una toma eléctrica e inserte las baterías.
2. Cargue el papel.
3. Continúe con la programación de la puesta en servicio rápida.
4. Realice transacciones de venta básicas.
5. Conozca más en detalle la caja registradora.
1. Sluit het kasregister aan op een stopcontact en plaats de batterijen.
2. Plaats het papier.
3. Voer de snelstart-programmering uit.
4. Voer basis-verkooptransacties uit.
5. Leer uw kasregister grondig kennen.
1. Ligue a caixa registadora a uma tomada eléctrica e insira as pilhas.
2. Coloque o papel.
3. Continue com a Programação de Iniciação Rápida.
4. Realize transacções básicas de vendas.
5. Familiarize-se com a sua caixa registadora.
1.
2.
3.
4.
5.
Tilslut kasseapparatet til elnettet og sæt batterierne i.
Sæt papir i.
Gå frem med Hurtig Start Programmering.
Indret basis salgstransaktioner.
Lær Deres kasseapparat at kende.
1.
2.
3.
4.
5.
Sätt in kassaregistersladden i ett vägguttag och sätt i batterierna.
Ladda pappret
Gå vidare med programmeringen för snabbstart.
Utför grundläggande försäljningstransaktioner.
Fördjupa kännedomen om kassaregistret.
INSERTING MEMORY BACKUP BATTERIES
INSÉRER LES BATTERIES TAMPONS DE LA MÉMOIRE
BATTERIEN ZUR SPEICHERSICHERUNG EINSETZEN
INSERCIÓN DE LAS BATERÍAS DE RESPALDO DE LA MEMORIA
INSTALLEREN VAN DE BATTERIJEN VOOR NOODVOEDING
INSERIR AS PILHAS DE BACKUP DA MEMÓRIA
INDSÆT HUKOMMELSE BACKUP BATTERIER
SÄTTA I BACK-UP BATTERIERNA
LOADING PAPER
INSTALLATION DU ROULEAU DE PAPIER
EINSETZEN PAPIER
CARGA DEL ROLLO DE PAPEL
PAPIER PLAATSEN
ABASTECER PAPEL
SÆT PAPIR I
LADDA PAPPER
DAILY JOB OPERATIONS
OPÉRATIONS QUOTIDIENNES
TÄGLICHE ARBEITEN
OPERACIONES COTIDIANAS DURANTE EL TRABAJO
DAGELIJKSE TAKEN
OPERAÇÕES DIÁRIAS
DAGLIGE ARBEJDSOPERATIONER
DAGLIGA ARBETSMOMENT
Morning startup
Démarre du matin
Einschalten zu
Geschäftsbeginn
Puesta en marcha al inicio
de la jornada
Morgens opstarten
Arranque da manhã
Morgens opstart
Sales transactions
Transactions de ventes
Verkaufsvorgänge
Transacciones de venta
Verkooptransacties
Transacções de vendas
Salgstransaktioner
Igångsättning på morgonen
End of day reports
Compte-rendu de fin journée
Berichte bei Geschäftsende
Informes de cierre de la
jornada
Einddaags-rapportages
Relatórios de fim de dia
Slut af dagens registreringer
Försäljingstransaktioner
Slut på dagen rapporter
Contents
1
1
1
2
2
3
3
3
3
3
4
4
5
5
5
6
6
6
6
7
7
8
8
8
9
10
10
10
11
11
11
11
11
11
12
•
•
•
•
•
•
•
•
•
•
•
•
•
•
•
•
•
14 departments and up to 200 Price Look-Up (PLU)
settings;
8 clerk numbers to monitor the sales of individual
employees;
9-digit operator numeric Liquid Crystal Display (LCD);
Quantity entries using the decimal point;
Training mode facility with related password;
Replaceable keycaps;
Receipt on/off, and duplicate receipt features;
Possibility of activating a Clerk Security System
consisting of a three-digit security code;
Z management report mode password definition;
Special rounding capabilities for Swiss, Danish and
Swedish currencies;
Department programming (positive and negative sales)
2 foreign currency exchange rates;
Cash, check, charge and card tender media keys, with
change tendered on all payments;
4 different VAT rates;
Possibility of programming the cash register to print a
range of VAT totals on the sales receipt;
Time display at the press of a key;
Battery back-up protection for the records and programming data.
Cash Register Components
With reference to figure 1:
1. Operator Display
2. Keypad
3. Cash Drawer
4. Cash Drawer Lock
5. Power Cord
6. Customer Receipt Output Window
7. Printer Compartment Cover
8. Control Dial
Removable Cash Drawer with Lock
With reference to figure 4, the cash drawer has slots for
banknotes and for coins.
Open the drawer by pressing
or by sliding the hidden
emergency button underneath the register.
The cash drawer can be completely removed from the
register by lifting up on the open drawer and pulling towards
yourself.
1
ENGLISH
Major Features
Cash Register Components
Removable Cash Drawer with Lock
Keypad Functions
The Control Dial
Operator Display
Error Conditions
Error Codes
Clearing an Error
Cash Register Reset Operations
Quick Start
Quick Start Programming
Cash Register Programming and Features
Making Changes to Cash Register Programming
Percent Discount (-%)
Foreign Currency Exchange Rates
Rounding Option for Swiss, Danish and
Swedish Currencies
Decimal Point Position
Printing VAT Information on Customer Receipts
Calculator Mode
Clerk System
Manager Password
Using the Cash Register in a
Password Protected Mode
Training Mode
System Options
Management Reports
X and Z Reports
Clerk Report
PLU Sales Report
Department Programming Report
PLU Programming Report
Cash Register Programming Report
Training Report
Clearing the Grand Total
Sales Transactions
Major Features
Keypad Functions
15.
- Clears an entry made from the numeric keypad
With reference to figure 5:
or with
1.
Department or function key. Also used to clear error
conditions.
- Allows price entries for Departments 8-14. Press
this key before entering applicable department keys.
- Registers any money taken out of the cash
2.
drawer that is not part of a sale. When pressed in the
JRNL mode, prints one or more copies of the last sales
translation recorded (overrides the Receipt Off mode
set with the related key).
3.
4.
17.
- Used to subtract a percentage rate from an
individual item or an entire sale. The rate can be a preprogrammed percentage rate or any other manually
entered percentage rate.
18.
- Used to manually enter a price for a PLU article.
19.
- When used as the coupon key, subtracts an amount
from an item or the sales total, such as a coupon deduction.
When used as the Refund key, subtracts an item that is
returned for refund.
- Advances the receipt or journal paper one line
20.
feed; advances the paper continuously when held down.
- Opens the cash drawer without registering any
amount or when changing cash for a non-sales
transaction.
6.
- Registers a preset price of an individual item to
the appropriate department.
- When used as the RA key, registers any money
received on account that is not part of a sale; for example,
the start-up money put in the drawer at the start of each
business day can be registered as an RA. As the
Currency Conversion key, it is used to automatically
calculate and display the value in foreign currency of the
subtotal of a sale or of a particular amount registered.
5.
16.
- Confirms an entered clerk number and three-digit
security code. In the JRNL mode, toggles the cash
register between printing and not printing the sales
receipt.
before finalizing a transaction with a
- Registers sales that are put on credit, such as a
- Deletes the last item entered, and used for
21.
correcting a particular entry after it is processed and
printed. During caption programming, cancels from right
to left the characters that have been entered.
debit card, or on a credit card that is alternative to the one
used for Charge tenders.
7.
- Registers sales paid by check.
The Control Dial
8.
- Subtotals a sale, and used for the programming of
This dial must be properly positioned to operate the cash
register, to set the programs and to print or reset the totals for
the management report. With reference to figure 3:
VAT rates.
9.
1. Turn the control dial to the required position as indicated
below.
- Registers sales that are charged.
10.
- Totals exact cash transactions, computes
change and totals transactions that are split tendered
with check or credit card and cash together. This key is
also used to enter into the calculator mode. In the calculator
mode, it is used as the "equal" (=) key.
11.
-
- Departments 1 through 7, to enter single
calculator mode. When pressed after
X1/X2 Prints the X management (mid-day) report.
, registers to
Z1/Z2 Prints the Z management (end-of-day) report and
resets totals (except the grand total) to zero.
- Enters a decimal point for defining quantities with
-
/
- Input amounts, indicate how many
times a particular item repeats, add and subtract
percentage rates and input department code numbers.
14.
- Multiplies [DEPARTMENT],
or
entries
and displays the current time in the REG and JRNL
modes.
2
JRNL (On/Journal Tape) - The cash register is set for
standard sales transactions. A journal record is
printed for each transaction. The key-activated
Receipt On/Off function does not work in this
mode (transaction always printed).
REG (On/Customer Receipt) - The cash register is set
for standard sales transactions. A customer
receipt is printed for each transaction.
decimals during sales transactions.
13.
The cash register is turned off and cannot be
used.
or multiple item sales to a particular department.
Department keys 1/8, 2/9, 5/12 and 6/13 also used in the
Departments 8 through 14.
12.
OFF
PRG Used to set and change program settings.
Operator Display
Clearing an Error
Your cash register is equipped with a 9-digit numeric Liquid
Crystal Display (LCD). With reference to figure 6, the display
is read from left to right as follows:
Press
(1) - With the Clerk System active,
indicates the clerk number entered
before working in the REG or JRNL
is pressed.
mode, or when
clear and the keypad unlocks, allowing you to continue with
the transaction or restart the program.
If an error condition cannot be cleared by pressing
,
reset the cash register by performing one of the three cash
register reset operations explained in the next section.
Department
(2) - A set of digits indicating the
department key pressed for each entry.
Repeat/Multiply
(3) - A number displayed when repeating or multiplying items to indicate the
number of items entered at one price.
If the cash register does not function, for example while
programming and the error signal cannot be stopped by
Amount
(4) - Indicates entry amounts and sales
totals.
pressing
Special Symbol Indicators
Special symbols appear at the far left-hand side of the display
during cash register operation:
C (Change)
Indicates that the displayed amount is the
change due to the customer.
E (Error)
Indicates when an error is made during
operation or when programming the cash
register. An error tone sounds to alert the
operator.
S (Sub-total) Indicates that the amount shown is the subtotal
of a transaction, including sales tax if
applicable.
Cash Register Reset Operations
, reset the cash register. There are three reset
operations; be very careful when choosing the one to
perform since you could unnecessarily cancel report
data and cash register programming data.
Partial Reset
A Partial Reset operation just clears the cash register's
working memory.
1. Unplug the cash register from the electrical outlet.
2. Press and hold down
and
simultaneously
while plugging the cash register back into its electrical
outlet.
If the cash register still remains in an error condition, proceed
with the Full Reset - Reports operation.
= (Total)
Indicates that the amount shown is the
transaction total.
- (Minus)
Displays a negative entry. Also displays if
subtotal or cash tendered total is a negative
number due to a return or refund.
A Full Reset - Reports operation erases the cash register's
working memory, and all totals and counters (all report data).
. (Dot)
Indicates calculator mode, receipt off mode
and training mode.
1. Unplug the cash register from the electrical outlet.
Displayed when
is pressed to indicate
that the amount is displayed in foreign currency.
These symbols clear automatically when you start the next
entry or press
.
Full Reset Reports
2. Press and hold down
and
simultaneously
while plugging the cash register back into its electrical
outlet.
If the cash register still remains in an error condition, proceed
with the Full Reset - All Data operation.
Full Reset - All Data
Error Conditions
Error Codes
The following error codes can be displayed:
E1
Operation error
E2
Sales amount exceeded
E3
Zero-price entry error
Sec Code
Password needs to be entered
A Full Reset - All Data operation erases the cash register's working memory, all totals and counters (all report
data) and cancels all cash register programming data.
Be extremely careful when using this reset operation.
Use this method as last resort only.
1. Unplug the cash register from the electrical outlet.
2. Press and hold down
and
simultaneously
while plugging the cash register back into its electrical
outlet.
3. Reprogram the cash register.
3
ENGLISH
1...8
to clear an error. The tone ends, the displays
Quick Start
Example: Set a VAT1 rate of 5.50%.
Type/Press:
This section allows you to program basic cash register
features so that you can start to work right away with your
new product.
VAT number
Programs and transaction information for management reports are stored in the memory of the cash register which is
protected by back-up batteries.
5
NOTE:
Before beginning to program the cash register or to
perform sales transactions, insert the batteries to save
this information if a power failure occurs or if the cash
register is unplugged from the electrical outlet.
50
Before changing a VAT rate, print a Z Financial
report. See "X1 and Z1 Financial Report".
For another VAT-related feature, see "Printing VAT Information on Customer Receipts".
Quick Start Programming
4. Link a multiple/single item sale, tax status
and Item Price to a Department
1. Set the Date
A total of 14 departments are available on your cash
register. Programming a department consists of assigning
a multiple/single item positive or negative sale and a
previously programmed tax status to it. You can then
optionally assign a preset price to the department.
A 3-digit department status can be programmed by using the
following options:
1. Control dial position: PRG.
2. Type the current date in the DDMMYY format.
3. Press
.
Example: Set a date of September 26, 2009.
Type/Press:
Day
Month
Multiple/Single Item Sales
Tax Status
0 = Multiple, positive item sales
1 = Single, positive item sales
2 = Multiple, negative item sales
3 = Single, negative item sales
00 = Non taxable
01 = Taxable with
VAT 1
02 = Taxable with
VAT 2
03 = Taxable with
VAT 3
04 = Taxable with
VAT 4
Year
2. Set the Time
1. Control dial position: PRG.
2. Type the current time in the HH:MM, 24-hour format.
3. Press
.
Example: Set the time at 3:30 PM.
1. Control dial position: PRG.
2. Type the [Multiple/Single Item Sales] and [Tax Status]
options by referring to the previous table. A 3-digit status
code must be entered.
3. Press
.
4. Type a maximum 7-digit [unit price] to assign to a
specific item and then assign it to a department by
Type/Press:
Hour
Minutes
to
pressing the related
key. Use
for
departments from 8 to 14.
3. Set a Fixed VAT Rate
1. Control dial position: PRG.
2. Type the [number] that represents the VAT (1 for VAT1,
2 for VAT2, 3 for VAT3 and 4 for VAT4).
3. Press
Example: Program a multiple positive item sale, VAT 2 and
a price of £2.50 to an item in Department 2.
Type/Press:
.
4. Type the VAT rate. Five digits can be used and you
MUST enter three digits after the desired decimal place.
Unit price
5. Press
.
Tax status
Department
Multiple positive
item sales
After you have programmed your departments, you can print
a report that indicates the programmed values. See section
"Department Programming Report" for details.
4
Up to 200 PLUs can be programmed.
1. Control dial position: PRG
2. Press
, type the [PLU number (between 1 and
200)] and then press
.
3. Type the [unit price] that you wish to assign to the PLU.
4. Press the related department
to
Programs and transaction information for management reports are stored in the memory of the cash register which is
protected by back-up batteries.
Before beginning to program the cash register or to
perform sales transactions, insert the batteries to save
this information if a power failure occurs or if you unplug
the cash register from the power outlet.
key to assign
the PLU to a Department from 1 to 14. If tax is required
for a particular PLU item, be sure to link the PLU number
related to the item to a department that is programmed for
tax. To program a department for tax, refer to the section
Link a Multiple/Single Item Sale, Tax Status and Item
Price to a Department.
5. Press
Cash Register Programming and
Features
Making Changes to Cash Register
Programming
If you wish to make a change to your initial programming
(such as an update to VAT rates, PLUs or exchange rates):
•
•
.
Example: Create PLU 1 with a unit price of £2.69
assigned to Department 3.
•
Turn the control dial to the PRG position.
Re-do the program in question and confirm as explained
in the next sections
Turn the control dial to another operating mode.
A new program entry will automatically overwrite a previous
entry for the same program.
Type/Press:
Percent Discount (-%)
Setting this option automatically calculates the preset rate
PLU number
PLU price
Department
After you have programmed your PLU items, you can print a
report that indicates the programmed values. See section
"PLU Programming Report" for details.
each time the
key is pressed. The percentage rate can
be discounted from an individual item or from a sales transaction total.
1. Control dial position: PRG.
2. Type the [numbers] representing the desired percentage
rate. Up to four digits ranging from 0.00 to 99.99 can be
used.
3. Press
to store the rate.
Example: Program a standard 5.50% discount rate.
Type/Press:
Units
Decimals
5
ENGLISH
5. Program a Fixed Price Look-Up (PLU)
Foreign Currency Exchange Rates
Decimal Point Position
You can program up to two different foreign currency
exchange rates. The foreign currency value is displayed
1. Control dial position: PRG.
whenever
is pressed during a sales transaction.
2. Type system option
[0, 1, 2 or 3] to select the desired format as indicated in
the following table:
1. Control dial position: PRG.
Status Number
2. Type the identification number
to
corresponding to the foreign currency exchange rate that
you wish to define and then press
.
3. Type the [decimal point position] of the exchange rate
(0-8 digits after the decimal point).
4. Type the [decimal point position] of the converted
amount (0-3 digits after the decimal point).
5. Type the [exchange rate] using up to six digits without
specifying any decimal point.
Example: Program the first exchange rate as:
1 GBP = 1.172 EURO.
Type/Press:
Exchange rate
ID number
Dec. point position of
exchange rate
Format
0
x
1
x.x
2
x.xx (default setting)
3
x.xxx
3. Press
to set the new format.
Example: Program the cash register so that three digits are
left after the decimal point.
Type/Press:
.
6. Press
followed by the status number
Dec. point position of
converted amount
System option number
Status number
Printing VAT Information on Customer
Receipts
You can program the cash register to print VAT information
on the customer receipt according to your business' or
country's requirements.
Programming the Cash Register to Print the
Required VAT Information
Exchange rate (1.172 Euro)
When the base currency system option is set to LOCAL,
the converted amount is in Euro:
(Conversion Amount = Subt / FC rate),
When the base currency is set to EURO, the converted
amount is in local:
(Conversion Amount = Subt x FC rate).
Rounding Option for Swiss, Danish and
Swedish Currencies
For the Swiss franc, Danish krone and Swedish krona
currencies, you can program the machine to so that the
amount of a transaction is automatically rounded accordingly
whenever the
,
or a [tender] key is pressed.
The rounded result will be displayed on the operator and
client displays, printed on the customer receipt and journal
report. The total adjustments are indicated on the financial
reports.
Setting the Rounding Option
With reference to the section "System Options", by setting
Machine Condition 13 to the related value (1, 2 or 3), you can
program the machine to round off the subtotal or tender
values of the related currency.
With reference to the section "System Options", by setting
machine conditions 5, 6, 10 and 25 you program the cash
register to print the VAT information that you need.
1. Control dial position: PRG.
2. Type the [machine condition number] followed by
status number
, then press
.
3. Turn the control dial to the OFF position.
Receipt With Sum of all VAT Amounts Calculated Machine Condition 5
VAT totals per
programmed
rate
Sum of
individual VAT
totals
Receipt With VAT Totals per Programmed Rate and Net
Prices - Machine Condition 6
VAT totals per
programmed
rate
Item net prices
6
Programming a Calculator Mode Password
1. Control dial position: PRG
, enter the [4-digit password] and press
2. Press
VAT totals per
programmed
rate
Net total
.
ENGLISH
Receipt With VAT Totals per Programmed Rate and NET
Total - Machine Condition 10
NOTE: The 4-digit password cannot be 0000.
Example: Define calculator mode password 1962.
Receipt with VAT Totals per Programmed Rate and
Sales Gross Total - Machine Condition 25 (Default)
Type/Press:
Calculator password defined
Switch to Calculator mode
password definition
Confirm
password
Clerk System
The Clerk System is a security feature that enables you to
control access to the cash register and monitor the number
of transactions and the sales of up to 8 Clerks.
VAT totals per
programmed
rate
Sales gross total
Calculator Mode
Your cash register is configured at the factory with the
Clerk System deactivated. You can activate the Clerk
System for a degree of protection and sales monitoring or
deactivate it again so that the cash register can be used
freely without restrictions.
NOTE:
The calculator mode is a non-print mode that can only be
accessed in the REG or JRNL position outside of a sales
transaction.
The following keys can be used in the calculator mode:
Key
If the Clerk System is deactivated, the cash register
is used without needing to enter a Clerk number
only or a Clerk number and its related 3-digit
security code. In this case the cash register
assumes Clerk 1 as the default Clerk, displays "1"
to indicate the clerk number in use and prints "1" on
all receipts, journals and reports. All sales will be
recorded to Clerk 1 and therefore the Clerk Report
will only report the sales of this Clerk.
You can also program other clerk-related features. See
"System Options", Machine conditions 9 and 17 for details.
Activating the Clerk System
to
1. Control dial position: PRG.
2. Press
.
Entering the Calculator Mode
1. Control dial position: REG or JRNL.
2. Hold down
Deactivating the Clerk System
and press
. If a calculator
mode password was defined, type the [four-digit
password] and press
1. Control dial position: PRG.
2. Press
.
.
3. A dot will appear on the far left-hand side of the display
indicating that the calculator mode is in operation.
Exiting the Calculator Mode
1. Control dial position: REG or JRNL.
2. Hold down
and press
.
3. The dot will disappear from the display and a beep will
sound indicating that you are now back into the normal
register mode.
7