1
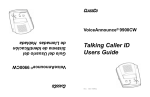
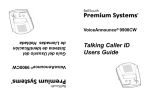
VoiceAnnounce® 9900CW Talking Caller ID Users Guide Table of Contents Introduction ................................................................................... 3 Features ........................................................................................ 4 Important Notice ........................................................................... 6 Important Safety Instructions ....................................................... 7 Installation ..................................................................................... 9 Getting Started… It’s as easy as 1 – 2 - 3 ................................ 10 Operating Modes ......................................................................... 11 Announcing Incoming Calls ......................................................... 11 Announcing Call Waiting Calls ................................................... 12 Reviewing Calls .......................................................................... 13 Entering a Telephone Number Manually .................................... 14 Recording a Name for a Frequent Caller ................................... 14 Leaving Outgoing Messages for specific callers ....................... 15 How do I review what I’ve Recorded? ........................................ 16 How Do I Delete What I’ve Recorded? ...................................... 16 Dial Back ..................................................................................... 16 Message Waiting Notification ..................................................... 17 Custom Setup Options ............................................................... 17 Troubleshooting .......................................................................... 18 FCC Information ......................................................................... 20 Radio Interference Statement .................................................... 20 Canadian Statement ................................................................... 21 Manufacturers Limited Warranty ................................................ 22 One Year Free Exchange on Caller ID Unit ............................... 22 2 VoiceAnnounce® 9900CW Talking Caller ID Users Guide Introduction The VoiceAnnounce 9900CW caller ID is designed to help you iden tify calls by displaying the caller ID information on an LCD screen and announcing the caller’s identity over a built-in speaker. Using VoiceAnnounce® technology saves you from having to run to the caller ID unit every time the phone rings. You can program the unit to associate frequent callers with names you record in your own voice (like “Mom & Dad” or “It’s the Boss”). The recorded name can be announced instead of the telephone number to help identify important calls. You can record up to 50 names and associate them with your frequent callers. You can even record customized outgoing messages for specific callers. If you have call waiting ID service from your local telephone com pany, VoiceAnnounce 9900CW will announce and display informa tion about your call waiting callers too. VoiceAnnounce 9900CW stores the last 99 calls in a call log for audible and visual review. Please read this manual for proper installation instructions and to find out about all of the valuable features VoiceAnnounce offers. 3 Features The model 9900CW has advanced Caller ID features that give you more control over your incoming calls: • Announces calls by recorded name or telephone number • Identify the caller without interrupting what you’re doing • Let you know when it’s your children’s friends calling • Let you know when it’s someone you don’t want to talk to • Store the name, number, date and time of 99 calls in a call log • Let you review who called while you were away • Find out who’s calling on call waiting • Dial back callers at the touch of a key • Delete the oldest call in the call log when a new call is re ceived when the call log is full • Record custom outgoing messages for specific callers • Notifies you to voicemail messages (requires voicemail ser vice available from the telephone company. 4 5 Important Notice The VoiceAnnounce 9900CW will announce the caller ID for incoming calls over the built-in speaker. To Turn OFF the caller ID announcement: 1. Press the MODE key nine times, or until you see the words “Adjust Volume” on the display. 2. Press the REVIEW BACK key until you see the words “Volume - OFF” and hear it “beep” twice. To make the VOLUME of the caller ID announcement louder or softer: 1. Press the MODE key nine times, or until you see the words “Adjust Volume” on the display. 2. Press the REVIEW BACK key until you see the words indicating the volume level of LOW, MEDIUM, or HIGH, and hear a “beep” at that volume setting. 6 Important Safety Instructions When using your telephone equipment, basic safety precautions should always be followed to reduce the risk of fire, electric shock and injury to persons, including the following: 1. 2. 3. 4. 5. 6. 7. 8. Read and understand all instructions. Follow all warnings and instructions marked on the product. Unplug this product from the wall outlet before cleaning. Do not use liquid cleaners or aerosol cleaners; use a damp cloth for cleaning. Do not use this product near water for example, near a bath tub, wash bowl, kitchen sink, or swimming pool, or in a wet basement. Do not place this product on an unstable cart, stand or table, as the product may fall, causing serious damage to the prod uct. Slots and openings in the cabinet and the back or bottom of this product are provided for ventilation (to protect it from over heating) and should not be blocked or covered. The openings should never be blocked by placing this product on a bed, sofa, rug or other similar surface. This product should never be placed near or over a radiator or heat register. This prod uct should never be placed in a built-in installation unless proper ventilation is provided. This product should be operated only from the type of power source indicated on the marking label. If you are not sure of the type of power supply to your home, consult your dealer or local power company. Do not allow anything to rest on the power cord. Do not place this product where the cord will be abused by people walking on it. 7 9. 10. 11. 12. 13. 14. Do not overload wall outlets and extension cords, as this can result in the risk of fire or electric shock. Never push objects of any kind into this product through cabi net slots, as they may touch dangerous voltage points or short out parts, resulting in the risk of fire or electric shock. Never spill liquid of any kind on the product. To reduce the risk of electric shock, do not disassemble this product, but take it to a qualified serviceman, when service or repair work is required. Opening or removing covers may ex pose you to dangerous voltage or other risks. Incorrect reas sembly can cause electric shock when this product is subse quently used. Unplug this product from the wall outlet and refer servicing to a qualified service personnel under the following conditions: a) when the power supply cord or plug is damaged or frayed; b) if liquid has spilled into the product; c) if the product has been exposed to rain or water; d) if the product does not oper ate normally when you follow the operating instructions (ad just only those controls that are discussed in the operating instructions, as improper adjustment of other controls may result in damage, often requiring extensive work by a qualified technician to restore the product to normal performance); e) if the product has been dropped or the cabinet has been dam aged; f) if the product exhibits a distinct change in performance. Avoid using a telephone (other than a cordless type) during an electrical storm. There may be a remote risk of electric shock from lightning. Do not use the telephone to report a gas leak in the vicinity of the leak. Save these instructions. 8 Installation Inside the VoiceAnnounce 9900CW package you will find the VoiceAnnounce Caller ID unit, users guide, a phone cord, and an AC power adapter. 1. Connect the phone cord that extends from the telephone jack on your wall to the LINE jack on the back of the caller ID unit. 2. Use the supplied phone cord to connect your telephone set to the PHONE jack on the back of the caller ID unit. (This also applies if connecting the base of a cordless phone.) 3. Use the included power adapter to power the unit. If your household experiences a power outage the caller ID unit will shut off without being damaged. It will remember calls in the log, recordings, and other settings, so you won’t have to re-program the unit when the power comes back on. When the power is restored, the caller ID unit will be ready to screen calls. 9 Getting Started… It’s as easy as 1 – 2 - 3 First, make sure you’ve called your phone company and ordered caller ID service. You must have caller ID service in order for your caller ID unit to function. For the unit to identify call waiting calls, you must also subscribe to call waiting ID service, sometimes known as call waiting deluxe. Now that you’ve subscribed to caller ID service and properly con nected your caller ID unit, you’re ready to get started! 1. Call a friend or relative in the area and ask them to call you back. Between the first and second ring, the caller’s telephone number will be announced. 2. When you’re done talking with the caller you will notice that their number is displayed in the display window on the unit. 3. To record the caller’s name, simply hold down the RECORD key, wait for the “beep” and say their name. From now on when that caller calls you, your unit will speak out the recorded name instead of the number. You can record new names and/ or record over existing names any time the caller’s informa tion is displayed on the screen by holding down the RECORD key. 4. After a while, the unit will display the number of new calls and total calls in the call log. It will also display the current time and date. The time and date are set automatically when your phone rings. 10 Operating Modes There are ten operating modes in the 9900CW. Normally, the unit is in standby mode, waiting for a call. You can go to other modes by pressing the MODE key. The modes are: Review Calls – See and hear who called Review Names – Review/Change recorded names Review OGM – Review/Change outgoing messages Enter Number – To manually enter telephone number for a re corded name Record Name – Record a name for a caller Select Name – Associate caller with an already recorded name Record OGM – Record an message to be delivered to a specific caller Select OGM – Associate caller with a previously recorded out going message Adjust Volume – Change volume low/medium/high/off with REVIEW keys The unit will automatically return to standby mode after 20-seconds of inactivity. 11 Announcing Incoming Calls Between the first and second ring, the caller’s telephone number or recorded name will be announced over the caller ID unit’s speaker. The telephone number, name listing (for caller ID deluxe custom ers) and date and time of the call will also be displayed. Sometimes the unit will display and announce NUMBER UNKNOWN or NUMBER BLOCKED. Number unknown means that the tele phone company sends no information about the calling party. Of ten times this means that the call is originating from a telemarketer. Number Blocked means that the caller has decided not to have his or her caller ID information sent to you. You can advise callers to “Un-Block” by dialing *82 before calling you. Announcing Call Waiting Calls If you subscribe to Call Waiting ID service, VoiceAnnounce 9900CW will announce and display information about your call waiting calls. In order for VoiceAnnounce to identify these calls, you must be talking on the telephone that’s plugged into the back of the unit. The call-waiting caller’s identity can be announced over the built-in speaker. You can set up how you want it to operate by selecting the desired set up options (See Custom Setup Options.) The speaker announcement broadcasts the call-waiting caller’s recorded name or number over the built-in speaker. Others in the house will know that there is a call waiting. Additional VoiceAnnounce call waiting ID products can be installed on the same line to “announce” the call waiting caller anywhere in the house. If you want, you can setup the unit to announce only call waiting callers that have a recorded name associated with their phone num ber (see Custom Setup Options.) 12 Reviewing Calls Your 9900CW will store up to 99 call records, providing you with the name and/or number of the last 99 callers. This information is re corded in the call log as soon as it is received between the first and second ring, even when you are away from home or choose not to answer a call, or when you get a call waiting call, provided you have call waiting ID service. In standby mode, the VoiceAnnounce 9900CW displays the number of new calls and the number of total calls in the call log. The LED flashes slowly to indicate when you have new calls. You may review the call log while in standby mode or in REVIEW CALLS mode. Simply push one of the REVIEW keys to scroll through each call record – the caller ID information is displayed on the screen, and if you are in REVIEW CALLS mode the date, time, and phone number are announced. If you push the reverse REVIEW Key you will scroll from the last call received backwards to the oldest call in the call log. If you push the forward REVIEW key you will scroll beginning with the oldest call in the log to the last one. If you hold down either review key for more than 2-seconds, the unit will an nounce the number of new calls in the call log followed by the date, time, and phone number of each call. You can clear a call by pressing the CLEAR key while the call is displayed on the screen. Holding down the CLEAR key for 2-seconds clears all the calls from the call log. 13 Entering a Telephone Number Manually Do you need to enter a number manually? You can record names and outgoing messages for any number that is already stored in the call log, or stored in the list of calls with recorded names or messages. If the number you want is not already stored in memory, you can enter it manually. 1. If the number and/or name of the person you want does not appear in the call log, press the MODE key repeatedly until XXX-XXX-XXXX ENTER NUMBER appears on the display screen of the caller ID unit. 2. Press the RECORD key to select the first digit of the desired number. 3. To move to the second digit of the desired number, press the forward REVIEW key. Use the RECORD key to select a num ber, then use the forward REVIEW key to move to the next digit. (note: you can also use the reverse REVIEW key to go to previous digits.) 4. When the complete number is displayed, press the MODE key to select recording or selecting names or outgoing mes sages. Note: You can leave some digits blank (X) to indicate a “wildcard.” For example, you could enter “603-XXX-XXXX” and record “Call from New Hampshire.” Calls from the 603 area code that do not specifically match other numbers will be announced as “Call from New Hampshire.” 14 Recording a Name for a Frequent Caller Up to fifty names can be recorded in your own voice and associ ated with frequent callers. You can even associate a recorded name to multiple callers or telephone numbers. When the phone rings from any of these numbers, the recorded name is announced in stead of the number. While reviewing the call log, you can record a name to associate with the displayed telephone number by simply pressing and hold ing down the RECORD key. After you hear the “beep” say the name, then release the RECORD key. The recorded name will be played back to you. If you want to re-record it, just hold down the RECORD key again. If you’ve just entered a telephone number manually, press the MODE key until the RECORD NAME mode is displayed. Then press and hold the RECORD key, wait for the “beep”, and say the name. If you want the displayed number to be announced with a name that has already been recorded, press the MODE key until SE LECT NAME is displayed. Then press either REVIEW key until you hear the name you want to use. Finally press the RECORD key momentarily to associate the recorded name you just heard with the number displayed on the screen. Note: When recording a name, make sure the caller ID display shows either the caller’s telephone number or the caller’s telephone number and name. 15 Leaving Outgoing Messages for specific callers You can have your VoiceAnnounce 9900CW answer the phone and deliver a special message to specific callers. You can use this feature to tell certain people where you are, or what time you’ll be home. You can even use this feature to intercept nuisance calls with a message specifically for them. Up to two outgoing messages (OGMs) can be recorded. One of the messages is temporary, and will only be delivered once to each specific caller. The other message is permanent and will be deliv ered to specific callers every time they call. While the caller’s telephone number is displayed, press the MODE key until the RECORD OGM mode is displayed. Using the RE VIEW keys, select which message type you prefer – either a tem porary or a permanent message. Then press and hold the RECORD key, wait for the “beep”, and record your message. Release the RECORD key when you’re done. Each message type is maximum 10-seconds long. If you want the displayed number to receive an outgoing message that has already been recorded, press the MODE key until SE LECT OGM is displayed. Then press either REVIEW key until you hear the message you want to use. Finally press the RECORD key momentarily to associate the message with the number displayed on the screen. How do I review what I’ve Recorded? Press and release the MODE key until REVIEW NAMES or RE VIEW OGM appears on the display screen. Then press one of the REVIEW keys to scroll through the numbers for which you have recorded names or outgoing messages. You’ll hear the recorded name or outgoing message for each number announced as you scroll through the list. 16 How Do I Delete What I’ve Recorded? Follow the steps above to review what you’ve recorded until you hear the name or outgoing message you want to delete. Then press the CLEAR key. The recording associated with that caller will be deleted. Dial Back You can dial back callers directly from the call log. Use the RE VIEW keys to locate the person you want to call. With the call information displayed on the screen, pick up the phone like you normally do to make a call, but instead of dialing, press the MODE/ DIAL key on the caller ID unit. If you’re placing a call that requires dialing only 7-digits, press the MODE/DIAL key again to complete the call. If 10-digit or 1+10-digit dialing is necessary to place the call, use the REVIEW keys to select the appropriate dialing method, then press the MODE/DIAL key to complete the call. Message Waiting Notification Your VoiceAnnounce 9900CW will alert you if you have voice mail messages. This requires a special service from your local tele phone company. The unit will detect both FSK and stuttered dialtone (SDT) message notification signals. When message waiting is detected, the unit displays a message waiting icon on the LCD, and will flash its LED fast. You can choose to have an audible notifica tion (beep every minute) by selecting the MSG WAIT BEEP option in the custom setup options. 17 Custom Setup Options You can customize the way your VoiceAnnounce 9900CW works. Hold down the MODE key and momentarily press the RECORD key to enter SETUP MODE. You can change the option by pushing the RECORD key, and can go to the next option by pressing the MODE key. RESET – Clears call log and all recorded named and mes sages. Tests memory. Returns to standby mode in about 30 seconds. ENGLISH – Selects between English and Spanish. English is default. MSG WAIT BEEP – Turns ON/OFF audible message waiting notification. Default OFF. CW SPEAKER – Turns ON/OFF announcement of call-waiting calls through the built-in speaker. Default ON. CW NAME – Turns ON/OFF announcement of call-waiting caller’s identity only if a recorded name is associated with the caller. Default OFF. 18 Troubleshooting Having problems? Before contacting ClassCo or your dealer, check the following list of suggestions. You might be able to solve the problem yourself. Q: Caller ID Unit Is Not Responding Properly to Commands. Unplug for ten seconds then restore power. Q: It’s not announcing calls Make sure the volume is set correctly (see ADJUST VOLUME mode) Call the telephone company to make sure caller ID service has been activated and is working with your line properly. Make sure the power cord is correctly plugged in. Make sure the phone line coming from the wall is going to the LINE jack on the unit and the phone cord coming from your phone is going to the PHONE jack on the unit. Let the phone ring twice before answering, as caller ID informa tion is announced between the first and second rings. If you see the words DATA ERROR it means the caller ID infor mation is not being properly transmitted to your caller ID unit. This could be a problem with the phone company’s caller ID ser vice or with your unit. Check your connections, then call the phone company. 19 Q: It’s not announcing call waiting calls Make sure the volume is set correctly (see ADJUST VOLUME mode) Call the telephone company to make sure call waiting ID service has been activated and is working with your line properly. Make sure you’re talking on the phone plugged into the back of the caller ID unit Make sure the power cord is correctly plugged in. Make sure the phone line coming from the wall is going to the LINE jack on the unit and the phone cord coming from your phone is going to the PHONE jack on the unit. If you have another call waiting ID device, try unplugging it. Q: How do I stop the LED from blinking? Review all new calls by repeatedly pressing the REV key until all calls in the call log have been displayed. Hold the CLEAR key down for 4-seconds to clear the call log. Check Voice Mail If the LED still blinks, unplug the unit from power for 10-seconds then plug back in. Q: How do I set the DATE and TIME display? The time and date will be set automatically with the first incom ing call. They will be reset with each new call. You cannot change the time or date manually. 20 FCC Information Your caller ID unit has been registered with the Federal Communications Com mission (FCC), and it complies with the standards set forth in part 68 of the FCC rules. The FCC requires that we provide the following information. Connection And Use: The FCC requires you to use a modular telephone jack. This equipment may not be used with party line service or coin-operated telephone lines. Notification Of The Telephone Company The FCC requires that upon request of your local telephone company you provide the following information: the line to which you will connect the caller ID unit (your phone number), the caller ID units FCC registration number and ringer equivalence number (REN) (located on the back of your caller ID unit), and the USOC jack required (USOC RJ-11C or RJ-11W). (note: the REN is useful in determining how many devices you may connect to your telephone line and still have all of them ring when someone calls your telephone number. in most, but not all areas, the sum of all RENs should be five or less. contact your local telephone company for more information.) Problems And Repairs If your caller ID unit is malfunctioning, the FCC requires you to completely disconnect it until the problem has been solved. If your caller ID unit is harm ing the nationwide telephone network, the telephone company may tempo rarily discontinue your telephone service. The telephone company will try to notify you before discontinuing service. If advance notice isn’t possible, the telephone company will notify you as soon as possible. you’ll be given the opportunity to correct the problem, and you’ll be informed of your right to file a complaint with the FCC. Your local telephone company may make changes in facilities, equipment or operations that affect the proper functioning of your caller ID unit. If such changes are planned, you’ll be notified and advised of your right to file a com plaint with the FCC. 21 Radio Interference Statement This equipment has been tested and found to comply with the limits for a class B digital device, pursuant to Part 15 of the FCC Rules. These limits are de signed to provide reasonable protection against harmful interference in a resi dential installation. This equipment generates, uses, and can radiate harmful radio frequency, and if not installed and used in accordance with the instruc tions, may cause harmful interference to radio communications. However, there is no guarantee that interference will not occur in a particular installation. If this equipment does cause harmful interference to radio or television recep tion, which can be determined by turning the equipment off and on, the user is encouraged to try to correct the interference by one or more of the following measures: reorient or relocate the receiving antenna; increase the separation between the equipment and receiver; connect the equipment to an outlet on a circuit different from that to which the receiver is connected; consult the dealer or an experienced radio/TV technician for help. Canadian Statement Notice: The Canadian Industry and Science Canada label identifies certified equipment. This certification means that the equipment meets certain telecommunications network protective, operational and safety requirements. The department does not guarantee that the equipment will operate to the user’s satisfaction. Before installing this equipment, users should ensure that it is permissible to be con nected to the facilities of the local telecommunications company. The equipment must also be installed using an acceptable method of connection. In some cases, the company’s inside wiring associated with a single line individual service may be extended by means of a certified connector assembly (telephone extension cord). The customer should be aware that compliance with the above conditions may not prevent degradation of service in some situations. Repairs to certified equipment should be made by an authorized Canadian maintenance facility designated by the supplier. Any repairs or alterations made by the user to this equipment, or equipment malfunctions, may give the telecommunications company cause to request the user to disconnect this equipment. Caution: Users should not attempt to make such connections themselves, but should contact the appropriate electric inspection authority, or electrician, as appropriate. The load number (LN) assigned to each terminal device denotes the percentage of the total load to be connected to a telephone loop which is used by the device to prevent overloading. The termination on a loop may consist of any combination of devices sub ject only to the requirement that the total of the load numbers of all the devices does not exceed 100. 22 Manufacturers 1-Year Limited Warranty Who Is Covered? You must have proof of purchase to exchange the product. A sales receipt or other document showing the date that you purchased the product is considered proof of purchase. What Is Covered? Coverage begins the day you buy your product. For one year there after, a defective or inoperative product will be replaced with a new, renewed or comparable product at no charge to you. A replace ment product is covered only for the original warranty period. When the warranty on the original product expires, the warranty on the replacement product also expires. What Is Excluded? Your warranty does not cover: • labor charges for installation or setup of the product and adjust ment of customer controls on the product. • product replacement because of misuse, accident, unauthorized repair or other cause not within the control of ClassCo Inc. • a product that requires modification or adaptation to enable it to operate in any country other than the country for which it was designed, manufactured, approved and/or authorized, or repair of products damaged by these modifications. • incidental or consequential damages resulting from the product. (Some states do not allow the exclusion of incidental or conse quential damages, so the above exclusion may not apply to you.) 23 Contenido Características Especiales ........................................................... 4 Aviso Importante ........................................................................... 6 Instrucciones Importantes de Seguridad ..................................... 7 Instalación ..................................................................................... 9 Como empezar...Es tan fácil como 1 – 2 - 3 ............................ 10 Modos de Operación ................................................................... 11 Anunciando Llamadas Que Entran ............................................. 11 Anunciando Llamadas en Espera .............................................. 12 Revisando Llamadas .................................................................. 13 Registrando Número s de Teléfono Manualmente ................... 14 Grabando Un Nombre Para Una Persona Que Llama Frecuentemente ................................................................. 15 Dejando Mensajes de Salida para Personas Específicas que Le Llamen ................................................................................ 16 ¿Cómo puedo verificar lo que he grabado? ............................... 17 ¿Cómo puedo borrar lo que he grabado? .................................. 17 Devolver Llamadas Directamente .............................................. 18 Notificación de Mensajes in Espera ........................................... 18 Opciones de Ajuste Especiales .................................................. 18 Resolviendo Problemas Tecnológicos ....................................... 19 Información del FCC .................................................................. 22 Declaración de interferencia de radio ........................................ 22 Declaración Canadiense ............................................................ 23 Garantía limitada del fabricante ................................................. 24 VoiceAnnounce® 9900CW Guía del Usuario del Sistema de Identificación de Llamadas Hablada Introducción El Sistema de Identificación de Llamadas VoiceAnnounce 9900CW fue diseñado para ayudarle a identificar llamadas mostrando la información de la llamada identificada en una pantalla LCD y al anunciar la identidad de la persona llamando por una bocina integrada. Usando la tecnología de VoiceAnnounce 9900CW le ahorra el trabajo de correr al aparato de identificación de llamadas cada vez que suene el teléfono. Puede programar la unidad para que asocie los números de las personas que le llaman frecuentemente con nombres que usted grabe en su propia voz (como “Mami y Papi” o “Es el jefe”). El nombre grabado puede ser anunciado en vez de el número telefónico para ayudarle a identificar llamadas importantes. Puede grabar hasta 50 nombres y combinarlos con los números de las personas que le llaman más frecuentemente. Hasta puede grabar mensajes personalizados de salida para específicas llamadas que entran. Si usted tiene un servicio de llamada identificada con llamada en espera provista por su compañía telefónica local, VoiceAnnounce 9900CW anunciará y mostrará la información de la llamada en espera también.. VoiceAnnounce 9900CW puede guardar hasta 99 de las últimas llamadas recibidas en un registro de llamadas para que usted pueda revisarlo oral o visualmente. Favor de leer este manual para instrucciones de instalación adecuada y como enterarse de todas las características especiales que el VoiceAnnounce ofrece. 25 Características Especiales El modelo 9900CW tiene características especiales de llamada identificada avanzadas que le ofrece más control sobre las llamadas que recibe: 26 • Anuncia las llamadas recibidas por un nombre grabado o por el número de teléfono. • Identifica la llamada sin interrumpir lo que usted hace. • Le deja saber cuando es el amigo de su hijo llamando. • Le deja saber cuando recibe una llamada indeseable. • Guarda el nombre, el número, la fecha y la hora de 99 llamadas recibidas en un registro de llamadas. • Le permite revisar quien le llamó cuando estaba fuera de casa. • Le permite averiguar quien le llama en llamada en espera. • Devuelve llamadas con el toque de una tecla. • Borrar las llamadas más viejas del registro de llamadas cuando se recibe una llamada nueva y el registro está lleno. • Le permite grabar mensajes de salida personalizados para personas específicas que llamen. • Le deja saber si tiene correo de voz (requiere el servicio de correo de voz provisto por la telefónica local. 27 Aviso Importante El VoiceAnnounce 9900CW anunciará todas las llamadas entrantes sobre el altavoz incorporado. Para dar vuelta APAGADO al aviso de la identificación de llamador: 1. Presione la llave del MODE nueve veces, o hasta usted vea el “Adjust Volume” de las palabras; en la pantalla. 2. Presione la llave de la REIVEW BACK hasta que usted ve el “Volume - OFF” y óigalo “señalar” dos veces. Para cambiar el VOLUMEN del aviso de la identificación de llamador: 1. Presione la llave del MODE nueve veces, o hasta usted vea el “Adjust Volume” de las palabras; en la pantalla. 2. Presione la llave de la REVIEW BACK hasta que usted ve las palabras el indicar del nivel del volumen de BAJO, de MEDIO, o de ALTO, y oiga un “beep” en ese ajuste del volumen. 28 Instrucciones Importantes de Seguridad Cuando use su equipo de teléfono, precauciones básicas de seguridad siempre deben ser seguidas para reducir el riesgo de fuego, choque eléctrico o heridas de personas, incluyendo lo siguiente: 1. 2. 3. Lea y comprenda todas las instrucciones. Siga todas las advertencias e instrucciones marcadas en el producto. Antes de limpiar este producto asegúrese de desenchufarlo. No use limpiadores líquidos o de aerosol; use un paño húmedo para limpiarlo. 4. No use este producto cerca de agua - por ejemplo, cerca de la bañera, lavamanos, fregadero, o piscina, o en un sótano mojado. 5. No ponga este producto en un carrito, pedestal, o mesita inestable ya que el producto puede caerse y sufrir daños severos. 6. Aperturas y ranuras en el gabinete y en la parte trasera o posterior del producto son provistas para ventilación (para que no se sobrecaliente) y no deben ser bloqueadas o cubiertas. El producto no debe ser puesto en camas, sofás, alfombras u otro tipo de superficie similar para que las aperturas nunca sean bloqueadas. Este producto nunca debe ser puesto cerca o encima de un radiador o calentador. Este producto nunca debe ser puesto en una instalación hecha para el a menos que tenga ventilación apropiada. 7. Este producto debe ser operado solamente con el tipo de corriente indicado en la etiqueta de marca. Si usted no está seguro cual es el tipo de servicio de corriente en su casa, consulte con su vendedor o su compañía local de corriente eléctrica. 8. No permita que nada descanse en el cable del enchufe. No ponga este producto donde el cable será mutilado por personas caminándole encima. 9. No sobrecargue los enchufes de la pared o extensiones, porque esto puede resultar en el riesgo de fuego o choque eléctrico. 10. Nunca empuje ninguna clase de objeto a través de las aperturas o ranuras de este producto, porque pueden tocar puntos peligrosos con voltaje o crear un corto circuito, esto resultaría en el riesgo de fuego o choque eléctrico. Nunca derrame ninguna clase de líquido sobre el producto. 29 11. Para reducir el riesgo de choque eléctrico, no desarme este producto, pero llévelo a un técnico calificado, cuando se requiere reparaciones. Abriendo o quitando cubiertas del producto puede exponerlo a voltaje peligroso u otro tipo de riesgo. Montando el producto incorrectamente puede causar un choque eléctrico cuando se use el producto. 12. Desenchufe este producto del enchufe de la pared y busque servicios técnicos profesionales bajo las siguientes condiciones: a) cuando el cable de enchufe o el enchufe esté dañado o mutilado; b) si líquido ha sido derramado sobre el producto; c) si el producto ha sido expuesto a lluvia o agua; d) si el producto no funciona correctamente cuando usted sigue las instrucciones de operación (ajuste solo esos controles que son mencionados en las instrucciones de operación, porque si usted ajusta algún otro control inadecuadamente puede causar daños, usualmente requiriendo trabajo extensivo por un técnico calificado para restaurar el sistema a su estado normal); e) si el producto se ha caído o si el gabinete ha sido dañado; f) si el producto muestra un cambio drástico en su funcionamiento. 13. Evite usar un teléfono (aparte de los inalámbricos) durante una tormenta eléctrica. Puede ser que haya el riesgo de choque eléctrico causado por relámpagos. 14. No use el teléfono para reportar un escape de gas si está cerca del escape. Guarde estas instrucciones. 30 Instalación Dentro del paquete del VoiceAnnounce 9900CW encontrará la unidad de VoiceAnnounce de Identificación de Llamadas, el manual del usario, un cable telefónico, y un adaptador de corriente alterna. 1. Conecte el cable telefónico que viene desde el enchufe de teléfono en la pared al enchufe que dice LINE que está en la parte de atrás de la unidad de identificación de llamadas. 2. Use el cable telefónico provisto para conectar su aparato telefónico al enchufe telefónico que dice PHONE en la parte de atrás de la unidad de identificación de llamadas. (Esto también aplica si está conectando la base de un teléfono inalámbrico.) 3. Usar un adaptador para darle corriente a la unidad. Si su hogar ha tenido un apagón, la unidad de Identificación de llamadas se apagará sin sufrir daños. Recordará las llamadas en el registro, grabaciones, y otros ajustes para que no tenga que re progamar la unidad cuando vuelva la luz. Cuando la corriente sea restaurada, la unidad de identificación de llamadas estará lista para recibir e identificar llamadas. 31 Como empezar...Es tan fácil como 1 – 2 - 3 Primero, asegúrese que ha pedido el servicio de llamada identificada a través de su servicio local telefónico. Tiene que tener el servicio de llamada identificada para que la unidad de identificación de llamada funcione. Para que la unidad pueda identificar llamadas en espera, también necesita un servicio para identificar llamadas en espera, a veces llamado Llamada En Espera Deluxe. ¡Ahora que ha sido suscrito al servicio de llamada identificada y que ha conectado su unidad de identificación de llamadas correctamente, está listo para comenzar! 1. Llame a un amigo o pariente en el área y pídale que le llame. Entre el primer y segundo timbre, su número será anunciado 2. Cuando termine de hablar con la persona que le llama se dará cuenta que su número está en la pantalla de la unidad. 3. Para grabar el nombre de la persona que le llamó, oprima y aguante la tecla que dice RECORD, cuando oiga un tono, diga su nombre. De ahora en adelante cuando esa persona le llame , su unidad dirá en voz alta el nombre grabado en vez del el número. Usted puede grabar nuevos nombres y/o grabar por encima de nombres que ya existen cuando la información de la persona que le está llamando se vea en la pantalla al oprimir la tecla que dice RECORD. 4. Después de un tiempo, la unidad mostrará en la pantalla el número de llamadas nuevas y el total de llamadas en el registro de llamadas. También mostrará la hora y la fecha. La hora y fecha serán programados automáticamente cuando su teléfono suene. 32 Modos de Operación Hay diez modos de operacion en el 9900CW. Normalmente, la unidad está en modo de espera, esperando una llamada. Puede ir a otros modos al oprimir la tecla de MODE. Los modos son: Review Calls – Revisar llamadas- Ver y oir quien ha llamado Review Names – Revisar Nombres- Revisar/Cambiar nombres grabados. Review OGM – Revisar MDS- Revisar/Cambiar mensajes de salida Enter Number – Registrar números- Para manualmente registrar un número de teléfono para un nombre grabado. Record Name –Grabar Nombre- Grabar un nombre para una persona que lo llame. Select Name – Escoja Nombre – Combinar el numero de una persona que le llama con un nombre grabado previamente. Record OGM – Grabar MDS- Grabar un mensaje de salida para una persona específica que le llame. Select OGM – Escoja MDS- Asociar una persona que le llame con mensaje de salida previamente grabado. Adjust Volume – Ajustar el Volumen- Cambiar el volumen bajito/ mediano/alto con las teclas de REVIEW. La unidad automáticamente volverá en modo de espera después de 20 segundos de inactividad. 33 Anunciando Llamadas Que Entran Entre el primer y segundo timbre, el número de teléfono o el nombre grabado de la persona que está llamando será anunciado por la bocina integrada a la unidad de identificación de llamadas. El número de teléfono, el listado del nombre (para clientes de Llamada Identificada Deluxe) y la fecha y hora de la llamada también se verá en la pantalla. A veces la unidad mostrará en la pantalla y anunciará NÚMERO DESCONOCIDO o NÚMERO BLOQUEADO. Número desconocido significa que la compañía telefónica no envía ninguna información sobre ese número que está llamando. A veces esto quiere decir que la llamada proviene de un telemercadeador. Número bloqueado significa que la persona llamando ha decidido no permitir que su información de llamada identificada le sea enviada a usted. Puede pedirle a estas personas que le quiten el bloqueo a su número al marcar el *82 antes de llamarle. 34 Anunciando Llamadas en Espera Si usted está suscrito a un servicio de llamada identificada con llamada en espera, el VoiceAnnounce 9900CW anunciará y mostrará la información sobre su llamada en espera en la pantalla. Para que su VoiceAnnounce pueda identificar estas llamadas, usted tiene que estar hablando por el teléfono que está conectado a la parte de atrás de la unidad. La identidad de la persona que está en llamada en espera puede ser anunciada por la bocina integrada. Usted puede escoger como quiere que lo anuncie cuando selecciona las opciones deseadas. (Vea Opciones de Ajuste Especiales.) El anuncio por la bocina , anuncia el nombre grabado o el número de la persona que lo está llamando por la bocina integrada a la unidad. Otros en el hogar sabrán que hay una llamada en espera. Otros productos de identificación de llamadas de VoiceAnnounce pueden ser instalados en la misma línea para anunciar la información de la llamada en espera en cualquier parte de su hogar. Si usted gusta, puede ajustar el sistema para que anuncie solamente aquellas llamadas en espera que tienen un nombre grabado asociado con su número de teléfono (Vea Opciones de Ajuste Especiales.) 35 Revisando Llamadas Su 9900CW guardará la información de hasta 99 llamadas, proveyéndole con el nombre y/o el número de las últimas 99 llamadas que ha recibido. Esta información es grabada en el registro de llamadas tan pronto sea recibida entre el primer y segundo timbre, aún cuando usted no está en casa, o decide no contestar una llamada, o cuando recibe una llamada en espera, siempre y cuando tenga el servicio de llamada identificada con llamada en espera. Cuando la unidad de VoiceAnnounce 9900CW está en el modo de espera muestra el la pantalla el número de llamadas nuevas y el total de llamadas en el registro de llamadas. La bombillita se enciende y se apaga lentamente para indicar que tiene llamadas nuevas. Usted puede revisar sus llamadas en el registro de llamadas cuando está en el modo de espera, o cuando está en el modo de REVISAR LLAMADAS. Simplemente oprima una de las teclas que dicen REVIEW (REVISAR) para pasar por cada llamada en el registro – la información de llamada identificada es mostrada en la pantalla, y si usted está en el modo de REVISAR LLAMADAS, la fecha, la hora y el número de teléfono serán anunciados. Si usted oprime la tecla de REVIEW (REVISAR) en reverso pasarás por las llamadas comenzando con la llamada más reciente hasta la más vieja del registro de llamadas. Si oprime la tecla de REVIEW (REVISAR) hacia adelante usted pasará por las llamadas del registro comenzando con la más vieja hasta la más reciente. Si usted oprime y sostiene cualquiera de las dos teclas por más de dos segundos la unidad anunciará el número de llamadas nuevas en el registro de llamadas seguido por la fecha , hora y número de teléfono de cada llamada. Usted puede borrar la información de una llamada al oprimir la tecla que dice CLEAR cuando la información de la llamada está en la pantalla. Al oprimir y sostener la tecla de CLEAR por 2 segundos borrará todas las llamadas guardadas en el registro de llamadas. 36 Registrando Número s de Teléfono Manualmente ¿Necesita registrar una llamada manualmente? Usted puede grabar nombres y mensajes de salida para cualquier número que ya está en el registro de llamadas, o en la lista de llamadas con nombres o mensajes grabados. Si el número que usted quiere no está ya guardada en la memoria de su unidad, usted puede registrarlo manualmente. 1. Si el número y/o el nombre de la persona que usted quiere no aparece en el registro de llamadas, oprima la tecla de MODE (MODO) varias veces hasta que XXX-XXX-XXXX REGISTRE EL NUMERO aparezca en la pantalla de la unidad de identificación de llamadas. 2. Oprima la tecla de RECORD (GRABAR) para escoger el primer dígito del número deseado. 3. Para escoger el segundo dígito del número deseado, oprima la tecla de REVIEW (REVISAR) hacia adelante. Use la tecla de RECORD (GRABAR) para escoger un número, entonces use la tecla de REVIIEW hacia adelante para escoger el próximo dígito. (nota: puede usar la tecla de REVIEW hacia atrás para escoger dígitos previos.) 4. Cuando el número completo esté en la pantalla, oprima la tecla de MODE (MODO) para escoger una grabación o nombres o mensajes de salida. Nota: Usted puede dejar algunos dígitos en blanco (X) para indicar un “ocho loco.” Por ejemplo, usted puede registrar el “603-XXXXXXX” y grabar “Llamada de New Hampshire.” Llamadas del código de área 603 que no refleja un número exacto que está en su lista de números serán anunciados como “Llamadas de New Hampshire” 37 Grabando Un Nombre Para Una Persona Que Llama Frecuentemente Hasta cincuenta nombres pueden ser grabados con su propia voz y combinados con personas que le llaman frecuentemente. Usted hasta puede hasta combinar un nombre grabado con múltiples números o personas que le llaman frecuentemente. Cuando el teléfono suena desde cualquiera de estos números , el nombre es anunciado en vez de el número. Mientras revise el registro de llamadas, usted puede grabar el nombre y combinarlo con el número en la pantalla con oprimir y sujetar la tecla de RECORD (GRABAR). Después que oiga el tono diga el nombre que quiera grabar y suelte la tecla de RECORD (GRABAR). El nombre grabado será anunciado por la bocina integrada. Si usted quiere grabarlo de nuevo, oprima y sujete la tecla de RECORD (GRABAR) de nuevo. Si usted acaba de registrar un número de teléfono manualmente, oprima la tecla de MODE (MODO) hasta que aparezca GRABE NOMBRE en la pantalla. Entonces, oprima y sujete la tecla de RECORD (GRABAR), espere por el tono y diga el nombre que desea grabar. Si usted desea que el número que está en la pantalla sea anunciado con un nombre que ya haya sido grabado, oprima la tecla de MODE (MODO) hasta que aparezca ESCOJA NOMBRE en la pantalla. Entonces oprima cualquiera de las dos teclas de REVIEW (REVISAR) hasta que oiga el nombre que usted quiere usar. Finalmente, oprima la tecla de RECORD (GRABAR) brevemente para combinar el nombre grabado que usted acaba de escuchar con el número en la pantalla. 38 Dejando Mensajes de Salida para Personas Específicas que Le Llamen Usted puede programar a su VoiceAnnounce 9900CW para que conteste el teléfono con un mensaje especial para personas específicas que le llamen. Usted puede usar esta característica especial para decirle a ciertas personas donde se encuentra, o a que hora llegará a casa. Hasta puede usar esta característica especial para interceptar llamadas indeseadas con mensajes especialmente para ellos. Se pueden grabar hasta dos mensajes de salida MDS(OGM). Uno de los mensajes es temporero, y solo será enviado una vez a cada persona específica que llame. El otro mensaje es permanente y será enviado cada vez que esa persona específica llame. Oprima la tecla de MODE (MODO) cuando el número de teléfono de la persona que le llama esté en la pantalla, hasta que el modo de GRABAR MDS este en la pantalla. Usando las teclas de REVIEW (REVISAR) , escoja que tipo de mensaje prefiere temporero o permanente. Entonces oprima y sujete la tecla de RECORD (GRABAR), espere por el tono y grabe el mensaje. Suelte la tecla cuando termine. Cada mensaje tiene un máximo de 10 segundos de largo. Si usted quiere que el número en la pantalla reciba un mensaje de salida ya grabado, oprima la tecla de MODE (MODO) hasta que aparezca ESCOJA MDS en la pantalla. Entonces oprima cualquiera de las dos teclas de REVIEW (REVISAR) hasta que oiga el mensaje que quiera usar. Finalmente, oprima la tecla de RECORD (GRABAR) brevemente para combinar el mensaje con el número en la pantalla. 39 ¿Cómo puedo verificar lo que he grabado? Oprima la tecla de MODO (MODE) varias veces hasta que REVISAR NOMBRES o REVISAR MDS aparezca en la pantalla. Entonces oprima una de las teclas de REVIEW (REVISAR) para revisar los números de teléfono para los cuales usted ya haya grabado nombres o mensajes de salida. Oirá el nombre grabado o el mensaje de salida para cada número anunciado mientras va revisando cada número. ¿Cómo puedo borrar lo que he grabado? Siga los pasos anteriores para revisar lo que usted grabó hasta que oiga el nombre o mensaje de salida que quiera borrar. Entonces oprima la tecla BORRAR (CLEAR). La grabación combinada con ese número será borrado. Devolver Llamadas Directamente Usted puede devolver llamadas directamente desde el registro de llamadas. Use las teclas de REVIEW (REVISAR) para encontrar la persona que usted quiere llamar. Con la información en la pantalla, descuelgue el teléfono como usted lo haría normalmente para hacer una llamada, pero en vez de marcar el número de teléfono, oprima la tecla de MODE/DIAL en la unidad de identificación de llamadas. Si usted está llamando un número que solo requiere marcar 7 dígitos , oprima la tecla de MODE/DIAL otra vez antes de completar la llamada. Si la llamada requiere marcar 10-dígitos o 1+10-dígitos, use las teclas de REVIEW para escoger el modo de marcar apropiado, entonces oprima la tecla de MODE/ DIAL para completar la llamada. 40 Notificación de Mensajes in Espera Su VoiceAnnounce 9900CW le dejará saber cuando usted tiene mensajes de correo de voz. Esto requiere un servicio especial de su compañía telefónica local. La unidad puede detectar señales de mensajes FSK y tono intermitente (SDT). Cuando el mensaje en espera es detectado, la unidad mostrará en su pantalla un símbolo de mensaje en espera y el bombillita se prenderá y apagará rápidamente. Usted puede escoger si quiere tener un aviso audible (un tono cada minuto) con seleccionar la opción de TONO MSJ ESP (MSG WAIT BEEP) en las opciones de ajuste especiales. 41 Opciones de Ajuste Especiales Usted puede ajustar la manera en que su VoiceAnnounce 9900CW trabaja. Oprima y sujete la tecla de MODE y oprima momentáneamente la tecla de RECORD para entrar en el MODO DE AJUSTE . Usted puede cambiar las opciones al oprimir la tecla de RECORD, y puede ir a la próxima opción al oprimir la tecla de MODE. RESET (REAJUSTAR)- Borra toda la información que está en el registro de llamadas, todos los nombres y mensajes grabados Examina la memoria. Vuelve a modo de espera en aproximadamente 30 segundos. ENGLISH (INGLES) – le permite escoger entre Inglés y Español. Inglés es el lenguaje asumido. MSG WAIT BEEP (TONO MSJ ESP) – Prende o apaga la notificación de mensaje en espera audible. La posición apagada es asumida. CW SPEAKER (ALTAVOZ LE) – Prende o apaga el anuncio de llamdas en espera por el altavoz. La posición apagada es asumida. CW NAME (NOMBRE LE) –Prende o apaga el anuncio de la identificación de una llamada en espera solamente si hay un nombre grabado asociado con el. La posición apagada es asumida. 42 Resolviendo Problemas Tecnológicos ¿Tiene algún problema? Antes de comunicarse con ClassCo o su distribuidor, examine su unidad usando estas sugerencias. Quizás pueda resolver el problema usted mismo. P: La unidad de identificación de llamadas no responde a mandos adecuadamente. Quizás las baterías están débiles. Trate de reemplazar las baterías. Si está usando un adaptador AC, desenchufe la unidad por diez segundos y luego restablece la corriente eléctrica. P: No anuncia las llamadas. Asegúrese de que el volumen está ajustado correctamente. (Vea el modo de AJUSTE VOLUMEN) Llame al la compañía telefónica para asegurarse de que el servicio de llamada identificada esté activada y que esté trabajando con su línea telefónica apropiadamente. Asegúrese de que sus baterías están cargadas o que el cable eléctrico esté conectado apropiadamente. Asegúrese de que el cable telefónico que proviene de la pared esté conectado en el enchufe que dice LINE en la parte de atrás de la unidad y que el cable telefónico que proviene desde su teléfono está conectado al enchufe que dice PHONE. Deje que el teléfono suene dos veces antes de contestarlo, ya que la información de identificación de llamada es anunciada entre la primera y segunda llamada. Si usted ve las palabras ERROR DE DATA quiere decir que la información de llamada identificada no ha sido transmitida apropiadamente a su unidad de identificación de llamadas. Esto puede ser un problema con el servicio de llamada identificada de su compañía de teléfono o con su unidad. Revise sus conexiones, y entonces llame a la compañía telefónica. 43 P: No anuncia las llamadas en espera. Asegúrese de que el volumen esté ajustado correctamente Vea modo de AJUSTE VOLUMEN ( ADJUST VOLUME ) Llame a la compañía telefónica para asegurarse de que usted tiene el servicio de llamada identificada en llamadas en espera activado y está trabajando con su línea telefónica apropiadamente. Asegúrese de que está hablando por el teléfono que está conectado a la unidad de identificación de llamadas. Asegúrese de que las baterías están cargadas o que el cable eléctrico está enchufado apropiadamente. Asegúrese de que el cable telefónico que proviene de la pared está conectado al enchufe que dice LINE en la parte de atrás de la unidad y que el cable telefónico que proviene de su teléfono está conectado al enchufe que dice PHONE en la parte de atrás de la unidad. Si usted tiene algún otro aparato de identificación de llamadas, desenchúfelo para ver si resuelve el problema. P: ¿Cómo puedo apagar el la bombillita cuando está intermitente? Revise todas las llamadas nuevas al oprimir la tecla de REVIEW hasta que todas las llamadas en el registro de llamadas hayan sido mostradas en la pantalla. Oprima y sujete la tecla de CLEAR por 4-segundos para borrar todas las llamadas en el registro de llamadas. 44 Información del FCC Su unidad de identificación de llamadas ha sido registrado con la Comisión Federal de Comunicaciones (Federal Communications Commission), y acata los reglamentos en la parte 68 de los reglamentos del FCC. El FCC requiere que proveamos la siguiente información. Uso y conexión El FCC requiere que use un enchufe de teléfono modular. Este equipo no puede ser usado con un servicio de línea colectiva, o con un teléfono público de monedas. Notificación de la compañía de teléfono El FCC requiere que usted le provea la siguiente información a su compañía de teléfono si ellos se la solicitan: la línea a la cual usted va a conectar la unidad de identificación de llamadas (su número de teléfono), el número de registro de FCC de la unidad de identificación de llamadas y su número de equivalente de timbre (Ringer Equivalence Number, localizado en la parte trasera de su unidad de identificación de llamadas), y enchufe USOC requerido (USOC RJ-11C o RJ-11W). (Nota: El REN es útil para determinar cuantos aparatos usted puede conectar a su línea de teléfonos y aun recibir un timbre. En la mayoría de los casos, pero no en todas las áreas, la suma de todos los REN’s debe ser cinco o menos. Comuníquese con su compañía de teléfono local para más información.) Problemas y reparaciones Si su unidad de identificación de llamadas no está funcionando bien, el FCC requiere que usted desconecte la unidad completamente hasta que el problema sea resuelto. Si su unidad de identificación de llamadas está causándole daño a la red nacional de teléfonos, la compañía de teléfono puede discontinuar su servicio telefónico temporeramente. La compañía de teléfono tratará de comunicarse con usted antes de discontinuar su servicio. Si ellos no pueden comunicarse con usted antes, la compañía de teléfono le notificará lo antes posible. Le darán la oportunidad de corregir el problema, y usted será informado de sus derechos de sentar una denuncia con el FCC. Su compañía de teléfono local puede hacer cambios en facilidades, equipo u operaciones que pueden afectar el funcionamiento adecuado de su unidad de identificación de llamadas. Si esos cambios son planificados, usted será notificado y le informarán de sus derechos de sentar una denuncia con el FCC. 45 Declaración de interferencia de radio Este equipo ha sido probado y acata los reglamentos de los límites para un aparato digital clase B, según la Parte 15 de los reglamentos del FCC. Estos límites son diseñados para proveer protección razonable de interferencia dañina en una instalación residencial. Este equipo genera, usa, y puede irradiar frecuencias de radio dañinas, y si no es instalado y usado en concordancia con las instrucciones, puede causar interferencia dañina a comunicaciones de radio. No obstante, no hay garantías que esa interferencia no ocurrirá en una instalación en particular. Si este equipo causa interferencia dañina a la radio o a la recepción de la televisión, lo cual puede ser determinado al encender y apagar el equipo, se le recomienda al usuario tratar de corregir la interferencia de uno o más de las siguientes maneras: vuelva a orientar o relocalizar la antena receptora; aumenta la separación entre el equipo y el receptor; conecte el equipo a un enchufe en un circuito diferente al cual está enchufado el receptor; consulte con el distribuidor o un técnico de radio/televisor con experiencia para ayuda. Declaración Canadiense Nota: La Industria de Canada (The Canadian Industry) y Canada Ciencia (Science Canada) son marcas que identifican equipo certificado. Esta certificación significa que este equipo acata cierto requisitos de protección, de operación y de seguridad de la red de telecomunicación. El departamento no garantiza que el equipo operará al gusto del usuario. Antes de instalar este equipo, usarios deberán asegurarse de que es permitido estar conectado a las facilidades de las compañías locales de telecomunicación. El equipo tambíen deberá ser instalado usando un método aceptable de conexión. En algunas áreas, la cablería interna de una compañía asociada con un servicio de línea individual podrá ser extendida a través de un montaje de conector certificado ( una extensión de cable de teléfono). El consumidor deber estar al tanto de que aunque usted siga todas estas provisiones no previene necesariamente la degradación de servicio en algunas situaciones. Reparos a equipo certificado debe ser hecho por una facilidad autorizada Canadiense designada por el vendedor. Cualquier alteración or reparos hechos a este equipo, problemas con el funcionamiento del equipo hechos por el usuario, puede darle causa a la compañía de telecomunicaciones pedir que el usuario desconecte este equipo. Precaución: Usuarios no deberán tratar de hacer estas conexiones, pero deben comunicarse con la autoridad de inspección eléctrica apropiada, o con un electricista, como sea apropiado. El número de carga (Load Numeber) (LN) asignado a cada aparato terminal denota el porcentaje de la carga total que puede ser conectada a un círcuito de teléfono el cual es usado por el aparato para prevenir sobrecargas. La terminación en un circuito puede consistir de cualquier combinación de aparatos, sujetos solo al requisito que la carga total de los números de carga no se exceden de 100. Un año Garantía limitada del fabricante ¿Quién está cubierto? Usted tiene que tener un comprobante de compra para intercambiar el producto. Un recibo o algún otro documento que muestre la fecha en la cual usted compró el producto es considerado como comprobante de compra. ¿Qué está cubierto? El producto está cubierto por esta garantía desde el día en que usted lo compra. Por un año en adelante, un producto con defectos o que no funcione será repuesto gratuitamente por un producto nuevo o renovado que sea comparable. El reemplazo de un producto es cubierto solo por el periodo original de la garantía. Cuando la garantía en el producto original expire, la garantía en el reemplazo también expira. ¿Qué está excluido? Su garantía no cubre: • cargos incurridos por labor de instalación del producto y el ajuste de controles del cliente en el producto. • reemplazo del producto a causa de mal uso, accidente, reparaciones no autorizadas u otra causa fuera del control de ClassCo Inc. • un producto que requiere modificaciones o adaptaciones para que pueda funcionar en otro país aparte del país para el cual fue diseñado, fabricado, aprobado y/o autorizado, o por reparaciones de productos causados por estas modificaciones. • daños incidentales o consecuentes producidos por el producto. (Algunos estados no permiten la exclusión de daños incidentales o consecuentes, así que la exclusión anterior quizás no le aplique a usted.) 47 FOR CUSTOMER SERVICE CALL CLASSCO TOLL FREE: (888) 252-7726 or visit product support on-line at www.classco.com Copyright © 2004 ClassCo Inc. All Rights Reserved ClassCo® and VoiceAnnounce® are trademarks of ClassCo Inc. This product is protected under the following US Patents: 5526406, 6038443 Printed in China Rev. 3ES 0408DL