1
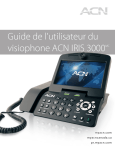
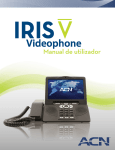
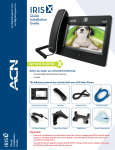
®
IRIS 3000™ VIDEOPHONE
USER MANUAL
mya c n.com
myacnc a na d a .c a
pr.mya c n.com
ACN IRIS 3000 VIDEOPHONE USER MANUAL
Contents
Safety Instructions.....................................................................3
3-4-1-2. Make a Call................................................................................ 16
1. Installing Video Phone................................................... 3
3-4-1-3. Edit Contact.............................................................................. 16
1-2. Connecting your Video Phone..............................................4
3-4-1-4. Delete Contact......................................................................... 17
1-3. Video Phone’s Components...................................................5
3-4-2. 1-4. Each Part’s Name and Function............................................6
3-4-2-1. Search by Name....................................................................... 17
Search Contact......................................................................... 17
3-4-2-2. Search by Phone Number.................................................... 18
2. Using Basic Functions of Your Video Phone............... 7
3-4-3. Delete All.................................................................................... 18
2-1. Making a Call...............................................................................7
3-5. Call Log....................................................................................... 18
2-1-1. Making a call in dial pad mode.............................................7
3-5-1. Total Calls .................................................................................. 19
2-1-2. Making a call in standby mode (When LCD is off ).........7
3-5-2. Answered Calls......................................................................... 19
2-1-3. Making a call from the Call Log menu................................8
3-5-3. Dialed Calls................................................................................ 19
2-1-4. Making a call from phonebook menu................................8
3-5-4. Missed Calls............................................................................... 20
2-2. Receiving a Call...........................................................................9
3-5-5. Making a Call, Saving or Deleting a Number................ 20
2-3. Rejecting a Call...........................................................................9
3-6. Settings....................................................................................... 21
2-4. Ending a Call................................................................................9
3-6-1. System Settings....................................................................... 21
2-5. Listening to Your Voice Mail...................................................9
3-6-1-1. Network...................................................................................... 21
2-6. Viewing the Status.................................................................. 10
3-6-1-2. Factory Reset............................................................................ 21
2-7. Useful Functions during a Call........................................... 10
3-6-1-3. Sound.......................................................................................... 22
2-7-1. Mute............................................................................................. 10
3-6-1-4. Display........................................................................................ 22
2-7-2. Privacy......................................................................................... 10
3-6-2. Time Setting.............................................................................. 25
2-7-3. Volume Control........................................................................ 11
3-6-3. Upgrade...................................................................................... 26
2-7-4. Brightness Control.................................................................. 11
3-6-4. Administrator........................................................................... 26
2-7-5. Hold............................................................................................. 11
3-7. Digital Photo Frame............................................................... 26
2-7-6. Conference Call........................................................................ 12
3-8. Information............................................................................... 28
2-7-7. Call Waiting............................................................................... 12
Troubleshooting Guide........................................................................... 29
3. Set Up.............................................................................. 13
3-1. Main Menu................................................................................ 13
3-2.
Using Keypad in Set-up ....................................................... 14
3-3. Entering Names and Characters........................................ 14
3-3-1. Entering Numbers.................................................................. 14
3-3-2. Entering Letters....................................................................... 14
3-3-3. Entering Numbers and Letters........................................... 14
3-4. Phonebook................................................................................ 15
3-4-1. All Contacts............................................................................... 15
3-4-1-1. Add New Entry......................................................................... 15
2
ACN IRIS 3000 VIDEOPHONE USER MANUAL
Safety Instructions
This guideline is for user safety and prevention of any financial loss in advance. Read thoroughly before using your Video Phone.
Precautions are categorized in two types and meanings are as follows:
Warning
This is a sign alerting you of possible death or severe injury if the instruction is not followed.
Caution
This is a sign alerting you of possible injury or financial loss if the instruction is not followed.
CAUTION
When removing the power adapter, turn off the power switch and unplug the power plug.
• Unplugging while the power is on may cause breakage of your Video Phone. Do not install the Video Phone in an unsafe
place, or on an unstable surface.
• The Video Phone may not operate properly, or may not work at all. Use a soft fabric when cleaning the LCD or camera.
• Do not use strong chemical solutions or abrasive materials to clean your Video Phone as they can damage the equipment,
especially the LCD or camera.
Install your Video Phone close to the most accessible electrical outlet.
WARNING
Do not install the unit in a location where it can be affected by dust or gas. Do not disassemble or modify the Video Phone or power adapter. The warranty will not cover any defect that occurs due to such mishandling. To avoid damage, overheating or shock, do not install in a humid location.
Do not install the unit in direct sunlight or near heat sources, such as radiators. To avoid electric shock, do not touch the
power adapter during thunder and lightning. To prevent damage, keep the unit safe from sudden shock. Do not apply
excessive force, especially to the LCD screen or camera.
Sudden changes of temperature may cause damage to the unit. Disconnect the power cable when the unit is not in use for an
extended period of time. Only use the power adapter supplied with the Video Phone.
1. Installing the ACN Video Phone
1.1 Video Phone Components
The following items should be included with your ACN Video Phone. If an item is missing, please contact ACN Digital Phone Service
Customer Service – 888-414-1958 (U.S.) or 866-913-3445 (Canada).
Main Body of ACN Video Phone
Handset
Ethernet Cable
Power Adapter
*Warning: Use the Power Adapter that comes with your Video Phone. Use of any other power adapter, other than one provided by ACN, may result
in corruption of your Video Phone or even fire.
3
ACN IRIS 3000 VIDEOPHONE USER MANUAL
1.2 Connecting your Video Phone
For the best result, please follow the installation procedures provided in the Quick Install Guide located in the box with your device.
1. Plug in the handset line to
the body.
2. Connect the power cable to
the power adapter.
3. Connect the Ethernet Cable
to the WAN port.
4. Turn on the power switch.
NOTE: The phone’s first boot up may take up to 15 minutes. The system will perform an initial software update and provision the phone as part
of this boot up process. Please allow ample time for the first boot up. The phone’s LCD screen will display a status as it moves through the process.
On completion, the phone’s registration light will turn green.
4
ACN IRIS 3000 VIDEOPHONE USER MANUAL
1.3 Part Names and Functions
Front
1.
Handset: Handset of Video Phone
2.
Speaker: Plays ring tones and transfers voice/sound in speakerphone
mode.
3.
Camera: Captures images that are transmitted to the called party.
4.
LCD Screen: Displays your image and the image of the calling party
during a call.
5.
Keypad: Buttons that operate the functions of the Video Phone.
6.
Microphone: Receives and transmits voice in speakerphone mode.
Rear
1. ON/OFF (I/O): Turns the
Video Phone on/off
2. POWER (DC IN): Connects to
the power adapter
3. USB: USB port used to
store data on the
video phone
4. LAN: Local Area Network connection
5. WAN: Connects to Internet via Ethernet Cable
6. PHONE: Connects Cordless Phone or corded phone to the Video Phone
7. VIDEO OUT: Transmits video data to TV or Computer
8. AUDIO OUT: Transmits audio data to external speakers or audio system
LAN (Local Area Network) is a computer network covering a small geographic area, like a home, office, or group of buildings. A home
network is a residential local area network, and is used to connect multiple devices within the home. The simplest home networks are used
to connect two or more PCs for sharing files, printers, and a single connection to the Internet (usually broadband Internet through a cable
or DSL provider).
WAN (Wide Area Network) is a computer network that covers a broad area. WANs are used to connect LANs and other types of networks
together, so that users and computers in one location can communicate with users and computers in other locations. The wide area
network provides network address translation (NAT), allowing multiple devices such as computers or video phones to share one IP address
and Internet connection. The router can be identified as it almost always has five Ethernet ports on the back. One port is separate from the
four other ports. The largest and most well-known example of a WAN is the Internet.
5
ACN IRIS 3000 VIDEOPHONE USER MANUAL
Keypad
Key
Use
1. REGISTER
The green LED light is on when the Video Phone is registered to the Internet phone service
2. POWER
Indicates if the Video Phone is switched on
3. MAIL
Allows you to retrieve voice mail/video mail messages
4. HOLD
Enables you to place and remove calls from hold
5. MUTE
Disables the voice and video transmission during the call
6. PHONEBOOK
Provides access to your personal phonebook
7. CONFERENCE
Allows you to audio conference multiple callers on to one call (3 way conference call)
8. PRIVACY
Temporarily disables video transmission on a call or becomes self-view when phone is not in use
9. *
Enters “*”
10. NUMERIC KEYPAD
Enters phone number in the dialing mode or letters in the “Settings” menu
11. #
Enters “#” or rejects incoming call
12. MENU
Activates the “Main” menu on your LCD screen
13. BACK
Moves to the previous menu, finishes a sequence and deletes characters or letters in a sequence
14. MY CONTENT
Future Enhancement
15.
Up navigation arrow
16. OK
Use to enter selections and save settings in the “Settings” menu
17.
Down navigation arrow
18.
Left navigation arrow
19.
Right navigation arrow
20. STATUS
Lists information needed for technical support. It lists configuration and version of the software
21. CAPS
Allows you to type in all caps mode and selects the type of letters or characters in the input mode.
Switches between numeric, lower-case alpha characters and upper-case alpha characters
22. MY APPLICATIONS
Future Enhancement
23. REDIAL
Makes a call to the last number dialed
24. SPEAKER
Activates/deactivates the speakerphone
25. CALL
Makes a call to the dialed number
6
ACN IRIS 3000 VIDEOPHONE USER MANUAL
2. Using Basic Functions of Your Video Phone
2.1 Making a Call
2-1-1. Making a call in dial pad mode.
Pick up the handset or press the Speaker button
• Enter the phone number
• Press the CALL button
Note: Refer to Section 3-3 in this User Manual for instructions on inputting letters and characters.
2-1-2. Making a call in standby mode (When LCD screen is off)
Enter the first digit of the phone number
• The dial pad window is displayed
• Enter the remaining digits of the phone number
• Press the CALL button
7
ACN IRIS 3000 VIDEOPHONE USER MANUAL
2-1-3. Making a call from the Call Log menu
Press the MENU button
• Use the Navigation Arrows to select “Call Log”
• Press the OK button
• Using the Navigation Arrows, select the menu location of the number you wish to call (Total Calls, Answered, Dialed, Missed) using the
Navigation Arrows
• Press the OK button
• Use the Navigation Arrows to select the number
• Press the OK button
• Use the Navigation Arrows to select the icon “Make A Call”
• Press the OK button
Select "Call Log"
Press OK
Select the type of menu
Press OK
Select the number
Press OK
Select “Make a Call”
Press OK
2-1-4. Making a call in phonebook menu
Press the MENU button when the LCD is off or in idle mode.
• The Main Menu is displayed
• Select the Phonebook menu by using the navigation arrows
• Press the OK button
• Select All Contacts and Press OK
• Scroll to the desired contact and press OK, select Make a Call and press OK
• Select Number you wish to call and press OK
Select the "Phonebook" from
the Main Menu
Press OK
Select “All Contacts”
Press OK
Scroll to the number you wish
to call and press OK
Makes the call
Scroll to the desired
contact and press OK
8
Select “Make a Call
and press OK
ACN IRIS 3000 VIDEOPHONE USER MANUAL
2.2 Receiving a call
The Video Phone begins ringing and the LCD screen will show the person calling or the name and phone number of the person calling.
Pick up the handset or press the SPEAKER button to answer the call. If there is a picture associated with a contact, it will be displayed.
2.3 Rejecting a call
To reject an incoming call, press #. The call will be sent directly to your voice mail.
2.4 Ending a call
Hang up the handset or if you are in speakerphone mode, press the SPEAKER button.
NOTE: Your call data is stored in the Call Log.
2.5 Listening to your Voice Mail
An envelope will appear in the bottom right-hand corner of your screen to indicate you have a video/voice mail message and the number
of message(s) waiting or you will hear a voicemail message tone (5 beeps) when you lift the handset.
To listen to your voice mail messages:
• Press the MAIL button on the front of your phone
• Enter your 4 digit passcode and press # (The voice mail access code defaults to 1234)
• Press 1 to retrieve video mail/voice mail message(s)
• If you have a message(s), the voice prompt will indicate whether it is a voicemail or video message.
9
ACN IRIS 3000 VIDEOPHONE USER MANUAL
Video Mail/Voice Mail Functions
Press
Command
# Key
To save the message
7
To erase the message
2
To repeat the message
4
To go back to the previous message
5
To play the message envelope
6
To go to the next message
8
To call back the caller
9
For additional options
* Key
To go back to the previous menu
2.6 Viewing the Status
Press the STATUS button to view information about your Video Phone.
Press the back button or highlight the box in the bottom right-hand corner of your screen and press OK to exit the status menu.
2.7 Useful Functions during a Call
2-7-1. Mute
Press the MUTE button to prevent the other party from hearing your voice. If you want to release mute, press MUTE button again.
2-7-2 Privacy
Press the PRIVACY button to keep your image from being displayed to the other party. In privacy mode, instead of your image, a logo image is displayed on the other party’s screen. If you want to release privacy mode, press the PRIVACY button again.
10
ACN IRIS 3000 VIDEOPHONE USER MANUAL
2-7-3. Volume Control
“ ” Lowers the Volume
“ “ Raises the Volume
To adjust the volume during a call:
Press the MENU button
• Select Volume Control by using the Navigation Arrows “
• Press the OK button
• Use ” ” to adjust volume
• Press the BACK button to return to the previous menu
”
2-7-4. Brightness Control
In order to control the LCD Brightness during a call:
• Press the MENU button
• Select “Brightness Control” by using the navigation arrows “ ”
• Press the OK button
• Use to adjust
“ ” Decreases the Brightness
“ “ Increases the Brightness
2-7-5. Hold
You can place a call on hold by pressing the HOLD button during a call. The LCD screen will become dark. To resume your call, press the
HOLD button again.
Caller screen "On Hold"
Screen person called will see “On Hold”
11
ACN IRIS 3000 VIDEOPHONE USER MANUAL
2-7-6. Conference Call
If you wish to conference another party into an existing phone call, press the HOLD button during the call. This places the existing caller
on HOLD.
Caller screen On Hold
Screen person called will see On Hold
Dial the number of the third person and press CALL.
When the third party answers, press the CONFERENCE button
NOTE: If the conference originator hangs up during the call, it will hang up the call for all three parties on the phone.
2-7-7. Call Waiting
You will hear a call waiting tone to indicate “Incoming Call signal” and the Caller ID information will be displayed.
•
To accept the incoming call, press “1” (the current call will be placed on hold).
•
To reject the call, press “2” (the new caller will receive a voice mail Busy Greeting).
•
Once the incoming call is completed, press the HOLD button again to reconnect to the original caller. If the calling party hangs up, you will be automatically connected to the original caller.
12
ACN IRIS 3000 VIDEOPHONE USER MANUAL
3. Set-Up
3.1 Menu
Press the MENU button to display the Main Menu.
Note. To navigate the menu screens, press the Navigation Arrows
until you reach the desired menu item. Then press the OK button.
Main Menu Selections
Phonebook
• Store contact names and phone numbers for frequently called numbers
• Search for phone numbers by name and number
• Place a call directly from this menu
Call Log
• View recent calls, including total calls, answered, dialed and missed calls
• Place a call directly from this menu
Settings
• Provides access to a variety of settings, including System Setting, Time Setting, Upgrade and Administrator
Settings
• In the System Setting menu, you can set the parameters for Network, Factory Reset, Sound and Display options
• In the Network menu, you can set your Net Settings, (NAT model or Bridge Model) interface (DHCP, PPPoE, or Fixed IP)
• In the Sound menu, you can set your ringtones, ring volume, sound effect type, sound volume and audio output.
• The Display menu allows you to select your Video Output, set LCD brightness, upload bandwidth, and use picture capture, which captures and stores picture from live video conversation. This menu is also where you can adjust settings for self view, power saving, wallpaper, digital photo frame, language options and more.
• The Time Setting menu allows you to set the time parameters such as NTP, D.S.T, and G.M.T
• In the Upgrade menu, you can set the upgrade server address and the upgrade method
• The Administrator menu provides access to more complex settings, such as SIP, A/V Codec setting, DNS, Proxy and LAN settings. Please do not attempt to adjust items in the Administrator menus. Please contact ACN Customer Service for assistance – 888-414-1958 (U.S.) or 866-913-3445 (Canada).
Digital Photo Frame
• Digital Photo Frame allows you to view pictures stored on a SD card or USB flash drive inserted into your phone.
Information
• The Information page shows you the main system settings on your Video Phone
13
ACN IRIS 3000 VIDEOPHONE USER MANUAL
3.2 Using Keypad in Set-Up
Numeric Keys
•
Used for character input
CAPS Key
•
Enables you to select the type of characters to enter (Numeric/Lowercase/Capital)
BACK Key
•
Enables you to return to the previous menu
OK Key
•
Used to select and enter selections
Navigation Arrows
•
Used to navigate between menus
•
Directs you to edit mode, or set values for selected items
3.3 Entering Names and Characters
Press the CAPS button to select the input mode (Numeric/Lowercase/Capital) you wish to use. The current input type is indicated on left
top of LCD screen, shown by an icon representing the current input type:
1
a
A
Indicates you are entering “Numbers”
Indicates you are entering “Lowercase” letters
Indicates you are entering “Capital” letters
English
Mode
Key
Numeric
Small
Capital
1 Key
:@/
:@/
1
2 Key
abc
ABC
2
3 Key
def
DEF
3
4 Key
ghi
GHI
4
5 Key
jkl
JKL
5
6 Key
mno
MNO
6
7 Key
pqrs
PQRS
7
8 Key
tuv
TUV
8
9 Key
wxyz
WXYZ
9
0 Key
-._
-._
0
* Key
*
*
*
# Key
#.
#.
#.
Forward Space
Forward Space
Forward Space
Backspace
Backspace
Backspace
BACK Key
3-3-1. Entering Numbers
Example: To Enter “123”
• Press the CAPS button until the 1 appears in the Upper left side of the screen.
• Press the buttons 1, 2, 3 consecutively.
3-3-2. Entering Letters
Press the CAPS button until the A appears in the upper left side of the screen.
You will press the corresponding key until the desired letter appears. Example: To enter “SKY
• Press the CAPS button to set input mode to A.
• Press buttons ‘S’, ‘K’, ‘Y’ consecutively. (7, 7, 7, 7
5, 5
9, 9, 9 )
3-3-3. Entering Numbers and Letters
Example: To enter “123.com”
You will press the corresponding key until the desired letter appears.
• Press the “CAPS” button to set input mode to 1.
• Press buttons 1, 2, 3 and the # key
• Press the “CAPS” button to set input mode to A .
• To spell out “com”, press buttons 2, 2, 2, 6, 6, 6 consecutively, pause and hit 6 again.
14
ACN IRIS 3000 VIDEOPHONE USER MANUAL
3.4 Phonebook
The Phonebook enables you to save frequently used phone numbers and place phone calls directly from the Phonebook. Up to 300 contacts can be stored in the Phonebook.
Select PHONEBOOK
in the main menu; Press OK
PHONEBOOK MENU
3-4-1. All Contacts
“All Contacts” lists all the contacts you have saved in the phonebook. You can edit and save or delete contact information here.
Select PHONEBOOK in the
main menu; Press OK
PHONEBOOK MENU
Select ALL CONTACTS in the
Phonebook Menu; Press OK
ALL CONTACTS LIST
3-4-1.1. Add New Entry
You can add new contact information (such as name or phone number), set up a corresponding ring tone or post a picture of the contact.
Once you enter the information, select “Save” to save the data in the Phonebook. If you don’t want to save the information, select “Cancel”.
Select PHONEBOOK
in the main menu; Press OK
PHONEBOOK MENU
Select “ADD NEW ENTRY” in
the All Contacts Menu and
Press OK
Enter information in “ADD
NEW ENTRY” window and
select “SAVE”
Select ALL CONTACTS in the
Phonebook Menu; Press OK
15
ALL CONTACTS LIST
ACN IRIS 3000 VIDEOPHONE USER MANUAL
3-4-1-2. Make Call
You can make a call to anyone listed in your “ALL CONTACTS” list by selecting the name and the phone number you wish to call.
Select PHONEBOOK
in the main menu; Press OK
PHONEBOOK MENU
Select ALL CONTACTS in the
Phonebook Menu; Press OK
Select the contact in the All
Contacts List
Press OK
Select “MAKE CALL” option
in the Menu
Press OK
Select desired number in the
list
Press OK
ALL CONTACTS LIST
3-4-1-3. Edit Contact
You can edit information such as phone number, name, ring tone and the picture of the contact. Once you have edited the information,
select “Save” to save the data. If you don’t want to save, select “Cancel”.
Select PHONEBOOK
in the main menu; Press OK
PHONEBOOK MENU
Select ALL CONTACTS in the
Phonebook Menu; Press OK
Select the contact in the All
Contacts List
Press OK
Select “EDIT” option in the
Menu
Press OK
Enter information in Edit Entry
window and select “SAVE”
Press OK
16
ALL CONTACTS LIST
ACN IRIS 3000 VIDEOPHONE USER MANUAL
3-4-1-4. Delete Contact
You can delete contact information that you do not need anymore.
Select PHONEBOOK
in the main menu; Press OK
PHONEBOOK MENU
Select ALL CONTACTS in the
Phonebook Menu; Press OK
Select “Delete” option in the
Menu
Press OK
Select “YES” to delete the
contact
Press OK
ALL CONTACTS LIST
Select the contact in the All
Contacts List
Press OK
3-4-2. Search Contact
You can search for a contact stored in the Phonebook by name or phone number. When you locate the desired information, you can make
a call, edit or delete the contact information.
Select PHONEBOOK
in the main menu; Press OK
Select “Search” in the
Phonebook Menu
Press OK
Search Menu
3-4-2-1. Search by Name
You can search for a contact by name in the Phonebook by selecting “Search by name”
Select PHONEBOOK
in the main menu; Press OK
Select “Search” in the
Phonebook Menu
Press OK
Search Menu
Select “Search by name” in the
Search Menu
Press OK
Enter the name that
you wish to find
Press OK
The contact information
will be displayed
NOTE: You should enter all the characters with upper and lower case letters.
17
ACN IRIS 3000 VIDEOPHONE USER MANUAL
3-4-2-2. Search by Phone Number
You can search for a phone number that has been saved.
Select PHONEBOOK
in the main menu; Press OK
Select “Search by number” in
the Search Menu
Press OK
Select “Search” in the
Phonebook Menu
Press OK
Search Menu
The information will display.
Enter the phone number you
wish to find in the “Search by Select OK and select the number you wish to call.
Number” window & press OK
3-4-3. Delete All
You can “Delete All” of the information in the Phonebook. If you want to “Delete All”, select “Yes” after selecting “Delete All”.
WARNING: SELECTING YES WILL AUTOMATICALLY DELETE ALL ENTRIES IN YOUR PHONEBOOK. YOU WILL NOT BE GIVEN A SECOND
WARNING AND WILL NOT BE ABLE TO RETRIEVE THESE ENTRIES AFTER YOU SELECT YES.
Select “Search” in the
Phonebook Menu
and Press OK
Search Menu
Select “Delete All” in the
Phonebook Menu
Select “Yes” in the “Delete
All” menu
Press OK
3.5 Call Log
The user can see all of the calls answered, dialed or missed by the phone. A call can be placed by selecting a number from the “Call Log” or
selected entries can be saved or deleted from the Phonebook.
Select “Call Log”
From the Main Menu
and Press OK
Call Log Menu
NOTE: A total of 300 calls (answered, dialed or missed) will be stored on the phone. The oldest calls will be deleted first.
18
ACN IRIS 3000 VIDEOPHONE USER MANUAL
3-5-1. Total Calls
Total calls answered, dialed or missed are listed in “Total Calls”. You can make a call by selecting the desired number.
Select “Call Log” from the Main
Menu and Press OK
Call Log Menu
Select “Make a Call”
and press OK
Your Video Phone makes a call
Select “Total Calls” from the
Call Log Menu
Press OK
Select the desired number or
contact name from the Total
Calls window
Press OK
3-5-2. Viewing Answered Calls
“Answered” lists all calls recently answered. You can see numbers of recently received calls, make a call by the number selected and record
the number in phonebook.
Select “Call Log”
From the Main Menu
Call Log Menu
Select “Make A Call” in the
menu
Press OK
Your Video Phone makes a call
Select “Answered” in the
Call Log Menu
Press OK
Select the number or contact
name in the Answered Calls
window
Press OK
3-5-3. Dialed Calls
You can see all the numbers of recently dialed calls, make a call by the number selected and save the number in phonebook.
Select “Call Log”
From the Main Menu
Select “Dialed” in the
Call Log Menu
Press OK
Select the number or contact
name in the Dialed Calls
window
Press OK
19
Select “Make A Call” in the
menu
Press OK
Your Video Phone makes a call
ACN IRIS 3000 VIDEOPHONE USER MANUAL
3-5-4. Missed Calls
You can see all the numbers of recent calls which were missed and make a call by the number selected and record the number in phonebook.
Select “Call Log” from the Main
Menu and Press OK
Call Log Menu
Select “Missed” in the
Call Log Menu
Press OK
Select the number in the
Missed Calls window
Press OK
Select “Make A Call” in the
menu
Press OK
Your Video Phone makes a call
3-5-5. Making a Call, Saving or Deleting a Number from the Call Log
You can make a call to a selected number in the Call Log menu as well as save or delete it.
Making a Call
Select “Call Log” from the Main
Menu and Press OK
Call Log Menu
Select the type of call from the
Call Log and Press OK
Select the desired number
Press OK
Select “Make A Call” in the
menu
Press OK
Your Video Phone makes a call
Call Log Menu
Select the type of call from the
Call Log and Press OK
Select the desired number,
select Save and Press OK
Call Log Menu
Select “Delete” in the menu
and Press OK
Select “YES” to delete the
phone number and Press OK
Saving a Number
Select “Call Log” from the Main
Menu and Press OK
Deleting a Number
Select “Call Log” from the Main
Menu and Press OK
20
ACN IRIS 3000 VIDEOPHONE USER MANUAL
3.6 Settings
In this menu, you can control the settings for your video phone for the system, time, upgrade and Administrator. Always press the BACK
button to save and exit the menu. After each entry, you will see a screen asking you to verify your changes. Select “Yes” or “No” and hit the
OK button .
Select “Settings” in the Main
Menu and Press OK
Select “Systems Settings” Menu
Press OK
3-6-1. System Settings
You can set up the network and control the sound and display settings for your video phone here.
Select “Settings” in the Main
Menu and Press OK
Select “System Settings” in the Select the Menu and Press OK
Settings Menu and Press OK
3-6-1-1. Network
The Network settings of your video phone are pre-set to allow calls through the Internet.
Select “Settings” in the Main
Menu and Press OK
Select “System Settings” in the
Settings Menu and Press OK
System Settings Menu
Select “Network” from menu
and Press OK
PLEASE DO NOT ATTEMPT TO ADJUST ITEMS IN THE NETWORK MENUS. PLEASE CONTACT ACN CUSTOMER SERVICE FOR
ASSISTANCE – 888-414-1958 (U.S.) or 866-913-3445 (Canada).
3-6-1-2. Factory Reset
You can reset your Video Phone to pre-set Factory Settings. If your Video Phone is initialized, all configurations you previously saved are
deleted.
Select “Settings” in the Main
Menu and Press OK
Select “System Settings” in the
Settings Menu and Press OK
System Settings Menu
Select”Factory Reset” from
menu and Press OK
PLEASE DO NOT ATTEMPT TO ADJUST ITEMS IN THE FACTORY RESET MENUS. PLEASE CONTACT ACN CUSTOMER SERVICE FOR
ASSISTANCE – 888-414-1958 (U.S.) or 866-913-3445 (Canada).
21
ACN IRIS 3000 VIDEOPHONE USER MANUAL
3-6-1-3. Sound
You can select the sound settings for ring tones, sound effects and volume controls.
Select “Settings” in the Main
Menu and Press OK
Select “Systems Settings” Menu
Press OK
Select “Sound” in the System
Settings Menu and Press OK
Choose the “Ring Tone”
Use Navigation Arrows to
control the “Ring Volume”
Choose the “Sound Effect Type”
Select the “Effect”
Use navigation keys to control
the “Sound Volume”
Select the “Audio Output”
(Internal or External)
External Output allows you to
use external speakers.
Use navigation keys to adjust
the “Speaker Volume”
Press Back
Select “Yes” and Press OK to
save
Always press the BACK button to save and exit the menu. After each entry, you will see a screen asking you to verify your changes. Select
“Yes” or “No” and select OK to save your settings.
3-6-1-4. Display
You can set-up the Video Output Device, LCD Brightness, Picture Capture, Self View, Power Saving, Wallpaper, Digital Photo Frame On/Off,
Digital Photo Frame Delay, Language, Upload Bandwidth, Screen Size, Frame Rate, and Video Codec Display from menu.
Select “Settings” in the Main
Menu and Press OK
Select “System Settings” in the Select the Menu and Press OK
Settings Menu and Press OK
Select “Display” in the
System Settings Menu
Your Video Phone gives you the flexibility to move your phone’s visual image to an external monitor. You can set the Video Output device
to activate this option. Select “ ” after each setting.
Video Output
LCD Brightness
Select the “Video Output”
Choosing between “LCD”,
“TV Out (PAL)” and
“TV Out (NTSC)”. Use Video
Output if you wish to connect
your Video Phone to a TV or
computer screen.
Use navigation keys to adjust
the “LCD Brightness”. Use to
adjust the brightness of your
screen.
Picture Capture
Select the device where the
stored pictures are housed
(either “SD” or “USB”). Use to
capture pictures while on a
call.
22
ACN IRIS 3000 VIDEOPHONE USER MANUAL
Self View
Power Saving
Select “On” if you want to
enable the self view option.
Allows you to see what the
caller sees.
Select the interval at which the phone
will switch to power saving mode from
“30 seconds - 90 seconds”
Wallpaper
The wallpaper is the Video Phone background displayed on your LCD screen. You can choose a different wallpaper pattern to be displayed
from an SD card or USB flash drive inserted in your Video Phone.
Select “Settings” in the Main
Menu and Press OK
Select “System Settings” in the
Settings Menu and Press OK
System Settings Menu
Select “ON” to enable the
Wallpaper function
You will receive a “Wallpaper
should be selected!” screen
Scroll down to “Type”
Press OK
Select the device type – USB or
SD and Press OK
Select the image and Press
OK or the location and press
BACK to save
Select “Yes or No” and Press OK
to save
Select “Display” in the
System Settings Menu
NOTE: You will receive a “No USB/SD device!” warning if you do not have a USB or SD device plugged into your telephone.
23
ACN IRIS 3000 VIDEOPHONE USER MANUAL
Digital Photo Frame On/Off
Select “Settings” in the Main
Menu and Press OK
Select “System Settings” in the
Settings Menu and Press OK
System Settings Menu
Select “Display” in the
System Settings Menu
Digital Photo Frame Delay
Language
See
Section
3.7
for more
details
To enable Digital Photo Frame,
select “On”. To disable, select
“Off”.
Select the delay you wish in between each Digital Photo Frame from
“10-20 seconds” NOTE: If you are displaying large photo files (greater than 3
mega pixels or larger than 600 x 800), set the delay in between each picture to 20
seconds. This will allow ample time for each photo to load.
Use the Navigation Arrows to change
the language displayed on the
screen. You can choose between
English, Spanish or French.
Upload Bandwidth
Upload Bandwidth is the capacity at which the video phone can upload data over your Internet connection. The IRIS 3000 comes with
pre-set optimal factory settings. If the video image you are sending is not as clear as you would like, you can adjust the upload bandwidth
speed of your video phone.
Before adjusting your upload bandwidth, you should perform a test to determine your actual upload bandwidth speed. From your home
computer connected to your LAN, go to http://speed.acndigital.net/network-check.html.
1. Enter in your VoIP telephone number.
2. Press the test button.
3. It will take approximately 60 seconds to return the results.
4. Document the Download and Upload speed on the test plan.
Select “Settings” in the Main
Menu and Press OK
From the Display menu, scroll
to Upload Bandwidth
Select “System Settings” in the
Settings Menu and Press OK
System Settings Menu
Select the appropriate Upload Bandwidth speed 128, 256, 384 or 512.
Select “Display” in the
System Settings Menu
Press BACK when finished then, “Yes” and
Press OK to save your settings.
24
ACN IRIS 3000 VIDEOPHONE USER MANUAL
If your Upload bandwidth speed is between 128 and 255, you should select an Upload bandwidth speed of 128.
If your Upload bandwidth speed is between 256 and 383, you should select an Upload bandwidth speed of 256.
If your Upload bandwidth speed is between 384 and 511, you should select an Upload bandwidth speed of 384.
If your Upload bandwidth speed is 512 or higher, you should select an Upload bandwidth speed of 512.
NOTE: You cannot change your display settings while on a call. You must make and save your selection prior to making calls. To see the effects of
the change, you’ll need to place a call. The party you have called will be able to tell you if your picture is clearer. If you set the upload bandwidth
speed too high, it will distort the quality of picture. To adjust, simply reset your upload bandwidth speed to the next setting down.
Screen Size
Screen Size refers to the resolution of your video. The screen size will automatically adjust to the appropriate setting (CIF or VGA) based on
your bandwidth and frame selection.
Frame Rate
The Frame Rate is the speed at which your video phone updates images. You can select Low, Normal or High depending on your
bandwidth speed.
Select “Settings” in the Main
Menu and Press OK
From the Display menu,
scroll to Frame Rate.
Select “System Settings” in the
Settings Menu and Press OK
System Settings Menu
Select “Display” in the
System Settings Menu
Use the navigation arrows to Press the BACK button when
select the appropriate Frame finished and select “Yes” to save
Rate: Low, Normal or High.
your settings. Press OK.
Video Codec
Video Codec represents the video compression on your phone. The IRIS 3000 uses two video codecs: H.263 and H.264. The Video Code will
automatically adjust to the appropriate setting based on the upload bandwidth and frame rate selected.
3-6-2. Time Setting
Your video phone provides you with a world time function.
Select “Settings” in the Main
Menu and Press OK
Select “Systems Settings” Menu
Press OK
Select “Time Setting” in the
Settings menu
Press OK
25
Time Settings menu
ACN IRIS 3000 VIDEOPHONE USER MANUAL
NTP (Network Time Protocols)
D.S.T (Daylight Saving Time) G.M.T (Greenwich Mean Time)
Select “On” to enable the
NTP option.
Select “Off” to disable the
NTP and enter the time and
date manually.
Select “On” to enable “Daylight
Saving Time” or “Off” to
disable it.
Use the navigation keys to
select the time zone for your
area.
Time Zone Settings
(GMT –11:00)
International Date Line West
(GMT –05:00)
Indiana (East)
(GMT –10:00)
Hawaii
(GMT –04:00)
Atlantic Time (Canada)
(GMT –09:00)
Alaska
(GMT –03:30)
NewFoundland
(GMT –08:00)
Pacific Time (US & Canada)
(GMT –03:00)
Greenland
(GMT –07:00)
Arizona
(GMT –02:00)
Mid-Atlantic
(GMT –07:00)
Mountain Time (US & Canada)
(GMT –01:00)
Cape Verde Island
(GMT –06:00)
Central Time (US & Canada)
(GMT)
Greenwich Mean Time
(GMT –05:00)
Eastern Time (US & Canada)
3-6-3. Upgrade
The Upgrade section shows the details of your video phone’s software. If the present version of software is not the most current, you can
upgrade the present software through the Internet.
PLEASE DO NOT ATTEMPT TO ADJUST ITEMS IN THE UPGRADE MENUS. PLEASE CONTACT ACN CUSTOMER SERVICE FOR
ASSISTANCE – 888-414-1958 (U.S.) or 866-913-3445 (Canada).
3-6-4. Administrator
The Administrator menus provide access to more complex settings, such as SIP, A/V Codec setting, DNS, Proxy and LAN settings.
PLEASE DO NOT ATTEMPT TO ADJUST ITEMS IN THE ADMINISTRATOR MENUS. PLEASE CONTACT ACN CUSTOMER SERVICE FOR
ASSISTANCE – 888-414-1958 (U.S.) or 866-913-3445 (Canada).
3.7 Digital Photo Frame
Your video phone provides you with the functionality of displaying digital photos taken on other devices such as cameras, camera phones, etc.
Insert the USB device or SD
card into your phone.
Select “Digital Photo Frame”
Select “View Another Picture”
from the Main Menu. Press OK.
Press OK
Select the file type where your Select the image and press OK. Your images should begin
pictures are stored and press to appear after the appropriate delay timeframe.
OK.
NOTE: Digital Photo Frame will automatically display all images on the SD or USB device. If you do not wish for a specific image to appear, you
must remove it from the device before inserting it into your phone.
26
ACN IRIS 3000 VIDEOPHONE USER MANUAL
To initialize Digital Photo Frame, you must turn Digital Photo Frame “On” and set the desired delay between photos in the Digital Photo
Frame Delay menu.
Select “Settings”
in the Main Menu
and Press OK
Select “System Settings” in the
Settings Menu and Press OK
Digital Photo Frame On/Off
Select “On” if you want to enable the Digital Photo Frame
option or “Off” to disable it
System Settings Menu
Select “Display” in the
System Settings Menu
Digital Photo Frame Delay
Select the amount of delay you wish in between each
Digital Photo Frame from “10 seconds” to “20 seconds.”
NOTE: If you are displaying large photos (more than 3 mega pixels),
set the delay to 20 seconds to allow time for each photo to load.
Press the BACK button when
finished. Select “Yes” to save
and press OK
NOTE: If you are displaying large photos (more than 3 mega pixels), set the delay to 20 seconds to allow time for each photo to load.
View Another Picture
Select “View Another
Picture”
Next Picture
Select the file type you want
to display and press the “OK”
button
Previous Picture
Select “Next Picture” in the
window to view the next
photo
Press OK
Select “Previous Picture”
in the window to view the
last photo
Press OK
NOTE. The video phone can only use JPG and PNG image formats. If the size of your image is greater than 3 megapixels, increase the time delay
between pictures to 20 seconds in order to give each photo time to load.
Delete the Current Picture
Select “Delete the Current
Picture” in the window
Select “YES” if you want to
delete the picture
Press OK
27
ACN IRIS 3000 VIDEOPHONE USER MANUAL
3-8. Information
You can view the most significant information about your video phone in this section.
Select “Information” in the
Main Menu
Press OK
Phone Information
28
ACN IRIS 3000 VIDEOPHONE USER MANUAL
TROUBLESHOOTING GUIDE
Problem
Troubleshooting
I cannot turn on the power.
•
Verify the power cable is connected correctly.
•
Press top part of power switch on back of phone to verify it is down.
•
Verify power outlet works by connecting a clock, radio, or other device to it.
•
Power cycle the phone by turning the phone off and then on again.
•
Verify the power cable is connected correctly.
LCD screen is not turned on.
•
Press a key or lift handset to verify power saver mode is not on.
I cannot hear the call connection signal from
handset.
•
Verify the handset is connected to the left port of the Video Phone.
I cannot make a call.
•
Verify the Internet cable is connected to the WAN port or LAN port.
•
Verify the handset is connected to video phone.
•
If the video phone is connected properly to the Internet, verify the registration lamp turns
on. If not, check if the server and user information are correct.
•
If the Video Phone is connected correctly to the network, the called party may not be registered with the same network.
•
Power cycle the phone by turning the phone off and then on again.
•
If you are using speed dial, verify the number is correctly registered in the Phonebook.
•
If a called party uses a video phone installed on a private network or firewall system, the call may not be connected.
•
Family Plan customers may not call phones off the ACN network. Their phone numbers start with 100 or 101.
•
Verify the called number is correct. Long Distance and toll free calls require 1+ the area code and phone number of the number called.
•
If the video phone is installed on a private network or a firewall system, you may not receive calls.
•
Verify registration light is on. If the phone is not registered, you cannot receive calls.
•
Power cycle the phone by turning the phone off and then on again.
•
Verify the ringtone volume level is set higher than “1” in the “Sound Settings” menu.
I cannot receive incoming calls.
When I receive a call, the screen is turned on but
there is no ringing sound.
The call is connected, but the other party’s screen •
is dark and the sound quality is poor.
If the video phone is installed on a private network or behind a firewall, you may not be
receiving the other party’s screen.
•
Check and verify if a camera is connected to the called party’s video phone.
•
Check and verify if the called party’s microphone is working. •
Increase the volume levels.
•
If the video phone is installed on a private network or behind a firewall, you may not be
receiving the other party’s audio.
•
Check and verify if the called party’s video phone is installed on a private network or a firewall system.
•
Check and verify if the audio/video input path is correctly configured in the “Set-up” menu
during a call.
•
Check to see if the other party’s audio/video device works properly.
The call is connected, and I can see the screen
and hear the sound and the other party can see
me but cannot hear me.
•
Verify the audio input path is configured correctly in the “Set-up” menu during a call.
•
Verify that the called party’s audio device works properly.
The call is connected, both the audio and video
are present, and the called party can hear me but
cannot see me.
•
Verify that the video input path is correctly configured in the “Set-up” menu during a call.
•
Verify that the called party’s video device is working properly.
The call is connected, the screen is visible, but
there is no sound.
The call is connected, both audio and video are
present, but the called party cannot see or hear
me.
29
ACN IRIS 3000 VIDEOPHONE USER MANUAL
The other party’s screen is frozen and there is no
sound.
•
Verify the video phone is connected to Internet properly.
•
Verify the called party’s video phone was not disconnected from Internet.
Phone connected to FXS port does not ring.
•
Verify that IRIS 3000 is functioning properly without phone connected to FXS port.
•
Verify phone cable from IRIS 3000 to auxiliary phone are securely connected.
•
Connect phone directly to FXS port. Do not use house wiring or external CID or answering machine.
•
Verify auxiliary phone has ringer turned on.
•
Test with a different phone if possible. Some phones may require more than the IRIS 3000 can supply. Not all phones are compatible.
•
Verify that IRIS 3000 is functioning properly without phone connected to FXS port.
•
Verify phone cable from IRIS 3000 to auxiliary phone is securely connected.
•
Connect phone directly to FXS port, do not use house wiring or external CID or answering
machine.
•
Test with a different phone if possible. Some phones may require more than the IRIS 3000 can supply. Not all phones are compatible.
•
Verify that IRIS 3000 is functioning properly without phone connected to FXS port.
•
Verify phone cable from IRIS 3000 to auxiliary phone is securely connected.
•
Verify that phone is set to TONE dialing, not PULSE.
•
Connect phone directly to FXS port. Do not use house wiring or external CID or answering machine.
•
Test with a different phone if possible. Some phones may send DTMF differently. Not all phones are compatible.
When the video phone is connected to TV or
monitor, the images displayed on the LCD screen
and TV or monitor are different.
•
When the external video output port is connected to TV or monitor, certain parts of the image will not be displayed as shown on the LCD screen of your video phone.
My Video Phone will not register
•
Ensure the Vide Phone is pulling an IP address from your modem/ router
•
Power Cycle your modem, router, and Video Phone.
•
Firewalls can block ports needed for registration. Bypass device with firewall or
Unable to answer call from phone connected to
FXS port.
Unable to make call from phone connected to
FXS port.
Unable to use *1 or *2 feature on phone connected to FXS port.
30
ACN IRIS 3000 VIDEOPHONE USER MANUAL
WARNING MESSAGES
DURING
WARNING MESSAGE
DESCRIPTION/MEANING
Loading System
Loading the latest firmware
Initializing UI
Loading Personal settings
Initializing Network
Obtaining IP. Contacting NTP server
Provisioning
Checking for and downloading updates
Updating
Phone is updating software.
Reading Files USB
A USB storage device was inserted.
Removing Files USB
A USB storage device was removed.
Reading Files SD
A SD storage device was inserted.
Removing Files SD
A SD storage device was removed.
Unplugged Network Cable
LAN cable is disconnected.
Loading the system…
Personal data settings are being loaded.
Setting current time…
Connection to NTP server is being made.
Initializing GUI Menu
Image data for GUI is being decompressed.
REGISTRATION FAIL
The Video Phone is attempting to connect to the Registration
Server but there is no response.
Hold
You are in Hold mode (Video & Audio).
On Hold
The call was put on hold by other phone.
Privacy On
You are in Privacy mode.
Mute On
You are in Mute mode.
Extension In Use
FXS phone is in use.
Call Transfer
Transferring call from 3000 to FXS.
You do not have a storage device
No storage device detected (SD Card or USB device)
Connecting to a ADSL Server… Network
configuration. Press “#” to interrupt
Connection to an ADSL service is being made.
Network Settings Failed. Press “#” to interrupt.
The video phone is attempting to connect to an ADSL Server but
there is no response.
Attempting to place a call
The phone is busy now.
The called party is on another line.
After completing a call
The phone is busy now.
The called party is on another line.
Invalid Password
Your password is incorrect.
Initializing the system…
All personal information is being initialized.
Initializing the Phonebook data
Phone & Call log data is being initialized.
Power On
Power On
During a Call
Configuring ADSL
Setting User Configuration
31
©ACN, Inc. 2009 IRIS_UserManual_MP_010509