1
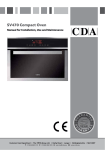
SV310SS Oven
Manual for Installation, Use and Maintenance
Passionate about style
Customer Care Department • The
Group Ltd. • Harby Road • Langar • Nottinghamshire • NG13 9HY
T : 01949 862 012 F : 01949 862 003 E : [email protected] W : www.cda.eu
1
Contents page
3-4Important
5
Use of the oven
6
Oven controls and use
7-8
Oven display icons
9
Manual cooking menu screen
10
Auto cooking menu screen
11
Roast chicken or meat
12Pizza
12Toast
12Cake
13
Special cooking menu screen
14
Minute minder menu screen
15
Cooking programme menu screen
16-17
Childlock and Settings
18
Cleaning and Maintenance
19
Changing the Oven Lamp
20
Removing the Oven Door
21
Electricity supply to your oven
22Installation
2
Important
This appliance must only be used for the purpose for which it is intended, i.e. domestic cooking. Any other use could be
dangerous and may lead to premature failure of the appliance.
The CDA Group Ltd cannot be held responsible for injuries or losses caused by incorrect use or installation of this
product. Please note that CDA reserve the right to invalidate the guarantee supplied with this product following
incorrect installation or misuse of the appliance.
This appliance is not designed to be used by people (including children) with reduced physical, sensorial or mental
capacity, or who lack experience or knowledge about it, unless they have had supervision or instructions on how to use
the appliance by someone who is responsible for their safety.
Under no circumstances should any external covers be removed for servicing or maintenance except by suitably qualified personnel.
User information:
• Ovens become hot during and immediately after use.
• The oven door can become very hot during operation.
• After use, please ensure that the oven is switched off.
• Keep children away from the appliance when in use, and immediately after use.
• Keep the oven door closed whilst grilling.
Appliance information:
Please enter the details on the appliance rating plate below for reference, to assist CDA Customer Care in the event of a
fault with your appliance and to register your appliance for guarantee purposes.
Appliance Model
Serial Number
CE Declarations of Conformity:
This oven has been designed, constructed and marketed in compliance with safety requirements of EEC Directive 2006/95/
EEC (Low voltage) and requirements of EMC Directive 2004/108/EEC.
This appliance has been manufactured to the strictest standards and complies with all applicable legislation, including
Electrical safety (LVD) and Electromagnetic interference compatibility (EMC). Parts intended to come into contact with
food conform to EEC/89/109.4
IMPORTANT INFORMATION FOR CORRECT DISPOSAL OF THE PRODUCT IN ACCORDANCE WITH EC
DIRECTIVE 2002/96/EC.
At the end of its working life, the product must not be disposed of as urban waste. It must be taken to a special local
authority differentiated waste collection centre or to a dealer providing this service.
Disposing of a household appliance separately avoids possible negative consequences for the environment and health
deriving from inappropriate disposal and enables the constituent materials to be recovered to obtain significant savings
in energy and resources. As a reminder of the need to dispose of household appliances separately, the product is marked
with a crossed-out wheeled dustbin.
3
Important
• Read the user instructions carefully before using the oven for the first time.
• Follow the instructions for first use of the oven.
• Clean the oven regularly.
• Remove spills as soon as they occur.
• Always use oven gloves when removing shelves and trays from the ovens.
• Do not allow children near the oven when in use.
• Do not allow fat or oils to build up on the oven shelves, grill pan or oven base.
• Do not place any cooking utensils or plates directly on the oven base.
• Always grill with the oven door closed.
• Do not grill food containing fat without using the grill pan grid.
• Do not cover the grill pan grid or the oven walls with aluminium foil.
• Do not use the oven tray for roasting.
• Do not perform maintenance or cleaning of the oven without first switching off the electricity supply. If the oven has
recently been used, allow to cool.
• Do not place hot enamel parts in water. Leave them to cool first.
• Do not allow vinegar, coffee, milk, saltwater, lemon or tomato juice to remain in contact with enamel parts.
• Do not use abrasive cleaners or powders that will scratch the surface of the enamel.
• Do not attempt to repair the internal workings of your oven.
4
Use of the oven
Before first use
• Before using the oven for the first time we recommend that you clean the oven with soapy water, rinse carefully and then heat on the fan oven programme at maximum temperature for one hour. A slightly unpleasant smell may be produced, caused by grease remaining on the oven elements from the production process.
Please note:
• This oven has been fitted with a cooling fan to achieve maximum efficiency and to maintain low surface temperatures. The cooling fan will switch on automatically when the oven reaches a preset temperature and switch off automatically when the oven has cooled sufficiently, even after the oven is switched off.
• The oven is programmed to retain date and time for approximately 24 hours in the event of a power cut. If the power is not restored within 24 hours the date and timer will need to be reset.
• The oven is equipped with a safety thermostat which will switch off the oven to prevent overheating. Overheating 5
can be caused by incorrect use of the oven or defective components. If the oven switches off due to overheating, wait for the oven to cool down before using it again. If the error continues, contact CDA Customer Care.
Oven controls and use
The oven will show the clock screen when on standby.
To turn on the oven, touch or swipe the screen for one to two seconds
The loading screen will open for one second, and then the front menu screen will open.
Front menu screen
1 – Minute minder (page 14)
2 – Childlock (page 16)
1
2
3
3 – Settings (page 16)
4 – Auto cooking (pages 10 - 12)
5 – Manual cooking (page 9)
6 – Special cooking (page 13)
4
5
6
fig. 1
6
Oven display icons
Icon
Name
Description
Back
Touch to return to the previous screen – shows on the cooking menu
screen when a programme has not started
OK
Touch to confirm settings. The icon will show the green tick for one
second before proceeding to the next menu screen.
Start
Touch and hold for two seconds to start cooking
Stop
Touch and hold for two seconds to stop cooking
Temperature
Touch the temperature display to activate temperature selection, then
touch
or
until the required temperature shows on the display.
The temperature will be set after three seconds’ delay.
The temperature can also be adjusted after the programme has
started.
When the oven is off, the temperature is shown in white.
When the oven is heating up, temperature flashes red and white
When the oven reaches the required temperature, there will be a beep
and the temperature is shown in red
Childlock off
Touch and hold for four seconds to switch the childlock on
Childlock on
Touch and hold for four seconds to switch the childlock off
180℃
7
Oven display icons
Icon
00:00
Name
Description
Light on
Touch to switch the light off – shows when a programme is running
without boost
Light Off
Touch to switch the light on – shows when a programme is running
without boost
Cooking timer
Touch to open the cooking timer menu screen.
The timer will turn if a programme with an end time is set but not yet
started.
Cooking time
display
In manual cooking where no timer is set or automatic cooking the
display will show the length of time the oven has been cooking
Boost on
Touch to switch boost on. Boost runs extra heating elements to speed
up the preheating process. This option is available for manual cooking
and auto cooking programmes (except toast)
The boost on icon shows when a programme has not started and will
flash in red and white when the boost is running . Once the required
temperature is reached, boost will automatically switch off and the
oven will beep.
Boost off
Touch to switch boost off – shows only when a programme has not
started
Minute minder
Touch to open the minute minder menu screen
Minute minder
running
Touch to open the cooking timer menu screen – this icon shows when
the minute minder is counting down
8
Manual cooking menu screen
The manual cooking programmes allow you to select exactly
which elements you want to use for any type of cooking, as
well as setting the temperature, booster, cooking time and
end of cooking time.
To start a manual cooking programme:
1. To open the manual cooking menu screen, touch
from the front menu screen.
2. Select the elements required by touching them , as shown in fig 2 .
When the element can be selected, it is pale grey.
When the element cannot be selected, it is dark grey
When the element is selected (before the programme has begun) or has reached temperature (during cooking) it is red
When the oven is heating up, the selected elements flash red and white
fig. 2
Functions
Max power (W)
Fan
60
Fan with circular elements
2160
Please note: The fan will come on automatically when the
circular element is selected.
Fan with top and bottom elements
1860
Fan with top elements
860
4. Set the temperature required, as shown on page 7.
Fan with bottom elements
1060
5. Set the booster if required, as shown on page8.
Top and bottom elements
1835
6. Set the cooking and end time if required, as shown on page 15.
Top element
835
Bottom element
1035
Grill element
1835
Grill and top elements (full grill)
2635
Fan with grill element
1860
3. Select the fan, if required.
Touch the fan, which will turn on the screen once it is selected.
7. Touch the start icon for two seconds. The oven will beep and start cooking
At the end of cooking, touch the stop icon for two seconds.
The oven will beep and stop cooking.
Fan with grill and top elements (full
grill)
If a cooking timer is set, at the end of cooking programme
a flag will show on the display and the oven will beep
intermittently. Cooking will stop automatically. To return to
the clock screen, touch the flag.
The manual cooking menu screen shows the layout of
elements available for use. The combinations available are
listed in the table to the right.
9
Fan with circular and top elements
2660
2960
Auto cooking menu screen
The auto cooking programmes are designed to make cooking even easier. Just touch the icon of the food to be
cooked, confirm the weight of the meat or the preferred level for toasting, touch
and the oven will set the
programme for you.
To open the auto cooking menu screen, touch
Icon
from the front menu screen.
Programme
Options
Programme alerts
Roast chicken
Weight between
0.8-2.5 kg
Preheat complete - Add chicken
Add vegetables
Turn food
Programme complete
Roast meat
Weight between
0.8-2.5 kg
Preheat complete - Add meat
Add vegetables
Turn food
Programme complete
Pizza
None
Preheat complete - Add pizza
Add seasoning/cheese
Programme complete
Toast
3 levels of toasting
Turn toast
Programme complete
Cake
None
Preheat complete - Add cake
Programme complete
Please note: If you change the temperature on an auto cooking programme, the oven will store the new setting for
the next time the programme is used.
10
Roast chicken or meat
1.Touch
or
as required from the auto cooking menu screen.
2. Adjust the temperature if necessary, as shown on page 7.
3. Set the booster if required, as shown on page 8.
4. Touch the start icon.
The screen will show preheat and the timer will turn on the display until the oven reaches the required temperature.
The oven will beep to confirm that the preheat is complete and the screen will display an icon to tell you put the roast
into the oven. At this point, the timer will recalculate to show the corrected cooking time and end of cooking time if
necessary.
During the programme, the oven will beep and the display will show icons to advise to add vegetables or to turn the
roast. To stop the beep, touch the icon.
At the end of the programme, the oven will beep intermittently and the screen will show a flag at the end of the
cooking time, along with two options (+8 or +15 minutes) to cook for longer. To stop the programme, touch the flag.
To extend the cooking time, touch one of the two options.
Chicken
Cooking times (excluding preheating times) are shown in the tables below.
Weight (g)
minutes
800
80* (55 for chicken)
1000
80* (65 for chicken)
1400
85
2000
110
2500
130
Meat
* Programmes marked with an asterisk allow extra time for roasting potatoes. The times for cooking the
chicken are shown in brackets.
Weight (g)
minutes
800
75
1000
85
1400
115
2000
155
2500
185
Please note:
The roast meat cooking times are preset to an average time for most types of meat. It may be necessary
to increase the cooking time, for example if you prefer well done roast beef, or for meats like pork that
require a longer cooking time.
You are recommended to check and increase the cooking times as required, using the +8 or +15 minute
option at the end of the programme.
11
Pizza
Touch
from the auto cooking menu screen.
1. Adjust the temperature if necessary, as shown on page 7.
2. Set the booster if required, as shown on page8.
3. Touch the start icon.
The screen will show preheat and the timer will turn on the display until the oven reaches the required temperature.
The oven will beep to confirm that the preheat is complete and the screen will display an icon to tell you put the pizza
into the oven. At this point, the timer will recalculate to show the corrected cooking time and end of cooking time if
necessary.
During the programme, the oven will beep and icons will show on the screen to advise to add cheese and seasoning.
To stop the beep, touch the icon.
At the end of the programme, the oven will beep intermittently and the screen will show a flag at the end of the cooking
time, along with two options (+3 or +6 minutes) to cook for longer. To stop the programme, touch the flag. To extend
the cooking time, touch one of the two options.
Toast
1.Touch
from the auto cooking menu screen.
2. Select the level of toasting required, as described below:
Light – 2 minutes each side
Medium – 3 minutes each side
Dark – 4 minutes each side
3. Touch the start icon.
The oven will beep the display will show an icon to remind you to turn the toast over halfway through cooking. To stop
the beep, touch the icon.
At the end of the programme, the oven will beep and the flag will show on the display. To stop the beep, touch the flag.
Cake
1.Touch
from the auto cooking menu screen.
2. Set the temperature required, as shown on page 7.
3. Set the booster if required, as shown on page 8.
4. Touch the start icon.
The screen will show preheat and the timer will turn on the display until the oven reaches the required temperature.
The oven will beep to confirm the preheat is complete. You should now put the cake into the oven. At this point, the
timer will recalculate to show 45 minutes cooking time and end of cooking time if necessary.
At the end of the programme, the oven will beep intermittently and the screen will show a flag at the end of the cooking
time, along with two options (+5 or +10 minutes) to cook for longer. To stop the programme, touch the flag. To extend
the cooking time, touch one of the two options.
12
Special cooking menu screen
The oven is equipped with five special cooking programmes, as detailed below.
Icon
Programme
Temperature
Preset cooking time
Defrost
50˚
120 minutes (adjustable as required)
Keeping food warm
80˚
60 minutes (adjustable as required)
Yogurt
38˚
180 minutes (adjustable as required)
Plate warming
65˚
60 minutes (adjustable as required)
Dough proving
48˚
90 minutes (adjustable as required)
on the front menu screen and then select the programme required. If
To run a special cooking programme, touch
.
necessary, set a cooking time as shown on page 15, then touch
At the end of the programme, the oven will beep intermittently and the screen will show a flag at the end of the cooking
time. To stop the programme, touch the flag.
13
Minute minder menu screen
The oven is equipped with a minute minder that can run independent of any cooking programmes. The timer can be
set to a maximum of 199 minutes.
To set the minute minder, touch
from the cooking menu screens or the front menu screen.
The minute minder menu screen will open. Then touch
.
Then touch
or
until the display shows the required countdown time.
To check on the countdown, touch
from the front menu screen. Alternatively, the countdown is also shown the
bottom right hand corner of the cooking screen. When the minute minder is running, the symbol will look like this:
At the end of the countdown the oven will beep for approximately one minute. To stop the beep before the end of the
.
minute, touch
Please note:
When the minute minder finishes, the oven will not switch off. Remember to turn off the oven after use.
14
Cooking timer menu screen
To set a cooking timer, touch
in the bottom left of the cooking menu screen. The cooking timer screen will open and
the available timer options will show. If the end timer is not available, then it is shown in grey.
To set a cooking time
The oven is equipped with a timer to allow you to set the oven to cook for a specific period of time. This option is
available on all manual and special cooking programmes.
Touch
to select cooking time, then touch
or
programme. To confirm the cooking time, touch
.
until the display shows the required number of minutes for the
To set the end time
The timer also allows you to set an end time on any manual cooking programmes – this will switch the oven on and off
at the times you need.
to select end time. To change the time, touch either hours or minutes. The digits will show in blue when
Touch
inactive, and red when active. Touch
or
to change the time. To confirm the end time, touch
.
When the displays show the required times, touch
to return without setting the timer
to confirm the timers and return to the cooking menu screen or
It is possible to change the cooking timers after the programme has been set. Simply touch
to return to the cooking
timer menu screen and the adjust the times as above. If the oven had not yet started cooking, both cooking time and
end time can be changed. If the oven had started cooking, only cooking time can be changed.
At the end of a timed cooking programme, the oven will beep intermittently and the screen will show a flag. To stop the
beep, touch the flag icon.
If an end time is set, once the start icon is touched the hourglass will turn in the bottom left hand corner until the
programme begins.
Please note:
On the auto cooking programmes, the oven will recalculate cooking times if necessary, for example if the oven is already
hot from use when another programme is set. When the oven beeps to confirm preheat is complete, the new time will
show on the display.
15
Childlock Settings
Childlock
The oven is equipped with a childlock to prevent accidental use. The childlock can be used when the oven is on
standby or when in use. To switch the childlock on, touch and hold
change to
for approximately four seconds. The icon will
as confirmation that the childlock is set.
If the childlock is switched on when there is no programme running, the display will return to the clock screen until
it is next touched. On touching the screen,
will flash in the display. Touch
for four seconds to switch off the
childlock.
If the childlock is switched on during cooking, only
will work for safety reasons. Before the oven can be used again,
the childlock must be switched off.
Settings menu screen
To open the settings menu screen, touch
.
Audio alert
To switch the audio alert on or off, touch
.
Brightness
To reduce the brightness, touch –.
To increase the brightness touch +
CALENDAR
Date and Time
2
CALENDAR
To set the date and time, touch
2
.
The date and time menu screen will open. Then touch
or
for each setting, until the display shows the required
date and time. Then touch
.
will show to confirm the setting.
Language
To set the language, touch
.
The language menu screen will open. Touch the arrows to scroll up and down the screens, then touch the language
required. Then touch
.
will show to confirm the setting.
16
Demo Mode
Demo mode
DEMO
MODE
The demo mode allows you to demonstrate all the functionality of the oven without turning on the heating elements.
DEMO
In the settings menu screen, touch and hold
for approximately three seconds. The icon will show
the oven will beep to confirm the Demo mode is on.
OFF
DEMO
ON
will show and
DEMO
MODE
You can then programme the oven to any cooking function. When the programme is started,
will flash on the
screen and there will be six short beeps to confirm that the Demo mode is on. The display will show as if the oven is
cooking, but the heating elements will not be used.
To switch Demo mode off, touch and hold
to confirm the Demo mode is off.
17
DEMO
ON
will show for approximately three seconds.
DEMO
OFF
and the oven will beep
Cleaning and Maintenance
IMPORTANT:
Always disconnect the appliance from the power supply before undertaking any cleaning or maintenance.
You should always allow the oven to cool fully after use before undertaking any cleaning or maintenance.
You should only use non-abrasive cleaners. Abrasive cleaners may damage the surface of the enamel interior and the
stainless steel surfaces. You should not cleaning products with a chlorine or acidic base.
Any spillages should be cleaned off immediately, especially any alkaline or acidic substances (lemon juice, vinegar etc.)
Stainless steel
Stainless steel can be effectively cleaned by simply using a dilute solution of water and mild detergent and drying to a
shine with a clean cloth. Proprietary stainless steel cleaners are available. We recommend the CDA E-Cloth available from
the CDA Sales Team for cleaning stainless steel surfaces.
Enamelled parts
All enamelled parts must be cleaned with a sponge and soapy water only, or other non-abrasive products. Suitable
proprietary chemical cleaners may be used after first consulting with the manufacturer’s recommendations and testing a
small sample on the oven cavity.
TFT screen
You should use a damp clean cloth or an E-Cloth to clean the touch screen. Do not use any detergents.
PLEASE NOTE: Steam cleaners must not be used to clean this appliance.
Do not store flammable material in the oven.
When correctly installed, your product meets all safety requirements laid down for this type of product.
However, special care should be taken around the rear or the underneath of the appliance as these areas are
not designed or intended to be touched and may contain sharp or rough edges that could cause injury.
18
e heating elements
to cool down;
k.
wi
nt isotn
covered by your gua
rantee.
(fig. 8);
th a new
onesui
tableforhightemperatures
Changing the Oven Lamp
fications:
230V and same pow er(check w att
Before any maintenance is started involving electrical
lamp parts,
itself)
repla
cof
ed
the
lamp.
the oven
must
be disconnected
from the power
supply.
repla
ce thebulbwithbare hands;
nge
rs can
cause
rematu
p re
failu
re.
A
If the oven has been2
in use,A
let the oven cavity and theB
ves.
gl heating elements cool down before attempting any
CORRECT
B
C
B
C
maintenance.
Never replace the bulb with bare hands as
contamination from your fingers can cause premature
failure. Always use a clean cloth or gloves.
unsc
rewing the fixing
rew s.
sc
protecti
ve cover
A (fig.
8)and remove itby
Changing
the bulbuse
(fig. 3)sc
ORTANT
:never
rewdri
vers orother
Unscrew damage
the protective cover.
.Thiscould
theenameloftheovenFig. 3
Carefully remove the bulb and replace with a new one
nly by
hands.
suitable for high temperatures with the same specification as
original
th a thenew
onebulb.
sui
tableforhightemperatures
Refit the protective cover.
fications:
230V and same pow er(check w att
lamp itself)
repla
cof
ed the
lamp.
repla
ce thebulbwithbare hands;
nge
rs can cause
rematu
p re failu
re.
ves.
gl
pe
rating rin
everse roder.
einner
edgeofthecovermustbe orien
ted
WWRONG
RONG
isotn
covered by your gua
rantee.
CORRECT
CORRECT
Fig. 4
19
2
A
B
A
Cleaning and Maintenance Removing the Oven Door
The oven doors can easily be removed as follows:
• Open the door fully.
• Open the lever on the left and right hinges (as show in figure 5).
• Gently close the door until left and right hinge levers are hooked to the door.
• Lift the door by removing the hinge hooks from their location in the direction indicated.
• Rest the door on a soft surface.
• To replace the door, repeat the above steps in reverse order.
Cleaning and Maintenance Removing the Oven Door Inner Glass
To remove the inner pane of the top oven door on both sides
1. Remove the oven door as shown above.
2. Release the two upper blocks by pressing down as shown in fig. 6.
3. Slide the door glass out in the direction shown in fig. 7.
4. Clean the glass with an appropriate cleaner, dry thoroughly and place on a soft surface.
5. Now you can also clean the inside of the outer glass.
To replace the inner glass
Fig. 5
1. Ensuring the OK symbol on the glass is facing you, slide the glass back into the frame.
2. Replace the upper blocks, ensuring they lock back into place.
3. Replace the oven door.
IMPORTANT: Do not clean the glass whilst it is still hot.
Please keep the ok symbol to the bottom right of the oven door (fig. 7).
Fig. 6
Fig. 7
20
Electricity supply to your oven
Warning! this appliance must be earthed.
This appliance must be connected by a competent person, using fixed wiring via a double pole switched fused spur
outlet.
We recommend that the appliance is connected by a qualified electrician, who is a member of the N.I.C.E.I.C. and
who will comply with the I.E.E and local regulations. The wires in the mains lead are coloured in accordance with the
following code:
GREEN AND YELLOW = EARTH BLUE = NEUTRAL BROWN = LIVE.
As the colours of the wires in the mains lead for the appliance, may not correspond with the coloured markings
identifying the terminals in your spur box, proceed as follows:
1. The wire which is coloured green and yellow must be connected to the terminal marked E (Earth) or coloured Green.
DOUBLE POLE SWITCHED
FUSE SPUR OUTLET
2. The wire which is coloured blue must be connected to the terminal marked N (Neutral), or coloured Black.
3. The wire which is coloured brown must be connected to the terminal marked L (Live), or coloured Red.
Assembly and electrical connection should be carried out by specialised
personnel.
USE A 13 AMP FUSE
When installing this product we recommend you seek the help of
another individual.
Please note:
• The mains cable must only be replaced by a qualified electrician or service engineer and must be of equivalent or 21
better rating (i.e. 1.5 mm² HO5RR-F,).
Installation
Important
If the oven is being installed into a built under oven housing unit ensure that the front rail at the top of the unit is not
installed as it could restrict ventilation.
Ensure that air can flow freely around the housing area. If the oven is being installed into a fully enclosed built-under oven
housing unit it may be necessary to cut a small slot in the top of the plinth fitted under the unit. Cut a section 400mm wide
and a minimum of 15mm high to allow air to pass under the unit. Alternatively cut a section 400 x450mm in the base of
the carcass as indicated.
Failure to allow adequate ventilation to the appliance may result in overheating or damage to adjacent units and could
invalidate the warranty.
o
The walls of the kitchen units must be able to withstand temperatures of 75 C above ambient (typically this is between
o
o
90 C and 100 C). (This appliance is type X installation)
When correctly installed ensure that there is a gap of 4mm minimum between the sides of the oven and adjacent
furniture doors.
Lift the oven carefully into position on the shelf, taking care NOT to lift it by the door handle. If you lower the oven door,
you will see 4 screw holes, 2 on each side of the oven. The oven should then be secured to the housing by fitting screws
into these holes. Remember the housing should not be free standing but be secured to the wall and/or adjacent fittings.
212
Statico Rev2 del 3/03
08-04-2005 10:05
Pagina 85
How to install your oven
Dimensions
Oven
Housing
Height (mm)
594
575
Width (mm)
598
560
Depth (mm)
499
560 (min)
Mueble y caracteristicas técnicas
450
100
558
575
You will need the following housing area fit your
oven correctly.
573
594
0
9
49
598
575
The oven is designed to fit into a cabinet of 600mm
width. The oven can be built in or built under
the kitchen units, but you must ensure that it is
properly ventilated. In the diagram the built-in oven
is ventilated by means of a space at the top of the
kitchen cabinet. There are many other methods of
ventilating your oven - Consult a qualified engineer
for advice.
56
560
4
-2
20
0
40
0
56
450
560
Volumen útil del horno
fig. 8
52 lt
48 lt
48 lt
22
To contact our Customer Care Department, or for Service,
please contact us on the details below.
Passionate about style
Customer Care Department • The
Group Ltd. • Harby Road • Langar • Nottinghamshire • NG13 9HY
T : 01949 862 012 F : 01949 862 003 E : [email protected] W : www.cda.eu