Download AbiSee Eye-Pal SOLO LV User manual
Transcript
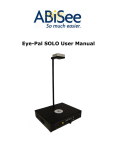
Eye-Pal SOLO LV User Manual ABiSee, Inc. The World’s Most Advanced Reading Devices Table of Contents Items Enclosed in This Box ........... 3 Assembly ................................... 3 What Eye-Pal SOLO LV Can Do ...... 4 Quick Start for Eye-Pal SOLO LV .... 5 How to Read with Eye-Pal SOLO LV 5 Operating Instructions ................. 5 Front Panel Controls Method ......... 6 Motion Activated Controls Method.. 6 Keypad Controls Method .............. 7 Advanced Features ...................... 9 Book Mode ................................. 9 Headphones Instructions.............. 10 Tips for Best Performance ............ 10 Trouble Shooting......................... 11 Important Notes ......................... 11 Warranty ................................... 12 2 Congratulations and Thank You…. for selecting the Eye-Pal SOLO LV, a unique, state-of-the-art, scanner/reader. The Eye-Pal SOLO LV was designed in Acton, Massachusetts at ABiSee, Inc., a leading innovator of assistive reading technology. We hope that you enjoy using the Eye-Pal SOLO LV as much as we enjoyed designing it. We are confident that the Eye-Pal SOLO LV will enhance your reading experience. Items Enclosed in This Box Base, a 9.63”/11.5”/2.38” black rectangular box Camera, a black, square-shaped device attached to the top of the neck, a thin black metal tube, 16” long Power Supply Power Cord Quick Reference Guide Warranty Card Manual Keypad Assembly Step 1- Place the Eye-Pal SOLO LV base on a flat surface with the front panel, with buttons, facing toward you. Step 2- Firmly press the bottom of the neck into the hole on the top surface of the base so that the camera extends directly over the middle of the base. It only fits one way. When properly inserted, the neck will not be able to twist. Step 3- At the bottom of the neck, there is a short USB cable. Plug this cable into the USB port located on the back of the base. 3 Step 4- Connect the power supply and power cord. Put the plug into a power outlet, and then put the other end into the back of the Base on the left side. Step 5- Plug the end of the Keypad cable into the USB port located on the right side of the base. Step 6- Plug your optional monitor or TV into the appropriate port on the back panel. Your Eye-Pal SOLO LV is now ready to use. *Note- There is a headphone port on the right side panel of the Eye-Pal SOLO LV for private listening. A headset is NOT included. What Eye-Pal SOLO LV Can Do The Eye-Pal SOLO LV is a versatile, easy-to-use scanner/reader device designed to make reading and other everyday tasks simpler to perform. Please read this manual thoroughly and save it to use Eye-Pal SOLO LV’s many options. Two modes of operation - Reading Mode - Magnification Mode Three easy ways to use - By pushing the front panel buttons - With hand motion activated controls - By using the keypad In Reading Mode, Eye-Pal SOLO LV will enable: - Reading magazines, newspapers, books, and mail - Displaying magnified text on an optional screen - Saving up to four pages of text - Switching from a male to a female voice - Reading English and Spanish texts (More languages coming soon) 4 Quick Start for Eye-Pal SOLO LV Step 1- Turn on the Eye-Pal SOLO LV by holding in the green square button located on the right side of the front panel. Step 2- Turn the black volume knob, in the middle of the front panel, clockwise. A tune will play while the software loads. Step 3- Once Eye-Pal SOLO LV is done loading, you will hear “Please place your document.” You are now ready to read. Note: Keep the platform clear of any documents until you hear “Please place your document.” How to Read with Eye-Pal SOLO LV (With or without the keypad) To start reading, place a document onto the Eye-Pal SOLO LV base. Place it in any direction, as the orientation does not matter. You will hear a “shutter” sound. Eye-Pal SOLO LV will begin to read your text aloud in a few seconds. If you remove the document, you will hear, “Please place your document”. You may either replace the document or resume reading, by pressing the white round Pause/Resume button on the front panel of the base or the Pause/Resume button on the Keypad. Note: Eye-Pal SOLO LV can only read text that is within the borders of the base platform. Any text outside of the borders will not be read. Be sure not to obstruct the camera’s vision with your hands. Operating Instructions The following instructions will provide a detailed description on how to use the Eye-Pal SOLO LV with each of these 3 methods of operation: 1. Front Panel Controls 2. Motion Activated Controls, no buttons! 3. Keypad Controls 5 Front Panel Controls Method Power - the green square button, on the right side of the front panel, is used to turn the Eye-Pal SOLO LV on and off. Pause/Resume Reading - the white round button, to the left of the black volume knob on the front panel, allows pausing and resuming reading. If this button is held down for 3 seconds, it will enable/disable the use of the motion activated controls. Read Previous Sentence - the red square button on the left side of the front panel is used to return to the previous sentence. This button may be pressed as many times as needed to return to a specific sentence. Reading Speed – there are two white square buttons, one above the other, located to the right of the volume knob on the front panel. The top button will increase the reading speed while the bottom button will decrease the reading speed. Volume – the black round knob in the middle of the front panel is used to adjust the volume. To increase the volume, turn this knob clockwise. Restarting – to restart the Eye-Pal SOLO LV for any reason, press the red square button for 5 seconds. You will hear “Restarting.” Motion Activated Controls Method (Disabled in default settings) To enable the motion-activated controls, press and hold the white circular button on the front panel for 3 seconds. Please note that the following hand motions only work when a document is on the platform. Pause/Stop Reading - move your hand slowly above the printed material from left to right. 6 Resume Reading - move your hand slowly above the printed material from left to right Read Previous Sentence - move your hand slowly from right to left above the printed material. Move your hand as many times as it takes to reach any sentence. Keypad Controls Method Note: Buttons on the keypad may function differently depending on which mode the device is in. Help Button –located in the middle of the keypad, above the Up Arrow, it is a white round button. It will say the function of each button on the keypad. Hold down the help button and any other button on the keypad at the same time. You will hear a description of that button and its function. Mode Button- located just above the white center round Help button, it is a white square, marked with a raised black circle Pause/Resume Button – located in the center of the arrow keys, it is a white square, marked with a raised black circle. In Reading Mode, this button will pause and resume reading. Left Arrow – located to the left of the center round Pause/Resume button, it is a white square, marked with a raised black Left Arrow. In Reading Mode, press this button to hear the previous word. Right Arrow – located to the right of the center round Pause/Resume button, it is a white square, marked with a raised black Right Arrow. In Reading Mode, press this button to hear the next word. Up Arrow – located above the center round Pause/Resume button, it is a white square, marked with a raised black Up Arrow. In Reading Mode, press this button to hear the previous sentence. Down Arrow – located below the Pause/Resume button, it is a white square, marked with a raised black Down Arrow. In Reading Mode, press this button to hear the next sentence. 7 Save Button - located on the upper left side of the keypad, it is a white square, marked with a raised black vertical line. Hold down the Save button and one of the Arrow buttons at the same time. You will hear, “Image saved.” Up to four pages can be saved; one page designated to each Arrow button. Recall Button- located on the upper right side of the keypad, it is a white square, marked with a raised black horizontal line. Hold down the Recall button and press one of the Arrow buttons to read a previously saved page. You will hear “Reading image.” Zoom Button*- located on the upper left corner of the keypad, it is a white square, marked with a raised black plus sign. In Reading Mode, the Zoom button will change the font size. Because Eye-Pal SOLO LV “wraps words”, the words will never run off the screen. In Magnification Mode, the Zoom button will change the magnification of the image displayed on the screen. Color Button*- located to the right of the Zoom button; on the upper right corner of the keypad, it is a yellow square. In Reading Mode, the Color 8 button will change the color of the text displayed on the screen. In Magnification Mode, the Color button will change the sharpness, color and brightness of the image displayed on the screen. *Note- Both of the Zoom and Color buttons run in a loop. If you continue to press them, you will return to the original settings. Advanced Features Full Screen Scrolling (without audio or highlighted line)If you would like to read magnified text on the screen without audio; while in Reading Mode, hold down the Recall button and the Pause/Resume button on the keypad, and then press the Increase Reading Speed button, on the front panel. To return to speech output, repeat these steps. Line speed is controlled with the Left and Right Arrow keys. Continuous Line Display- To read the text in a single, running line; hold down the Recall button and the Pause/Resume button on the keypad, and then press the Decrease Reading Speed button on the front panel. To return to normal speech output, repeat these steps. Line speed is controlled with the Left and Right Arrow keys. Reading Columns - when the Left Arrow and Right Arrow buttons are pressed at the same time, Eye-Pal SOLO LV will read through columns. Describing Page Layout - when the Up Arrow and Down Arrow buttons on the keypad are pressed at the same time, Eye-Pal SOLO LV will describe the layout of the page. Changing Languages - when the Recall and Save buttons on the keypad are pressed at the same time, Eye-Pal SOLO LV will switch languages and/or voices. Spanish text can be read if the Spanish voice is selected. Book Mode How to Use Book Mode with Eye-Pal SOLO LV - Book Mode allows you to save documents to a USB flash drive. How to start scanning in Book Mode: 1. Turn on the Eye-Pal SOLO LV. 2. Wait for the music to stop playing, then plug the USB flash drive into 9 the USB Port. You will hear “External memory device is detected. Entering Scanning Mode.” 3. Place the document on the platform. 4. Wait for the shutter sound. 5. Scan your documents. How to convert a saved Book to text: 1. When you’re done scanning, press the Pause/Resume button and listen as your pages are being converted into a text file. 2. When the process is complete, you will hear “Conversion complete, you can now disconnect external memory device.” 3. Take out the flash drive when instructed. Now, you can use the flash drive on your computer to view and read saved text. Headphones (or External Speakers) Instructions 1. Headphones with a pin audio jack are recommended. Headphones with a USB connector are not compatible with the Eye-Pal SOLO LV. 2. With the device on, plug the headphones or speakers into the Eye-Pal SOLO LV. The headphone jack is located on the right side of the device. Note: Always stop reading before plugging or unplugging the headphones or external speakers. If you add or remove the headphones or speakers while the Eye-Pal SOLO LV is reading and a problem occurs, restart the device and follow the instructions. Tips for Best Performance Give your Eye-Pal SOLO LV time to work. Too many commands at once or too quickly will overwhelm the device. For optimal performance, Eye-Pal SOLO LV should process only one command at a time. When Eye-Pal SOLO LV is starting up, make sure that there is no document on the base and that the ABiSee logo is not covered. When placing a document onto Eye-Pal SOLO LV, keep the text flat and make sure there are no obstructions blocking the camera’s view of the text (including your hands). 10 Make sure that a document is moved completely off the Eye-Pal SOLO LV before placing another document onto it. Trouble Shooting The Eye-Pal SOLO LV is trouble free most of the time due to its simple, yet effective design. However, in the off chance that something does go wrong, here are some tips: 1. If Eye-Pal SOLO LV freezes up, stops responding to your commands or is acting abnormally, try holding the red square button on the front panel for several seconds. You should hear “Restarting”. This process does not restart the device itself, just the software. 2. If this doesn’t correct the problem, try turning off the device, and then powering it back on by pressing the green square button on the front panel. 3. If problems keep occurring, please call your local distributor or ABiSee, Inc. customer service professionals. Important Notes The Eye-Pal SOLO LV is programmed to correct itself and will restart on its own, if necessary. If this occurs, wait a moment before using it again. DO NOT REMOVE the ABiSee logo from the center of the top panel of the Base. This logo allows the camera to recognize when a document is placed onto the device. Without the logo, the device will malfunction. 11 ABiSee, Inc. WARRANTY 2 YEAR WARRANTY ON ALL ABiSee, Inc. PRODUCTS: ABiSee, Inc. warrants to the original purchaser that its products are free from defects in materials and workmanship for two years from the date of purchase. This warranty does not cover accidental damage, misuse, improper care or alteration, acts of God - such as floods and earthquakes, any products whose mechanical serial number or electronic serial number has been removed, altered or defaced, or damage from exposure to moisture, humidity, excessive temperatures or extreme environmental conditions. Coverage terminates if the original purchaser sells or otherwise transfers the product. To report a warranty defect, please contact your local distributor or ABiSee, Inc. Please include your email and telephone number so that we may contact you. If, after inspection, we find that the product is defective in materials or workmanship, we shall, at no charge to you, repair or replace the product at our discretion, and return the product to you. You are responsible for shipping costs to ABiSee, Inc. but there is no charge for the inspection or the return postage. This warranty excludes claims for incidental or consequential damages in connection with the warranty problem. Some jurisdictions do not allow the exclusion or limitation of incidental or consequential damages so the above limitation or exclusion may not apply to you. This warranty gives you specific legal rights, and you may also have other rights, which vary from state to state. To obtain warranty service, a warranty card must have been filled out and mailed back to ABiSee, Inc. ABiSee, Inc. sells only through authorized distributors. Online auction confirmations are not accepted for warranty verification and ABiSee, Inc. will not replace missing components from any package purchased through an online auction or any other authorized source. ABiSee, Inc. retains the exclusive right to either repair or replace the unit with a refurbished unit or new unit at its sole discretion. The same policy shall apply to software. 5 12 Thank You for Choosing Eye-Pal SOLO LV Your Local Distributor is: ABiSee, Inc. 20 Main St, Suite G2 Acton, MA 01720 + 1-800-681-5909 or +1-978-635-0202 www.abisee.com


