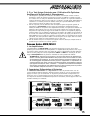
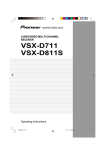
1
2 x 400 Watt Powered Mixer
2
x
800
Watt
Powered
Mixer
POWERED WEDGE MIXERS
dB
+15
-15
dB
+15
-15
Mid
Lo
dB
+15
-15
dB
+15
-15
dB
+15
3
Hi
-15
Mid
Lo
dB
+15
-15
dB
+15
-15
dB
+15
4
Hi
-15
Mid
Lo
dB
+15
-15
dB
+15
-15
dB
+15
5
Hi
-15
Mid
Lo
dB
+15
-15
dB
+15
-15
dB
+15
6
Hi
Mid
Lo
-15
dB
Hi
Hi
+15
-15
EFX
0
4
Mon 3
EFX
0
10
5
6
2
7
1
6
7
1
-15
dB
+15
-15
dB
+15
Mid
0
7
1
0
10
5
6
2
9
0
4
Mon 3
8
10
7
1
0
7
1
6
dB
1
dB
+3
+6
-3
0
-10
-20
+3
+6
dB +10
-3
0
-10
+3
-20
+6
-
dB +10
+15
5
10
6
Line
Mic
Set
Trim
Line
Mic
2
3
Set
Trim
Line
Mic
4
Set
Trim
Line
Mic
5
Set
Trim
Line
Mic
-3
0
-10
-20
dB +10
Set
Trim
Line
Mic
2
3
4
5
4
5
10
6
Mic
Mic
Mic
Mic
Line
Line
Line
Line
Instrument
Hi/Z
2
6
Mic
Instrument
7
10
Rec
Out
4
3
1
6
7
5
2
4
3
7
8
1
9
0
1
clip
6
10
7/8
5
Mic
9
0
6
MAIN
EFX
Return
6
0
-5
Lo
2
9
0
10
Clip/
Pro tect
Hi
1
9
0
4
3
10
5
6
2
1
F
B
S
9
0
10
LS
E
D
C
10
-15
+15
G AT E S C H
A
G H I
A P O
J
MODIFY EFX
M
K
L
M
N
5
4
3
D
6
7 8 9
10
11
12
13
2
14
1 16 15
clip
EFX
7
8
+15
B
Power
48V Phantom
Powe r On
9/10
Main/Mon
8
8
1
A
7
I
Rooms
Rooms+Thickening DelaysJ
Rooms+Regen Delays
K
Rooms/Halls+Chorus
L
M
Halls
Halls+Thickening Delays N
Halls+Regen Delays
O
Gates/Reverse Reverb P
A
B
C
D
E
F
G
H
Chambers
Chambers+Thickening Delays
Chambers+Regen Delays
Short Delays
Medium Delays
Long Delays
Delays+Chorus
Special Effects
O
9/10
Pre-EQ
OUT
2
B
Mic
Line
630 1.0K 1.6K 2.5K 4.0K 6.3K
-15
9
5
2
Tape/CD
7
7
S T E R E
7/8
8
6
10
0
4
2
4
400
-15
8
3
10
5
5
3
2
7
9
0
10
4
MON
EFX
Return
9
8
1
9
0
6
2
Bal
3
250
-10
Amp
Assign
+15
10
5
3
8
1
Bal
6
Hi/Z
5
8
MAIN 4
7
A
Mic
4
3
0
S T E R E O
Turn Up Trim Control Until Green LED Starts to Blink
1
+15
-15
2
Mon 3
7
9
0
+3
+6
6
-15
8
1
LEVEL
1
Trim
+5
Hi
+15
0
4
clip
Set
+5
160
Left /Right
-15
1
0
-
Lo
dB
EFX
Mon 3
0
0
-
0
0
dB +10
0
0
0
0
-
+10
-10
10
LEVEL
0
-20
LEVEL
-3
-10
LEVEL
+3
dB +10
LEVEL
0
+6
-
LEVEL
-3
-10
-20
0
0
0
0
LEVEL
+3
dB +10
+15
9
0
clip
dB
MON
Pan
clip
+15
+10
OM
0
+6
-
clip
+15
RS
-3
-10
-20
clip
630 1.0K 1.6K 2.5K 4.0K 6.3K
RO
clip
-15
EFX
2
clip
400
0
+15
Lo
-15
7
8
10
Pan
250
9/10
-15
10
5
2
9
0
4
Mon 3
8
10
Pan
6
160
+15
Mid
Lo
10
5
2
9
0
10
Pan
4
Mon 3
8
dB
BE
Pan
6
EQUALIZER B
EQUALIZER A
-15
-5
EFX
EFX
10
5
2
9
0
4
Mon 3
8
10
Pan
0
10
5
2
9
0
4
Mon 3
8
EFX
Mute 1-8
+15
7/8
-15
EFX
dB
AYS
-15
2
Hi
EL
+15
L
Lo
dB
HA
Mid
-15
LEVEL
1
Hi
Line
Post-EQ
OUT
Rec OUT
x
800
Watt
Powered
Mixer
MON
Out
Power AMP IN
EFX
Out
Tape/CD In
Footswitch
A
B
TYPE: YS1032
TYPE: YS1033
OWNER'S MANUAL
MANUEL DE L'UTILISATEUR
IMPORTANT SAFETY INSTRUCTIONS
INSTRUCTIONS PERTAINING TO A RISK
OF FIRE, ELECTRIC SHOCK,
OR INJURY TO PERSONS.
CAUTION:
INSTRUCTIONS RELATIVES AU RISQUE
DE FEU, CHOC ÉLECTRIQUE, OU
BLESSURES AUX PERSONNES.
AVIS:
TO REDUCE THE RISK OF ELECTRIC SHOCK, DO
NOT REMOVE COVER (OR BACK).
NO USER SERVICEABLE PARTS INSIDE.
AFIN DE REDUIRE LES RISQUE DE CHOC ELECTRIQUE,
N’ENLEVEZ PAS LE COUVERT (OU LE PANNEAU
ARRIERE). NE CONTIENT AUCUNE PIECE REPARABLE
PAR L’UTILISATEUR.
REFER SERVICING TO QUALIFIED
SERVICE PERSONNEL.
CONSULTEZ UN TECHNICIEN QUALIFIE
POUR L’ENTRETIENT.
Read Instructions:
Veuillez lire le manuel:
Packaging:
Emballage:
The Owner’s Manual should be read and understood
before operation of your unit. Please, save these
instructions for future reference.
Keep the box and packaging materials, in case the unit
needs to be returned for service.
Warning:
When using electric products, basic precautions should
always be followed, including the following:
Power Sources:
Your unit should be connected to a power source only of the
voltage specified in the owners manual or as marked on the unit.
This unit has a polarized plug. Do not use with an extension cord or
receptacle unless the plug can be fully inserted. Precautions should
be taken so that the grounding scheme on the unit is not defeated.
Hazards:
Do not place this product on an unstable cart, stand, tripod, bracket or
table. The product may fall, causing serious personal injury and serious
damage to the product. Use only with cart, stand, tripod, bracket, or table
recommended by the manufacturer or sold with the product. Follow the
manufacturer’s instructions when installing the product and use mounting
accessories recommended by the manufacturer.
The apparatus should not be exposed to dripping or splashing
water; no objects filled with liquids should be placed on the
apparatus.
Terminals marked with the “lightning bolt” are hazardous live;
the external wiring connected to these terminals require installation
by an instructed person or the use of ready made leads or cords.
No naked flame sources, such as lighted candles, should be
placed on the apparatus.
Power Cord:
The AC supply cord should be routed so that it is unlikely that it will
be damaged. If the AC supply cord is damaged DO NOT
OPERATE THE UNIT.
Service:
The unit should be serviced only by qualified service personnel.
Il contient des informations qui devraient êtres comprises avant
l’opération de votre appareil. Conservez S.V.P. ces instructions
pour consultations ultérieures
Conservez la boite au cas ou l’appareil devait être
retourner pour réparation.
Attention:
Lors de l’utilisation de produits électrique,
assurez-vous d’adhérer à des précautions de bases
incluant celle qui suivent:
Alimentation:
L’appareil ne doit être branché qu’à une source d’alimentation
correspondant au voltage spécifié dans le manuel ou tel qu’indiqué
sur l’appareil. Cet appareil est équipé d’une prise d’alimentation
polarisée. Ne pas utiliser cet appareil avec un cordon de
raccordement à moins qu’il soit possible d’insérer complètement les
trois lames. Des précautions doivent êtres prises afin d’eviter que le
système de mise à la terre de l’appareil ne soit désengagé.
Risque:
Ne pas placer cet appareil sur un chariot, un support, un trépied ou une
table instables. L’appareil pourrait tomber et blesser quelqu’un ou subir des
dommages importants. Utiliser seulement un chariot, un support, un trépied
ou une table recommandés par le fabricant ou vendus avec le produit.
Suivre les instructions du fabricant pour installer l’appareil et utiliser les
accessoires recommandés par le fabricant.
Il convient de ne pas placer sur l’appareil de sources de flammes
nues, telles que des bougies allumées.
L’appeil ne doit pas être exposé à des égouttements d’eau ou des
éclaboussures et qu’aucun objet rempli de liquide tel que des vases
ne doit être placé sur l’appareil.
Les dispositifs marqués d’une symbole “d’éclair” sont des parties
dangereuses au toucher et que les câblages extérieurs connectés à
ces dispositifs de connection extérieure doivent être effectivés par un
opérateur formé ou en utilisant des cordons déjà préparés.
Cordon d’alimentation:
Évitez d’endommager le cordon d’alimentation. N’UTILISEZ PAS
L’APPAREIL si le cordon d’alimentation est endommagé.
Service:
Consultez un technicien qualifié pour l’entretien de votre appareil.
safety-4v0.pdf 04/29/03
+15
2
Hi
-15
Mid
-15
Lo
dB
dB
+15
+15
3
Hi
-15
Mid
-15
Lo
dB
dB
+15
+15
4
Hi
-15
Mid
-15
Lo
dB
dB
+15
+15
5
Hi
-15
Mid
-15
Lo
dB
dB
+15
+15
6
Hi
Mid
Lo
-15
dB
Hi
Hi
+15
-15
-15
dB
+15
-15
dB
+15
0
4
Mon 3
0
10
5
6
2
7
1
dB
+15
6
0
7
1
6
0
7
1
+15
6
dB
-15
dB
Mid
+15
+15
1
4
Mon 3
dB
6
0
7
1
0
6
1
-15
dB
-3
0
-10
-20
+3
+6
-3
0
-10
+3
-20
+6
-
dB +10
-3
5
10
6
1
Set
Trim
2
Set
Trim
3
Set
Trim
4
Set
Trim
5
Set
6
2
3
4
5
10
6
Mic
Mic
Mic
Mic
Line
Line
Line
Line
Instrument
Hi/Z
6
10
0
Instrument
9
0
10
Rec
Out
4
3
10
5
6
7
4
3
5
4
3
7
8
1
9
0
1
clip
6
10
7/8
-5
-10
-10
Amp
Assign
630 1.0K 1.6K 2.5K 4.0K 6.3K
-15
Lo
Hi
5
6
2
9
0
1
6
2
Power
9
0
4
10
5
3
6
2
1
10
7
9
0
10
48V Phantom
Power On
9/10
F
B
S
9
0
10
LS
E
D
C
-15
+15
G AT E S C H
A
G H I
A P O
J
MODIFY EFX
M
K
L
M
N
5
4
3
D
6
7 8 9
10
11
12
13
2
14
1 16 15
clip
EFX
7
8
+15
B
Clip/
Protect
7
8
1
Main/Mon
8
1
Tape/CD
A
9
10
5
3
MAIN
EFX
Return
-15
7
A
B
C
D
E
F
G
H
Rooms
Rooms+Thickening Delays
Rooms+Regen Delays
Rooms/Halls+Chorus
Halls
Halls+Thickening Delays
Halls+Regen Delays
Gates/Reverse Reverb
I
J
K
L
M
N
O
P
Chambers
Chambers+Thickening Delays
Chambers+Regen Delays
Short Delays
Medium Delays
Long Delays
Delays+Chorus
Special Effects
9/10
Pre-EQ
OUT
2
B
Line
Hi/Z
Post-EQ
OUT
Rec OUT
x
800
Watt
Powered
Mixer
MON
Out
Mic
Line
400
S T E R E O
7/8
Mic
8
6
8
0
8
1
5
3
2
4
7
2
2
250
0
-5
+15
4
MON
EFX
Return
9
6
2
9
Bal
6
Mic
-15
7
10
5
3
A
Mic
5
8
MAIN 4
7
8
1
S T E R E O
5
4
2
Bal
Trim
Turn Up Trim Control Until Green LED Starts to Blink
1
+15
4
3
0
9
0
+3
LEVEL
Trim
-15
2
Mon 3
7
8
clip
Set
+15
0
4
1
+6
dB +10
+5
Hi
1
0
-10
-20
-
-15
dB
EFX
0
0
0
dB +10
0
0
-
0
0
0
0
dB +10
+5
160
Left /Right
10
LEVEL
+3
+6
-
LEVEL
0
-20
LEVEL
-3
-10
LEVEL
+3
dB +10
LEVEL
0
+6
-
0
0
0
0
LEVEL
-3
-10
-20
+10
RS
+3
dB +10
+15
Lo
+15
EFX
Mon 3
clip
dB
MON
7
Pan
clip
+15
+10
OM
0
+6
-
clip
+15
BE
-3
-10
-20
clip
630 1.0K 1.6K 2.5K 4.0K 6.3K
RO
clip
-15
9
0
400
0
+15
2
clip
250
9/10
Lo
10
5
160
+15
-15
8
10
Pan
dB
+15
2
9
10
4
Mon 3
8
EQUALIZER B
EQUALIZER A
-15
Mid
dB
Lo
10
5
2
9
0
Pan
-15
EFX
0
7
8
10
Pan
-15
10
5
2
9
0
4
Mon 3
8
10
Pan
dB
EFX
10
5
2
9
0
4
Mon 3
8
10
-15
EFX
10
5
2
9
0
4
Mon 3
8
Pan
-15
EFX
EFX
Mute 1-8
+15
7/8
-15
EFX
dB
AYS
dB
+15
EL
-15
Lo
dB
L
-15
HA
Mid
LEVEL
1
Hi
Power AMP IN
EFX
Out
Tape/CD In
Footswitch
A
B
Introduction
1/4-inch Phone Plug
1/4-inch T.R.S. Phone Plug
XLR Plug
Thank you for purchasing a Yorkville powered mixer. We at Yorkville Sound are confident that
you’ll find the M810/M1610 to be an excellent and versatile mixer/amp. We’ve used our experience in the development of powered mixers to create the smallest, lightest, and most powerful combination mixer/amplifiers available. This manual contains information to help you get
the maximum performance from your M810/M1610. We hope you’ll take the time to read it.
Stereo Power Amplifier
The M810/M1610 features high-efficiency stereo power amplifiers which have been designed
to deliver maximum power into a 4-ohm load. When lower speaker impedances are connected, a dedicated, sonically transparent circuit limits the output power to safe levels. Multiple
speakers may be connected without the amplifier overheating or shutting down.
Input Channels
1. MIC & LINE Inputs
The M810/M1610 features gold-plated dualcontact XLR low-impedance microphone connectors on the channels. These microphone
inputs are balanced for maximum noise suppression. Condenser microphones can also be
connected. The 48 Volt DC phantom power is
activated by depressing the Phantom Power
push-button on the rear panel.
Note: Condenser and dynamic mics
can be used together while the phantom
power is on. It will not affect the performance of the dynamic mics.
4
Mic
Line
6
Mic
Instrument
7/8
Mic
Line
Hi/Z
In addition to the XLR inputs, each channel features ¼-inch LINE in jacks. Channels
1-4, 7/8 and 9/10 are balanced line-level inputs and will accept either balanced (Tip/Ring/
Sleeve) or unbalanced (Tip/Sleeve) input cables from high impedance microphones, mixer
line outputs, keyboards, synthesizers, electric pianos etc.
Note: When connecting a balanced signal, use balanced patch cables with either an
XLR or a Tip/Ring/Sleeve ¼-inch plug on the mixer end.
1
Channels 5 and 6 have very high impedance, unbalanced ¼-inch inputs which are optimized for instruments such as electric basses, acoustic electric guitars etc. Stereo channels
7/8 and 9/10 have left and right ¼-inch balanced LINE in jacks as well as mono gold-plated
XLR low impedance microphone inputs. The ¼-inch inputs may be used to connect a stereo
CD player, tape deck or an additional mixer etc. A phono pre-amplifier must be connected to
the M810/M1610 inputs for optimum turntable performance.
Connecting signals to both types of inputs on any one channel (MIC and LINE in) is not
recommended. To do so may change the gain of the input circuit.
Note: You may connect a stereo source to channels 1 through 6 but you must use two channels, one for left and one for right and Pan appropriately or sum to mono using a ‘Y’ cable.
2. Channel 1-6 TRIM Controls & SET LEDs
1
Hi
Mid
Lo
-15
dB
+15
-15
dB
+15
-15
dB
+15
EFX
0
4
Mon 3
10
5
6
2
7
8
1
9
0
10
Pan
-3
0
-10
+3
-20
+6
0
0
-
1
dB +10
LEVEL
clip
Set
Trim
Line
Mic
The first 6 mono channels of the M810/M1610 have been equipped with an input TRIM
control and are also protected by an overload protection circuit. The TRIM controls are used
to make sure that an ideal signal level is flowing through the channel, no matter what the
input source. Each channel has a green LED that will flash when the proper signal level has
been reached. The channel overload protection circuit will provide additional protection from
clipping on peaks of up to 16 dB above normal operating levels.
To set the TRIM
i. Turn down the channel LEVEL control,
ii. With a normal signal present at the input, turn up the TRIM control until the green LED
just starts to flash (when the signal peaks).
iii. You can then use the LEVEL control to set the channel volume level. Increasing the
TRIM beyond this point will compress the signal on that channel.
3. Channel LEVEL Controls & CLIP LEDs
This adjustment determines the signal level sent to the MAIN mixing bus. The CLIP LED will
illuminate when the channel’s overall signal level is 3 dB below the onset of actual clipping.
As a result, small amounts of clip LED activity are acceptable, however frequent or continuous activity indicates the need to turn down the LEVEL control.
In audio terminology, a bus is a mix-down channel where all the signals from the input
channels are blended into one signal. The M810/M1610 has 5 busses: MAIN (left and
right), MONITOR, EFFECTS and RECORD OUT.
4. Channel Lo, Mid, & Hi Equalization
The M810/M1610 tone controls adjust the bass, middle and treble frequencies for each
channel independently. Center frequencies have been carefully selected to help achieve the
best quality of sound. Bass is centered on 80 Hz, Mid at 2.5 kHz and the Hi is at 12 kHz.
The adjustment range for each control is +/- 15 dB. These parameters provide versatile
equalization consistent with the clean simplicity of the M810/M1610’s design. As with
equalizers, boosting one or more frequencies increase the channel’s level. If the channel
is already at a high level, clipping may occur, in which case the clip LED will illuminate.
Reduce the LEVEL setting and/or the Equalizer if clip activity is excessive.
Note: The center position reflects a neutral or flat EQ control setting; however, turning
down EQ settings can be used effectively to reduce feedback and/or distortion).
5. Channel MON Controls
The MON control (monitor send) on each channel varies the amount of signal being sent to
the monitor bus in the M810/M1610. In the mono channels the MON signal is pre-LEVEL
control, post-EQ and post-TRIM. It is taken before the LEVEL control so the monitor signal
can be mixed independently of the MAIN mix. As a result, channel EQ and TRIM settings do
affect the sound of the monitor signals, while the channel LEVEL controls do not affect the
MON signal. The MON signal in the stereo channels is pre-LEVEL and pre-EQ.
Note: With an independent monitor mix, it may be beneficial to connect a graphic equalizer between the MON output and the monitor amplifier (Power AMP IN B, external amplifier or powered speakers, depending on how you have it set up) to help control feedback.
6. Channel EFX Controls
The EFX control (effects send) for each channel adjusts the level of the channel signal being
sent to the M810/M1610 effects bus. This signal is post-LEVEL control and post-EQ, the sound
is affected by both the channel EQ controls and the channel LEVEL control. The signal from
the effects bus is internally routed to the Digital Effects Processor. The channel EFX control
2
regulates the intensity of the built-in digital effects for the channel’s output. When using the
built-in digital effects, you can connect a standard on/off footswitch (e.g. Yorkville model IFS1A) to the EFX Out/Footswitch jack to turn the internal effects on or off. For more information see the section EFX Out/Footswitch in this manual.
Tip: Alternatively, this signal at this jack can be connected to the input of an external stereo effects unit and returned via channel 7/8 or 9/10. However, if you do not
require any effects at all, the effects bus output signal can be connected to the input
of an additional monitor system or another amp/speaker system via the EFX Out/
Footswitch jack using a standard balanced patch cord. In this case, the EFX controls
would act as send controls to achieve a semi-separate mix. Remember that the channel LEVEL controls also affect this signal.
7. Channel Pan & Bal Controls
The signal balance of each channel going to the left and right main PA channels can be
adjusted by the Pan control in channels 1 to 6, and by the Bal control in channels 7/8 and
9/10. Turning this control counterclockwise towards the L will increase the signal level in
the left channel to a maximum of 3 dB while also reducing the level in the right channel to
zero. Turning the control clockwise towards the R will increase the signal level in the right
channel while also reducing the signal level in the left channel.
Master Section
+15
+15
+10
+10
+5
+5
0
-5
-10
-10
-15
Lo
Hi
160
250
400
630 1.0K 1.6K 2.5K 4.0K 6.3K
0
-5
Amp
Assign
-15
Lo
Hi
Left /Right
+15
4
5
3
6
2
8
1
MON
EFX
Return
5
2
4
8
1
9
0
4
3
10
5
6
2
7
8
1
9
0
8
10
48V Phantom
Power On
MAIN
EFX
Return
Tape/CD
A
Main/Mon
Clip/
Protect
10
5
3
6
2
Power
7
8
1
9
0
4
3
10
5
6
2
1
9
0
10
LS
E
D
C
S
-15
+15
F
B
G AT E S C H
A
G H I
A P O
J
MODIFY EFX
M
5
4
3
K
L
M
N
D
6
7 8 9
10
11
12
13
2
14
1 16 15
clip
EFX
7
8
+15
B
9
0
7
-15
7
RS
6
6
2
10
3
5
BE
MAIN 4
+15
4
3
1
9
0
Rec
Out
-15
7
AYS
-15
MON
OM
Note: As with the MAIN master, set the MON master to
deliver the desired volume after
setting the channel sends.
630 1.0K 1.6K 2.5K 4.0K 6.3K
RO
2. MON Master Control
The overall level of the monitor
mix is adjusted with the MON
master control.
400
EL
Note: To ensure maximum signal headroom and clarity, set the
channel TRIM and LEVEL controls first for a good signal without clipping, then set the master
for the overall volume desired.
250
L
The MAIN master control adjusts
the overall level of the main mix,
the PA volume.
EQUALIZER B
EQUALIZER A
160
HA
1. MAIN Master Control
A
B
C
D
E
F
G
H
Rooms
Rooms+Thickening Delays
Rooms+Regen Delays
Rooms/Halls+Chorus
Halls
Halls+Thickening Delays
Halls+Regen Delays
Gates/Reverse Reverb
I
J
K
L
M
N
O
P
Chambers
Chambers+Thickening Delays
Chambers+Regen Delays
Short Delays
Medium Delays
Long Delays
Delays+Chorus
Special Effects
3. MAIN EFFECTS Return Control
The MAIN EFX control regulates the amount of signal going from the output of the internal Digital Effects Processor to the MAIN mixing bus where it is mixed with the dry signals
directly. It controls the intensity of the effects on the left and right MAIN output signals.
4. MON EFFECTS Return Control
The MON EFX control regulates the amount of signal going from the output of the internal Digital
Effects Processor to the MON mixing bus where it is mixed with the dry signals directly from the
channel MON send controls. It controls the overall effects intensity for the MON Out signal.
5. Pre-EQ OUT, Post-EQ OUT
These jacks offer a variety of patching and routing options. They are positioned in the signal
path before and after the M810/M1610 main graphic equalizers.
These bus signals are at line level, not speaker level (use the SPEAKER outputs on the rear panel
to drive speakers). Using signals from these jacks has no effect on the operation of the M810/
M1610 built-in power amplifier. This makes it possible to feed an external power amplifier, or even
multiple inter-connected power amps, while the internal power amplifier is functioning.
Note: It is not necessary to have speakers connected if you’d like to use the unit strictly as
a mixer. If a mono signal is required, possibly to feed a mono-house PA or another amp/
speaker system, use the L/Mono Pre-EQ jack. Mono operation of this jack is switched to left
channel only as soon as a jack is inserted in the R Pre-EQ jack. The Post-EQ OUT jacks are
not linked in this manner. They follow the operation of the Main/Mon switch described below.
3
6. Power AMP IN Jacks
The Power AMP A IN and Power AMP B IN jacks are direct inputs to the built-in power
amplifiers. They are referred to as A and B rather than left and right simply because it is
possible to power both main PA speakers with one amplifier channel and monitors with
the other. This can be accomplished by selecting the Main/Mon position on the selector
switch located between the graphic equalizers. In the Left/Right position, Power AMP
A receives the left signal while Power AMP B receives the right signal. In the Main/Mon
position, Power AMP A receives a mono sum of left and right signals while Power AMP B
receives the monitor signal. An alternative use for the Power AMP A IN and Power AMP
B IN jacks would be as patching inputs. Since they’re switching jacks if you plug into one
(or both) the internal signal flow will be interrupted. This interrupts the signal from the
M810/M1610 mixer to the built-in power amplifiers allowing you to insert signal control
devices such as an élite processor, an additional equalizer, or a compressor/limiter into
the main stereo signal path. Connect cables from the L and R Post-EQ OUT (or Pre-EQ
OUT) to the device’s input jacks and then from the device’s output jacks to the M810/
M1610 Power AMP A IN and Power AMP B IN jacks.
You can connect another mixer to the M810/M1610 power amplifier through the Power
AMP A IN and Power AMP B IN jacks. This slaves the amplifier to the other mixer’s signals; it no longer receives the built-in mixer’s signals which means that you could use
the built-in mixer to do a totally separate mixing job. For example, you could patch the
M810/M1610 L and R Pre-EQ OUT (or Post-EQ OUT) to inputs on another mixer connected to other amplifiers driving a PA speaker system while using the M810/M1610’s A
and B amps to power control room speakers.
7. Rec OUT Jacks
These phono connectors send
the L and R pre-EQ, pre-EFFECTS
(not affected by the MAIN EQ)
main mix signals. The Rec OUT A
control, located just below the
MAIN control, adjusts the signal level for these jacks. Using
phono patch cords, connect
directly to the Auxiliary (linelevel) inputs on a tape deck or
other recording device.
Pre-EQ
OUT
2
B
Post-EQ
OUT
Rec OUT
x
800
Watt
Powered
Mixer
MON
Out
Power AMP IN
EFX
Out
Tape/CD In
Footswitch
A
B
8. MON Out Jack
The monitor bus output signal from the Mon OUT jack is line level and would normally
be patched to the input of a mono power amplifier (or a single channel of a stereo amp)
driving stage monitor speakers. Keep in mind that in the Left/Right position of the Amp
Assign switch there is no internal equalization for the monitor mix (you might want to
patch a graphic equalizer between the Mon OUT jack and the input of your monitor power
amplifier, this can help regulate the feed). As mentioned under #5. Pre-EQ OUT, Post-EQ
OUT section (above), the monitor mix signal can also be patched to one channel of the
internal amplifier using the Amp Assign switch.
9. EFX Out / Footswitch Jack
Using this jack you can connect a standard on/off footswitch to control the activation of
the internal Digital Effects Processor or it can be used as an effects send jack for use with an
external effects processor.
Note: Both devices would be sent a signal, so you could connect the external unit’s
left and right outputs to the L and R inputs on channel 7/8 (channel 9/10 or any of the
other channels). Use the LEVEL of that channel to adjust the amount of wet signal
added to the main mix and the MON control to adjust the amount of wet signal added
to the monitor mix. Make sure that its EFX control on the channels are turned off. An
alternative could be to use the EFX Out / Footswitch jack to deliver line level signal to
the input of an auxiliary amplifier or even a recording device. Here, the channel EFX
controls would act as secondary level controls.
4
10. Power LED & Switch
The Power LED lets you know that the M810/M1610 is plugged in, turned on and all systems are normal. The Clip/Protect LEDs normally indicate clipping in the amplifiers. They
will remain illuminated and the power LED will turn off in the unlikely event that the
amplifiers overheat or if DC voltage is detected on the output. The AC power on/off switch
is on the rear panel of the M810/M1610.
11. Phantom Power
The Phantom Power LED indicates that 48 volts of DC phantom power is present on the
XLR microphone inputs for powering condenser microphones. Regular dynamic mics may
also be used while the Phantom Power is on. Connecting a microphone of either type
with phantom power on and the channel LEVEL up will create a large transient, resulting in a loud, potentially damaging pop. When setting up, either turn off the AC power,
the phantom power, or set all channel levels to zero. The Phantom Power push-button is
located on the rear panel between the speaker output jacks.
12. Tape/CD Input
Left and right RCA inputs are provided to connect a CD player, cassette player or other stereo source to the mixer. These inputs are routed directly to the main bus, the Tape/CD control adjusts the amount of signal.
13. Mute 1-8 Switch
The M810/M1610 includes a feature that enables
users to instantly mute channels 1-8. Depressing
the Mute 1-8 switch will mute channels 1-8 signals
being sent to the Left, Right, Mon and EFX busses
(the signals from these channels will still be sent to
the record bus and will not be muted. Channel 9/10
will remain active, leaving this channel open for
allowing a microphone or CD player, cassette player
or other stereo source to be heard over the Left,
Right, Mon and EFX busses. This feature lets you
mute the mics and instruments on stage and still
allows you to make announcements or play music
during breaks. When the band returns to perform,
simply deactivate.
Note: The Tape/CD input in the master section
also remains active. While muted, the Mute LED
flashes at a slow rate (long on/short off) and the
clip LEDs of all the muted channels alternate
long off/short on.
14. Amp Assign Switch
A
Main/Mon
Clip/
Protect
B
dB
Mute 1-8
+15
-15
dB
+15
7/8
-15
dB
+15
-15
Lo
dB
+15
Lo
-15
dB
+15
-15
EFX
dB
+15
EFX
0
Mon 3
9/10
Mid
Mid
4
5
10
6
0
7
Mon 3
4
5
10
6
7
2
8
2
8
The MAIN controls determine the level of the signal
1
9
1
9
routed through the Amp Assign switch:
0
10
0
10
Bal
Bal
i. In the Left/Right position, the Amp Assign
switch directs the left and right MAIN master
signals through Equalizer A and Equalizer B.
clip
clip
The signal goes to the left and right inputs of
4 5 6
4 5 6
3
3
7
7
the built-in power amplifier (Amp A and Amp B)
2
8
2
8
and to the left and right post-EQ OUT jacks.
1
9
1
9
0
10
0
10
ii. In the Main/Mon position, the Amp Assign switch
7/8
9/10
sums the left and right MAIN signals into a single,
S T E R E O
S T E R E O
mono signal while directing it to the input of
Equalizer A, the output of which goes to both the
Amp A power amp channel and to the Post-EQ
MAIN OUT jack. Additionally, the signal from the MON master’s output is routed through
Equalizer B and then to both the Amp B power amp channel and to the MON Out jack.
LEVEL
Left /Right
Hi
-15
LEVEL
Amp
Assign
Hi
5
Digital Effects Processor
1. Select & MODIFY EFX Controls
The Select control selects from 16 banks of digital reverbs, delays and other effects. Simply
rotate the Select control to the basic type of effect you prefer. This control rotates continuously so you can rotate in either clockwise or counter-clockwise to select the desired effect.
Lists of effects banks appear later in this manual and on the front panel of the M810/
M1610. (The variations for the specific effects banks are listed later in this manual.)
Each bank of effects contains 16 effect variations. The MODIFY EFX control selects one
of these variations. For example, if bank M (Medium Delays) has been selected, position
1 on the MODIFY EFX control will give you 200 milliseconds of delay, and positions 2
through 16 will give you progressively longer delays up to 375 milliseconds. Bank P is the
exception to this rule. It consists of sixteen different special effects such as pitch shift up
or down, detune, flanger etc.
3. EFFECTS TABLES
OM
Situated to the right of the MODIFY EFX control,
the CLIP LED indicates that the digital processor is
receiving an input signal that’s too strong, resulting
in distortion. For optimum performance, the CLIP
LED should never flash. If there is clipping activity,
turn down the channel EFX controls appropriately.
B
A P O
M
N
3
AYS
C
S
EL
RO
2. Effects CLIP LED
RS
HA
BE
L
Note: The signal sent from the internal Digital Effects Processor to the MON mix is
independent from the MON send controls on the channel strips. When a channel’s
EFX control is sending signal to the internal
Effects processor and the MON control, for
G AT E S C H
MODIFY EFX
that channel, is turned off, that channel’s wet
AM
LS
G H I
7 8 9
effects will be heard in the MON bus if the EFX
F
J
6
10
E
K
5
11
to Monitor return is turned up.
4
12
D
L
2
D
clip
13
14
1 16 15
EFX
A
B
C
D
E
F
G
H
Rooms
Rooms+Thickening Delays
Rooms+Regen Delays
Rooms/Halls+Chorus
Halls
Halls+Thickening Delays
Halls+Regen Delays
Gates/Reverse Reverb
I
J
K
L
M
N
O
P
Chambers
Chambers+Thickening Delays
Chambers+Regen Delays
Short Delays
Medium Delays
Long Delays
Delays+Chorus
Special Effects
See rear inside cover for effects tables.
Built in 9-Band Graphic Equalizer & Shelving EQs
General
Each EQ consists of a set of +/-15dB range type controls. In the M810/M1610 there are
nine sliders for each channel, each one operating over a 2/3-octave portion of the midrange
band of sound frequencies, as well as rotary shelving Bass and Treble controls.
Note: Equalizers have an effect on the gain of the main system as well as its frequency
response. Once adjusted, you may need to adjust the MAIN master level if the clip
LEDs become too active.
EQUALIZER B
EQUALIZER A
160
250
400
630 1.0K 1.6K 2.5K 4.0K 6.3K
Lo
-15
+15
+15
+10
+10
+5
+5
0
0
-5
-5
-10
-10
-15
-15
160
250
Hi
+15
-15
400
630 1.0K 1.6K 2.5K 4.0K 6.3K
Lo
+15
-15
Hi
+15
-15
+15
There Are 3 Main Functions for the Graphic EQ & Shelving Equalizers
i. To adjust the system to help reduce feedback, a normal technique is to turn the main
system up to the point of feedback and then adjust the EQ sliders individually to determine which frequency band will reduce the potential of feedback. When the specific
frequency band is isolated, set it to about -3 to -5 dB. Usually only 2 or 3 bands can be
reduced before the feedback reduction process begins to affect the sound quality.
6
ii. To adjust for deficiencies in the speaker system’s high frequency and bass response, the
M810/M1610 also has a 2-band rotary shelving equalizer. These work in conjunction with
the 9-band graphic. Yorkville engineers have developed this technique to provide you with
greater tone shaping capability. This allows the graphic equalizer bands frequencies to be
spaced at closer intervals, which mean better selectivity for feedback reduction and sound
shaping. You may want to turn up the Lo and Hi controls to give the system a more HiFi
sound when you’re playing at lower volumes. At higher volume levels, you may need to
turn these controls down, this will help maximize the volume and tighten up the sound.
iii. The third use of the graphic equalizer is to adjust the sound character for artistic reasons. The frequencies are adjusted until the sound feels best to the musicians.
M810/M1610 Rear Panel
1. Power Amplifiers
Each of the M810/M1610 dual power amplifiers has two ¼-inch jacks and 1 Speakon jack
for speaker connections. The power amplifiers are designed to provide full power into a 4ohm load. Connecting two 4-ohm speakers (2-ohm load) to either AMP A or AMP B will not
harm the M810/M1610 but the maximum power output may be reduced.
WARNING: Do not obstruct the flow of air around the vents on the rear of the M810/
M1610, this may cause the power amplifier to overheat. The amplifier will start to reduce
its power output in order to keep running. In extreme cases it may be forced to shut down.
If the clip LEDs are illuminated continuously and the Power LED is off, this will indicate
shutdown. After the M810/M1610 cools down, operation will be restored automatically
This condition should not occur if adequate ventilation is provided at the back of the unit.
2. Power Switch and Breaker
The Power switch and circuit breaker are located on the rear panel. If the circuit breaker
trips during use, wait a few minutes (to cool), then push in to reset. The circuit breaker can
trip if the amplifier is too heavily loaded with long periods of continuous tones (such as
feedback). If the circuit breaker trips immediately after being reset, take the unit to your
Yorkville dealer for service.
SPEAKER OUTPUT
CHANNEL B
SPEAKON™ Pin 1+/1–
Configuration
800 Watts MAX
@ 4 ohms
(2 ohm min.)
Phantom
SPEAKER OUTPUT
Power
in
out
TYPE: YS1032
CHANNEL A
800 Watts MAX
@ 4 ohms
(2 ohm min.)
230V
50Hz
3,3A
2
x
800
Watt
Powered
Circuit
Breaker
Z446A / 1.1
Yorkville
120VAC
60Hz
6.4A
DESIGNED & MANUFACTURED BY
YORKVILLE SOUND • TORONTO, CANADA
Mixer
POWER
ON
SPEAKER OUTPUT
CHANNEL B
SPEAKON™ Pin 1+/1–
Configuration
400 Watts MAX
@ 4 ohms
(2 ohm min.)
Phantom
SPEAKER OUTPUT
Power
in
out
TYPE: YS1033
CHANNEL A
400 Watts MAX
@ 4 ohms
(2 ohm min.)
230V
50Hz
2,2A
Circuit
Breaker
Z446B / 1.1
Yorkville
120VAC
60Hz
4.2A
DESIGNED & MANUFACTURED BY
YORKVILLE SOUND • TORONTO, CANADA
2 x 400 Watt Powered Mixer
POWER
ON
7
General Operating Instructions
Keep the Main Speakers
between mics and audience
to minimize feedback
1. Connect the AC power cord to a 120 Volt AC grounded power outlet (220 to 240
Volts in export units).
2. Turn the MAIN and MON master controls to 0 initially, then switch on the Power.
3. You can connect low-impedance microphones to the 3-pin XLR type MIC inputs.
4. Connect high-impedance mics or mono line-level signal sources (mixer line outputs,
keyboards etc.), to the ¼-inch balanced LINE IN jacks on channels 1-4, 7/8 and
9/10. Connecting more than one signal source to both XLR and ¼-inch inputs is not
recommended; this includes stereo sources (if you try to connect a stereo source to a
mono channel using a Y-adapter, you may get distortion). The ¼-inch channels 5 and
6 are optimized for musical instruments and are not balanced.
5. Connect stereo sources (CD players, tape decks, stereo keyboards etc.) to channels 7/8 or
9/10 via the stereo ¼-inch balanced LINE IN type inputs. Once again, connect only one
signal source per channel, and use shielded patch cords for all pre-amp connections. If a
monitor send or EFX send is not required use the Tape/CD input for your stereo source.
6a. Use 18-gauge (or heavier) speaker cables, using shielded patch cords to connect speakers will waste power by heating up. Connect one or two 8-ohm PA speakers to the
SPEAKER outputs on the rear panel.
Note: To deliver maximum power to a pair of 4-ohm PA speakers, connect only one
speaker to each amplifier.
DO NOT place Main
Speakers in back of
the stage!!
6b. If you are using a separate power amplifier for the stage monitor speakers, connect the
main speakers (as in #6, above) and run a shielded patch cord from the Pre-EQ or PostEQ Out jack to the input of the monitor power amp. If you are using a separate graphic
equalizer for the monitors run a shielded patch cord from the Pre-EQ or Post-EQ Out
OUT jack to the input of the EQ. Then, another one from the EQ’s output to the input of
the monitor power amp.
7. Position your main PA speakers at the front of the stage, pointing directly at the
audience. Position your monitor speakers on the stage floor; preferably to one side
of the mic stands, pointing up at the performer. Try to use cardioid or uni-directional
mics to help reduce the threat of feedback through the monitors (avoid having the
back of the mic pointing directly at the speakers).
8. During a sound check and with the band playing, make the following control adjustments:
i.
Input Wiring tips:
1. For all input connectivity use shielded wire only.
Cables with a foil shield or a
high-density braid are better.
2. When changing input
connections, turn down the
level controls on the mixer to
eliminate pops and thumps
out of the loudspeakers as
the cable contacts the mixer.
3. Keep input connection
cables as short as possible
to minimize noise and hum.
On mono channels, you need to set the TRIM appropriately. To set the TRIM, first turn
the channel LEVEL control down, with a normal signal (present at the input) adjust
the TRIM control until the green LED flashes only during the peaks in signal. Now you
can use the LEVEL control to set the channel volume level.
ii. Set the channel Lo, Mid, and Hi EQ controls at center. Set the channel LEVEL, MON,
and EFX controls to seven. The Graphic EQ sliders and rotary shelving controls should
be set at the center position at this point as well.
iii. Turn the MAIN and MON Master controls up to give the desired volume, the MAIN EFX
return to around 7. Effects in the monitors tend to increase the possibility of feedback
so if the band insists, set the MON EFX return to 5.
iv. Adjust the channel MON control/s to give each performer the desired volume levels.
Use the MON master control to adjust the overall monitor level.
v. Use the channel LEVEL control/s to balance each channel’s volume level through the
main PA speakers.
vi. Turn up the EFX controls on those channels requiring the selected Digital Effect. Typically, the
lead and harmony vocal channels would be good candidates for effects. Reverb can be used on
other channels or on recorded music, but should be used sparingly.
9. Feedback during a performance is usually caused by one of the stage monitors. The
main PA is less likely to feedback because the mics are usually a good distance from
the main PA speakers. Therefore, if you’re using monitors, and feedback occurs, try the
following procedures:
i. Turn the MON Master down until the feedback stops.
ii. If a graphic equalizer is patched between the MON output and your monitor power
amp, adjust the EQ sliders individually to determine which frequency band will reduce the
potential of feedback.
iii. Now turn the MON Master back up. If the feedback returns, reset the sliders to their
original positions and retry using different sliders.
iv. In the rare case of main system feedback, follow the above type of procedure, but use
the MAIN Master and the built in Graphic EQ.
8
-15
dB
+15
-15
dB
+15
2
Hi
-15
Mid
Lo
dB
+15
-15
dB
+15
-15
dB
+15
3
Hi
-15
Mid
Lo
dB
+15
-15
dB
+15
-15
dB
+15
4
Hi
-15
Mid
Lo
dB
+15
-15
dB
+15
-15
dB
+15
5
Hi
-15
Mid
Lo
dB
+15
-15
dB
+15
-15
dB
+15
6
Hi
Mid
Lo
-15
dB
Hi
Hi
+15
-15
EFX
0
4
Mon 3
EFX
0
10
5
6
2
7
1
5
6
2
9
0
4
Mon 3
8
7
1
5
6
7
1
-15
dB
+15
-15
dB
+15
Mid
5
7
1
5
7
1
dB
5
6
1
dB
0
-10
+3
-20
+6
-
dB +10
-3
1
Set
Trim
2
Set
Trim
3
Set
Trim
4
Set
4
5
10
6
5
Set
2
3
4
6
4
5
10
6
2
Mic
Mic
Mic
Mic
Line
Line
Line
Line
Instrument
Hi/Z
5
6
10
4
0
6
4
10
5
6
7
4
8
1
9
0
10
7/8
5
6
2
9
0
6
1
0
Hi/Z
-5
-15
Lo
6
2
Hi
9
0
4
3
10
5
6
2
10
10
48V Phantom
Power On
9/10
F
B
S
9
0
10
LS
E
D
C
-15
+15
G AT E S C H
A
G H I
A P O
J
MODIFY EFX
M
5
4
3
K
L
M
N
D
6
2
7 8 9
10
11
12
13
14
1 16 15
clip
EFX
7
8
1
+15
B
Power
7
9
0
Clip/
Protect
7
8
1
Main/Mon
8
1
Tape/CD
A
9
10
5
3
MAIN
EFX
Return
7
A
B
C
D
E
F
G
H
Rooms
Rooms+Thickening Delays
Rooms+Regen Delays
Rooms/Halls+Chorus
Halls
Halls+Thickening Delays
Halls+Regen Delays
Gates/Reverse Reverb
I
J
K
L
M
N
O
P
Chambers
Chambers+Thickening Delays
Chambers+Regen Delays
Short Delays
Medium Delays
Long Delays
Delays+Chorus
Special Effects
9/10
Pre-EQ
OUT
2
B
Mic
Line
630 1.0K 1.6K 2.5K 4.0K 6.3K
S T E R E O
7/8
Mic
8
1
3
7
400
-15
8
0
9
3
5
3
2
4
7
8
0
10
4
MON
EFX
Return
9
6
1
Rec
Out
clip
5
3
2
250
-10
Amp
Assign
+15
10
5
2
6
Instrument
7
2
9
Bal
S T E R E O
Mic
-15
8
3
A
Mic
4
MAIN 4
7
8
1
Bal
Trim
5
Hi
+15
3
0
9
0
+3
dB +10
Turn Up Trim Control Until Green LED Starts to Blink
1
-15
2
Mon 3
7
8
1
+6
Trim
+15
0
0
-10
-20
-
dB
1
0
LEVEL
Trim
+5
160
Left /Right
-15
EFX
clip
Set
+5
-10
10
LEVEL
dB +10
LEVEL
+3
+6
-
LEVEL
0
-10
-20
+15
Lo
+15
EFX
Mon 3
0
0
dB +10
0
0
LEVEL
+3
+6
-
LEVEL
0
-10
-20
0
0
dB +10
0
0
LEVEL
+3
+6
-
+10
RS
0
-10
-20
0
0
0
0
dB +10
dB
9
0
clip
-3
-15
MON
7
Pan
clip
-3
+15
+10
BE
+3
+6
-
clip
-3
+15
OM
0
-10
-20
clip
-3
630 1.0K 1.6K 2.5K 4.0K 6.3K
RO
clip
-3
400
0
+15
2
clip
250
9/10
Lo
-15
8
10
Pan
160
+15
-15
10
2
9
0
4
Mon 3
8
10
Pan
6
dB
Mid
Lo
0
10
2
9
0
4
Mon 3
8
10
Pan
6
EQUALIZER B
EQUALIZER A
-15
-5
EFX
0
10
2
9
0
4
Mon 3
8
10
Pan
0
10
2
9
0
4
Mon 3
8
10
Pan
EFX
EFX
0
10
Mute 1-8
+15
7/8
-15
EFX
dB
AYS
+15
EL
dB
L
Lo
-15
HA
Mid
LEVEL
1
Hi
Line
Post-EQ
OUT
Rec OUT
x
800
Watt
Powered
Mixer
MON
Out
Power AMP IN
EFX
Out
Tape/CD In
Footswitch
A
B
Introduction
1/4-inch Phone Plug
1/4-inch T.R.S. Phone Plug
XLR Plug
Merci de vous être procurer un mixeur amplifié de Yorkville. Nous sommes certains que votre nouvel
M810/M1610 répondra à vos besoins en coffre mixeur/amplificateur de façon souple et efficace.
Nous avons jumelé notre expérience dans le développement et production de mixeurs amplifiés avec
notre système informatique à la fine pointe de la technologie afin de créer le plus petit, le plus
léger, et le plus puissant mixeur /amplificateur disponible. Ce manuel contient l ’information nécessaire qui vous permettra d ’obtenir de votre M810/M1610 la meilleure performance possible. Nous
espérons que vous prendrez quelques instants pour vous familiariser avec le contenu de ce manuel.
Stereo Power Amplifier
Le M810/M1610 est doté d’un amplificateur de puissance stéréo à haute efficacité qui a été
conçu pour offrir une puissance maximale dans une charge de 4 ohms. Lorsqu’une charge de
haut-parleur plus basse y est connectée, un circuit offrant une performance acoustique transparente limite la sortie à un niveau qui ne pause pas de risque. De multiples haut-parleurs
peuvent y être branchés sans causer une surchauffe ou éteindre l’appareil
Input Channels
1. Entrées MIC & LIGNE
7/8
Le M810/M1610 est équipé de connecteurs type
4
6
XLR plaqués or à doubles contacts pour microphone à basse impédance sur les canaux. Ces
entrées pour microphone sont équilibrées pour la
suppression maximum de bruit. Les microphones Mic
Mic
Mic
à condensateur peuvent aussi être branchés à ces
I
n
s
t
r
u
m
e
n
t
Line
Line
prises. L’alimentation en duplex de 48 Volts CC
est activé en appuyant sur le bouton poussoir
«Phantom» situé sur le panneau arrière.
Hi/Z
Note: Les microphones à condensateur
et les microphones dynamiques peuvent
être simultanément utilisés lorsque l’alimentation en duplex est activé. La performance des microphones dynamiques ne sera pas affectée.
En plus des prises d’entrées XLR, chaque canal est équipé d’une prise D’ENTRÉE LIGNE ¼
de pouce. Les canaux 1-4, 7/8 et 9/10 sont des entrées de niveau ligne symétriques et ils
acceptent soit des signaux symétriques (Pointe/Bague/Manchon) ou des signaux asymétriques
(Pointe/Bague) acheminés par des câbles branchés à des microphones à haute-impédance, sortie ligne de mixeur, claviers électronique, synthétiseurs, pianos électriques etc.
Note: lors de l’utilisation de signaux symétriques, utilisez des câbles de branchement
symétriques avec soit un prise type XLR ou une du type Pointe/Bague/Manchon ¼
pouce à l’extrémité qui connecte au mixeur..
9
Les canaux 5 et 6 sont équipés de prise d’entrée ¼ de pouce asymétrique avec impédance
très élevée, qui ont été optimisé pour instruments tels, basses électriques, guitares électriques
acoustiques etc. Les canaux stéréos 7/8 et 9/10 sont équipés de prises d’entrées lignes gauches
et droites ¼-de pouce symétriques en plus d’une prise d’entrée pour microphone XLR monophonique à basse impédance plaqués or. Les entrées ¼-pouce peuvent être utilisées pour connecter
un lecteur pour disque compact stéréo, un magnétophone à cassette ou un mixeur additionnel
etc. Un pré amplificateur phono doit être raccordé aux entrées du M810/M1610 pour obtenir une
performance maximale lors de l’utilisation d’une platine.
Le branchement de signaux aux deux types d’entrées sur n’importe quel canal (MIC et
ENTRÉE LIGNE) n’est pas recommandé. Cela pourrait changer le gain du circuit d’entrée.
Note: Vous pouvez brancher une source stéréo aux canaux 1 à 6 mais vous devez utiliser
deux canaux, un pour le signal de droite, un pour le signal de gauche et ajustez le contrôle
PAN à la position appropriée ou faite le somme des deux signaux en utilisant un câble en ‘Y’.
1
Hi
Mid
Lo
-15
dB
+15
-15
dB
+15
-15
dB
+15
EFX
0
4
Mon 3
10
5
6
2
7
8
1
9
0
10
Pan
-3
0
-10
+3
-20
+6
0
0
-
1
Les 6 premiers canaux monophoniques du M1610/M810 ont été équipé de contrôle d’ajustement de
niveau d’entrée TRIM et sont de plus protégés par un circuit de protection de surcharges. Les contrôle
TRIM sont utilisés pour assurer qu’un niveau idéal de signal est acheminé à travers le circuit du canal peu
importe la source à l’entrée. Chaque canal est aussi doté d’une DEL verte qui clignotera lorsque le niveau
de signal approprié est obtenu. Le circuit de protection de surcharge sur les canaux offrira une protection
additionnelle contre l’écrêtage sur les pointes jusqu’à 16 dB au-dessus des niveaux d’opération normale.
Pour ajuster le contrôle TRIM.
i. Réglez au minimum le contrôle de niveau de canal,
ii. Avec un signal normal présent à l’entrée, augmentez le niveau du contrôle TRIM jusqu’à
ce que la DEL verte commence à clignoter (sur les pointes de signal).
iii. Vous pouvez ensuite utiliser le contrôle de niveau du canal pour ajuster le volume de ce
canal. L’aumenation du niveau du contrôle TRIM au-delà de ce réglage causera une compression du signal sur ce canal.
3. Contrôle de NIVEAU des Canaux & DEL d’Écrêtage
dB +10
LEVEL
clip
2. Contrôles TRIM sur les Canaux 1-6 et DEL d’Ajustement
Set
Trim
Line
Mic
Cet ajustement détermine le niveau du signal acheminé au bus principal de mixage. La DEL
d’écrêtage s’illuminera quand le niveau général du signal de canal est à 3 dB en dessous du niveau
réel d’écrêtage. À cause de cela, une légère activité de la DEL est donc acceptable. Une activité
fréquente ou continue indique cependant qu ’on doit réduire le niveau de GAIN.
Dans la terminologie utilisée en sonorisation, un “bus”est un canal de mélange où tous les signaux de canaux d ’entrées sont mélangés en un signal. Le M810/M1610 est doté de cinq bus,
PRINCIPAL (gauche et droite), MONITEUR, EFFETS et SORTIE POUR ENREGISTREMENT).
4. Égalisation de Canal Basse, Moyenne, Aiguë
Les contrôles d ’égalisation de BASSE, MOYENNE & AIGUE du M1610/M810 ajustent indépendamment
les fréquences basses, aiguës et moyennes pour chaque canal. Les fréquences centrales ont été soigneusement sélectionnées pour offrir un réglage acoustique optimum. Les graves sont centrés à 80 Hz,
les Médianes à 2.5 kHz et les Aiguës à 12 kHz. La gamme de réglage de gain pour chaque contrôle
est plus ou moins (+/-)15dB fournissant une égalisation souple, qui s ’harmonise avec la simplicité
du design de la M810/M1610. Comme avec tous les égalisateurs, un renforcement à une ou plusieurs
fréquences produira une augmentation du niveau de signal du canal. La DEL D’ECRETAGE s ’illuminera si
l ’opération de canal à des niveaux élevés cause l’écrêtage. Si la DEL D ’ECRETAGE s ’illumine continuellement, réduisez le niveau du contrôle de GAIN et /ou de renforcement du contrôle d ’égalisation.
Note: Un réglage à la position centrale procure une courbe d ’égalisation uniforme.
Cependant il est parfois possible de réduire le feedback ou prévenir l ’écrêtage en réduisant le niveau des contrôles d ’égalisation)
5. Contrôles MON sur les Canaux
Chaque canal est doté d ’un contrôle MON (envoie aux retours) qui varie la somme signal de canal
étant tapé et dirigé aux bus de retours de scène du M810/M1610. Sur les canaux monophoniques, le signal est pré-contrôle de niveau, post-Égalisateur et post-contrôle TRIM. Il est pris
avant les contrôles niveau de façon à permettre un mélange de retour indépendant du mélange
principal. Le réglage de l ’égalisateur et du contrôle TRIM au canal affectent donc le signal aux
retours de scène alors que le contrôle de niveau du canal au canal n ’affecte pas le signal des
retours. Le signal MON dans les canaux stéréo est pré-NIVEAU et pré-Égalisateur.
Note: Avec un mélange de moniteur indépendant, il peut être bénéfique de brancher
un égalisateur graphique entre la sortie MON et l’amplificateur de retours (ou enceintes
amplifiées) pour aider à contrôler le feedback.
10
6. Contrôle EFX de Canal
Le contrôle EFX (envoi aux effets) pour chaque canal ajuste le niveau du signal de ce canal
étant acheminé au bus d’effets du M810/M1610. Ce signal est post-contrôle de NIVEAU et postEGALISATEUR, le son est affecté par les contrôles d’égalisation du canal et le contrôle de niveau du
canal. Le signal du bus d’effet est intérieurement acheminé au processeur d’effet numérique. Le
contrôle EFX de canal règle l’intensité de l’effet numérique intégré pour la sortie du canal. Lorsque
vous utilisez l’effet numérique intégré, vous pouvez raccorder un commutateur standard au pied
on/off (ex. modèle IFS-1A de Yorkville) à la prise EFX Out/Footswitch pour activer ou désactiver
l’effet interne. Pour plus d’information voir la section EFX Out/Footswitch dans ce manuel.
Conseil: le signal à cette prise peut être connecté à l’entrée d’un appareil d’effet stéréo
externe et retourné par l’entremise des canaux 7/8 ou 9/10. Toutefois, si vous ne requérez
aucun effet, le signal de sortie du bus d’effet peut être raccordé à l’entrée d’un système de
retour additionnel ou un autre système d’amplificateur/haut-parleurs par l’entremise de la
prise EFX Out/Footswitch à l’aide d’un câble de raccordement standard symétrique. Dans
ce cas, les contrôles EFX agissent comme contrôles d’envoi pour obtenir un mélange semiséparé. Rappelez-vous que les contrôles de niveau des canaux affectent aussi ce signal.
7. Contrôles Pan & Bal
La balance de signal de chaque canal allant à gauche et à droite des canaux PA principal peuvent être
ajustés par le contrôle PAN sur les canaux 1 à 6, et par le contrôle BALANCE sur les canaux 7-8 et 910.De tourner ce contrôle vers la gauche aura pour effet d ’accroître le niveau du signal dans le canal
gauche jusqu’à un maximum de 3 dB tout en réduisant le niveau dans le canal droit. De tourner ce contrôle vers la droite aura pour effet d’accroître le niveau du signal dans le canal droit tout en réduisant le
niveau dans le canal gauche.
Section Maîtraisse
1. Contrôle Maître PRINCIPAL
400
630 1.0K 1.6K 2.5K 4.0K 6.3K
+15
+15
+10
+10
+5
+5
0
-5
-10
-10
-15
Lo
Hi
160
250
400
630 1.0K 1.6K 2.5K 4.0K 6.3K
0
-5
Amp
Assign
-15
Lo
Hi
Left /Right
2
8
1
MON
EFX
Return
5
6
2
8
1
9
0
4
3
10
5
6
2
7
8
1
9
0
8
4
10
MAIN
EFX
Return
Tape/CD
-15
7
A
Main/Mon
Clip/
Protect
10
5
3
6
2
Power
7
8
1
9
0
4
10
5
3
6
2
1
9
0
48V Phantom
Power On
10
LS
E
D
C
S
-15
+15
F
B
G AT E S C H
AM
G H I
A P O
J
MODIFY EFX
5
4
3
K
L
M
N
D
6
7 8 9
10
11
12
13
2
14
1 16 15
clip
EFX
7
8
+15
B
9
0
7
6
2
10
3
5
RS
MAIN 4
+15
4
3
1
9
0
Rec
Out
-15
7
AYS
6
EL
5
L
+15
4
3
HA
-15
MON
OM
Le niveau général du mélange de retours
est ajusté avec le contrôle maître MON .
Note: Tout comme avec le contrôle
maître principal, réglez les contrôle
maître pour retour pour l’obtention
du niveau désiré après avoir réglé
les niveaux d’envoi des canaux.
250
RO
2. Contrôle Maître MON
EQUALIZER B
EQUALIZER A
160
BE
Le contrôle maître principal ajuste le niveau
général du mélange principal, le volume du
système de sonorisation.
Note: Pour assurer un signal clair et
une extension dynamique maximum,
réglez en un premier temps les contrôles TRIM et LEVEL du canal pour
l’obtention d’un signal clair et sans
écrêtage, réglez ensuite le niveau du
volume principal jusqu’à l’obtention
du niveau général désiré.
A
B
C
D
E
F
G
H
Rooms
Rooms+Thickening Delays
Rooms+Regen Delays
Rooms/Halls+Chorus
Halls
Halls+Thickening Delays
Halls+Regen Delays
Gates/Reverse Reverb
I
J
K
L
M
N
O
P
Chambers
Chambers+Thickening Delays
Chambers+Regen Delays
Short Delays
Medium Delays
Long Delays
Delays+Chorus
Special Effects
3. MAIN EFFECTS Return Control
Le contrôle maître “MAIN EFX” règle la somme de signal allant de la sortie du PROCESSEUR interne D
’EFFETS NUMÉRIQUES au bus de mélange PRINCIPAL où il est mélangé avec les signaux dépourvus d ’effet
provenant des canaux. Il contrôle l ’intensité générale d ’effets sur les signaux de sortie de gauche et de
droite.
4. MON EFFECTS Return Control
Le contrôle maître “MONITOR EFX”règle la somme de signal allant de la sortie du PROCESSEUR
interne D’EFFETS NUMERIQUES au bus de mélange MONITEUR où il est mélangé avec les signaux
dépourvus d ’effet provenant du contrôles d ’envoi de canal “MON SEND”. Il contrôle l’intensité
générale d’effets du signal de la SORTIE DE MONITEUR.
5. Sortie Pré-Égalisateur, Sortie Post-Égalisateur
Ces prises offrent une variété d’options de raccordements et d’acheminements. Elles sont positionnées
dans le parcours du signal avant et après les égalisateurs graphiques principaux du M810/M1610.
Ces signaux de bus sont à un niveau ligne, pas à des niveau haut-parleur (utilisez les sorties SPEAKER sur le panneau arrière pour acheminer le signal aux haut-parleurs). L’utilisation
11
du signal présent à ces prises n’a aucun effet sur l’opération de l’amplificateur de puissance
intégré du M810/M1610. Cela permet l’acheminement du signal à un amplificateur de puissance externe, ou encore à de plusieurs amplificateurs de puissance raccordés, alors que
l’amplificateur de puissance interne continue de fonctionner.
Note: Il n’est pas nécessaire d’avoir des ha ut-parleurs branchés si vous désirez utiliser
l’appareil simplement comme un mixeur. Si un signal monophonique est requit, par exemple pour amener le signal à un système de sonorisation monophonique ou un autre système amplificateur/haut-parleurs, utilisez la prise «L/Mono Pre-EQ». L’opération monophonique de cette prise est commuter au canal de gauche seulement aussitôt qu’une fiche est
insérée dans la prise «R Pre-EQ». Les prises Post-EQ OUT ne sont pas reliées de cette
façon. Elles suivent l’opération du commutateur Main/Mon décrite ci-dessous.
6. Prises d’Entrées pour Amplificateur de Puissance
Les prises AMP IN et AMP B IN sont directement raccordées aux entrées d’amplificateur de puissance interne. Elles sont désignées “A” et “B”plutôt que“gauche ”et“ droite ”simplement parce
qu’il est possible d’alimenter les deux haut-parleurs du système sono principal avec un canal de
l’amplificateur et les retours avec l’autre. Cela peut être accompli en sélectionnant la position
Main/Mon sur le commutateur situé entre les égalisateurs graphiques. En position Gauche/Droite,
l’amplificateur de puissance AMP A reçoit le signal de gauche alors que l’amplificateur de droite
AMP B reçoit le signal de droite. En position Main/Mon, l’amplificateur de puissance AMP A reçoit
la somme monophonique des signaux gauche et droit alors que l’amplificateur de puissance AMP
B reçoit le signal de retour. La prise Power AMP A IN et Power AMP B IN peut aussi être utilisé
comme prise de connexion. Puisqu’elles agissent comme prise commutatrice, si vous insérez une
fiche à l’une d’elle (ou les deux) le réseau interne de signal sera interrompu. Cela interrompt le
signal provenant de la section de mixage du M810/M1610 aux amplificateurs de puissance intégré
vous permettant ainsi d’insérer des appareils de traitement de signal tel que processeur élite, égalisateur additionnel ou un compresseur/limiteur au réseau de signal stéréo de la section maîtresse.
Connectez un câble à partir de la sorite “Pre-EQ OUT” gauche (L) et droite (R) (ou sortie “Post-EQ
OUT”) à la prise d’entrée de l’appareil externe et ensuite un câble de la prise de sortie de l’appareil
externe aux prises d’entrées sur le M810/M1610 identifiées «Power AMP A IN» et «Power AMP B».
Vous pouvez connecter un autre mixeur à l’amplificateur de puissance du M810/M1610 par
l’entremise de prises d’entrées «Power AMP A IN» et «Power AMP B IN». L’amplificateur répond ainsi
aux signaux de l’autre mixeur; il ne reçoit plus les signaux du mixeur intégré vous permettant ainsi
d’utiliser le mixeur intégré pour un mélange complètement indépendant. Par exemple, vous pouvez
raccorder les prises de sortie «Pre-EQ OUT» de gauche (L) et droite (R) du M810/M1610 (ou sorties Post-EQ OUT) aux entrées d’un autre mixeur lui-même connecté à un amplificateur de puissance
entraînant un système de haut-parleur alors que vous utilisez les amplificateur de puissance A et B du
M810/M1610 pour alimenter les haut-parleurs de la salle d’écoute.
7. Prise de Sortie pour
Enregistrement Rec OUT
Pre-EQ
2
x
800
Watt
Powered
Mixer
OUT
Ces connecteurs type phono
A
B
MON
envoient les signaux du mélange
Out
principal pré-égalisateur et préPost-EQ
Power AMP IN
OUT
effet de gauche (L) et droite (R)
EFX
Out
(pas affecté par l’égalisateur principal). Le contrôle Rec OUT, situé
Rec OUT
Tape/CD In
A
B
Footswitch
juste en dessous du contrôle MAIN,
ajuste le niveau du signal pour ces
prises. Avec des câbles de raccordement type phono, connect ez directement aux prises d’entrée
auxiliaires (niveau ligne) d’un magnétophone ou autre appareil d’enregistrement.
8. Prise MON Out
Le signal de sortie du bus moniteur provenant de la prise Mon OUT est niveau ligne et il est
normalement raccordé à l’entrée d’un amplificateur de puissance monophonique (ou à un canal
d’un amplificateur stéréo) pour entraîner les haut-parleurs de retour de scène. Rappelez-vous
que lorsque le commutateur Amp Assign est à la position Left/Right il n’y a pas d’égalisation
interne pour le mélange des retours (vous pouvez raccorder un égalisateur graphique entre la prise
Mon OUT et l’entrée de votre amplificateur de puissance pour retour de scène, cela peut aider
à contrôler le signal). Tel que mentionné dans la section ci-dessus #5. Sortie Pre-Égalisateur,
sortie Post-Égalisateur , le signal du mélange de retours peut aussi être raccordé à un canal de
l’amplificateur de puissance interne à l’aide du commutateur Amp Assign.
9. Prise EFX Out / Footswitch
Cette prise peut être employée pour raccorder un commutateur au pied type marche/arrêt pour
l’unité de traitement numérique interne ou comme jack d’envoi pour unité de traitement externe.
12
Note: Un signal est acheminé aux deux appareils, vous pouvez donc connecter les
sorties gauche et droite de l’unité de traitement externe aux entrées de gauche et
droite du canal 7/8 (canal 9/10 ou n’importe quel autre canal). Utilisez le contrôle
de niveau de ce canal pour ajuster la quantité de signal affecté qui sera ajoutée
au mélange principal et utilisez le contrôle MON pour ajuster la quantité de signal
affecté qui sera ajoutée au mélange de retour. Assurez-vous que le contrôle EFX
sur le canal est à la position off. Une autre option serait d’utiliser la prise EFX Out /
Footswitch pour amener le signal de niveau ligne à l’entrée d’un amplificateur auxiliaire ou même à un appareil d’enregistrement. Dans ce cas, les contrôles EFX des
canaux agiraient comme contrôles de niveau secondaire.
10. Commutateur et DEL d’Alimentation
La DEL d’alimentation indique que le cordon d’alimentation du M810/M1610 est bien branché, l’appareil
est en marche et tous les systèmes fonctionnent normalement. La DEL Clip/Protect indique normalement l’écrêtage au niveau des amplificateurs. Elles demeureront illuminées et la DEL d’alimentation
s’éteindra dans le cas improbable que l’amplificateur surchauffe ou si un voltage CC est détecté à la sortie. Le commutateur d’alimentation on/off est situé sur le panneau arrière du M810/M1610.
11. Alimentation en Duplex
La DEL d’alimentation en Duplex indique la présence sur les entrées types XLR pour microphone
de 48 volts CC d’alimentation en duplex destiné à l’alimentation des microphones à condensateur.
Les microphones dynamiques peuvent être branchés sans problème même lorsque l’alimentation
en duplex est activé. Brancher un microphone de l’un ou l’autre des deux types avec l’alimentation
en duplex activée et le niveau élevé du canal créera une transitoire importante, résultant en un
« pop » considérable qui pourrait causer des dommages. Lorsque vous faite le réglage, éteignez soit
l’appareil, l’alimentation en duplex ou réglez tous les contrôles de niveau sur les canaux à 0. Le
bouton Phantom Power est situé au panneau arrière entre les prises de sortie pour haut-parleurs.
12. Entrée Tape/CD
Des prises d’entrée gauche et droite de type RCA sont prévues pour brancher au mixeur un
lecteur pour disque compact, un magnétophone à cassette ou autre source. Ces entrées sont
acheminées directement au bus principal. Le contrôle Tape/CD ajuste le niveau du signal.
13. Commutateur Mute 1-8
Le M810/M1610 inclus un commutateur qui vous permet de couper
instantanément les canaux 1-8. En appuyant sur le commutateur
Mute 1-8 vous couperez les signaux des canaux 1-8 étant acheminé
aux busses Gauche, Droite, Mon et EFX (les signaux provenant de ces
canaux seront toutefois toujours acheminés au bus d’enregistrement
et ils ne seront pas coupé). Le canal 9/10 demeurera actif, gardant
ce canal ouvert pour permettre la retransmission du son d’un microphone, lecteur pour disque compact, magnétophone à cassette ou
autre source stéréo au busses Droite, Gauche, Mon et EFX. Cette caractéristique vous permet de couper les microphones et instruments
sur la scène tout en vous permettant de faire des annonces et de
faire jouer de la musique durant les intermissions.
Note: L’entrée Tape/CD dans la section maîtresse demeure,
elle aussi, active. Lorsqu’en mode «Mute», la DEL Mute
clignote lentement (long = on/court = off) et les DEL d’écrêtage
sur tous les canaux coupés alterne long=off/court=on.
14. Commutateur Amp Assign
A
Main/Mon
Clip/
Protect
B
dB
Mute 1-8
+15
-15
dB
+15
7/8
Mid
-15
dB
+15
-15
Lo
dB
+15
Lo
-15
dB
+15
-15
dB
+15
EFX
EFX
0
Mon 3
4
5
10
6
2
0
7
Mon 3
8
1
4
5
10
6
2
9
0
Bal
9/10
Mid
10
7
8
1
9
0
10
Bal
Les contrôles MAIN déterminent le niveau du signal acheminé à
clip
clip
travers le commutateur Amp Assign:
4 5 6
4 5 6
3
3
7
7
i. En position Left/Right, le commutateur Amp Assign
2
8
2
8
1
9
1
9
dirige les signaux de gauche et droite principaux à travers
0
10
0
10
7/8
9/10
l’Égalisateur A et l’Égalisateur B. Le signal prend simulS T E R E O
S T E R E O
tanément deux directions aux entrées droite et gauche de
l’amplificateur de puissance intégré (Amp A et Amp B) et
aux prises de sortie gauche et droite post-Égalisateur.
ii. En position Main/Mon, le commutateur Amp Assign joint les signaux de gauche et droite
PRINCIPAUX en un signal unique monophonique et le dirige à l’entrée de l’Égalisateur A.
La sortie de l’égalisateur est ensuite divisé et est acheminé à l’amplificateur de puissance
Amp A et à la prise de sortie Post-EQ MAIN.De plus, le signal de la sortie principale MON
est dirigé à travers L’égalisateur B et ensuite au canal de l’amplificateur de puissance
Amp B et à la prise MON Out.
LEVEL
Left /Right
Hi
-15
LEVEL
Amp
Assign
Hi
13
Processeur d’Effet Numérique
1. Processeur d’effet numérique – contrôle Select et MODIFY EFX
A P O
5
4
3
K
L
M
N
AYS
B
S
J
EL
L
HA
OM
3. Tables Des Effets
RO
Située juste à droite du contrôle MODIFY EFX, la DEL D
’ÉCRÊTAGE indique que le processeur numérique reçoit un
signal d ’entrée trop élevé,qui pourrait éventuellement
résulter en écrêtage. Pour obtenir la meilleur performance,
la DEL décrêtage ne devrait jamais s ’illuminer. S ’il y a
de l’activité du coté DEL D ’ÉCRÊTAGE, réduisez le niveau
des contrôles EFX de canal.
F
RS
2. DEL d’écrêtage d’effet
E
D
C
BE
Le contrôle “SELECT ”sélectionne à partir de 16 “banques” de réverbérations, délais et autres
effets. Pour obtenir le type d ’effet désiré, tournez simplement le contrôle “SELECT”.Ce type de
contrôle à réglage continu vous permet de tourner dans l ’une ou l ’autre des directions pour
atteindre l ’effet désiré. Les listes de banques d ’effets apparaissent dans ce manuel et sur le panneau avant du M810/M1610.
Chaque banque d ’effets contient seize variations individuelles d ’effet. Le contrôle MODIFY
EFX sélectionne chacune de ces variations. Par exemple, si la banque M (retards moyens) a été
sélectionné, un réglage du contrôle à la position “1” vous donnera 200 millisecondes de retard.
Les positions de “2” à “16” vous donneront des retards progressivement plus longs jusqu ’à 375
millisecondes. La banque ‘P’ est l ’exception à cette règle. Elle offre seize effets spéciaux différents, tels que “pitch shift” plus haut ou plus bas,flanger,etc
Note: Le signal acheminé du processeur d’effet numérique interne au mélange de
retour est indépendant du contrôle d’envoi au moniteur sur chaque canal. Quand un
contrôle EFX de canal envoi un signal au processeur d’effet interne et le contrôle MON,
pour ce canal, est fermé, le signal affecté de ce
canal sera présent au bus MON si le contrôle de
G AT E S C H
MODIFY EFX
AM
retour «EFX to Monitor» est relevé.
LS
7 8 9
G H I
D
6
10
11
12
13
2
14
1 16 15
clip
EFX
A
B
C
D
E
F
G
H
Rooms
Rooms+Thickening Delays
Rooms+Regen Delays
Rooms/Halls+Chorus
Halls
Halls+Thickening Delays
Halls+Regen Delays
Gates/Reverse Reverb
I
J
K
L
M
N
O
P
Chambers
Chambers+Thickening Delays
Chambers+Regen Delays
Short Delays
Medium Delays
Long Delays
Delays+Chorus
Special Effects
Référez-vous à la table d ’effet à l ’intérieur de la page
couverture à la fin du manuel.
Égalisateur Graphique Intégré à 9 Bandes et
Égalisateurs à Chevauchement
1. Général
Chaque égalisateur consiste en un ensemble de contrôle offrant une gamme de réglage de +/15dB. Sur le M1610/M810 il y a neuf curseurs sur chaque canal, chacun opérant sur une portion
de 2/3 d’octave de la bande médiane des fréquences audibles, en plus des contrôles à chevauchement de graves et aiguës.
Note: Les Égalisateurs affectent le gain du système principal et sa réponse en
fréquence. Une fois ajustés, vous aurez peut-être à ajuster le niveau principal de la section maîtresse si la DEL d’écrêtage devient trop active.
EQUALIZER B
EQUALIZER A
160
250
400
630 1.0K 1.6K 2.5K 4.0K 6.3K
Lo
-15
14
+15
+15
+10
+10
+5
+5
0
0
-5
-5
-10
-10
-15
-15
160
250
Hi
+15
-15
400
630 1.0K 1.6K 2.5K 4.0K 6.3K
Lo
+15
-15
Hi
+15
-15
+15
2. Il y a Trois Raisons Principales pour l ’Utilisation d’Un Égalisateur
Graphique et d’Un Égalisateur à Chevauchement
i.
Afin d’ajuster le système pour la réduction de feedback. La technique normale consiste à
augmenter le niveau du système principal jusqu ’au point de feedback et a déplacer ensuite
les contrôles un à un de façon à déterminer la bande de fréquence à l ’origine du feedback. Le
niveau de la bande en faute est alors réduit de 3 à 6 dB et le procédé répété. Habituellement,
seulement 2 ou 3 bandes peuvent être réduites avant que le procédé d’élimination de feedback commence à affecter la qualité sonore du système.
ii. Afin de compenser pour des déficiences dans les fréquences graves et aiguës du système de
haut-parleur. Le M1610/M810 est aussi équipé d’un égalisateur à chevauchement à deux
bandes qui travaille en conjonction avec l’égalisateur à 9 bandes. Les ingénieurs de Yorkville ont
développé cette technique pour vous offrir un plus grand contrôle sur la sonorité du système.
Cela permet un espacement plus rapproché des bandes de fréquence sur l’égalisateur graphique,
offrant du même coup une meilleure sélectivité pour la réduction de feedback et façonnement de
la sonorité. Vous souhaiterez peut-être d’augmenter les graves et les aiguës pour obtenir un son
Haute fidélité lorsque vous utilisez le système à un volume réduit. Lors d’opération à des niveaux
plus élevés, vous aurez peut-être à réduire le niveau des graves et des aiguës. Cela vous aidera à
obtenir de votre système un niveau maximale et un son plus serré.
iii. Afin de modifier la réponse en fréquence du système à des fins artistiques. Chaque bande est
ajustée de façon à obtenir une sonorité optimum.
Panneau Arriére M810/M1610
1. Les Amplificateurs
Les amplificateurs de M1610/M810 sont équipés de deux prises ¼ pouce et une prise
Speakon pour le branchement des haut-parleurs. Les amplificateurs de puissance sont conçus
pour offrir la pleine puissance avec une charge de 4-ohm. Le branchement de deux haut-parleurs de 4-ohm (charge de 2-ohm) amplificateurs AMP A ou AMP B ne causera pas de dommage au M1610/M810 mais la puissance maximale de sortie pourrait être réduite.
ATTENTION: N ’obstruez pas la circulation d ’air autour des ailerons du dissipateur de
chaleur à l’arrière-garde du M1610/M810.Cela pourrait causer une surchauffe au niveau
de l’amplificateur de puissance. Un circuit interne réduira le niveau de puissance de sortie ou désengagera complètement les deux canaux d ’amplification si l ’amplificateur de
puissance devient trop chaud. Les DEL’s d’écrêtage illuminée continuellement indiquent
que l’appareil est entré en mode « shutdown ». L ’opération sera restaurée automatiquement lorsque la température sera redevenue normal. Cela ne devrait jamais se produire
si une ventilation adéquate est fournie à l ’arrière de l’appareil
2. Commutateur D’alimentation et Disjoncteur
Le commutateur d’alimentation et le disjoncteur sont situés au panneau arrière. Si le disjoncteur déclenche durant l’utilisation, attendez quelques minutes et (pour le refroidissement),
appuyez sur dessus pour le réenclencher. Le disjoncteur peut déclencher si l’amplificateur est
chargé avec un ton continue durant une longue période de temps. (Comme avec un feedback).
Si le disjoncteur déclenche immédiatement après l’avoir réenclenché, amenez l’appareil chez votre
revendeur Yorkville pour entretient.
SPEAKER OUTPUT
CHANNEL B
SPEAKON™ Pin 1+/1–
Configuration
800 Watts MAX
@ 4 ohms
(2 ohm min.)
Phantom
SPEAKER OUTPUT
Power
in
out
TYPE: YS1032
CHANNEL A
800 Watts MAX
@ 4 ohms
(2 ohm min.)
230V
50Hz
3,3A
2
x
800
Watt
Powered
Circuit
Breaker
Z446A / 1.1
Yorkville
120VAC
60Hz
6.4A
DESIGNED & MANUFACTURED BY
YORKVILLE SOUND • TORONTO, CANADA
Mixer
POWER
ON
SPEAKER OUTPUT
CHANNEL B
SPEAKON™ Pin 1+/1–
Configuration
400 Watts MAX
@ 4 ohms
(2 ohm min.)
Phantom
SPEAKER OUTPUT
Power
in
out
TYPE: YS1033
CHANNEL A
400 Watts MAX
@ 4 ohms
(2 ohm min.)
230V
50Hz
2,2A
120VAC
60Hz
4.2A
DESIGNED & MANUFACTURED BY
YORKVILLE SOUND • TORONTO, CANADA
2 x 400 Watt Powered Mixer
Circuit
Breaker
Z446B / 1.1
Yorkville
POWER
ON
15
Instructions Général d’Opération
Gardez les haut-parleurs
principaux entre les microphones
et l'audfence pour minimizer
le feedback.
Ne placez pas les haut-parleurs
principaux à l'arrière scéne.
Conseil pratique
pour le raccordement aux entrées:
1. Pour tous les
branchements aux
entrées, utilisez seulement des câbles blindés. Les câbles avec
feuille de métal ou
tressage à haute densité sont préférables.
2. Lorsque vous
changez les branchements aux entrées,
baissez les contrôles
de niveau sur le mixeur
pour éliminer les éclatements et les cognements aux haut-parleurs produits lorsque
les câbles entre en
contact avec le mixeur.
3. Pour minimiser les
bruits et bourdonnements, gardez les
câbles de raccordement aux entrées aussi
court que possible.
16
1. Branchez le cordon d ’alimentation à une prise de courant 120Volt CA avec mise à la masse
(220 ou 240 Volts dans des unités 220-240Volts).
2. Réglez initialement les contrôles maître de moniteur (MONITOR MASTER) et PRINCIPAL (MAIN
MASTER) à “0“ et mettez l ’appareil en marche.
3. Branchez des microphones basse impédance aux prises d ’entrées type XLR à 3-tiges pour microphone.
4. Branchez ensuite les microphones haute impédance ou autre source de signal monophonique
niveau ligne (ex. Sortie “ligne” d ’amplificateur, sortie mono de mélangeur, instrument électrique,
etc.) aux prises d ’entrées symétriques type 1/4»sur les canaux 1-4, 7/8 et 9/10. Nous vous recommandons de ne branchez qu ’une chose par canal. Cela inclut les sorties stéréos (brancher une
source stéréo à un canal mono en utilisant un adaptateur en “Y ”pourrait produire un signal écrêté). Les canaux 5 et 6 sont optimisés pour instruments musicaux et ils ne sont PAS symétriques.
5. Branchez les sources stéréos (tels magnétophone à cassette, lecteur de disque compacte, instrument
à clavier stéréo, etc). aux canaux 7/8 et 9/10,en utilisant les prises d’entrées symétriques type RCA
(phono)ou 1/4» . Encore une fois, ne branchez qu ’une source de signal par canal et n ’employez que
des câbles blindés pour les raccordements au niveau du pré-amplificateur. Si vous n’avez pas besoin
d’un “monitor send” ou “EFX send” utilisez l’entrée «TapeCD» pour votre source stéréo.
6a.À l’aide de câble pour haut-parleur de jauge 18 ou plus (n ’employez jamais des câbles blindés
pour brancher des haut-parleurs - Ils sont incapables de traiter le courant élevé et dissipent
inutilement la puissance en chauffant), branchez un ou deux haut-parleurs de 8 ohms à la sortie SPEAKER sur le panneau arrière.
NOTE: pour acheminer la puissance maximale à une paire de haut-parleur 4-ohm, ne
branchez qu’un haut-parleur à chaque amplificateur.
6b. Si vous utilisez un amplificateur de puissance externe pour les retours de scène, branchez les
haut-parleurs principaux (tel qu ’indiqué au point #6 ci-dessus) et raccordez ensuite un câble
blindé à partir de la prise de SORTIE de retours jusqu ’à l’entrée de l’amplificateur externe. Si
vous employez un égalisateur graphique pour les retours, raccordez un câble blindé à partir de
la prise de SORTIE de retours à l ’entrée de l ’égalisateur, et un autre à partir de la sortie de l
’égalisateur jusqu ’à l ’entrée de l ’amplificateur externe.
7. Placez vos enceintes principales au devant de la scène, de façon à les diriger directement vers l’audience.
Placez ensuite vos moniteurs sur le plancher de la scène, préférablement sur un côté du pied pour microphone, en les dirigeant directement vers l’artiste. L’emploi de microphone “cardioid” ou “uni-directionnel” réduira la possibilité de feedback. (Évitez de pointer le microphone vers les haut-parleurs).
8. Procédez aux réglages des contrôles suivants durant le “sound check” du groupe:
i. Sur les canaux monophoniques, vous devez ajuster les contrôle TRIM correctement. Pour ce faire,
tournez tout d’abord au minimum le contrôle LEVEL du canal, avec un signal normal ajustez le
contrôle TRIM jusqu’à ce que la DEL verte clignote seulement durant les pointes de signal. Ajustez
ensuite le contrôle de niveau du canal (LEVEL) pour obtenir le niveau désiré sur ce canal.
ii. Réglez à la position centrale les contrôles d’égalisation “LO,” “MID” et “HI”. Réglez ensuite
les contrôles LEVEL, MON, et EFXà sept. Les curseurs de l’égalisateur graphique et les contrôles de l’égalisateur à chevauchement devraient eu aussi être réglé à la position centrale.
iii. Augmentez le niveau des contrôles de niveau principal MAIN et MON Master jusqu’à l’obtention
du niveau désiré, le contrôle de retour pour MAIN EFX à environ 7 et MON EFX à environ 5.
iv. Ajustez le(s) contrôle(s) MON sur les canaux pour que chacun des artistes obtienne le
niveau désiré. Utilisez le contrôle maître MON pour ajuster le volume général des retours.
v. Utilisez les contrôles de volume (LEVEL) sur chaque canal pour balancer leur volume dans
le système de sonorisation principal.
vi. Augmentez le niveau du contrôle EFX sur les canaux nécessitant l’effet numérique sélectionné. Généralement, la voix principale et les harmonies sont de bons candidats pour
l’utilisation de l’effet. La réverbération peut être utilisé sur les autres canaux ou sur un
programme musical pré-enregistré, mais son utilisation devrait alors être judicieuse.
9. Le feedback durant une performance est habituellement causé par un des retours de scène. Étant donné
la distance par rapport aux microphones, le système sono principal est rarement la cause de feedback.
Donc, si vous avez un problème de feedback avec les retours de scène, essayez les procédures suivantes:
i. Réduisez le niveau du contrôle principal MON jusqu ’à l ’élimination du feedback.
ii. Si un égalisateur graphique est raccordé entre la sortie MON OUT et votre amplificateur de
retour de scène externe, repérez la gamme de fréquences qui semble causer le feedback et
réduisez le niveau des curseurs qui semblent être problématiques.
iii. Remontez le niveau du contrôle principal MON MASTER. Si le feedback persiste, repoussez les
curseurs de l ’égalisateur à la position centrale et essayez à nouveau avec d’autres curseurs.
iv. Si le feedback est causé par le système principal,(ce qui est peut probable) suivez les étapes
ci-dessus en utilisant le contrôle de niveau MAIN MASTER et l ’égalisateur incorporé.
17
Line R
Mic
Line L/
Mono
Mic
Inst.
Hi/Z
Mic
Line
Rec In
Phantom Power
Stereo Channel Input Details
Channels 7/8 & 9/10
Phantom Power
-3.6db
Mono Channel Input Details
Channels 5-6
Phantom Power
-3.6db
Mono Channel Input Details
Channels 1-4
REC Input
CD/Tape In
Rec In
+48V
+48V
+48V
Trim
Trim
Gain
SET
SET
2.5k
12k
2.5k
12k
2.5k
2.5k
12k
Monitor
12k
Low / Mid / High
80
80
Low / Mid / High
80
Low / Mid/ High
80
Low / Mid/ High
Level
Level
CLIP
to Mon Bus
CLIP
to Mon Bus
CLIP
Effect Send
to Efx Bus
Pan
to Efx Bus
Pan
D E S I G N E D & M A N U FA C T U R E D B Y Y O R K V I L L E S O U N D
B
A
L
Block Diagram for M810 / M1610
REC-L
REC-R
REC-L
REC-R
MON
EFX
MON
EFX
Mon
Right
Left
Mon Master Efx
Left Main
Right Main
Global
Mute
Efx to Monitor
Mon Bus
Right Bus
Left Bus
Efx
EQ / AMP ASSIGN
SWITCH
R / Mon
L / Main
Main Efx Send
HI
HI
Tone
LO
Tone
LO
9 Band EQ
60 250 400 630 1k 1.6k 2.5k 4k 6.3k
9 Band EQ
60 250 400 630 1k 1.6k 2.5k 4k 6.3k
EFFECTS
Sel
EFX
Mod
CLIP
CLIP
R / Mon
400 W (M810)
800 W (M1610)
L / Main
400 W (M810)
800 W (M1610)
-1
+1
+1
AMP 2
Amp B Input
Amp A Input
R / Mon Post EQ Out
L / Main Post EQ Out
STEREO
Pre EQ Out R
Pre EQ Out L
-1
2 x 1/4" & Speakon®
AMP 1
2 x 1/4" & Speakon®
MON
Monitor
Efx Send
Footswitch
A
M
P
I
N
E
Q
O
U
T
P
O
S
T
O
U
T
P
R
E
E
Q
O
U
T
P
U
T
S
S
P
E
A
K
E
R
M810 SPECIFICATIONS
Number of Channels
10
Mono Channel EQ
Low, Mid, High
Stereo Channel EQ
Low, Mid, High
Channel Effects
Monitors Effects
Balance Controls
Pan Controls
Channel Overload Protection
Inputs - XLR (bal)
Inputs - 1/4"
Inputs - RCA (unbal)
Mute Switches
Activity / Solo LED
Clip /Mute LED
Phantom Power
All Channels
Yes
Ch. 7 - 10
Ch. 1 - 6
Ch. 1 - 6
8
10
1 Pair
Global 1 - 8
Trim Set Ch. 1 - 6
All Channels
48V + LED Indicator
Internal Effects
Digital 16 Bit; 255 Effects
Auxiliary Sends
Effect - Monitor
Effects Send
Effects Return
Yes
Internal
Effects Return to Main
Yes
Effects Return to Monitor
Yes
Reverb / Effects Footswitch
Yes
Record Outputs
Stereo RCA Pair
Max Gain to Line Out -Mic Input (dB)
84
Max Gain to Line Out -Line Input (dB)
82
Master EQ -1 (type /Channels /Range - dB)
Graphic 9 band (160hz-6.3khz) +2 band Shelving
Monitor EQ -1 (type /Channels /Range - dB)
Graphic 9 band (160hz-6.3khz) +2 band Shelving
Main Outputs ( Line Level)
2 x 1/4-inch TRS
Main Amp Inputs (Line Level)
2 x 1/4-inch TRS
Monitor Outputs (Line Level)
1 x 1/4-inch TRS
Outputs - Amp A - 1/4" Jacks
2
Outputs - Amp A - Speakon 4-pin
1
Outputs - Amp B - 1/4" Jacks
2
Outputs - Amp B - Speakon 4-pin
1
Mixer - Signal to Noise Ratio (dB)
105
Mixer - Frequency Response (Tone and EQ Flat,+/-2dB) 20 - 20,000
Mixer - Input Referred Noise to line out, @ 150 Ohms (dBv) -119
Mixer THD (Main out w/ -10dB input)
250
Amp A - Power Output @ 4 Ohms
400
Amp A - Power Output -other
400 @ 2 ohms
Amp B - Power Output @ 8 Ohms (0%1"THD, 1kHz)
250
Amp B - Power Output @ 4 Ohms
400
Amp B - Power Output -other
400 @ 2 ohms
THD - 1kHz (dB)
0.1%
THD - 20Hz-20kHz (dB)
0.5%
Hum and Noise (un / Aweight -dB)
Typical crosstalk -1 kHz (dB)
Input Impedance - Bal/Unbal (Ohms)
Input Sesitivity (Vrms Sine)
CMRR @ 60Hz (min/typ)
Max Votage Gain (dB)
Power Consumption
Protection
Cooling
Transformer Type
Finish
Chassis Construction
Rackmount
Other Features
Dimensions (DWH, inches)
Dimensions (DWH, cm)
Weight (lbs/kg)
18
0.01%
Amp A - Power Output @ 8 Ohms (0%1"THD, 1kHz)
-101 / -107
better than -60 db
20k / 10k ohms
1.4
-37db / -60db
29
4.2A @ 60Hz / 2.2A @ 50Hz
Thermal, Short Circuit, Impedance Overload
2 x 80 mm Fans
Toroidial
Grey and Black Powder Coat
Steel and Aluminum
Yes (Kit Available)
Tiltback or Upright Wedge Angles
11.1 x 18.6 x 11
28 x 47 x 28
27 / 12
M1610 SPECIFICATIONS
Number of Channels
10
Mono Channel EQ
Low, Mid, High
Stereo Channel EQ
Low, Mid, High
Channel Effects
All Channels
Monitors Effects
Yes
Balance Controls
Pan Controls
Channel Overload Protection
Inputs - XLR (bal)
Inputs - 1/4"
Inputs - RCA (unbal)
Mute Switches
Activity / Solo LED
Clip /Mute LED
Phantom Power
Ch. 7 - 10
Ch. 1 - 6
Ch. 1 - 6
8
10
1 Pair
Global 1 - 8
Trim Set Ch. 1 - 6
All Channels
48V + LED Indicator
Internal Effects
Digital 16 Bit; 255 Effects
Auxiliary Sends
Effect - Monitor
Effects Send
Effects Return
Yes
Internal
Effects Return to Main
Yes
Effects Return to Monitor
Yes
Reverb / Effects Footswitch
Yes
Record Outputs
Stereo RCA Pair
Max Gain to Line Out -Mic Input (dB)
84
Max Gain to Line Out -Line Input (dB)
82
Master EQ -1 (type /Channels /Range - dB)
Graphic 9 band (160hz-6.3khz) +2 band Shelving
Monitor EQ -1 (type /Channels /Range - dB)
Graphic 9 band (160hz-6.3khz) +2 band Shelving
Main Outputs ( Line Level)
2 x 1/4inch TRS
Main Amp Inputs (Line Level)
2 x 1/4inch TRS
Monitor Outputs (Line Level)
1 x 1/4inch TRS
Outputs - Amp A - 1/4" Jacks
2
Outputs - Amp A - Speakon 4-pin
1
Outputs - Amp B - 1/4" Jacks
2
Outputs - Amp B - Speakon 4-pin
1
Mixer - Signal to Noise Ratio (dB)
101
Mixer - Frequency Response (Tone and EQ Flat,+/-2dB)
Mixer - Input Referred Noise to line out, @ 150 Ohms (dBv)
Mixer THD (Main out w/ -10dB input)
20 - 20,000
-119
0.01%
Amp A - Power Output @ 8 Ohms (0%1"THD, 1kHz)
600
Amp A - Power Output @ 4 Ohms
800
Amp A - Power Output -other
600 @ 2 ohms
Amp B - Power Output @ 8 Ohms (0%1"THD, 1kHz)
600
Amp B - Power Output @ 4 Ohms
800
Amp B - Power Output -other
600 @ 2 ohms
THD - 1kHz (dB)
0.10%
THD - 20Hz-20kHz (dB)
0.50%
Hum and Noise (un / Aweight -dB)
Typical crosstalk -1 kHz (dB)
Input Impedance - Bal/Unbal (Ohms)
Input Sesitivity (Vrms Sine)
CMRR @ 60Hz (min/typ)
Max Votage Gain (dB)
Power Consumption
Protection
Cooling
Transformer Type
Finish
Chassis Construction
Rackmount
Other Features
Dimensions (DWH, inches)
Dimensions (DWH, cm)
Weight (lbs/kg)
-101
better than -60db
20k / 10k ohms
1.4
-37db / -60db
32
6.4A @ 60Hz / 3.3A @ 50Hz
Thermal, Short Circuit, Impedance Overload
2 x 80mm Fans
Toroidial
Grey and Black Powder Coat
Steel and Aluminum
Yes (Kit Available)
Tiltback or Upright Wedge Angles
11.1 x 18.6 x 11
28 x 47 x 28
29 / 13
19
M810 SPÉCIFICATIONS
Nombre de canal
10
Égalsisateur -canaux monophoniques
Graves,Méedianes,Aiguës
Égalsisateur -canaux stéréophoniques
Graves,Méedianes,Aiguës
Effets sur canal
Effets pour les retours
Contrôle de balance
Tous les canaux
Oui
Canaux 7 - 10
Contrôle panoramique
Canaux 1 - 6
Protection de surcharge pour canal
Canaux 1 - 6
Entrées XLR (symétriques)
8
Entrées - 1/4" 10
Entres - RCA (asymétriques) 1 Paire
Commutateur Mute
DEL d'activité / Solo
DEL Clip /Mute
Alimentation en duplex
Effets internes
Envois auxiliaires
Envoi pour effets
Retour pour effets
Trim Set Canaux 1 - 6
Tous les canaux
DEL indicatrice 48V +
Numérique 16 Bit; 255 Effets
Effet - Moniteur
Oui
Interne
Retour pour effet au bus principal
Oui
Retour pour effet au bus de moniteur
Oui
Commutateur au pied Reverb / Effects
Oui
Sorties pour enregistrement
Gain maximum à la sortie ligne -Entrée Mic (dB)
Paire Stéréo RCA
84
Gain maximum à la sortie ligne -Entrée Ligne (dB)
82
Égalisateur principal -1 (type /Canaux / Bande- dB)
Graphique 9 bandes (160hz-6.3khz) +2 bandes à
Égalisateur pour moniteurs -1 (type /Canaux / Bande- dB)
Graphique 9 bandes (160hz-6.3khz) +2 bandes à
Sorties principales ( Niveau Ligne)
2 x 1/4 pouce Pointe-Bague-Manchon
Entrées pour amplificateur principal(Niveau Ligne)
2 x 1/4 pouce Pointe-Bague-Manchon
Sorties Moniteur (Niveau Ligne)
1 x 1/4 pouce Pointe-Bague-Manchon
Sorties - Amp A - Jacks 1/4"
2
Sorties - Amp A - prise Speakon 4-tiges
1
Sorties - Amp B - Jacks 1/4"
2
Sorties - Amp B - prise Speakon 4-tiges
1
Mixeur - Rapport Signal Bruit (dB)
Mixeur - Réponse en fréquence (Contrôle Tone et EQ Flat,+/-2dB)
Mixeur - Bruit d'entré déféré à la sortie ligne @ 150 Ohms (dBv)
DHT Mixeur (Sorties principales avec entrée -10dB )
105
20 - 20,000
-119
0.0001
Puissance de sortie Amp A @ 8 Ohms (0%1"DHT, 1kHz)
250
Puissance de sortie Amp A @ 4 Ohms
400
Puissance de sortie Amp A -autre
400 @ 2 ohms
Puissance de sortie Amp B @ 8 Ohms (0%1"DHT, 1kHz)
250
Puissance de sortie Amp B @ 4 Ohms
400
Puissance de sortie Amp B -autre
400 @ 2 ohms
DHT - 1kHz (dB)
0.001
DHT - 20Hz-20kHz (dB)
0.005
Bruit et bourdonnement (non / pondéré -dB)
Transmodulation typique -1 kHz (dB)
Impédance d'entrée - sym/asym (Ohms)
Sensibilité d'entrée (Vrms Sin)
Rapport de réjection en mode commun @ 60Hz (min/typ)
Gain de Votage Max (dB)
Consommation de puissance (typ/max)
Protection
Refroidissement
Transformateur- Type
Finition
Construction du châssis
Montage en rack
Autres caractéristiques
Dimensions (PLH, pouces)
Dimensions (PLH, cm)
Poids (lives/kg)
20
Global 1 - 8
-101 / -107
meilleur que -60db
20k / 10k ohms
1.4
-37db / -60db
29
770VA / 500VA
Thermique, Court-Circuit, surcharge d'impédance
2 x ventilateurs de 80mm
Toroïdal
Gris et noire
acier et aluminium
Oui (trousse disponible)
Inclinable
11.1 x 18.6 x 11
28 x 47 x 28
27 / 12
M1610 SPECIFICATIONS
Nombre de canal
10
Égalsisateur -canaux monophoniques
Graves,Méedianes,Aiguës
Égalsisateur -canaux stéréophoniques
Graves,Méedianes,Aiguës
Effets sur canal
Effets pour les retours
Contrôle de balance
Tous les canaux
Oui
Canaux 7 - 10
Contrôle panoramique
Canaux 1 - 6
Protection de surcharge pour canal
Canaux 1 - 6
Entrées XLR (symétriques)
Entrées - 1/4"
Entres - RCA (asymétriques)
Commutateur Mute
DEL d'activité / Solo
DEL Clip /Mute
Alimentation en duplex
Effets internes
Envois auxiliaires
Envoi pour effets
Retour pour effets
8
10
1 Paire
Global 1 - 8
Trim Set Canaux 1 - 6
Tous les canaux
DEL indicatrice 48V +
Numérique 16 Bit; 255 Effets
Effet - Moniteur
Oui
Interne
Retour pour effet au bus principal
Oui
Retour pour effet au bus de moniteur
Oui
Commutateur au pied Reverb / Effects
Oui
Sorties pour enregistrement
Gain maximum à la sortie ligne -Entrée Mic (dB)
Gain maximum à la sortie ligne -Entrée Ligne (dB)
Égalisateur principal -1 (type /Canaux / Bande- dB)
Égalisateur pour moniteurs -1 (type /Canaux / Bande- dB)
Sorties principales ( Niveau Ligne)
Paire Stéréo RCA
84
82
Graphique 9 bandes (160hz-6.3khz) +2 bandes à
chevauchement
Graphique 9 bandes (160hz-6.3khz) +2 bandes à
chevauchement
2 x 1/4 pouce Pointe-Bague-Manchon
Entrées pour amplificateur principal(Niveau Ligne)
2 x 1/4 pouce Pointe-Bague-Manchon
Sorties Moniteur (Niveau Ligne)
1 x 1/4 pouce Pointe-Bague-Manchon
Sorties - Amp A - Jacks 1/4"
2
Sorties - Amp A - prise Speakon 4-tiges
1
Sorties - Amp B - Jacks 1/4"
2
Sorties - Amp B - prise Speakon 4-tiges
1
Mixeur - Rapport Signal Bruit (dB)
Mixeur - Réponse en fréquence (Contrôle Tone et EQ Flat,+/-2dB)
Mixeur - Bruit d'entré déféré à la sortie ligne @ 150 Ohms (dBv)
DHT Mixeur (Sorties principales avec entrée -10dB )
101
20 - 20,000
-119
0.01%
Puissance de sortie Amp A @ 8 Ohms (0%1"DHT, 1kHz)
600
Puissance de sortie Amp A @ 4 Ohms
800
Puissance de sortie Amp A -autre
600 @ 2 ohms
Puissance de sortie Amp B @ 8 Ohms (0%1"DHT, 1kHz)
600
Puissance de sortie Amp B @ 4 Ohms
800
Puissance de sortie Amp B -autre
600 @ 2 ohms
DHT - 1kHz (dB)
0.10%
DHT - 20Hz-20kHz (dB)
0.50%
Bruit et bourdonnement (non / pondéré -dB)
Transmodulation typique -1 kHz (dB)
Impédance d'entrée - sym/asym (Ohms)
Sensibilité d'entrée (Vrms Sin)
Rapport de réjection en mode commun @ 60Hz (min/typ)
Gain de Votage Max (dB)
Consommation de puissance (typ/max)
Protection
Refroidissement
Transformateur- Type
Finition
Construction du châssis
Montage en rack
Autres caractéristiques
Dimensions (PLH, pouces)
Dimensions (PLH, cm)
Poids (lives/kg)
-101
meilleur que -60db
20k / 10k ohms
1.4
-37db / -60db
32
770VA / 500VA
Thermique, Court-Circuit, surcharge d'impédance
Overload
2 x ventilateurs de 80mm
Toroïdal
Gris et noire
acier et aluminium
Oui (trousse disponible)
Inclinable
11.1 x 18.6 x 11
28 x 47 x 28
29 / 13
21
INDEX
22
Introduction ...............................................................1
Stereo Power Amplifier ..............................................1
Input Channels
1. Mic & Line Inputs ..........................................1
2. Channel 1-6 Trim Controls & Set LEDS .........2
3. Channel LEVEL Controls & CLIP LEDs ..........2
4. Channel Lo, Mid & Hi Equalization.................2
5. Channel MON Controls ..................................2
6. Channel EFX Controls ....................................2
7. Channel Pan & Bal Controls...........................3
Master Section
1. MAIN Master Control .....................................3
2. MON Master Control ......................................3
3. MAIN EFFECTS Return Control ......................3
4. MON EFFECTS Return Control .......................3
5. Pre-EQ OUT, Post-EQ OUT .............................3
6. Power AMP IN Jacks .....................................4
7. Rec OUT Jacks ..............................................4
8. MON Out Jack ...............................................4
9. EFX Out / Footswitch Jack .............................4
10. Power LED & Switch .....................................5
11. Phantom Power .............................................5
12. Tape/CD Input ................................................5
13. Mute 1-8 Switch ............................................5
14. Amp Assign Switch .......................................5
Digital Effects Processor
1. Select & MODIFY EFX Controls .....................6
2. Effect CLIP LED .............................................6
Built In 9-Band Graphic Equalizer & Shelving EQs
1. General ..........................................................6
2. Main Functions ..............................................6
M810/M1610 Rear Panel
1. Power Amplifiers ...........................................7
2. Power Switch & Breaker ................................7
General Operating Instructions ..................................8
Specifications
Block Diagram ...............................................17
1. M810 .............................................................18
2. M1610 ...........................................................19
Introduction.............................................................................9
Amplicature de Puissance Stéréo ..........................................9
Input Channels
1. Entrées Mic & Ligne .....................................................9
2. Contrôles Trim suu les 1-6 et DEL d'Adjustement.......10
3. Contrôles de Niveau des Canaux & DEL d'Écrêtage ....10
4. Égalisation de Canel Bass, Moyenne, Aiguë ................10
5. Contrôles Mon sur les Canaux .....................................10
6. Contrôle EFX de Canal ..................................................11
7. Contrôles Pan & Bal......................................................11
Section Maîtraisse
1. Contrôle Maître Principal ..............................................11
2. Contrôle Maître MON ...................................................11
3. MAIN EFFECTS Return Control ....................................11
4. MON EFFECTS Return Control .....................................11
5. Sortie Pré-Égalisateur ...................................................11
6. Prise d'Entrées Pour A,plificateur de Puissance ..........12
7. Prise de Sortie Pour Enregistre Rec Out ......................12
8. Prise MON Out .............................................................12
9. Prise EFX Out / Footswitch ...........................................12
10. Commutateur et DEL d'Alimentation ...........................13
11. Alimentation en Duplex.................................................13
12. Entrée Tape/CD..............................................................13
13. Commutateur Mute 1-8 ................................................13
14. Commutateur Amp Assign ...........................................13
Processeur d'Effet Numérique
1. Contrôle Select et Modify EFX ......................................14
2. DEL d'Écrêtage d'Effet ..................................................14
Built In 9-Band Graphic Equalizer & Shelving EQs
1. Général ..........................................................................14
2. Raisons Principales ......................................................14
Panneau Arriére M810/M1610
1. Les Amplificateurs ........................................................15
2. Commutatuer D'Aliment ...............................................15
Instructions Général D'Opération ..........................................16
Specifications
Block Diagram...............................................................17
1. M810 .............................................................................20
2. M1610 ...........................................................................21
Effects Table ....................................................................23
Tables Des Effets .......................................................................... 23
1
2
3
4
5
6
7
8
9
10
11
12
13
14
15
16
0.5s Bright Small Room
0.5s Warm Small Room
0.5s Dark Small Room
0.8s Bright Small Room
0.8s Warm Small Room
1.0s Bright Small Room
1.0s Warm Small Room
1.2s Bright Medium Room
1.2s Warm Medium Room
1.5s Bright Medium Room
1.5s Warm Medium Room
1.5s Dark Medium Room
2.0s Bright Large Room
2.0s Warm Large Room
2.5s Bright Large Room
2.5s Warm Large Room
ROOMS & THICKENING
DELAYS
0.5s Bright Small Room + 50ms doubling delay
0.5s Warm Small Room + 40ms doubling delay
0.5s Dark Small Room + 40ms doubling delay
0.8s Bright Small Room + 60ms doubling delay
0.8s Warm Small Room + 50ms doubling delay
1.0s Bright Small Room + 70ms slap delay
1.0s Warm Small Room + 50ms doubling delay
1.2s Bright Medium Room + 50ms doubling delay
1.2s Warm Medium Room + 50ms doubling delay
1.5s Bright Medium Room + 80ms slap delay
1.5s Warm Medium Room + 60ms doubling delay
1.5s Dark Medium Room + 70ms slap delay
2.0s Bright Large Room + 80ms slap delay
2.0s Warm Large Room + 60ms doubling delay
2.5s Bright Large Room + 100ms slap delay
2.5s Warm Large Room + 80ms slap delay
ROOMS &
REGENERATION DELAYS
0.5s Bright Small Room + 200ms regen delay
0.5s Warm Small Room + 175ms regen delay
0.5s Dark Small Room + 150ms regen delay
0.8s Bright Small Room + 200ms regen delay
0.8s Warm Small Room + 150ms regen delay
1.0s Bright Small Room + 175ms regen delay
1.0s Warm Small Room + 125ms regen delay
1.2s Bright Medium Room + 150ms regen delay
1.2s Warm Medium Room + 200ms regen delay
1.5s Bright Medium Room + 200ms regen delay
1.5s Warm Medium Room + 175ms regen delay
1.5s Dark Medium Room + 150ms regen delay
2.0s Bright Large Room + 200ms regen delay
2.0s Warm Large Room + 125ms regen delay
2.5s Bright Large Room + 150ms regen delay
2.5s Bright Large Room + 200ms regen delay
1
2
3
4
5
6
7
8
9
10
11
12
13
14
15
16
B
1
2
3
4
5
6
7
8
9
10
11
12
13
14
15
16
C
1
2
3
4
5
6
7
8
9
10
11
12
13
14
15
16
1
2
3
4
5
6
7
8
9
10
11
12
13
14
15
16
1
2
3
4
5
6
7
8
9
10
11
12
13
14
15
16
0.5s Bright Room + slow chorus
0.8s Warm Room + medium chorus
1.0s Bright Room + slow chorus
1.2s Warm Room + medium chorus
1.5s Bright Room + slow chorus
1.8s Warm Room + slow chorus
2.5s Bright Room + medium chorus
3.0s Warm Room + slow chorus
2.0s Bright Hall + slow chorus
2.5s Warm Hall + medium chorus
2.5s Bright Hall + slow chorus
3.0s Warm Hall + slow chorus
3.5s Warm Hall + slow chorus
3.5s Bright Hall + medium chorus
5.0s Warm Hall + slow chorus
8.0s Warm Hall + slow chorus
H
D ROOMS / HALLS
& CHORUS
1
2
3
4
5
6
7
8
9
10
11
12
13
14
15
16
G
1
2
3
4
5
6
7
8
9
10
11
12
13
14
15
16
F
E
A ROOMS
0.8s decay 100ms Gate
0.8s decay 200ms Gate
1.2s decay 100ms Gate
1.2s decay 200ms Gate
1.8s decay 150ms Gate
1.8s decay 200ms Gate
2.0s decay 300ms Gate
2.0s decay 300ms Gate
2.5s decay 250ms Gate
2.5s decay 400ms Gate
0.5s decay 100ms Reverse
0.5s decay 200ms Reverse
1.0s decay 100ms Reverse
1.0s decay 200ms Reverse
2.5s decay 250ms Reverse
4.0s decay 300ms Reverse
GATED / REVERSE
REVERB
1.5s Dark Medium Hall + 150ms regen delay
1.5s Warm Medium Hall + 175ms regen delay
1.5s Bright Medium Hall + 200ms regen delay
2.0s Dark Medium Hall + 200ms regen delay
2.0s Warm Medium Hall + 150ms regen delay
2.0s Bright Medium Hall + 175ms regen delay
2.5s Dark Medium Hall + 200ms regen delay
2.5s Warm Medium Hall + 150ms regen delay
2.5s Bright Medium Hall + 175ms regen delay
3.5s Dark Medium Hall + 125ms regen delay
3.5s Dark Medium Hall + 150ms regen delay
3.5s Bright Medium Hall + 200ms regen delay
5.0s Dark Large Hall + 175ms regen delay
5.0s Bright Large Hall + 200ms regen delay
8.0s Dark Large Hall + 150ms regen delay
8.0s Bright Large Hall + 200ms regen delay
HALLS & REGENERATION
DELAYS
1.5s Dark Medium Hall + 50ms doubling delay
1.5s Warm Medium Hall + 70ms slap delay
1.5s Bright Medium Hall + 90ms slap delay
2.0s Dark Medium Hall + 90ms slap delay
2.0s Warm Medium Hall + 70ms slap delay
2.0s Bright Medium Hall + 50ms doubling delay
2.5s Dark Medium Hall + 70ms slap delay
2.5s Warm Medium Hall + 80ms slap delay
2.5s Bright Medium Hall + 100ms slap delay
3.5s Dark Medium Hall + 80ms slap delay
3.5s Warm Medium Hall + 90ms slap delay
3.5s Bright Medium Hall + 100ms slap delay
5.0s Dark Large Hall + 80ms slap delay
5.0s Bright Large Hall + 100ms slap delay
8.0s Dark Huge Hall + 100ms slap delay
8.0s Warm Huge Hall + 100ms slap delay
HALLS &
THICKENING DELAYS
1.5s Dark Medium Hall
1.5s Warm Medium Hall
1.5s Bright Medium Hall
2.0s Dark Medium Hall
2.0s Warm Medium Hall
2.0s Bright Medium Hall
2.5s Dark Medium Hall
2.5s Warm Medium Hall
2.5s Bright Medium Hall
3.5s Dark Medium Hall
3.5s Warm Medium Hall
3.5s Bright Medium Hall
5.0s Dark Large Hall
5.0s Warm Large Hall
8.0s Dark Huge Hall
8.0s Warm Huge Hall
HALLS
CHAMBERS / PLATES
0.8s Warm Chamber + 50ms doubling delay
0.8s Bright Chamber + 50ms doubling delay
1.2s Warm Chamber + 60ms doubling delay
1.2s Bright Chamber + 70ms slap delay
1.5s Warm Chamber + 70ms slap delay
1.5s Bright Chamber + 80ms slap delay
2.5s Warm Chamber + 80ms slap delay
2.5s Bright Chamber + 100ms slap delay
3.5s Warm Chamber + 90ms slap delay
3.5s Bright Chamber + 100ms slap delay
0.3s Bright Plate + 40ms doubling delay
0.5s Bright Plate + 50ms doubling delay
0.8s Bright Plate + 50ms doubling delay
1.2s Bright Plate + 80ms slap delay
1.5s Bright Plate + 80ms slap delay
2.0s Bright Plate + 100ms slap delay
CHAMBERS / PLATES
+ THICKENING DELAYS
0.8s Warm Chamber
0.8s Bright Chamber
1.2s Warm Chamber
1.2s Bright Chamber
1.5s Warm Chamber
1.5s Bright Chamber
2.5s Warm Chamber
2.5s Bright Chamber
3.5s Warm Chamber
3.5s Bright Chamber
0.3s Bright Plate
0.5s Bright Plate
0.8s Bright Plate
1.2s Bright Plate
1.5s Bright Plate
2.0s Bright Plate
SHORT DELAYS
30ms slap delay
35ms slap delay
40ms slap delay
50ms slap delay
60ms slap delay
70ms slap delay
80ms slap delay
90ms slap delay
100ms slap delay
100ms regen delay
125ms low regen delay
125ms medium regen delay
150ms low regen delay
150ms medium regen delay
175ms low regen delay
175ms medium regen delay
1
2
3
4
5
6
7
8
9
10
11
12
13
14
15
16
0.8s Warm Chamber + 150ms regen delay
0.8s Bright Chamber + 125ms regen delay
1.2s Warm Chamber + 175ms regen delay
1.2s Bright Chamber + 200ms regen delay
1.5s Warm Chamber + 150ms regen delay
1.5s Bright Chamber + 200ms regen delay
2.5s Warm Chamber + 175ms regen delay
2.5s Bright Chamber + 125ms regen delay
3.5s Warm Chamber + 200ms regen delay
3.5s Bright Chamber + 150ms regen delay
0.3s Bright Plate + 125ms regen delay
0.5s Bright Plate + 150ms regen delay
0.8s Bright Plate + 200ms regen delay
1.2s Bright Plate + 175ms regen delay
1.5s Bright Plate + 150ms regen delay
2.0s Bright Plate + 200ms regen delay
L
1
2
3
4
5
6
7
8
9
10
11
12
13
14
15
16
K CHAMBERS / PLATES
+ REGEN DELAYS
1
2
3
4
5
6
7
8
9
10
11
12
13
14
15
16
J
1
2
3
4
5
6
7
8
9
10
11
12
13
14
15
16
I
YORKVILLE SOUND • DIGITAL EFFECTS BY A.R.T.
200ms low regen delay
200ms medium regen delay
225ms low regen delay
225ms medium regen delay
250ms low regen delay
250ms medium regen delay
275ms low regen delay
275ms medium regen delay
300ms low regen delay
300ms medium regen delay
325ms low regen delay
325ms medium regen delay
350ms low regen delay
350ms medium regen delay
375ms low regen delay
375ms medium regen delay
390ms low regen delay
390ms medium regen delay
400ms low regen delay
400ms medium regen delay
410ms low regen delay
410ms medium regen delay
420ms low regen delay
420ms medium regen delay
430ms low regen delay
430ms medium regen delay
450ms low regen delay
450ms medium regen delay
475ms low regen delay
475ms medium regen delay
500ms low regen delay
500ms medium regen delay
1
2
3
4
5
6
7
8
9
10
11
12
13
14
15
16
P
1
2
3
4
5
6
7
8
9
10
11
12
13
14
15
16
TABLE-DIG-EFX-1v0.eps 04/04
Pitch Shift octave down
Pitch Shift octave up
Pitch Shift major 3rd up
Pitch Shift major 5th down
Dual Pitch Shift major 3rd and 5th up
Dual Pitch Shift octave up and octave down
Detune Flanger
Slow Flanger w/ medium regen
Slow Flanger w/ high regen
Medium Flanger w/ medium regen
Medium Flanger w/ high regen
250ms high regen delay
500ms medium regen delay
500ms high regen delay
Slow Flanger + Pitch Shift octave down
Slow Flanger + Pitch Shift ocatve up
SPECIAL EFFECTS
50ms doubling delay + slow chorus
80ms slap delay + medium chorus
100ms slap delay + medium chorus
150ms regen delay + slow chorus
175ms regen delay + medium chorus
200ms regen delay + slow chorus
225ms regen delay + medium chorus
250ms regen delay + slow chorus
275ms regen delay + medium chorus
300ms regen delay + slow chorus
325ms regen delay + medium chorus
350ms regen delay + slow chorus
370ms regen delay + medium chorus
380ms regen delay + slow chorus
390ms regen delay + medium chorus
400ms regen delay + slow chorus
O DELAYS & CHORUS
1
2
3
4
5
6
7
8
9
10
11
12
13
14
15
16
N LONG DELAYS
1
2
3
4
5
6
7
8
9
10
11
12
13
14
15
16
M MEDIUM DELAYS
STEREO DIGITAL EFFECTS
255 PRESET 16 Bit DIGITAL EFFECTS PROCESSOR
WORLD HEADQUARTERS
CANADA
U.S.A.
Yorkville Sound
Yorkville Sound Inc.
550 Granite Court
Pickering, Ontario
L1W-3Y8 CANADA
4625 Witmer Industrial Estate
Niagara Falls, New York
14305 USA
Voice: (905) 837-8481
Fax: (905) 837-8746
Voice: (716) 297-2920
Fax: (716) 297-3689