1
38AJ 008-074 (R-22)
38AZ 008-074 (R-407C)
Air-Cooled Condensing Units
50 Hz
Installation, Operation and Maintenance Instructions
QUALITY ASSURANCE
SYSTEM
1
CONTENTS
Page
Start-up checklist .......................................................................................................................................................................... 3
Dimensions and clearances .......................................................................................................................................................... 4
Physical and electrical data ......................................................................................................................................................... 6
Application data ............................................................................................................................................................................ 7
Operating limits .............................................................................................................................................................................. 7
Installation ..................................................................................................................................................................................... 7
Safety considerations ...................................................................................................................................................................... 7
Preliminary checks ......................................................................................................................................................................... 7
Moving and siting the unit .............................................................................................................................................................. 7
Refrigerant connections ............................................................................................................................................................... 7
Refrigerant piping diagram ............................................................................................................................................................. 8
General recommendations for field installation ............................................................................................................................. 8
Accessories ................................................................................................................................................................................... 11
Power supply ............................................................................................................................................................................... 11
Start-up ........................................................................................................................................................................................ 11
Preliminary checks ....................................................................................................................................................................... 11
Electrical checks ........................................................................................................................................................................... 11
Unit start-up .................................................................................................................................................................................. 11
Capacity control systems ........................................................................................................................................................... 11
Pressure-operated control valve ................................................................................................................................................... 11
Control setpoint ............................................................................................................................................................................ 11
Setpoint control ............................................................................................................................................................................ 11
Pressure differential ...................................................................................................................................................................... 12
Modifications ................................................................................................................................................................................ 12
Servicing refrigeration components .......................................................................................................................................... 13
General maintenance .................................................................................................................................................................... 13
Liquid refrigerant charging ........................................................................................................................................................... 13
Compressors ................................................................................................................................................................................. 13
Compressor protection circuit board (STARTERGUARD) ......................................................................................................... 14
Oil pressure safety switch ............................................................................................................................................................. 14
Compressor protection devices ..................................................................................................................................................... 14
Condenser coil .............................................................................................................................................................................. 14
Fan motor replacement ................................................................................................................................................................. 15
Fan motor protection .................................................................................................................................................................... 15
Refrigerant circuit ......................................................................................................................................................................... 15
Troubleshooting chart ................................................................................................................................................................ 16
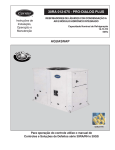
The photo shown on the front cover is solely for information, and not contractually binding. The manufacturer reserves the right to make changes
without previous notification.
2
START-UP CHECK LIST
Start-up date:
Equipment sold by:
Contract No.:
Installed by:
Contract No.:
Site address:
Equipment type and serial numbers:
Electrical data:
Supply voltage:
Ph.
Nominal voltage:
V
Current draw:
Ph. 1
V
Ph. 2
V
Ph. 3
V
A
Ph. 3
A
% network voltage:
Control circuit voltage
A
Ph. 2
V
Circuit breaker calibration
A
Main circuit breaker rating:
A
Physical data:
Condenser:
Compressor:
Entering air temperature:
°C
Leaving air temperature:
°C
Pressure drop (air):
kPa
Discharge air pressure:
Suction gas pressure:
kPa
°C
Circuit 2: Suction gas temperature:
Pa
Fan speed:
°C
Circuit 1: Suction gas temperature:
Suction gas pressure:
kPa
r/s or rpm
Fan motor input:
Ph. 1
V
Ph. 2
V
Ph. 3
V
Ph. 1
V
Ph. 2
V
Ph. 3
V
Ph. 1
V
Ph. 2
V
Ph. 3
V
Ph. 1
V
Ph. 2
V
Ph. 3
V
Safety device setting:
High pressure switch:
cut-out
kPa:
cut-in
kPa
Low-pressure switch:
cut-out
kPa
cut-in
kPa
Control thermostat:
cut-out first step
°C
cut-in first step
°C
cut-out second step
°C
cut-in second step
°C
Oil level:
Oil visible in sight glass:
Colour of moisture indicator:
Air bubbles visible in sight glass:
Accessories:
Commissioning engineer (name):
Name
Date
Remarks:
NOTE: Please fill in this sheet during the installation
3
Dimensions and clearances
38AJ/AZ
A
B
C
D
E
F
G
008-012
014-024
030-036
046
062-074
1220
1720
2060
2450
2900
1160
1160
1370
1870
2156
977
1112
1231
1912
2060
1200
1200
1000
2500
2500
1000
1000
1000
1200
1200
1000
1000
1000
500
500
1000
1000
1200
1200
1200
38AJ/AZ 008-012
Do not obstruct
38AJ/AZ 014-024
Do not obstruct
38AJ/AZ 030-036
Do not obstruct
Legend:
All dimensions are given in mm.
Required clearance space for servicing
Power supply
Water inlet
Water outlet
NOTE: The drawings above are not contractually binding.
Certified dimensional drawings are available on request
4
Dimensions and clearances
38AJ/AZ 062-074
38AJ/AZ 046
Do not obstruct
Do not obstruct
Floor mounting
•
•
For unit mounting holes, weight distribution and centre of gravity coordinates, refer to the dimensional
drawings supplied with the unit.
These units are designed for outdoor installation.
CAUTION:
•
•
•
•
Ensure the air flow around the unit is not obstructed.
At least two sides of the units must be free from obstructions, to ensure proper air flow.
If several units are installed, next to each other, ensure that the space in between the units is the same as the
unit depth.
There must not be any roof or cover above the unit.
5
Physical data
38AJ/AZ
008
010
012
014
018
024
030
036
046
062
074
Nominal cooling capacity 38AJ*
Nominal cooling capacity 38AZ*
kW
kW
23.3
21.5
29.4
27.5
36.5
34.2
51.0
47.3
61.0
57.0
76.0
69.0
93.0
85.0
119.0
113.0
139.0
129.0
170.0
158.0
233.0
219.0
Operating weight**
kg
248
431
477
644
682
1185
1422
1492
1
2
66
1
2
66
1
2
66
2
4
33
2
4
33
2
4
33
250
264
376
Refrigerant
38AJ
38AZ
R-22
R-407C
Compressor
Number of compressors
Number of capacity steps
Minimum capacity
Hermetic
1
1
1
1
100
100
1
1
100
Semi-hermetic
1
1
2
2
66
50
%
Outdoor coil
Copper tubes and aluminium fins
Fan
Quantity
Total air flow
Speed
Direct drive, propeller
1
1
1
2640
2640
2640
15
15
15
Shrouded axial, Flying Bird low-noise fan
1
1
1
2
4700
4700
4700
9400
12.5
12.5
12.5
12.5
2
9400
12.5
2
9400
12.5
4
18800
12.5
4
18800
12.5
1-1/8
5/8
1-3/8
5/8
Pipe connection diameter
Suction line
Liquid line
l/s
r/s
in
1-1/8
5/8
1-1/8
5/8
1-5/8
5/8
1-5/8
7/8
1-5/8
7/8
2-1/8
7/8
1-5/8
7/8
2-1/8
7/8
2-1/8
7/8
024
030
036
046
062
074
Legend:
* Nominal capacities are based on:
- a saturated suction temperature (R-22) or a suction dew point temperature (R-407C) of 7.2°C
- an outdoor air temperature (OAT) of 35°C
** Unit weight without options
Electrical data
38AJ/AZ
Power supply
Nominal power supply
Voltage range
008
010
012
014
018
V-ph-Hz 400-3-50
V
360-440
Auxiliary circuit
Auxiliary circuit power input
(heaters)
V-ph-Hz 230-1-50
W
70
70
100
200
200
200
200
400
400
400
Fan power input
Fan power supply
kW
0.70
0.70
400-3-50
0.70
1.14
1.14
1.14
2.30
2.30
2.30
4.60
4.60
Nominal unit power input*
kW
7.5
10.4
14.5
13.5
18.3
25.9
27.0
39.4
51.0
55.0
77.0
Maximum unit power input**
kW
8.6
13.0
16.1
18.6
22.3
29.2
34.9
47.3
59.0
70.0
95.0
400 V-3 ph-50 Hz (360 V-440 V)
Maximum starting current (ICF)
Nominal unit current drawn*
Maximum unit current drawn**
A
A
A
81
12.9
24.5
110
17.8
31.0
135
24.9
38.5
84
23.2
34.0
104
31.5
38.9
134
44.5
51.0
152
46.4
60.0
207
68.0
83.0
194
88.0
102.0
219
95.0
120.0
296
133.0
166.0
230 V-3 ph-50 Hz (207 V-253 V)
Maximum starting current (ICF)
Nominal unit current drawn*
Maximum unit current drawn**
A
A
A
140
22.3
42.4
190
30.9
54.0
233
43.2
67.0
146
40.2
59.0
180
55.0
67.0
232
77.0
88.0
263
80.0
104.0
359
117.0
144.0
336
152.0
177.0
379
165.0
208.0
512
230.0
288.0
70
Legend:
* Saturated suction temperature (R-22) or a suction dew point temperature (R-407C) of 7.2°C, outdoor air temperature (OAT) of 35°C
** Maximum unit operating conditions (saturated suction temperature (R-22) or a suction dew point temperature (R-407C) of 10°C, saturated discharge temperature (R22) or discharge dew point temperature of 68.3°C.
*** ICF = maximum instantaneous current during starting, equal to the current value of the last compressor to start, plus the sum of the maximum currents of the other
compressors and fans ooperating.
Electrical data notes:
•
•
The units have a single power connection point.
A separate power source (230 V, 1 ph, 50 Hz) that does not exceed the main switch
capacity is required to power the compressor crankcase heater circuit. This source
must be supplied from a transformer. It must not be supplied from a phase + neutral
supply (for ground + neutral systems).
• The control box includes the following standard features:
Starter and motor protection devices for each compressor and the fan(s)
Control devices
• Field connections:
All connections to the system and the electrical installations must be in full
accordance with all applicable local codes.
• These Carrier units are designed and built to ensure conformance with local codes.
The recommendations of European standard EN 60 204-1 (machine safety - electrical
machine components - part 1: general regulations) are specifically taken into account,
when designing the electrical equipment.
NOTES:
• Conformance with EN 60 204 is the best means of ensuring compliance with the
Machines Directive § 1.5.1. Generally the recommendations of IEC 364 are accepted
as compliance with the requirements of the installation directives.
•
6
Annex B of EN 60204-1 describes the electrical characteristics used for the operation of
the machines.
1. The operating environment for these units is specified below:
• Environment* - Environment as classified in EN 60 721:
outdoor installation*
ambient temperature range: -25°C to +46°C, class 4K4H*
altitude: < 2000 m*
presence of hard solids, class 4S2 (no significant dust present)
presence of corrosive and polluting substances, class 4C2 (negligible)
vibration and shock, class 4M2
• Competence of personnel, class BA4* (trained personnel - IEC 364)
2. Power supply frequency variation: ± 2 Hz.
3. The neutral (N) line must not be connected directly to the unit (if necessary use a
transformer).
4. Overcurrent protection of the power supply conductors is not provided with the unit.
5. The optional factory-installed circuit breaker is of type “a” (EN 60 204-1 § 5.3.2).
NOTE: If particular aspects of an actual installation do not conform to the conditions
described above, or if there are other conditions which should be considered, always
contact your local Carrier representative.
* The required protection level for this class is IP43BW (according to reference
document IEC 529). All units are protected to IP44CW and fulfill this protection
condition.
APPLICATION DATA
Moving and siting the unit
Operating limits
Moving
Do not remove skids, pallets or protective packaging until the
unit is in its final position. Move the chiller using tubes or
rollers, or lift it, using slings of the correct capacity.
Varifan III (option)
The Carrier Varifan III allows adjustment of the fan speed or of
the three-phase motors (400 V-3 ph-50 Hz) at low outdoor
temperatures.
Varifan III is an adjustment device that is directly controlled by
a pressure transducer that permits very precise maintenance of
the condensing pressure.
38AJ/AZ
008-024
030-036
046-074
Min. outdoor air temperature °C
Unit with Varifan option
Standard unit
-18
12
-18
2
-18
0
INSTALLATION
SAFETY CONSIDERATIONS
Installation, start-up and servicing this equipment can be
hazardous due to system pressures, electrical components and
equipment location (roofs, elevated structures, etc.).
NOTE: Only trained, qualified installers and service
mechanics should install, start-up and service this equipment.
When working on the equipment, observe precautions in the
literature, and on tags, stickers, and labels attached to the
equipment.
•
•
•
Follow all safety codes.
Wear safety glasses and work gloves.
Use care in handling, rigging and setting down bulky
equipment.
WARNING: Before doing any work ensure that the power
supply (400 V and 230 V) is disconnected, and switches and
isolators are opened and tagged.
During operation some parts of the unit reach or exceed
temperatures of 70°C (e.g. compressor discharge side,
discharge line). Only trained and qualified engineers, aware of
these hot surfaces, are allowed to perform maintenance
operations.
Preliminary checks
Check equipment received
•
Inspect the unit for damage or missing parts. If damage is
detected, or if shipment is incomplete, immediately file a
claim with the shipping company.
•
Confirm that the unit received is the one ordered.
Compare the nameplate data with the order.
•
Confirm that all accessories ordered for on-site installation
have been delivered, and are complete and undamaged.
Siting
Before siting the unit check that :
•
•
•
•
•
•
the permitted loading at the site is adequate or that
appropriate strenghtening measures have been taken.
the surface is horizontal, flat and intact.
there is adequate space around the unit to make power and
water connections for service and air flow.
there are adequate support points and that they are in the
right places.
the location is not subject to flooding.
where heavy snowfall is likely and long periods of subzero temperatures are normal, provision has been made to
prevent snow accumulating by raising the unit above the
height of drifts normally experienced.
Baffles may be necessary to deflect strong winds and to
prevent snow from blowing directly into the unit. They
must not restrict air flow into the unit.
CAUTION: Before lifting the unit, check that all casing panels
are securely fixed in place. Lift and set down the unit with
great care. Tilting and jarring can damage the unit and impair
unit operation. Only use slings at the designated lifting points
which are marked on the unit.
The 38AJ/AZ units can be hoisted with rigging or lifted by
forklift. Coils should always be protected against crushing
while a unit is being moved. Use struts or spreader bars to
spread the slings above the unit. Do not tilt a unit more than 15°.
WARNING: Never push or lever on any of the enclosure panels
of the unit. Only the base of the unit frame is designed to
withstand such stresses.
REFRIGERANT CONNECTIONS
Size the refrigerant lines. Consider the length of piping
required between condensing unit and evaporator, the amount
of liquid lift, and the compressor oil return.
Refer to the dimensional drawings for the size, type and
location of the suction and liquid line pipe connections. Refer
to the Carrier System Design Manual (Refrigerant lines).
Include a liquid receiver in the installation.
7
Refrigerant piping diagram
Soldered plug with
pressure equalisation
port. To be removed
during installation.
Legend:
1 Condenser
2 Liquid line valve
3 Filter drier
4 Sight glass
5 Fan cycling pressure switch
6 Suction valve
7
8
9
A
B
C
Compressor
Discharge valve
Muffler
Circuit 1
Circuit 2
Option No. 97
NOTE: The typical refrigeration circuit diagram shown does
not apply to all control types used.
Single circuit only for 38AJ/AZ 008-036 units
General recommendations for field installation
Installation of piping
Thermostatic expansion valve (TXV) and solenoid valve
IMPORTANT:
•
In order to prevent vibration and possible pipe breaks
install proper pipe supports for all pipes at the point
where they leave the unit.
•
On all units, relieve the pressure of the holding charge
before opening the circuit.
•
•
•
8
The thermal expansion valve sensing bulb must be
installed after at least two 90° bends at the evaporator
outlet.
Ideally the TXV should be installed in a vertical pipe run.
If that is not possible, the valve may be rotated through a
full 90°, with the horizontal pipe remaining at the base.
The TXV and solenoid valves are installed as shown in
Figs. 1 to 5 (pages 9 and 10).
Liquid line solenoid valves are not necessary, if
single-circuit evaporators are used and the evaporator
has sufficient capacity to hold the whole refrigerant
charge. In this case the unit wiring must be modified;
please refer to Carrier Service Bulletin No. SB 00576-96 E.
Solenoid valves are needed with dual-circuit
evaporators to deactivate the upper section of the
evaporator coil and reduce the load on the
compressor (capacity unloaders operated by suction
pressure).
•
•
•
•
Open all service valves:
on models 014 to 074, open the compressor suction
and discharge valves
on all models, open the liquid line shut-off valves.
Remove the protective cap from the Schrader port in the
liquid line valve and press on the valve depressor to
release the holding charge (nitrogen).
Unsolder the plugs and prepare the pipes for connection.
Install the filter-drier and moisture indicator (for 38AZ
units these must be specific for R-407C), as shown in
Figs. 1 to 5. Select the filter-drier for maximum unit
capacity and minimum pressure drop. Install the filterdrier in the liquid line before the expansion valve and the
moisture indicator just after the shut-off valve in the same
line. These are available as factory-fitted option 97.
•
•
•
The second moisture indicator must be installed close to
the condenser to provide a means of checking the
refrigerant charge.
Complete the liquid line valve connections between the
moisture indicator and the evaporator.
Complete the low-pressure suction line connections
between the compressor and the evaporator. Do this with
nitrogen or another inert gas flowing through the
pipework to prevent oxidation of the copper.
Oil return
Condensing units with multiple-step unloading may require
double suction risers to ensure proper oil return at minimum load.
A reduction of the evaporator coil surface should be considered
as a means of achieving a refrigerant velocity that will ensure
that enough oil returns to the compressor. Liquid line solenoid
valves may be used in certain situations to accomplish this.
Bypass hot gas, if used, should be introduced before the
evaporator. Consult your local Carrier distributor.
The oil charge must be adjusted to allow for extra line length.
This is done by adding 1% of the nominal oil charge for the
compressor every 3 m of piping in excess of 16 m.
Insulation
The refrigerant suction line should be insulated in accordance
with the guidelines set forth in the Carrier System Design
Manual (3rd part).
Fig. 1 - 38AJ/AZ 008-036, single evaporator
Legend:
1 38AJ/AZ liquid line
2 Filter drier
3 Solenoid valve
4 Evaporator
5 Thermostatic expansion valve TXV
6 Moisture sight glass
Fig. 2 - 38AJ/AZ 014-036, dual evaporator
Legend:
1 Solenoid valves
2 Thermostatic expansion valve TXV
3 Evaporator
4 Moisture sight glass
5 Filter drier
6 Liquid line
Fig. 3 - 38AJ/AZ 046-074, single evaporator
Legend:
1 38AJ/AZ liquid line
2 Filter drier
3 Solenoid valve
4 Evaporator
5 Thermostatic expansion valve TXV
6 Moisture sight glass
A Circuit 1
B Circuit 2
9
Fig. 4 - 38AJ/AZ 046-074, dual evaporator
Legend:
1 Solenoid valves
2 Thermostatic expansion valve TXV
3 Evaporator
4 Moisture sight glass
5 Filter drier
6 Liquid line
A Circuit 1
B Circuit 2
Fig. 5 - Suction line piping to three-section split evaporator coil
Legend:
1 "L" reduction
2 "T" reduction
3 To compressor (via double suction riser if necessary)
4 TXV sensing bulb
5 10 x dia. min.
6 8 x dia. min.
7 Reduction coupling
8 Air flow
9 Coil end centre line
A Upper section
B Middle section
C Lower section
Notes:
1. The suction line is connected to the coil entering air side.
2. For a single-section coil use the piping shown for the upper section. For coils with two sections use the piping shown for the upper and the middle sections.
3. The lower section is always the first section to be activated and the last to be shut off.
4. Refer to the Carrier System Design Manual, Part 3, for more guidance on piping techniques.
Fig. 6 - Suction line piping
Legend:
A Suction riser without trap
B Suction riser with trap
C Suction riser line to condensing unit
1 Evaporator
2 1 m max.
3 Condensing unit
10
ACCESSORIES
The field-installed accessories are shipped with full installation
instructions and/or a wiring diagram.
•
Single- or two-stage low voltage thermostat.
•
Additional capacity unloader
•
Fan speed controller to maintain the condensing pressure
in the winter months
•
Hot gas bypass
•
Control circuit transformer
•
Coil protection grilles
•
Compressor operating hours counter
•
Compressor oil differential pressure gauge
•
Gauge panel (HP-LP)
•
•
•
•
•
Open the compressor suction and discharge line valves,
and then close them one turn each to stabilise the pressure
to the control gauges (if fitted).
Open the liquid line service valves.
Check that the compressor sight glasses show an oil level
between 1/8 and 3/8 (check all compressors).
Check that there are no refrigerant leaks.
Confirm that the discharge muffler securing bands are
secure.
Electrical checks
Switch the power off.
Open the control circuit switch. Check the mains supply
voltage at the power supply bus bars.
Power supply
The power supply must conform to the specification on the
chiller nameplate. The supply voltage must be within the range
specified in the electrical data table.
For connections refer to the wiring diagrams.
WARNING: Operation of the chiller with an improper supply
voltage or with excessive phase imbalance constitutes abuse
which will invalidate the Carrier warranty. If the phase
imbalance exceeds 2% for voltage, contact your local
electricity supply company at once and ensure that the chiller
is not switched on until corrective measures have been taken.
Voltage phase imbalance (%) :
= 100 x max.deviation from average voltage deviation
Average voltage
•
•
•
•
Check the connections to the transformers.
Check the control circuit with reference to the unit wiring
diagram.
Check the tightness of all electrical connections
(terminals, connectors, bus bars etc.)
Check the direction of rotation of the three-phase fan
motors. Viewed from above the unit the direction of
rotation of the plastic blades must be counter-clockwise.
Swap any two of the three wires to correct the direction of
rotation, if necessary.
Unit start-up
Set the room thermostat to a temperature that is lower than the
room temperature in order to try to start up the unit. After this
check reset the thermostat to the set point which corresponds to
the required temperature.
Pressure-operated capacity control valves
WARNING: Never switch off the power supply to the crankcase
heaters unless the chiller is out of service for a seasonal
shutdown or lengthy repair. The heaters must be re-energised
for at least 24 hours before the chiller is restarted.
Start-up
IMPORTANT: Commissioning and start-up of the chiller must
be supervised by a qualified refrigeration engineer.
Preliminary checks
Before the unit pre-start-up, or start-up follow the start-up
checklist on page 3 of this document. Use of this list will
ensure a troublefree start-up, maintaining the initial operating
parameters.
Never start the unit, even momentarily, without fully
understanding the instructions in this document and without
having taken the following precautions:
•
Confirm that the power supply corresponds to the data on
the unit nameplate.
•
Check that the crankcase heaters are securely in place.
•
Touch the compressor crankcase to confirm that the
crankcase heaters are working. Each compressor is
equipped with a heater (see wiring diagram) which is
energized when the unit is switched off to ensure proper
lubrication of the compressor.
See Fig. 7 and capacity reduction table.
Pressure-operated control valve
These valves are suction pressure-controlled and discharge
pressure-actuated. Each valve controls two cylinders. At startup the controlled cylinders do not load up until the differential
between the suction and discharge pressure is 70 kPa (10 psig).
Control setpoint
The cylinder control setpoint is set between 0 kPa and 586 kPa.
The differential pressure (difference in pressure between the
suction and discharge ports in a cylinder) is controllable
between 41 kPa and 152 kPa.
Setpoint control (cylinder load point)
Turn adjustment nut 햲 clockwise to its maximum position.
The setpoint is now 586 kPa.
The setpoint can now be adjusted to the desired pressure by turning the adjustment nut counter-clockwise. The number of turns
required can be determined from the curve. Each full turn counterclockwise decreases the setpoint by approximately 51 kPa.
11-1/2 turns will decrease the setpoints from 586 kPa to 0 kPa.
11
Pressure differential (difference between cylinder
load point and unloader points)
The capacity control factory settings for 4-cylinder units are:
475 kPa gauge control setpoint (cylinder load point), 70 kPa
differential, 405 kPa gauge cylinder unload point.
Turn the adjusting screw 햵 counter-clockwise to its back stop
position. In this position the differential is 41 kPa. The pressure
differential is set by turning the adjusting screw clockwise. Each
full turn increases the differential by 10 kPa. Approximately 10
turns clockwise will increase the pressure to 152 kPa.
The settings for 6-cylinder units are: the left cylinder bank
setpoint is 482 kPa gauge (70 kPa differential); the right
cylinder bank setpoint is 469 kPa gauge (70 kPa differential).
Fig. 7 - Pressure-operated control valve
Legend:
1 Control setpoint adjustment screw
2 Valve body
3 Sealing cap (covering the differential adjustment screw)
4 Differential pressure adjustment screw
Modifications
It is possible to convert pressure-controlled capacity reductions to electrically controlled reductions or to add capacity reductions
in accordance with the table below.
38AJ/AZ
Pressure-controlled
unloader standard
Possibility of changing
press. to electric unloader
Possibility of 2
pressure-contr. unloaders
008
010
012
014
018
024
030
036
046
062
074
yes
yes
yes
yes
yes
yes
yes
yes
yes
yes
yes
yes
yes
yes
yes
yes
yes
yes
yes
yes
yes
yes
yes
yes
Low and high pressure switch control and condensing pressure pressostat control
Pressostat control:
38AJ/AZ
High pressure, kPa
Opens
Closes
Low pressure, kPa
Opens
Closes
Condensing pressure, kPa
Opens
Closes
008-012
014-036
046-074
2500
2900
2900
50
50
240
870
870
12
2150
2200
2500
150
150
390
1820
1820
SERVICING REFRIGERATION COMPONENTS
Any technician attending the machine for any purpose must be
a fully qualified refrigeration engineer.
WARNING: Before doing any work on the machine ensure that
the power is switched and locked off and that all isolators are
tagged. If a refrigerant circuit is opened, it must be evacuated,
and recharged, after ensuring that the refrigerant is clean and
free from impurities, the filter-drier has been changed and the
unit has been tested for leaks. Before any operation on a
refrigerant circuit, it is necessary to remove the complete
charge of refrigerant from the unit with a refrigerant charge
recovery group.
Refrigerant guidelines
Refrigeration installations must be inspected and maintained
regularly and rigorously by specialists. Their activities must be
overseen and checked by properly trained people.
To minimise discharge to the atmosphere, refrigerants and
lubricating oil must be transferred using methods which reduce
leaks and losses to a minimum.
•
•
•
General maintenance
•
Keep the unit itself and the space around it clean and free of
obstructions. Remove all rubbish such as packing materials, as
soon as the installation is completed.
•
Regularly clean the exposed pipework to remove all dust and
dirt. This makes detection of water leaks easier, and they can
be repaired before more serious faults develop.
Confirm that all screwed and bolted connections and joints are
secure. Secure connections prevent leaks and vibration from
developing.
Check that all insulation joints are securely closed and that all
insulation is firmly in place. Check all heat exchangers and all
pipework.
Confirm regularly that any phase imbalance in the three-phase
power supply is within acceptable limits.
Lubricate the hinges, locks and latches on the electrical control
box doors sparingly.
Liquid refrigerant charging
Checking the charge
Run the unit at full capacity for some time and then add
refrigerant until there are no bubbles in the sight glass. This
will generally mean adding more refrigerant than would be
needed to prevent bubbles from being seen in the sight glass.
WARNING: To ensure proper operation of these units there
must be at least 5 K of subcooling as the liquid refrigerant
enters the expansion valve (difference between the saturated
pressure at the liquid valve and the liquid temperature).
The 38AJ/AZ units use a liquid refrigerant charge. For your
information, we are reproducing here some extracts from the
official publication dealing with the design, installation,
operation and maintenance of air conditioning and refrigeration systems and the training of people involved in these
activities, agreed by the air conditioning and refrigeration
industry.
Leaks must be repaired immediately
A valve on the condenser liquid refrigerant outlet line
enables the refrigerant charge to be transferred to the
receiver provided specifically for this purpose.
If the residual pressure is too low to make the transfer
alone, a purpose-built refrigerant recovery unit must be
used.
Compressor lubricating oil contains refrigerant. Any oil
drained from a system during maintenance must therefore
be handled and stored accordingly.
Refrigerant under pressure must never be discharged to
the atmosphere.
CAUTION: 38AZ units are designed to run on refrigerant
HFC-407C. This non-azeotropic refrigerant blend consists of
23% R-32, 25% of R-125 and 52% R-134a, and is characterised by the fact that at the time of the change in state the
temperature of the liquid/vapour mixture is not constant, as
with azeotropic refrigerants. All checks must be pressure tests,
and the appropriate pressure/temperature ratio table must be
used for the interpretation of the values.
Leak detection is especially important for units charged with
refrigerant R-407C. Depending on whether the leak occurs in
the liquid or in the vapour phase, the proportion of the
different components in the remaining liquid is not the same.
Undercharge
If there is not enough refrigerant in the system, this is indicated
by gas bubbles in the moisture sight glass. There are two
possiblities:
•
Small undercharge (bubbles in the sight glass, no
significant change in suction pressure).
After detection and repair the unit can be recharged.
The replenishment of the charge must always be done
in the liquid phase at the liquid line. The refrigerant
cylinder must contain a minimum of 10% of its initial
charge.
•
Significant undercharge (large bubbles in the sight glass,
drop in suction pressure).
After detection and repair completely drain the
refrigerant charge, using a refrigerant recovery unit,
then recharge completely, following the precautions
given above.
Compressors
Checking the oil charge
Check the oil level and add or remove oil as necessary so that
the level is 1/8 to 3/8 up each sight glass with the compressors
running normally.
WARNING: Use only oils which have been approved for use in
refrigeration compressors. Never use oil which has been
exposed to air.
13
CAUTION: R-22 oils are absolutely not compatible with R-407C.
To restart the unit press the manual reset button on the main
circuit breaker and set the fan switch to OFF and then to ON.
Recommended oil:
R-22 semi-hermetic compressors:
Mineral oil, Carrier specification No. PP 33-02
Suniso 3 GS (Sun Oil Co)
Capella WF 32-150
Clavus G 32 (Shell Oil Co)
Gargoyle Artic (Mobil Oil) - original charge
R-407C semi-hermetic compressors:
Polyester oil without additives (POE), Carrier
specification No. PP 47-26
Polyolester Mobil Oil EAL 68
WARNING: All fixing devices and fittings which may have
been removed during servicing must always be replaced upon
completion of the work and before restarting the unit.
Tightening torques to be applied
Description
Diameter, mm
Torque, Nm
Discharge valve
Cylinder head
Suction and liquid line flange
Suction valve
M16
M12
M12
M16
135-140
75-87
75-87
135-140
Compressor protection circuit board (STARTERGUARD)
The purpose of this card is to monitor the compressor
operating environment, in particular:
•
•
•
•
the crankcase heaters
the contactors
the part winding start timer
the control wiring between these components
The status of the controlled components is displayed via three
different-coloured LEDs:
•
Green LED: correct operation
•
Orange LED: signals that the magnetic loop of the card
has detected the presence of a current, either in the
compressor crankcase heater or in the compressor motor.
•
If the green and orange LEDs are illuminated together,
this indicates that there is no fault.
Red LED - fault related to:
the heater, if the orange LED is not lit
the contactor or the power line of the compressor
motor, if the orange LED is lit
If a fault is detected, the compressor is shut down.
Power supply and resetting:
The STARTERGUARD card uses 24 V AC ± 10%, 50 Hz or
60 Hz. When a fault occurs, the 24 V supply must be
interrupted and then restored, in order to reset the card. The
green LED lights up.
Oil pressure safety switch
38AJ/AZ 014-074 units have an oil pressure safety switch
which shuts down the unit if the oil differential pressure at the
compressor either fails to reach or to be held at the proper level.
14
NOTE: Damage resulting from failure to follow these
instruction is not covered by the product warranty.Compressor
motor protection
Compressor protection devices
Circuit breaker
Calibrated, thermo-magnetic, manually reset circuit breaker
protects the compressors against locked rotors and overloads. It
also offers protection against excessive current draw up to the
trip capacity given in the wiring diagram.
WARNING: Never bypass a circuit breaker or increase its
setting. If a circuit breaker trips, find out why it has done so
and correct the problem before resetting the breaker.
Discharge gas thermostat DGT - 38AJ/AZ 018-074
A sensor in each compressor discharge line opens to shut down
the compressor if the discharge gas temperature exceeds the
preset level.
Cut out 146°C
Cut in 113°C
Crankcase heater
Each compressor is fitted with an electric resistance crankcase
heater which prevents any absorption of refrigerant by the
compressor lubricating oil when the compressor is shut down.
Each heater is held in place by a screw clip which must be
secure. Prolonged exposure of the heater to air will result in its
destruction. The heater is energized when the compressor is
switched off.
WARNING: Never open or disconnect any switch or circuit
breaker which will cut the supply to the heaters, unless the unit
is to be shut down for lengthy service or repair or for a
seasonal shut down. In all cases the heater must be energised
for at least 24 hours before a compressor is restarted.
Condenser coil
We recommend, that finned coils are inspected regularly to
check the degree of fouling. This depends on the environment
where the unit is installed, and will be worse in urban and
industrial installations and near trees that shed their leaves.
For coil cleaning proceed as follows:
•
Remove fibres and dust collected on the condenser face
with a soft brush (or vacuum cleaner).
•
Clean the coil with the appropriate cleaning agents.
We recommend TOTALINE products for coil cleaning:
Part No. P902 DT 05EE: traditional cleaning method
Part No. P902 CL 05EE: cleaning and degreasing.
These products have a neutral pH value, do not contain
phosphates, are not harmful to the human body, and can be
disposed of through the public drainage system.
Depending on the degree of fouling both products can be used
diluted or undiluted.
For normal maintenance routines we recommend using 1 kg of
the concentrated product, diluted to 10%, to treat a coil surface
of 2 m2. This process can either be carried out with a
TOTALINE applicator gun (part No. TE01 WA 4000EE) or
using a high-pressure spray gun in the low-pressure position.
With pressurised cleaning methods care should be taken not to
damage the coil fins.
•
The spraying of the coil must be done:
- in the direction of the fins
- in the opposite direction of the air flow direction
- with a large diffuser (25-30°)
- at a distance of 300 mm.
CAUTION: On unit sizes 38AJ/AZ 014-074 the fan rotation is
counter clockwise, viewed from above.
Withdraw the fan motor.
Installation is in the reverse order. Take care not to damage the
plastic components when installing the fan and position the fan
to maintain a clearance of 170 + 0/2 mm between the upper
edge of the fan and the upper edge of the volute. The tightening
torque on the fan motor support fixing screws must be 9 Nm.
38AJ/AZ 014-074 fan
The two cleaning products can be used for any of the following
coil finishes: Cu/Cu, Cu/Al, Cu/Al with Polual, Blygold and/or
Heresite protection.
170 + 0 mm
2
Maximum
clearance
It is not necessary to rinse the coil, as the products used are pH
neutral. To ensure that the coil is perfectly clean, we
recommend rinsing with a low water flow rate. The pH value
of the water used should be between 7 and 8.
WARNING: Never use pressurized water without a large
diffusor. Concentrated and/or rotating water jets are strictly
forbidden.
Correct and frequent cleaning (approximately every three
months) will prevent 2/3 of the corrosion problems.
WARNING: Never use pressurized air or water, as this will
damage the fins, and always clean them against the normal air
flow direction.
Fan motor replacement
38AJ/AZ 008-012 units
Follow the safety considerations. Fan motors can be easily
removed through the top of the unit. Take care not to damage the
propeller. Label the wires to facilitate correct reassembly later.
Fan motor protection
All fan motors have thermal protection which will stop the
current flow when the fan motor temperature becomes too
high. The fans will restart automatically when the motor
temperature drops to a safe level. In addition all fan motors are
protected by one or several circuit breakers.
Refrigerant circuit
Liquid line service valve
This valve provides, in each circuit, a liquid refrigerant charging
port and, in conjunction with the compressor discharge line
valves, enables liquid refrigerant to be pumped to the high
pressure side of the system.
38AJ/AZ 008-012 fan
80 mm + 0 mm
2
Maximum
clearance
38AJ/AZ 018-024 units
This presents no special problems. The work is done from
above the unit.
•
Remove the grille with its support air duct assembly.
•
Remove the fan shaft protection cap.
•
Pull the fan from the shaft using a FACOM U35, or
similar, hub puller.
•
Unscrew the fan motor fixing bolts.
WARNING: Remove only the lower bolts to prevent the
motor from falling.
15
TROUBLESHOOTING CHART
Below we list a series of possible faults, along with the probable causes and suggested solutions. In the event of a unit
malfunction, it is advisable to disconnect the power supply and ascertain the cause.
SYMPTOMS
CAUSE
REMEDY
Compressor does not run
Power line open
Tripped circuit breaker
Reset circuit breaker
Check control circuit for ground or short; repair and
reset breaker
Reset thermostat
Replace contactor
Check connections
Check wiring and rewire
Check line voltage - determine location of voltage
drop and remedy deficiency
Check motor windings for open or short. Replace
compressor, if necessary
Replace compressor
Check chilled water pump. Check switch.
Safety thermostat tripped
Contactor stuck open
Loose terminal connection
Improperly wired controls
Low line voltage
Compressor motor defective
Seized compressor
Chilled water flow switch open
Compressor stops or cycles rapidly on
low-pressure control
Low-pressure control erratic in action
Compressor discharge valve partially closed
Low refrigerant charge
Filter-drier blocked or fouled
Compressor cycles rapidly on highpressure control
High-pressure control erratic in action
Compressor discharge valve partially closed
Air in system
Condenser fan(s) not operating or low air flow
Raise differential setting. Check capillary for pinches.
Replace control.
Open valve
Add refrigerant
Clean strainer. Clean or replace.
Check capillary tube for pinches. Set control as
required.
Open valve, or replace if defective.
Purge, dehydrate and recharge.
Check motor and wiring. Repair or replace if defective.
Check fan position and security on shaft.
Operating cycles too long or continuous
operation
Low refrigerant charge
Control contacts fused
Air in system
Partially blocked or blocked expansion valve or strainer
Defective insulation
Inefficient compressor
Add refrigerant.
Replace control device concerned
Purge
Clean or replace
Replace or repair
Check valves, replace if necessary.
System noises
Piping vibrations
Expansion valve hissing
Compressor noisy
Support piping as required. Check for loose pipe
connectors.
Add refrigerant. Check for blocked liquid line strainer.
Check valve plates for valve noise. Replace
compressor (worn bearings). Check for loose
compressor hold-down bolts.
Compressor loses oil
Leak in system
Crankcase heaters not energizing during shutdown
Find and repair leak, pump down and recharge.
Replace heaters, check wiring.
Frosted or sweating suction line
Expansion valve admitting too much refrigerant
Adjust expansion valves.
Hot liquid line
Shortage of refrigerant due to leak
Expansion valve closed too far
Repair leak and recharge.
Adjust expansion valve.
Frosted liquid line
Restricted filter-drier
Remove restriction or replace filter-drier.
Compressor will not unload
Burnt-out coil
Leaky bypass piston
Miswired solenoid
Weak bypass piston spring
Replace coil.
Replace.
Wire correctly.
Replace.
Compressor will not load
Damaged bypass piston
Miswired solenoid
Blocked bypass port strainer (high side)
Replace.
Wire correctly.
Clean.
ENVIRONMENTAL
MANAGEMENT
Order No. 13811-76, May 1998. Supersedes order No.: 13811-76, September 1996 + 13883-76, April 1995.
Manufacturer reserves the right to change any product specifications without notice.
16
Manufactured by: Carrier SA, Montluel, France.
Printed on Totally Chlorine-Free Paper.
Printed in the Netherlands.