1
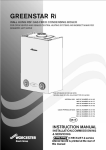
GREENSTAR DANESMOOR 18/25kW FLOOR STANDING OIL-FIRED CONDENSING BOILER CONVENTIONAL FLUE & ROOM SEALED FLUE FOR FULLY PUMPED OPEN VENT OR SEALED CENTRAL HEATING SYSTEMS AND DOMESTIC HOT WATER CYLINDERS Patent pending: Application number 0327645.8 THE APPLIANCE IS FOR USE WITH 28 SECOND KEROSENE ONLY GB GB/IE INSTRUCTION MANUAL INSTALLATION COMMISSIONING & SERVICING 8-716-106-254a (03.05) CONTACT INFORMATION WORCESTER BOSCH: MAIN RECEPTION: 01905 754624 MAIN FAX: 01905 754619 TECHNICAL: 08705 266241 SERVICE: 08547 256206 SPARES: 01905 752571 LITERATURE: 01905 752556 TRAINING: 01905 752526 SALES: 01905 752640 WEBSITE: www.worcester-bosch.co.uk WATER TREATMENT: FERNOX 01799 550811 www.fernox.com INSTALLATION & SERVICING INSTRUCTIONS PLEASE READ THESE INSTRUCTIONS CAREFULLY BEFORE STARTING INSTALLATION. THESE INSTRUCTIONS ARE APPLICABLE TO THE WORCESTER BOSCH APPLIANCE MODEL(S) STATED ON THE FRONT COVER OF THIS MANUAL ONLY AND MUST NOT BE USED WITH ANY OTHER MAKE OR MODEL OF APPLIANCE. THE INSTRUCTIONS APPLY IN THE UK ONLY AND MUST BE FOLLOWED EXCEPT FOR ANY STATUTORY OBLIGATION. THIS APPLIANCE MUST BE INSTALLED BY A COMPETENT PERSON. FAILURE TO INSTALL CORRECTLY COULD LEAD TO PROSECUTION. IF YOU ARE IN ANY DOUBT CONTACT WORCESTER BOSCH TECHNICAL HELPLINE. DISTANCE LEARNING AND TRAINING COURSES ARE AVAILABLE FROM WORCESTER BOSCH. PLEASE LEAVE THESE INSTRUCTIONS WITH THE USER OR WITH THE APPLIANCE AFTER INSTALLATION OR SERVICING. SENTINEL 0151 420 9595 www.betzdearborn.com/sentinel ABBREVIATIONS USED IN THIS MANUAL: FLUE TERMINAL GUARDS: WORCESTER BOSCH Part Number: 7-716-190-050 CONVENTIONAL FLUE MANUFACTURERS: INTERACTIVE (Flue Systems) Ltd., 01908 569887 Selkirk Manufacturing Ltd. (SF Ltd.), 01271 326633 CONDENSATE PUMP MANUFACTURERS: ASPEN 01323 848842 Ø Diameter CH Central Heating DHW Domestic Hot Water TRV Thermostatic Radiator Valve IP Ingress Protection CF Conventional flue RS Room sealed flue N/A Not allowed SEDBUK Seasonal Efficiency for Domestic Boilers in the United Kingdom OFTEC Oil Firing Technical Association for the Petroleum Industry OIL FIRING TECHNICAL ASSOCIATION: OFTEC 0845 6585080 www.oftec.org SYMBOLS USED IN THIS MANUAL: Domestic hot water IMPORTANT HANDLING INSTRUCTIONS: It is advised that more than one person is involved in the transfer of the packaged appliance from the van to the point of installation. It is advised that no attempt should be made to move the packaged appliance without the use of a suitable truck. Central heating Electricity supply At all times the correct method for handling heavy objects should be strictly observed. GENERAL HANDLING GUIDELINES: Lift only a manageable weight, or ask for help. When lifting, bend the knees, and keep the back straight and feet apart. Do not lift and twist at the same time. Lift and carry items close to the body Wear protective clothing and gloves to protect from any sharp edges. Store the appliance in a dry area prior to installation. INSTALLATION & SERVICING INSTRUCTIONS INSTALLATION & SERVICING INSTRUCTIONS FOR WORCESTER BOSCH 8-716-106-254a (03.05) SAFETY & REGULATIONS CONTENTS SAFETY & REGULATIONS SAFETY PRECAUTIONS 2 INSTALLATION REGULATIONS 2 GENERAL INFORMATION 3 TECHNICAL DATA 4 LAYOUT & COMPONENTS 5 APPLIANCE INFORMATION APPLIANCE INFORMATION PRE-INSTALLATION WATER SYSTEMS & PIPEWORK CONDENSATE & PRESSURE RELIEF PIPEWORK BOILER LOCATION & CLEARANCES 7-8 PREINSTALLATION MAINS SUPPLIES 6 9-10 11 12-13 FLUE OUTLET POSITIONS 14 CONVENTIONAL FLUE 15 ROOM SEALED FLUE OPTIONS 16 INSTALLATION CLEANING PRIMARY SYSTEMS UNPACKING THE BOILER 17 PIPEWORK POSITIONS & FLUE OPENING 18 BOILER INSTALLATION 19 FLUE INSTALLATION 20 COMBUSTION CHAMBER 21 PIPEWORK CONNECTIONS 22 OIL BURNER & PUMP 23 REFIT COMPONENTS ELECTRICS COMMISSIONING INSTALLATION 24 25-30 COMMISSIONING PRE-COMMISSIONING CHECKS 31 FILLING THE SYSTEM 32 33-36 WATER TREATMENT 36 FINISHING COMMISSIONING 37 SERVICING & SPARES STARTING THE APPLIANCE SERVICING & SPARES 39-42 43 CONVERSION KITS INSPECTION AND SERVICE SHORT PARTS LIST CONVERSION KITS N/A FAULT FINDING & DIAGRAMS 44-45 FAULT FINDING & DIAGRAMS FAULT FINDING INSTALLATION & SERVICING INSTRUCTIONS FOR WORCESTER BOSCH 8-716-106-254a (03.05) CONTENTS 1 SAFETY & REGULATIONS SAFETY PRECAUTIONS INSTALLATION REGULATIONS OIL SMELLS, LEAKS OR FUMES FROM THE APPLIANCE: Failure to install appliances correctly could lead to prosecution. Extinguish any naked flames Open windows and doors Isolate the electrical supply Isolate the fuel supply to the boiler Contact boiler engineer. HEALTH & SAFETY: The appliance contains no asbestos and no substances have been used in the construction process that contravene the COSHH Regulations (Control of Substances Hazardous to Health Regulations 1988). Where applicable, the CE mark indicates compliance with relative EU Directives. The appliance should be installed by a competent person. The person installing the appliance should be aware of the Health and Safety at Work Act and take appropriate action to ensure that the regulations are adhered to. In order to give optimum efficiency and trouble free operation the appliance must be commissioned by a qualified OFTEC engineer. Do not store or use any combustible materials (paper, thinners, paints etc.) inside or within the vicinity of the appliance. The compliance with a British Standard does not, of itself, confer immunity from legal obligations. In particular the installation of this appliance must be in accordance with the relevant requirements of the following British Standards and regulations in respect of the safe installation of equipment. The combustion air must be kept clear of chemically aggressive substances which can corrode the appliance and invalidate any warranty. BS 5410: part 1: Code of practice for Oil Fired Boilers. COMBUSTIBLE AND CORROSIVE MATERIALS: BS 799: part 5: Specification for Oil Storage Tanks. FITTING & MODIFICATIONS: Fitting the appliance and any controls to the appliance may only be carried out by a competent engineer in accordance with these instructions and the relevant Installation Regulations. BS 7593: Code of Practice for treatment of water in domestic hot water central heating systems. Flue systems must not be modified in any way other than as described in the fitting instructions. BS 5449: part 1: Specification for forced circulation hot water central heating for domestic premises. Any misuse or unauthorised modifications to the appliance, flue or associated components and systems could invalidate the warranty. The manufacturer accepts no liability arising from any such actions, excluding statutory rights. SERVICING: Advise the user to have the system regularly serviced by a competent, qualified engineer (such as OFTEC registered personnel) using approved spares, to help maintain the economy, safety and reliability of the appliance. BS 5955: part 8: Specification for the installation of thermoplastic pipes and associated fittings for use in domestic hot and cold water services and heating systems. BS 7291: Thermoplastic pipes and associated fittings for hot and cold water for domestic purposes and heating installations in buildings. BS 7074: part 1: Application, selection and installation of expansion vessels and ancillary equipment for sealed water systems. BS 7671: IEE Wiring Regulations, current edition. The Building Regulations Part J and L1 England and Wales; Part F and Part J Section III Scotland; Part L and Part F Northern Ireland. Local water company bye-laws. The Control of Pollution (Oil) Regulations. OFTEC Standards. To ensure that the installation will perform to the highest standards, the system and components should conform to those mentioned in these instructions. 2 SAFETY PRECAUTIONS & INSTALLATION REGULATIONS INSTALLATION & SERVICING INSTRUCTIONS FOR WORCESTER BOSCH 8-716-106-254a (03.05) GENERAL INFORMATION STANDARD PACKAGE: A - Floor standing oil fired condensing boiler B - Literature pack C - Hardware pack including: 600mm APPLIANCE INFORMATION Condensate trap 370mm A 850mm B C INSTALLATION & SERVICING INSTRUCTIONS FOR WORCESTER BOSCH 8-716-106-254a (03.05) GENERAL INFORMATION 3 TECHNICAL DATA DESCRIPTION UNITS 18/25kW Central Heating APPLIANCE INFORMATION Primary water capacity (total) litres 24.5 Maximum static head metres 30 Minimum static head metres 1 mbar 57 bar 2.65 kg/hr 40 mm 10 inch BSP 1 mm 22 CH vent (Optional) inch BSP 1 CH drain inch BSP 1 mm 21.5 AC...V 230 Frequency Hz 50 Max. power consumption W 155 Boiler flow temperature range (cut in/cut out) °C 55/81 CH control thermostat differential °C 5 Boiler high limit thermostat set point °C 95 Boiler manual reset overheat thermostat set point °C 105 Flue reset overheat thermostat set point °C 110 Maximum hearth temperature °C <100 SEDBUK (Band A) % 92.9 Appliance protection rating (with programmer blanking plate fitted) IP 20 Appliance protection rating (with fascia programmer fitted) IP 20 Weight (excluding packaging) kg 119 Water side resistance (20°C difference) Max. permissible sealed system operating pressure Flue Exit flue gas mass flow Pipework connections Fuel line (compression) CH flow CH return Condensate (polypropylene) Electrical Electrical power supply voltage Thermostats General Data 4 TECHNICAL DATA INSTALLATION & SERVICING INSTRUCTIONS FOR WORCESTER BOSCH 8-716-106-254a (03.05) The diagram opposite excludes the top,front and RH side casing panels. 1 CONTROL BOX ASSEMBLY 2 CASING SIDE PANEL 3 CH CONTROL & HIGH LIMIT MANUAL RESET THERMOSTATS 4 OVERHEAT THERMOSTAT (AUTOMATIC RESET) 5 OIL DRIP TRAY 6 SECONDARY HEAT EXCHANGER 7 MANUAL RESET FLUE OVERHEAT THERMOSTAT 8 FLUE GAS SAMPLING POINT 9 FLUE MANIFOLD ACCESS COVER 10 AIR INLET CASING (RS) 11 HEAT EXCHANGER FLOW PIPE 12 REAR CABINET SUPPORT BRACKET 13 CONDENSATE OUTLET 14 FUEL ISOLATING VALVE 15 PRIMARY HEAT EXCHANGER 16 BASE PLATE 17 COMBUSTION CHAMBER ACCESS DOOR 18 CONTROL BOX 19 OVERHEAT RESET BUTTON 20 QUICK REFERENCE GUIDE SLOT 21 LOCK-OUT INDICATOR 22 DEMAND INDICATOR 23 FLUE OVERHEAT RESET BUTTON 24 LOCK-OUT RESET BUTTON 25 CH TEMPERATURE CONTROL 26 STERLING 50 BURNER 28 27 i) ii) iii) iv) v) 26 1 2 3 4 5 6 8 7 9 10 APPLIANCE INFORMATION LAYOUT & COMPONENTS i) Control box ii) Motor iii) Air intake casing iv) Oil pump 11 12 13 14 25 v) Blast tube 27 CLIP - AIR INTAKE HOSE (RS) 28 AIR INTAKE HOSE (RS) OPTIONAL ACCESSORIES (not supplied) a - 7 day TWIN CHANNEL DIGITAL TIMER Part No. 7 716 190 031 15 24 23 22 21 20 19 18 a 17 16 INSTALLATION & SERVICING INSTRUCTIONS FOR WORCESTER BOSCH 8-716-106-254a (03.05) LAYOUT & COMPONENTS 5 CLEANING PRIMARY SYSTEMS IMPORTANT: All the following pre-installation sections must be read and requirements met before starting boiler or flue installation. CAUTION: ISOLATE THE MAINS SUPPLIES BEFORE STARTING ANY WORK AND OBSERVE ALL RELEVANT SAFETY PRECAUTIONS. IMPORTANT: Debris from the system can damage the boiler and reduce efficiency. Failure to comply with the guidelines for the use of water treatment with the appliance will invalidate the appliance warranty. BEFORE CLEANING THE SYSTEM: ENSURE THE SYSTEM AND PIPEWORK IS IN GOOD WORKING ORDER PREINSTALLATION USE THE EXISTING BOILER/CIRCULATING PUMP WHERE POSSIBLE OR USE A POWER FLUSHING MACHINE TO AID THE CLEANSING PROCEDURE BEFORE INSTALLING A NEW BOILER CLEANING THE PRIMARY SYSTEM: Fill the system with cold mains water to the recommended pressure and check for leaks Open all drain cocks and drain the system Close drain cocks and add a suitable flushing agent at the correct strength for the system condition in accordance with the manufacturer's instructions Circulate the flushing agent before the boiler is fired up Run the boiler and system at normal operating temperature in accordance with the manufacturer's instructions Drain and thoroughly flush the system to remove the flushing agent and any debris 6 CLEANING PRIMARY SYSTEMS INSTALLATION & SERVICING INSTRUCTIONS FOR WORCESTER BOSCH 8-716-106-254a (03.05) MAINS SUPPLIES INSTALLATION & SERVICING INSTRUCTIONS FOR WORCESTER BOSCH 8-716-106-254a (03.05) Supply: 230V - 50Hz Cable: PVC insulated 0.75mm² (24 x 0.2mm) temperature rated to 90°C Protection IP20 External 5A fuse to BS1362 The appliance must be earthed All pipes to the boiler must be cross-bonded It must be possible to isolate the appliance from the electric supply with at least a 3mm contact separation in all poles supplying the appliance Wiring between the appliance and the electrical supply must comply with IEE wiring regulations and any local regulations which may apply for fixed wiring to a stationary appliance Any system connected to the boiler must not have a separate electricity supply. MAINS SUPPLIES PREINSTALLATION ELECTRIC SUPPLY: 7 MAINS SUPPLIES A - oil storage tank G - oil burner B - isolating valve H - oil supply pipe C - oil filter J - oil pump D - fire valve to BS5410 K - full base (plastic tanks) E - external wall L - non-return valve F - fire detection element M - de-aerator OIL SUPPLY: Do not use galvanised steel tanks or pipework for the oil supply system. Note: All dimensions are in metres unless stated otherwise. The maximum pipe run figures are based on using copper pipe with an inside diameter of 2mm less than the Ø. Do not use soldered joints on the oil supply pipework as this could cause a hazard in the event of a fire. a) Single pipe gravity feed system: E F K B C BD H B C G 4m (13ft) max. PREINSTALLATION A 300mm min. a) J HEAD 2.5 3.0 3.5 4.0 12mmØ 30 69 91 100 b) B L A 10mmØ 62 74 87 99 150mm c) Single pipe suction lift with de-aerator Maximum suction height 3.5 metres. The oil tank (A) must be positioned below the oil pump (J). Create an inlet and return loop between the deaerator (M) and oil pump (J). B H K G F D B C L Maximum suction height 3.5 metres. Non-return valves must be fitted to the inlet and return oil line between the oil pump (J) and oil storage tank (A). 12mmØ 100 100 100 100 3.5m (11.5ft) max. 10mmØ 12 25 37 49 J C E HEAD 2.0 2.5 3.0 3.5 12mmØ 100 100 95 80 10mmØ 26 20 14 8 F M c) A B C H B K J D E Lay the oil supply pipe (H) as straight and level as possible to avoid air pockets and unnecessary friction losses. Route away from the boiler access door or other hot surfaces. G MAXIMUM PIPE RUN FOR SINGLE PIPE SUCTION LIFT WITH DE-AERATOR HEAD 0 0.5 1.0 1.5 FUEL FLOW RATE 2.5kg/h 5kg/h 10kg/h 10kg/h 8mmØ 8mmØ 8mmØ 10mmØ 100 55 26 100 95 45 23 100 80 40 20 90 70 35 17 75 HEAD 2.0 2.5 3.0 3.5 FUEL FLOW RATE 2.5kg/h 5kg/h 10kg/h 8mmØ 8mmØ 8mmØ 60 30 14 45 25 11 35 15 8 25 10 5 10kg/h 10mmØ 65 50 35 20 The table and illustration above is a guide only and does not in any way override the de-aerators manufacturers instructions. 8 MAINS SUPPLIES A top feed oil tank fitted with a de-aerator using an internal non-return valve should have any nonreturn valve/s fitted in the base of the tank to the suction line removed to assist purging air from the oil line. Use copper pipe of the correct diameter according to the information shown opposite. Use flexible hoses to connect to the oil pump (J). 12mmØ 66 50 37 22 3.5m (11.5ft) max. 10mmØ 50 44 38 32 A non-return valve must be incorporated within the de-aerator or fitted to the oil line between the oil storage tank (A) and the de-aerator (M). Pipework MAXIMUM PIPE RUN FOR DOUBLE PIPE SUB-GRAVITY FEED SYSTEM HEAD 0 0.5 1.0 1.5 The oil storage tank (A) must be positioned so that the oil level does not exceed 4 metres above the level of the burner oil pump (J) and in addition the oil level must be at least 300mm above the oil pump (J). Where the maximum oil level in the oil storage tank exceeds 4 metres, a head breaking device must be installed between the tank (A) and the burner oil pump (J). b) Double pipe sub-gravity feed system: MAXIMUM PIPE RUN FOR SINGLE PIPE GRAVITY FEED SYSTEM HEAD 0.5 1.0 1.5 2.0 Plastic or steel tanks should be installed to BS5410. A steel tank should conform to BS799: part 5 and arranged with a slope of 1 in 24 away from the outlet valve with a sludge cock at its lower end. Install a manual isolating valve (B) to the oil supply pipe (H), as close to the oil storage tank (A) as possible. Fit an oil filter (C) to the oil supply pipe, near the oil storage tank. If there is doubt about the internal condition of the oil supply pipe, fit an additional oil filter (recommended paper filter element) close to the boiler, but not inside the boiler casing. Fit a fire valve in accordance with BS5410. The fire valve (D) should be fitted externally to the building with a fire detection element (F) located within the appliance case. A capillary type valve provides a neat and simple installation. Alternatively, a fusible link or electrical system may be used. Under no circumstances should a combination isolating/fire valve be used as the sole fire protection device. INSTALLATION & SERVICING INSTRUCTIONS FOR WORCESTER BOSCH 8-716-106-254a (03.05) WATER SYSTEMS & PIPEWORK PRIMARY SYSTEM PLASTIC PIPEWORK: Any plastic pipework must have a polymeric barrier with 1000mm (minimum) length of copper or steel pipe connected to the boiler Do not use plastic pipework on sealed systems Plastic pipework used for underfloor heating must be correctly controlled with a thermostatic blending valve limiting the temperature of the circuits to approx. 50°C. The pipework from the boiler to the blending valve must be in copper or steel (protected from corrosion). TYPICAL OPEN VENT SYSTEM: 350mm min. E S 150mm max. H F M R T A R L T R L Do not use galvanised pipes or radiators. All system connections, taps and mixing valves must be capable of sustaining a pressure of 3 bar Radiator valves should conform to BS2767:10 All other valves should conform to BS1010 On new installations TRVs must be used on all radiators except the radiator where the room thermostat is sited, this must be fitted with lockshield valves and left open. All installations should have TRV's fitted to radiators within the sleeping accommodation An automatic bypass valve must be connected between the heating flow and return where TRV's are used on all radiators Drain cocks are required at all the lowest points on the system Air vents are required at all high points on the system. R K T L T L C K J D D A - appliance G - pressure gauge N - automatic air vent B - expansion vessel H - heating vent 22mmØ min P - pressure relief discharge C - automatic bypass valve J - circulating pump R - radiators D - drain cock K - zone valve S - static head E - expansion tank L - lockshield valve T - TRV F - cold feed 15mmØ min M - hot water cylinder U - to filling system OPEN VENT PRIMARY SYSTEM: The cold feed (F) and expansion tank (E) must be positioned to provide a static head (S) of at least 1 metre above the highest point in the heating system to the water level in the expansion tank (E) The heating vent (H) and cold feed (F) pipes must rise continuously from the appliance. The heating vent pipe (H) must be at least 22mmØ and 350mm above the waterline in the cold feed and expansion tank (E). TYPICAL SEALED SYSTEM: N FULLY PUMPED SEALED PRIMARY SYSTEM: M R T R L T A R T L T L C J K A pressure relief valve (P) (spring loaded safety valve set to operate at 3 bar) must be fitted to the heating flow pipe as close as possible to the boiler or onto one of the boiler top 1" BSP outlets An expansion vessel (B) must be fitted to the heating return pipe close to the boiler and pressurised for the system volume according to the instructions supplied with the vessel A pressure gauge (G) (3 bar min.) must be fitted to the heating flow pipe or one of the boiler 1" BSP outlets An automatic air vent (N) must be fitted. R B G L P U PREINSTALLATION PRIMARY SYSTEM/CONNECTIONS/VALVES: 1000mm min. D INSTALLATION & SERVICING INSTRUCTIONS FOR WORCESTER BOSCH 8-716-106-254a (03.05) D WATER SYSTEMS & PIPEWORK 9 WATER SYSTEMS & PIPEWORK Water main supply Heating return Hose return Non return Non return valve valve Stop cock PREINSTALLATION Temporary hose Heating return Auto air vent Test cock Stop cock FILLING PRIMARY SYSTEMS: Filling the system must comply with one of the methods shown opposite The filling point must be at low level and must never be a permanent direct fixing to the mains water supply Filling loops must be WRAS approved. Make up vessel Non return valve 1000mm above the highest point of the system Stop cock 10 WATER SYSTEMS & PIPEWORK INSTALLATION & SERVICING INSTRUCTIONS FOR WORCESTER BOSCH 8-716-106-254a (03.05) CONDENSATE & PRESSURE RELIEF PIPEWORK CONDENSATE PIPEWORK: a The condensate pipe must be a minimum of 21.5mmØ polypropylene pipe C B The condensate pipework must fall at least 50mm per metre towards the outlet and should take the shortest practicable route and not exceed 3 metres outside the building F A 75mm min. D The pipework must follow one of the options shown opposite: a - Internal waste drainage system b - Soil/vent stack C E c - External drainage system c 75mm min. Use waterproof pipe insulation in exposed positions and for external pipework A 75mm min. 450 min. F D F Invert d d - External condensate absorption point C A IMPORTANT: Condensate pipework must not leak and must discharge into a condensate trap filled with water before the boiler is started to prevent the possibility of potentially harmful flue products escaping via the condensate route. PREINSTALLATION b A -Condensate from boiler C B -Sink 500mm min. G A C -21.5mmØ polypropylene condensate pipe D -Gully 75mm min. 25mm min. F H K J 400mm min. E - Internal soil and vent stack F - Condensate trap (75mm min) G -300mm x 100mmØ sealed plastic tube H -Ground level J - Drainage holes 50mm from base of tube (12mmØ at 25mm centres) facing away from building K - Limestone chippings PRESSURE RELIEF PIPEWORK: IMPORTANT: The pressure relief valve is a safety device for the boiler and if activated may discharge boiling water or steam through the relief valve drain pipe. Care should taken when siting the outlet pipe so that it does not cause an obstruction or discharge above a window, entrance or other public access where it could cause a hazard. M The pressure relief drain pipe (M) should be at least 15mm diameter copper pipe and run downwards away from the boiler and discharge away from any electrics or other hazard, preferably to an external drain or soakaway Pipe (M) should be finished with a partial bend, near the outlet to face the external wall (as shown) to help prevent freezing L Use waterproof pipe insulation in exposed positions and for external pipework M L - Outside wall N M - Drain pipe N - External drain INSTALLATION & SERVICING INSTRUCTIONS FOR WORCESTER BOSCH 8-716-106-254a (03.05) CONDENSATE & PRESSURE RELIEF PIPEWORK 11 BOILER LOCATION & CLEARANCES a: RECOMMENDED INSTALLATION CLEARANCES 570mm 1200mm This boiler is only suitable for installing internally within a property at a suitable location onto a fixed rigid non-combustible surface at the same size as the boiler and capable of supporting the boiler weight. The boiler must be installed on a flat level surface to ensure condensate does not enter the primary heat exchanger. The boiler is not suitable for external installation unless a suitable enclosure is provided. Roof space installations must fully conform to BS5410 part 1 section 4.6.9 1150mm 300mm 100mm 100mm 600mm PREINSTALLATION Open flue model (CF): b: SERVICE CLEARANCES 380mm 1200mm In order to ensure clean and efficient combustion an adequate supply of air must be delivered to the combustion chamber. To provide sufficient air a suitable inlet must be provided into the room or space in which the boiler is situated, minimum size 110cm² for 18/25kW appliances. 1150mm 300mm An air brick or other form of continuous air supply may have to be built into the installation in order to ensure an adequate supply of air. 5mm* 5mm* 600mm If the appliance is to be installed in a confined space or compartment two air vents are required, one at high level and one at low level. The minimum free area of each vent is shown opposite and depends whether the air is taken from another room or from outside the building. Where the air is taken from another room that room must contain an air inlet as described above. Room sealed balanced flue model (RS): The appliance does not require a separate vent for combustion air. Installation in cupboards or compartments require permanent vents for cooling purposes, one at high level and one at low level, either direct to outside air or to a room. Both vents must pass to the same room or be on the same wall to the outside air. The minimum air vent free area is given in the table opposite. a: INSTALLATION CLEARANCES: Diagram (a) shows the minimum space recommended to install the boiler only. b: SERVICE CLEARANCES: Diagram (b) shows the minimum space required to service the boiler only. MINIMUM AIR VENT AREA (cm²) FOR APPLIANCES INSTALLED IN A COMPARTMENT: 1 Internal air to and from a space/room inside the building. 2External air to and from directly outside the building Conventional flue: kW 18/25 12 Room Sealed flue: Internal1 ventilation External2 ventilation High Low Level (D) Level (C) High Low Level (D) Level (C) 220 330 110 220 BOILER LOCATION & CLEARANCES kW 18/25 Internal1 ventilation External2 ventilation High Low Level (D) Level (C) High Low Level (D) Level (C) 220 220 110 The appliance is suitable for an under worktop installation providing that the worktop above the boiler (min.10mm clearance) is removable for maintenance and the front of the boiler is not enclosed * Remove the flue 'knock-out' panel sections if this clearance is less than 75mm. 110 INSTALLATION & SERVICING INSTRUCTIONS FOR WORCESTER BOSCH 8-716-106-254a (03.05) BOILER LOCATION & CLEARANCES c: COMPARTMENTS: Follow the requirements of BS5410 and note: Minimum clearances must be maintained An access door is required to install, service and maintain the boiler and any ancillary equipment If fitting the boiler into an airing cupboard use a non-combustible material (if perforated, maximum hole sizes of 13mm) to separate the boiler from the airing space. There must be sufficient clearance around the appliance to allow proper circulation of ventilation air. The clearances required for installation and servicing will normally be adequate for ventilation. 600mm 600mm 750mm 2 3 1 2 1 3 2250mm 0 750mm 1 1 Free air must not be taken from a room or internal space containing a bath or shower and must not communicate with a protected area such as a hall, stairway, landing, corridor, lobby, shaft etc. Air vents must allow access for clean free air and must be sited to comply with the flue terminal position requirements. Air ducting runs must not exceed 3m. Low level air vents must be less than 450mm from the floor. A warning label must be added to the vents with a statement to the effect: ''Do not block this vent. Do not use for storage'. SHOWER / BATHROOMS: The boiler must not be installed in zones 0, 1 or 2 or in the shaded areas shown on the diagrams opposite. IMPORTANT: any switch or appliance control using mains electricity must not be able to be touched by a person using the bath or shower. 600mm 2 Ventilation must be provided for boilers fitted into compartments as described in BS 5410 IMPORTANT: conventional flued boilers must not be fitted in a bathroom. A 3 PREINSTALLATION Venting compartments: 2 3 Electrical switches, fused spur and socket outlets must not be situated in the bathroom. 2250mm 0 A 600mm radius A - Bath or shower cubicle (zone 0) INSTALLATION & SERVICING INSTRUCTIONS FOR WORCESTER BOSCH 8-716-106-254a (03.05) BOILER LOCATION & CLEARANCES 13 FLUE OUTLET POSITIONS Minimum dimensions (mm) of flue terminal positions for oil-fired appliances: Flue terminals must be positioned to avoid combustion products entering into buildings The flue must be fitted and terminated in accordance with the recommendations of BS5410 CF RS(H) RS(V) The flue must not cause an obstruction. N/A 600 N/A B Horizontally to an opening (1, 2) N/A 600 N/A Discharge from the flue outlet must not be a nuisance. C Below a plastic/painted gutter, drainage pipe or eaves if combustible material protected N/A Flue gases have a tendency to plume and in certain weather conditions a white plume of condensation will be discharged from the flue outlet which could be regarded as a nuisance, for example, near security lighting. There should be no restriction preventing the clearance of combustion products from the terminal. The air inlet/outlet duct and the terminal of the boiler must not be closer than 25mm to any combustible material. Detailed recommendations on protection of combustible materials are given in BS 5410:1 A protective terminal guard must be fitted if the terminal is 2m or less above a surface where people have access TERMINAL POSITION A Below an opening (1, 2) D Below a balcony or a plastic/painted, gutter, drainage pipe or eaves without N/A protection to combustible material (3) E From vertical sanitary pipework PREINSTALLATION 75 N/A 600 N/A N/A 300 N/A F From an external or internal corner or from a surface or boundary alongside N/A the terminal 300 N/A G Above ground or balcony level N/A 300* N/A H From a surface or boundary facing a terminal N/A 600** N/A J From a terminal facing the terminal K Vertically from a terminal on the same wall 1200 N/A 1500 N/A L Horizontally from a terminal on the same wall 750 M Above the highest point of an intersection with the roof 600 600 N From a vertical structure on the side of the terminal 750 750 O Above a vertical structure less than 750mm from the side of the terminal 600 600 P From a ridge terminal to a vertical structure on the roof 1500 N/A The guard must be spaced equally (minimum 50mm) around the flue and fixed to the wall with plated screws. See 'Contact Information' on the inside front cover for flue guard information. Not applicable N/A Not allowed CF Conventional flue RS(H) Room Sealed Horizontal flue RS(V) Room Sealed Vertical flue 1 An opening means an openable element, such as an openable window, or a permanent opening such as a permanently open air vent. 2 Notwithstanding the dimensions above, a terminal should be at least 300mm from combustible material, e.g. a window frame. 3 A way of providing protection of combustible material would be to fit a heat shield at least 750mm wide. The following additional guidelines (from part L Exceptions Guidance Document) are recommended when determining the flue outlet position: Avoid discharging flue gases into car ports or narrow passageways P *Minimum distance of the flue terminal to a facing wall, fence, building or property boundary is 2500mm O M boundary C, D **Minimum distance of the flue terminal from above ground is 2100mm where directed to a public footpath, private access route or a frequently used area and 2500mm from a car parking area. N F J H boundary 14 FLUE OUTLET POSITIONS A E G B F K F L INSTALLATION & SERVICING INSTRUCTIONS FOR WORCESTER BOSCH 8-716-106-254a (03.05) D E Open (conventional) flued appliances must not be installed in a bedroom, bathroom or bedsitting room The flue system must be in accordance with BS5410 : Part 1 and the current Building Regulations The flue must be constructed of materials suitable for the use of condensing combustion products External flue systems must be of the insulated type Brick and masonry chimneys must be lined with a suitable non-combustible material and properly jointed to withstand the effects of the working temperature (minimum rating of material 120°C) of the appliance and any condensate which may form All flue joints must be sealed to prevent the leakage of condensate and combustion products Ensure that joints are made so that the condensate runs away and is not collected within the joint PREINSTALLATION CONVENTIONAL FLUE NOTE: The flue can be increased in size from the boiler take off point providing the joint is correctly sealed. Never reduce the flue diameter from the boiler take off point The flue should be vertical and contain as few bends as possible, a maximum of two 135° bends should be used The flue outlet must be extended beyond the eaves of the building and where possible, above the apex Fit a suitable anti down-draught terminal where down draughts are experienced. Manufacturers of conventional flue systems suitable for this appliance are listed under 'Contact Information' on the inside front cover. C B A A - Boiler B - Flue C - Max. 2 bends at 135° D - Anti down-draught terminal E - Chimney INSTALLATION & SERVICING INSTRUCTIONS FOR WORCESTER BOSCH 8-716-106-254a (03.05) CONVENTIONAL FLUE 15 L = 140 - 390mm L ROOM SEALED FLUE OPTIONS L L = 2000mm A The diagrams (opposite) show the components used and the maximum flue length (L) for each flue configuration. A B 125mmØ x2 C x2 PREINSTALLATION L = 4000mm To achieve the maximum flue length (L), a flue section will have to be reduced in length. Only the flue terminal or straight flue extensions can be reduced in length by cutting. The flue terminal end can be fitted from the inside or outside of the building. IMPORTANT: L All horizontal sections must rise away from the boiler by 52mm per metre (3°) to allow the condensate to drain back to the boiler. A B 125mmØ x4 L = 6000mm L A C D E B E A - Horizontal terminal B 125mmØ x6 B - Straight flue extension C - Flue bend 90° D - Flue bend 45° L = 3000mm E - Vertical Terminal Kit (incl. 90° elbow) L A Calculating the flue length: B 125mmØ x3 Measure the total flue length required, noting that the maximum straight flue length including the terminal is: C Horizontal 80/125mmØ: 4000mm (excluding 120mm of terminal extending outside the building) Vertical 80/125mmØ: 6000mm (including the vertical flue kit 90° elbow) L = 5000mm L = 3000mm L A Then reduce the total straight flue length for each extra flue bend (excluding the vertical flue kit 90° elbow) by: D E 1000mm for 90° D 500mm for 45° B 125mm x4 B 125mmØ x3 D L Flue Extension lengths: Horizontal & Vertical 80/125mmØ: 1000mm overall length. Effective length when engaged into sockets within the flue run is 950mm D Flue Terminal lengths: Horizontal 80/125mmØ: 720mm Vertical 80/125mmØ: 1080mm + cage L = 3000mm L = 5000mm L to outside wall. A L B 125mmØ x3 E B 125mmØ x5 C 16 ROOM SEALED FLUE OPTIONS INSTALLATION & SERVICING INSTRUCTIONS FOR WORCESTER BOSCH 8-716-106-254a (03.05) IMPORTANT: All the previous Pre-Installation sections must be read and requirements met before starting boiler or flue installation. UNPACKING THE BOILER Unpacking: 1 Cut the ties securing the carton taking care not to pierce the carton or cause personal injury 2 Open the top flaps of carton and lift carton up and away from the boiler Remove the plastic bag and upper front protection cover from the boiler and place safely aside 1 3 Pull base of front panel (E) away from the boiler to disengage ball stud connectors Lift front panel (E) upwards off the top supporting ledge and store safely away from the working area At least two or more persons are required to move the boiler, taking care not to damage the boiler, panels or the floor. At all times the correct method for handling heavy objects should be strictly observed. GENERAL HANDLING GUIDELINES: When lifting, bend the knees, and keep the back straight and feet apart. Do not lift and twist at the same time. Lift and carry items close to the body Wear protective clothing and gloves to protect from any sharp edges. INSTALLATION Lift only a manageable weight, or ask for help. 2 E 3 INSTALLATION & SERVICING INSTRUCTIONS FOR WORCESTER BOSCH 8-716-106-254a (03.05) UNPACKING THE BOILER 17 PIPEWORK POSITIONS & FLUE OPENING All dimensions in mm 105 185 25 CAUTION: Ensure there are no pipes, electric cables, damp proof course or other hazards before drilling. SAFETY: D All relevant safety precautions must be undertaken. Protective clothing, footwear, gloves and safety goggles must be worn as appropriate. D C C A A PIPEWORK POSITIONS: A to D (opposite) show the pipe positions from the front of the boiler: A A - CH flow/heating vent 1''Ø BSP B - Primary drain/cold feed 1''Ø BSP 752 C - CH return 22mmØ copper 550 D - Flue outlet 500 B B NOTE: For servicing purposes, keep the condensate and pressure relief discharge pipes away from components and pipework connections. B 67 INSTALLATION FLUE OPENING: Follow the diagram opposite to mark the centre of the flue (1, & 2) for rear opening, (2 & 3) for side opening or (1 & 4) for top opening. E F ** IMPORTANT: for horizontal flues, increase this height by 52mm for every 1000mm of horizontal length that the flue opening is away from the boiler G NOTE: all horizontal flue sections must rise away from the boiler by 52mm per meter to ensure that condensate flows back into the boiler for safe discharge via the condensate waste pipe. Make an opening (E, F or G) through the wall using a core drill or similar at a size relative to the wall thickness as shown below: 125mmØ flue: Wall thickness 4 105 F 3 E 155mmØ 240 - 330mm 160mmØ 330 - 420mm 165mmØ 420 - 500mm 170mmØ Clear away any debris 1 105 190 G 2 +5 752** 18 PIPEWORK POSITIONS & FLUE OPENING Flue hole size 150 - 240mm INSTALLATION & SERVICING INSTRUCTIONS FOR WORCESTER BOSCH 8-716-106-254a (03.05) BOILER PANEL REMOVAL 1 1 Lift the top panel (A) upwards to disengage the ball stud connections (B) and remove A 3 2 Remove securing screws (C) from each side Slide control box (G) outwards to its full extent F Pivot control box (G) upwards and secure in the position as shown C 3 Depress locking ears to unplug burner lead (F) from control box (G) 2 B 4 Release burner retainers (H) Loosen clip (J) and disconnect the air inlet pipe Lift burner up to release blast tube (N) from heat exchanger and store safely away from the boiler G 5 4 6 4 Release split pins (P) Carefully remove the overheat thermostat phial (Q) (automatic reset) from the rear heat exchanger thermostat pocket 7 S Release split pin to remove the flue thermostat (M) from the flue hood Carefully remove the CH control thermostat and High Limit manual reset thermostat phials (Q) from the front heat exchanger thermostat pocket INSTALLATION E R 7 N D Unscrew side panel (R) retaining screws (S) from both sides Slide both side panels together with the top support bracket and control box (G) forwards to release the side panel retaining lugs H Remove and store safely away from the boiler. Note: to enable the panels to stand upright, reposition and secure the control box (G) to the side panels. J 5 M 6 Q P INSTALLATION & SERVICING INSTRUCTIONS FOR WORCESTER BOSCH 8-716-106-254a (03.05) BOILER PANEL REMOVAL 19 A FLUE INSTALLATION B D The flue can exit the boiler from outlets A, B, C or D allowing vertical (RS & CF) and horizontal (RS low or high level) flues to be fitted. (CF position 'D' only). C Refer to the separate flue installation instructions supplied with the flue kits available for this boiler: RS FLUE KITS & COMPONENTS 80/125mmØ (not supplied): Horizontal flue kit: Part No. 7-716-190-031 Vertical flue kit: Part No. 7-716-190-032 Extension kit (1 metre) x1: Part No. 7-716-190-033 600mm Inline elbow 90° x1: Part No. 7-716-190-034 Inline elbow 45° x2: Part No. 7-716-190-035 Horizontal terminal guard: Part No. 7-716-190-050 CF FLUE KITS 80/100 & 103mmØ (not supplied): INSTALLATION H CF Vertical flue kit: Part No. 7-716-190-036 INSTALLATION NOTES: Ensure all flue seals are in good condition and seated properly To ease assembly of flue components, grease seals lightly with the solvent-free grease supplied E - Boiler outer casing F - Outer flue tube Use flue clamps to support the flue system G - Outer/elbow connection H - Outside wall/roof IMPORTANT: The boiler is not designed to take the weight of the flue system, this must be supported externally to the boiler. K - CF adaptor K X E 120mm L G E G All horizontal flue sections must rise by at least 52mm for each meter away from the boiler to ensure that condensate flows back into the boiler for safe discharge via the condensate waste pipe. F H 2m 1m 52mm 20 FLUE INSTALLATION 104mm INSTALLATION & SERVICING INSTRUCTIONS FOR WORCESTER BOSCH 8-716-106-254a (03.05) COMBUSTION CHAMBER F Combustion chamber: 1 E Release retaining nuts and washers (B) Remove combustion chamber access door (A) 2 Ensure the baffles (C) and baffle retainer (D) are correctly fitted for the boiler output as shown in the plan view opposite 4 3 Refit combustion chamber door (A) Secure with nuts and washers (B) and tighten until the door is firmly secured, do not overtighten the nuts A B 2 1 4 Unscrew screws (E) and remove flue manifold access cover (F) 5 Check that all the baffles (G) and baffle retainer (H) are correctly fitted to the secondary heat exchanger. INSTALLATION 3 5 G H Plan sectional view 18/25kW C D INSTALLATION & SERVICING INSTRUCTIONS FOR WORCESTER BOSCH 8-716-106-254a (03.05) COMBUSTION CHAMBER 21 PIPEWORK CONNECTIONS CAUTION: ISOLATE THE OIL & WATER MAINS SUPPLY BEFORE STARTING ANY WORK AND OBSERVE ALL RELEVANT SAFETY PRECAUTIONS. C A - CH flow/heating vent 1''Ø BSP A H G J K B - Primary drain/cold feed 1''Ø BSP C - CH return 22mmØ copper D - Oil supply pipe (10mmØ) - not supplied E - Oil pipe isolating valve F - Flexible oil pipe G - Condensate outlet (21.5mmØ) - supplied H - Flue manifold condensate outlet J - Condensate pipe - not supplied K - Condensate trap with wall clamp - supplied WATER CONNECTIONS: B Remove the transit bungs from the pipework connections on the boiler. Note: that surplus water may be present due to factory testing. INSTALLATION Ensure all pipework is clean Align water pipework and connect Check that all unused sockets have been plugged. OIL SUPPLY CONNECTIONS: Route the oil supply pipe (D) along either side of the boiler as required and connect to the isolating valve (E), ensure the valve is closed 1m F E D Connect the flexible oil pipe (F) to the isolating valve (E). 50mm (min.) H CONDENSATE CONNECTION: Measure condensate pipe (G), mark and cut square to length required Fit sealing washer to condensate waste pipe (G) and connect to the flue manifold outlet (H) Connect 21.5mm polypropylene pipe (J) (not supplied) to the condensate waste pipe (G) and condensate trap (K) before terminating to waste Secure the water trap (K) with clamp supplied Ensure that the condensate pipe runs away from the boiler at a constant fall of 50mm (min.) for every metre Seal all condensate pipe joints. 500ml Carefully pour 500ml of water into the condensate collection (N) to fill condensate trap Check the water is running away and the condensate pipework joints are water tight Refit manifold access cover (M) and secure with screws (L). L 22 M N PIPEWORK CONNECTIONS IMPORTANT: The condensate trap must be correctly filled to prevent the possibility of potentially harmful flue products escaping via the condensate pipework. INSTALLATION & SERVICING INSTRUCTIONS FOR WORCESTER BOSCH 8-716-106-254a (03.05) OIL BURNER & PUMP 1 Electrode gap 2.5 - 3.0mm B A 5mm CAUTION: ISOLATE THE OIL MAINS SUPPLY BEFORE STARTING ANY WORK AND OBSERVE ALL RELEVANT SAFETY PRECAUTIONS.OIL BURNER: 5mm Check the nozzle (A) and electrode (B) settings are correct for the relevant burner as shown opposite C Ensure nozzle (A) is aligned central within the combustion head (C) 1 Inspect for any visible defects INSTALLATION 7.5mm OIL PUMP: Connecting the oil pump for a single pipe system: 1 Remove oil pump inlet plug (1) Connect the flexible oil pipe inlet hose to the pump inlet and tighten to secure. Connecting the oil pump for a double pipe system: 1 Remove oil pump inlet plug (1) Connect the flexible oil pipe inlet hose to the pump inlet and tighten to secure a) DANFOSS BFP 11 L3 OIL PUMP a) DANFOSS BFP 11 L3: b) SUNTEC AS47C OIL PUMP Remove pump front cover (A) ensuring a suitable receptacle is used to catch any oil residue A Remove changeover screw (B) Remove horseshoe washer (C) B Refit changeover screw (B) Reposition front cover (A) and secure 2 C 1 B Remove oil pump return plug (2) 1 b) SUNTEC AS47C: 2 Remove return port plug (2) and insert grub screw (B) 2 INSTALLATION & SERVICING INSTRUCTIONS FOR WORCESTER BOSCH 8-716-106-254a (03.05) Connect the flexible oil pipe return hose to the pump return and tighten to secure. OIL BURNER & PUMP 23 REFIT COMPONENTS 1 6 F Slide side panels (R) and top support bracket (L) together with control box (G) along base rails and push to secure into the retaining lugs on the baseplate and align with the lugs on the rear support panel (T) Release control box (G) if secured C L 2 7 B E G Carefully replace the CH control and high limit manual reset thermostats (Q) into the front thermostat pocket and the auto reset overheat thermostat (U) into the rear thermostat pocket Refit split pins (P) to secure 3 Carefully replace the flue thermostat (M) into the flue hood and refit split pin to secure 4 Align burner blast tube (N) into boiler housing tube with gasket (O) correctly fitted Push firmly down to compress the gasket (O) Tighten burner retainers (H) sufficiently to ensure a good seal INSTALLATION 4 IMPORTANT: T Ensure the gasket is a good seal between the burner blast tube and the boiler housing to prevent flue gases escaping from the combustion chamber into the room. 1 S R D 4 5 Attach air duct pipe and tighten clip (J) to secure to the burner air intake 6 Plug burner lead (F) into control box (G) 7 Pivot control box (G) and slide into boiler casing. 5 O J N H 3 M 2 Q U P 24 REFIT COMPONENTS INSTALLATION & SERVICING INSTRUCTIONS FOR WORCESTER BOSCH 8-716-106-254a (03.05) 1 B ELECTRICS C = EARTH A = LIVE DANGER - 230v: ISOLATE THE MAINS ELECTRICITY SUPPLY BEFORE STARTING ANY WORK AND OBSERVE ALL RELEVANT SAFETY PRECAUTIONS. = NEUTRAL = SWITCHED LIVE IMPORTANT: OBSERVE ELECTRONIC STATIC DISCHARGE PRECAUTIONS. DO NOT TOUCH THE PCB CIRCUITS Access to 230v connections: 230v 1 Release screws (B) and remove cover panel (C) from control box (A) 2 E D Pull inner clamp part (F) outwards Feed sufficient power cable (G) through the cable clamp (E) and secure grip with screw (D) F Separate wires from cable end and strip to 6mm 5 H 230v connections: G 3 Release screw (D) from cable clamp (E) 3 Connect LIVE wire (Brown or Red) to terminal (L) Connect NEUTRAL wire (Blue or Black) to terminal (N) 230v Connect EARTH wire (Green/Yellow) to the terminal ( ) Route the power cable to the connection point avoiding any potentially hot surfaces with sufficient cable to move the control box into the service position. Open the control box into the service position to check the cable length and routing. J N1 1 2 3 INSTALLATION 2 Any external device connected to the boiler must take its power supply from the boiler only and must NOT have a separate supply. See the following pages of electrical diagrams for details of different systems. 7 8 9 10 K External 230v programmer: 4 Remove link (K) Connect wires as shown 4 Optional Worcester 230v programmer: 5 Remove blanking plate (J) Set the pin on the rear of the programmer to 'pumped' Remove link (K) Clip programmer (H) into position and plug into the terminal as shown N1 1 2 3 4 *Note; for 3 port valve systems only, move the orange wire from terminal 9 to terminal 6. Refit electric control panel cover: Refit cover panel (C) to control box (A) and secure with screws (B) K 7 8 9 10 INSTALLATION & SERVICING INSTRUCTIONS FOR WORCESTER BOSCH 8-716-106-254a (03.05) ELECTRICS 25 ELECTRICS = EARTH = LIVE 230v STANDARD WIRING DIAGRAM: = NEUTRAL Key to components: A - EARTH STUD B - HIGH LIMIT THERMOSTAT C - BOILER MANUAL RESET THERMOSTAT D - FLUE MANUAL RESET THERMOSTAT E - LOCKOUT RESET SWITCH F - INTERNAL PROGRAMMER CONNECTOR G - TERMINAL CONNECTOR BLOCK H - LINK CONNECTOR I - CH CONTROL THERMOSTAT J - DEMAND NEON K - LOCKOUT NEON L - BURNER CONTROL SOCKET M - BURNER CONTROL PLUG-IN CONNECTOR G INSTALLATION A Grey Blue N - BURNER CONTROL BOX Brown White E Brown N1 1 2 3 4 5 6 White Green/Yellow Blue Brown B 7 8 9 10 F H Green/Yellow C D Brown Orange Brown Brown Brown Green/Yellow J Black I 3 K 2 Blue Grey Red White L 12 34 5 6 12 34 5 6 M White Green/Yellow Red Black Grey N 26 ELECTRICS 12 3 4 5 6 789 A INSTALLATION & SERVICING INSTRUCTIONS FOR WORCESTER BOSCH 8-716-106-254a (03.05) ELECTRICS E = EARTH L = LIVE O N = NEUTRAL S = SWITCHED LIVE PRE-WIRED REMOTE 2 OR 3 PORT VALVE CONTROL SET USING INTERNAL PROGRAMMER: Key to components: O - REMOTE JUNCTION BOX (10-way) to connect the following: Mains wiring 230V 50Hz HOT WATER OFF Hot water tank thermostat HEATING ON Room thermostat System water valves HOT WATER ON Circulating pump P - 230v WORCESTER PROGRAMMER (fitted into fascia panel) F - INTERNAL PROGRAMMER CONNECTOR G - TERMINAL CONNECTOR BLOCK Remote (10 way) junction box (O) requirements: the junction box (O) must be a terminal block type, current rated to at least 5 amps a 5 amp fuse must be fitted to the mains supply the junction box (O) must be fitted externally to the boiler OUTSIDE BOILER INSTALLATION H - LINK CONNECTOR link 1 to 3 must be removed from the boiler terminal connector block (G) INSIDE BOILER A frost thermostat can also be connected to the remote junction box if required. G N1 1 2 3 4 5 6 Programmer (P) requirements: 2 and 3 port valve control sets: set the pin on the rear of the programmer to 'pumped' remove the link plug (H) connect the plug from programmer (P) into connector (F) 7 8 9 10 F H 2 PORT connect terminal 1 from the boiler terminal block (G) to the HOT WATER ON at the remote junction box (O) connect terminal 2 from the boiler terminal block (G) to the HEATING ON at the remote junction box (O) 3 port valve control set only: Brown 3 PORT Orange P A 3 port valve control set also requires a live feed from HOT WATER OFF switch position: remove the orange wire from terminal 9 and pull back through the tie wraps. (Ensure that the brown wire is firmly secured in terminal 9) connect the orange wire to terminal 6 on the boiler terminal block (G) connect terminal 6 on the boiler terminal block (G) to the HOT WATER OFF connection at the remote junction box (O). 12 34 5 6 INSTALLATION & SERVICING INSTRUCTIONS FOR WORCESTER BOSCH 8-716-106-254a (03.05) ELECTRICS 27 ELECTRICS E = EARTH L = LIVE O N = NEUTRAL S = SWITCHED LIVE PRE-WIRED REMOTE 2 OR 3 PORT VALVE CONTROL SET USING REMOTE PROGRAMMER: Key to components: O - REMOTE JUNCTION BOX (10-way) to connect the following: Mains wiring 230V 50Hz Hot water tank thermostat Room thermostat System water valves Circulating pump External programmer F - INTERNAL PROGRAMMER CONNECTOR G - TERMINAL CONNECTOR BLOCK H - LINK CONNECTOR Remote (10 way) junction box (O) requirements: INSTALLATION the junction box (O) must be a terminal block type, current rated to at least 5 amps a 5 amp fuse must be fitted to the mains supply the junction box (O) must be fitted externally to the boiler link 1 to 3 must be removed from the boiler terminal connector block (G) OUTSIDE BOILER A frost thermostat can also be connected to the remote junction box if required. INSIDE BOILER G N1 1 2 3 4 5 6 7 8 9 10 F H 12 34 5 6 28 ELECTRICS INSTALLATION & SERVICING INSTRUCTIONS FOR WORCESTER BOSCH 8-716-106-254a (03.05) ELECTRICS E = EARTH L = LIVE 2 PORT VALVE CONTROL SET: N = NEUTRAL Key to components: Q Q - CH ZONE VALVE Brown R - ROOM THERMOSTAT Blue S - CIRCULATING PUMP F - INTERNAL PROGRAMMER CONNECTOR G - TERMINAL CONNECTOR BLOCK H - LINK CONNECTOR Orange Yellow/Green Blue Grey R T - HOT WATER CYLINDER THERMOSTAT U - HOT WATER VALVE Blue P - OPTIONAL 230v WORCESTER PROGRAMMER (fitted into fascia panel) S T Terminal connector block (G): Brown remove link 1 to 3 Orange U remove link 2 to 4 make link 3 to 4 Orange Optional 230v programmer (P) requirements: Yellow/Green set the pin on the rear of the programmer (P) to 'pumped' Blue remove the link plug (H) Grey connect the plug from programmer (P) into connector (F). INSTALLATION 1 Brown 2 C G N1 1 2 3 4 5 6 7 8 9 10 F H P 12 34 5 6 INSTALLATION & SERVICING INSTRUCTIONS FOR WORCESTER BOSCH 8-716-106-254a (03.05) ELECTRICS 29 ELECTRICS E = EARTH L = LIVE 3 PORT VALVE CONTROL SET: N = NEUTRAL Key to components: R - ROOM THERMOSTAT S - CIRCULATING PUMP R F - INTERNAL PROGRAMMER CONNECTOR G - TERMINAL CONNECTOR BLOCK H - LINK CONNECTOR Blue T - HOT WATER CYLINDER THERMOSTAT V - MID-POSITION VALVE Blue P - OPTIONAL 230v WORCESTER PROGRAMMER (fitted into fascia panel) S T Terminal connector block (G): 2 C remove link 1 to 3 1 remove link 2 to 4 Brown make link 3 to 5 Optional 230v programmer (P) requirements: INSTALLATION V set the pin on the rear of the programmer (P) to 'pumped' Grey Orange remove the link plug (H) White Blue Yellow/Green connect the plug from programmer (P) into connector (F) move the 'Orange' wire from terminal 9 to terminal 6. G N1 1 2 3 4 5 6 7 8 9 10 F Brown H Orange P 12 34 5 6 30 ELECTRICS INSTALLATION & SERVICING INSTRUCTIONS FOR WORCESTER BOSCH 8-716-106-254a (03.05) PRE-COMMISIONING CHECKS 1 3 CAUTION: ISOLATE THE MAINS SUPPLIES BEFORE STARTING ANY WORK AND OBSERVE ALL RELEVANT SAFETY PRECAUTIONS. 1 Check that the service and water pipes are connected correctly Check that all unused sockets are plugged 2 Check that the oil supply is 28 sec Kerosene and that the pipework is connected correctly to the oil pump Turn on the main oil supply valve at the tank and check the oil supply pipework, connections and rectify any leaks 4 3 Check the flue is correctly fitted and the connections are secure 4 Check the condensate pipework is correctly fitted and connected Check the condensate trap is filled with water. after successfully completing all of the checks and any rectification work, close the water valves, shut off the oil supply and electrically isolate the boiler. Complete the 'Installation' part of the Guarantee Registration Card. COMMISSIONING IMPORTANT: If the boiler is not to be commissioned immediately then: 2 INSTALLATION & SERVICING INSTRUCTIONS FOR WORCESTER BOSCH 8-716-106-254a (03.05) PRE-COMMISIONING CHECKS 31 FILLING THE SYSTEM 1 1 Open all system and radiator valves Turn on the water main stop cock Open vented systems only; turn on the water to the system header tank and allow the system to fill 2 Sealed systems only; Fill the system to between 1 and 2 bar pressure via a WRAS approved filling link Check the expansion vessel pressure and adjust if necessary using the Schrader type valve 2 1 - 2 bar 3 Vent all radiators, retighten when completed Check the system and rectify any leaks COMMISSIONING 3 32 FILLING THE SYSTEM INSTALLATION & SERVICING INSTRUCTIONS FOR WORCESTER BOSCH 8-716-106-254a (03.05) STARTING THE APPLIANCE IMPORTANT: Never run the appliance when the appliance/system is unpressurised (sealed systems) or empty. 1 1 Check the oil supply is correctly fitted and in good working order before turning on the oil supply valves to the boiler. Turn on the main oil supply valve at the tank and draw off at least 2½ litres of oil until a steady flow of clear uncontaminated oil can be seen as follows: Single pipe gravity feed systems: DANFOSS SUNTEC BFP 11 L3 OIL PUMP AS47C OIL PUMP A D Double pipe sub-gravity feed systems and single pipe suction lift with de-aerator: B B C C When completed, close the isolating valve, reconnect the flexible oil pipe. D Air will be automatically vented when the boiler is started up. Prime the oil supply pipework to prevent oil pump damage on single pipe systems with de-aerator using long oil pipe runs. A - Bleed & pressure gauge port B - Pressure adjustment To prime a de-aerator, disconnect the flexible oil inlet hose (nearest to the de-aerator) and place in a container of the same oil fuel. Place an empty container to collect oil from the oil inlet pipe connection of the de-aerator. Prime the de-aerator and reconnect the flexible oil inlet hose. C - Vacuum gauge port D - Retaining screws - cover Open the isolating valve and the oil pump bleed valve (A) to discharge into a suitable container once the boiler is started up. BURNER LOCKOUT: Switch on the electricity supply to the boiler Set the programmer to ON for CH and DHW Turn on the boiler CH control thermostat Allow the burner to run through to 'lock-out' indicated by the illumination of the lockout indicator (E) F E COMMISSIONING A Disconnect the flexible oil pipe and open the isolating valve to discharge the oil into a suitable container. Wait 2 minutes then press the lockout reset button (F) Repeat the procedure at least 3 times or until a steady stream of oil, without air, runs from the bleed port, then relock bleed port (A) Switch off the boiler Remove the oil pump filter, clean with kerosene and refit The internal filter is accessed by removing the oil pump cover on the Danfoss BFP 11 L3 and Suntec AS47C Safely dispose of the container/discharge. INSTALLATION & SERVICING INSTRUCTIONS FOR WORCESTER BOSCH 8-716-106-254a (03.05) STARTING THE APPLIANCE 33 STARTING THE APPLIANCE 2 2 D Fit a suitable pressure gauge to port (A) on the oil pump Remove plastic cover from the burner casing E Adjust the air shutter (K) and pump pressure (B) as shown in the table opposite. The burner should ignite following a pre-ignition period of approx. 15 seconds. K Boiler lockout indicator on: 4 3 G E J E If the boiler fails to establish a normal firing pattern or flame failure occurs the flame monitoring photocell mounted in the burner body will alert the burner control box to shut the burner down and provide a safe lockout state indicated by the illumination of the lockout indicator (E). Wait 2 minutes then press the lockout reset button (D) to initiate another start sequence F H Repeat procedure until a flame is established. 3 Start and run for 3 minutes then switch off Check for after-spurting from the nozzle, indicated by oil saturation on the blast tube (E) If after-spurting occurs: DANFOSS SUNTEC BFP 11 L3 OIL PUMP AS47C OIL PUMP A A C B C COMMISSIONING release the burner retainers (F) A - Bleed & pressure gauge port B - Pressure adjustment refit nozzle (G) and burner restart and run for 3 minute intervals until afterspurting stops. C - Vacuum gauge port B remove the burner, hold vertical to unscrew the nozzle (G) and fill the nozzle holder (H) with oil 4 Start and run for 20 minutes Remove sampling point plug (J) to check the smoke reading is between 0-1. If the smoke level is above 1, check the combustion settings are correct and the oil nozzle is in good condition 5 Note; smoke readings may be inaccurate until the smoke from burning organic binder in the access door insulation has ceased. Check the CO² levels and adjust the air shutter (K) setting according to the table opposite Check the flue gas temperature is close to the values shown in the table K If the flue gas temperature is too high and the baffles are correctly fitted, then reduce the oil pump pressure (B) 5-10p.s.i. to compensate for nozzle variations. NOMINAL BOILER RATING AT NORMAL OPERATING TEMPERATURE USING 28sec KEROSENE: OIL PUMP NOZZLE FUEL APPROX. PRESSURE FLOW RATE (p.s.i.) Kg/h l/h FLUE GAS Turn off the electrical supply APPROX. %CO2 TEMP °C AIR SETTING Isolate the oil supply to the burner APPLIANCE INPUT kW Btu/hr OUTPUT kW Remove the oil pressure gauge Btu/hr Refit the blanking plug (A) Check and rectify any oil leaks Bentone Sterling 50 Burner: 0.50 80°EH 130 1.56 1.98 72 11.5 4.25 18.6 63300 18.0 61400 0.55 80°EH 145 1.86 2.36 79 12.0 6.00 22.2 75100 21.5 73400 0.65 80°EH 150 2.17 2.75 82 12.5 8.00 25.8 87900 25.0 85300 5 Switch on the oil supply Switch on the electrical supply Restart the boiler and run for 5 minutes Recheck the CO² levels and if required, adjust the air shutter setting (K) according to the table opposite Repeat the fine tuning procedure (5) if required Refit the sampling point plug (J) Refit plastic cover to burner casing. 34 STARTING THE APPLIANCE INSTALLATION & SERVICING INSTRUCTIONS FOR WORCESTER BOSCH 8-716-106-254a (03.05) STARTING THE APPLIANCE 1 A Central heating: 1 Open all radiator valves Set room thermostat to maximum Set programmer to ON for CH & DHW Turn the CH thermostat control (B) to 'max' The 'demand' indicator (A) should illuminate and the burner should be ON with the circulating pump. Ensure all radiators are heating up evenly and balance the system to the temperature difference required for the heating flow and return according to the heating load. B A 2 Set the room thermostat to minimum The 'demand' indicator light (A), burner and circulating pump should be off. COMMISSIONING 2 INSTALLATION & SERVICING INSTRUCTIONS FOR WORCESTER BOSCH 8-716-106-254a (03.05) STARTING THE APPLIANCE 35 WATER TREATMENT 1 IMPORTANT: Debris from the system can damage the boiler and reduce efficiency. Failure to comply with the guidelines for the use of water treatment with the appliance will invalidate the appliance warranty. FLUSHING (Central Heating): 1 Switch off the boiler Open vented systems only: turn off the water to the system header tank 2 Open all radiator valves/drain cocks and drain the system while the appliance is hot Close drain cocks 2 Add a suitable flushing agent (F) and refill the system at the correct strength for the system condition in accordance with the manufacturer's instructions Run the boiler/system at normal operating temperature for the time stated by the flushing agent manufacturer 3 3 Drain and thoroughly flush the system to remove the flushing agent and debris COMMISSIONING INHIBITOR (Central Heating): 4 Check drain cocks are closed and all radiator valves are open 5 Add a suitable inhibitor (I), (or combined inhibitor/anti-freeze if the system is exposed to freezing conditions) to the heating system in accordance with the manufacturers instructions. The inhibitor or combined inhibitor/anti-freeze must not cause damage to the materials within the boiler (mild steel, stainless steel, copper and brass) and any other materials/components within the system. 4 Open vented systems only: turn on the water to the system header tank and allow the system to fill Sealed systems only: fill the system to between 1 and 2 bar via a WRAS approved filling loop 5 1 - 2 bar 6 Vent the boiler and all radiators; retighten vents when complete 7 Record the date when the inhibitor was added to the system on the guarantee card. NOTE: The concentration level of inhibitor in the system should be checked every 12 months or sooner if system content is lost. The addition of sealing agents to the system water is not recommended as this can cause problems with deposits left in the heat exchanger. 6 36 WATER TREATMENT INSTALLATION & SERVICING INSTRUCTIONS FOR WORCESTER BOSCH 8-716-106-254a (03.05) FINISHING COMMISSIONING 1 Slide control box (A) into the boiler Secure with screws (B) 2 Locate top edge of panel (C) onto the top supporting ledge (D) on the boiler Locate the ball stud connections (E) at the base of the front panel (C) and push towards the boiler to secure 3 3 Locate the top panel (F) onto the ball stud connections (G) and press down to secure. F G A B 1 D COMMISSIONING C 2 E Handover: Complete the Guarantee Registration Card Set up the controls and show the user how to operate all the controls shown in the User Guide Where applicable, instruct the customer how to repressurise the system K If the appliance is unused and exposed to freezing conditions, advise the customer of the precautions necessary to prevent damage to the boiler, system and building. In the event of the appliance being inoperative, isolate the boiler and drain the system and boiler. Note: Release drain point (K) to drain the secondary heat exchanger. INSTALLATION & SERVICING INSTRUCTIONS FOR WORCESTER BOSCH 8-716-106-254a (03.05) FINISHING COMMISSIONING 37 38 INSTALLATION & SERVICING INSTRUCTIONS FOR WORCESTER BOSCH 8-716-106-254a (03.05) INSPECTION AND SERVICE CAUTION: ISOLATE THE WATER, ELECTRICITY AND OIL MAINS SUPPLIES BEFORE STARTING ANY WORK AND OBSERVE ALL RELEVANT SAFETY PRECAUTIONS. Routine servicing: To assist efficient boiler operation, the following should be carried out at least once a year. 1 Carry out a pre-service check and note any operational faults: A 4 Pre-Service Check: B 1 Lift the top panel (A) upwards to disengage the ball stud connections (B) and remove F 2 C Pull base of front panel (E) away from the boiler to disengage ball stud connectors (K) Lift front panel (E) upwards off the supporting ledge (D) and store safely away from the working area 3 3 Remove securing screws (C) from each side of control box (G) Slide control box (G) outwards to its full extent Pivot control box (G) upwards and secure in the service position as shown D G Operate the appliance and system and note any faults which may need to be corrected during the service. Switch off and electrically isolate the boiler. 6 4 Depress locking ears and unplug burner lead (F) from control box (G) E 5 RS flue only; loosen clip (J) to detach air duct pipe 6 Unscrew burner retainers (H) to release the burner blast tube (N) 2 K See the following instructions for detail of some of the service requirements listed below: Check and clean the burner Replace burner nozzle and flexible oil pipe/s Check and clean the baffle retainers SERVICING & SPARES Lift burner away, taking care not to over strain the flexible oil pipe/s or connections. Check and clean the baffles 5 J Check and clean the heat exchanger surfaces Check the combustion chamber access door insulation board Check that the flue system is unobstructed and clean as necessary Clean or replace all oil filters. 6 N H INSTALLATION & SERVICING INSTRUCTIONS FOR WORCESTER BOSCH 8-716-106-254a (03.05) INSPECTION AND SERVICE 39 INSPECTION AND SERVICE J P H D 1 Clean the Burner: Remove the air intake cover (H) by removing the M5 screws and clear any debris from the air intake and air damper. N Electrode gap 2.5 - 3.0mm F M E 5mm 5mm L O Separate the main body of the burner from the burner front by removing the M6 screw (J) using a 4mm allen key Check the condition of the gaskets between these parts and replace if necessary Note the position of the air damper adjustment and check the air damper moves freely Clean both sides of the fan impeller and remove any debris from the burner housing Check that the impeller rotates freely Reassemble the components K 2 Inspection of Mechanical Shut-off Valve: 7.5mm Remove the combustion head (K) and thoroughly clean any deposits Remove the nozzle (E) Fasten an M5 screw, with a minimum length of 30mm, into the threaded hole (L) and pull the screw to withdraw the check valve (M) Check that the nozzle holder (N) is clear of any debris and clean if necessary Check that the three holes in the check valve (M) are clear of any debris. Check the condition of the 'O' ring (O). Discard the check valve if the holes cannot be cleared, if the unit is defective or if the 'O' ring is damaged and replace with a new one Refit the check valve Fit a new oil atomising nozzle (E) - DO NOT dismantle the nozzle and DO NOT clean the nozzle tip Check the electrodes (F) and reset if necessary as shown opposite SERVICING & SPARES Refit the combustion head. Check that the nozzle (E) lies central to the combustion head and the head settings are as shown Withdraw the photocell (P) from its housing and clean DANFOSS SUNTEC BFP 11 L3 OIL PUMP AS47C OIL PUMP A A B B Remove the oil pump internal filter, clean in kerosene and reassemble The internal filter is accessed by removing screws (A) and the oil pump cover (B) on the Danfoss BFP 11 L3 and Suntec AS47C Replace the standard flexible oil line/s at every annual service to prevent the possibility of leakage due to ageing. Reassemble the burner components Check the sponge O-ring seal located around the combustion head and replace if necessary. A - Retaining screws - cover B - Cover - oil pump 40 INSPECTION AND SERVICE This seal must be in good condition since failure will cause flue gases to escape into the room. INSTALLATION & SERVICING INSTRUCTIONS FOR WORCESTER BOSCH 8-716-106-254a (03.05) INSPECTION AND SERVICE K External oil filter: Remove the paper element from the external oil filter and replace it. If the filter contains a washable element, thoroughly clean in kerosene and reassemble into the filter. Clean the boiler: Manifold access: E F Release screws (E) to remove the flue manifold access cover (F) and clear any debris J Check the condensate route (G) is clear and clean the condensate trap and pipework Check and clean the flue system if necessary H Remove the baffle retainer (J) and baffles (H) from the secondary heat exchanger G Check and clean the secondary heat exchanger surfaces A Clean the secondary heat exchanger baffles (H) if necessary and refit correctly B Refill the condensate trap by pouring 500ml of water into the drain (G) Refit the baffle retainer (J) Check the seal on the manifold access cover (F) and replace if necessary Replace the flue manifold access cover (F) and secure with screws (E). Combustion chamber: Release the M10 retaining nuts and washers (B) and remove combustion chamber access door (A) Check the fibreglass rope seal on the combustion chamber access door (A) and replace if necessary Remove and check the baffle retainer (D) Thoroughly clean all of the heat exchanger surfaces using a suitable brush and clear all loose debris from the combustion chamber Check the condition of the combustion chamber access door insulation; if the insulation is damaged the door assembly must be replaced Plan sectional view SERVICING & SPARES Remove the baffles (C), clean and check the condition of the baffles and the acoustic insulation. Replace any baffles or insulation pads considered to be badly corroded/degraded. Refit the items in reverse order, ensure the baffles (C) and baffle retainer (D) are correctly fitted as shown in the plan view opposite 18/25kW Refit combustion chamber access door (A) Secure with nuts and washers (B) and tighten until the door is firmly secured. C Fire valve: Check that the oil supply pipe has a fire valve fitted externally to the building with a fire detection element located within the appliance case. A fire valve clip (K) is provided for this purpose. D INSTALLATION & SERVICING INSTRUCTIONS FOR WORCESTER BOSCH 8-716-106-254a (03.05) INSPECTION AND SERVICE 41 INSPECTION AND SERVICE 1 Re-commission the burner: 1 O N Align burner blast tube (N) into the boiler housing tube with the gasket (O) correctly fitted Push firmly down to compress the gasket (O) H Tighten burner retainers (H) sufficiently to ensure a good seal Refit flexible air hose and secure with clip (J) IMPORTANT: J Ensure the gasket is a good seal between the burner blast tube and the boiler housing to prevent flue gases escaping from the combustion chamber into the room. 2 Re-commission the burner as described in 'STARTING THE APPLIANCE' under the Commissioning section. 5 A Refit panels: 2 3 F Unlock support (L) to pivot control box (G) and slide into the boiler Secure with screws (C) B C Plug burner lead (F) into control box (G) 4 3 Locate top edge of panel (E) onto the top supporting ledge (D) on the boiler Locate the ball stud connections (K) at the base of the front panel (E) and push towards the boiler to secure 5 Locate the top panel (A) onto the ball stud connections (B) and press down to secure. After service handover: SERVICING & SPARES D Make a note of the date of any water treatment G Set the controls back to the users requirements L If the appliance is unused and exposed to freezing conditions; shut off all the mains supplies, isolate the boiler and drain the system and boiler, including the secondary heat exchanger. 1 E 4 42 INSPECTION AND SERVICE K INSTALLATION & SERVICING INSTRUCTIONS FOR WORCESTER BOSCH 8-716-106-254a (03.05) 1 SHORT PARTS LIST 2 1 Burner - Sterling 50 Part Number: 8-716-108-571-0 2 Combustion head - burner Part Number: 8-716-108-573-0 3 Control box Satronic DKO 970 Part Number: 8-716-142-396-0 4 Photocell Satronic MZ770s 3 4 5 6 Part Number: 8-716-156-692-0 5 Control box base Satronic S98 12 pole Part Number: 8-716-142-782-0 6 Ignition electrode Part Number: 8-716-156-683-0 7 Motor Part Number: 8-716-156-645-0 8 Oil pump - Danfoss BFP 11 L3 7 8 9 10 Part Number: 8-716-142-736-0 9 Transformer (Excludes cable) Part Number: 8-716-156-696-0 10 Mechanical shut-off valve Part Number: 8-716-156-658-0 11 Flexible oil line kit Part Number: 8-716-106-346-0 12 Burner 'O' ring gasket Part Number: 8-716-140-902-0 11 12 13 14 13 Heating control thermostat Part Number: 8-716-107-621-0 14 Auto reset High Limit thermostat Part Number: 8-716-107-623-0 15 Manual reset High Limit thermostat Part Number: 8-716-107-625-0 16 Manual reset flue thermostat Part Number: 8716-107-624-0 15 16 17 18 17 Cleaning brush Part Number: 8-716-109-478-0 Part Number: 8-716-107-536-0 19 Secondary Heat Exchanger gasket Part Number: 8-716-108-103-0 SERVICING & SPARES 18 Manifold access cover seal 19 INSTALLATION & SERVICING INSTRUCTIONS FOR WORCESTER BOSCH 8-716-106-254a (03.05) SHORT PARTS LIST 43 PROBLEM CAUSE FAULT FINDING REMEDY LOCKOUT: Pulsation on start Intermittent lockout BOILER LOCKOUT: CF - Flue draught incorrect CF - Check flue draught Combustion settings incorrect Set up as in installation instructions Faulty nozzle Replace nozzle Bad electrical connection Check control box/electrical connections Intermittent flame detection fault See flame detection fault Downdraught Extend flue or fit a downdraught cowl Faulty motor or electrical supply to motor Check for 230v at motor plug during startup period Control box fault Replace control box Photocell filmed over (dirty) Clean Photocell faulty Replace Control box faulty Replace Air adjustment fault Incorrect CO² Set up as in installation instructions No oil from nozzle No oil at pump Burner motor fails to operate Flame detection fault Indicated by the illumination of the 'Lockout' indicator on the fascia. To reset, wait 2 minutes then press the lockout reset button. Check and refill oil tank Check and clean filters & valves from oil tank to boiler Ignition failure BURNER FAILS TO START Bleed pump Nozzle blocked Replace nozzle Faulty pump or drive Replace Faulty mechanical shut off valve Clean or replace Electrode settings incorrect Set up as in installation instructions Faulty ignition transformer Replace Open circuit ignition Check and replace electrodes or high tension leads if necessary Faulty control box or electrical connections not properly made Correct electrical control box connections or replace control box No power to boiler Check electrical / control circuit Faulty boiler thermostat Check by temporarily linking out high limit and control thermostats Programmer open circuit Check by linking 8 & 9 on the connector Faulty control box Replace Air/flue intake blocked Check & clear air/flue intake Incorrect combustion settings Set up as in installation instructions Oil pressure incorrect Adjust to correct pressure Incorrect components used on combustion head Check with installation instructions Faulty nozzle Replace nozzle FAULT FINDING & DIAGRAMS HIGH SMOKE NUMBER Air in pump 44 FAULT FINDING INSTALLATION & SERVICING INSTRUCTIONS FOR WORCESTER BOSCH 8-716-106-254a (03.05) PROBLEM CAUSE REMEDY Pump noise from air in pump or worn pump Bleed air from pump or replace pump Worn motor bearings Replace motor Fan out of balance Replace fan FAULT FINDING FAULTY BOILER OPERATION: Boiling Short Cycling OIL SMELLS Faulty boiler thermostat Replace if necessary Short circuit boiler thermostat Take out of circuit to check Thermostat bulb not fully home in pocket Ensure bulb is pushed fully home No primary water circulation Check system / circulating pump Burner rating incorrect Correct burner rating Boiler thermostat differential incorrect Replace boiler thermostat External controls not operating correctly Check and correct external controls Blocked flue, fumes on startup CF - Check flue with gauge and seal/gaskets RS - Check seal / gaskets Oil soaked boiler, faulty burner operation, numerous lockouts Rectify burner operation and lockouts Odour in boiler room, oil leaks from pipework, flexible hoses connections Rectify oil leaks, replace components if necessary FAULT FINDING & DIAGRAMS Noisy operation INSTALLATION & SERVICING INSTRUCTIONS FOR WORCESTER BOSCH 8-716-106-254a (03.05) FAULT FINDING 45 INSTRUCTION MANUAL INSTALLATION COMMISSIONING & SERVICING www.worcester-bosch.co.uk Worcester, Bosch Group Cotswold Way, Warndon, Worcester WR4 9SW Telephone: (01905) 754624 Fax: (01905) 754619 Part Number: 8-716-106-254a (03.05) Worcester, Bosch Group is a trading name of BBT Thermotechnology UK Ltd.