1
01GB00iDAX001_R_QG.book Page 1 Friday, December 22, 2006 11:23 AM
FOR CAR USE ONLY/NUR FÜR AUTOMOBIL GEBRAUCH/POUR APPLICATION AUTOMOBILE UNIQUEMENT/
PARA USO EN AUTOMÓVILES/SOLO PER L’UTILIZZO IN AUTOMOBILE/ENDAST FÖR BILBRUK
R
EN
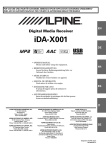
Digital Media Receiver
iDA-X001
DE
• QUICK REFERENCE GUIDE
Please read before using this equipment.
FR
• KURZANLEITUNG
Lesen Sie diese Kurzanleitung bitte vor Gebrauch
des Gerätes.
• GUIDE DE RÉFÉRENCE RAPIDE
Veuillez lire avant d’utiliser cet appareil.
• GUÍA DE REFERENCIA RÁPIDA
Léalo antes de utilizar este equipo.
ES
• GUIDA RAPIDA
Si prega di leggere prima di utilizzare il
attrezzatura.
• SNABBGUIDE
Innan du använder utrustningen bör du läsa igenom
denna snabbguide.
IT
ALPINE ELECTRONICS MARKETING, INC.
1-1-8 Nishi Gotanda,
Shinagawa-ku,
Tokyo 141-0031, Japan
Phone 03-5496-8231
ALPINE ELECTRONICS OF AMERICA, INC.
19145 Gramercy Place, Torrance,
California 90501, U.S.A.
Phone 1-800-ALPINE-1 (1-800-257-4631)
ALPINE ELECTRONICS OF CANADA, INC.
777 Supertest Road, Toronto,
Ontario M3J 2M9, Canada
Phone 1-800-ALPINE-1 (1-800-257-4631)
YAMAGATA (Wuxi) Co., Ltd.
Block 28-25,Changjiang Nanlu, WND, jiangsu, China
ALPINE ELECTRONICS OF AUSTRALIA PTY. LTD.
161-165 Princes Highway, Hallam
Victoria 3803, Australia
Phone 03-8787-1200
ALPINE ITALIA S.p.A.
Viale C. Colombo 8, 20090 Trezzano
Sul Naviglio (MI), Italy
Phone 02-484781
ALPINE ELECTRONICS GmbH
Frankfurter Ring 117, 80807 München, Germany
Phone 089-32 42 640
ALPINE ELECTRONICS DE ESPAÑA, S.A.
Portal de Gamarra 36, Pabellón, 32
01013 Vitoria (Alava)-APDO 133, Spain
Phone 945-283588
ALPINE ELECTRONICS OF U.K. LTD.
Alpine House
Fletchamstead Highway, Coventry CV4 9TW, U.K.
Phone 0870-33 33 763
ALPINE ELECTRONICS (BENELUX) GmbH
Leuvensesteenweg 510-B6,
1930 Zaventem, Belgium
Phone 02-725-13 15
ALPINE ELECTRONICS FRANCE S.A.R.L.
(RCS PONTOISE B 338 101 280)
98, Rue de la Belle Etoile, Z.I. Paris Nord Il,
B.P. 50016, 95945 Roissy Charles de Gaulle
Cedex, France
Phone 01-48638989
Designed by ALPINE Japan
Printed in China (Y)
68-08564Z75-A
01GB01iDAX001_R_QG.fm
ALPINE iDA-X001-EU_QG 68-08564Z75-A (EN)
SE
01GB00iDAX001_R_QG.book Page 1 Friday, December 22, 2006 11:23 AM
ENGLISH
Contents
WARNING
WARNING
WARNING ................................................. 1
CAUTION .................................................. 2
PRECAUTIONS ........................................ 3
Center Jog Dial Operation ............... 4
Getting Started.................................. 5
Radio.................................................. 6
RDS .................................................... 7
iPod® .................................................. 8
Specifications ................................. 11
Installation....................................... 11
Connections .................................... 14
The Quick Reference Guide explains basic
operation of Radio, Radio Data System and iPod
functions. For details on operation, refer to the
iDA-X001 Owner's Manual, which may be
downloaded from the ALPINE homepage (http://
www.manuals.alpine-europe.com).
Also, if required, an Alpine dealer will readily
provide a print out of the Owner’s Manual.
WARNING
This symbol means important instructions.
Failure to heed them can result in serious
injury or death.
DO NOT OPERATE ANY FUNCTION THAT TAKES YOUR
ATTENTION AWAY FROM SAFELY DRIVING YOUR
VEHICLE.
Any function that requires your prolonged attention should only
be performed after coming to a complete stop. Always stop the
vehicle in a safe location before performing these functions.
Failure to do so may result in an accident.
KEEP THE VOLUME AT A LEVEL WHERE YOU CAN STILL
HEAR OUTSIDE NOISES WHILE DRIVING.
Excessive volume levels that obscure sounds such as emergency
vehicle sirens or road warning signals (train crossings, etc.) can be
dangerous and may result in an accident. LISTENING AT LOUD
VOLUME LEVELS IN A CAR MAY ALSO CAUSE HEARING
DAMAGE.
MINIMIZE DISPLAY VIEWING WHILE DRIVING.
Viewing the display may distract the driver from looking ahead of
the vehicle and cause an accident.
DO NOT DISASSEMBLE OR ALTER.
Doing so may result in an accident, fire or electric shock.
USE ONLY IN CARS WITH A 12 VOLT NEGATIVE GROUND.
(Check with your dealer if you are not sure.) Failure to do so may
result in fire, etc.
KEEP SMALL OBJECTS SUCH AS BATTERIES OUT OF THE
REACH OF CHILDREN.
Swallowing them may result in serious injury. If swallowed,
consult a physician immediately.
USE THE CORRECT AMPERE RATING WHEN REPLACING
FUSES.
Failure to do so may result in fire or electric shock.
DO NOT BLOCK VENTS OR RADIATOR PANELS.
Doing so may cause heat to build up inside and may result in fire.
USE THIS PRODUCT FOR MOBILE 12V APPLICATIONS.
Use for other than its designed application may result in fire,
electric shock or other injury.
1-EN
01GB03iDAX001_R_QGTOC.fm
ALPINE iDA-X001-EU_QG 68-08564Z75-A (EN)
01GB00iDAX001_R_QG.book Page 2 Friday, December 22, 2006 11:23 AM
MAKE THE CORRECT CONNECTIONS.
Failure to make the proper connections may result in fire or
product damage.
BEFORE WIRING, DISCONNECT THE CABLE FROM THE
NEGATIVE BATTERY TERMINAL.
Failure to do so may result in electric shock or injury due to
electrical shorts.
DO NOT SPLICE INTO ELECTRICAL CABLES.
Never cut away cable insulation to supply power to other
equipment. Doing so will exceed the current carrying capacity of
the wire and result in fire or electric shock.
DO NOT DAMAGE PIPE OR WIRING WHEN DRILLING
HOLES.
When drilling holes in the chassis for installation, take
precautions so as not to contact, damage or obstruct pipes, fuel
lines, tanks or electrical wiring. Failure to take such precautions
may result in fire.
DO NOT USE BOLTS OR NUTS IN THE BRAKE OR
STEERING SYSTEMS TO MAKE GROUND CONNECTIONS.
Bolts or nuts used for the brake or steering systems (or any other
safety-related system), or tanks should NEVER be used for
installations or ground connections. Using such parts could
disable control of the vehicle and cause fire etc.
DO NOT INSTALL IN LOCATIONS WHICH MIGHT HINDER
VEHICLE OPERATION, SUCH AS THE STEERING WHEEL
OR SHIFT LEVER.
Doing so may obstruct forward vision or hamper movement etc.
and results in serious accident.
DO NOT ALLOW CABLES TO BECOME ENTANGLED IN
SURROUNDING OBJECTS.
Arrange wiring and cables in compliance with the manual to
prevent obstructions when driving. Cables or wiring that obstruct
or hang up on places such as the steering wheel, shift lever, brake
pedals, etc. can be extremely hazardous.
CAUTION
This symbol means important instructions.
Failure to heed them can result in injury or
material property damage.
HALT USE IMMEDIATELY IF A PROBLEM APPEARS.
Failure to do so may cause personal injury or damage to the
product. Return it to your authorized Alpine dealer or the nearest
Alpine Service Centre for repairing.
HAVE THE WIRING AND INSTALLATION DONE BY
EXPERTS.
The wiring and installation of this unit requires special technical
skill and experience. To ensure safety, always contact the dealer
where you purchased this product to have the work done.
USE SPECIFIED ACCESSORY PARTS AND INSTALL THEM
SECURELY.
Be sure to use only the specified accessory parts. Use of other
than designated parts may damage this unit internally or may not
securely install the unit in place. This may cause parts to become
loose resulting in hazards or product failure.
ARRANGE THE WIRING SO IT IS NOT CRIMPED OR
PINCHED BY A SHARP METAL EDGE.
Route the cables and wiring away from moving parts (like the seat
rails) or sharp or pointed edges. This will prevent crimping and
damage to the wiring. If wiring passes through a hole in metal,
use a rubber grommet to prevent the wire’s insulation from being
cut by the metal edge of the hole.
DO NOT INSTALL IN LOCATIONS WITH HIGH MOISTURE
OR DUST.
Avoid installing the unit in locations with high incidence of
moisture or dust. Moisture or dust that penetrates into this unit
may result in product failure.
2-EN
01GB03iDAX001_R_QGTOC.fm
ALPINE iDA-X001-EU_QG 68-08564Z75-A (EN)
01GB00iDAX001_R_QG.book Page 3 Friday, December 22, 2006 11:23 AM
PRECAUTIONS
About iPods usable with this unit
• The unit can be used with the fourth generation and above
iPod, iPod photo, iPod mini or the first generation iPod nano
only. However, future generation iPod compatibility cannot be
guranteed.
• Touch wheel or scroll wheel type iPods without the dock
connector cannot be connected to the unit.
• The unit can be used with the following iPod.
<USB connected>
Fifth generation iPod
First generation iPod nano
<Directly connected>
Fourth generation iPod
Fifth generation iPod
iPod photo
iPod mini
First generation iPod nano
• If the unit is used with iPod software versions of iTunes earlier than
7.0.0.1, correct function and performance are not guaranteed.
Protecting the USB connector
• Only an iPod or USB memory can be connected to the USB
connector on this unit. Correct performance using other USB
products cannot be guaranteed.
• If the USB connector is used, be sure to use only the supplied
connector cable with the unit. A USB hub is not supported.
• Depending on the connected USB memory device, the unit
may not function or some functions may not be performed.
• The audio file format that can be played back on the unit is
MP3/WMA/AAC.
• Artist/song name, etc., can be displayed, however characters
may not be correctly displayed.
On Handling USB Memory
• The unit can play back “mp3,” “wma” or “m4a” file extensions.
• Do not add the above extensions to a file other than audio data.
This non-audio data will not be recognized. The resulting
playback may contain noise that can damage speakers and/or
amplifiers.
• It is recommended to back up important data on a personal
computer.
• Do not remove the USB device while playback is in progress.
Change SOURCE to something other than USB, then remove
the USB device to prevent possible damage to its memory.
CAUTION
Alpine accepts no responsibility for lost data, etc., even if data, etc.,
is lost while using this product.
• Windows Media and the Windows logo are trademarks, or
registered trademarks of Microsoft Corporation in the United
States and/or other countries.
• Apple, the Apple logo, iPod and iTunes are trademarks of
Apple Computer, Inc., registered in the U.S. and other
countries.
• “MPEG Layer-3 audio coding technology licensed from
Fraunhofer IIS and Thomson.”
• “Supply of this product only conveys a license for private,
non-commercial use and does not convey a license nor imply
any right to use this product in any commercial (i.e. revenuegeneration) real time broadcasting (terrestrial, satellite, cable
and/or any other media), broadcasting/streaming via internet,
intranets and/or other networks or in other electronic content
distribution systems, such as pay-audio or audio-on-demand
applications. An independent license for such use is required.
For details, please visit http://www.mp3licensing.com”
• “Uni-Type™” is a style of Universal design font developed by
a joint reserch between LIM Corporation Ltd., and Chiba
University Faculty of Engineering.
• “Uni-Type™” is the trademark registered by LIM
Corporation Ltd.
• To prevent malfunction or damage, note the following points.
Read the USB memory Owner’s Manual thoroughly.
Do not touch the terminals by hand or metal.
Do not subject USB memory to excessive shock.
Do not bend, drop, disassemble, modify or soak in the water.
• Avoid usage or storage in the following locations:
Anywhere in the car exposed to direct sunlight or high
temperatures.
Anywhere the possibility of high humidity or corrosive
substances are present.
• Fix the USB memory in a location where driver operation will
not be hindered.
• USB memory may not function correctly at high or low
temperature.
• Use only certified USB memory. Note that even certified USB
memory, may not function correctly depending on its type or
state.
• USB memory function is not guaranteed. Use USB memory
according to the terms of agreement.
• Depending on the settings of the USB memory type, memory
state or encoding software, the unit may not play back or
display properly.
• A file that is copy-protected (copyright protection) cannot be
played back.
• USB memory may take time to start playback. If there is a
particular file other than audio in the USB memory, it may take
considerable time before the file is played back or searched.
3-EN
01GB03iDAX001_R_QGTOC.fm
ALPINE iDA-X001-EU_QG 68-08564Z75-A (EN)
01GB00iDAX001_R_QG.book Page 4 Friday, December 22, 2006 11:23 AM
Center Jog Dial
Operation
The Center Jog Dial is used when you adjust volume, select list items,
etc., by turning it left or right. You can turn the Center Jog Dial left or
right in two steps, and settings change depending on the steps.
Center Jog Dial
Centre position
Turning One Step
Turning and
holding
(changes
continuously)
Turning One Step
Turning and
holding
(changes
continuously)
After turning the Center Jog Dial, it will return to its centre
position automatically when you release it.
4-EN
01GB03iDAX001_R_QGTOC.fm
ALPINE iDA-X001-EU_QG 68-08564Z75-A (EN)
01GB00iDAX001_R_QG.book Page 5 Friday, December 22, 2006 11:23 AM
Getting Started
Turning Power On and Off
ON :
Press SOURCE/ .
OFF :
Press and hold SOURCE/
for at least 2 seconds
Changing the Source
Press SOURCE/
repeatedly.
Select the desired mode.
iPod :
iPod2 :
If a USB connection to an iPod is used.
If an iPod is directly connected using the ALPINE FULL
SPEED™ Connection Cable (KCE-422i).
USB Memory : Displayed when USB memory is connected.
CD CHG :
Displayed when a CD changer is connected.
Adjusting Volume
DOWN
UP
Changing the Display
Press VIEW repeatedly.
In each audio mode, the display changes every time VIEW is pressed.
5-EN
01GB05iDAX001_R_QG.fm
ALPINE iDA-X001-EU_QG 68-08564Z75-A (EN)
01GB00iDAX001_R_QG.book Page 6 Friday, December 22, 2006 11:23 AM
Radio
Recalling the TUNER Mode
1
Press SOURCE/
repeatedly.
Select the tuner mode.
Changing the Band
Press BAND/TA repeatedly.
FM-1
Select the desired radio band.
2
LW
MW
FM-2
FM-3
Presetting Stations Automatically
3
Press and hold TUNE/A.ME for at least 2 seconds.
The tuner will automatically seek and store 6 strong stations in the
selected band.
They will be stored into preset numbers 1 to 6 in order of signal strength.
Tuning to Preset Stations
1
Press PRESET.
The Preset screen is displayed.
4
2
Turn the Center Jog Dial.
Select the a radio station.
3
Press ENT.
The display shows the band, preset number and frequency of the
station selected.
6-EN
01GB05iDAX001_R_QG.fm
ALPINE iDA-X001-EU_QG 68-08564Z75-A (EN)
01GB00iDAX001_R_QG.book Page 7 Friday, December 22, 2006 11:23 AM
RDS
Setting RDS Reception Mode and
Receiving RDS Stations
The RDS (Radio Data System) is a radio information system using the 57
kHz subcarrier of regular FM broadcast. The RDS allows you to receive
a variety of information such as traffic information, station names, and to
automatically re-tune to a stronger transmitter that is broadcasting the
same programme.
1
2
3
4
Press FUNC./SETUP to activate the Function mode.
Press ENT to select the AF (Alternative Frequency) mode.
Turn the Center Jog Dial to select On, and press ENT.
Press FUNC./SETUP to activate the RDS mode.
Receiving Traffic Information
Press and hold BAND/TA for at least 2 seconds to turn on the
“TA” indicator.
When a traffic information station is tuned in, the “TP” indicator lights up.
Traffic information is heard only when it is being broadcast.
If traffic information is not being broadcast, the unit is set in the standby
mode. When a traffic information broadcast begins, the unit
automatically receives it and the TRF Info screen is displayed.
When the traffic information broadcast is over, the unit will automatically
set in the standby mode.
PTY (Programme Type) Tuning
1
2
Press FUNC./SETUP to activate the Function mode.
Turn the Center Jog Dial to select PTY, and press ENT,
while the unit is in Radio (FM receiving) mode.
The PTY Select screen is displayed.
3
4
Turn the Center Jog Dial to choose the desired programme
type.
Press ENT after selecting the programme type to start
searching for a station in the selected programme type.
The chosen programme type display blinks during searching and
lights when a station is found.
If no PTY station is found, “No PTY” will be displayed for 10
seconds.
7-EN
01GB05iDAX001_R_QG.fm
ALPINE iDA-X001-EU_QG 68-08564Z75-A (EN)
01GB00iDAX001_R_QG.book Page 8 Friday, December 22, 2006 11:23 AM
iPod®
Recalling the iPod Mode
Press SOURCE/
repeatedly.
Select the iPod mode.
Pause and Playback
To pause playback, press / .
Pressing / again will resume playback.
Selecting the desired song
Return to the beginning of the current song:
Press
.
Fast backward:
Press and hold
.
Advance to the beginning of the next song:
Press
.
Fast forward:
Press and hold
.
Repeat Play
Repeat Song:
A single song is repeatedly played back.
Repeat Off:
Repeat playback is cancelled.
1
Press FUNC./SETUP.
The Function screen is displayed.
2
3
4
5
6
Turn the Center Jog Dial to select Repeat.
Press ENT.
Turn the Center Jog Dial to select a Song.
Press ENT.
Press BACK.
The song is repeatedly played back.
8-EN
01GB05iDAX001_R_QG.fm
ALPINE iDA-X001-EU_QG 68-08564Z75-A (EN)
01GB00iDAX001_R_QG.book Page 9 Friday, December 22, 2006 11:23 AM
Random Play Shuffle
Shuffle Albums:
Album shuffle plays back all songs in an album in order, then randomly
selects the next album.
Shuffle Songs:
Song shuffle randomly plays back certain selected songs.
Shuffle Off:
Shuffle mode off.
1
Press FUNC./SETUP.
The Function screen is displayed.
2
3
4
Turn the Center Jog Dial to select Shuffle.
Press ENT.
Turn the Center Jog Dial.
Select the Shuffle playback mode.
5
6
Press ENT.
Press BACK.
The songs will be played back in random sequence.
Random Play Shuffle All
Shuffle ALL plays all songs in the iPod randomly.
1
Press
/SEARCH.
The Menu Select screen is displayed.
2
3
Turn the Center Jog Dial to select Shuffle All mode.
Press ENT.
The songs will be played back in random sequence.
9-EN
01GB05iDAX001_R_QG.fm
ALPINE iDA-X001-EU_QG 68-08564Z75-A (EN)
01GB00iDAX001_R_QG.book Page 10 Friday, December 22, 2006 11:23 AM
Searching for a desired Song/Title
Using the Playlist/Artist/Album/Podcast/Audiobook/Genre/Composer/
Song search mode's individual hierarchy, you can narrow down your
search as shown in the table below.
Hierarchy 1
Playlists
Artists
Albums
Podcasts
Audiobooks*
Genres
Composers
Songs
Hierarchy 2
Songs
Albums
Songs
Episodes
Artists
Albums
-
Hierarchy 3
Songs
Albums
Songs
-
Hierarchy 4
Songs
-
* Only when connected via USB.
• E.g., if there is only an album in the selected artist when USB is connected,
the song search mode is selected in such a way that the album search mode is
skipped.
1
Press
/SEARCH.
The Menu Select screen is displayed.
2
Turn the Center Jog Dial to select the desired searching
mode.
Playlists / Artists / Albums / Podcasts / Audiobooks / Genres /
Composers / Songs
3
4
5
Press ENT.
Turn the Center Jog Dial to select the desired title.
Press ENT.
Song/Episode/Audiobook The selected song/title is played
Search mode :
back.
Others Search mode :
Proceed to the search mode of the
next hierarchy. Select a title by
performing steps 4 and 5 repeatedly.
• After pressing and holding ENT for at least 2 seconds while in each hierarchy
(except Song/Episode/Audiobook hierarchy), all songs/titles of the selected
hierarchy are played back.
10-EN
01GB05iDAX001_R_QG.fm
ALPINE iDA-X001-EU_QG 68-08564Z75-A (EN)
01GB00iDAX001_R_QG.book Page 11 Friday, December 22, 2006 11:23 AM
Specifications
FM TUNER SECTION
Tuning Range
Mono Usable Sensitivity
Alternate Channel Selectivity
Signal-to-Noise Ratio
Stereo Separation
Capture Ratio
87.5-108.0 MHz
0.7 µV
80 dB
65 dB
35 dB
2.0 dB
MW TUNER SECTION
Tuning Range
Sensitivity (IEC Standard)
531-1,602 kHz
25.1 µV/28 dB
LW TUNER SECTION
Tuning Range
Sensitivity (IEC Standard)
153-281 kHz
31.6 µV/30 dB
USB SECTION
USB requirements
USB 1.1/2.0
Max. Power Consumption
500mA
USB Class
Mass Storage
File System
FAT 12/16/32
MP3 Decoding
MPEG-1/2 AUDIO Layer-3
WMA Decoding
Windows Media™ Audio
AAC Decoding
AAC-LC format “.m4a” file
Number of Channels
2-Channel (Stereo)
Frequency Response*
5-20,000 Hz (±1 dB)
Total Harmonic Distortion
0.008% (at 1 kHz)
Dynamic Range
95 dB (at 1 kHz)
Signal-to-Noise Ratio
105 dB
Channel Separation
85 dB (at 1 kHz)
* Frequency response may differ depending on the encoder
software/bit rate.
GENERAL
Installation
• Be sure to disconnect the cable from the (–) battery post before
installing your iDA-X001. This will reduce any chance of damage to
the unit in case of a short-circuit.
• Be sure to connect the colour coded leads according to the diagram.
Incorrect connections may cause the unit to malfunction or damage
to the vehicle’s electrical system.
• When making connections to the vehicle’s electrical system, be
aware of the factory installed components (e.g. on-board computer).
Do not tap into these leads to provide power for this unit. When
connecting the iDA-X001 to the fuse box, make sure the fuse for the
intended circuit of the iDA-X001 has the appropriate amperage.
Failure to do so may result in damage to the unit and/or the vehicle.
When in doubt, consult your Alpine dealer.
• The iDA-X001 uses female RCA-type jacks for connection to other
units (e.g. amplifier) having RCA connectors. You may need an
adaptor to connect other units. If so, please contact your authorized
Alpine dealer for assistance.
• Be sure to connect the speaker (–) leads to the speaker (–) terminal.
Never connect left and right channel speaker cables to each other or
to the vehicle body.
Accessory List
•
•
•
•
•
•
•
•
•
•
•
Digital Media receiver ....................................................... 1
Power cable ....................................................................... 1
Mounting sleeve ................................................................ 1
Carrying case .................................................................... 1
Front frame ........................................................................ 1
USB cable .......................................................................... 1
iPod Dock interface cable................................................. 1
Rubber Cap........................................................................ 1
Hex Bolt.............................................................................. 1
Screw (M5x8) ..................................................................... 4
Quick Reference Guide............................................... 1 set
Caution
Power Requirement
14.4 V DC
(11-16 V allowable)
50 W × 4
2 V/10 k ohms
1.0 kg (2 lbs. 3 oz)
Maximum Power Output
Maximum Pre-Output Voltage
Weight
Do not block the unit’s heat sink, thus preventing air circulation.
If blocked, heat will accumulate inside the unit and may cause a
fire.
Heat sink
CHASSIS SIZE
Width
Height
Depth
178 mm (7")
50 mm (2")
156 mm (6-1/8")
NOSEPIECE SIZE
Width
Height
Depth
170 mm (6-3/4")
46 mm (1-13/16")
24 mm (15/16")
DETACHABLE FRONT PANEL SIZE
Width
Height
Depth
107 mm (4-1/4")
46 mm (1-13/16")
30 mm (1-3/16")
• Due to continuous product improvement, specifications and design
are subject to change without notice.
11-EN
01GB06iDAX001_R_QG.fm
ALPINE iDA-X001-EU_QG 68-08564Z75-A (EN)
01GB00iDAX001_R_QG.book Page 12 Friday, December 22, 2006 11:23 AM
3
Detachable
Front Panel
Slide the iDA-X001 into the dashboard. When the
unit is in place, make sure the locking pins are fully
seated in the down position. This can be done by
pressing firmly in on the unit while pushing the
locking pin down with a small screwdriver. This
ensures that the unit is properly locked and will not
accidentally come out from the dashboard. Install
the detachable front panel.
Caution
Lock pin
When you install this unit in your car, do not remove the
detachable front panel.
If the detachable front panel is removed during installation, you
might press too hard and warp the metal plate that holds it in
place.
Removal
1. Remove the detachable front panel.
1
Rubber Cap
(Included)
Bracket
Mounting Sleeve
(Included)
Hex Bolt
(Included)
Dashboard
2. Use a small screwdriver (or similar tool) to push the
locking pins to the “up” position (see above drawing).
As each pin is unlocked, gently pull out on the unit to
make sure it does not re-lock before unlocking the
second pin.
3. Pull the unit out, keeping it unlocked as you do so.
<JAPANESE CAR>
Pressure Plates*
This unit
* If the installed mounting sleeve is loose in the main unit, the pressure
plates may be bent slightly to remedy the problem.
Front Frame
Remove the mounting sleeve from the main unit (see
“Removal” on page 12). Slide the mounting sleeve
into the dashboard and fix it with the metal shackles.
2
Screws (M5 × 8)
(Included)
Metal Mounting Strap
This unit
Screw
Bolt Stud
Mounting Bracket
Hex Nut (M5)
This unit
When your vehicle has the Bracket, mount the long
hex bolt onto the rear panel of the iDA-X001 and put
the Rubber Cap on the hex bolt. If your vehicle does
not have the Mounting Support, reinforce the head
unit with the metal mounting strap (not supplied).
Connect all the leads of the iDA-X001 according to
details described in the CONNECTIONS section.
• For the screw *, provide a proper screw to the chassis installing
location.
USB cable connection
Insert a USB cable into the unit, and fix with a lock screw.
USB Cable
12-EN
01GB06iDAX001_R_QG.fm
ALPINE iDA-X001-EU_QG 68-08564Z75-A (EN)
01GB00iDAX001_R_QG.book Page 13 Friday, December 22, 2006 11:23 AM
iPod Connection (sold separately)
Direct connection
Connect iPod direct connector to an iPod with FULL SPEEDTM
connection cable (KCE-422i).
FULL SPEEDTM
Connection Cable
(KCE-422i)
USB connection
Connect USB cable to an iPod with iPod Dock interface cable.
USB cable
iPod Dock interface Cable
Remove the iPod
Remove the iPod from FULL SPEED™ Connection Cable or iPod
Dock interface cable.
USB memory Connection (sold separately)
Connect USB memory
Connect USB memory to USB cable.
USB cable
USB memory
Remove USB memory
Pull out USB memory squarely from the USB cable.
USB cable
USB memory
IMPORTANT
Please record the serial number of your unit in the space provided
below and keep it as a permanent record. The serial number or the
engraved serial number is located on the bottom of the unit.
SERIAL NUMBER:
INSTALLATION DATE:
INSTALLATION TECHNICIAN:
PLACE OF PURCHASE:
13-EN
01GB06iDAX001_R_QG.fm
ALPINE iDA-X001-EU_QG 68-08564Z75-A (EN)
01GB00iDAX001_R_QG.book Page 14 Friday, December 22, 2006 11:23 AM
Connections
To iPod or USB memory
(Black)
SWRC G.OUT
(Brown/Yellow)
ADAPTIVE STEERING REMOTE CONTROL IN1
(Brown/Orange) ADAPTIVE STEERING REMOTE CONTROL IN2
To adaptive steering remote
control interface box
To adaptive steering remote
control interface box
To adaptive steering remote
control interface box
To iPod
To vehicle Display Interface
Antenna
ISO Antenna Plug
JASO Antenna Plug
(Pink/Black)
AUDIO INTERRUPT IN
To vehicle phone
(Blue/White) REMOTE TURN-ON
To amplifier or equalizer
(Orange) DIMMER
To the instrument cluster
illumination lead
To power antenna
(Red) IGNITION
(Black) GND
Ignition Key
(Blue) POWER ANT
BATTERY
(10A)
(Yellow)
Battery
(Green)
(Green/Black)
(White)
(White/Black)
Rear Left
Front Left
(Grey/Black)
Front Right
(Grey)
(Violet/Black)
Rear Right
(Violet )
Speakers
*1
EQ
NORM
CD Changer
(Sold Separately)
Speakers
Amplifier
(Sold Separately)
Rear Left
Rear Right
Amplifier
(Sold Separately)
Front Left
Front Right
Amplifier
(Sold Separately)
Subwoofers
*1 The label is attached on the bottom of the unit.
14-EN
01GB06iDAX001_R_QG.fm
ALPINE iDA-X001-EU_QG 68-08564Z75-A (EN)
01GB00iDAX001_R_QG.book Page 15 Friday, December 22, 2006 11:23 AM
Vehicle Display Interface Connector
Fuse Holder (10A)
Outputs Vehicle Display Interface control signals. Connect
this to the optional Vehicle Display Interface box.
For details about connections, consult your nearest Alpine
dealer.
Rear Output RCA Connectors
Antenna Receptacle
Audio Interrupt In Lead (Pink/Black)
Connect this lead to the Audio Interface output of a cellular
phone which provides ground shorting when a call is received.
Remote Turn-On Lead (Blue/White)
Connect this lead to the remote turn-on lead of your
amplifier or signal processor.
Dimmer Lead (Orange)
This lead may be connected to the vehicle’s instrument
cluster illumination lead. This will enable the vehicle’s
dimmer control to dim the backlighting of the unit.
Switched Power Lead (Ignition) (Red)
Connect this lead to an open terminal on the vehicle’s fuse
box or another unused power source which provides (+)
12V only when the ignition is turned on or in the accessory
position.
Ground Lead (Black)
Connect this lead to a good chassis ground on the vehicle.
Make sure the connection is made to bare metal and is
securely fastened using the sheet metal screw provided.
Power Antenna Lead (Blue)
Connect this lead to the +B terminal of your power antenna,
if applicable.
• This lead should be used only for controlling the vehicle’s power
antenna. Do not use this lead to turn on an amplifier or a signal
processor, etc.
RED is right and WHITE is left.
Front Output RCA Connectors
RED is right and WHITE is left.
Subwoofer Ouput RCA Connectors
RED is right and WHITE is left.
System Switch
When connecting a processor using Ai-NET, place this
switch in the EQ position. When no device is connected,
leave the switch in the NORM position.
• Be sure to turn the power off to the unit before changing the switch
position.
Power Supply Connector
Ai-NET Cable (Included with CD Changer)
RCA Extension Cable (sold separately)
ISO/JASO Antenna Adaptor (sold separately)
An ISO/JASO antenna adapter may be required, depending
on the vehicle.
Adaptive Steering Remote Control In 1 Lead (Brown/
Yellow)
To adaptive steering remote control interface box.
For details about connections, consult your nearest Alpine
dealer.
Adaptive Steering Remote Control In 2 Lead (Brown/
Orange)
To adaptive steering remote control interface box.
For details about connections, consult your nearest Alpine
dealer.
Steering Wheel Remote Control G.OUT
Connect this lead to the positive (+) post of the vehicle’s
battery.
To adaptive steering remote control interface box.
For details about connections, consult your nearest Alpine
dealer.
ISO Power Supply Connector
iPod Direct Connector
ISO Connector (Speaker Output)
Control iPod signals.
Connect this to an iPod or to an optional Bluetooth Box.
To use a hands-free mobile phone, an optional Bluetooth
Box connection is required. For details on connection, refer
to the Owner’s Manual of the Bluetooth Box.
Battery Lead (Yellow)
Left Rear (+) Speaker Output Lead (Green)
Left Rear (–) Speaker Output Lead (Green/Black)
Left Front (+) Speaker Output Lead (White)
Right Front (–) Speaker Output Lead (Grey/Black)
FULL SPEED™ Connection Cable (KCE-422i) (sold
separately)
Right Front (+) Speaker Output Lead (Grey)
USB Connector
Left Front (–) Speaker Output Lead (White/Black)
Right Rear (–) Speaker Output Lead (Violet/Black)
Right Rear (+) Speaker Output Lead (Violet)
Ai-NET Connector
Connect this to the output or input connector of other
product (CD changer, Equalizer, etc.) equipped with Ai-NET.
Steering Remote Control Interface Connector
To steering remote control interface box.
For details about connections, consult your nearest Alpine
dealer.
Connect USB cable.
USB cable
Connect this to an USB memory or to an iPod. To use an
iPod, iPod Dock interface cable connection is required.
• Use the supplied USB cable. If a USB cable other than the supplied is
used, correct performance cannot be guaranteed.
• Route the USB cable away from other cables.
To prevent external noise from entering the audio system.
• Locate the unit and route the leads at least 10 cm away from the car harness.
• Keep the battery power leads as far away from other leads as possible.
• Connect the ground lead securely to a bare metal spot (remove any paint, dirt or grease if necessary) of the car chassis.
• If you add an optional noise suppressor, connect it as far away from the unit as possible. Your Alpine dealer carries various noise
suppressors, contact them for further information.
• Your Alpine dealer knows best about noise prevention measures so consult your dealer for further information.
15-EN
01GB06iDAX001_R_QG.fm
ALPINE iDA-X001-EU_QG 68-08564Z75-A (EN)
01GB00iDAX001_R_QG.book Page 2 Friday, December 22, 2006 11:23 AM
01GB02iDAX001_R_QG.fm
ALPINE iDA-X001-EU_QG 68-08564Z75-A (EN)
01SE00iDAX001_R_QG.book Page 18 Friday, December 22, 2006 11:32 AM
S/NO. LABEL
01SE06iDAX001_R_QG.fm
ALPINE iDA-X001-EU_QG 68-08564Z75-A (SE)