1
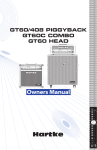
GT60/408 PIGGYBACK
GT60C COMBO
GT60 HEAD
�
�
�
�
�
�
��
�
�
�
�
�
�
�
�
�
�
��
�
�
�
�
�
��
��
�
���
�
�
���
�
��
�� ��
�
��
�
���
�
�
���
��
�
��
����
��������������
����
�
�
�
�
�
�
��
�
�
�
�
�
�
�
�
�
�
��
�
�
�
�
�
��
��
�
���
�
�
���
�
��
�� ��
�
��
�
���
�
�
���
�
��
�� ��
�
��
�
���
�
�
���
��
�
��
�
�
�
�
�
�
��
�
�
�
�
�����
WARNING: To reduce the risk of fire or electric shock, do not expose this unit
to rain or moisture. To reduce the hazard of electrical shock, do not remove
cover or back. No user serviceable parts inside. Please refer all servicing to
qualified personnel.The lightning flash with an arrowhead symbol within an
equilateral triangle, is intended to alert the user to the presence of uninsulated "dangerous voltage" within the products enclosure that may be of sufficient magnitude to constitute a risk of electric shock to persons. The exclamation point within an equilateral triangle is intended to alert the user to the
presence of important operating and maintenance (servicing) instructions in
the literature accompanying the product.
Important Safety Instructions
1. Please read all instructions before operating the unit.
2. Keep these instructions for future reference.
3. Please heed all safety warnings.
4. Follow manufacturers instructions.
5. Do not use this unit near water or moisture.
6. Clean only with a damp cloth.
7. Do not block any of the ventilation openings. Install in accordance with
the manufacturers instructions.
8. Do not install near any heat sources such as radiators, heat registers,
stoves, or other apparatus (including amplifiers) that produce heat.
9. Do not defeat the safety purpose of the polarized or grounding-type plug.
A polarized plug has two blades with one wider than the other. A grounding type plug has two blades and a third grounding prong. The wide blade
or third prong is provided for your safety. When the provided plug does
not fit your outlet, consult an electrician for replacement of the obsolete
outlet.
10. Protect the power cord from being walked on and pinched particularly at
plugs, convenience receptacles and at the point at which they exit from
the unit.
11. Unplug this unit during lightning storms or when unused for long periods
of time.
12.Refer all servicing to qualified personnel. Servicing is required when the
unit has been damaged in any way, such as power supply cord or plug
damage, or if liquid has been spilled or objects have fallen into the unit,
the unit has been exposed to rain or moisture, does not operate normally,
or has been dropped.
ATTENTION: Pour éviter tout risque d’électrocution ou d’incendie, ne pas exposer cet appareil à la pluie ou
à l’humidité. Pour éviter tout risque d’électrocution, ne pas ôter le couvercle ou le dos du boîtier. Cet appareil ne
contient aucune pièce remplaçable par l'utilisateur. Confiez toutes les réparations à un personnel qualifié. Le
signe avec un éclair dans un triangle prévient l’utilisateur de la présence d’une tension dangereuse et non
isolée dans l’appareil. Cette tension constitue un risque d’électrocution. Le signe avec un point d’exclamation
dans un triangle prévient l’utilisateur d’instructions importantes relatives à l’utilisation et à la maintenance du
produit.
Consignes de sécurité importantes
1. Veuillez lire toutes les instructions avant d’utiliser l’appareil.
2. Conserver ces instructions pour toute lecture ultérieure.
3. Lisez avec attention toutes les consignes de sécurité.
4. Suivez les instructions du fabricant.
5. Ne pas utiliser cet appareil près d’une source liquide ou dans un lieu humide.
6. Nettoyez l’appareil uniquement avec un tissu humide.
7. Veillez à ne pas obstruer les fentes prévues pour la ventilation de l’appareil. Installez l’appareil selon les
instructions du fabricant.
8. Ne pas installer près d’une source de chaleur (radiateurs, etc.) ou de tout équipement susceptible de
générer de la chaleur (amplificateurs de puissance par exemple).
9. Ne pas retirer la terre du cordon secteur ou de la prise murale. Les fiches canadiennes avec polarisation
(avec une lame plus large) ne doivent pas être modifiées. Si votre prise murale ne correspond pas au
modèle fourni, consultez votre électricien.
10. Protégez le cordon secteur contre tous les dommages possibles (pincement, tension, torsion,, etc.).
Veillez à ce que le cordon secteur soit libre, en particulier à sa sortie du boîtier.
11. Déconnectez l’appareil du secteur en présence d’orage ou lors de périodes d’inutilisation prolongées.
12. Consultez un service de réparation qualifié pour tout dysfonctionnement (dommage sur le cordon
secteur, baisse de performances, exposition à la pluie, projection liquide dans l’appareil, introduction
d’un objet dans le boîtier, etc.).
ACHTUNG: Um die Gefahr eines Brandes oder Stromschlags zu verringern, sollten Sie dieses Gerät weder
Regen noch Feuchtigkeit aussetzen.Um die Gefahr eines Stromschlags zu verringern, sollten Sie weder
Deckel noch Rückwand des Geräts entfernen. Im Innern befinden sich keine Teile, die vom Anwender gewartet werden können. Überlassen Sie die Wartung qualifiziertem Fachpersonal.Der Blitz mit Pfeilspitze im gleichseitigen Dreieck soll den Anwender vor nichtisolierter “gefährlicher Spannung” im Geräteinnern warnen.
Diese Spannung kann so hoch sein, dass die Gefahr eines Stromschlags besteht. Das Ausrufezeichen im
gleichseitigen Dreieck soll den Anwender auf wichtige Bedienungs- und Wartungsanleitungen aufmerksam
machen, die im mitgelieferten Informationsmaterial näher beschrieben werden.
Wichtige Sicherheitsvorkehrungen
1. Lesen Sie alle Anleitungen, bevor Sie das Gerät in Betrieb nehmen.
2. Bewahren Sie diese Anleitungen für den späteren Gebrauch gut auf.
3. Bitte treffen Sie alle beschriebenen Sicherheitsvorkehrungen.
4. Befolgen Sie die Anleitungen des Herstellers.
5. Benutzen Sie das Gerät nicht in der Nähe von Wasser oder Feuchtigkeit.
6. Verwenden Sie zur Reinigung des Geräts nur ein feuchtes Tuch.
7. Blockieren Sie keine Belüftungsöffnungen. Nehmen Sie den Einbau des Geräts nur entsprechend den
Anweisungen des Herstellers vor.
8. Bauen Sie das Gerät nicht in der Nähe von Wärmequellen wie Heizkörpern, Wärmeklappen, Öfen oder
anderen Geräten (inklusive Verstärkern) ein, die Hitze erzeugen.
9. Setzen Sie die Sicherheitsfunktion des polarisierten oder geerdeten Steckers nicht außer Kraft. Ein
polarisierter Stecker hat zwei flache, unterschiedlich breite Pole. Ein geerdeter Stecker hat zwei flache
Pole und einen dritten Erdungsstift. Der breitere Pol oder der dritte Stift dient Ihrer Sicherheit. Wenn der
vorhandene Stecker nicht in Ihre Steckdose passt, lassen Sie die veraltete Steckdose von einem Elektriker
ersetzen.
10. Schützen Sie das Netzkabel dahingehend, dass niemand darüber laufen und es nicht geknickt werden
kann. Achten Sie hierbei besonders auf Netzstecker, Mehrfachsteckdosen und den Kabelanschluss am
Gerät.
11. Ziehen Sie den Netzstecker des Geräts bei Gewittern oder längeren Betriebspausen aus der Steckdose.
12. Überlassen Sie die Wartung qualifiziertem Fachpersonal. Eine Wartung ist notwendig, wenn das Gerät auf
irgendeine Weise, beispielsweise am Kabel oder Netzstecker beschädigt wurde, oder wenn Flüssigkeiten
oder Objekte in das Gerät gelangt sind, es Regen oder Feuchtigkeit ausgesetzt war, nicht mehr wie
gewohnt betrieben werden kann oder fallen gelassen wurde.
PRECAUCION: Para reducir el riesgo de incendios o descargas, no permita que este aparato quede expuesto
a la lluvia o la humedad. Para reducir el riesgo de descarga eléctrica, nunca quite la tapa ni el chasis. Dentro
del aparato no hay piezas susceptibles de ser reparadas por el usuario. Dirija cualquier reparación al servicio
técnico oficial. El símbolo del relámpago dentro del triángulo equilátero pretende advertir al usuario de la
presencia de “voltajes peligrosos” no aislados dentro de la carcasa del producto, que pueden ser de la magnitud suficiente como para constituir un riesgo de descarga eléctrica a las personas. El símbolo de exclamación
dentro del triángulo equilátero quiere advertirle de la existencia de importantes instrucciones de manejo y
mantenimiento (reparaciones) en los documentos que se adjuntan con este aparato.
Instrucciones importantes de seguridad
1.
Lea todo este manual de instrucciones antes de comenzar a usar la unidad.
2.
Conserve estas instrucciones para cualquier consulta en el futuro.
3.
Cumpla con todo lo indicado en las precauciones de seguridad.
4.
Observe y siga todas las instrucciones del fabricante.
5.
Nunca utilice este aparato cerca del agua o en lugares húmedos.
6.
Limpie este aparato solo con un trapo suave y ligeramente humedecido.
7.
No bloquee ninguna de las aberturas de ventilación. Instale este aparato de acuerdo a las instrucciones
del fabricante.
8.
No instale este aparato cerca de fuentes de calor como radiadores, calentadores, hornos u otros aparatos (incluyendo amplificadores) que produzcan calor.
9.
No anule el sistema de seguridad del enchufe de tipo polarizado o con toma de tierra. Un enchufe polarizado tiene dos bornes, uno más ancho que el otro. Uno con toma de tierra tiene dos bornes normales y
un tercero para la conexión a tierra. El borne ancho o el tercero se incluyen como medida de seguridad.
Cuando el enchufe no encaje en su salida de corriente, llame a un electricista para que le cambie su
salida anticuada.
10. Evite que el cable de corriente quede en una posición en la que pueda ser pisado o aplastado, especialmente en los enchufes, receptáculos y en el punto en el que salen de la unidad.
11. Desconecte de la corriente este aparato durante las tormentas eléctricas o cuando no lo vaya a usar
durante un periodo de tiempo largo.
12. Dirija cualquier posible reparación solo al servicio técnico oficial. Deberá hacer que su aparato sea reparado cuando esté dañado de alguna forma, como si el cable de corriente o el enchufe están dañados, o
si se han derramado líquidos o se ha introducido algún objeto dentro de la unidad, si esta ha quedado
expuesta a la lluvia o la humedad, si no funciona normalmente o si ha caído al suelo.
ATTENZIONE: per ridurre il rischio di incendio o di scariche elettriche, non esponete questo apparecchio
a pioggia o umidità. Per ridurre il pericolo di scariche elettriche evitate di rimuoverne il coperchio o il pannello posteriore. Non esistono all'interno dell'apparecchio parti la cui regolazione è a cura dell'utente. Per
eventuale assistenza, fate riferimento esclusivamente a personale qualificato. Il fulmine con la punta a freccia
all'interno di un triangolo equilatero avvisa l'utente della presenza di "tensioni pericolose" non isolate all'interno
dell'apparecchio, tali da costituire un possibile rischio di scariche elettriche dannose per le persone. Il punto
esclamativo all'interno di un triangolo equilatero avvisa l'utente della presenza di importanti istruzioni di
manutenzione (assistenza) nella documentazione che accompagna il prodotto.
Importanti Istruzioni di Sicurezza
1. Prima di usare l'apparecchio, vi preghiamo di leggerne per intero le istruzioni.
2. Conservate tali istruzioni per una eventuale consultazione futura.
3. Vi preghiamo di rispettare tutte le istruzioni di sicurezza.
4. Seguite tutte le istruzioni del costruttore.
5. Non usate questo apparecchio vicino ad acqua o umidità.
6. Pulite l'apparecchio esclusivamente con un panno asciutto.
7. Evitate di ostruire una qualsiasi delle aperture di ventilazione. Posizionatelo seguendo le istruzioni del
costruttore.
8. Non posizionatelo vicino a sorgenti di calore come radiatori, scambiatori di calore, forni o altri apparecchi
(amplificatori compresi) in grado di generare calore.
9. Non disattivate la protezione di sicurezza costituita dalla spina polarizzata o dotata di collegamento a
terra. Una spina polarizzata è dotata di due spinotti, uno più piccolo ed uno più grande. Una spina dotata
di collegamento a terra è dotata di due spinotti più un terzo spinotto di collegamento a terra. Questo
terzo spinotto, eventualmente anche più grande, viene fornito per la vostra sicurezza. Se la spina fornita in
dotazione non si adatta alla vostra presa, consultate un elettricista per la sostituzione della presa obsoleta.
10. Proteggete il cavo di alimentazione in modo che non sia possibile camminarci sopra né piegarlo, con particolare attenzione alle prese, ai punti di collegamento e al punto in cui esce dall'apparecchio.
Copyright 2003 Samson Technologies Corp.
11. Staccate l'apparecchio dalla alimentazione in caso di temporali o tempeste o se non lo usate per un lungo
periodo.
Printed January, 2003 - 2006 v 5.0
12. Per l'assistenza, fate riferimento esclusivamente a personale qualificato. È necessaria l'assistenza se
l'apparecchio ha subito un qualsiasi tipo di danno, come danni al cavo o alla spina di alimentazione, nel
www.hartke.com
caso in cui sia stato versato del liquido o siano caduti oggetti al suo interno, sia stato esposto a pioggia o
umidità, non funzioni correttamente o sia stato fatto cadere.
Phone: 1-800-3-SAMSON (1-800-372-6766)
Fax: 516-364-3888
Table of Contents
ENGLISH
Introduction . . . . . . . . . . . . . . . . . . . . . . . . . . . . . . . . . . . . . . . . . . . . . . . . . . . . . . . . . . . . . . . . . . . 2
Hartke GT60 Guitar Amplifier Features . . . . . . . . . . . . . . . . . . . . . . . . . . . . . . . . . . . . . . . . . . 3
Guided Tour - Front Panel . . . . . . . . . . . . . . . . . . . . . . . . . . . . . . . . . . . . . . . . . . . . . . . . . . . . . . 4
Guided Tour - Rear Panel . . . . . . . . . . . . . . . . . . . . . . . . . . . . . . . . . . . . . . . . . . . . . . . . . . . . . . . 6
Setting Up and Using Your Hartke GT60 Guitar Amplifier . . . . . . . . . . . . . . . . . . . . . . . . 7
Using the Footswitch Jack and Effects Loop . . . . . . . . . . . . . . . . . . . . . . . . . . . . . . . . . . . . 9
GT60 Sample Settings . . . . . . . . . . . . . . . . . . . . . . . . . . . . . . . . . . . . . . . . . . . . . . . . . . . . . . . . .42
Specifications . . . . . . . . . . . . . . . . . . . . . . . . . . . . . . . . . . . . . . . . . . . . . . . . . . . . . . . . . . . . . . . . .45
FRANÇAIS
Introduction . . . . . . . . . . . . . . . . . . . . . . . . . . . . . . . . . . . . . . . . . . . . . . . . . . . . . . . . . . . . . . . . . .10
Hartke GT60 - Caractéristiques . . . . . . . . . . . . . . . . . . . . . . . . . . . . . . . . . . . . . . . . . . . . . . . .11
Présentation de la face avant . . . . . . . . . . . . . . . . . . . . . . . . . . . . . . . . . . . . . . . . . . . . . . . . . .12
Présentation de la face arrière . . . . . . . . . . . . . . . . . . . . . . . . . . . . . . . . . . . . . . . . . . . . . . . . .14
Configuration et utilisation de l’amplificateur guitare Hartke GT60 . . . . . . . . . . . . . .15
Utilisation d’une pédale et d’une boucle d’effets . . . . . . . . . . . . . . . . . . . . . . . . . . . . . . .17
GT60 - Exemples de réglage . . . . . . . . . . . . . . . . . . . . . . . . . . . . . . . . . . . . . . . . . . . . . . . . . . .42
Caractéristiques techniques . . . . . . . . . . . . . . . . . . . . . . . . . . . . . . . . . . . . . . . . . . . . . . . . . . .45
DEUTSCHE
Einleitung . . . . . . . . . . . . . . . . . . . . . . . . . . . . . . . . . . . . . . . . . . . . . . . . . . . . . . . . . . . . . . . . . . . .18
Features des Hartke GT60 Gitarren-Amps . . . . . . . . . . . . . . . . . . . . . . . . . . . . . . . . . . . . . .19
Geführter Rundgang - Vorderseite . . . . . . . . . . . . . . . . . . . . . . . . . . . . . . . . . . . . . . . . . . . . .20
Hartke GT60 Gitarren-Amp einrichten und einsetzen . . . . . . . . . . . . . . . . . . . . . . . . . . .23
Hartke GT60 Gitarren-Amp einrichten und einsetzen . . . . . . . . . . . . . . . . . . . . . . . . . . .24
Footswitch-Buchse und Effects Loop einsetzen. . . . . . . . . . . . . . . . . . . . . . . . . . . . . . . . .25
GT60 Beispieleinstellungen. . . . . . . . . . . . . . . . . . . . . . . . . . . . . . . . . . . . . . . . . . . . . . . . . . . .42
Technische Daten . . . . . . . . . . . . . . . . . . . . . . . . . . . . . . . . . . . . . . . . . . . . . . . . . . . . . . . . . . . . .45
ESPAÑOL
Introducción . . . . . . . . . . . . . . . . . . . . . . . . . . . . . . . . . . . . . . . . . . . . . . . . . . . . . . . . . . . . . . . . . .26
Características del amplificador de guitarra Hartke GT60 . . . . . . . . . . . . . . . . . . . . . . .27
Recorrido guiado - Panel frontal . . . . . . . . . . . . . . . . . . . . . . . . . . . . . . . . . . . . . . . . . . . . . . .28
Configuración y uso de su amplificador de guitarra Hartke GT60 . . . . . . . . . . . . . . . .31
Configuración y uso de su amplificador de guitarra Hartke GT60 . . . . . . . . . . . . . . . .32
Uso de la toma Footswitch y del bucle de efectos . . . . . . . . . . . . . . . . . . . . . . . . . . . . .33
Ejemplos de configuración del GT60 . . . . . . . . . . . . . . . . . . . . . . . . . . . . . . . . . . . . . . . . . . .42
Especificaciones técnicas . . . . . . . . . . . . . . . . . . . . . . . . . . . . . . . . . . . . . . . . . . . . . . . . . . . . . .45
ITALIANO
Introduzione . . . . . . . . . . . . . . . . . . . . . . . . . . . . . . . . . . . . . . . . . . . . . . . . . . . . . . . . . . . . . . . . . .34
Amplificatore per chitarra Hartke GT60 Caratteristiche . . . . . . . . . . . . . . . . . . . . . . . . .35
Tour Guidato - Pannello Frontale. . . . . . . . . . . . . . . . . . . . . . . . . . . . . . . . . . . . . . . . . . . . . . .36
Tour Guidato- Pannello Posteriore . . . . . . . . . . . . . . . . . . . . . . . . . . . . . . . . . . . . . . . . . . . . .38
Configurare e utilizzare l'amplificatore per chitarra Hartke GT60 . . . . . . . . . . . . . . . .39
Configurare e utilizzare l'amplificatore per chitarra Hartke GT60 . . . . . . . . . . . . . . . .40
Utilizzare la connessione Footswitch e l'Effects Loop . . . . . . . . . . . . . . . . . . . . . . . . . .41
Esempi d'impostazioni . . . . . . . . . . . . . . . . . . . . . . . . . . . . . . . . . . . . . . . . . . . . . . . . . . . . . . . .42
Specifiche . . . . . . . . . . . . . . . . . . . . . . . . . . . . . . . . . . . . . . . . . . . . . . . . . . . . . . . . . . . . . . . . . . . .45
Copyright 2005, Samson Technologies Corp.
Printed April, 2005 - 2006 v5.0
Samson Technologies Corp.
Phone: 1-800-3-SAMSON (1-800-372-6766)
Fax: 516-364-3888
www.samsontech.com
ENGLISH
Introduction
We know you don’t like reading owners manuals, but you’ve just purchased one of the
finest guitar amplifiers around, and we want to tell you about it! So, before you plug in
and start strumming and shredding, we’d like to suggest you take just a few moments to
scan these pages. We’ll make it as painless as possible, we promise—and, who knows, you
might just pick up a tip or two.
The Hartke GT60 Series amplifiers have been designed for modern guitar players looking
for a new sound that respects the tone of a classic amp. The GT60/408 “Piggyback” and
GT60C combo are powerful amplifiers, with an amazingly wide variety of tone, allowing
guitar players to rediscover the sound from a favorite old vintage amp, or dial up a new
sound that’s uniquely their own. Both models feature the GT60, tube-pre, 60-watt, 2-channel amplifier section with a matching GH408 4 x 8-inch mini-stack for the Piggyback, and
a custom designed 12-inch speaker in a convertible Closed-back / Open-back design for
the GT60C. The GT60 pre-amplifier section features a high voltage, 12AX7 “bootstrap” tube
circuit providing a layer of harmonic overtones that add to the warmth and richness of the
sound. The 2-channel per-amp design with foot switch control lets you quickly and easily switch from rhythm to lead. Plus, unique Channel 1 circuitry employs VOLUME, BASS,
TREBLE plus CRUNCH allowing you to dial up a sweet clean sound, or add a bit of overdrive
for a great roots-rock rhythm tone. The Channel 2 has VOLUME, BASS, TREBLE plus MID and
high GAIN for smooth to shredding distortions. In addition, special attention was also taken
in designing a Reverb effect that you actually want to use! The warm spring sound has
been optimized by carefully selecting both the electronic and mechanical components. The
GT60’s feature a steel amplifier chassis, enclosures made of rugged Plywood and MDF construction, with durable vinyl covering, and the GH408 is set upon four heavy-duty casters
for easy transport. The GT60/408 “Piggyback” and GT60C combo are perfect amplifiers for
use in small or large venues. Plus, the CD input and dedicated headphone output makes
them awesome practice amps! There are two different GT60 models, and this manual covers the GT60/GH408 “Piggyback” and GT60C combo. Whichever of these models you’ve
purchased, you’re assured of robust construction and that great Hartke sound.
In these pages, you’ll find a detailed description of the many features of your GT60 Series
Amplifier, as well as a guided tour through its front and rear panels, step-by-step instructions for setting up and using the amp, plus full specifications. You’ll also find a warranty
card enclosed—please don’t forget to fill it out and mail it so that you can receive online
technical support and so we can send you updated information about this and other
Hartke and Samson products in the future. Also, be sure to check out our website (http://
www.samsontech.com) for complete information about our full product line.
SPECIAL NOTE: Should your Hartke GT60 Amplifier ever require servicing, a Return
Authorization (RA) number is necessary. Without this number, the unit will not be accepted.
If purchased in the United States, please call Samson at 1-800-372-6766 for a Return
Authorization number prior to shipping. Please retain the original packing materials and, if
possible, return the unit in its original carton and packing materials. If purchased outside
the United States, please contact your local distributor for warranty information.
2
Hartke GT60 Guitar Amplifier Features
ENGLISH
The Hartke GT60 Series amplifiers have been designed for modern guitar players looking for a
new sound that respects the tone of a classic amp. Here are some of their main features:
•
The GT60 amplifier offers a roaring 60-Watts of power with a 2-channel front-end control
section built around a tube pre-amp.
•
The Piggyback is comprised of the GT60 head and matched up with the GH408 mini angled
half-stack cabinet with four custom designed eight-inch, 20-Watt Hartke GXL speakers.
•
The GT60C combo features a Hartke GXL12 75-Watt twelve-inch speaker installed in a convertible enclosure allowing for closed-back, or open-back configuration.
•
The GT60 amplifier utilizes a 12AX7 bootstrap tube pre-amp circuit, which gives the amplifier its inherently personal tone.
•
Front panel CHANNEL switch with LED indicators for selecting the GT60’s Channel 1 or
Channel 2.
•
Channel 1 features CRUNCH, VOLUME with BASS and TREBLE equalizer.
•
Channel 2 employs GAIN and VOLUME plus an equalizer comprised of BASS, TREBLE and
MID.
•
The GT60 boasts a sweet and lush spring REVERB with level control.
•
A dedicated CD input is included allowing you to hook up a portable CD or MP3 player to
practice along with.
•
The GT60 features a separate headphone output, which automatically disconnects the
speaker output, allowing use as a high-quality practice amp.
•
Rear panel Effect IN and Effect OUT jacks for connecting external signal processors.
•
Jack for optional footswitch provides great on-stage channel selection.
•
Hartke guitar cabinets are constructed from Plywood and MDF (medium density fiberboard) and feature mesh fabric grill and durable vinyl covering.
•
Rugged construction makes the GT60 Series eminently road-worthy.
3
ENGLISH
Guided Tour - Front Panel
����
�
�
�
�
�
�
�
�
�
��
�
�
�
�
�
�
�
�
�
�
�
��
�
�
�
�
�
�
�
�
�
�
��
��
���
���
�
�
��
��
��
��������������
�
� � �
�
�
�
�
�
��
�
�
�
�
�
�
���
�
�
�
�
���
�����
����
�
�
�� ��
��
�
�
�
�
�
�
��
��
�
�
�
�
�
�
�
��
��
���
���
��
�
�
�
�
�
��
��
���
���
�
�
�
�
�� ��
�� ��
��
��
��
��
���
���
�� ��
�
�
�
�
�
�
�
�
�
��
��
��
��
��
1
INPUT - Connect your guitar to this standard 1/4” unbalanced jack. This GT Series Input was
designed to handle the signals from guitar with a wide range of output levels from lipstick
singe coils to the beefiest humbucker.
2
CRUNCH – CHANNEL 1’s pre-amp level control used to dial up tube overdrive tone for just
a touch of harmonic warmth for blues all the way to a dirty rhythm of classic and modern
rock
3
VOLUME - (CH1) This is the overall volume control for CHANNEL. 1
4
BASS - This control provides approximately 15 db of cut or boost at 100 Hz, with a peak
(bell) curve. When the knob is at the 12 o’clock ("5") position, there is no boost or attenuation (that is, flat response). As it is turned clockwise from the "5" position, the frequency
area is boosted; as it is turned counterclockwise from the "5" position, the frequency area is
attenuated.
5
TREBLE - This peaking control provides approximately 15 db of cut or boost at 5 kHz. When
the knob is at the 12 o’clock ("5") position, there is no boost or attenuation (that is, flat
response). As it is turned clockwise from the "5" position, the frequency area is boosted; as
it is turned counterclockwise from the "5" position, the frequency area is attenuated.
6
CH1 LED – When this light is illuminated, CHANNEL 1 is selected.
7
CHANNEL SWITCH The switch allows you to select either CHANNEL 1 or CHANNEL 2.
8
CH2 LED - When this light is illuminated, CHANNEL 2 is selected.
9
GAIN - CHANNEL 2’s pre-amp level control used to dial up tube overdrive tone for classic
metal distortion, shredding leads and fat modern chunk.
10
VOLUME (CH2) - This is the overall volume control for CHANNEL 2.
4
Guided Tour - Front Panel
BASS - This control provides approximately 15 db of cut or boost at 100 Hz, with a peak
(bell) curve. When the knob is at the 12 o’clock ("5") position, there is no boost or attenuation (that is, flat response). As it is turned clockwise from the "5" position, the frequency
area is boosted; as it is turned counterclockwise from the "5" position, the frequency area is
attenuated.
12
MID - This control provides approximately 15 db of cut or boost at 2.5 kHz, with a peak
(bell) curve. When the knob is at the 12 o’clock ("5") position, there is no boost or attenuation (that is, flat response). As it is turned clockwise from the "5" position, the frequency
area is boosted; as it is turned counterclockwise from the "5" position, the frequency area is
attenuated.
13
TREBLE - This peaking control provides approximately 15 db of cut or boost at 5 kHz. When
the knob is at the 12 o’clock ("5") position, there is no boost or attenuation (that is, flat
response). As it is turned clockwise from the "5" position, the frequency area is boosted; as
it is turned counterclockwise from the "5" position, the frequency area is attenuated.
14
REVERB – The control knob used to set the level of the internal Spring Reverb.
15.
CD IN - Your GT Series amplifier features a CD input which you can use with a portable CD
player, cassette, mini disk or MP3 player. You can use the CD input to jam with pre-recorded
tracks or to learn a riff from a favorite recording.
16. PHONES - Connect any stereo headphone (600 ohms or less) to this standard 1/4" stereo
jack. When a plug is inserted into the headphone jack, the speaker output is disconnected,
allowing you to use your GT60 as a practice amplifier. The level of the signal sent to the
headphones is determined by the setting of the Volume knob—at the point where a connected speaker would clip, the headphones will clip.
WARNING: Because even the smallest GT Series amplifier is capable of generating
extremely high headphone signal levels, always start with the Volume knob at minimum
and then slowly turn it up. In particular, a clicking sound is an indication of distortion and
possible damage to the headphones (and/or your hearing!); don’t let things get to that
point!
17.
POWER switch - Use this to power the GT Series on or off. When powered on, an LED
inside this switch is lit.
5
ENGLISH
11
ENGLISH
Guided Tour - Rear Panel
A
B
C
D
E
F
A.
AC POWER INLET - Use the supplied grounded AC power cord to connect your GT Series
amplifier to mains power. This cord comes supplied with the appropriate plug for your
geographic area. CAUTION: Do not use an adapter to defeat the third grounding pin on this
plug or severe electric shock may result!
B.
VENT - The Vent provides vital cooling to your Model GT60. Make sure that it is kept free of
all obstructions and that cool, fresh air is accessible at all times. Also, try to ensure that the
Model GT60 is used in a dust-free environment.
C.
SPEAKER OUTPUT – The jack is used to connect the internal driver of the combo cabinet or
to the external GH 408 cabinet.
D.
EFFECTS RETURN - Use this 1/4" unbalanced jack to return signal from a professional outboard effects processor.*
E
EFFECTS SEND - Use this 1/4" unbalanced jack to send signal to a professional outboard
effects processor.* Output level is approximately 0 dB to +4 dB and is post-EQ and postVolume. The signal from this output can also be used as a Direct Out for recording.
F.
FOOTSWITCH jack - Connect a standard footswitch for channel selection.
* In-line effects (such as footpedals) intended for low signal levels should be placed
between your guitar and the front panel GT SERIES amplifier Input and not connected with
the rear panel Effects Loop jacks.
6
1. Remove all packing materials (save them in case of need for future service) and decide
where the amplifier is to be physically placed. To avoid potential overheating problems, make
sure that the rear panel is unobstructed and that there is good ventilation around the entire
unit.
2. Before you plug-in the power cable, be sure the POWER
switch is in the off (down) position. Connect the supplied
power cable to the AC INLET located on the rear panel.
Then, plug-in the 3-pin AC plug into any grounded AC
socket. Don’t turn the GT Series on just yet, though.
3. If you are using the GT60/408 PIGGYBACK connect the
included speaker cable from the SPEAKER OUT located
on the GT60’s rear panel to the INPUT on the rear of the
HG408 speaker cabinet.
WARNING: The GT60 is to be used only when connected to an 4 or 8 ohm speaker load. Use with speaker
loads of less than 4 ohms can result in severe damage
to the unit due to excessive heat and current limiting
and will void your warranty!
4. Use a standard music instrument cable to connect your guitar to the
INPUT jack on the front panel.
5. On the front panel of the GT Series, turn the CRUNCH and VOLUME
on CHANNEL 1, and GAIN and VOLUME on CHANNEL 2 controls to their
minimum (fully counterclockwise) position. Set the BASS, TREBLE and
MID controls to their "5" position.
�����
5. Press the front panel Power switch in order to turn on your GT Series
amp; the switch will light up and you will see the tube heating up
through the front panel window.
6. Press the front panel CHANNEL SWITCH to select CHANNEL 1. Note: If
a footswitch is connected to the rear panel FOOTSWITCH input jack you
will need to change the channel using the foot switch.
7. Set the output of your guitar to maximum and then, while playing,
slowly turn the GT Series CHANNEL 1 VOLUME control up until the
desired level is achieved. You will get a nice clean tone when using just
VOLUME (no CRUNCH) for level, so set it to the level you like.
7
����
����
��������������
ENGLISH
Setting Up and Using Your Hartke GT60
Guitar Amplifier
ENGLISH
Setting Up and Using Your Hartke GT60
Guitar Amplifier
8. Adjust the CHANNEL 1 BASS and Treble equalizer controls to
taste. (When you get a great setting that complement your instrument and playing style, it’s a good idea to write it down for future
use.)
9. Now, press the CHANNEL SWITCH (or the footswitch) to select
CHANNEL 2.
10. Set the CHANNEL 2 GAIN to “10” position (fully clockwise) and
then, while playing, slowly turn the GT Series CHANNEL 2 VOLUME
control up until the desired level is achieved.
����
NOTE: With the GAIN control on “10” you will get the most overdrive
from CHANNEL 2. You can turn down the GAIN control for less
distortion.
11. Adjust the CHANNEL 2 BASS, MID and TREBLE equalizer controls to taste. (When you get a great setting that complement your
instrument and playing style, it’s a good idea to write it down for
future use.)
12. Your GT series amplifier features a CD input which you can use
with a portable CD player, cassette, mini disk or MP3 player to jam
with pre-recorded tracks or learn a riff from a favorite tune. In fact,
you can plug any line level signal into the CD input including the
signal from a keyboard or drum machine. Connect the CD player or
other Line level device to the CD Input using standard RCA cable. You
will want to use the volume control on the CD player or other Line
level device to set the balance between the track and your guitar.
So, start with the volume control all the way down and slowly raise it
until you reach a good balance with your guitar
13. Test the headphone output by turning the Volume control to its
minimum (fully counterclockwise) position and then connect a standard stereo headphone to the front panel Phones jack. While playing
your guitar, slowly turn the Volume control up—you should hear
sound from the headphones and none from the connected speaker.
8
Using the Footswitch Jack and Effects Loop
15. The Hartke GT60 has a footswitch jack located on the
rear chassis panel. You can connect a standard footswitch
terminated with a 1/4-inch phone plug, readily available at
your musical instrument retailer, so that channel switching is
hands-off easy.
9
ENGLISH
14. If you’re using a professional external signal processor that
has Line-level inputs and outputs, turn your GT Series amp
off momentarily and then connect a standard audio cable
between the rear panel EFFECTS SEND jack and your effects
processor input and another standard audio cable between
the EFFECTS RETURN jack and your effects processor output.
(If required, multiple effects processors can be daisy-chained
together, output to input). Then turn the GT Series amp back
on and play your guitar while adjusting the controls of your
effects processor(s). For best results, set both the input and
output gain of the connected effects processor(s) to 0 dB
(unity gain), so that there is no increase or decrease in level
whether the effects are switched in or out.
Hartke
575 Underhill Blvd.
P.O. Box 9031
Syosset, NY 11791-9031
Phone: 1-800-3-SAMSON (1-800-372-6766)
Fax: 516-364-3888
www.hartke.com