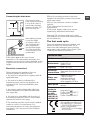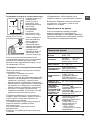
1
Instructions for use WASHING MACHINE Contents GB English,1 ES Español,13 BG БЪЛГАРСКИ,25 GB Installation, 2-3 Unpacking and levelling Connecting the electricity and water supplies The first wash cycle Technical data Care and maintenance, 4 Cutting off the water and electricity supplies Cleaning the washing machine Cleaning the detergent dispenser drawer Caring for the door and drum of your appliance Cleaning the pump Checking the water inlet hose Precautions and tips, 5 General safety Disposal Opening the porthole door manually Description of the washing machine, 6-7 WMF 722 Control panel Display Running a wash cycle, 8 Wash cycles and options, 9 Table of programmes and wash cycles Wash option Detergents and laundry, 10 Detergent dispenser drawer Preparing the laundry Special wash cycles Troubleshooting, 11 Service, 12 1 Installation GB ! Read these instructions carefully: they contain vital information relating to the safe installation and operation of the appliance. compensate for any unevenness by tightening or loosening the adjustable front feet (see figure); the angle of inclination, measured in relation to the worktop, must not exceed 2°. Levelling the machine correctly will provide it with stability, help to avoid vibrations and excessive noise and prevent it from shifting while it is operating. If it is placed on carpet or a rug, adjust the feet in such a way as to allow a sufficient ventilation space underneath the washing machine. Unpacking and levelling Connecting the electricity and water supplies ! This instruction manual should be kept in a safe place for future reference. If the washing machine is sold, transferred or moved, make sure that the instruction manual remains with the machine so that the new owner is able to familiarise himself/herself with its operation and features. Unpacking Connecting the water inlet hose 1. Remove the washing machine from its packaging. 2. Make sure that the washing machine has not been damaged during the transportation process. If it has been damaged, contact the retailer and do not proceed any further with the installation process. 3. Remove the 4 protective screws (used during transportation) and the rubber washer with the corresponding spacer, located on the rear part of the appliance (see figure). 4. Close off the holes using the plastic plugs provided. 5. Keep all the parts in a safe place: you will need them again if the washing machine needs to be moved to another location. ! Packaging materials should not be used as toys for children. Levelling 1. Install the washing machine on a flat sturdy floor, without resting it up against walls, furniture cabinets or anything else. 2. If the floor is not perfectly level, 2 1. Connect the inlet hose by screwing it to a cold water tap using a 3/4 gas threaded connection (see figure). Before performing the connection, allow the water to run freely until it is perfectly clear. 2. Connect the inlet hose to the washing machine by screwing it onto the corresponding water inlet of the appliance, which is situated on the top right-hand side of the rear part of the appliance (see figure). 3. Make sure that the hose is not folded over or bent. ! The water pressure at the tap must fall within the range of values indicated in the Technical data table (see next page). ! If the inlet hose is not long enough, contact a specialised shop or an authorised technician. ! Never use second-hand hoses. ! Use the ones supplied with the machine. Connecting the drain hose 65 - 100 cm Connect the drain hose, without bending it, to a drain duct or a wall drain situated between 65 and 100 cm from the floor; alternatively, placed it over the edge of a basin, sink or tub, fastening the duct supplied to the tap (see figure). The free end of the hose should not be underwater. ! When the washing machine has been installed, the electricity socket must remain within easy reach. ! Do not use extension cords or multiple sockets. ! The cable should not be bent or compressed. ! The power supply cable must only be replaced by authorised technicians. GB Warning! The company shall not be held responsible in the event that these standards are not observed. The first wash cycle Once the appliance has been installed, and before you use it for the first time, run a wash cycle with detergent and no laundry, using wash cycle number “Auto Clean” (see “Cleaning the washing machine”). Technical data ! We advise against the use of hose extensions; if it is absolutely necessary, the extension must have the same diameter as the original hose and must not exceed 150 cm in length. Electrical connections Before plugging the appliance into the electricity socket, make sure that: • the socket is earthed and complies with all applicable laws; • the socket is able to withstand the maximum power load of the appliance as indicated in the Technical data table (see opposite); • the power supply voltage falls within the values indicated in the Technical data table (see opposite); • the socket is compatible with the plug of the washing machine. If this is not the case, replace the socket or the plug. ! The washing machine must not be installed outdoors, even in covered areas. It is extremely dangerous to leave the appliance exposed to rain, storms and other weather conditions. Model WMF 722 Dimensions width 59.5 cm height 85 cm depth 54 cm Capacity from 1 to 7 kg please refer to the technical Electrical data plate fixed to the maconnections chine maximum pressure 1 MPa (10 bar) Water conminimum pressure nections 0.05 MPa (0.5 bar) drum capacity 52 litres to 1200 rotations per Spin speed up minute Test wash cycles in ; programme accordanCotton Standard 60°C; ce with ; programme directives Cotton Standard 40°C. 1061/2010 1015/2010 This appliance conforms to the following EC Directives: - 2004/108/EC (Electromagnetic Compatibility) - 2006/95/EC (Low Voltage) - 2012/19/EU 3 Care and maintenance GB Cutting off the water and electricity supplies Caring for the door and drum of your appliance •Turn off the water tap after every wash cycle. This will limit wear on the hydraulic system inside the washing machine and help to prevent leaks. •Always leave the porthole door ajar in order to prevent unpleasant odours from forming. •Unplug the washing machine when cleaning it and during all maintenance work. The washing machine is fitted with a selfcleaning pump which does not require any maintenance. Sometimes, small items (such as coins or buttons) may fall into the pre-chamber which protects the pump, situated in its bottom part. Cleaning the washing machine • The outer parts and rubber components of the appliance can be cleaned using a soft cloth soaked in lukewarm soapy water. Do not use solvents or abrasives. • The washing machine has a “Auto Clean” programme for its internal parts that must be run with no load in the drum. To help the wash cycle A you may want to use either the detergent (i.e. a quantity 10% the quantity specified for lightly-soiled garments) or special additives to clean the washing machine. We recommend running a cleaning programme every 40 wash cycles. To start the programme press button A for 5 seconds (see figure). The programme will start automatically and will run for about 70 minutes. To stop the cycle press the START/PAUSE button. Cleaning the pump ! Make sure the wash cycle has finished and unplug the appliance. To access the pre-chamber: 1. using a screwdriver, remove the cover panel on the lower front part of the washing machine (see figure); 2. unscrew the lid by rotating it anticlockwise (see figure): a little water may trickle out. This is perfectly normal; Cleaning the detergent dispenser drawer 1 2 4 Remove the dispenser by raising it and pulling it out (see figure). Wash it under running water; this operation should be repeated frequently. 3. clean the inside thoroughly; 4. screw the lid back on; 5. reposition the panel, making sure the hooks are securely in place before you push it onto the appliance. Checking the water inlet hose Check the inlet hose at least once a year. If there are any cracks, it should be replaced immediately: during the wash cycles, water pressure is very strong and a cracked hose could easily split open. ! Never use second-hand hoses. Precautions and tips ! This washing machine was designed and constructed in accordance with international safety regulations. The following information is provided for safety reasons and must therefore be read carefully. must be separately collected. Consumersshould contact their local authority or retailer for information concerning the correct disposal of their old appliance General safety Opening the porthole door manually • This appliance was designed for domestic use only. In the event that it is not possible to open the porthole door due to a powercut, and if you wish to remove the laundry, proceed as follows: • This appliance can be used by children aged from 8 years and above and persons with reduced physical, sensory or mental capabilities or lack of experience and knowledge if they have been given supervision or instruction concerning use of the appliance in a safe way and understand the hazards involved. Children shall not play with the appliance. Cleaning and user maintenance shall not be made by children without supervision. • Do not touch the machine when barefoot or with wet or damp hands or feet. • Do not pull on the power supply cable when unplugging the appliance from the electricity socket. Hold the plug and pull. • Do not open the detergent dispenser drawer while the machine is in operation. 20 GB 1. remove the plug from the electrical socket. 2. make sure the water level inside the machine is lower than the door opening; if it is not, remove excess water using the drain hose, collecting it in a bucket as indicated in the figure. 3. using a screwdriver, remove the cover panel on the lower front part of the washing machine (see figure). • Do not touch the drained water as it may reach extremely high temperatures. • Never force the porthole door. This could damage the safety lock mechanism designed to prevent accidental opening. • If the appliance breaks down, do not under any circumstances access the internal mechanisms in an attempt to repair it yourself. • Always keep children well away from the appliance while it is operating. • The door can become quite hot during the wash cycle. • If the appliance has to be moved, work in a group of two or three people and handle it with the utmost care. Never try to do this alone, because the appliance is very heavy. • Before loading laundry into the washing machine, make sure the drum is empty. Disposal •Disposing of the packaging materials: observe local regulations so that the packaging may be re-used. • The European Directive 2012/19/EU on Waste Electrical and Electronic Equipment, requires that old household electrical appliances must not be disposed of in the normal unsorted municipal waste stream. Old appliances must be collected separately in order to optimise the recovery and recycling of the materials they contain and reduce the impact on human health and the environment. The crossed out “wheeled bin” symbol on the product reminds you of your obligation, that when you dispose of the appliance it 4. pull outwards using the tab as indicated in the figure, until the plastic tie-rod is freed from its stop position; pull downwards and open the door at the same time. 5. reposition the panel, making sure the hooks are securely in place before you push it onto the appliance. 5 Description of the washing machine GB Control panel TEMPERATURE CHILD LOCK button button ON/OFF CLEANING ACTION button button DISPLAY Detergent dispenser drawer WASH CYCLE SELECTOR KNOB SPIN button OPTION button and indicator light START/PAUSE button and indicator light DELAY TIMER button Detergent dispenser drawer: used to dispense detergents and washing additives ( see “Detergents and laundry”). DELAY TIMER button: press to set a delayed start for the selected wash cycle; the delay period appears on the display. ON/OFF button: press this briefly to switch the machine on or off. The START/PAUSE indicator light which flashes slowly in a green colour shows that the machine is switched on. To switch off the washing machine during the wash cycle, press and hold the button for approximately 3 seconds; if the button is pressed briefly or accidentally the machine will not switch off. If the machine is switched off during a wash cycle, this wash cycle will be cancelled. START/PAUSE button and indicator light: when the green indicator light flashes slowly, press the button to start a wash cycle. Once the cycle has begun the indicator light will remain lit in a fixed manner. To pause the wash cycle, press the button again; the indicator light will flash in an amber colour. If the symbol is not illuminated, the door may be opened. To start the wash cycle from the point at which it was interrupted, press the button again. WASH CYCLE SELECTOR KNOB: used to set the desired wash cycle (see “Table of programmes and wash cycles”). OPTION button and indicator light: press to select the available options. The indicator light corresponding to the selected option will remain lit. CLEANING ACTION button wash intensity. : to select the desired TEMPERATURE button: press to reduce or completely exclude the temperature; the value appears on the display. SPIN button: press to reduce or completely exclude the spin cycle; the value appears on the display. 6 CHILD LOCK button : to activate the control panel lock, press and hold the button for approximately 2 seconds. When the symbol is illuminated, the control panel is locked (apart from the ON/OFF button). This means it is possible to prevent wash cycles from being modified accidentally, especially where there are children in the home. To deactivate the control panel lock, press and hold the button for approximately 2 seconds. Standby mode This washing machine, in compliance with new energy saving regulations, is fitted with an automatic standby system which is enabled after about 30 minutes if no activity is detected. Press the ON-OFF button briefly and wait for the machine to start up again. Consumption in off-mode: 0,5 W Consumption in Left-on: 8 W Display GB The display is useful when programming the machine and provides a great deal of information. The duration of the available wash cycles and the remaining time of a running cycle appear; if the DELAY TIMER option has been set, the countdown to the start of the selected wash cycle will appear. Pressing the corresponding button allows you to view the maximum spin speed and temperature values attained by the machine during the set wash cycle, or the values selected most recently, if these are compatible with the set wash cycle. DOOR LOCKED indicator light: The lit symbol indicates that the door is locked. To prevent any damage, wait until the symbol turns off before opening the door. To open the door while a cycle is in progress, press the START/PAUSE button; if the DOOR LOCKED symbol is switched off the door may be opened. 7 Running a wash cycle GB 1.SWITCH THE MACHINE ON. Press the button; the START/PAUSE indicator light will flash slowly in a green colour. 2.LOAD THE LAUNDRY. Open the porthole door. Load the laundry, making sure you do not exceed the maximum load value indicated in the table of programmes and wash cycles on the following page. 3.MEASURE OUT THE DETERGENT. Pull out the detergent dispenser drawer and pour the detergent into the relevant compartments as described in “Detergents and laundry”. 4. CLOSE THE DOOR. 5. SELECT THE WASH CYCLE. Use the WASH CYCLE SELECTOR knob to select the desired wash cycle. A temperature and spin speed is set for each wash cycle; these values may be adjusted. The duration of the cycle will appear on the display. 6.CUSTOMISE THE WASH CYCLE. Use the relevant buttons: Modify the temperature and/or spin speed. The machine automatically displays the maximum temperature and spin speed values set for the selected cycle, or the most recently-used settings if they are compatible with the selected cycle. The temperature can be decreased by pressing the button, until the cold wash “OFF” setting is reached. The spin speed may be progressively reduced by pressing the button, until it is completely excluded (the “OFF” setting). If these buttons are pressed again, the maximum values are restored. ! Exception: if the programme is selected, the temperature can be increased up to a value of 90°C. Setting a delayed start. To set a delayed start for the selected cycle, press the corresponding button repeatedly until the required delay period has been reached. When this option has been activated, the symbol lights up on the display. To remove the delayed start setting, press the button until the text “OFF” appears on the display. Set the desired wash intensity. Option makes it possible to optimise washing based on the level of soil in the fabrics and on desired wash cycle intensity. Select the wash programme: the cycle will be automatically set to “Normal” as optimised for garments with an average level of soil (this setting is not applicable to the “Wool” cycle, which is automatically set to “Delicate”). For heavily-soiled garments press button until the “Intensive” level is reached. This level ensures a high-performance wash due to a larger quantity of water used in the initial phase of the cycle and due to increased drum rotation. It is useful when removing the most stubborn stains. 8 It can be used with or without bleach. If you desire bleaching, insert the extra tray compartment (4) into compartment 1. When pouring in the bleach, be careful not to exceed the “max” level marked on the central pivot (see figure pag. 10). For lightly-soiled garments or a more delicate treatment of the fabrics, press button until the “Delicate” level is reached. The cycle will reduce drum rotation to ensure washing results that are perfect for delicate garments. Modify the cycle settings. • Press the button to enable the option; the indicator light corresponding to the button will switch on. • Press the button again to disable the option; the indicator light will switch off. ! If the selected option is not compatible with the set wash cycle, the indicator light will flash and the option will not be activated. ! The options may affect the recommended load value and/or the duration of the cycle. 7.START THE WASH CYCLE. Press the START/ PAUSE button. The corresponding indicator light will turn green, remaining lit in a fixed manner, and the door will be locked (the DOOR LOCKED symbol will be lit). To change a wash cycle while it is in progress, pause the washing machine using the START/PAUSE button (the START/PAUSE indicator light will flash slowly in an amber colour); then select the desired cycle and press the START/PAUSE button again. To open the door while a cycle is in progress, press the START/PAUSE button; if the DOOR LOCKED symbol is switched off the door may be opened. Press the START/PAUSE button again to restart the wash cycle from the point at which it was interrupted. 8.THE END OF THE WASH CYCLE. This will be indicated by the text “END” on the display; when the DOOR LOCKED symbol switches off the door may be opened. Open the door, unload the laundry and switch off the machine. ! If you wish to cancel a cycle which has already begun, press and hold the button. The cycle will be stopped and the machine will switch off. Wash cycles and options Fabric softener Max. load (kg) Residual dampness% Energy consumptionkWh Total water lt Cycle duration 10 Bleach 5 5 6 7 8 9 Wash 1 2 GB Prewash Wash cycles Table of programmes and wash cycles 1200 1200 - 4 4 - - - 180’ 180’ 1200 (3) 7 53 1.10 52,5 190’ 1200 - 7 53 0.99 82 185’ 60° 40° 60° 40° 40° 30° 800 800 1200 1000 800 0 - - 3.5 3.5 4 4 1.5 1 44 0.93 44 0.57 - 47 46 - 110’ 95’ 195’ 145’ 70’ 80’ 60° 1200 - - 3.5 53 0.81 40 60’ 20° 1200 - 7 - 170’ 1200 - - 7 53 0.17 63 80’ 800 - - 3 48 0.07 30 70’ 800 - - 3 71 0.04 34 30’ Detergents Description of the wash cycle Max. temp. (°C) 40° 60° 60° Cotton Standard 60° (1): heavily soiled whites and resistant colours. (Max. 90°) Cotton Standard 40° (2): lightly soiled resistant and delicate colours. 40° Anti Stain Whites Synthetics: heavily soiled resistant colours. Synthetics (4): lightly soiled resistant colours. Anti allergy Baby Wool: for wool, cashmere, etc. Delicates Fast Wash 60’: to refresh normal soiled garments quickly (not suitable for wool, silk and clothes which require washing by hand). 11 Cotton Standard 20°: lightly soiled resistant and delicate colours. 12 Eco Cottons 13 Eco Synthetics 14 Eco Fast 30’ Cold Water Cold Water Cold Water Max. speed (rpm) - - Rinse - 1200 - - - 7 - - - 36’ Spin and Pump out - 1200 - - - - 7 - - - 16’ The length of cycle shown on the display or in this booklet is an estimation only and is calculated assuming standard working conditions. The actual duration can vary according to factors such as water temperature and pressure, the amount of detergent used, the amount and type of load inserted, load balancing and any wash options selected. 1) Test wash cycle in compliance with directive 1061/2010: set wash cycle with a temperature of 60°C. This cycle is designed for cotton loads with a normal soil level and is the most efficient in terms of both electricity and water consumption; it should be used for garments which can be washed at 60°C . The actual washing temperature may differ from the indicated value. 2) Test wash cycle in compliance with directive 1061/2010: set wash cycle with a temperature of 40°C. This cycle is designed for cotton loads with a normal soil level and is the most efficient in terms of both electricity and water consumption; it should be used for garments which can be washed at 40°C . The actual washing temperature may differ from the indicated value. 3) At 60 °C the “Prewash” function cannot be selected. For all Test Institutes: 2) Long wash cycle for cottons: set wash cycle with a temperature of 40°C. 4) Long wash cycle for synthetics: set wash cycle 5 with a temperature of 40°C. Wash option Prewash If this function is selected, the pre-wash cycle will run; this is useful for removing stubborn stains. N.B.: Put the detergent in the relevant compartment. ! It cannot be used in conjunction with wash cycles (60°), , 6, 8, 9, 10, 11, 12, 13, 14, , . 9 Detergents and laundry GB Detergent dispenser drawer Successful washing results also depend on the correct dose of detergent: adding too much detergent will not necessarily result in a more efficient wash, and may in fact cause build up on the inside of your appliance and contribute to environmental pollution. ! Use powder detergent for white cotton garments, for prewashing, and for washing at temperatures over 60°C. ! Follow the instructions given on the detergent packaging. ! Do not use hand washing detergents; they create too much foam. Open the detergent A B dispenser drawer and pour 4 in the detergent or washing additive, as follows. MAX 1 compartment 1: Prewash detergent (powder) Before pouring in the detergent, make sure that extra compartment 4 has been removed. compartment 2: Detergent for the wash cycle (powder or liquid) If liquid detergent is used, it is recommended that the removable plastic partition A (supplied) be used for proper dosage. If powder detergent is used, place the partition into slot B. compartment 3: Additives (fabric softeners, etc.) The fabric softener should not overflow the grid. Extra compartment 4: Bleach 3 2 Preparing the laundry • • • Divide the laundry according to: - the type of fabric/the symbol on the label - the colours: separate coloured garments from whites. Empty all garment pockets and check the buttons. Do not exceed the listed values, which refer to the weight of the laundry when dry: see “Table of programmes and wash cycles”. How much does your laundry weigh? 1 sheet 400-500 g 1 pillow case 150-200 g 1 tablecloth 400-500 g 1 bathrobe 900-1,200 g 1 towel 150-250 g Special wash cycles Anti Stain: the programme 1 is suitable to heavily-soiled garments with resistant colours. It ensures a washing class that is higher than the standard class (A class). When running the programme, do not mix garments of different colours. We recommend the use of powder detergent. Pre-treatment with special additives is recommended if there are obstinate stains. Whites: use this cycle 2 to wash white clothes. The programme is designed to maintain the brightness of white clothes over time. Use powder detergent for best results. 10 Anti allergy: use programme 6 to remove major allergens such as pollen, mites, cat’s and dog’s hair. Baby: use the special wash cycle 7 to remove the soiling typically caused by babies, while removing all traces of detergent from nappies in order to prevent the delicate skin of babies from suffering allergic reactions. The cycle has been designed to reduce the amount of bacteria by using a greater quantity of water and optimising the effect of special disinfecting additives added to the detergent. Wool: The wool wash cycle on this Hotpoint-Ariston machine has been tested and approved by The Woolmark Company for washing wool garments labelled as hand washable provided that the garments are washed according to the instructions on the garment label and those issued by the manufacturer of this washing machine. Hotpoint-Ariston is the first washing machine brand to be approved by The Woolmark Company for Apparel CarePlatinum for its washing performance and consumption of energy and water. (M1126) Delicates: use programme 9 to wash very delicate garments having strasses or sequins. To wash silk garments and curtains select the cycle 9 and set the “Delicate” level from option . We recommend turning the garments inside out before washing and placing small items into the special bag for washing delicates. Use liquid detergent on delicate garments for best results. Eco cycles The Eco Cycles assure energy saving by eliminating the need of heating water and it’s an advantage both to your energy bill and the environment! These innovative Eco programmes (Eco Cottons 12, Eco Synthetics 13 and Eco Fast 30’ 14) are available for various fabrics and different quantity of garment; they have been designed to guarantee a high cleaning action even at low temperature and can be used for lightly to medium soiled loads. Eco Cycles give the best results thanks to an intensified wash action, water optimization and are carried out in the same average time of a standard cycle. For the best washing results with Eco Cycles we recommend the usage of a liquid detergent. Cotton Standard 20° ideal for lightly soiled cotton loads. The effective performance levels achieved at cold temperatures, which are comparable to washing at 40°, are guaranteed by a mechanical action which operates at varying speed, with repeated and frequent peaks. Load balancing system Before every spin cycle, to avoid excessive vibrations before every spin and to distribute the load in a uniform manner, the drum rotates continuously at a speed which is slightly greater than the washing rotation speed. If, after several attempts, the load is not balanced correctly, the machine spins at a reduced spin speed. If the load is excessively unbalanced, the washing machine performs the distribution process instead of spinning. To encourage improved load distribution and balance, we recommend small and large garments are mixed in the load. Troubleshooting Your washing machine could occasionally fail to work. Before contacting the Technical Assistance Service (see “ Service”), make sure that the problem cannot be solved easily using the following list. Problem: Possible causes / Solutions: The washing machine does not switch on. • The appliance is not plugged into the socket fully, or not enough to make contact. GB • There is no power in the house. The wash cycle does not start. • The washing machine door is not closed properly. • The ON/OFF button has not been pressed. • The START/PAUSE button has not been pressed. • The water tap has not been opened. • A delayed start has been set. The washing machine does not fill • The water inlet hose is not connected to the tap. with water (the text “H2O” flashes • The hose is bent. on the display). • The water tap has not been opened. • There is no water supply in the house. • The pressure is too low. • The START/PAUSE button has not been pressed. The washing machine continuously • The drain hose is not fitted at a height between 65 and 100 cm from the floor takes in and drains water. (see “Installation”). • The free end of the hose is under water (see “Installation”). • The wall drainage system is not fitted with a breather pipe. If the problem persists even after these checks, turn off the water tap, switch the appliance off and contact the Technical Assistance Service. If the dwelling is on one of the upper floors of a building, there may be problems relating to water drainage, causing the washing machine to fill with water and drain continuously. Special antidraining valves are available in shops and help to prevent this inconvenience. The washing machine does not drain or spin. • The wash cycle does not include draining: some cycles require the draining process to be enabled manually. • The drain hose is bent (see “Installation”). • The drainage duct is clogged. The washing machine vibrates a lot during the spin cycle. • The drum was not unlocked correctly during installation (see “Installation”). • The washing machine is not level (see “Installation”). • The washing machine is trapped between cabinets and walls (see “Installation”). The washing machine leaks. • The water inlet hose is not screwed on properly (see “Installation”). • The detergent dispenser drawer is blocked (for cleaning instructions, see “Care and maintenance”). • The drain hose is not fixed properly (see “Installation”). The “option” and START/PAUSE • Switch off the machine and unplug it, wait for approximately 1 minute and then indicator lights flash rapidly and an switch it back on again. error code appears on the display (e.g.: If the problem persists, contact the Technical Assistance Service. F-01, F-..). There is too much foam. • The detergent is not suitable for machine washing (it should display the text “for washing machines” or “hand and machine wash”, or the like). • Too much detergent was used. 11 Service GB Before contacting the Technical Assistance Service: • Check whether you can solve the problem alone (see “Troubleshooting”). • Restart the wash cycle to check whether the problem has been solved. • If this is not the case, contact an authorised Technical Assistance Centre. ! Always request the assistance of authorised technicians. Have the following information to hand: • the type of problem; • the appliance model (Mod.); • the serial number (S/N). This information can be found on the data plate applied to the rear of the washing machine, and can also be found on the front of the appliance by opening the door. 12 Manual de instrucciones LAVADORA Sumario ES Instalación, 14-15 ES Español Desembalaje y nivelación Conexiones hidráulicas y eléctricas Primer ciclo de lavado Datos técnicos Mantenimiento y cuidados, 16 Interrumpir el agua y la corriente eléctrica Limpiar la lavadora Limpiar el contenedor de detergentes Cuidar la puerta y el cesto Limpiar la bomba Controlar el tubo de alimentación de agua Precauciones y consejos, 17 WMF 722 Seguridad general Eliminación Apertura manual de la puerta Descripción de la lavadora, 18-19 Panel de control Pantalla Cómo efectuar un ciclo de lavado, 20 Programas y opciones, 21 Tabla de programas Opción de lavado Detergentes y ropa, 22 Contenedor de detergentes Preparar la ropa Programas particulares Anomalías y soluciones, 23 Asistencia Técnica, 24 13 Instalación ES ! Es importante conservar este manual para poder consultarlo en cualquier momento. En caso de venta, de cesión o de traslado, verifique que permanezca junto con la lavadora para informar al nuevo propietario sobre el funcionamiento y brindar las correspondientes advertencias. Una cuidadosa nivelación brinda estabilidad a la máquina y evita vibraciones, ruidos y desplazamientos durante el funcionamiento. Cuando se instala sobre moquetas o alfombras, regule los pies para conservar debajo de la lavadora un espacio suficiente para la ventilación. ! Lea atentamente las instrucciones: ellas contienen importante información sobre la instalación, el uso y la seguridad. Conexiones hidráulicas y eléctricas Desembalaje y nivelación Desembalaje 1. Desembale la lavadora. 2. Controle que la lavadora no haya sufrido daños durante el transporte. Si estuviera dañada no la conecte y llame al revendedor. 3. Quite los 4 tornillos de protección para el transporte y la arandela de goma con el correspondiente distanciador ubicados en la parte posterior (ver la figura). 4. Cubra los orificios con los tapones de plástico suministrados con el aparato. 5. Conserve todas las piezas: cuando la lavadora deba ser transportada nuevamente, deberán volver a colocarse. ! Los embalajes no son juguetes para los niños. 1. Conectar el tubo de tubo enroscándolo a un grifo de agua fría con la boca roscada de 3/4 gas (ver la figura). Antes de conectarlo, haga correr el agua hasta que esté límpida. 2. Conecte el tubo de alimentación a la lavadora enroscándolo en la toma de agua correspondiente ubicada en la parte posterior derecha (arriba) (ver la figura). 3. Controle que en el tubo no hayan pliegues ni estrangulaciones. Nivelación 1. Instale la lavadora sobre un piso plano y rígido, sin apoyarla en las paredes, muebles ni en ningún otro aparato. 2. Si el piso no está perfectamente horizontal, compense las irregularidades desenroscando o enroscando las patas delanteras (ver la figura); el ángulo de inclinación medido sobre la superficie de trabajo, no debe superar los 2º. 14 Conexión del tubo de alimentación de agua ! La presión de agua del grifo debe estar comprendida dentro de los valores contenidos en la tabla de Datos técnicos (ver la página correspondiente). ! Si la longitud del tubo de alimentación no es la suficiente, diríjase a un negocio especializado o a un técnico autorizado. ! No utilice nunca tubos ya usados. ! Utilice los suministrados con la máquina. Conexión del tubo de desagüe Conecte el tubo de desagüe, sin plegarlo, a un conducto de desagüe o a una desagüe de pared 65 - 100 cm ubicados a una distancia del piso comprendida entre 65 y 100 cm.; o apóyelo en el borde de un lavamanos o de una bañera, uniendo la guía suministrada con el aparato, al grifo (ver la figura). El extremo libre del tubo de desagüe no debe permanecer sumergido en el agua. ! No se aconseja utilizar tubos de prolongación, si fuera indispensable hacerlo, la prolongación debe tener el mismo diámetro del tubo original y no superar los 150 cm. Conexión eléctrica Antes de enchufar el aparato, verifique que: • la toma tenga la conexión a tierra y haya sido hecha según las normas legales; • la toma sea capaz de soportar la carga máxima de potencia de la máquina indicada en la tabla de Datos técnicos (ver al costado); • la tensión de alimentación esté comprendida dentro de los valores indicados en la tabla de Datos técnicos (ver al costado); • la toma sea compatible con el enchufe de la lavadora. Si no es así, sustituya la toma o el enchufe. ! La lavadora no debe ser instalada al aire libre, ni siquiera si el lugar está reparado, ya que es muy peligroso dejarla expuesta a la lluvia o a las tormentas. ! Una vez instalada la lavadora, la toma de corriente debe ser fácilmente accesible. ! No utilice prolongaciones ni conexiones múltiples. ! El cable no debe estar plegado ni sufrir compresiones. ! El cable de alimentación debe ser sustituido sólo por técnicos autorizados. ¡Atención! La empresa fabricante declina toda responsabilidad en caso de que estas normas no sean respetadas. Primer ciclo de lavado Después de la instalación y antes del uso, realice un ciclo de lavado con detergente y sin ropa, seleccionando el programa “Auto Limpieza” (ver “Limpiar la lavadora”). Datos técnicos Modelo WMF 722 Dimensiones ancho 59.5 cm altura 85 cm profundidad 54 cm Capacidad de 1 a 7 kg Conexiones eléctricas ver la placa de características técnicas aplicada en la máquina presión máxima 1 MPa (10 bar) presión mínima 0,05 MPa (0,5 bar) capacidad del cesto 52 litros Conexiones hídricas Velocidad de centrifugado Programas de control según las directivas 1061/2010 1015/2010 máxima 1200 r.p.m. programa ; Algodón Standard 60ºC; programa ; Algodón Standard 40ºC. Esta máquina cumple con lo establecido por las siguientes Directivas de la Comunidad: - 2004/108/CE (Compatibilidad Electromagnética) - 2012/19/EU - 2006/95/CE (Baja Tensión) 15 ES Mantenimiento y cuidados ES Interrumpir el agua y la corriente eléctrica •Cierre el grifo de agua después de cada lavado. De este modo se limita el desgaste de la instalación hidráulica de la lavadora y se elimina el peligro de pérdidas. •Desenchufe la máquina cuando la debe limpiar y durante los trabajos de mantenimiento. Limpiar la lavadora • La parte externa y las partes de goma se pueden limpiar con un paño embebido en agua tibia y jabón. No use solventes ni productos abrasivos. • La lavadora posee un programa de “Auto Limpieza” de su interior que se debe realizar sin ningún tipo de carga en el cesto. El detergente (en un 10% de la cantidad aconsejada para prendas poco sucias) o algunos aditivos específicos para la limpieza de la ropa se podrán utilizar como coadyuvantes en el programa de lavado. Se aconseja efectuar el programa de limpieza cada 40 ciclos de lavado. Para activar el programa presionar el botón A durante 5 segundos (ver la figura). El programa comenzará automáticamente y tendrá una duración de 70 minutos aproximadamente. Para detener el ciclo presione el botón START/PAUSE. Limpiar la bomba La lavadora posee una bomba autolimpiante que no necesita mantenimiento. Pero puede suceder que objetos pequeños (monedas, botones) caigan en la precámara que protege la bomba, situada en la parte inferior de la misma. ! Verifique que el ciclo de lavado haya terminado y desenchufe la máquina. Para acceder a la precámara: 1. quite el panel que cubre la parte delantera de la lavadora con la ayuda de un destornillador (ver la figura); A Limpiar el contenedor de detergentes 1 2 Extraiga el contenedor levantándolo y tirándolo hacia fuera (ver la figura). Lávelo debajo del agua corriente, esta limpieza se debe realizar frecuentemente. Cuidar la puerta y el cesto •Deje siempre semicerrada la puerta para evitar que se formen malos olores. 16 2. desenrosque la tapa girándola en sentido antihorario (ver la figura): es normal que se vuelque un poco de agua; 3. limpie con cuidado el interior; 4. vuelva a enroscar la tapa; 5. vuelva a montar el panel verificando, antes de empujarlo hacia la máquina, que los ganchos se hayan introducido en las correspondientes ranuras. Controlar el tubo de alimentación de agua Controle el tubo de alimentación al menos una vez al año. Si presenta grietas o rajaduras debe ser sustituido: durante los lavados, las fuertes presiones podrían provocar roturas imprevistas. ! No utilice nunca tubos ya usados. Precauciones y consejos ! La lavadora fue proyectada y fabricada en conformidad con las normas internacionales de seguridad. Estas advertencias se suministran por razones de seguridad y deben ser leídas atentamente. Seguridad general • Este aparato ha sido fabricado para un uso de tipo doméstico exclusivamente. • Este aparato puede ser utilizado por niños de 8 años o más y por personas con capacidades físicas, sensoriales o mentales disminuidas o con experiencia y conocimientos insuficientes siempre que sean supervisados o que hayan recibido una adecuada formación sobre el uso del aparato en forma segura y conozcan los peligros derivados del mismo. Los niños no deben jugar con el aparato. El mantenimiento y la limpieza no deben ser realizados por niños sin supervisión. • La lavadora debe ser utilizada sólo por personas adultas y siguiendo las instrucciones contenidas en este manual. • No toque la máquina con los pies desnudos ni con las manos o los pies mojados o húmedos. • No desenchufe la máquina tirando el cable, sino tomando el enchufe. • No abra el cajón de detergentes mientras la máquina está en funcionamiento. • No toque el agua de descarga ya que puede alcanzar temperaturas elevadas. • En ningún caso fuerce la puerta: podría dañarse el mecanismo de seguridad que la protege de aperturas accidentales. • En caso de avería, no acceda nunca a los mecanismos internos para intentar una reparación. • Controle siempre que los niños no se acerquen a la máquina cuando está en funcionamiento. • Durante el lavado, la puerta tiende a calentarse. • Si debe ser trasladada, deberán intervenir dos o más personas, procediendo con el máximo cuidado. La máquina no debe ser desplazada nunca por una sola persona ya que es muy pesada. • Antes de introducir la ropa controle que el cesto esté vacío. Eliminaciones • Eliminación del material de embalaje: respete las normas locales, de ese modo, los embalajes podrán volver a ser utilizados. • La norma Europea 2012/19/EU sobre la eliminación de aparatos eléctricos y electrónicos, indica que los electrodomésticos no deben ser eliminados de la misma manera que los desechos sólidos urbanos. Los aparatos en desuso se deben recoger separadamente para optimizar el porcentaje de recuperación y reciclaje de los materiales que los componen e impedir potenciales daños para la salud y el medio ambiente. El símbolo de la papelera tachada se encuentra en todos los productos para recordar la obligación de recolección separada. Para mayor información sobre la correcta eliminación de los electrodomésticos, los poseedores de los mismos podrán dirigirse al servicio público responsable o a los revendedores. Apertura manual de la puerta Si desea sacar la ropa de la lavadora y no es posible abrir la puerta debido a un corte de energía eléctrica, proceda del siguiente modo: 20 1. desenchufe la máquina. 2. verifique que el nivel de agua en el interior de la máquina sea inferior al hueco de la puerta; si no es así, extraiga el agua en exceso utilizando el tubo de descarga y recogiéndola en un balde como se indica en la figura. 3. quite el panel de cobertura delantero de la lavadora con la ayuda de un destornillador (ver la figura). 4. utilizando la lengüeta indicada en la figura, tire hacia fuera hasta liberar la varilla de plástico del retén; posteriormente tire hacia abajo y simultáneamente abra la puerta. 5. vuelva a montar el panel verificando, antes de empujarlo hacia la máquina, que los ganchos se hayan introducido en las correspondientes ranuras. 17 ES Descripción de la lavadora ES Botón Panel de control Botón ON/OFF BLOQUEO DE BOTONES Botón TEMPERATURA Botón ACCIÓN DE LIMPIEZA PANTALLA Cajón de detergentes MANDO DE PROGRAMAS Botón y piloto Botón CENTRIFUGADO Botón START/PAUSE Botones y pilotos OPCIÓN COMIENZO RETRASADO Cajón de detergentes: para cargar detergentes y aditivos (ver “Detergentes y ropa”). Botón ON/OFF : presione brevemente el botón para encender o apagar la máquina. El piloto START/PAUSE que centellea lentamente de color verde indica que la máquina está encendida. Para apagar la lavadora durante el lavado, es necesario mantener presionado el botón durante más tiempo, aproximadamente 3 seg.; si se presiona en forma más breve o accidental, la máquina no se apagará. Si la máquina se apaga durante un lavado en curso, dicho lavado se anulará. MANDO DE PROGRAMAS: para seleccionar el programa deseado (ver “Tabla de programas”). Botones y pilotos OPCIÓN: para seleccionar las opciones disponibles. El piloto correspondiente a la opción seleccionada permanecerá encendido. Botón ACCIÓN DE LIMPIEZA : pulse este botón para seleccionar la intensidad de lavado deseada. Botón TEMPERATURA : presiónelo para disminuir o excluir la temperatura; el valor se indica en la pantalla. Botón CENTRIFUGADO : presiónelo para disminuir o excluir totalmente el centrifugado; el valor se indica en la pantalla. Botón COMIENZO RETRASADO : presiónelo para seleccionar un comienzo retrasado del programa previamente elegido; el retraso se indica en la pantalla. 18 Botón con piloto START/PAUSE: cuando el piloto verde centellea lentamente, presione el botón para que comience el lavado. Una vez que el ciclo ha comenzado, el piloto se mantiene fijo. Para poner en pausa el lavado, presione nuevamente el botón; el piloto centelleará con un color anaranjado. Si el símbolo no está iluminado, se podrá abrir la puerta. Para que el lavado se reanude a partir del momento en el cual fue interrumpido, presione nuevamente el botón. Botón BLOQUEO DE BOTONES : para activar el bloqueo del panel de control, mantenga presionado el botón durante 2 segundos aproximadamente. El símbolo encendido indica que el panel de control está bloqueado (con excepción del botón ON/OFF). De este modo, se evitan modificaciones accidentales de los programas, sobre todo si en la casa hay niños. Para desactivar el bloqueo del panel de control, mantenga presionado el botón durante 2 segundos aproximadamente. Modalidad de stand by Esta lavadora está en conformidad con las nuevas normativas vinculadas al ahorro energético. Está dotada de un sistema de auto-apagado (stand by) que, en caso de no funcionamiento, se activa pasados aproximadamente 30 minutos. Presionar brevemente el botón ON/OFF y esperar que la máquina se active. Consumo en off-mode: 0,5 W Consumo en Left-on: 8 W Pantalla ES La pantalla es útil para programar la máquina y ofrece múltiple información. Se visualiza la duración de los diferentes programas a disposición y una vez que comienza el ciclo, el tiempo residual hasta la finalización; si se hubiera seleccionado un COMIENZO RETRASADO, se visualiza el tiempo que falta para que comience el programa seleccionado. Además, presionando el botón correspondiente, se visualizan los valores máximos de la velocidad de centrifugado y de temperatura que la máquina puede alcanzar en base al programa seleccionado o los últimos valores seleccionados si son compatibles con el programa elegido. Piloto Puerta bloqueada El símbolo encendido indica que la puerta está bloqueada. Para evitar daños, antes de abrir la puerta espere que el símbolo se apague. Para abrir la puerta mientras un ciclo está en curso, presione el botón START/PAUSE; si el símbolo PUERTA BLOQUEADA está apagado, será posible abrir la puerta. 19 Cómo efectuar un ciclo de lavado ES 1.ENCENDER LA MÁQUINA. Presione el botón ; el piloto START/PAUSE centelleará lentamente de color verde. 2.CARGAR LA ROPA. Abra la puerta. Cargue la ropa, cuidando no superar la cantidad de carga indicada en la tabla de programas de la página siguiente. 3.DOSIFICAR EL DETERGENTE. Extraiga el cajón y vierta el detergente en las cubetas correspondientes como se explica en “Detergentes y ropa”. 4. CERRAR LA PUERTA. 5. ELEGIR EL PROGRAMA. Seleccione con el mando PROGRAMAS el programa deseado; al mismo están asociadas una temperatura y una velocidad de centrifugado que se pueden modificar. En la pantalla aparecerá la duración del ciclo. 6.PERSONALIZAR EL CICLO DE LAVADO. Utilice los correspondientes botones: Modificar la temperatura y/o el centrifugado. La máquina muestra automáticamente la temperatura y la centrifugación máximas previstas para el programa fijado o las últimas seleccionadas si son compatibles con el programa elegido. Presionando el botón se disminuye progresivamente la temperatura hasta llegar al lavado en frío “OFF”. Presionando el botón se disminuye progresivamente el centrifugado hasta su exclusión “OFF”. Si se presionan una vez más los botones, se volverá a los valores máximos previstos. ! Excepción: cuando se selecciona el programa , la temperatura se puede aumentar hasta 90°. Seleccionar un comienzo retrasado. Para seleccionar el comienzo retrasado del programa elegido, presione el botón correspondiente hasta alcanzar el tiempo de retraso deseado. Cuando dicha opción está activada, en la pantalla se ilumina el símbolo . Para cancelar el comienzo retrasado presione el botón hasta que en la pantalla aparezca “OFF”. Seleccionar la intensidad de lavado deseada. La opción permite optimizar el lavado en base al grado de suciedad de los tejidos y a la intensidad de lavado deseada. Seleccione el programa de lavado, el ciclo automáticamente se fija en el nivel “Normal” optimizado para prendas medianamente sucias (selección no válida para el ciclo “Lana” que se fija automáticamente en el nivel “Delicate”). Para prendas muy sucias, pulse el botón hasta alcanzar el nivel “Intensive”. Este nivel garantiza un lavado de grandes prestaciones gracias al uso de una mayor cantidad de agua en la fase inicial del ciclo y un mayor movimiento mecánico. Es útil para eliminar las manchas más resistentes. Puede emplearse con o sin lejía. 20 Si se desea realizar un blanqueo, introduzca la cubeta adicional 4 suministrada con la máquina, en la cubeta 1. Al verter el blanqueador, no supere el nivel “max” indicado en el perno central (ver la figura de la pág. 22). Para prendas poco sucias o para un tratamiento más delicado de los tejidos, pulse el botón hasta alcanzar el nivel “Delicate”. El ciclo disminuirá el movimiento mecánico para garantizar resultados perfectos de lavado para las prendas delicadas. Modificar las características del ciclo. • Presione el botón para activar la opción; el piloto correspondiente al botón se encenderá. • Presione nuevamente el botón para desactivar la opción; el piloto se apagará. ! Si la opción seleccionada no es compatible con el programa elegido, el piloto centelleará y la opción no se activará. ! Las opciones pueden variar la carga recomendada y/o la duración del ciclo. 7.PONER EN MARCHA EL PROGRAMA. Presione el botón START/PAUSE. El piloto correspondiente se iluminará de color azul fijo y la puerta se bloqueará (símbolo PUERTA BLOQUEADA encendido). Para cambiar un programa mientras un ciclo está en curso, ponga la lavadora en pausa presionando el botón START/PAUSE (el piloto START/PAUSE centelleará lentamente de color ámbar); luego seleccione el ciclo deseado y presione nuevamente el botón START/ PAUSE. Para abrir la puerta mientras un ciclo está en curso, presione el botón START/PAUSE; si el símbolo PUERTA BLOQUEADA está apagado, será posible abrir la puerta. Presione nuevamente el botón START/PAUSE para reanudar el programa a partir del momento en el que se había interrumpido. 8.FIN DEL PROGRAMA. Se indica con el mensaje “END” en la pantalla, cuando el símbolo PUERTA BLOQUEADA se apague, será posible abrir la puerta. Abra la puerta, descargue la ropa y apague la máquina. ! Si se desea anular un ciclo ya comenzado, presione largo tiempo el botón . El ciclo se interrumpirá y la máquina se apagará. Programas y opciones Tabla de programas Velocidad máx. (r.p.m.) Lavado Blanqueador Suavizante Carga máx. (Kg.) Humedad residual% Consumo de energía kWh Agua total lt Duración del ciclo 40° 60° 60° (Max. 90°) 1200 1200 - 4 4 - - - 180’ 180’ 1200 (3) 7 53 1.10 52.5 190’ Algodón Standard 40° (2): blancos y colores delicados poco sucios. 40° 1200 - 7 53 0.99 82 185’ Sintético: colores resistentes muy sucios. 60° 40° 60° 40° 40° 30° 800 800 1200 1000 800 0 - - 3.5 3.5 4 4 1.5 1 44 0.93 44 0.57 - 47 46 - 110’ 95’ 195’ 145’ 70’ 80’ 10 (no se aconseja utilizarlo para lana, seda y prendas para lavar a 60° 1200 - - 3.5 53 0.81 40 60’ Standard 20°: blancos y colores delicados 11 Algodón poco sucios. 20° 1200 - 7 - 170’ 12 Algodón Agua fría 1200 - - 7 53 0.17 63 80’ 13 Sintético Agua fría 800 - - 3 48 0.07 30 70’ 14 Rápido 30’ Agua fría 800 - - 3 71 0.04 34 30’ Aclarado - 1200 - - - 7 - - - 36’ Centrifugado y Descarga - 1200 - - - - 7 - - - 16’ Programas Temp. max. (°C) Prelavado ES 1 2 Detergentes Descripción del Programa Antimancha Blancos Algodón Standard 60° (1): blancos y colores resistentes muy sucios. 5 5 6 7 8 9 Sintético (4): colores resistentes poco sucios. Antialérgico Baby Lana: para lana, cachemira, etc. Ultradelicado Lavado Rápido 60’: para refrescar rápidamente prendas sucias mano). - - La duración del ciclo que se indica en el visor o en el manual es una estimación calculada en base a condiciones estándar. El tiempo efectivo puede variar en función de numerosos factores como la temperatura y la presión del agua de entrada, la temperatura ambiente, la cantidad de detergente, la cantidad y el tipo de carga, el equilibrado de la carga y las opciones adicionales seleccionadas. 1) Programa de control según la directiva 1061/2010: seleccione el programa con una temperatura de 60ºC. 2) Programa de control según la directiva 1061/2010: seleccione el programa con una temperatura de 40ºC. Este ciclo es adecuado para limpiar una carga de algodón normalmente sucia, es el más eficiente en lo que se refiere al consumo combinado con la energía y la cantidad de agua y se usa con prendas lavables a 60ºC. La temperatura efectiva de lavado puede diferir de la indicada. Este ciclo es adecuado para limpiar una carga de algodón normalmente sucia, es el más eficiente en lo que se refiere al consumo combinado con la energía y la cantidad de agua y se usa con prendas lavables a 40ºC . La temperatura efectiva de lavado puede diferir de la indicada. 3) A la temperatura de 60ºC no se puede activar la función ”Prelavado”. Para todos los Test Institutes: 2) Programa algodón largo: seleccione el programa con una temperatura de 40ºC. 4) Programa sintético largo: seleccione el programa 5 con una temperatura de 40ºC. Opciones de lavado Prelavado Seleccionando esta función, se realiza el prelavado, muy útil para eliminar manchas difíciles. Nota: Agregue el detergente en el compartimento correspondiente. ! No se puede activar con los programas (60°), , 6, 8, 9, 10, 11, 12, 13, 14, , . 21 Detergentes y ropa ES Contenedor de detergentes El buen resultado del lavado depende también de la correcta dosificación del detergente: si se excede la cantidad, no se lava de manera más eficaz, sino que se contribuye a encostrar las partes internas de la lavadora y a contaminar el medio ambiente. ! Utilice detergentes en polvo para prendas de algodón blancas, para el prelavado y para lavados con una temperatura mayor que 60ºC. ! Respete las indicaciones que se encuentran en el envase de detergente. ! No use detergentes para el lavado a mano porque producen demasiada espuma. Extraiga el contenedor de A B detergentes e introduzca el 4 detergente o el aditivo de la siguiente manera: MAX Compartimento 1: Detergente para 3 prelavado (en polvo) Antes de verter el detergente, verifique que no esté colocada la cubeta adicional 4. Compartimento 2: Detergente para lavado (en polvo o líquido) Si se utiliza detergente líquido, se aconseja colocar el tabique divisorio A suministrado con la máquina, para una correcta dosificación. Cuando utilice detergente en polvo, vuelva a colocar el tabique divisorio en la cavidad B. Compartimento 3: Aditivos (suavizante, etc.) El suavizante no se debe volcar fuera de la rejilla. cubeta adicional 4: Blanqueador 1 2 Preparar la ropa • • • Subdivida la ropa según: - el tipo de tejido / el símbolo en la etiqueta. - los colores: separe las prendas de color y las blancas. Vacíe los bolsillos y controle los botones. No supere los valores indicados, referidos al peso de la ropa seca: ver “Tabla de programas”. ¿Cuánto pesa la ropa? 1 sábana 400/500 g 1 funda 150/200 g 1 mantel 400/500 g 1 albornoz 900/1.200 g 1 toalla 150/250 g Programas particulares Antimancha: el programa 1 es adecuado para el lavado de prendas muy sucias, con colores resistentes. El programa garantiza una clase de lavado superior a la clase estándar (clase A). No ejecute el programa mezclando prendas de distintos colores. Se aconseja el uso de detergente en polvo. Si las manchas son difíciles de eliminar, realice un pretratamiento con aditivos específicos. Blancos: utilice el ciclo 2 para el lavado de las prendas blancas. El programa ha sido estudiado para mantener el brillo de las prendas blancas. Para obtener mejores resultados, se recomienda el uso de detergente en polvo. 22 Antialérgico: utilice el programa 6 para la eliminación de los principales alérgenos como polen, ácaros, pelos de gato y de perro. Baby: utilice el programa correspondiente 7 para quitar la suciedad típica de los niños y eliminar el detergente de las prendas evitando reacciones alérgicas en la piel delicada de los mismos. Este ciclo ha sido estudiado para disminuir la carga bacteriana utilizando una mayor cantidad de agua y optimizando el efecto de aditivos específicos higienizantes agregados al detergente. Lana: el ciclo de lavado “Lana” de esta lavadora HotpointAriston ha sido probado y aprobado por la Woolmark Company para el lavado de prendas de lana clasificadas como “lavables a mano”, siempre que el lavado se realice respetando las instrucciones contenidas en la etiqueta de la prenda y las indicaciones suministradas por el fabricante del electrodoméstico. Hotpoint-Ariston es la primera marca de lavadoras que ha obtenido de la Woolmark Company la certificación Woolmark Apparel Care - Platinum por sus prestaciones de lavado y por el consumo de agua y energía. (M1126) Ultradelicado: utilice el programa 9 para el lavado de las prendas muy delicadas que tienen aplicaciones como strass o lentejuelas. Para el lavado de las prendas de seda o cortinas, seleccione el ciclo 9 y fije el nivel “Delicate” de la opción . Se recomienda voltear las prendas antes del lavado e introducir las más pequeñas en la bolsa para el lavado de prendas delicadas. Para obtener mejores resultados, se recomienda el uso de detergente líquido para prendas delicadas. Programas Eco Los programas Eco ofrecen buenos rendimientos en los lavados a bajas temperaturas permitiendo un menor uso de energía eléctrica con un beneficio para el medio ambiente y un ahorro económico. Los programas Eco (12 Algodón, 13 Sintéticos y 14 Rápido 30’) han sido creados para distintos tipos de tejido y para prendas poco sucias. Para garantizar un resultado óptimo, recomendamos el uso de un detergente líquido. Se aconseja además tratar previamente los puños, cuellos y manchas. Algodón Standard 20º ideal para cargas de prendas de algodón sucias. Los buenos rendimientos aún en frío, comparables con los de un lavado a 40º, están garantizados por una acción mecánica que trabaja con variación de velocidad con picos repetidos y cercanos. Sistema de equilibrado de la carga Antes de cada centrifugado, para evitar vibraciones excesivas y para distribuir la carga de modo uniforme, el cesto realiza rotaciones a una velocidad ligeramente superior a la del lavado. Si después de varios intentos, la carga todavía no está correctamente equilibrada, la máquina realiza el centrifugado a una velocidad inferior a la prevista. Cuando existe un excesivo desequilibrio, la lavadora realiza la distribución antes que el centrifugado. Para obtener una mejor distribución de la carga y su correcto equilibrado, se aconseja mezclar prendas grandes y pequeñas. Anomalías y soluciones Puede suceder que la lavadora no funcione. Antes de llamar al Servicio de Asistencia Técnica (ver “Asistencia Técnica”),controle que no se trate de un problema de fácil solución utilizando la siguiente lista. ES Anomalías: Posibles causas / Solución: La lavadora no se enciende. • El enchufe no está introducido en la toma de corriente, o no hace contacto. • En la casa no hay corriente. El ciclo de lavado no comienza. • • • • • La puerta no está correctamente cerrada. El botón ON/OFF no fue pulsado. El botón START/PAUSE no ha sido presionado. El grifo de agua no está abierto. Se fijó un retraso de la hora de puesta en funcionamiento. La lavadora no carga agua (En la pantalla se visualiza el mensaje “H2O” centelleante). • • • • • • El tubo de alimentación de agua no está conectado al grifo. El tubo está plegado. El grifo de agua no está abierto. En la casa no hay agua. No hay suficiente presión. El botón START/PAUSE no ha sido presionado. La lavadora carga y descarga agua continuamente. • El tubo de descarga no está instalado entre los 65 y 100 cm. del suelo (ver “Instalación”). • El extremo del tubo de descarga está sumergido en el agua (ver “Instalación”). • La descarga de pared no posee un respiradero. Si después de estas verificaciones, el problema no se resuelve, cierre el grifo de agua, apague la lavadora y llame al Servicio de Asistencia Técnica. Si la vivienda se encuentra en uno de los últimos pisos de un edificio, es posible que se verifiquen fenómenos de sifonaje, por ello la lavadora carga y descarga agua de modo continuo. Para eliminar este inconveniente se encuentran disponibles en el comercio válvulas especiales que permiten evitar el sifonaje. La lavadora no descarga o no centrifuga. • El programa no prevé la descarga: con algunos programas es necesario activarla manualmente . • El tubo de descarga está plegado (ver “Instalación”). • El conducto de descarga está obstruido. La lavadora vibra mucho durante la centrifugación. • El cesto, en el momento de la instalación, no fue desbloqueado correctamente (ver “Instalación”). • La máquina no está instalada en un lugar plano (ver “Instalación”). • Existe muy poco espacio entre la máquina, los muebles y la pared (ver “Instalación”). La lavadora pierde agua. • El tubo de alimentación de agua no está bien enroscado (ver “Instalación”). • El contenedor de detergentes está obstruido (para limpiarlo ver “Mantenimiento y cuidados”). • El tubo de descarga no está bien fijado (ver “Instalación”). Los pilotos de las “Opciones” y de START/PAUSE centellean velozmente y en la pantalla se visualiza un código de anomalía (por ej.: F-01, F-..). • Apague la máquina y desenchúfela, espere aproximadamente 1 minuto y luego vuelva a encenderla. Si la anomalía persiste, llame al Servicio de Asistencia Técnica. Se forma demasiada espuma. • El detergente no es específico para la lavadora (debe contener algunas de las frases “para lavadora”, “a mano o en lavadora” o similares). • La dosificación fue excesiva. 23 Asistencia Técnica ES Antes de llamar al Servicio de Asistencia Técnica: • Verifique si la anomalía la puede resolver Ud. solo (ver “Anomalías y soluciones”); • Vuelva a poner en marcha el programa para controlar si el inconveniente fue resuelto; • Si no es así, llame a un Centro de Asistencia Técnica. ! No recurra nunca a técnicos no autorizados. Comunique: • el tipo de anomalía; • el modelo de la máquina (Mod.); • el número de serie (S/N ). Esta información se encuentra en la placa aplicada en la parte posterior de la lavadora y en la parte delantera abriendo la puerta. 24 Инструкции за ползване ПЕРАЛНА МАШИНА Съдържание BG Български BG Инсталиране, 26-27 Разопаковане и нивелиране Свързване към водопровода и електрозахранването Първи цикъл на изпиране Технически данни Поддръжка и почистване, 28 Спиране на водата и изключване на електрозахранването Почистване на пералната машина Почистване на чекмеджето за перилни препарати Поддръжка на люка и на барабана Почистване на помпата Проверка на маркуча за студена вода Мерки за безопасност и препоръки, 29 WMF 722 Общи мерки за безопасност Рециклиране Описание на пералната машина, 30-31 Табло за управление Дисплей Как се изпълнява един цикъл на изпиране, 32 Програми и опции, 33 Таблица с програмите Опции на прането Перилни препарати и дрехи за пране, 34 Чекмедже за перилни препарати Разпределяне на дрехите за пране Специални програми Проблеми и мерки за отстраняването им, 35 Сервизно обслужване, 36 25 Инсталиране BG ! Важно е да съхранявате тези инструкции, за да можете да правите допълнителни справки по всяко време. В случай че пералната машина бъде продадена, преотстъпена и или преместена, трябва да се погрижите инструкциите винаги да я придружават, за да се предостави на новия собственик информация за работата на уреда и съответните предупреждения. ! Прочетете внимателно инструкциите: те съдържат важна информация за монтажа, използването и безопасността. измерен върху работната повърхност, не трябва да надвишава 2°. Точното нивелиране позволява машината да бъде стабилна и да се избягват вибрациите, шумът и преместването й по време на работа. Когато настилката е мокет или килим, регулирайте така крачетата, че под пералната машина да остане достатъчно място за вентилация. Разопаковане 1. Разопаковайте пералната машина. 2. Проверете дали пералната машина не е повредена при транспортирането. Ако е повредена, не я свързвайте, а се обърнете към дистрибутора. 1. Свържете захранващия маркуч, като го завиете към крана за студената вода с накрайник с газова резба 3/4 (вижте фигурата). Преди да го свържете, източете водата, докато се Разопаковане и нивелиране 3. Отстранете 4-те защитни винта за предпазване при превоза и гумираната опаковка със съответния раздалечител, намиращи се в задната част (вижте фигурата). 4. Затворете отворите с предоставените пластмасови капачки. 5. Съхранете всички части: целта е да се монтират отново при необходимост пералната машина да бъде транспортирана. ! Опаковъчният материал не е играчка за деца. Нивелиране 1. Монтирайте пералната машина на равен и твърд под, без да я опирате в стени, мебели и др. 2. Ако подът не е идеално равен, компенсирайте неравностите, като отвиете или завиете предните крачета (вижте фигурата). Ъгълът на наклона, 26 Свързване към водопровода и електрозахранването Свързване на маркуча към водопроводната мрежа избистри. 2. Свържете маркуча за студената вода към пералната машина, като го завиете към специалния щуцер, разположен от задната страна, горе вдясно (вижте фигурата). 3. Внимавайте маркучът да не се прегъва и притиска. ! Налягането по водопроводната мрежа трябва да бъде в границите, указани в таблицата “Технически данни” (вижте следващата страница). ! Ако дължината на захранващия маркуч не е достатъчна, обърнете се към специализиран магазин или към упълномощен техник. ! Никога не използвайте вече употребяван маркуч. ! Използвайте тези, което са доставени с пералната машина. Свързване на маркуча за мръсната вода Свържете маркуча за мръсната вода, без да го прегъвате, към канализационната тръба или 65 - 100 cm към тръбата за отвеждане в стената, разположени на височина от пода между 65 и 100 см; или го подпрете в края на мивката, или на ваната, като вържете водача за крана (вижте фигурата). Свободният край на маркуча за мръсната вода не трябва да бъде потопен във вода. ! Не се препоръчва използването на удължаващи маркучи. Ако е необходимо, удължителят трябва да има същия диаметър като оригиналния маркуч и да не надвишава 150 см. Свързване към електрическата мрежа Преди да свържете щепсела в контакта, проверете дали: • контактът е заземен съгласно действащите стандарти; • контактът може да поеме максималната мощност на натоварване на машината, указана в таблицата с техническите данни (вижте следващата страница); • захранващото напрежение е в границите на указаното в таблицата с технически данни (вижте следващата страница); • контактът отговаря на щепсела на пералната машина. В противен случай заменете щепсела или контакта. ! Пералната машина не се монтира на открито, дори под навес, защото е много опасно да се остави на влиянието на атмосферните условия. ! Електрическият контакт на монтирана перална машина трябва да бъде леснодостъпен. ! Не използвайте удължители или разклонители. ! Кабелът не трябва да бъде огънат или сплескан. ! Захранващият кабел трябва да се подменя само от упълномощени техници. Внимание! Фирмата отхвърля всякаква отговорност в случаите, в които тези норми не се спазват. Първи цикъл на пране След инсталиране и преди употреба включете един цикъл на изпиране с перилен препарат, но без дрехи, задавайки програма „Автоматично почистване“ (вижте Почистване на пералната машина). Òåõíè÷åñêè äàííè Ìîäåë WMF 722 Ðàçìåðè øèðèíà 59,5 ñì âèñî÷èíà 85 ñì äúëáî÷èíà 54 ñì Âìåñòèìîñò îò 1 äî 7 êã. òàáåëêàòà ñ Åëåêòðè÷åñêî Âèæ õàðàêòåðèñòèêèòå, çàõðàíâàíå ïîñòàâåíà íà ìàøèíàòà ìàêñèìàëíî íàëÿãàíå ÌÐà (10 bar) Çàõðàíâàíå ñ 1 ìèíèìàëíî íàëÿãàíå âîäà 0,05 ÌÐà (0,5 bar) îáåì íà êàçàíà 52 ëèòðà Ñêîðîñò íà öåíòðîôóãàòà Програми за проверка съгласно Регламенти № 1061/2010 и № 1015/2010 на Комисията. äî 1200 îáîðîòà/ìèíóòà ïðîãðàìà ; стандартна програма за памук при 60 C°; ïðîãðàìà ; стандартна програма за памук при 40 C°. Ïåðàëíàòà ìàøèíà ñúîòâåòñòâà íà ñëåäíèòå Åâðîïåéñêè äèðåêòèâè: - 2004/108/ÑÅ (çà åëåêòðîìàãíèòíà ñúâìåñòèìîñò) - 2012/19/EU - 2006/95/CE (çà íèñêî íàïðåæåíèå) 27 BG Поддръжка и почистване BG • • Пералнята разполага с програма за „Автоматично почистване“ на вътрешните части, което трябва да се извършва при абсолютно празен барабан. Прахът за A пране (10% от препоръчваното количество за слабо замърсено пране) или специални допълнителни препарати за почистване на пералнята може да се ползват в добавка към програмата за изпиране. Препоръчва се пускането на програмата за почистване на всеки 40 изпирания. За да задействате програмата, натиснете бутон A за 5 сек (вижте фигурата). Програмата ще се активира автоматично и ще продължи около 70 минути. За да спрете цикъла, натиснете бутона START/ PAUSE. 1 2 28 ! ! Мерки за безопасност и препоръки ! Пералната машина е проектирана и произведена в съответствие с международните норми за безопасност. Предупрежденията тук са продиктувани от съображения за безопасност и трябва да се четат внимателно. Общи мерки за безопасност • Този уред е предназначен изключително за домашна употреба. • Този уред може да бъде използван от деца над 8 години и лица с ограничени физически, сетивни или умствени способности, или с недостатъчен опит и познания, ако те са наблюдавани или инструктирани относно използването на уреда от лице, отговорно за тяхната безопасност и разбират опасностите, свързани с употребата на уреда. Децата не трябва да си играят с уреда. Поддръжката и почистването не трябва да се извършват от деца без надзор. • Пералната машина трябва да се използва само от възрастни хора съгласно инструкциите, предоставени в тази книжка. • Не докосвайте машината, когато сте боси, с мокри или влажни ръце или крака. • Не изключвайте щепсела от контакта за електрически ток, като дърпате кабела, а като хващате щепсела. • Не отваряйте чекмеджето с перилни препарати, докато пералната машина работи. • Не докосвайте маркуча за мръсната вода, защото може да е достигнал високи температури. • Никога не отваряйте люка със сила, защото може да се повреди обезопасителния механизъм, който предпазва от случайно отваряне. • В случай на повреда по никакъв повод не достигайте до вътрешните механизми в опити за ремонт. • Винаги контролирайте децата да не се доближават до работещата машина. • По време на изпиране люкът се нагрява. • Преместването да се извършва внимателно от двама или трима души. Никога от сам човек, защото пералната машина тежи много. • Преди да заредите машината, проверете дали барабанът е празен. зачеркнатия контейнер е поставен върху всички продукти, за да напомня за задължителното разделно събиране. За по-нататъшна информация относно правилното извеждане от употреба на домакинските електроуреди се обърнете към предназначената за това обществена служба или към дистрибуторите. 20 Рециклиране • Унищожаване на опаковъчния материал: спазвайте местните норми – по този начин опаковъчният материал може да се рециклира. • Европейската директива 2012/19/EU за отпадъците от електрическо и електронно оборудване предвижда домакинските електроуреди да не се изхвърлят заедно с обичайните твърди градски отпадъци. Извадените от употреба уреди трябва да бъдат събирани отделно с цел да бъде увеличен делът на подлежащите на повторна употреба и рециклиране материали, от които са направени, както и да бъдат избегнати евентуални вреди за здравето и околната среда. Символът със 29 BG Описание на пералната машина BG Табло за управление Бутон ТЕМПЕРАТУРА Бутон ПОЧИСТВАНЕ Бутон ON/OFF ДИСПЛЕЙ Чекмедже за перилни препарати Бутон ПРОГРАМАТОР ЦЕНТРОФУГА Бутон ОТЛОЖЕН СТАРТ Бутон със светлинен индикатор START/PAUSE Бутони със светлинни индикатори ОПЦИЯ Чекмедже за перилни препарати: за дозиране на перилни препарати и добавки (вижте “Перилни препарати и дрехи за пране”. Бутон ОТЛОЖЕН СТАРТ : натиснете, за да зададете забавен старт за избраната програма – закъснението ще се появи на дисплея. ON/OFF START/PAUSE 3 START/PAUSE ПРОГРАМАТОРПРОГРАМИ: за задаване на желаната програма (вижте “Таблица с програмите”). Бутони и светлинни индикатори ОПЦИЯ: за избиране на възможните опции. Светлинният индикатор за избраната опция ще продължи да свети. ПОЧИСТВАНЕ : натиснете, за да изберете желаната степен на интензивност на прането. Бутон ТЕМПЕРАТУРА : натиснете, за да намалите или “изключите” температурата; стойността се изобразява на дисплея. Бутон ЦЕНТРОФУГА : натиснете, за да намалите или изключите напълно центрофугата – стойността се показва на дисплея. 30 (с изключение на бутон ON/OFF) Режим на stand by В съответствие с новите нормативи за пестене на енергия тази перална машина е снабдена със система за автоматично изключване (stand by), която се задейства след 30 минути в случай, че машината не се използва. Натиснете за кратко бутон ON/OFF и изчакайте машината да се задейства отново. Потребление в режим „Off“ (Изкл.) 0,5 W Потребление в режим „On“ (Вкл.) 8 W Дисплей BG Дисплеят служи за програмиране на пералната машина и дава многостранна информация. Изписва се продължителността на различните налични програми, а при започнал цикъл се изписва оставащото до приключването му време; в случай че е бил зададен ОТЛОЖЕН СТАРТ, показва времето, оставащо до включване на избраната програма. Също така с натискане на съответния бутон се изобразяват максималните стойности на скоростта на центрофугата и на температурата, които машината може да осъществи при зададената програма, или последните избрани стойности, ако те са съвместими с избраната програма. Светлинен индикатор БЛОКИРАН ЛЮК Светещият символ показва, че люкът е блокиран. За избягване на щети трябва да изчакате символът да угасне, преди да отворите люка. За да отворите люка по време на цикъл на пране, натиснете бутона START/PAUSE. Ако символът БЛОКИРАН ЛЮК не свети, ще бъде възможно да го отворите. 31 Как се извършва един цикъл на пране BG 1.ВКЛЮЧВАНЕ НА ПЕРАЛНЯТА. Натиска се бутон ; START/PAUSE . 2.ПОСТАВЯНЕ НА ДРЕХИТЕ ЗА ПРАНЕ. Отваря се вратичката на люка. Заредете дрехите за пране, като внимавате да не превишите количеството на зареждане, посочено в таблицата с програмите на следващата страница. 3.ДOЗИРАНЕ НА ПЕРИЛНИЯ ПРЕПАРАТ. Извадете чекмеджето и изсипете перилния препарат в специалните ванички, както е обяснено в “Перилни препарати и дрехи за пране”. 4. ЗАТВОРЕТЕ ЛЮКА. 5. ИЗБИРАНЕ НА ПРОГРАМАТА. Изберете с превключвателя ПРОГРАМИ желаната програма; към нея са предвидени температура и скорост на центрофугиране, които могат да бъдат изменяни. На дисплея се изобразява продължителността на цикъла на пране. 6.ПЕРСОНАЛИЗИРАНЕ НА ЦИКЪЛ ПРАНЕ. Натиснете съответните бутони: Промяна на температурата и/или центрофугирането. Машината автоматично изписва максималните температура и скорост на центрофугиране, които са предвидени за зададената програма, или последно избраните такива параметри, ако са съвместими с текущо избраната програма. С натискане на бутон се намалява прогресивно температурата – до студено пране – “OFF”. С натискане на бутон се намалява центрофугата – до пълното й изключване “OFF”. Последващо натискане на бутоните връща стойностите на максимално предвидените. ! Изключение: с избиране на програма температурата може да се повиши до 90°. Задаване на отложен старт. За задаване на отложен старт на избрана програма натиснете съответния бутон до достигане на желаното време за закъснение. Когато е активна тази опция, на дисплея ще светне символът . За отказ от отложено стартиране натискайте бутона, докато на дисплея се изпише “OFF”. Настройте на желаната степен на интензивност на пране. Опцията позволява да се оптимизира изпирането в зависимост от степента на замърсяване на тъканите и избраната от вас степен на интензивност на прането. Изберете програмата за пране; цикълът се настройва автоматично на степен “Normal”, оптимизирано за средно замърсено пране, (настройката не е валидна за цикъла „Вълна“, който се настройва автоматично на степен “Delicate”. 32 При много замърсено пране натиснете бутона , докато достигнете степен “Intensive”. Благодарение на използването на по-голямо количество вода в началната фаза на цикъла и на по-силното триене тази степен гарантира висококачествено изпиране и е подходяща за отстраняване на упорити петна. Може да се използва със или без белина. Ако желаете избелване, поставете допълнителната ваничка 4, комплект с доставката, във ваничка 1. При дозиране на белина не надвишавайте максималното ниво „max“, указано на централната ос (вижте фигурата на стр. 34). За слабо замърсено пране или за по-деликатно третиране на тъканите натиснете бутона , докато достигнете степен “Delicate”. Цикълът ще намали триенето, за да осигури безупречно изпиране на деликатните тъкани. Променяне на характеристиките на цикъла. • Натиснете бутона, за да активирате опцията съответният индикатор за бутона светва. • При повторното му натискане опцията се деактивира и индикаторът изгасва. ! Ако избраната опция не е съвместима със зададената програма, светлинният индикатор ще мига и опцията няма да се активира. ! Оп циите могат да променят препоръчителното количество на зареждане и/или продължителността на цикъла. 7. СТАРТИРАНЕ НА ПРОГРАМАТА. Натиснете клавиш START/PAUSE. (символът БЛОКИРАН ЛЮК свети). За да смените програмата, докато се изпълнява един цикъл, поставете пералната машина в режим на пауза, натискайки бутона START/PAUSE (светлинният индикатор START/PAUSE започва бавно да мига в кехлибарен цвят), след което изберете желания цикъл и натиснете отново бутона START/PAUSE. За да отворите люка по време на цикъл на пране, натиснете бутона START/PAUSE. Ако символът БЛОКИРАНЕ НА ЛЮКА не свети, ще бъде възможно да отворите вратата. Натиснете отново бутона START/PAUSE, за да продължи програмата от мястото, в което е била прекъсната. 8. КРАЙ НА ПРОГРАМАТА. Указва се от надписа “END” върху дисплея и когато символът за БЛОКИРАН ЛЮК угасне, люкът може да се отвори. Отворете люка, извадете прането и изключете пералнята. ! Ако искате да спрете вече започнал цикъл, натиснете продължително бутона . Изпълнението на цикъла ще се прекъсне и пералнята ще се изключи. Програми и опции Таблица с програмите редпране Остатъчна влажност% Разход на енергия kWh Общ разход на вода lt 1200 1200 - 4 4 - - - 180’ 180’ 1200 (3) 7 53 1.10 52,5 190’ 40° 1200 - 7 53 0.99 82 185’ 60° 40° 60° 40° 40° 30° 800 800 1200 1000 800 0 - - 3.5 3.5 4 4 1.5 1 44 0.93 44 0.57 - 47 46 - 110’ 95’ 195’ 145’ 70’ 80’ 10 60° 1200 - - 3.5 53 0.81 40 60’ стандартна програма за памук при 20°: Áåëè è öâåòíè, äåëèêàòíè, çàìúðñåíè. 20° 1200 - 7 - 170’ 1200 - - 7 53 0.17 63 80’ 800 - - 3 48 0.07 30 70’ 800 - - 3 71 0.04 34 30’ BG 1 2 БЕЗ ПЕТНА БЕЛИ стандартна програма за памук при 60°(1): 5 5 6 7 8 9 40° 60° 60° (Max. 90°) стандартна програма за памук при 40°(2): Áåëè è öâåòíè, äåëèêàòíè, çàìúðñåíè. СИНТЕТИЧНИ: силно СИНТЕТИЧНИ(4): Противоалергично действие Áåáå Вълнени тъкани: за вълна, кашмир и т.н. Фини тъкани БЪРЗО ПРАНЕ 11 студена вода студена вода студена вода 12 Памук 13 Синтетика 14 Бърза 30’ - - Изплакване - 1200 - - - 7 - - - 36’ Центрофуга и Източване на водата - 1200 - - - - 7 - - - 16’ Продължителността на цикъла, показана на дисплея или посочена в ръководството, е приблизително изчислена въз основа на стандартните условия. Реалното времетраене може да варира в зависимост от множество фактори като температура и налягане на водата при пълнене, температура на въздуха в помещението, количество перилен препарат, количество, вид и тегло на прането, допълнително избрани опции. 1) Програма за проверка съгласно стандарт 1061/2010: задайте програма с температура 60°C. 2) Програма за проверка съгласно стандарт 1061/2010: задайте програма с температура 40°C. Този цикъл е подходящ за пране на памучни, нормално замърсени тъкани и е най-ефективен от гледна точка на комбиниран разход на енергия и вода, подходящ е за дрехи, които могат да се перат на 60°C. Действителната температура на пране може да се различава от указаната. Този цикъл е подходящ за пране на памучни, нормално замърсени тъкани и е най-ефективен от гледна точка на комбиниран разход на енергия и вода, подходящ е за дрехи, които могат да се перат на 40°C. Действителната температура на пране може да се различава от указаната. 3) При температура 60°C функцията “Предпране” не може да бъде активирана. За всички институции, извършващи изпитания: 2) Продължителна програма за памук: задайте програма с температура 40° C. 4) Дълга програма за синтетични тъкани: задайте програма 5 с температура 40° C. ; Опции на прането Предпране С избора на тази функция се извършва предпране, полезно за отстраняване на трудно почистващи се петна.Забележка: Добавете перилен препарат в предназначеното за това отделение. ! (60°), , 6, 8, 9, 10, 11, 12, 13, 14, , . 33 Перилни препарати и дрехи за пране BG Чекмедже за перилни препарати Добрият резултат от прането зависи и от правилното дозиране на перилните препарати. С предозиране не се пере по-ефикасно, а това води до отлагане на налепи по вътрешната страна на пералната машина и до замърсяване на околната среда. ! Използвайте прахообразни перилни препарати за бели памучни тъкани за предпране и за пране при температура над 60°C. ! Уверете се, че следвате указанията, посочени върху опаковката на перилния препарат. ! Не използвайте препарати за ръчно пране, защото образуват много пяна. Изтеглете чекмеджето A B за перилни препарати и 4 изсипете праха за пране и допълните препарати по следния начин. 1 Отделение 1: Препарат за 2 3 предпране (на прах) Преди да изсипете препарата, проверете дали не е поставена допълнителната ваничка 4. Отделение 2: Препарат за пране (на прах или течен) При употребата на течен препарат за пране се препоръчва да се използва разделителят от комплекта A с цел правилно дозиране. В случай на употреба на прах за пране върнете разделителя в отделение B. Отделение 3: Допълнителни препарати (омекотител и др.) Омекотителят не трябва да изтича извън решетката. допълнителна ваничка 4: Белина MAX Разпределяне на дрехите за пране • • • Разпределете прането съобразно: - типа на тъканите/символа върху етикета. - цветовете: отделете цветните от белите дрехи. Изпразнете джобовете и проверете копчетата. Не надвишавайте указните стойности за теглото на сухото пране: вижте “Таблица с програмите”. Колко тежат дрехите за пране? 1 чаршаф 400-500 г 1 калъфка 150-200 г 1 покривка 400-500 г 1 хавлия 900-1200 г 1 кърпа 150-250 г Специални програми БЕЗ ПЕТНА: програмата 1 е подходяща за изпирането на силно замърсено пране с устойчиви цветове. Програмата осигурява по-висок клас изпиране от стандартния (клас A). Не активирайте програмата при разноцветно пране. Препоръчва се използването на прахообразен перилен препарат. Срещу упорити петна се препоръчва предварителна обработка със специални допълнителни препарати. Бели: Използвайте този цикъл за 2 изпиране на бели тъкани. Програмата е разработена с цел продължителното запазване на искрящия бал цвят на тъканите. За подобри резултати се препоръчва използването на прах за 34 пране. използвайте цикъла за прането в светли цветове. Програмата е разработена с цел продължителното запазване на тъмните цветове на тъканите. Противоалергично действие: използвайте програмата 6 за отстраняване на основните алергени като полени, акари, кучешки и котешки косми. Бебе: използвайте специалната програма 7, за да отстраните типичното замърсяване на детските дрехи и премахнете перилния препарат, за да се избегнат алергични реакции на деликатната детска кожа. Цикълът е създаден за елиминиране на бактериите чрез използване на по-голямо количество вода и оптимизиране на ефекта от специфичните хигиенизиращи добавки към перилния препарат. Цикълът на изпиране „Вълна“ на тази пералня Hotpoint-Ariston е тестван и одобрен от компанията Woolmark за пране на вълнени тъкани, определени като „подходящи за изпиране на ръка“, при условие че се спазват инструкциите от етикета на дрехата и указанията на производителя на електродомакинския уред. HotpointAriston е първата марка перални машини, получила от компанията Woolmark сертификата Woolmark Apparel Care - Platinum за постигани резултати при изпиране и разходи на вода и енергия. (M1126) Фини тъкани: използвайте програмата 9 за изпиране на много фини тъкани с апликации от рода на страс или пайети. За изпиране на копринени тъкани и пердета изберете цикъл 9 и настройте на степен “Delicate” от опция . Препоръчва се обръщането на дрехите наопаки преди прането и слагането на малките дрехи в торбичката за фино пране. За по-добри резултати се препоръчва използването на течен препарат за пране за фини тъкани. Програми „Еко“ Програмите „Еко“ предлагат добър резултат от изпирането при ниска температура, позволявайки по-ниско потребление на електроенергия, като с това допринасят за опазването на околната среда и икономическата ефективност. Програмите „Еко“ (12 Памук, 13 Синтетика и 14 Бърза 30’) са създадени за различни видове тъкани и слабо замърсени дрехи. За да бъдат гарантирани оптимални резултати, препоръчваме да използвате течен перилен препарат; добре е да обработите предварително маншетите, яките и петната. стандартна програма за памук при 20 C° е идеална за замърсено пране от памучна тъкан. Добрите резултати включително при изпиране със студена вода, в сравнение с тези след пране при 40°, са гарантирани от механичното действие с промяна на скоростта, многократно и често достигащо до пикови стойности. Система за измерване на тежестта на товара Преди всяко центрофугиране, с цел избягване на прекалени вибрации и за да се получи равномерно разпределяне на товара, барабанът се завърта със скорост, малко по-висока от тази при пране. Ако след направените последователни опити товарът все още не е правилно разпределен, машината извършва центрофугиране при скорост, по-ниска от предвидената. При наличие на прекален дисбаланс пералнята извършва разпределението вместо центрофугата. За улесняване на по-доброто разпределение на товара и правилното му балансиране се препоръчва да се смесват дрехи за пране с големи и малки размери. Проблеми и мерки за отстраняването им Възможно е пералната машина да откаже да работи. Преди да се обадите в сервиза за техническа поддръжка и ремонт (вижте “Сервизно обслужване”), проверете дали не става въпрос за леснорешим проблем, като си помогнете със следващия списък. Проблеми: Възможни причини/Мерки за отстраняването им: Пералната машина не се включва. • Щепселът не е включен към електрически контакт или не е добре включен, за да прави контакт. • Нямате ток вкъщи. Цикълът на изпиране не започва. • • • • • Люкът не е затворен добре Бутонът ON/OFF не е бил натиснат. Бутонът START/PAUSE не е бил натиснат. Кранът за вода не е отворен. Въвело се е закъснение за часа на стартиране. Пералната машина не се пълни с вода (на дисплея се показва мигащ надпис H2O). • • • • • • Маркучът за студената вода не е свързан към крана. Маркучът е прегънат. Кранът за вода не е отворен. Няма вода по водопроводната мрежа. Налягането е недостатъчно. Бутонът START/PAUSE не е бил натиснат. Пералнята непрекъснато се пълни и източва. • Маркучът за мръсната вода не е монтиран между 65 и 100 см от земята (вижте “Инсталиране”). • Краят на маркуча за мръсната вода е потопен във вода (вижте “Монтаж”). • Канализационната тръба в стената няма отдушник. Ако след тези проверки проблемът не се реши, затворете крана за водата, изключете пералната машина и позвънете в сервиза. Ако жилището ви се намира на последните етажи на сградата, налягането на студената вода може да е ниско, поради което пералната машина непрекъснато се пълни и източва. За избягване на това неудобство в търговската мрежа се предлагат подходящи възвратни клапани. Пералната не се източва или не центрофугира. • Програмата не предвижда източване: с някои програми трябва да се извършва ръчно. • Маркучът за мръсната вода е притиснат (вижте “Монтаж”). • Канализационната тръба е запушена. Пералната вибрира много по време на центрофугиране. • При монтажа барабанът не е бил отблокиран правилно (вижте “Монтаж”). • Пералната машина не е нивелирана (вижте “Монтаж”). • Пералната машина е притисната между мебели и стена (вижте “Монтаж”). Пералнята има теч. • Маркучът за студената вода не е добре свързан (вижте “Монтаж”). • Чекмеджето за перилни препарати е запушено (за почистването му вижте “Поддръжка и почистване”). • Маркучът за мръсната вода не е закрепен добре (вижте “Монтаж”). Светлинните индикатори на “Опции” • Изключете машината и извадете щепсела от контакта, изчакайте около 1 и светлинният индикатор на “START/ минута и я включете отново. PAUSE” мигат и дисплеят изписва код Ако неизправността не може да се отстрани, потърсете услугите на сервиза. за грешка. бразува се твърде много пяна. • Перилният препарат не е за автоматична пералня (трябва да има надпис “за автоматична пералня”, “за пране на ръка и за автоматична пералня” или подобен надпис). • Дозирането е било твърде голямо. 35 BG Сервизно обслужване 195101393.01 07/2013 - Xerox Fabriano BG Преди да се свържете с техническия сервиз: • Проверете дали можете да решите сами проблема (вижте “Неизправности и начини за отстраняването им”); • Включете отново програмата, за да проверите дали неизправността е отстранена; • В противен случай се обърнете към Центъра за техническо обслужване и ремонт. ! Никога не ползвайте услугите на неупълномощени техници. Съобщете: • типа на проблема; • модела на машината (Mod.); • серийния номер (S/N). Тази информация се намира върху фабричната табелка, разположена на задната страна на пералната машина, и в предната част; вижда се след отваряне на люка. 36