1
o As the colours of the wires in the appliance’s mains lead may not
correspond with the coloured markings identifying the terminals
in your spur box, please proceed as follows:
o The blue wire must be connected to the
terminal marked “N” (neutral), or coloured
black.
o The brown wire must be connected to the
terminal marked “L” (live), or coloured red.
Before beginning installation
o Check that the product purchased is of a suitable size for the
chosen installation area. In addition check whether there is an
electrical socket available that will be accessible once the hood is
mounted. If the product is going to be used in extraction mode,
then there should also be space to connect a ducting hose to the
outside.
o Carry out all necessary masonry work prior to the fitting of the
cooker hood.
o Ensure that all electrical connections are carried out by a suitably
qualified person.
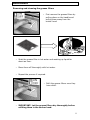
o Before commencing installation of the cooker hood the grease
filters should be removed.
o Check inside the product and insure that there is no transit
packaging or any other materials, such as packets of screws,
guarantees etc. These should be removed and kept for future
use.
o If possible, disconnect and move freestanding or slot-in cookers
from their position, to provide easier access to the rear wall and
ceiling. If this is not possible, then a thick, protective covering
should be placed over the worktop, hob top or cooker. This will
help to protect these surfaces from damage and debris.
o Select a flat surface for assembling the cooker hood. Cover that
surface with a protective covering and place all cooker hood
parts and fittings on to it.
o Rawl plugs are provided to secure the hood to most types of
walls and ceilings. However a qualified technician must verify the
suitability of the materials, in accordance with the type of wall
and ceiling. The wall and ceiling must be strong enough to take
the weight of the hood.
15