1
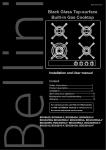
20121211
20100319issue
issue31
60cm Electric
Cooktop
For warranty service call 1300 373 199(Australia) or
0508 123108(New Zealand) to connect you to the
nearest authorised service centre
BCS604X
BCS604X-F
All electrical work/repairs must be carried out by a suitable and authorised electrician or
service agent.
Important Safeguards
NOTE: The adjacent furniture or the
housing and all materials used in the
installation must be able to withstand a
minimum temperature rise of 85ºC above
ambient during periods of use.
Certain types of vinyl or laminate kitchen
furniture are particularly prone to
heat damage or discolouration at
temperatures below the above guidelines.
Installing the appliance in contravention
of this temperature limit or the placing
of adjacent cabinet materials closer than
4mm to the appliance, will be at the
liability of the owner.
When using electrical appliances, in
order to reduce the risk of fire, electric
shock and/or injury, these basic safety
precautions should always be followed:
For Your Safety
Read all instructions carefully, even if you are
quite familiar with the appliance.
•
This appliance is not intended for use by
persons (including children) with reduced
physical, sensory and mental capabilities, or
lack of experience and knowledge, unless they
have been given supervision or instruction
concerning use of the appliance by a person
responsible for their safety.
•
Young children should be supervised to
ensure they do not play with the appliance.
•
•
NOTE: The minimum safety distance
between the top of the cooktop and the
underside of the rangehood must be
600mm.
•
Allow the appliance to cool before cleaning.
WARNING: Accessible parts may become
hot during use. To avoid burns young children
should be kept away.
•
Do not use the appliance for anything other
than its intended use. This product is intended
for household use only.
If it is necessary for younger family members
to be in the kitchen, please ensure that they
are kept under close supervision at all times.
•
DO NOT MOVE appliance when switched on.
•
Ensure the power cord does not touch the
cooker housing when in use.
•
Do not use outdoors.
•
WARNING: If the surface is cracked, switch off
the appliance to avoid the possibility of electric
shock.
•
This cooking range must be connected to
the supply by a supply cord fitted with an
appropriately rated plug that is compatible with
the socket-outlet fitted to the final sub-circuit in
the fixed wiring that is intended to supply this
cooking range.
•
Do not attempt to repair or disassemble the
appliance.
•
The appliance should not be covered or
operated near or underneath flammable
material such as curtains or drapes or other
combustible materials when in operation.
•
Take care not to burn hands on upper
elements when removing items from the
cooker.
•
Do not touch hot surfaces.
•
CAUTION: The temperature of the door or the
outer surface may be high when the appliance
is in operation.
•
Use only on heat resistant surfaces.
•
The appliance becomes hot during operation.
Take care not to touch the hot parts inside the
oven.
•
WARNING: Ensure that the appliance is
switched off before replacing the lamp to avoid
the possibility of electric shock.
•
In order to prevent accidental tipping of the
appliance, for example by a child climbing onto
•
the open oven door, the stabilising means
must be installed. Refer to the instructions for
installation.
2
Do not operate in the presence of flammable
or explosive materials.
•
Do not operate any appliance with a damaged
cord or plug.
•
Do not allow electrical fittings or cables to be in
contact with hot areas of the appliance.
•
Do not use an extension cord with this
appliance.
•
Take care when opening and closing the door
of the appliance.
•
Don’t move the cooker by pulling by the door
and/or handle.
•
Do not attempt to lift or move cooking
appliances by pulling on any door or handle as
this can cause damage.
•
Don’t store flammable materials, aerosols etc.,
in adjacent cabinets.
•
Don’t place flammable or plastic items on or
near the hob and never place wet cloths etc.,
on the hob to dry.
•
•
Don’t store flammable items such as oven
gloves, paper and similiar items in the storage
compartment.
Don’t use the cooker for:
- Hanging towels and dish cloths etc., on the
handles
- Warming plates under the grill
- Heating the kitchen
- Drying
•
Ensure that the appliance is switched off
before replacing the lamp to avoid the
possibility of electric shock.
•
Do not place heavy objects on or lean on
the oven door when open as this can cause
damage to the hinging.
•
•
•
Do not place pans or baking trays on the
bottom of oven cavities or line with Aluminium
Foil.
NEVER INSERT A KNIFE OR ANY OTHER
UTENSIL INTO THE COOKER. This may
damage the mechanism and cause a safety
hazard. Contact with elements could result in
electrical shock.
Food Hygiene
Ensure meat and poultry is thoroughly
defrosted before cooking.
Check food is thoroughly cooked and is piping
hot.
3
•
Ensure that small items of household
equipment, including connection leads, do not
touch the hot oven or the hob as the insulation
material of this equipment is usually not
resistant to high temperatures.
•
Do not allow the hob to get soiled and prevent
liquids from boiling over onto the surface of the
hob, Any spillages should be cleaned up as
they happen.
•
Do not place pans with a wet bottom on the
warmed up heating zones as this can cause
irreversible changes to the hob(irremovable
stains).
•
Do not switch on the hob until a pan has been
placed on it.
•
Do not put pans weighing over 15kg on the
opened door of the oven and pans over 25kg
on the hob.
•
Do not use harsh cleaning agents or sharp
metal objects to clean the doors as they can
scratch the surface, which could then result in
the glass cracking.
•
Do not use the cooker in the event of a
technical fault. Any faults must be fixed by an
appropriately qualified and authorised person.
•
In the event of any incident caused by a
technical fault, disconnect the power and
report the fault to the service centre to be
repaired.
•
The rules and provisions contained in this
instruction manual should be strictly observed.
Do not allow anybody who is not familiar with
the contents of this instruction manual to
operate the cooker.
•
The cooker should not be cleaned using steam
equipment.
•
Any spillage should be removed from the hob
lid before opening.The hob surface should be
allowed to cool before closing the lid.
•
Do not attempt to repair, modify, and
disassemble the appliance. The use for any
other purpose or in any other environment
without the express agreement of the
manufacture or its agent would invalidate any
warranty or liability claim.
•
This appliance complies with all current
safety legislation, however the manufacture
wish’s to emphasise that compliance does not
remove the fact that the appliance surfaces will
become hot during use and retain heat after
operation.
•
We also advise that great care is taken during
use and cleaning operations.
•
Remove cardboard lids from food containers
and replace with aluminum foil before placing
in the appliance. When using aluminum foil,
keep it from touching the heating elements.
•
This appliance must be correctly installed by a
suitably qualified person, strictly in accordance
with the manufacturer’s instructions. The
manufacture declines any responsibility for
injury or damage to persons or property as
a result of improper use or installation of this
appliance.
•
Dispose of packaging properly keeping plastic
bags away from babies and young children.
Compulsory Warning
If the supply cord is damaged, the cord must be
replaced by the manufacturer, its service agent
or similarly qualified persons in order to avoid a
hazard.
This product has not been designed for any uses
other than those specified in this booklet.
Save These Instructions
The manufacturer reserves the right to introduce
changes which do not affect the operation
of the appliance.
4
Features of Your Electric Cooktop
Knob to control the
respective hotplate
Hotplate
A marking to the bottom right of each control knob, indicates which hotplate it controls.
5
Getting to Know Your
Cooktop
Installation
Positioning
Congratulations on the purchase of your new
Bellini appliance.
This appliance must be correctly installed by a
suitably qualified person.
Before using your new cooktop, it is most
important that you read and follow the instructions
in this use and care booklet, even if you feel you
are familiar with this type of appliance.
To avoid damaging your appliance.
Your attention is drawn particularly to the section
dealing with IMPORTANT SAFEGUARDS.
•
Pans should be lifted on and off the hotplate
surface and not dragged.
•
Hotplates should not be switched on without
cookware placed on them. Cookware should
not be empty.
Find a safe and convenient place to keep this
booklet handy for future reference.
The adjacent furniture must be able
to withstand a minimum temperature
rise of 100°C above the ambient
temperature of the room it is located
in, during periods of use.
This appliance has been designed to operate
from a standard domestic power outlet. It is not
intended for industrial or commercial use.
How to Save Energy
Using energy in a responsible way not only saves
money but also helps the environment. So let’s
save energy! And this is how you can do it:
•
Use proper pans for cooking. Pans with thick,
flat bases can save up to 1/3 on electric
energy. Remember to cover pans if possible
otherwise you will use four times as much
energy!
•
Match the size of the saucepan to the surface
of the heating plates. A saucepan should
never be smaller than a heating plate.
•
Do not uncover the pan too often (a watched
pot never boils!).
•
•
Do not install the cooktop in the direct vicinity
of refrigerators/freezers. Otherwise energy
consumption increases unnecessarily.
600mm (minimum) between the hob surface
and the underside of any horizontal surface
above it.
•
50 mm clearance around the appliance and
between the hob surface and any combustible
materials.
This appliance is to be built into a kitchen unit
(depending on size) or 600 mm worktop, providing
the following minimum distances are allowed:
Unpacking the appliance
When unpacking the appliance please check
that the following items are contained within the
packaging:
1 cooktop
1 Installation and instruction manual
4 Fixing screws
4 Clamps
1 Sealing strip
6
Installing the appliance
•
Cut a hole in the worktop that corresponds
with the drawings shown above.
•
IMPORTANT: You must have a gap of at
•
Place the clamp (B) over the holes that match
the size of the screws. There are one set of
screw holes in each corner of the cooktop.
Slightly tighten a screw (C) through the
clamp (B) so that the clamp is attached to the
cooktop, but so that you can still adjust the
position of it.
•
Carefully turn the cooktop back over and then
gently lower it into the aperture hole that you
have cut out.
•
On the underneath of the cooktop, adjust the
clamps into a position that is suitable for your
worktop. Then fully tighten the screws (C) to
secure the cooktop into position.
least 25 mm between the underneath of the
appliance and any surface that is below it.
•
Carefully turn the cooktop upside down and
place it on a cushioned mat.
•
Apply the sealing strip provided around the
edge of the appliance.
•
The protective covering must be removed from
both sides.
•
Do not leave a gap in the sealing agent or
overlap the thickness.
•
IMPORTANT: Do not use a silicon sealant to
seal the appliance against the aperture. This
will make it difficult to remove the hob from the
aperture in future, particularly if it needs to be
serviced.
7
Electrlcal connection
Troubleshooting Guide
This appliance must be
installed by a qualified person.
Before connecting the appliance, make sure that
the supply voltage marked on the rating plate
corresponds with your mains supply voltage.
220-240V a.c. 50Hz
L
WARNING: THIS APPLIANCE MUST BE
EARTHED.
Connecting the mains supply cable
•
The mains terminal block is located on the
underside of the hob and the terminals are
accessible by removing the terminal block
cover by removing the cover screw.
•
The cable connections must be in accordance
with the diagram located on the bottom of the
hob.
Problems
Possible Cause and
solve
The hotplates
are not
functioning or
will not switch
on.
Check that the mains
electrical supply to the
appliance is correct
and working. Check the
mains fuse.
A humming
sound is heard
when a hotplate
is selected.
This is normal; the
sound will disappear
when the hotplate heats
up
The hotplates
have become
discoloured
Only two of the
hotplates on
my cooktop are
working
This maybe caused
by burnt on remnants
of food. This will not
affect the working of the
appliance. However you
should make sure that
the cleaning instructions
are being followed
regularly.
You should recheck
that the terminal screws
are all fully tightened
between the links.
IMPORTANT: If your appliance appears not
to be operating correctly, then you should
disconnect it from your mains supply and
then contact the Service Department .
DO NOT ATTEMPT TO REPAIR THE
APPLIANCE BY YOURSELF.
8
How to Use Your Electric
Cooktop
Before first use
IMPORTANT: You should clean the cooktop
and hotplates. (See Cleaning and maintenance
section).
Product specification
Product dimensions:
L: x W: x H( mm)
580x500x85
Aperture dimensions:
L: x W: x H( mm)
473 x 555 x40
Product specifications:
Electrical details
•
You should switch on one hotplate at a time,
for 5 minutes at the maximum setting. This will
help to eliminate any new smell that exists and
evaporate any humidity that has formed on the
heating elements during transit.
Control knobs
2 x 2.00 kW
thermostatic plates
(diameter 180 mm)
2 x 1.50 kW
thermostatic plates
(diameter 145 mm)
220-240 Vac 50 Hz
30 A (double pole
switched fused outlet
with 3mm contact gap)
Max Rated Inputs:
7 kW
Mains Supply Lead:
3 core x 2.5 mm_ (not
supplied)
•
All operations are performed by means of the
4 control knobs that can be found on the right
hand side of the cooktop.
•
The control knobs can be turned either
clockwise or anti-clockwise to select a heating
level. The numbers around the outside of each
control knob indicates the power level that you
have set the hotplate to.
•
A marking to the bottom of each control knob,
indicates which hotplate it controls.
Turning on a hotplate and setting a
power level
Plate layout
9
•
Turn the control knob of the hotplate that you
wish to cook on, clockwise or anticlockwise
until it reaches the power level that you desire.
•
Each hotplate can be adjusted between 1 and
6, one being the coolest hotplate setting and
six being the hottest hotplate setting.
•
When you have finished cooking, make sure
that you turn the control knob anti-clockwise,
to the 0 position.
Cleaning Your Cooktop
Cooktop guidelines
•
The first few times the cooktop is used, it may
give off an acrid, burning smell. This smell will
disappear completely with repeated use.
•
The hotplates are fitted with cooking areas of
different diameter and power.
•
The positions where the heat will radiate
from are clearly marked on the cooktop. The
saucepans must be positioned exactly on
these hotplates for efficient heating to occur.
Pans should have the same diameter as the
hotplate that they are being used on.
•
You should not use saucepans with rough
bottoms, as this can scratch the solid plates.
•
Before use, make sure that the bottoms of the
saucepans are clean and dry.
•
When cold, the bottom of the pans should be
slightly concave, as they expand when hot and
lie flat on the surface of the hotplate. This will
allow the heat to transfer more easily.
•
Cover pans with a lid to permit cooking at a
lower heat.
•
Food or liquid that has high sugar content may
damage the cooktop if it comes into contact
with the hotplates. Any spillages should be
wiped up immediately, however this may
not prevent the hotplates from becoming
damaged.
•
Allow the cooktop to cool before cleaning.
•
The hotplates should be cleaned after every
use to avoid build up of food.
•
If a major spillage occurs, wipe clean as soon
as possible with a damp cloth.
•
Do not immerse in water.
•
DO NOT use spray-on or other cleaners as
they may cause electrical damage. DO NOT
use sharp utensils to clean.
Abrasive cleaners or sharp objects will damage
the cooktop surface; you should clean it using
water and a little washing up liquid.
Although it is easier to clean some deposits whilst
the hotplates are still warm, you should take care
not to burn yourself.
After each use
•
Wipe the appliance over with a damp cloth and
a little washing up liquid.
•
Dry the appliance by rubbing the surface with
a clean cloth.
Regular Inspections
Besides keeping the cooktop clean, you should:
•
DO NOT USE THE HOTPLATE IF THE
SURFACE BECOMES BROKEN OR
CRACKED.
Carry out periodical maintenance.
Caution!
Caution!
All repairs and regulatory activities should be
carried out by the appropriate service
centre or by an appropriately authorised fitter.
Large pots MUST NOT be placed over two or
more hotplates as damage will more than likely
occur.
•
Before using your electric cooktop, check each
time that the base of the saucepan and the
cooking zone are clean and dry.
•
To save on energy consumption, always
use pans with lids. When the boiling point is
reached, it is best to turn the knob to the LOW
position.
•
Do not allow vinegar, coffee, milk, salted
water, lemon or tomato juice to remain in
contact with the enamelled surface of your
cooktop for long periods of time.
Do not leave pans unattended on a hotplate.
Ensure the hotplates are clean. A soiled hotplate
does not transfer all the heat.
Protect the hotplate against corrosion.
Switch off the hotplate before a pan is removed.
10
•
Never leave the hot plates on without pans on
them or with empty pans. Switch on the hot
plates after having set the pan in place.
•
Switch off the heating element before
removing the pan, Once switched off, the
plates will remain warm for a while.
•
Avoid using oversized pans that may radiate
excessive heat and cause damage to
surrounding surfaces.
Cleaning Hints
To keep your electric cooktop in good condition,
always allow it to cool down before attempting to
clean.
Stainless steel surface
The stainless steel surface are to be cleaned
only with a damp cloth and with a purpose made
product, such as Steel Power from Hillmark, or a
few drops of olive oil on a damp cloth.
Hot Plates
Weekly cleaning of frequently used hot plates is
recommended to maintain their surface finish.
•
Use a small amount of concentrated house
hold detergent and a nylon scourer to remove
all baked on grime. Wipe off with a damp
cloth and dry with about 10 seconds of high
temperature heat.
•
Apply a hot plate protector to the cleaned hot
plates such as Solid Hotplate Protector from
Hillmark or lightly oil with olive oil while plate is
still warm.
•
The chrome element rings around the hot
plates will change colour over time due the
effect of the heat on the metal. The colour
changes are dependant on the temperature
levels and is common to all electric cooktops.
11
WARRANTY
1.1
In this warranty:
1.1.1 Australian Consumer Law means the law as set out in Schedule 2 of the Competition and
Consumer Act 2010;
1.1.2 Company means GSM Sales Pty Ltd ABN 53 007 682 475 of 142-144 Fullarton Road, Rose
Park SA 5067. Telephone 08 8122 2390. Email [email protected];
1.1.3 Consumer means a “consumer” as that term is defined in Section 3 of the Australian Consumer
Law as the original purchaser of a Bellini product;
1.1.4 Consumer Guarantees means the guarantees under the Australian Consumer Law;
1.1.5 You means the Consumer.
1.2
Nothing in this warranty affects any person’s rights under the Australian Consumer Law. The benefits to
any Consumer under this warranty are in addition to the rights and remedies available under any
Consumer Guarantees.
1.3
Subject to the other clauses of this warranty, the Company warrants to the Consumer that the Bellini
product will be free of manufacturing defects and will perform to the Company’s specifications.
1.4
The benefit of this warranty extends only to the Consumer as original purchaser of a Bellini product which
is installed in a residential property.
1.5
This warranty commences on the date of purchase of the Bellini product by the Consumer and continues
for the benefit only of the Consumer until the expiry of two (2) years (Warranty Period).
1.6
If within the Warranty Period a manufacturing defect is discovered in the Bellini product or it fails to perform
to the Company’s specifications as a result of some defect in materials, components or workmanship
(Defect) then the Company will, at its option, repair the Bellini product or supply a replacement Bellini
product free of charge. A replacement Bellini product may differ from the original product purchased by the
Consumer.
1.7
This warranty will not apply to any Bellini product:
1.7.1
Installed by any person other than a qualified tradesperson; or
1.7.2
Subjected to misuse, neglect, negligence or accidental damage; or
1.7.3
Operated in any way contrary to any operating or maintenance instructions; or
1.7.4
Improperly handled, installed or maintained; or
1.7.5
Altered or modified prior to or after installation; or
1.7.6
Damaged directly or indirectly by power surges, electrical storm damage or connection to incorrect
power supply
The Australian Consumer Law requires the inclusion of the following statement with this warranty: Our goods come with guaranteed that cannot be excluded under the Australian Consumer Law. You are
entitled to a replacement or refund for a major failure and for compensation for any other reasonably
foreseeable loss or damage. You are also entitled to have the goods repaired or replaced if the goods
fail to be of acceptable quality and the failure does not amount to a major failure.
IN ORDER TO MAKE A CLAIM UNDER THIS WARRANTY THE
CONSUMER MUST CALL 1300 373 199 (AUSTRALIA) OR 0508 123 108
(NEW ZEALAND) TO CONNECT TO THE NEAREST AUTHORISED CENTRE
12
1.8
You must provide proof of your purchase of the Bellini product and the date of purchase in order to obtain
the benefit of this warranty.
1.9
If you live outside the service area of the Company or one of its service agents, this warranty does not
cover the cost of transport of the Bellini product for service nor the service agent’s traveling costs to and
from your home.
1.10 If you are required to transport the Bellini product to the Company or its service agent, you must ensure it is
safely disconnected by a qualified tradesman and securely packed and insured. The Company does not
accept any responsibility for loss or damage of the Bellini product prior to it being received by the Company
or its service agent.
1.11 You will be responsible for all costs of returning a Bellini product to the Company and for redelivery of the
Bellini product by the Company (whether it is the original or a repaired and/or a replacement Bellini product)
and for any other expenses you incur in claiming under this warranty.
1.12 The Company or its service agent will examine any Bellini product and if the Company determines that it is
defective through no fault of the Owner and is otherwise undamaged, the Company will repair or replace
the Bellini product in accordance with this warranty.
DO NOT SEND IN THIS WARRANTY
Fill out the following details and file with your purchase invoice.
RETAIN & FILE WITH YOUR RECEIPT
Your Purchase Receipt/Invoice is proof of date of purchase. If you are unable to establish the date of purchase,
or if the fault is not covered by this warranty, or if the product is found to be in working order, you will be required
to bear all service call charges.
GSM Sales Pty Ltd reserves the right to discontinue items, modify designs and change specifications without
incurring obligation.
Whilst every effort is made to ensure that descriptions, specifications and other information in this publication is
correct, no warranty is given in respect thereof and the company shall not be liable for any errors therein.
Purchased from:
Co. Name:
Address:
Date of Purchase:
Serial number:
NOTE:
Consistent with our continuing product development policy, improvements may have been made
which render the contents of this packaging slightly different to that shown.
FOR WARRANTY SERVICE CALL 1300 373 199 (AUSTRALIA)
OR 0508 123 108 (NEW ZEALAND) TO CONNECT YOU TO THE NEAREST
AUTHORISED SERVICE CENTRE
13