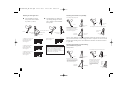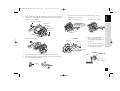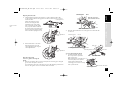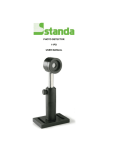
1
Belgium: Derby Cycle Werke GmbH, Siemensstr. 1-3, D-49661 Cloppenburg, Phone: +49-4471966101
France: Derby Cycle Werke GmbH, Siemensstr. 1-3, D-49661 Cloppenburg, Phone: +49-4471966101
Great Britain: 50Cycles Ltd., Unit M Littlemoor Lane, GB-Loughborough LE11 1SF, Phone: +44-1509 266656
Italy: Bike Evolution, Rigaste S. Zeno 39/B, I-37123 Verona, Phone: +39-045592410
Latvia: Laterns Ltd., Brivibas 353/16, LV-1000 Riga, Phone: +371-9848860
Lithuania: Meibalt, Svitrigailos 5, LT-2000 Vilnius, Phone: +370-52651259
Netherlands: Derby Cycle Werke GmbH, Siemensstr. 1-3, D-49661 Cloppenburg, Phone: +49-4471966101
Romania: S.c. SportBikeCenter. S.r.l, St. Penes Carcanul 3-5, RO-300124 Timisoara, Phone: +40-256220023
Slovakia: AGF Invest s.r.o., Hlinikova 365/39, SK-95201 Vrable, Phone: +421-262859549
Spain: Clean Laguna S.L., Urbanisation Sant Jordi da Alfama, E-43860 Ametlla de Mar, Phone: +34-977486160
www.kalkhoff-bikes.com
1973K0110002
KALKHOFF - Instruction manual - Guide d‘utilisation - Handleiding - Instrucciones de uso
Kalkhoff bikes
Derby Cycle Werke GmbH
Siemensstraße 1-3
49661 Cloppenburg
Tel. +49 (4471) 966-0
Fax +49 (4471) 966-44845
E-Mail: [email protected]
Instruction manual
Guide d’utilisation
Handleiding
Instrucciones de uso
Foreword
Your bicycle was delivered to you fully assembled. In case any bicycle parts are not
assembled, please contact your bicycle dealer.
These instructions help you in the
● appropriate,
● safe and
● advantageous
Use of your bicycle.
We assume that users already have general knowledge regarding
the handling of bicycles.
Every person who
● uses,
● cleans,
● maintains or
● disposes of this bicycle
Racing shift lever
Standard shift lever
Twistgrips
Derailleur
must be fully acquainted with the entire contents of this instruction manual.
Fine adjustment of the derailleur / troubleshooting
Chain guide
Layout features
Fine adjustment of the chain guide
Various elements of this instruction manual are provided with special symbols, which
enable you to easily distinguish between normal text,
●
➢
lists or
actions to be taken or
important additional information or particular details regarding the use
Using the multispeed hub gear shifter with and without a coaster brake
Shimano hub gear shifter
Shimano 3-speed shift lever
Shimano 7/8-speed shift lever
Dismounting and mounting the rear wheel with Shimano hub
Removing the rear wheel
Refitting the rear wheel
SRAM hub gear shifter
of the bicycle.
SRAM 3-speed
SRAM 5(7)-speed brake gear hub
Contents
Safety advice
Fundamental safety advice
Appropriate use as intended
Assembling the pedals
Pedal types
Before each use
Use of the quick release
Adjusting the saddle
Determining the correct saddle height
Adjusting the saddle height
Adjusting the saddle tilt
Suspension seat post
Adjusting the handlebar
Determining the correct handlebar height
Adjustment of the handlebar height for a conventional handlebar stem
Adjustment of the A-Head system handlebar height
Aligning the handlebar to the front wheel
Adjustment of the handlebar height for an adjustable handlebar stem
Checking the headset
Checking the bottom bracket / inner bearing
Using the gear shifter
Using the multispeed chain gear shifter
Shift lever operation
4
4
5
6
6
7
7
Bicycle chain maintenance
Brakes, brake levers and braking systems
Brake levers
Wheel rim brakes
Disc brakes
Hydraulic disc brakes
Drum brakes and roller brakes
SRAM drum brakes
SHIMANO drum brakes
7
8
8
8
9
9
9
9
10
10
10
10
10
11
11
11
12
14
15
15
15
16
16
16
17
17
18
18
18
18
22
22
23
24
24
26
26
27
27
28
29
30
english
Seite 3
français
12:50 Uhr
nederlands
24.10.2007
español
DCW BedienA_GB UNI.qxd
3
DCW BedienA_GB UNI.qxd
24.10.2007
Frame
Forks
Checking the wheels
Checking the tyres and inner tubes
Tyres
Inner tubes
Repairing a puncture
Operating the lighting components
Dynamo
Failure of the lighting system
Carrier
Mudguards
Bicycle stand
Selecting accessories and equipment
Handling carbon components
Care and maintenance of the bicycle
Care
Consumable parts
Regular inspection
Inspection schedule
Technical data
Total permissible weight of the bicycle
Permissible carrier load
Tightening torques of screws, nuts and bolts
Tightening torques of Shimano components
Tyres and tyre pressures
Warranty conditions
12:50 Uhr
Seite 4
32
32
34
34
34
35
35
37
37
38
38
38
39
39
40
41
41
42
43
44
44
44
44
45
45
46
46
Safety advice
Read all warnings and notices in this operating manual completely before using the
bicycle. Always store the operating manual near to the bicycle so that it is available at
all times.
If you pass on or sell your bicycle to others, please also hand out this operating manual to them.
Fundamental safety advice
●
●
●
●
●
Bicycle safety
●
●
●
●
●
●
●
4
Personal safety measures
Always use a suitable bicycle helmet.
Wear light coloured clothing or clothing with reflective elements, so that other
road users can see you.
Wear shoes with rigid and, as far as possible, non-slip soles.
Wear tight-fitting trousers or use bicycle clips.
Always wear suitable protective clothing when riding, such as solid shoes
and a bicycle helmet.
Observe the maximum load of the relevant bicycle type, otherwise important
operational parts could break or fail.
Have damaged or bent parts replaced before riding the bicycle again,
otherwise important operational parts could fail.
Observe the maximum load of the carrier. It is marked on the carrier
(see chapter “permissible carrier load“, page 44).
Have maintenance and repairs carried out by a dealer.
Comply with maintenance intervals (see page 43).
If you make any technical changes to your bicycle, you should observe
the national traffic regulations and valid standards.
Electrical parts of your bicycle may only be replaced by type-tested parts.
During adverse light conditions such as
● fog
● rain
● dusk ● darkness
you should only ride with sufficient lighting.
●
●
●
●
●
Road traffic safety
Always obey the valid traffic regulations.
Never ride hands-free. This can lead to serious accidents.
Remember that children under eight years of age must ride on the pavement.
Children aged eight to ten may ride on the pavement.
If children have to cross the road, they must dismount from the bicycle.
When the road is wet, adjust your riding style accordingly.
Ride more slowly and brake earlier, as the braking distance will be
noticeably longer.
Adjust your speed according to the terrain and your ability.
Don’t listen to music via headphones whilst riding your bike.
Don’t use a mobile telephone whilst riding your bike.
If you ride off-road, use only official cycle paths.
Always be ready to brake at blind corners and when riding downhill.
Appropriate use as intended
General
Bicycles are intended as a means of transport for single persons. The carrying of an
additional person on the bicycle is only permissible within the scope of national
regulations. If you wish to transport baggage, the bicycle must be suitably equipped
for this purpose. In this case, observe the loading limits for the carriers (see chapter
‘Permissible carrier load’, page 44).
Not every type of bicycle is suitable for every type of terrain. Bicycles are not designed
for extreme strains such as riding over steps or jumping.
The details given in this operating manual are valid for all types of bicycle.
Where details for individual types of bicycle differ, these are marked accordingly.
Observe the individual component manufacturers’ operating instructions, which are
supplied with your bicycle or are available online. If you still have questions after
reading the component manufacturers’ documentation, please consult your bicycle
dealer.
Appropriate use as intended also means complying with the usage, maintenance and
service conditions which are described in this operating manual.
The manufacturer and dealer shall not be liable for any use of the bicycle which goes
beyond the intended use.
Trekking bikes / ATBs
These bicycles may be used on public and made roads. They are also suitable for
light off-road use.
The manufacturer and dealer shall not be liable for any use of the bicycle which
goes beyond the intended use. This particularly applies to non-compliance with
safety advice and the resulting damage, for example due to:
●
●
overload or
improper repair of faults.
City, touring, sport, children’s and junior cycles
These bicycles may be used on public and made roads.
The manufacturer and dealer shall not be liable for any use of the bicycle which
goes beyond the intended use. This particularly applies to non-compliance with
safety advice and the resulting damage, for example due to:
●
●
●
off-road use,
overload or
improper repair of faults.
Mountain bike (MTB)/Cross bike
These bicycles may be used off road. Do not use these bicycles to take part in
competitions. These bicycles may not be used on public roads. If you wish to use
your bike on a public road, you must comply with national regulations.
The manufacturer and dealer shall not be liable for any use of the bicycle which
goes beyond the intended use.
This particularly applies to non-compliance with safety advice and the resulting
damage, for example due to:
●
●
●
●
●
●
●
english
Seite 5
français
●
12:50 Uhr
nederlands
●
●
●
24.10.2007
español
DCW BedienA_GB UNI.qxd
use in competitions,
overload,
improper repair of faults,
riding over steps,
jumps,
riding through deep water or
extreme strain outside special MTB-courses.
5
DCW BedienA_GB UNI.qxd
24.10.2007
12:50 Uhr
Seite 6
Racing cycles / fitness bikes
If racing cycles are to be used on public roads, the national regulations must be complied with.
The manufacturer and dealer shall not be liable for any use of the bicycle which goes
beyond the intended use. This particularly applies to non-compliance with safety advice
and the resulting damage, for example due to:
●
●
●
●
off-road use,
overload,
improper repair of faults or
competitions.
Assembling the pedals
Tighten all screws to the specified torque, otherwise the screws could break
off and parts may become loose. (see chapter ‘Tightening torques of screws, nuts
and bolts’, page 45).
Thread sealant prevents screws from working loose on their own.
Thread sealant is available from hardware stores.
➢
➢
➢
Screw the left pedal in an anticlockwise direction into the left pedal crank.
Screw the right pedal in a clockwise direction into the right pedal
crank (on the chain side).
Tighten both pedals using a size 15 spanner.
Pedal types
Use MTB, racing and system pedals only with the matching shoes.
You might slip off the pedals with other shoes.
The use of MTB or racing pedals may lead to serious falls if the user is not
experienced.
If you use system pedals, at first practise fastening and unfastening the shoes to
and from the pedals whilst standing still. Never practice in traffic.
Read the pedal and shoe manufacturers’ instructions.
If the pedals are placed in position at an angle or screwed in crookedly,
the thread in the crank arm may be destroyed.
The left pedal (”L“) has a left-hand thread, the right pedal (”R“) has a
right-hand thread.
1
1
2
3
MTB pedals
Touring or sport pedals
System pedals
2
Racing cycles or mountain bikes may be delivered without pedals.
If you wish to mount the pedals of your racing cycle or mountain bike yourself,
proceed as follows:
➢
6
Paint both pedal threads with a medium-strength thread sealant (glue).
3
Before each use
Despite taking great care during production and final checking, parts
may work loose or their functionality may alter during transport.
➢
●
●
●
●
●
●
●
●
●
●
●
For this reason, the following items must be checked before each use:
tightness of the quick releases,
tightness of all screws, nuts and pedals,
adjustment and tightness of suspension parts
adjustment and function of the brakes
tightness of pipes and connectors if hydraulic brakes are being used,
fastening of the saddle support and the handlebar stem,
minimum insertion depth of the seat post and the handlebar stem,
lighting function,
gear shift function,
proper fixing of the wheels and
sufficient tyre tread depth and correct tyre pressure.
To open the quick release, proceed as follows:
➢ Tilt the tensioning lever, so that the word OPEN is readable.
➢ Open the quick release as far as it will go.
➢ To loosen the quick release, turn the locking nut in an anticlockwise direction.
To close the quick release, proceed as follows:
➢ Adjust the locking tension using the locking nut.
➢ If the quick release is too loose, open it again and turn the locking
nut in a clockwise direction.
If the quick release is still too easy to close, repeat the last step.
➢
If the quick release is too difficult to close, turn the locking nut in an
anticlockwise direction.
➢
Tilt the tensioning lever away from the OPEN position, so that the
word CLOSE is readable.
Adjusting the saddle
The seat position is crucial to your comfort and cycling efficiency.
english
Seite 7
français
12:50 Uhr
nederlands
24.10.2007
español
DCW BedienA_GB UNI.qxd
Use of the quick release
All quick releases must be fastened tightly before riding.
Check that all quick releases are correctly seated if the bicycle has been left
unattended for a while.
When tightening the quick release, so much force is required that you will need to use
the ball of your hand, otherwise the quick release could loosen itself.
A quick release is made up of two
operating elements:
1
2
Tensioning lever
Locking nuts 1
Do not remove the seat post or the saddle clamp.
The manufacturer accepts no liability for damage or accidents.
Tighten all screws to the specified torque, otherwise the screws could break off and
parts may become loose. (see chapter ‘Tightening torques of screws, nuts and bolts’,
page 45).
You should only carry out work on your bicycle with suitable tools and
sufficient knowledge. Have complicated repairs or work related to safety done
by a dealer.
Adjust the bicycle saddle and handlebar to suit your requirements.
7
DCW BedienA_GB UNI.qxd
24.10.2007
12:50 Uhr
Seite 8
Determining the correct saddle height
To adjust the saddle height, proceed as follows:
➢
➢
➢
Loosen the saddle locking screw by turning
it anticlockwise using an allen key or by
opening the quick release (see chapter ‘Use
of the quick release’, page 7).
➢
Pull the saddle out of the seat tube until
the required height is reached.
Lock the saddle locking screw by turning it
clockwise using an allen key or by closing
the quick release.
Check once again that the saddle height is
correct (see chapter ‘Determining the
correct saddle height’, left).
Sit on the bicycle saddle.
Try to reach the pedal at its lowest position
with your heel.
Your knee should be almost completely
straight at this point.
➢
➢
Place the ball of your foot in the centre
of the pedal.
➢
If your knee is now slightly bent, the saddle
height is correctly adjusted.
Saddle locking screw
Quick release
Adjusting the saddle height
Adjusting the saddle tilt
Never pull the seat post out of the seat tube beyond the maximum or stop
mark or the height of the middle of the top tube, (in the case of bicycle frames
without top tube, beyond the middle of the seat brace). The bottom end of the seat
post must be at least at the same height as the top tube, otherwise you may injure
yourself and damage the seat post.
Adjust your saddle so that it is as level as possible, or slightly tilted to the rear.
Determine the most comfortable seating position by making a longer cycling trip.
If the saddle of a mountain bike with full suspension (MTB-Full-Suspension) is
adjusted to its lowest point, the seat post may protrude a maximum of 20 mm from
the seat tube at the bottom end, otherwise the real wheel rocker arm will collide
with the seat post when the damper is compressed.
The minimum insertion depth is marked. If
the saddle support has no marking, the minimum insertion depth must be 7.5 cm. In the
case of frames with longer seat tubes, which protrude beyond the upper tube, the minimum
insertion depth is 10 cm.
8
Observe
the stop mark!
If necessary, adjust the saddle tilt by proceeding as follows:
➢
➢
➢
To loosen the locking screw, turn it in an
anticlockwise direction.
Tip the saddle until the required tilt is reached.
To tighten the locking screw, turn it in a
clockwise direction. (for tightening torque,
see page 45).
In the case of a saddle with a collar clamp, the
locking screw is located at the side. If necessary,
adjust the saddle tilt by proceeding as follows:
➢ To loosen the locking screw, turn it in an
anticlockwise direction. It may be necessary to
hold the nut located on the other side using a
second spanner.
➢ Tip the saddle until the required tilt is reached.
➢ To tighten the locking screw, turn it in a
clockwise direction. It may be necessary to hold the nut located on the
other side using a second spanner (for tightening torque, see page 45).
Determine the optimum handlebar height for your body height as follows:
➢ Sit on the bicycle saddle.
➢ If necessary, ask someone to hold the bicycle.
➢ Bend forward towards the handlebar until you reach a position which is
comfortable for your back.
➢ Stretch your arms out towards the handlebar.
➢ Note the approximate height of your hands, so that you can adjust the
handlebar to this height.
Adjustment of the handlebar height for conventional handlebars
Never pull the handlebar stem out beyond the maximum or stop mark
on the stem tube. Insert the handlebar stem to a minimum depth of 65 mm
in the steering tube, otherwise the handlebar stem can slip down.
Suspension seat post
Suspension seat posts compensate for mild shocks and
road unevenness. This reduces stress on the spine during
cycling.
If the spring elements of the seat post need to be
adjusted, consult your dealer.
Adjusting the handlebar
Tighten all screws to the specified torque, otherwise the screws could break
off and parts may become loose (see chapter ‘Tightening torques of screws, nuts
and bolts’, page 45).
Determining the correct handlebar height
By altering the handlebar height, you can determine the seating position on the
bicycle. The seating position will be changed by a height difference between the
handlebar and the saddle.
The lower you adjust the handlebar, the further you will have to lean forward.
This results in an increase in the load on wrists, arms and upper body.
To loosen the stem shaft in the steering tube, proceed as follows:
➢ Release the stem spindle in order to loosen the handlebar stem.
Turn it two to three turns in an anticlockwise direction using an allen key.
➢ Clamp the front wheel between your knees to prevent the bicycle fork
from moving when the stem shaft is loosened.
➢ Turn the stem shaft backwards and forwards.
➢ If this is not possible, tap the stem spindle lightly with a plastic
hammer from above until the locking screw inside the steering tube loosens
itself.
english
Seite 9
français
12:50 Uhr
nederlands
24.10.2007
español
DCW BedienA_GB UNI.qxd
Having loosened the stem shaft, proceed as follows:
➢
➢
➢
Push the handlebar stem to the required height.
Adjust the handlebar so that the handlebar
stem is at a right-angle to the bicycle frame.
To tighten the stem shaft again, turn the stem
spindle with an allen key in a clockwise direction
(for tightening torque, see page 45).
The higher you adjust the handlebar, the more upright you will have to sit. This results
in an increase of the load on the spine.
9
DCW BedienA_GB UNI.qxd
24.10.2007
12:50 Uhr
Seite 10
The retaining catch screws are located on the underside of the stem
Adjustment of the A-Head system handlebar height
Stems such as the one illustrated here are called A-Head stems. If this system is fitted,
it is compulsory to have the handlebar height adjusted by a dealer.
Aligning the handlebar to the front wheel
To align the handlebar to the front wheel, proceed as follows:
➢ Loosen the allen screw at the front side of the
stem by turning it in an anticlockwise direction
using an allen key.
➢ Turn the handlebar to the desired position.
Ensure that the handlebar is clamped exactly at
the centre of the stem.
➢ Tighten the allen screw in a clockwise direction
using an allen key (for tightening torque, see
page 45).
Allen screws
On some types of handlebar stems, the tilt of the handlebar is variable.
The locking screws for the handlebar tilt adjustment can be found at the side of the
joint or on the top or the underside of the stem. There are also
models with additional retaining
catches or adjustment screws.
Loosen the locking screw
two to three turns in an
anticlockwise direction
using an allen key.
Adjustment
screw
If you own a model with additional latching gear, proceed as follows:
➢ To loosen the serration of the latching gear, turn the locking screw further in an
anticlockwise direction if necessary.
If you own a model with integrated retaining catches, proceed as follows:
➢ Remove the retaining catch screws if necessary.
10
➢
➢
Adjust the handlebar stem to the desired height
Tip the handlebar stem to the desired tilt.
To tighten the handlebar stem, proceed as follows:
➢ In the case of models with integrated retaining catch, carefully tighten the
retaining catch screw in a clockwise direction.
➢ The retaining catch must thereby grip the serration.
Tighten the locking screw in a clockwise direction using an allen key
(for tightening torque, see page 45).
Adjustment of the handlebar height for an adjustable handlebar stem
➢
on many stem models.
Checking the headset
If the headset is improperly adjusted or tightened too hard, breakage
may occur, therefore always consult a dealer.
If you ride with a loose headset, damage may occur to the bearing casing
or the forks.
The headset forms the bearing of the
bicycle forks in the frame. A properly
adjusted headset can be easily turned. However, there should be no
play.
Shocks from the road place a great strain on the headset. It can be become loose
or misadjusted. Have the play and the ease of movement of the headset checked
regularly by a dealer (for intervals, see page 44).
Checking the bottom bracket
Chain sprockets are consumable parts. Their service lifetime depends on various
factors such as:
● Maintenance and care,
● type and duration of use and
● the distance travelled.
The crank arms must be seated tightly, otherwise the crank assembly may become
damaged.
➢ Since the crank arms can become loose, check the tightness of the
bottom bracket regularly.
➢ To check that the crank arms are seated tightly on the axles, shake
them regularly.
➢ If any play is found in the crank arms, have the bicycle checked and the
arms tightened by a dealer.
Using the gear shifter
Using the multispeed chain gear shifter
This operating manual describes the typical, conventional gear shift components of
an MTB, ATB, crossbike or racing cycle. In the case of differing components, refer to
the special information or attached manuals. If anything is unclear to you, consult
your bicycle dealer in the case of questions regarding assembly, maintenance and
operation.
english
Seite 11
The bicycle chain may not sit simultaneously on the smallest chain
sprocket at the front and the small outer sprocket at the rear, nor may it sit
simultaneously on the largest chain sprocket at the front and the large inner
sprocket at the rear, otherwise the chain may become disengaged.
Never pedal backwards when shifting gear, otherwise the gear shifter may be
damaged. Be careful when making adjustments to the gear shifter.
français
12:50 Uhr
Due to incorrect adjustments, the chain may jump off the sprocket which may
lead to a fall. If you are not sure, have the work done by a dealer.
nederlands
24.10.2007
Do not ride without the spoke protector, otherwise the bicycle chain
or the gear shifter mechanism could get between the sprockets and the spokes.
Change to the lowest gear (largest rear sprocket) very carefully using the gear
shift, otherwise the changer mechanism could come into contact with the
spokes and damage them.
español
DCW BedienA_GB UNI.qxd
Shift lever operation
There are various types of gear shit levers.
The commonest types are described below.
Loose, worn, damaged or incorrectly adjusted gear shift components
represent a risk of injury to the rider.
Have the chain gear shifter adjusted by a dealer!
Racing shift lever
The Shimano brake shift lever may exist in two versions.
Lever b
Lever b
from larger to smaller
chain sprocket
Lever a
●
●
●
●
●
If the chain jumps off the chain sprockets, or
if abnormal noises are heard, or
if gear shifting does not work correctly, or
if the chain guide, derailleur or other gear shift components are loose,
damaged or bent, or
if the chain links are loose or worn, consult your dealer to have repairs
carried out.
Rear
Lever b
Lever a
from larger to smaller
chain sprocket
Lever a
Lever a
from smaller to larger
chain sprocket
Front
Rear
Lever B
Lever b
Lever A
Lever a
Lever A : shifting to a larger rear sprocket.
Lever B : shifting to a smaller rear sprocket.
from smaller to larger
chain sprocket
Front
Lever B
Lever b
Lever A
Lever a
Lever a : shifting to a larger chain sprocket.
Lever b : shifting to a smaller chain sprocket.
All levers return to their initial positions when released.
11
DCW BedienA_GB UNI.qxd
24.10.2007
12:50 Uhr
Seite 12
Actuating the chain guide lever
●
Actuating the derailleur lever (standard)
● Lever B: shifting to a smaller rear
sprocket. By pressing lever B once,
gear is shifted to the next smaller
rear sprocket.
Lever A: shifting to a larger
rear sprocket. Lever A latches
in positions 1, 2 and 3.
Lever a: shifting to a larger chain sprocket.
Lever b
Lever a
Initial position
Lever A
Initial position
Lever B
2nd click position
Complete chain
shift lever stroke
1st click position
4 3
1: Shifting by one gear to the
next larger rear sprocket.
Example: Shifting from
3rd to 4th gear.
5
3
2: Shifting by two gears to
a larger rear sprocket.
Example: Shifting from
3rd to 5th gear.
3: Shifting by three gears to
a larger rear sprocket.
Example: Shifting from
3rd to 6th gear.
6
3
Initial position
Lever a
If the lever movement does not produce a
complete change of chain sprocket, the lever
must be moved again by amount (X’) in
order to execute the missing lever movement
distance (X) and thus the gear shift.
3rd click position Lever B
Lever A
Initial position
Lever b
4 3
Example: Shifting from
4th to 3rd gear.
Operating advice
Lever B moves with lever A when it is actuated;
however, the exertion of pressure on lever B must
be avoided. Correspondingly, the exertion of
pressure on lever A must be avoided when
actuating lever B. The simultaneous actuation of
both levers results in no gear shift.
Lever b: shifting from the middle to the smallest chain sprocket
Complete derailleur
lever stroke
Stroke actually
performed
Click position
Click position
Lever ‘b’ moves with lever ‘a’ when it is actuated. However, the exertion of pressure on
lever ‘b’ must be avoided. Correspondingly, the exertion of pressure on lever ‘a’ must be
avoided when actuating lever ‘b’. The simultaneous actuation of both levers results in
no gear shift.
Actuating the derailleur lever with trimming
(noise minimisation) optional
Shift procedure
Lever a: shifting to a larger chain sprocket.
Lever b: shifting from the largest to the middle chain sprocket.
Lever b
Lever a
Initial position
Lever a
If the lever movement does not produce a
complete change of chain sprocket, the lever
must be moved again by amount (X’) in
order to execute the missing lever movement
distance (X) and thus the gear shift.
Complete chain
shift lever stroke
12
Stroke actually
performed
When shifting using lever b, an initial click
stop marks the start of trimming (noise
prevention mechanism) and a second,
stronger click stop marks the complete
chain sprocket shift. After trimming,
the next press concludes the shift
sequence.
Initial position
Lever b
Complete
chain
shift lever
stroke
Click position
Click position
12:50 Uhr
Seite 13
Chain
position
large chain sprocket
Trimming
Indication
Lever actuation
Derailleur movement
français
english
Trimming (noise minimisation)
Depending on the chain position after completion of shifting, the chain may rub
against the outer or inner chain guide plate and cause noises. In this case, press
lever ‘a’ or lever ‘b’ lightly in order to move the derailleur slightly so that it no
longer contacts the chain.
This adjustment is called ‘trimming’. Trimming is possible when the chain is
located on the large, middle or small chain sprocket. If noises occur, trim to one
of the following positions in order to completely eliminate the noises.
Chain
position
large chain sprocket
Chain touches
outer chain guide
plate
Trimming
Indication
Lever actuation
Trimming
Lever (a)
smaller
rear sprockets
before trimming
Trimming
after trimming
derailleur movement
outer chain guide
plate
larger rear sprockets
inner chain guide
plate
Lever (b)
before trimming
after trimming
derailleur movement
middle chain sprocket
middle chain sprocket
smaller
rear sprockets
larger rear sprockets
small chain sprocket
kleines Kettenblatt
Chain
position
Chain
smaller
rear sprockets
Derailleur movement
Chain touches
inner chain
guide plate
nederlands
24.10.2007
español
DCW BedienA_GB UNI.qxd
Chain
position
Chain
(contact)
(contact)
larger rear sprockets
13
DCW BedienA_GB UNI.qxd
24.10.2007
12:50 Uhr
Seite 14
Standard shift lever
Both levers (A) and (B) return to their initial positions after actuation.
The crank must always be turned when actuating a lever.
Actuating the derailleur shift lever
Lever (A) initial position
Shifting from a large to a smaller rear
sprocket
Pressing once shifts to a smaller rear
sprocket.
Shifting from a small to a
larger chain sprocket
By pressing lever (A) once,
the chain is shifted from
a small to a larger chain
sprocket.
Lever (B)
Hebel
(B)
Complete derailleur
lever stroke
Click position
Shifting from a large to a
smaller chain sprocket
By pressing lever (B) once,
the chain is shifted from
a large to a smaller chain
sprocket.
Trim actuation
Click position
Lever (B)
If the chain is on the largest chain
sprocket and the largest rear sprocket,
the chain rubs against the derailleur,
which is noticeable from the characteristic
noises. The derailleur can be move slightly
to the inside by lightly pressing lever (B)
(to the click position) so that there are
no more noises.
H Lever
b l (B)
(B)
Actuating the standard chain guide lever
Shifting from a small to a larger rear sprocket.
To shift by one gear only, push the lever (A)
to position (1). To shift by two gears, push
the gear shift lever to position 2. It is
possible in this way to shift by a maximum
of three gears.
14
Lever (A) initial position
1
2
When shifting using lever (B), an initial
click stop marks the start of trimming
(noise prevention mechanism) and a
second click stop marks the complete
chain sprocket shift. After trimming is
completed, the noise prevention system
does not click any more, so that only the
click positions for shifting the rear sprokkets remain.
Chain position
Derailleur
movement
Twistgrips
To shift by one gear only, turn the twistgrip forwards or backwards by one position.
Decreasing
Abnehmende
Pedalkraft
pedal force
Increasing
Zunehmende
pedalPedalkraft
force
Abnehmende
Pedalkraft
Decreasing
pedal force
Zunehmende
Pedalkraft
Increasing
pedal force
Derailleur
Have the chain gear shifter maintained, adjusted or replaced by a
cycle dealer!
Fine adjustment of the derailleur / troubleshooting
Cable sheath adjustment screw
Cable sheath adjustment screw
Position of the cable sheath adjustment screw
This adjustment screw may be located on the frame
on racing cycles.
B
A
If the chain falls on the crank arm
side:
➢ Tighten the adjustment screw for
the largest gear to the right
(approx. 1/4 turn).
If shifting from the middle to the large ➢ Loosen off the adjustment screw
for the largest gear to the left
chain sprocket is difficult:
(approx. 1/4 turn).
If shifting from the middle to the small ➢ Loosen off the adjustment screw
for the smallest gear to the left
chain sprocket is difficult:
(approx. 1/4 turn).
If the chain rubs against the inner
chain guide when set to the largest
chain sprocket:
➢ Tighten the adjustment screw for
the largest gear to the right
(approx. 1/8 turn).
If the chain rubs against the outer
chain guide when set to the largest
chain sprocket:
➢ Loosen off the adjustment screw
for the largest gear to the left
(approx. 1/8 turn).
If the middle chain sprocket is missed
out when shifting from the largest
chain sprocket:
➢ Loosen off the cable sheath adjustment screw to the left (1 to 2 turns).
If the chain is on the middle chain
sprocket and rubs against the inner
chain guide when shifting to the largest rear sprocket:
➢ Tighten the cable sheath adjustment
screw to the right (1 to 2 turns).
If the chain falls on the bottom
bracket side:
➢ Tighten the adjustment screw for
the smallest gear to the right
(approx. 1/2 turn).
If lever actuation is difficult when
shifting from the middle to the largest
chain sprocket:
➢ Loosen off the adjustment screw for
the largest gear to the left (approx.
1/4 turn).
english
Seite 15
français
12:50 Uhr
nederlands
24.10.2007
español
DCW BedienA_GB UNI.qxd
Cable sheath adjustment screw
15
DCW BedienA_GB UNI.qxd
24.10.2007
12:50 Uhr
Seite 16
Chain guide
Optimum adjustment
When the slack is taken up by the gear shift lever, the chain should
rub against the third rear sprocket and make a noise if the adjustment is optimal.
Release the gear shift lever in second gear and turn the crank arm.
Have the chain gear shifter maintained, adjusted or replaced
by a cycle dealer!
Fine adjustment of the chain guide
Actuate the lever to shift the chain from the smallest rear sprocket to the second
rear sprocket. Then take up the slack and turn the crank arm.
If the chain rubs against the third rear sprocket, the adjustment
screw must be turned a little to the right so that no rubbing noises
occur.
For trouble-free SIS function, all power transmitting parts must be lubricated.
IfFalls
therekeine
are
Geräusche
no
noises:
auftreten
die Kette
auf
If Falls
the chain
jumps
toden
thedritten
third rear
Zahnkranz springt
sprocket:
Note
If the chain is in the position shown, it may rub against the chain sprockets or derailleur and cause noise. In this case, you can shift the chain to the next or next-but-one
larger rear sprocket.
Chain sprockets
Kettenblätter
Rear sprockets
Zahnkränze
Adjustmentscrew
Adjustmentscrew
Tighten the adjustment screw to the
right until the chain jumps back to the
second rear sprocket.
Loosen off the screw to the left
until the chain rubs against the
third rear sprocket.
Adjustment screw
Note:
The adjustment screw may also be
located on the gear shift lever
or on the frame.
B
A
Gear shift lever
16
Cleaning:
● Use only a neutral cleaning agent for the chain. The use of alkaline or acidic
cleaning agents, such as rust remover, can damage the chain and lead to
operational faults.
● The chain sprockets and rear sprockets should be washed at periodic intervals
using a neutral cleaning agent and subsequently lubricated again.
● The chain shifter should be cleaned at periodic intervals and the moving parts
(mechanism and rollers) must be lubricated.
Using the multispeed hub gear shifter with
and without a coaster brake
This operating manual describes the typical, conventional gear shift components of a
city or trekking bike with a hub gear. In the case of differing components, refer to the
special information or attached manuals.
If anything is unclear to you, consult your bicycle dealer in the case of questions regarding assembly, maintenance and operation.
When mounting the hub in the frame, the correct safety washers must be
inserted on both sides and the hub nuts must be tightened to the prescribed torque.
If the safety washers are inserted on one side only, or if the hub nuts are not correctly
tightened, a safety washer can fall out. This could lead to the hub axle or the gear
shift arm rotating and pulling the handlebar to one side via the gear shift cable,
which could cause a serious accident.
Brake hub:
Brake drum
Bremstrommel
Avoid constantly actuating the coaster brake
on long downhill sections, as the interior brake parts
can get very hot, leading to a reduction in braking
power. Be sure to use the second brake (front wheel
brake) alternately on long, steep downhill sections, so
that the rear wheel brake can cool down.
The brake drum can get very hot after prolonged
braking; the brakes should therefore not be touched for
at least 30 minutes after riding.
The coaster brake can be controlled very precisely. The full braking
power is achieved after a certain running-in period.
english
Seite 17
In order to get used to the brakes, operate the brake lever carefully at first to
acquire a feel for the coaster brake’s deceleration.
If the bicycle is left standing for a longer period, a rust film may form in the
brake drum, increasing the braking effect. Therefore, when beginning your
journey, brake gently a few times to wear off the rust film. This will help to
avoid the brakes suddenly locking.
If the hub gets too hot, this can lead to a loss of lubricant and thus to a stronger
braking effect. In this case, the brakes must be checked in a specialist workshop.
Shimano hub gear shifter
français
12:50 Uhr
nederlands
24.10.2007
Shimano 3-speed shift lever
There are two different types of gear shift elements.
Twistgrip (Revo)
Button gear shift (Rapidrise)
Turn the Revo twistgrip to shift to all 3 gears.
Press the button to shift gear.
Press
Increasing pedal force
español
DCW BedienA_GB UNI.qxd
Increasing pedal force
Indicator against 3
Indicator against 3
Revo twistgrip
The gears can be shifted whilst pedalling. In rare cases noise may be caused
in the hub by the interior gear wheels and retaining catches, which is normal when
shifting gear.
If the wheel is hard to turn, the brake shoes must be replaced or the hub lubricated.
This must be carried out in a specialist workshop.
If the chain jumps off the sprockets when riding, it should first be re-tensioned. If the
adjustment range is exhausted, the sprockets and the chain must be replaced.
Indicator
Indicator
Press
Decreasing pedal force
Indicator against 1
1 … Starting off/riding on sand
2…
3…
or over uneven ground/riding uphill/
carrying heavy luggage/
riding against the wind/
riding with lights switched on
Riding on level roads
Riding at high speed
Decreasing pedal force
Indicator against START 1
START 1 … Starting off/riding on sand
or over uneven ground/riding uphill/
carrying heavy luggage/
riding against the wind/
riding with lights switched on
2 …….......…… Riding on level roads
3 ……….......… Riding at high speed
17
DCW BedienA_GB UNI.qxd
24.10.2007
12:50 Uhr
Seite 18
Cable anchor screw
Shifter wheel
Shimano 7/8-speed shift lever
Turn the twistgrip to shift to all 8 (7) gears.
Increasing pedal force ➢ Indicator against 8 (7) Increasing pedal force ➢ Indicator against 8 (7)
➢
Indicator
Remove the cable anchor screw
from the shifter wheel.
LOCK
Indicator
CJ-8S20
JAPAN
Revo twistgrip
3
2
➢
Decreasing pedal force ➢ Indicator against 1
Decreasing pedal force ➢ Indicator against 1
➢
Removing the rear wheel
Removing the Shimano 3-speed hub gear shifter unit
➢ Remove the shifter unit fixing screw. Remove the shifter unit from the hub.
Pull the shifter rod out of the hub axle.
Removing the Shimano 7/8-speed hub gear shifter unit
➢ Remove the cable from the shifter unit in order to remove the rear wheel from the
frame. Before doing this, set the gear shift lever to 1st gear.
➢ Pull the cable sheath out of the cable sheath holder and remove the cable from
the slot in the holder.
CJ-8S20
JAPAN
1
turn the
shifter wheel
shifter wheel hole
2 mm allen key
or no. 14 spoke
➢
➢
➢
Loosen and remove the screws from the brake arm.
Remove the wheel nuts and place them aside. Remove the safety washers
from the wheel axle.
Pull the rear wheel out of the slots in the dropouts.
Refitting the rear wheel
JA
PA
CJ8S
20
JA
PA
N
1
Slot
2
remove
from the slot
18
Shifter unit
➢
Place the chain on a rear sprocket and
position the hub axle in the dropouts.
Attach the safety washers on both sides
of the hub axle.
Dropout
LOCK
pull out of
the cable
sheath holder
➢
JAPAN
20
8S
CJ- N
NHub axle
CJ-8S20
LOCK
Holder
Cable sheath holder
pull out of
the cable sheath
holder
LOCK
Dismounting and mounting the rear wheel with Shimano hub
If it is difficult to pull the cable sheath
out of the holder in the shifter unit,
insert a 2 mm allen key in the hole of the
shifter wheel and turn the shifter wheel
to release the cable.
After this, first remove the cable anchor
screw from the shifter wheel before
pulling the cable sheath out of the cable
sheath holder.
Remove
the cable
anchor screw
➢
24.10.2007
12:50 Uhr
Seite 19
Turn the shifter arm so that the safety washers latch in the slots in the dropouts.
In this case, the shifter arm can be mounted almost parallel to the chainstay.
Illustration of 7/8-speed shifter:
➢
Tension the chain and fix the wheel to the frame with the cap nuts,
tightening torque 30 – 45 Nm.
Illustration of 7/8-speed shifter:
Illustration of 3-speed shifter:
english
DCW BedienA_GB UNI.qxd
Safety washer (left side)
7R
LOCK
Cap nut
AN
JAP
CJ-8S
20
Chainstay
7R
LOCK
Safety washer
Illustration of 3-speed shifter:
➢
When mounting the brake arm clip,
hold the clip nut tight using
a 10 mm spanner whilst tightening
the clip screw.
➢
After mounting the brake arm clip,
check that the clip screw protrudes
2 to 3 mm beyond the clip nut.
Clip nut
Schellenmutter
Brake
arm
Bremsarm
Clip screw
Schellenschraube
nederlands
AN
Safety washer
(right side)
español
JAP
0
-8S2
CJ
Slot in
the dropout
français
Tightening torque:
30 – 45 Nm
Shifter arm
Brake arm clip
Bremsarmschelle
Chainstay
Rahmengabel
Brake
arm
Bremsarm
➢
➢
The protruding part must be located on the outer side of the dropout.
Insert the safety washers so that the protrusions latch properly in the dropout
slots in front of behind the hub axle.
Clip nut
Schellenmutter
Brake arm clip
Bremsarmschelle
Clip
screw
Schellenschraube
(M6 x16
mm)
(M6
16mm)
2 - 3 mm
7R
Marking
Markierung
19
DCW BedienA_GB UNI.qxd
24.10.2007
12:50 Uhr
Seite 20
If the clip nut loosens itself from the brake arm or the clip screw or brake
arm clip are damaged, the brake arm can rotate on the chainstay. This can cause
the handlebar to move suddenly or the wheel to lock, which can lead to a fall with
serious injuries.
Adjusting the angle lever – fine adjustment
➢
Set the Revo twistgrip to (2).
Turn the cable adjustment screw so that the red line on the rod is aligned
to the end of the hub axle.
Mounting the Shimano
3-speed hub gear shifter unit
➢
Push the angle lever into the hub axle
and align the inner lever serration to
the flange nut; push the angle lever
until it is contacting the hub axle.
In this condition, tighten the hub
axle fixing screw.
Cable adjustment screw
Rod
Rod
approx 14 mm
The end of the rod must protrude approx.
14 mm beyond the hub axle.
Flange nut
SET
SET
Fixing screw
The edge of the window
must be aligned to
the end of the hub axle.
End of the hub axle
T
SE
T
SE
20
The red line on the rod and the end of the hub axle must be aligned
to one another.
End of the hub axle
Red line
on the rod
Tightening torque:
3 – 5 Nm
5 mm allen key
or 10 mm spanner
SET
Set to 2
Edge of
the window
SET
Insert the rod in the hub axle.
SET
➢
Yellow line
Yellow line
SET
Yellow part of the
intermediate piece
If the red line is not visible, the yellow part of the intermediate piece
must be adjusted between the two yellow lines of the window.
Note:
The two yellow lines
must be viewed directly
from above.
➢
LOCK
CJ-8
➢
S20
JAPAN
SET
➢
CJ-8S20
Turn
through 60 °
Cable adjustment nut
If the alignment is incorrect,
you can perform fine adjustment
using the cable adjustment screw.
Hook
Turn the cable 60° to the right and
fix it to the hook.
LOCK
Turn the crank arms and switch the Revo twistgrip two to three times from (3)
to (1) and back from (1) to (3) to check the shifting operation.
Set the Revo twistgrip to (2) and check that the red line on the rod is aligned
to the end of the hub axle.
➢
Shifter cable
Shifter wheel
Holder
SET
Holder
Cable sheath holder
Push into
the cable
sheath holder.
After adjusting the angle lever, tighten the cable adjustment nut
to secure the cable adjustment screw.
english
Seite 21
JAPAN
Attach the cable to the
shifter wheel as shown
in the illustration.
Pull the cable through the
slot in the shifter unit holder
and push the end of the cable
sheath firmly into the cable
sheath holder.
CJ-8
S20
JAPA
N
2
Slot
1
Mounting the Shimano 7/8-speed hub gear shifter unit
➢
Attach the cable to the shifter wheel so that the cable fixing nut is directed
outwards towards the dropout and push the straight side of the intermediate
washer into the open side of the shifter wheel.
Straight side of the
intermediate washer
Cable fixing nut
Shifter wheel
JAPAN
Pull through
the slot.
➢
If it is easier, first insert the cable
sheath in the cable sheath holder,
insert a 2 mm allen key in the shifter
wheel hole and rotate the shifter
wheel in order to fit the cable anchor
screw correctly in the open side of
the shifter wheel.
3
1
Push into the cable
sheath holder
Insert
the cable
anchor screw
LOCK
LOCK
CJ-8S20
Open side of
the shifter wheel
français
12:50 Uhr
nederlands
➢
24.10.2007
español
DCW BedienA_GB UNI.qxd
CJ-8S20
JAPAN
2
Rotate
the shifter
wheel
Shifter wheel hole
2 mm allen key
or no. 14 spoke
21
DCW BedienA_GB UNI.qxd
24.10.2007
12:50 Uhr
Seite 22
SRAM hub gear shifter
Check that the cable is inserted properly into the shifter wheel guide.
LOCK
LOCK
Shifting
● Continue to pedal without force when shifting gear.
● If the desired gear does not engage immediately, stop pedalling briefly.
● Change down in good time before uphill sections.
CJ-8S20
Brakes
● Be sure to use the second brake (front wheel brake) alternately on long,
steep downhill sections, so that the rear wheel brake can cool down.
CJ-8S20
JAPAN
JAPAN
Guide
Guide
correct
incorrect
Adjustment of the shifter unit – fine adjustment
➢ Set the twistgrip to 4th gear.
SRAM 3-speed
Removing and refitting the rear wheel
Yellow alignment marks
Set to 4
JA
PA
LOCK
20
8S
CJ- N
➢
➢
➢
Check that the yellow alignment marks on the holder and the shifter wheel
are aligned to one another.
Yellow alignment marks are present in two places on the shifter unit.
Use the line that is easiest to see.
Bicycle in the normal position
line up the marks
Bicycle upside down
line up the marks
Shifter wheel
Shifter wheel
JAPAN
CJ-8S20
LOCK
LOCK
CJ-8S20
JAPAN
Holder
➢
➢
22
Holder
Turn the cable adjustment screw of the gear shift lever to align the alignment
marks to one another.
After this, turn the gear shift lever from 4th to 1st gear and back to 4th gear
and check that the yellow alignment marks are still aligned to one another
Removal
➢ switch the twist grip to 3rd gear.
➢ Remove the clamping bush (1, fig. 2)
from the pulling chain (3) using the
pushbutton (2).
➢ Pull off the pulley (5, fig. 1).
➢ Unscrew the axle nut with the cylindrical
projection (6) and the axle nut on
the other end of the axle and remove the
fixing washer(s) (7).
➢ Remove the wheel.
1
1
5
7
6
3
Refitting
➢ Insert the wheel in the frame.
➢ Fit a 2.5 mm thick fixing washer (7, fig. 1) on the outside on both sides. The
serration must lie on the dropout, the holding tab must latch in the dropout.
Alternative: 1 x 3.5 mm thick fixing washer on the left end of the axle only.
➢ Mount and tighten the axle nut with the cylindrical projection (6, fig. 1) and
the axle nut on the other end of the axle.
➢ 15 mm spanner, tightening torque 30 – 40 Nm.
➢ Feed the pulling chain (3, fig. 1) through the pulley (5).
➢ Push the pulley onto the axle nut (6) until it latches. Rotate the pulley until
the round surface (4, fig. 2) is at the top.
➢ Hub shifter adjustment: see page 23
Shifter adjustment
➢ Place the shifter lever in gear position ‘3’. Move the pedal arm to ensure that
the gear is engaged.
➢ Push the clamping bush (2, fig. 2) onto the pulling chain (3) until the pulling
cable is taut. Do not pull the pulling chain out of the pulley (4) during
this operation.
Checking
➢ Turn the twistgrip to 1st gear whilst moving the pedal arm.
➢ Adjustment is too loose: the pulling chain can be pulled further out of the
pulley by hand in gear position ‘1’.
➢ Adjustment is too tight: the twistgrip can only be brought into gear position ‘1’
with difficulty.
➢ Repeat the adjustment procedure if necessary.
2
3
2
Refitting
➢ Fit a 2.5 mm thick fixing washer (4, fig. 2) on the outside on both sides
of the dropout. The serration must lie on the dropout, the tab must latch
in the dropout. Alternative: 1 x 3.5 mm thick fixing washer on the left end
of the axle only.
➢ No additional washers or other axle attachments are allowed on the
drive side.
➢ Attach the protective bar (3, fig. 1) on the sprocket side.
➢ Tightening torque of the axle nuts approx. 35 Nm.
➢ Insert the shifter pin (1, fig. 3) in the shifter tube (2) (oil the parts lightly)
and insert them into the axle bore as far as they will go.
➢ Rotate the slot (6) into an easily visible position.
➢ Push the clamping bush (3) with the guide pin (4) in front onto the hub
axle – at the same time, feed the interior lug (5) into the slot (6) in the
shifter tube until it latches.
➢ Turn the clamping bush guide pin to the top.
➢ Check: the twistgrip shifter should be in 2nd gear.
➢ Push the clickbox (4, fig. 1) onto the hub axle as far as it will go. The red
guide pin then sits completely in the groove (2) of the clickbox housing.
➢ Tighten the knurled screw (1, fig. 1) by hand.
➢ Shifter adjustment: see page 24.
4
english
Seite 23
français
12:50 Uhr
nederlands
24.10.2007
español
DCW BedienA_GB UNI.qxd
1
1
Improved braking function in 3rd gear.
When braking in 3rd gear, the pulling chain moves approx. one chain link
out of the pulley. After braking ceases, the pulling chain returns to the
normal position immediately.
1
2
4
SRAM 5(7)-speed brake gear hub
1
Removing/refitting the rear wheel
Removal
➢ Turn the twistgrip to 2nd gear (1st gear in the case of 7-speed hub)
➢ After loosening the knurled screw (1, fig. 1), pull the clickbox off the hub axle.
➢ Unlatch the clamping bush (3, fig. 3) and pull it off.
➢ Remove the shifter pin/tube (1/2) from the axle bore.
2
4
3
5
3
6
3
4
7
2
1
3
5
23
DCW BedienA_GB UNI.qxd
24.10.2007
12:50 Uhr
Seite 24
Bicycle chain maintenance
If the clip nut loosens itself from the brake arm or the clip screw or brake
arm clip are damaged, the brake arm can rotate on the chainstay. This can
cause the handlebar to move suddenly or the wheel to lock, which can lead to a
fall with serious injuries.
Bicycle chains are consumable parts. In the case of hub gear shifters, the chain is worn
after about 3000 km, in the case of chain gear shifters after around 2000 km. A worn
bicycle chain may snap and cause a fall. Have a worn chain replaced by a dealer before riding the bicycle again.
Shifter adjustment
To adjust the shifter, it is imperative to turn the twistgrip from 4th to 3rd gear (in the
case of 7-speed hub: from 5th to 4th gear). Then align the marks in the viewing window using the clickbox adjustment screw (1) Check this adjustment from time to time.
There are two basic types of bicycle chains:
●
●
wide bicycle chain (1/2 x 1/8“) for hub gear shifters,
narrow bicycle chain (1/2 x 3/32“) for chain gear shifters.
➢
➢
Clean and oil your bicycle chain regularly.
To prevent premature wearing of the chain in the case of chain gear shifters,
use gears with a small chain skew as far as possible.
To check the wear of the bicycle chain, proceed as follows:
Take the part of the chain which is lying on the front chain sprocket between
thumb and forefinger.
Pull the chain away from the chain sprocket.
➢
1
Maintenance / care
●
●
●
●
●
●
24
The chain sprockets and rear sprockets should be washed at periodic intervals
using a neutral cleaning agent and subsequently lubricated again.
If the braking effect of the coaster brake is too strong, the brake sleeve must be
lubricated with special grease (this should be carried out by a specialist).
No dot clean gear hubs using water under pressure (strong water jets, high
pressure cleaners etc.) - if water penetrates into the hub, it may malfunction.
Do not use strong cleaning agents. Use only a neutral cleaning agent for the
chain. The use of alkaline or acidic cleaning agents, such as rust remover, can
damage the chain and lead to operational faults.
Clean your bicycle more regularly in winter so that road salt cannot cause any
damage.
Clean dirty chains before oiling them. Allow the cleaning agent to work for a
short time only, then rinse with water. Only oil the chain when it is
completely dry.
➢
If the bicycle chain can be clearly lifted, it is worn and should be replaced
with a new one.
In the case of hub gear shifters, the chain tension must be adjusted so that the chain
hanging between the front chain sprocket and the rear sprocket has a vertical play of
one to two centimetres.
If you need to re-tension the bicycle chain, proceed as follows:
➢ Loosen the rear wheel nuts.
➢ Pull the wheel backwards in the dropouts until the play of the bicycle chain
meets the specifications.
➢ Carefully tighten any previously loosened nuts or bolts in a clockwise direction.
Brakes, brake levers and braking systems
This operating manual describes the typical, conventional braking components of an
MTB, ATB, crossbike or racing cycle. In the case of differing components, refer to the
special information or attached manuals. If anything is unclear to you, consult your
bicycle dealer in the case of questions regarding assembly, maintenance and operation.
There are several different kinds of brakes, depending on where they are used:
● hub brakes,
● disc brakes and
● wheel rim brakes.
The brakes may be actuated mechanically or hydraulically.
Normally, in the case of hub gear shifters, the brake lever for the front brake is at the
right-hand side of the handlebar, in the case of chain gear shifters it is at the left-hand
side. Acquaint yourself with the positions of the brake levers before starting to ride.
Brake cables are consumable parts. Check them regularly for wear
and have them replaced if necessary.
Check the brake cable for rust and fraying and replace it if any faults are found.
If the cable is not replaced, braking malfunctions may occur.
Checking hub brakes
Hub brakes are virtually maintenance-free since the braking body is located
inside the hub.
Have maintenance work carried out by a specialist workshop.
Do not apply oily liquids to brake pads, wheel rim braking surfaces, brake blocks or
brake discs, otherwise the efficiency of the brakes will be reduced.
Brake pads are consumable parts. Check them regularly for wear. This is
recognisable via a marking. For example, the grooves on the brake block may
not be visible anymore. Always exchange both brake blocks at the same time.
Use only original spare parts, otherwise reduced functionality or damage to the
bicycle may result.
A hub brake may only be fitted at a later stage to the front wheel if
the letter ”N“ is stamped on the bicycle fork, otherwise the brakes may
malfunction.
Hub brakes become hot when subjected to constant load. Braking efficiency
is thus reduced. The brakes may fail completely.
Adjust your riding style accordingly.
english
Seite 25
français
12:50 Uhr
nederlands
24.10.2007
español
DCW BedienA_GB UNI.qxd
To obtain a correct friction pairing, use only brake pads which fit the wheel rim,
otherwise a longer braking distance and greater wear will result.
If you wish to fit the brake lever to the opposite side of the handlebar, refer to the
manufacturer’s operating instructions for use or consult a dealer.
The brake blocks must not come into contact with oil or grease. If the brake blocks
have come into contact with oil or grease they must be replaced, otherwise braking
efficiency may be strongly impaired.
Tighten all screws to the specified torque, otherwise the screws could break off and
parts may become loose. (see chapter ‘Tightening torques of screws, nuts and bolts’,
page 45).
25
DCW BedienA_GB UNI.qxd
24.10.2007
12:50 Uhr
Seite 26
Brake levers
Standard brake levers
The bicycle is fitted as standard with a suitable brake lever.
Check regularly that the brake lever does not contact the handlebar grip when you pull
it. Push the bicycle backwards and forwards to determine whether or not there is still
sufficient braking power. If the bicycle rolls slightly, you must adjust the brake lever or
have the brake blocks replaced.
Adjusting bush
Adjusting the brakes
Your bicycle’s brakes have been correctly adjusted in the factory or by your dealer. The
gap between the brake block and the wheel rim is approx. 1 – 1.5 mm. However, the
brake blocks are subject to wear, so that the gap becomes ever larger and the brake
lever travel becomes longer. The brakes must therefore be checked at regular intervals
and adjusted if the lever travel is too great or the brakes do not brake correctly.
Checking the brakes:
➢ Pull the brake lever for the front or rear brake three quarters of the way back
whilst pushing the bicycle.
➢ The rear wheel should lock, or
➢ the front wheel should brake so strongly, that the bicycle begins to tip over
towards the front.
Bowden cable nipple
(not visible!)
Grip width
adjusting screw
Adjusting the gap between the brake pad and the wheel rim
Turn the cable adjustment screw (adjusting bush). To increase the brake pad gap, the
adjusting screw is turned towards the inside (clockwise). To decrease the brake pad
gap, the adjusting screw is turned towards the outside (anticlockwise). The gap between the brake block and the wheel rim should be 1 mm.
Kabeleinstellschraube
Cable
adjustment screw
Wheel rim brakes
V-brakes are very powerful lever brakes. Acquaint yourself with the V-brake
and use the braking power sparingly. Practise emergency braking until you are
in full control of the bicycle even when braking very strongly.
The improper use of additional sprung elements (power-modulators) can lead to
serious falls. The spring power of the power modulator is dependant on the actual
total weight of the bicycle.
If the brake blocks are worn to the extent that the notches are no longer visible,
have them replaced by a specialist workshop.
26
If necessary, adjust the spring
tension using the spring
adjustment screw so that both
brake arms move symmetrically.
Subsequently, check that the
brakes work correctly
(see page 26).
2
1
2
2
1
SpringFedereinstelladjustment
screw schraube
1
1 mm
1 mm
FedereinstellSpring
adjustment
schraube
screw
24.10.2007
12:50 Uhr
Seite 27
If the brakes do not work correctly, of if the brake blocks are worn to the extent that
adjustment is no longer possible, have the bicycle checked and the brake blocks
replaced by a dealer.
The brake saddle and the disc may be hot after braking, therefore do not touch
them during or immediately after riding, as you could burn yourself.
Before adjusting the brakes, check that the parts have cooled down sufficiently.
english
DCW BedienA_GB UNI.qxd
Carry out a braking test after each adjustment by pushing the bicycle strongly whilst
pulling the brake lever. Only use your bicycle when it can be safely braked.
Disc brakes require a ‘braking-in’ period. Braking power increases with time. You
should therefore be aware during the braking-in period that the braking power can
increase. The same applies after replacement of the brake blocks or the disc.
If you hear noises when braking, the brake blocks may be worn down to the wear
limit. Allow the brakes to cool down and have the brake block thickness checked or
the brake blocks replaced.
If the brake blocks have come into contact with oil or grease they must be
replaced. If the brake disc has come into contact with oil or grease it must be
cleaned, otherwise braking efficiency may be strongly impaired.
Check whether or not the quick release lever is located on the right-hand side
(opposite side to the brake disc). If the quick release lever is located on the
same side as the brake disc, there is a danger that the lever and the brake disc
could impair one another
A worn, cracked or bent brake disc must be
replaced. Consult a dealer.
2 mm
0,5 mm
nederlands
Have disc brakes adjusted by a dealer.
Incorrect adjustments can lead to accidents.
Your bicycle may be fitted with a disc brake only when appropriate
fixings are present on the frame and on the fork. If in doubt, consult a dealer.
español
General safety advice
This type of brake is fitted with a brake disc mounted on the hub and a brake saddle
on the frame or on the fork.
français
Disc brakes
If the thickness of the brake block is less than 0.5 mm,
it must be replaced.
Be particularly careful not to touch the brake disc with your finger during installation, removal or maintenance if the disc is rotating. If you insert your fingers in the
holes in the brake disc, you may suffer serious injury.
Hydraulic disc brakes
The hydraulic oil pressure disc brake has a fluid reservoir on the brake lever. The
hydraulic fluid is fed to the brake cylinders via a tube. The brake blocks are thus
pressed against the wheel rim via the brake pistons. This is a low maintenance type
of brake.
27
DCW BedienA_GB UNI.qxd
24.10.2007
12:50 Uhr
Seite 28
Carry out a braking test after each adjustment by pushing the bicycle strongly
whilst pulling the brake lever. Only use your bicycle when it can be safely braked.
Brake pads and brake blocks are consumable parts.
Have the brake pads of hydraulic oil pressure disc brakes checked regularly by
a dealer and replaced if necessary.
Check the tubes and connections for leaks each time before riding. Leaking tubes and
connections can result in brake fluid leaking out of the braking system. This can lead
to reduced efficiency of the brakes.
Do not use the brakes further if oil leaks out; have the appropriate repairs carried out
by a dealer without delay.
If you continue to ride in this condition, there is a large risk of brake failure. If the
brake blocks have come into contact with oil or grease they must be replaced. If the
brake disc has come into contact with oil or grease it must be cleaned, otherwise braking efficiency may be strongly impaired.
Steam bubble formation
Steam bubble formation may occur if the brakes are applied constantly.
Therefore, Release the brake lever from time to time in order to avoid such a situation.
●
Steam bubbles are formed when the oil heats up to the extent that water in the
braking system boils and air bubbles expand.. Due to this, the brake lever travel can
suddenly become larger.
●
The bicycle is stored or transported upside down, air bubbles may form
in the brake system reservoir.
If the bicycle is used in this condition, there is a risk of brake failure which could lead
to a serious accident.
Removing / refitting the wheel
➢ It is recommended to use a brake block spacer when removing the wheel. The use
of a brake block spacer can prevent the pistons falling out if the brake lever is
pulled after the wheel has been removed.
➢ If the brake lever is pulled and no brake block spacer is fitted, the pistons can
move as usual. Use a flat blade screwdriver to push the brake blocks back, taking
care not to scratch them. (If the brake blocks are not fitted, push the pistons back
carefully without damaging them). If it is difficult to push back the brake blocks
or pistons, remove the lid of the reservoir and try again. (please remember that oil
may overspill from the reservoir).
➢ After fitting the wheel, check whether or not the quick release lever is located on
the right-hand side (opposite side to the brake disc). If the quick release lever is
located on the same side as the brake disc, there is a danger that the lever and
the brake disc could impair one another
Cleaning the braking system
If the brake blocks have come into contact with oil or grease they must be replaced. If
the brake disc has come into contact with oil or grease it must be cleaned, otherwise
braking efficiency may be strongly impaired.
➢
Use isopropanol, soapy water or a dry cloth to clean and maintain the braking
system. Do not use commercially available brake cleaning agents or agents for
preventing brake noises as these may damage parts such as seals.
Drum brakes and roller brakes
After bringing the bicycle back into an upright position, the brake lever must be pulled
a few times to check that the brakes respond normally. If the brakes do not respond
normally, they must be adjusted as follows:
➢ Set the brake lever parallel to the ground and pull it a few times slowly so that
the bubbles return to the reservoir.
➢ If the response is still bad after this, the brake system needs to be bled. Consult a
dealer.
28
In the case of roller and drum brakes, the braking power is transmitted from the brake
lever via a cable to the braking system. Roller or drum brakes become very hot when
subjected to constant load. Braking efficiency is thus reduced. The brakes may fail completely. Adjust your riding style accordingly.
➢
Roller and drum brakes require a specially matched brake lever.
Check regularly that the screws on the brake lever are tight.
Tighten them in a clockwise direction if necessary.
Check the brake function by pulling the brake lever three quarters of the way
back whilst pushing the bicycle. The rear wheel should lock.
The front wheel should brake so strongly, that the bicycle begins to tip over
towards the front.
Oil the brake cable regularly.
The brake arm of the drum brake is fixed to the frame by means of a suitable
pipe clip (1).
5 6
3
1
4
2
3
Brake pads are consumable parts. Have the brake pads of coaster, roller and
drum brakes checked regularly by a dealer and replaced if necessary.
Mount the brake arm between the two tabs of the pipe clip!
The pipe clip must sit on the frame with absolutely no play! Use a self-locking
nut! Tightening torque: 2 – 3 Nm.
If the bicycle is left standing for a longer period, a rust film may form in the brake
drum, increasing the braking effect. Therefore, when beginning your journey,
brake gently a few times to wear off the rust film. This will help to avoid the brakes
suddenly locking.
Mounting / dismounting the drum brake
➢ Hook up the cable clip (2) to (or unhook it from) the brake lever (3).
➢ For the NL version with special lever (4), use only an original NL brake cable
(the cable clip (2) is not suitable for this purpose).
SRAM drum brakes
The drum brake can be controlled very precisely. The full braking power is
achieved after a certain running-in period.
In order to get used to the brakes, operate the brake lever carefully at first to acquire
a feel for the drum brake’s deceleration.
Do not rinse drum brake hubs with petrol or similar fluids when cleaning the wheel.
Note:
The brake anchor plate must be replaced if oil or other greasy substances have got
onto the brake pads. Oily brake pads reduce braking efficiency and may even lead to
total brake failure. This can lead to falls or collisions resulting in very serious injuries.
english
Seite 29
Fine adjustment of the brake:
➢ Unscrew the adjusting screw (5) until the brakes drag slightly when
the wheel is rotated.
➢ Actuate the manual brake lever powerfully several times and, if necessary,
turn the adjusting screw further until the brakes drag slightly once again.
➢ Tighten the hexagonal nut (6).
➢ Repeat the adjustment if the braking effect wears off after prolonged use or
if the manual brake lever can be pulled back to the handlebar grip.
français
➢
➢
➢
12:50 Uhr
nederlands
24.10.2007
español
DCW BedienA_GB UNI.qxd
If the cable needs to be replaced, consult your dealer.
If the clip nut loosens itself from the brake arm or the clip screw or brake
arm clip are damaged, the brake arm can rotate on the chainstay.
This can cause the handlebar to move suddenly or the wheel to lock, which can
lead to a fall with serious injuries.
29
DCW BedienA_GB UNI.qxd
24.10.2007
12:50 Uhr
Seite 30
Groove
Nut
Shimano drum brake (Inter-M)
Front wheel roller brake
Dismantling (before removing the wheel)
The brake drum can get very hot after prolonged braking;
the brakes should therefore not be touched for at least
30 minutes after riding.
Check that the front brake is fixed correctly to the hub by
means of the brake unit fixing nut.
Push the cam plate as far as it will go.
Then push the connecting piece
along the groove in the cam plate to
remove it.
If it is difficult to remove the
connecting piece, the cable adjusting
screw must be turned to the right in
order to decrease the cable tension first.
AS
E
2
Auf dieout
Seite
Push
to the
herausschieben
side
1
Wenn
Whendie
theNockenplatte
cam plate isnach
oben
gedrückt
ist
pushed
upwards
Nut
Groove
Connecting
piece
Verbindungsstück
Check whether the hub axle is touching the inner side of the fork and whether the
wheel is fixed correctly to the frame by means of the quick release; a loose connection
can lead to serious accidents.
Braking performance may be reduced by a rusty brake cable. In this case, replace the
brake cable by a new, original brake cable and check the brake function again.
GRE
E
➢
Connecting
piece
Verbindungsstück
RELEAS
If any of the following signs occur when braking,
you must not ride any further:
1) abnormal braking noises, or
2) unusually high braking power or
3) unusually weak braking power.
In these cases, consult a specialist workshop.
AS
E
RELEASE
GRE
3
Assembly (after fitting the wheel)
Pull
strongly
Starkdownwards
nach unten ziehen
➢ To attach the brake cable, the above
steps must be performed in the reverse order. When attaching the connecting
piece to the cam plate, it must pushed until it latches. Check that the connecting
piece is located correctly in the position shown.
The Inter-M brake differs from conventional band brakes in that the brake
drum is filled with grease. The rotational resistance of the wheel can increase slightly,
especially in cold weather.
RELEASE
The Inter-M brake is equipped with a modulator to control the braking force exerted
on the hub. When the brake is operated, the modulator generates noises. However,
these noises do not indicate a fault.
Connecting
piece rivet
Verbindungsstückniete
Part
of Nockenplatte
the cam plate
Teil AAder
If you operate the Inter-M brake strongly when the bicycle is at a standstill and pull
on the wheel, you will notice a small amount of play. This is normal and does not
cause any problems when riding.
The rivet must be located in the middle of part A of the cam plate.
➢
30
Pull the brake lever and check the brake function.
If the brake does not function properly, the brake cable must be adjusted.
Seite 31
Connecting
piece
Verbindungsstück
KabeleinstellCable
adjustment
schraube
screw
Groove
Nut
When
Wenn the
die cam plate is
pushed
towards
the front
Nockenplatte
nach
vorne gedrückt ist
1
JAPAN
MIN 2Nm
RE
LE
AS
E
2
Push
downwards
Nachout
unten
herausschieben
➢
Push the cable sheath holder out of the guide slot in the brake arm
to remove it.
Connecting
piece
Verbindungsstück
Groove
Nut
GREASE
15-20Nm
GR
EA
MIN 2Nm
➢
Pull the brake lever to check the
brake function and secure the
cable adjustment screw using the
cable adjustment nut.
español
RELEASE
SE
JAPAN
RE
LE
AS
E
Guide slot
Führungsschlitz
3
Pull Stark
strongly
towards
rear
nach
hintenthe
ziehen
KabeleinstellCable
adjustment
nutmutter
15-20Nm
EA
SE
Rear wheel roller brake
Dismantling (before removing the
wheel)
➢ Push the cam plate as far as it will go. Then push the connecting piece along the
groove in the cam plate to remove it.
If it is difficult to remove the connecting piece, the cable adjusting screw must be
turned to the right in order to decrease the cable tension first.
N
PA
JA
Cable
adjustment screw
Kabeleinstellschraube
Assembly (after fitting the wheel)
➢ To attach the brake cable, the
above steps must be performed
in the reverse order.
When attaching the connecting piece
to the cam plate, it must pushed
until it latches. Check that the
connecting piece is located correctly
in the position shown.
MIN
2N
m
Brake arm
Bremsar
ASE
RELE
GR
RELEASE
Push out to the
side
Adjusting the brake cable
➢ Check whether the wheel shows resistance to rotation when the brake cable
is taut. Pull the brake lever strongly about ten times towards the grip in order to
stretch the cable.
Cable adjustment nut
Adjust the brake lever play to
about 15 mm using the cable
Play of approx. 15 mm
adjustment screw on the brake
unit or the brake lever. The brake
lever play is the distance between
the initial position of the brake lever
and the position at which a braking
effect is felt when pulling the lever.
english
12:50 Uhr
français
24.10.2007
nederlands
DCW BedienA_GB UNI.qxd
Cable
sheath holder
Kabelhüllenhalter
RE
LE
AS
E
Part
of Nockenplatte
the cam plate
Teil AAder
Connecting
piece rivet
Verbindungsstückniete
31
DCW BedienA_GB UNI.qxd
24.10.2007
12:50 Uhr
Seite 32
Frame
The rivet must be located in the middle of part A of the cam plate.
➢
Pull the brake lever and check the brake function.
If the brake does not function properly, the brake cable must be adjusted.
Adjusting the brake cable
➢ Check whether the wheel shows resistance to rotation when the brake cable is
taut. Pull the brake lever strongly about ten times towards the grip in order to
stretch the cable.
Adjust the brake lever play to about 15 mm using the cable adjustment screw on
the brake unit or the brake lever. The brake lever play is the distance between the
initial position of the brake lever and the position at which a braking effect is felt
when pulling the lever.
Cable adjustment nut
Never ride with a bent or cracked frame.
Never attempt to repair damaged parts. This can lead to accidents. Replace defective
parts before using the bicycle again.
Following an accident or a fall, have your bicycle checked by a dealer before using it
again. Undetected defects on the frame or other permanent parts may lead to accidents.
Avoid jumps and riding over high kerbs. These can lead to frame damage and thus to
serious accidents.
Play of approx. 15 mm
GREASE
MIN 2Nm
The shape of the frame depends on the
type and function of the bicycle.
Frames are manufactured from a variety
of materials, such as steel or aluminium
alloys or carbon.
The frame number of the bicycle is located on the seat tube or on the bottom
bracket. The bicycle can be identified by the frame number in case of theft. In the case
of a carbon frame, the frame number may be located on the inner side of the dropouts.
JAPAN
RE
LE
AS
E
If your bicycle does not travel in a straight line, have the tracking adjusted by a specialist cycle dealer.
Kabeleinstellschraube
Cable
adjustment screw
➢
Pull the brake lever to check the brake function and secure the cable adjustment
screw using the cable adjustment nut.
Wenn Ihr Fahrrad nicht geradeaus läuft,
lassen Sie die Spur von einem Fachhändler
einstellen.
Bicycle fork
N
PA
JA
MIN
32
2N
Suspension fork
m
Kabeleinstellmutter
Cable
adjustment nut
The front wheel is held by the bicycle fork. The fork comprises two fork sheaths, the
fork crown and the fork tube.
The majority of mountain bikes and also trekking and city bikes are fitted with suspension forks. They provide more comfort when riding the bicycle.
To adjust an oil-air fork, proceed as follows:
➢ Adjust the suspension hardness via the air pressure in the fork.
➢ Check the air pressure regularly with a pump.
To adjust an elastomer fork, proceed as follows:
➢ To increase the spring tension, turn the adjustment knob on the top of the fork
head clockwise by hand.
➢ To decrease the spring tension, turn the adjustment knob on the top of the fork
head anticlockwise by hand.
➢ Clean and grease the plastic springs regularly.
To adjust a steel-spring fork, proceed as follows:
➢ To increase the spring tension, turn the adjustment knob on the top of the fork
head clockwise by hand.
➢ To decrease the spring tension, turn the adjustment knob on the top of the fork
head anticlockwise by hand.
Since various types of damping exist, this operating manual cannot deal with
every system. Read the manufacturer’s operating manual or consult a dealer.
Chainstay dampers
The chainstay dampers provides a more comfortable ride.
1 Spring dampers
2 Air dampers
Spring dampers
may be used for sporty and also for comfortable riding. The compression or
rebound speed is controlled by oil or gas pressure chambers, which are adjustable
on most suspension elements. When adjusting the suspension, only carry out one
adjustment at a time. The spring can be pre-tensioned using the pre-tensioning
nut. In the case of shock absorbers with adjustable damping, the rebound speed
can be set slower by turning the red adjustment knob anticlockwise.
The compression speed can be set faster by turning a compression knob anticlockwise. If the shock absorber is particularly dirty
clean it carefully, especially the piston rod and the
wiper. At the same time, check whether the
stop buffer is damaged. If so, have it repaired by a specialist workshop.
2
Tune the suspension fork to the weight of the rider and the intended use. In this
way, the optimum functional efficiency is achieved. To this end, read the manufac
turer’s operating manual.
Never ride with a damaged bicycle fork. A defective bicycle fork should not be
repaired as this can lead to serious accidents. Replace bent or otherwise damaged
forks before using the bicycle again.
Avoid jumps and riding over high kerbs. These can lead to damage to the fork and
thus to serious accidents.
english
Seite 33
français
12:50 Uhr
nederlands
24.10.2007
español
DCW BedienA_GB UNI.qxd
Air dampers
1
are generally used where comfort is required.
Apart from pumping up, air suspension needs no
maintenance. How often you need to pump up will
depend on the desired air pressure. For physical reasons, high pressure reduces faster
than low pressure. If the bicycle is used daily, the air pressure will last longer than
when the bicycle is used only rarely. The pre-tensioning of a damper is adjusted via the
air pressure in the main chamber of the damper. In the case of air dampers with adjustable damping, the rebound speed can be adjusted via the pressure in the auxiliary
chamber.
Check regularly that all screws on the bicycle fork are tight. Loose screws can cause
serious accidents.
Since various types of damping exist, this operating manual cannot deal with
every system. Read the manufacturer’s operating manual or consult a dealer.
33
DCW BedienA_GB UNI.qxd
24.10.2007
12:50 Uhr
Seite 34
Checking the wheel rims
If you use wheel rim brakes, the wheel rim is subject to greater wear.
Tighten all screws to the specified torque, otherwise the screws could break
off and parts may become loose. (see chapter ‘Tightening torques of screws, nuts
and bolts’, page 45).
Checking the wheels
The wheels form the interface between bicycle and road. Unevenness of the road
surface and the weight of the rider place a great strain on the wheels.
The wheels are carefully checked and centred before delivery.
Despite this, the spokes will settle during the first 100 km of riding.
➢
➢
After riding the first 100 km or so, have the wheels checked and, if necessary,
centred by a dealer.
After this, check the tension of the spokes regularly and have loose or damaged
spokes replaced or centred by a dealer.
Checking the hubs
Tighten all screws to the specified torque, otherwise the screws could break
off and parts may become loose. (see chapter ‘Tightening torques of screws, nuts and
bolts’, page 45).
The wheel is fixed via the hub axle to the bicycle fork or the frame. The axle is fastened by means of either a hexagonal (cap) nut or a quick release.
To check the hub bearings, proceed as follows:
➢ Lift up the wheel and turn it.
➢ Check that the wheel continues to turn a few times and then slows down
and stops.
➢ To check whether there is play in the hub bearing, try to move the wheel
backwards and forwards in the fork or chainstays.
➢ If you determine that there is play in the bearings, or if the wheel is hard to
turn, have the hub bearings adjusted by a dealer.
34
When a wheel rim is worn, the tyre air pressure can damage the wheel rim.
This can lead to serious accidents. As soon as you see any marks on the wheel rim
(grooves, coloured spots) or if an applied coloured ridge has worn off, replace the
wheel rim.
Bicycles from size 24“ upwards are fitted with a wheel rim wear indicator.
On the flanks of the wheel rim there is a line or groove which runs along the complete circumference of the rim.
Checking the tyres and inner tubes
Tyres
There are many different types of tyre. The suitability for a particular type of terrain
and the roll resistance depend on the tyre tread.
Pump up the tyre only to the maximum permissible pressure, otherwise it may
burst. If the tyre pressure is too low, the tyre can loosen itself from the wheel rim. The
maximum permitted tyre pressure can be found on the side-wall of the tyre.
When changing tyres, use only tyres of the same type, size and tread, otherwise the
bicycle’s handling characteristics may be negatively affected.
This can lead to accidents.
Tyres are consumable parts. Check the tread depth, tyre pressure and side-wall
condition regularly. Replace worn tyres before using the bicycle again.
Note the size of the fitted tyre. There are standard descriptions for tyre sizes.
Example 1: ”46-622“ means 46 mm tyre width and 622 mm diameter.
Example 2: ”28 x 1.60 Inch“ means 28 inch diameter and 1.60 inch tyre width.
To pump up an inner tube with a Dunlop or lightning valve and Schrader or
automatic valve, proceed as follows:
➢ Screw off the valve cap in an anticlockwise direction.
➢ Pump up the inner tube using a suitable pump.
➢ Screw the valve cap onto the valve in a clockwise direction.
Air pressures are often given in the English PSI unit. You will find a table to convert
pressure from PSI to Bar in the chapter “Technical data”, page 44.
Repairing a puncture
Inner tubes
The inner tube is required to maintain the air pressure inside the tyre.
It is pumped up via a valve.
There are three different types of valve:
Sclaverand or racing valve (1),
Schrader or automatic valve (2) and
Dunlop or lightning valve (3).
1
2
3
All three types of valves are protected from the
ingress of dirt by a cap.
To pump up an inner tube with a Sclaverand or
racing valve, proceed as follows:
➢
➢
➢
➢
Screw off the valve cap in an anticlockwise
direction with your finger.
Unscrew the knurled nut in an anticlockwise
direction.
Press the knurled nut into the valve with your
finger until air escapes.
Pump up the inner tube using a suitable
pump.
A dealer can advise you which pump is suitable for your valve.
➢
➢
Tighten the knurled nut after pumping by screwing it in a clockwise direction.
Screw the valve cap onto the valve in a clockwise direction.
If you wish to repair a
punctured tyre, you will need
the following equipment:
● spare inner tube,
● spare valve,
● plastic tyre levers,
● patches,
● rubber glue,
● sandpaper,
● spanners (if your bicycle is not fitted with quick releases) and
● bicycle pump.
To repair a punctured tyre, you must remove the defective wheel.
First remove the brakes. The procedure depends on the type of brakes fitted
to your bicycle.
english
Seite 35
français
12:50 Uhr
nederlands
24.10.2007
español
DCW BedienA_GB UNI.qxd
Read the chapter on brakes before removing the brakes, otherwise the
braking system may be damaged. This can lead to accidents.
Removing a cantilever or V-brake
➢ Grip the wheel with your hand.
➢ Press the brake pads or the brake arms together against the wheel rim.
➢ Unhook the brake cable from one of the brake arms.
Removing a hydraulic wheel rim brake
There are two possibilities:
➢ If brake quick releases are fitted, dismount one brake unit
(see chapter “Use of the quick release“, page 7).
➢ If no quick releases are fitted, let the air out of the tyre.
35
DCW BedienA_GB UNI.qxd
24.10.2007
12:50 Uhr
Seite 36
Removing a side-pull brake
➢ Loosen the screws fastening the brake blocks to the brake arms.
The tyre slips through between the brake pads.
Removing a hub gear shifter, roller, drum or coaster brakes
➢ Loosen the screw or the quick release on the brake arm.
Removing the wheel
➢ If your bicycle has a chain gear shifter, change to the smallest rear sprocket. The
removal of the wheel is not hindered by the gear shift mechanism in this position.
➢ If your bicycle is fitted with quick releases, open them (see chapter “Use of the
quick release“, page 7).
➢ If your bicycle is fitted with hexagonal cap nuts, loosen them in an anticlockwise
direction using a size 15 spanner.
➢ Fold the gear change mechanism towards the rear.
➢ Pull the wheel out of the fork.
➢
➢
If this does not work, your bicycle is fitted with a safety mechanism to prevent the
wheel falling out. This will take the form of either retaining lugs or sheet metal
protectors, which grip inside a notch in the wheel receptacle.
In this case, lift up the bicycle a little.
Tap the wheel lightly from above with your hand.
The wheel will fall out.
Air bubbles will rise to the surface from the place where the inner tube is torn
or punctured.
➢ Allow the inner tube to dry.
➢ Roughen up the damaged area of the inner tube with sandpaper.
➢ Apply rubber glue to the area.
➢ Wait a few minutes until the rubber glue is dry to the touch.
➢ Press the rubber patch firmly onto the damaged area.
➢ Allow the rubber patch to dry for a few minutes whilst applying pressure.
Fitting the tyre and inner tube
Avoid foreign bodies getting inside the tyre. Make sure that the inner tube is
free of creases at all times and is not squashed.
➢
➢
➢
➢
➢
➢
➢
Check that the wheel rim tape covers the spoke nipples and is not damaged.
Place one flank of the wheel rim inside the tyre.
Press one side of the tyre completely into the wheel rim.
Pump up the inner tube just enough so that it is round.
Place the inner tube inside the tyre.
Press the tyre over the wheel rim.
Pull the tyre down strongly.
The area already mounted slides into the base of the wheel rim.
Removing the tyre and inner tube from the wheel rim
➢ Remove the valve cap and the fixing nut from the valve.
➢ Let the air out of the inner tube.
➢ Place the tyre lever against the lower edge of the tyre opposite the valve.
➢ Lever the side-wall of the tyre over the wheel rim.
➢ Push the second tyre lever between wheel rim and tyre at a distance of
approximately 10 cm from the first.
➢ Lever the tyre with the tyre lever over the wheel rim as often as is necessary until
the entire circumference of the tyre is loosened.
➢ Remove the inner tube from the tyre.
Repairing the inner tube
➢ Pump up the inner tube.
➢ To check where the inner tube is damaged, place it in a bowl of water.
➢ Hold the inner tube under the water.
36
➢
➢
➢
➢
Check again that the inner tube is correctly seated.
Push the tyre completely over the wheel rim with the ball of your hand.
Pump up the inner tube to the recommended tyre pressure.
Check the seating of the tyre by means of the control ring on the side
of the wheel rim.
Fitting the wheel
If your bicycle is fitted with quick releases, mount the front wheel so that the
quick release lever is on the opposite side to the chain. In this way, you will
avoid fitting the wheel the wrong way around.
➢
➢
➢
➢
➢
Insert the wheel to the limit and centrally in the dropouts.
Tighten the hub nuts or the quick release.
Hook up the brake cable.
Check that the brake pads contact the brake surfaces.
Carry out a braking test.
Operating the lighting components
Turn the dynamo on and off only when standing still, otherwise it is
dangerous for yourself and other road users. The efficiency of the side dynamo
is reduced in wet weather. If necessary, provide extra lighting.
Only lighting elements which are stipulated by and approved according
to national regulations may be attached to bicycles.
If in doubt, consult your dealer.
Lighting regulations
● The light cone from the front headlamp may only be half as high at a distance
of 5 metres as it is at the point of exit from the headlamp. The centre of the
light cone is decisive for determining the height.
●
●
The light cone from the front headlamp must strike the road at a distance
of maximum ten metres. The centre of the light cone is decisive for determining
the height.
Attach the rear light at a minimum height of 25 cm.
Dynamo
The dynamo produces the energy necessary to drive the headlamp and rear light.
Side dynamo
The dynamo must be vertical to the wheel axle and
the friction roller must contact the tyre over its entire
width.
➢
➢
Switch on the dynamo using either a pushbutton or a lever. The friction roller
is now in contact with the side-wall of the tyre.
To switch off the dynamo, move it back to its initial position.
The dynamo latches in its original position.
Hub dynamo
The hub dynamo is located in the front wheel hub. The
efficiency of the hub dynamo is very high, wear on the
other hand is very low.
english
Seite 37
français
12:50 Uhr
nederlands
24.10.2007
Some bicycles with a hub dynamo are fitted with a
switch or a sensor on the back side of the headlamp. The
sensor switches on the light at dusk or when riding in a
tunnel. Other models have a switch on the handlebar.
Hub dynamo
español
DCW BedienA_GB UNI.qxd
If you need to remove the front wheel, first remove the connecting
clamp. Fit the front wheel so that the connecting clamp is located on the righthand side (as seen towards the direction of travel). If the connecting clamp is
located on the left-hand side, the dynamo cannot turn correctly, or the lighting
system may fail. Observe the correct polarity of the connections.
The hub dynamo generates high voltage, therefore do not touch the
connecting clamp when the front wheel is turning.
Side dynamo
37
DCW BedienA_GB UNI.qxd
24.10.2007
12:50 Uhr
Seite 38
Failure of the lighting system
Chainstay carrier
Failure of the lighting system when riding in the dark can lead to serious
accidents. Have the fault rectified by a dealer before riding further.
Mount child seats on chainstay carriers only
if appropriate fixings are present. Do not exceed the
maximum allowable weight class.
Carrier
This type of carrier is supported by the chainstays of
the bicycle. Due to the weight of the uncushioned
mass, the reaction of the chainstay carrier suspension
system becomes more sluggish.
The DIN 79 121 standard specifies how carriers may be built and loaded. The maximum load may be higher depending on the constructional design. This will be specified separately.
The loading capacity of the carrier is divided into four weight classes:
5 kg, 10 kg, 18 kg and 25 kg.
The specified loading capacity is stamped on the carrier.
Luggage alters the riding characteristics of your bicycle. Amongst others, the
braking distance is increased. This can lead to serious accidents. Adjust your riding
style accordingly.
Mudguards
Check regularly that the braces are tightly seated in the tear-off fasteners.
It is imperative to have damaged mudguards replaced before using the bicycle again.
Tear-off fasteners are mounted on the front wheel braces. They prevent objects
which get swept along from locking the front wheel. The tear-off fastener releases the
brace in this case and prevents a possible accident. Latch the plug connectors again
afterwards.
If you load your bicycle with luggage, it is imperative to observe the
maximum permissible loading of the bicycle (see chapter ”Total permissible weight
of the bicycle”, page 44).
If your bicycle is fitted with mudguards, they will usually be made from metal
or plastic.
A carrier fitted later on must conform to DIN 79 121.
The maximum permissible load must be stamped on it (see chapter “Permissible
carrier load“, page 44).
Plastic has the advantage that electrical cables can be integrated in rear wheel mudguards. These plastic mudguards are fitted with special eyes or fixing guides for
electrical cables. This ensures that the cables can be laid in such a way that they are
optimally protected and cannot be torn off.
Front wheel carriers are supported by the front axles or so-called ‘low-rider-hubs’.
Special carrier bags can also be attached to the ‘low-rider-hubs’.
Use only suitable carrier bags.
Enquire at a specialist dealer.
38
Chainstay carrier
Mudguards are fastened in the correct position with the aid of additionally mounted
braces. The length of the brace is ideal when the lower edge of the mudguard is
approximately circularly parallel to the tyre.
Due to this, the mudguard cannot work loose during normal riding. However, if a
foreign body gets between the tyre and the front wheel mudguard, the mudguard
loosens itself from the plastic clips. The braces must be refastened afterwards.
Selecting accessories and equipment
Never ride if the braces are loose. Refasten them. If it is not possible to
refasten the braces, have them replaced by a dealer.
Latching the SKS ASR safety device
Push the front wheel mudguard (profile
and brace) onto the ASR plug until it latches.
➢ Adjust the mudguard so that the tyre and the
front wheel mudguard do not touch each other.
➢
Use only accessories which conform to the national bicycle regulations.
Accessories which are not approved are not safe for use in traffic and can lead
to accidents. All accessories and attached parts must be suitable for your
bicycle, otherwise accidents or damage to the bicycle may occur.
Take advice from a dealer.
Child seat
Use only child seats which conform to national regulations.
These child seats must support the child’s feet securely.
A plastic clip is fixed to the brace.
.➢ Push the front wheel brace into the easy clip
receptacle on the fork until it latches.
.➢ Adjust the mudguard so that the tyre and the
front wheel mudguard do not touch each other.
In order to be able to clip the bushes together tightly, it may be necessary to
push the brace and the bridge about one millimetre towards each other.
Bicycle stand
Never leave children sitting unattended in the child seat of a parked bicycle.
The bicycle can fall over and seriously injure the child.
Never ride with the stand extended.
english
Seite 39
français
12:50 Uhr
Never leave children sitting unattended in the child seat of a parked bicycle.
The bicycle can fall over and seriously injure the child.
Never fasten the child seat directly to the handlebar. Doing so will impair the
steering efficiency of the bicycle. Do not use a sprung saddle if you are carrying
a child in a child seat mounted behind the saddle, otherwise the child’s fingers
could be squashed.
nederlands
24.10.2007
español
DCW BedienA_GB UNI.qxd
Always fasten the child seat’s safety belts, otherwise the child could fall out
and be seriously injured.
Ensure that children wear well-fitting bicycle helmets, otherwise serious head
may occur in case of a fall.
The bicycle’s handling will be unfavourably influenced when using a child seat.
The extra weight may cause the bicycle to become unstable. The braking
distance will be significantly increased. Adjust your riding style accordingly.
Not all bicycles with suspension systems are suitable for carrying child seats.
Check the fixing possibilities or consult a specialist workshop. Incorrectly
mounted child seats can lead to severe accidents.
Observe the maximum permissible weight of the bicycle and the maximum
permissible load of the carrier (see chapter ”Permissible carrier load”, page 45),
otherwise damage to the carrier and the frame may occur. This can lead to
serious accidents.
39
DCW BedienA_GB UNI.qxd
24.10.2007
12:50 Uhr
Seite 40
A child may only be carried in a child seat up to the age of 7 years.
The rider must be at least 16 years old.
➢
➢
➢
➢
It is not permitted to attach a child seat to a carbon frame, as this could
damage the frame.
Bar-Ends
Bicycle trailer
Use only bicycle trailers which conform to the national bicycle regulations.
Trailers which are not approved can lead to accidents.
Bicycle trailers impair the handling of the bicycle. Adjust your riding style accordingly,
otherwise the bicycle trailer can tip over or break away and cause an accident.
The braking distance will be greatly increased by a bicycle trailer. This can lead to
accidents. At first, practise starting, braking, and riding around curves and downhill
with an unloaded trailer.
Bicycle lock
We recommend the use of a cable lock or a D-lock. These offer the greatest security
against theft. Connect the D-lock to an object which is permanently anchored
to the ground or a building, such as a bicycle stand fixed to the ground. The D-lock
can be attached to the bicycle frame by means of a holder so that it is always
available for use.
A cable lock additionally immobilises the wheels. If you don’t have a lock holder for
the frame, you can wrap the cable lock around the seat post instead.
Always fasten the bar-ends tight to the handlebar as otherwise falls may occur.
If your bicycle has a thin-walled handlebar you may require extra parts.
These are intended to prevent damage to the handlebar. Read the manufacturer’s
operating manual.
Roof and boot racks
Use only roof and boot racks which conform to the national traffic regulations.
Roof and boot racks which are not approved are not safe for use in traffic and can
lead to accidents.
Loose parts (tools, bags, child seats, bicycle pump etc.) may fall off during transport
and endanger other road users.
Remove loose parts from the bicycle before setting off.
The bicycle can detach itself from the rack and cause serious road traffic accidents.
Check the fixings regularly during throughout the journey.
Avoid transporting the bicycle upside down. Do not fasten it via the handlebar, handlebar stem, saddle or saddle support. Do not use any fixings which could
damage the bicycle fork or the frame.
Basket
The handlebar or handlebar stem must not be damaged when fastening
the basket.
40
Attach the basket in such a way that it does not cover up the headlamp
or front reflector.
Do not bend the brake or gear shift cables when doing this.
The basket load must not exceed 5 kg.
Remember that the steering characteristics will be altered due to the basket.
Do not hang your bicycle by the pedal cranks on the roof or boot rack.
Always transport bicycles upright on their wheels, otherwise the frame and the forks
may be damaged.
Handling carbon components
Recutting the thread and the bearing shells or rubbing out the seat
tube are not allowed. It is not permitted to mount a child seat on
a carbon frame – there is a risk that the frame could break.
Carbon is a special material that requires special treatment and care during assembly,
maintenance, riding, transport and storage of the bicycle.
Properties
Carbon parts must not be deformed, dented or bent following an accident/fall. The
appearance does not change, even though the interior fibres may be torn. You should
therefore subject the carbon frame and all other carbon components to an intensive
examination following a fall or if the bicycle falls over.
Torques
Some carbon components require lower tightening torques. Excess torques can lead to
hidden damage which is not visible from outside. The frame or other components may
break or be altered to the extent that you may fall. Therefore always observe the
manufacturer’s specifications attached or consult a dealer.
Visual check
A previously damaged attached carbon part may suddenly fail without warning. This
could lead to injury or even death. Therefore, check your carbon frame and attached
carbon parts regularly.
●
If your bicycle has fallen over onto the handlebar, it is best to have
it replaced by a dealer. Bar-ends should only be fitted by a dealer.
●
●
Carbon frame
Derailleur clamping area, shifter eyes, saddle clamp, headset shell, bottom bracket
shell, socket or disc brake receptacle, dropout slot, suspension element receptacles
on the handlebar stem and chainstay, bearing receptacles on suspension frames,
transitional areas around drinking bottle holders.
Carbon fork
Fork sheaths at the fork head, fork head under the conical ring, clamping
area of the A-head, stem inside and out.
If you have changed the handlebar position, remember that the stem
must enclose the carbon part extensively.
●
Check the following parts and areas regularly (at least every 100 km) for cracks,
breakage or surface changes and always check these parts following a fall or if the
bicycle falls over:
●
Carbon wheels
Wear of the surface and brake blocks, wheel hub and flanks.
Please note that only approved brake blocks may be used.
➢
➢
➢
Look for splintering, deep scratches, holes or other changes to the carbon surface.
Check whether any parts feel softer or less hard than usual.
Check whether any individual layers (paint, finish or fibres) are peeling off.
If you are suspicious that a part may no longer be in order, be sure to replace it before
riding the bicycle. Better still, take your bicycle to a dealer for inspection.
Carbon handlebar
Transitional area around the handlebar stem, grips, clamping areas of other
attached parts.
english
Seite 41
français
12:50 Uhr
nederlands
24.10.2007
español
DCW BedienA_GB UNI.qxd
Carbon handlebar stem
Screws in the clamping area, fork shaft inside and out.
If you have changed the handlebar stem, remember that the stem must
enclose the carbon part extensively.
●
Carbon seat support
Area of transition from saddle support to seat tube, area of transition to the
head of the saddle support.
If any other parts of your bicycle are made of carbon, check them regularly for
cracks, breakages or surface changes.
41
DCW BedienA_GB UNI.qxd
24.10.2007
12:50 Uhr
Seite 42
Splinters
Carbon fibres are very thin and hard. Therefore, handle damaged carbon parts very
carefully. Individual fibres may become loose and protrude. If they come into contact
with your skin, small splinters may penetrate the skin.
Small repairs in an assembly stand
If you wish to fix your carbon frame in an assembly stand, please clamp it via the
saddle support only, since the clamping mechanism could otherwise cause hidden
damage to the frame. If your bicycle is fitted with a carbon saddle support, we recommend replacing it by an aluminium or steel saddle support for this work.
Transporting by car
When transporting the bicycle with a roof rack or a trailer, never fasten it via the
frame. Always fasten the bicycle via the saddle support, never via the bottom tube,
top tube, seat tube, fork sheaths, fork shaft tube, chainstay or seat brace.
The clamping mechanism could cause visible or hidden damage to the frame, which
may affect safety. If you have installed a carbon saddle support, we recommend replacing it by an aluminium or steel saddle support for transport purposes.
Do not clean your bicycle with
➛ acids,
➛ greases,
➛ hot oil,
➛ brake cleaner or
➛ fluids containing solvents.
These items attack the surface of the bicycle and encourage wear.
Dispose of lubricating, cleaning and care products after use in an environmentallyfriendly manner. Do not dispose of these substances in the domestic waste, down the
drain or in the countryside.
The trouble-free function and durability of your bicycle depend on its maintenance
and care.
➢
➢
➢
➢
Care and maintenance of the bicycle
Clean your bicycle regularly with warm water, a small quantity of detergent
and a sponge.
Use the opportunity to check your bicycle for cracks, gouges or material
deformation.
Have defective parts replaced before using the bicycle again.
Repair defective paintwork.
Particularly in winter or in an aggressive environment (e.g. at the coast), treat all
parts which are subject to corrosion especially often with suitable preservation and
care products, otherwise increased corrosion of your bicycle may occur.
Care
➢
Do not allow any cleaning materials or oil to come into contact with brake
pads, brake discs or the wheel rim braking surfaces, otherwise the braking efficiency
will be reduced.
Do not use strong jets of water or steam for cleaning purposes. The water
strikes the bicycle under high pressure and can penetrate into the bearings. The
lubrication will be diluted and friction will be increased. This leads to the destruction
of the bearings or rusting.
42
➢
➢
➢
Clean all galvanised and chrome parts, as well as stainless steel components,
regularly.
Preserve these parts after cleaning with a wax spray.
If your bicycle is not to be used for a longer period of time (e.g. in winter),
store it in a dry place at a constant temperature.
Before putting your bicycle into storage, pump up both tyres to the specified
tyre pressure.
Consumable parts
Have your bicycle checked regularly by a dealer and the consumable parts
replaced.
Your bicycle is a technical product which must be checked regularly. Many parts
of your bicycle are subject to higher wear, depending on their function and use.
Chain sprockets, rear sprockets, bottom bracket and gear shift rollers
In the case of bicycles with chain gear shifter, the chain sprockets, rear sprockets,
bottom bracket and gear shift rollers are subject to wear. The level of wear is
dependant on the care, maintenance and usage of the bicycle (mileage, riding
in the rain, dirt, salt, etc).
➢ In order to prolong the service lifetime, clean and oil these parts regularly.
➢ Have them replaced by a dealer if the wear limit has been reached.
Tyres
The bicycle tyres are subject to wear. This is dependant on the usage of the bicycle. It
can be significantly influenced by the rider.
➢ Do not brake so hard that the wheels lock.
➢ Check the tyre pressures regularly.
➢ If necessary, pump up the tyres to the tyre manufacturer’s specified tyre pressure.
➢ Avoid prolonged exposure to sunlight, petrol, oil, etc, which can damage the tyres.
Lighting system lamps
Light bulbs and other light sources are subject to wear.
For this reason, replacement may be necessary.
➢ Always carry replacement light bulbs, so that defective bulbs can be replaced.
Wheel rims in conjunction with brakes
Due to the interaction between the brake and the wheel rim, not only the brake pad
but also the wheel rim is subject to wear. If fine cracks appear or the wheel rims
deform when the tyre pressure is increased, this indicates increased wear. Wheel rims
with wear indicators make it possible to easily determine the amount of wear.
➢ Check the wheel rims regularly for wear (see chapter “Checking the wheel rims”,
page 34).
Hydraulic oils and lubricants
Hydraulic oils and grease lose their efficiency over a period of time.
Failure to exchange lubricants regularly will result in greater wear of the affected
parts and bearings.
➢ Clean and lubricate all relevant parts and bearings regularly.
Brake pads and shoes
The brake pads of wheel rim, roller, drum and disc brakes are subject to wear, depending on the usage of the bicycle. When riding in hilly country or when the bicycle is
used for sporting purposes, replacement of the brake pads may be necessary at shorter
intervals. Check the brake pads regularly for wear and have them replaced by a dealer
if necessary.
Bicycle chains and toothed belts
The bicycle chain is subject to wear. The level of wear is dependant on the care, maintenance and usage of the bicycle (mileage, riding in the rain, dirt, salt, etc).
➢ In order to prolong the service lifetime, clean and oil bicycle chains and toothed
belts regularly.
➢ Have them replaced by a dealer if the wear limit has been reached (see chapter
“Bicycle chain maintenance”, page 24).
Handlebar tapes and grip covers
Handlebar tapes and grip covers are subject to wear.
For this reason, regular replacement may be necessary.
➢ Check regularly that the grips are seated tightly.
english
Seite 43
français
12:50 Uhr
nederlands
24.10.2007
español
DCW BedienA_GB UNI.qxd
Gear shift and brake cables
➢ Maintain all Bowden cables regularly.
➢ Have defective parts replaced by a dealer.
This can be especially necessary when the bicycle is often parked in the open and is
subject to weather influences.
Paintwork
The paintwork requires regular maintenance. This preserves the optical appearance
of your bicycle.
➢ Check the paintwork regularly for damage and repair it immediately.
43
DCW BedienA_GB UNI.qxd
24.10.2007
12:50 Uhr
Seite 44
Bearings
All of the bicycle’s bearings such as headset, wheel hubs, pedals and inner bearings
are subject to wear. This is dependant on the level and length of usage and on the
level of care.
Plain bearings and suspension frame / suspension fork
or other suspension elements
Suspension components on the bicycle, especially plain bearings and suspension
elements are subject to greater strain compared to other bearings. They are subject
to wear.
➢ Check these parts regularly and most thoroughly.
Regular inspections
Inspection plan
When?
100 km after purchase, after
that at least once a year
When ?
After each use of the bicycle
Since the spokes settle, the brake and gear shift cables stretch and the bearings runin during the first kilometres of riding, the first inspection should be carried out by a
dealer after 100 km or after four to six weeks.
Clean your bicycle after each off-road use and check it for damage.
➢
➢
➢
➢
➢
➢
➢
➢
Have the first inspection carried out.
Check your bicycle at intervals of around 300 to 500 km or three to six months.
At this time, check that the following items are all tight:
➛ screws,
➛ nuts and
➛ quick releases.
Clean your bicycle.
Lubricate all moving parts.
Repair all damaged paintwork and rust.
Treat bare metal parts with rust preventer.
Have damaged parts or parts that do not work replaced.
After every 300 to 500 km
Maintenance / Check
Check
tyres and wheels.
Have the tightening torques of the following
checked:
➛ handlebar,
➛ pedals,
➛ pedal cranks,
➛ saddle,
➛ saddle support and ➛ screws.
➢ Have the following components adjusted:
➛ headset,
➛ gear shifter,
➛ brakes and
➛ suspension elements
➢
➛
➢
Maintenance / Check
Check
spokes,
wheel rims for wear and roundness,
tyres for foreign bodies,
quick releases,
gear shifter and suspension function,
brakes,
lights and
bell.
➢
➛
➛
➛
➛
➛
➛
➛
➛
➢
➛
➛
➛
➢
➢
➢
➢
After 1000 km
44
Have the following checked:
bicycle chain, ➛ rear sprockets,,
chain sprockets, ➛ wheel rims and
brake pads
for wear and have them replaced if necessary.
Clean the bicycle chain,
rear sprockets andchain sprockets.
Lubricate them with chain grease.
Check that all screws are tight.
Have the brake hub checked and the brake
sleeve replaced if necessary.
Clean and lubricate the
gear shifter,
➛ brakes and
bicycle chain.
Technical data
Total permissible weight of the bicycle
The total permissible weight of the bicycle comprises the weight of the bicycle, the
weight of the rider and the weight of the luggage.
Bicycle type
Total permissible weight
20“ trailer
20“ child’s bicycle
24“ child’s bicycle
MTB and racing cycle
City- and trekking bike
Touring bicycle
50 kg
60 kg
80 kg
110 kg
120 kg
140 kg
Permissible carrier load
Observe possible differing data on your carrier or in the manufacturer’s
specifications.
Maximum load of the rear carrier:
20“ child’s bicycle and trailer
24“ child’s bicycle
Touring, city, trekking bike, ATB
10 kg
18 kg
25 kg
Maximum load of the front carrier:
Loading surface above the front wheel
Low lying loading surface
10 kg
18 kg
Use only suitable tools for tightening screwed components, e.g. torque
wrench, otherwise the screws may shear off.
Parts may be damaged if the screws are over-tightened.
Always observe the specified torque.
Observe the minimum screw depth. In the case of hard aluminium alloys this must
be minimum 1.4 x screw diameter (e.g. nominal diameter M 5 x 1.4 = 7 mm).
According to the current state of the art, all screws, nuts and bolts that
are relevant to safety should be tightened with a torque wrench.
This indicates the corresponding torque in Nm (Newton meter).
Screwed component
Tightening torque
Pedal crankset, steel
30 Nm
Pedal crankset, aluminium
30 Nm
Pedals
30 Nm
Wheel, front
25 Nm
Wheel, rear
40 Nm
Handlebar screw
15 Nm
Stem clamp spindle
15 Nm
A-head clamping screw
9 Nm
Bar-Ends – clamping screw on the handlebar
10 Nm
Bar-Ends – horn clamps on clamping collar
6 Nm
Saddle support clamp screw M8
20 Nm
Saddle support clamp screw M6
14 Nm
Saddle support clamp
20 Nm
Brake blocks
6 Nm
Dynamo mounting
10 Nm
Saddle clamp
14 Nm
Saddle clamp on carbon frame
5 Nm*
Drinking bottle holder on carbon frame
2 Nm
The following are different for carbon frames:
Derailleur clamp fixing screw
3 Nm*
Gear shift lever fixing screw
3 Nm*
Brake lever fixing screw
3 Nm*
Clamp, handlebar – handlebar stem
5 Nm*
Clamp, handlebar stem – fork shaft
4 Nm*
français
➢
➛
➛
Tightening torques of screws, nuts and bolts
nederlands
➛
➛
➛
Have the
hubs,
➛ headset,
(1)
pedals,
➛ gear shift cables and
brake cables
by a dealer
dismantled,
➛ checked,
cleaned,
➛ lubricated and
replaced if necessary by a dealer.
english
Seite 45
español
Each time after it rains
➢
➛
➛
➛
12:50 Uhr
No not apply lubricants or oil
to Teflon-coated cable bushings.
After 3000 km
24.10.2007
(1)
DCW BedienA_GB UNI.qxd
* We recommend the use
of plastic mounting paste
under the components.
45
DCW BedienA_GB UNI.qxd
24.10.2007
12:50 Uhr
Seite 46
Racing cycle brake (BR)
In the case of carbon parts, observe any differing information or marking
regarding the recommended torque.
Cantilever brake (BR)
General tightening torques of screws, nuts and bolts
The screw quality is stamped on the screw head, e.g. 8.8.
If the manufacturer’s specifications do not differ, the following torques
(average values) apply, depending on the screw quality:
Dimension
M4
M5
M6
M8
M 10
Screw quality stamp
8.8
10.9
12.9
2,7
3,8
4,6
5,5
8,0
9,5
9,5
13,0
16,0
23,0
32,0
39,0
46,0
64,0
77,0
Unit
Nm
Nm
Nm
Nm
Nm
Brake lever (BL)
Brake lever on
carbon handlebar
Rear wheel hub (FH)
Inner bearing (BB)
Inner bearing (BB)
Crank assembly (FC)
Pedals (FC)
Cassettes (HG)
Fixing screw (welded socket)
Inner cable fixing screw
Brake pad fixing bolt
Fixing screw (welded socket)
Inner cable fixing screw
Brake pad fixing bolt
Clip fixing screw
5 Nm
6 Nm
8 Nm
5 Nm
6 Nm
8 Nm
6 Nm
Fixing screw
Freewheeling body fixing screws
Bearing casing right and left
Plastic bearing casing right and left
Crank arm fixing screw
Chain sprocket fixing screw
Pedal axle
Fixing ring
Quick release:
3 Nm*
40 Nm
50 Nm
30 Nm
35 Nm
10 Nm
35 Nm
30 Nm
see page 7
* We recommend the use of a plastic mounting paste under the components.
Not all values can be applied to other manufacturers’ components. Read the
component manufacturer’s specifications or observe the torque specifications marked
on the components.
Tyres and tyre pressures
Observe any differing manufacturer’s specifications.
The tyres and inner tubes could otherwise be damaged.
Tightening torques of Shimano components
Article
Specification
Gear shifter (RD)
Fixing bolts (shifter eye)
Inner cable fixing screw
Schaltrollenbefestigungsschraube
Clip fixing screw
Inner cable fixing screw
Clip fixing screw
Derailleur (FD)
46
Derailleur on
carbon frame (FD)
Gear shift lever (STI/SL) Fixing screws
Gear shift lever
Fixing screw
on carbon handlebar
V-brake (BR)
Fixing screw (welded socket)
Inner cable fixing screw
Brake pad fixing bolt
Tightening
torque
8 Nm
5 Nm
3 Nm
5 Nm
5 Nm
3 Nm*
6 Nm
3 Nm*
5 Nm
6 Nm
8 Nm
Conversion table PSI – Bar:
Tyre width in mm
25 HP(*)
28 HP(*)
28
32
37
40
42
47
57 – 62
(*) HP = high pressure tyres
PSI
80 – 110
70 – 80
60
60 – 70
50
60
60
40 – 50
30 – 40
Bar
5,5 – 7,6
4,8 – 5,5
4,1
4,1 – 4,8
3,5
4,1
4,1
3,5 – 4,1
2,1 – 2,8
Dynamo, right/left-hand
Hub dynamo
Power supply
6 Volt
2,4 Watt
6 Volt
2,4 Watt HS3
6 Volt
0,6 Watt
6 Volt
0,6 Watt
diode carrier rear light with
LEDs (no bulb)
6 Volt
3 Watt
6 Volt
3 Watt
Warranty conditions
●
●
●
●
●
●
All parts which are subject to wear, except in the case of production
or material faults (see chapter “Consumable parts”, page 42).
Damage caused by improper or insufficient care and unprofessional repairs,
modifications or replacement of bicycle parts. Detailed care instructions are
to be found in this operating manual.
Damage due to accidents or external influences, provided these are not due
to faulty information or production.
Repairs with used parts or damage resulting from such repairs.
Special equipment or accessories or non-standard equipment; especially
technical alterations, such as replacement of gear shifter, bicycle fork,
alteration of the frame geometry.
Parts fitted later which, at the time of handover, did not belong to the
standard equipment of the product, or damage resulting from the
unprofessional assembly of such parts.
Read the chapter „Care and maintenance of the bicycle“, page 41, carefully
and thoroughly. Comply with the specified inspection intervals listed in chapter
“Regular inspections”, page 43. Compliance with specified service intervals is a prerequisite in case of warranty claims.
You are legally entitled to a warranty of two years, starting from handover of the bicycle by the dealer, who is your contact person in case of a warranty claim.
We wish you lots of pleasure
riding your new bicycle!
english
Seite 47
français
Lighting system
Type
Headlamp, neon bulb
Headlamp, halogen
Rear light with parking light
Rear light
Rear light, D-toplight plus
12:50 Uhr
nederlands
24.10.2007
español
DCW BedienA_GB UNI.qxd
As proof of the purchase or handover date, keep the handover note signed by both parties and the bill or receipt in a safe place for the duration of the warranty.
Prerequisites for warranty claims
● The damage is due to faulty manufacturing, material or information.
● The damage or fault was already present at the time of handover to the customer.
Exclusions from the warranty
A right to claim on the warranty exists only for the initial faults of defective parts. The
following are excluded from the warranty:
● Damage caused by use in competition, improper use and acts of nature
(see chapter ”Appropriate use as intended”, page 5).
Copyright © 2007 Derby Cycle Werke GmbH
Reprinting, also of extracts, only with the permission
of Derby Cycle Werke GmbH. Printing errors, mistakes
and technical changes reserved!
47