1
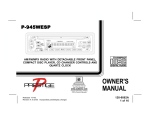
P-942WESP
RELEASE
T/F
SEL
LOUD
BAND
1
2
3
4
5
6
MODE
MUTE
LOC
AS/PS
EQ
POWER
AM/FM/MPX RADIO
WITH DETACHABLE FRONT PANEL,
COMPACT DISC PLAYER
AND QUARTZ CLOCK
OWNER'S
MA NUAL
Released 8-15-03
128-6887
1 of 12
INDEX
Page
Operating Instructions ............................................................... 3 - 8
Setting the Clock .......................................................................... 8
CD Player Error Codes................................................................. 8
Specifications ............................................................................... 9
Care and Maintenance ...............................................................10
Notes on Discs ............................................................................11
Electronic Skip Protection ...........................................................11
Warranty .............................................................................. Back Cover
-2-
128-6887
2 of 12
OPERATING INSTRUCTIONS
30
11, 20, 21
28, 29
19
14, 15
27
12
9
26
2
18
RELEASE
T/F
SEL
LOUD
BAND
3
4
5
6
7
1
25
8, 10
1
2
3
22
4
23
7
EQ
17
POWER
1
3
SELECT BUTTON (SEL)
This button is used to select the audio function (volume, bass, treble,
balance or fade) to be adjusted using the Volume/Level Control
.
Pressing the SEL button once will set the unit for volume adjustment
(VOL will appear on the display panel). Pressing the button additional
times will select bass adjustment (BAS on display panel), treble adjustment (TRB), balance (BAL), fader (FAD), and volume (VOL) again. The
display will return to the normal indication 5 seconds after the last adjustment or when another function is activated.
2
2
456
MODE
AS/PS
16
13
VOLUME / LEVEL CONTROLS
To increase the volume level, press the + side of the button. The volume will increase and the level will be shown on the display panel
from a minimum of VOL 00 to a maximum of VOL 100. To increase
the volume quickly, keep the button pressed. To decrease the volume level, press the - button. Keep the button pressed to decrease the
volume quickly. The display will automatically return to the normal indication 5 seconds after the last volume adjustment or when another function is activated. These controls are also used in conjunction with
the Select button
to adjust the volume, bass, treble, balance and
,
,
, and
.
fader levels as described in
6
LOC
24
POWER OFF BUTTON
Press this button to turn the unit on and off. When the ignition is on, the
unit will also turn on automatically when a disc is loaded, or when any
other button is pressed. If the ignition is turned off while the radio is on,
the radio will turn on automatically when the ignition is again turned on.
3
5
MUTE
4
BASS CONTROL
To adjust the bass level, first select the Bass mode by pressing the
SEL button until the BAS indication appears on the display panel.
Within 5 seconds of choosing the Bass mode, press the + or - buttons
of the Level Control to adjust the bass response as desired. The bass
-3-
128-6887
3 of 12
indication 5 seconds after the last adjustment or when another function is activated.
level will be shown on the display panel from a minimum of BAS -10
to a maximum of B 10 (B 00 represents flat response). The display
will automatically return to the normal indication 5 seconds after the
last adjustment or when another function is activated.
8
LOUDNESS CONTOUR (LOUD)
When listening to music at low volume levels, this feature will boost the
bass and treble ranges to compensate for the characteristics of human
hearing. Press and hold the BAND/LOUD button for 2 seconds to activate this feature as indicated by a beep tone and LOUD ON appearing on the display panel for about 5 seconds. Pressing the button
again for 2 seconds will sound a beep tone and LOUD OFF will appear
on the the display for about 5 seconds.
5
TREBLE CONTROL
To adjust the treble level, first select the Treble mode by pressing the
SEL button until the TRB indication appears on the display panel.
Within 5 seconds of choosing the Treble mode, press the + or - buttons
of the Level Control to adjust the treble response as desired. The
treble level will be shown on the display panel from a minimum of T -10
to a maximum of T 10 (T 00 represents flat response). The display will
automatically return to the normal indication 5 seconds after the last
adjustment or when another function is activated.
9
AUDIO MUTE (MUTE)
This button is used to mute the volume from the system. By pressing
the button, a flashing MUTE indication will appear on the display panel
and the volume will be muted. Pressing the MUTE button again or
activating any other function of the unit will return to the volume level
setting in use before the Mute function was activated.
6
LEFT/RIGHT BALANCE CONTROL
To adjust the left-right speaker balance, first select the Balance mode
by pressing the SEL button until the BAL indication appears on the
display panel. Within 5 seconds of choosing the Balance mode, press
the + or - button of the Level Control to adjust the stereo balance of the
right and left speakers. The balance position will be shown on the
display panel from 10 L (full left) to 10 R (full right). When the volume
level between the left and right speakers is equal, L=R will be shown
on the display panel. The display will automatically return to the normal
indication 5 seconds after the last adjustment or when another function
is activated.
bl
AM/FM BAND SELECTOR
During radio play, each time the BAND/LOUD button is pressed momentarily, the radio band changes. The indications AM, F1, F2, or
F3 will appear on the display panel according to your selection.
bm
MANUAL UP/DOWN (
/
) AND SEEK TUNING
The radio tuning function is normally in automatic tuning mode.
The radio will tune to the next available station and stop at that
frequency when either button is pressed momentarily.
7
FRONT/REAR FADER CONTROL
To adjust the front-rear speaker balance, first select the Fader mode by
pressing the SEL button until the FAD indication appears on the display panel. Within 5 seconds of choosing the Fader mode, press the +
or the - buttons of the Level Control to adjust the front-rear speaker
levels as desired. The fader position will be shown on the display
panel from 10 R (full rear) to 10 F (full front). When the volume level
between the front and rear speakers is equal, F=R will be shown on
the display panel. The display will automatically return to the normal
To tune rapidly in an upward or downward direction, press and
hold either button for at least 2 seconds. MANUAL will appear on
the display and the radio will tune through the entire band in an
up or down direction while the button is pressed. When the desired radio frequency is reached, release the button; 5 seconds
later, AUTO will appear momentarily on the display.
-4-
128-6887
4 of 12
bn
bp
AUTO-STORE (AS) / PRE-SET SCAN (PS) TUNING
Press this button momentarily to scan the 6 stations in the pre-set
memories of each FM band in sequence (or the AM band if in use).
The unit will stop at each pre-set station for 5 seconds before continuing to the next pre-set station. (The preset number will flash during
Pre-Set Scan operation.) Press the button again momentarily to stop
Pre-Set Scan operation and remain on the selected frequency.
Pressing the button for longer than 2 seconds will activate the AutoStore Tuning feature. If the radio is in the LOCAL mode, it will automatically scan each band in sequence and enter strong stations into
the pre-set local memory positions for each band. If you have already
set the pre-set memories of that band to your favorite stations, activating the Auto-Store Tuning feature will erase those stations and enter
the new strong stations. If the radio is in the distant (Dx) mode, weaker,
more distant stations will be preset into each band. This feature is most
useful when traveling in a new area where you are not familiar with the
local stations.
FM STEREO INDICATION
During FM radio operation, under normal reception conditions, the
unit receives in the stereo mode, as indicated by ST on the display
panel when listening to an FM stereo signal. If the signal is not broadcast in stereo or too weak for comfortable listening, or if AM (monaural) reception is selected, ST will disappear from the display panel,
indicating stereo reception in no longer in effect. To return to the stereo reception mode, select a reasonably strong FM stereo station so
that the ST indication returns.
bq
LIQUID CRYSTAL DISPLAY PANEL
The Liquid Crystal Display (LCD) panel displays the frequency, time,
and activated functions.
NOTE: It is a characteristic of LCD panels that, if subjected to cold
temperatures for an extended period of time, they may take
longer to illuminate than under normal conditions. In addition, the visibility of the numbers on the LCD may slightly decrease. The LCD readout will return to normal when the temperature increases to a normal range.
bo
STATION PRE-SET MEMORIES
To set any of the 6 preset memory buttons, use the following procedure:
1. Turn the unit on and select the desired band.
2. Select the first station to be preset using the Manual Up/Down
or Up/Down Seek Tuning functions .
3. Press the preset button to be set and continue to hold the
button in. A confirming tone will be heard and the preset
number will appear on the display panel. The station is now set
into the memory of that preset button and can be recalled at
any time by momentarily pressing that button.
4. Repeat the above procedure for the remaining 5 presets on
the band in use and for the other 3 bands of the unit.
br
MODE SELECT BUTTON
on the
When listening to radio with a disc loaded in the unit (
display panel), press this button to return to disc play mode from the
beginning of the last track in play.
Conversely, during disc play, press this button to return to radio operation;
remains displayed unless the disc is ejected and removed
from the unit.
bs
EQUALIZER (EQ) BUTTON
The EQ button applies preset sound effects to the unit’s audio output
signal. The EQ button, when pressed, will activate one of the following
operating modes: CLASSICS, POP M, ROCK M, DSP OFF or FLAT.
-5-
128-6887
5 of 12
cl
Nonetheless, when the EQ function is active, the bass and treble
levels can still be changed to accommodate the listener ear. When
the EQ function is not active, the unit returns to the user-set bass and
treble levels. The FLAT selection indicates no equalizer enhancement of the program, thereby removing the preset sound effects, unless otherwise desired, while DSP OFF inhibits selection of equalizer
mode enhancement.
TRACK SELECT (
/
)
The Track Select functions are used to quickly access the beginning
of a particular track during disc play operation. Each time the Forward
) button is pressed, the next higher track number
Track Select (
will be selected as shown on the display panel. Similarly, each time
the Backward Track Select (
) button is pressed, the next lower
track number will be selected as shown on the display panel.
bt
cm
LOCAL (LOC) BUTTON
This feature is used to select the strength of the signals at which the
radio will stop during Automatic Seek Tuning. Pressing this button will
select the Local setting (LOCAL will appear for 5 seconds on the display,
in addition to LOC) and seek tuning will stop only at strong (local)
stations. Pressing the button again will select the normal Distant
setting (LOC will disappear from the display panel, and Dx will be
displayed for 3 seconds) and seek tuning will stop at a wider range
of signals, including weaker (more distant) stations.
bu
DISC SLOT
With the label surface facing up, gently insert the disc into the slot
until the soft-loading mechanism engages and disc play begins.
A dual disc indication appears, with the upper disc ( ) indicating a
disc is installed; the lower disc indication (
) illuminates and becomes animated, the S--CDP symbol lights, and the track number
and elapsed time will appear on the display panel.
NOTE: This unit is designed for play of standard 5"(12cm) Compact
Discs ONLY. Do not attempt to use 3" (8cm) CD-Singles in
this unit, either with or without an adaptor, as damage to the
player and/or disc can occur. Such damage will not be covered by the Warranty on this product.
CUE/REVIEW FUNCTIONS (
/
)
High-speed audible search to any section of the disc can be made by
)
the Cue and Review functions. Press and hold the Cue button (
)
to advance rapidly in the forward direction or the Review button (
to advance rapidly in the backward direction. During either function,
the elapsed time within each track will automatically be shown on the
display panel.
cn
TRACK SCAN (SCN) SELECT
During disc play, press the SCN button to play the first 10 seconds of
each track on the disc (S---SCN will appear on the display panel).
When a desired track is reached, press the SCN button again to
cancel the function and play of the selected track will continue. Track
Scan mode will also be canceled by activating the Repeat Play or
Shuffle Play functions.
co
TRACK REPEAT (RPT) PLAY SELECT
During disc play, press the RPT button to repeat the play of the selected track (S---RPT will appear on the display panel). Play of the
track will continue to repeat until the button is pressed again and the
S---RPT indication disappears from the display panel. Repeat Play
mode will also be canceled by activating the Track Scan or Random
Play functions.
-6-
128-6887
6 of 12
cp SHUFFLE (SHF) PLAY SELECT
cu
cq
dl
RESET BUTTON
A RESET button is located on the chassis behind the front panel.
(Front panel must be removed to access the button). The reset circuitry is provided to protect the microprocessor circuitry and should
only be activated under the following circumstances.
1. Upon initial installation after all wiring is completed.
2. If there is a malfunction of any of the switches on the unit or of the
CD player, pressing the RESET button may clear the system and
return to normal operation.
During disc play, press this button to play the tracks on the disc in a
random shuffled order (S---SHF will appear on the display panel). In
Shuffle Play mode, the Forward Track Select (
) will also select
tracks in the random order instead of the normal progression. Backward Track Select (
) will go back to the beginning of the track in
play. The Shuffle Play mode can be canceled by pressing the button
again (S---SHF indication will disappear from the display panel).
Shuffle Play mode will also be canceled by activating the Track Scan
or Repeat Play functions.
FRONT PANEL RELEASE BUTTON (
)
This button is used to release the mechanism that holds the front panel
to the chassis. To detach the front panel, press the button so that the
left side of the panel is released. Grasp the released side and pull it
off of the chassis. To re-attach the panel, position the right side of the
panel in place first and then press in the left side until the mechanism
locks it into place.
DISC PAUSE (PAU) SELECT
The Pause function is used to freeze disc play when the CD player is
in use. S---PAUSE will appear on the display. Press this button again
to resume disc play; the S---PAUSE indication will disappear.
cr
DISC EJECT ( )
Disc play is stopped, the disc is ejected and the unit will change to
radio operation by pressing this button. If the disc is not removed from
the unit within 10 seconds of being ejected, it will automatically be reloaded into the unit to prevent damage (
panel).
NOTES ON USE OF FRONT PANEL
will appear on the display
cs
1.
Make sure the front panel is right-side-up when attaching it
to the chassis as it cannot be attached when up-side down.
2.
Do not press very hard on the front panel when attaching it
to the chassis. No more than light to moderate pressure
should be needed.
ct
3.
When attaching the front panel, make sure the right side is
correctly engaged before pressing the left side to lock it into
position.
4.
When taking the front panel with you, please use the supplied carrying case to protect the panel from dirt and damage.
TIME/FREQUENCY DISPLAY SELECTOR (T/F)
Press this button to call the time display on the incorporated quartz
clock. Press the button again to return to radio frequency or disc display, or it will return automatically after 5 seconds.
THEFT-DETERRENT LED
Located on the chassis behind the front panel, a light-emitting diode
(LED) will flash when the panel is removed. The flashing light serves
as a visual warning to the would-be thief that the unit has been disabled by removal of the front panel.
-7-
128-6887
7 of 12
DETACHING THE FRONT PANEL
CD PL
AYER ERR
OR CODES
PLA
ERROR
If a problem should develop while operating the CD player, the
following error codes may be displayed on the display panel:
ER-2: Indicates the disc is not loading properly. Try reloading or
pressing the Eject button. Check the condition of the disc
in use or try another disc.
Release button
ER-3: Indicates the disc is not ejecting properly. Try pressing
the Eject button again. Check the condition of the disc
in use or try another disc.
ATTACHING THE FRONT PANEL
ER-4: Indicates an error in the laser reading the disc. Eject the
disc, make sure it is clean, undamaged, and loaded correctly (label side up). Reload the disc and check for proper
operation or try another disc.
Engage right side first
ER-5: Indicates excessive temperature conditions. CD play will
resume when the temperature returns to the normal
range.
SET
SETTT ING THE CLOCK
ER-6: Indicates a mechanism error. Eject the disc and try reloading. Also try activating the RESET button
and try
again.
1. Switch the vehicle ignition “on” and the radio “on” (radio frequency or disc track number will be shown on the display
panel).
2. Momentarily press the Time/Frequency (T/F) button to display
the time of day. The press and hold the T/F button until the time
display flashes.
3. While the display is flashing, press the Up Tuning button
(
) to adjust the hours and the AM or PM indication, and
the Down Tuning button (
) to adjust the minutes to the
correct time.
4. When the correct time is shown on the display panel, press
and release the TF button (or wait 5 seconds) for the display
to return to the normal indication.
cu
ER-7: Indicates an error in the laser reading the disc. Eject the
disc, make sure it is clean, undamaged, and loaded
correctly (label side up. Re-load the disc and check for
proper operation or try another disc.
ER-8: Indicates an error in the laser reading the disc. Eject the
disc, make sure it is clean, undamaged, and loaded
correctly (label side up). Re-load the disc and check for
proper operation or try another disc.
If the suggested measures do not solve the problem, contact an
approved warranty station near you for further assistance.
-8-
128-6887
8 of 12
SPECIFICATIONS
Size:
7" W x 2" H x 6-5/8" D
178 mm x 50 mm x 168 mm
Operating Voltage:
12 volts DC, negative ground
Output Power:
140 watts maximum
(25 watts x 4 channels)
Output Wiring:
Floating-ground type designed for 4 speaker use.
Front and rear channels CANNOT be combined (bridged)
for use with 2 speakers. RCA low-level outputs (rear channels).
Output Impedance:
Compatible with 4-8 ohm speakers.
Low-Level Output:
500 mv.
Tuning Range:
AM: 530-1,710 kHz. (10 kHz. step)
FM: 87.5-107.9 MHz. (200 kHz. step)
Sensitivity:
AM: 20 uV.
FM: 1.5 uV.
FM Stereo Separation:
>30 dB
CD Frequency Response: 20 – 20,000 Hz, +/- 3 dB
CD Signal/Noise Ratio:
60 dB
CD Channel Separation: >55 dB
CD Distortion:
0.2%
*Specifications are subject to change without notice.
-9-
128-6887
9 of 12
!
!
!
!
!
!
CARE AND MAINTENANCE
!
The radio section of your new sound system does not require any
maintenance. We recommend you keep this manual for reference on the many features found in this unit as well as how to set
the clock.
The compact disc player section also requires no routine
maintenance, but proper understanding of its use and handling will
help you obtain maximum enjoyment of its capabilities. The
following points should be observed:
When cleaning the interior of the vehicle, do not get water or
cleaning fluids on the unit.
The CD player is a precision instrument and will not operate properly
in extreme hot or cold. In case of such conditions, wait
until the interior temperature of the vehicle reaches a normal
temperature before using the player.
If the temperature inside the player gets too hot, a protective circuit
will automatically stop play of the disc. In this case, allow the unit
to cool off before operating the player again.
Never insert anything other than a 5" (12 cm) compact disc into the
player as the mechanism can be damaged by foreign objects.
Do not attempt to use 3" (8 cm) CD-Single discs in this unit, either
with or without an adaptor, as damage to the player and/or disc
may occur. Such damage will not be covered by the Warranty on
this product.
When not using the disc player, always remove the compact disc.
Do not leave an ejected disc sitting in the disc slot as this can
expose it to sunlight and other causes of damage.
!
!
Do not attempt to open the unit chassis. There are no user
serviceable parts or adjustments inside.
When the vehicle warms up during cold weather or under damp
conditions, moisture may condense on the lens of the disc
player. Should this occur, the player will not operate properly
until the moisture has evaporated.
The unit is designed with a vibration dampening CD mechanism
to minimize interruption of disc play due to normal vibration in a
moving vehicle. When driving on very rough roads, however,
occasional sound skips may occur. This will not scratch or
damage the disc and normal play will resume when the rough
conditions cease.
HANDLING COMPACT DISCS
Dirt, dust, scratches, and warpage can cause skips in the
playback and deterioration of sound quality. Please follow these
guidelines to take care of your compact discs:
!
!
!
!
!
!
Use only compact discs with the mark
Fingerprints, dust, and dirt should be carefully wiped off the
disc’s playing surface (shiny side) with a soft cloth. Wipe in a
straight motion from the inside to the outside of the disc.
Never use chemicals such as record sprays, household cleaners
or thinner to clean compact discs. Such chemicals can
irreparably damage the disc’s surface.
Discs should be kept in their storage cases when not in use.
Do not expose discs to direct sunlight, high temperatures or high
humidity for extended periods.
Do not stick paper, tape, or labels on the disc surfaces nor write
on them with any type of marker.
-10-
128-6887
10 of 12
NOTES ON DISCS
Attempting to use non-standard shape discs (e.g.; square, star, heart) may damage the unit. Be sure to use round-shape CDs only in this
unit.
NOTES ON CD-Rs (Recordable CDs)/CD-RWs (Rewriteable CDs):
1. Be sure to use discs with the following marks only for play in this unit:
.
2. The unit cannot play a CD-R or CD-RW that is not finalized. (Please refer to the manual of your CD-R/CD-RW software
for more information on the finalization process.)
3. Depending on the recording status, conditions of the disc and the equipment used for the recording, some CD-Rs/CD-RWs
may not be played on this unit.
RELIABLE PLAYBACK:
To ensure more reliable playback, please note the following recommendations:
1. Use CD-RWs with speed 1x to 4x.
2. Use CD-Rs with speed 1x to 8x, and write with speed 1x to 2x.
3. Do not play a CD-RW which has been written on more than 5 times.
NOTES ON MULTI-SESSION DISCS:
If the first track of the first session is audio CD data, then the unit will play only the audio CD data.
ELECTRONIC SKIP PROTECTION (ESP)
The CD Player in this unit is equipped with Electronic Skip Protection (ESP) circuits. This capability enables the CD Player to project disc
play approximately 10 seconds ahead of its current play position. As a result, if a severe road bump is encountered during Player operation,
play of the current track will not be interrupted, or result in a skip.
-11-
128-6887
11 of 12
12 / 24 MONTH LIMITED WARRANTY
Applies to automotive radios, radio/tape players, radio/CD players,
CD changers, power amplifiers, equalizers and accessories.
AUDIOVOX CORPORATION (the Company) warrants to the original retail purchaser of this product that should this product or any part thereof,
under normal use and conditions, be proven defective in material or workmanship within 12 months from the date of original purchase, such
defect(s) will be repaired or replaced with new or reconditioned product (at the Company's option) without charge for parts and repair labor.
To obtain repair or replacement within the terms of this Warranty, the product is to be delivered with proof of warranty coverage (e.g. dated bill
of sale), specification of defect(s), transportation prepaid, to an approved warranty station or the Company at the address shown below.
The warranty period will be extended to 24 months from the date of original purchase if the product is installed by an authorized Prestige Audio
dealer. To claim warranty service during this extended period, the bill of sale must specify that the product was installed by an authorized Prestige
Audio dealer.
This Warranty does not extend to the elimination of externally generated static or noise, to correction of antenna problems, to costs incurred
for installation, removal or reinstallation of the product, or to damage to tapes, compact discs, speakers, accessories, or vehicle electrical
systems.
This Warranty does not apply to any product or part thereof which, in the opinion of the Company, has suffered or been damaged through
alteration, improper installation, mishandling, misuse, neglect, accident, or by removal or defacement of the factory serial number/bar code
label(s). THE EXTENT OF THE COMPANY'S LIABILITY UNDER THIS WARRANTY IS LIMITED TO THE REPAIR OR REPLACEMENT
PROVIDED ABOVE AND, IN NO EVENT, SHALL THE COMPANY'S LIABILITY EXCEED THE PURCHASE PRICE PAID BY PURCHASER
FOR THE PRODUCT.
This Warranty is in lieu of all other express warranties or liabilities. ANY IMPLIED WARRANTIES, INCLUDING ANY IMPLIED WARRANTY
OF MERCHANTABILITY, SHALL BE LIMITED TO THE DURATION OF THIS WRITTEN WARRANTY. ANY ACTION FOR BREACH OF ANY
WARRANTY HEREUNDER INCLUDING ANY IMPLIED WARRANTY OF MERCHANTABILITY MUST BE BROUGHT WITHIN A PERIOD OF
30 MONTHS FROM DATE OF ORIGINAL PURCHASE. IN NO CASE SHALL THE COMPANY BE LIABLE FOR ANY CONSEQUENTIAL OR
INCIDENTAL DAMAGES FOR BREACH OF THIS OR ANY OTHER WARRANTY, EXPRESS OR IMPLIED, WHATSOEVER. No person or
representative is authorized to assume for the Company any liability other than expressed herein in connection with the sale of this product.
Some states do not allow limitations on how long an implied warranty lasts or the exclusion or limitation of incidental or consequential damage
so the above limitations or exclusions may not apply to you. This Warranty gives you specific legal rights and you may also have other rights
which vary from state to state.
U.S.A. : AUDIOVOX CORPORATION, 150 MARCUS BLVD., HAUPPAUGE, NEW YORK 11788 ! 1-800-645-4994
CANADA : CALL 1-800-645-4994 FOR LOCATION OF WARRANTY STATION SERVING YOUR AREA
© 2003 Audiovox Electronics Corporation, Hauppauge, N.Y. 11788
128-5543
128-6887
-12-
128-6887
12 of 12