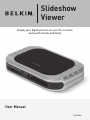
1
Slideshow
Viewer
Display your digital pictures on your TV—to share
easily with friends and family
User Manual
F5U229uk
Table of Contents
Table of Contents
1.
Introduction .........................................................................1
Features ...............................................................................2
System Requirements ..........................................................2
Package Contents ................................................................2
2.
Hardware Installation (TV) ..................................................5
3.
Using your Slideshow Viewer ..............................................6
4.
Hardware Installation (Computer) ......................................9
5.
Information ........................................................................11
Introduction
1
2
3
4
5
Congratulations and thank you for purchasing the Slideshow
Viewer from Belkin. This innovative device allows you to easily
watch digital pictures and video clips on your television, from the
convenience of your favorite family-room chair. Included photoediting software lets you create professional-looking slideshows
on your PC, complete with transitions and special effects. When
you’ve completed your slideshow, save it onto your media card
and pop the card into the Slideshow Viewer. Then, just connect
the Viewer to your TV and you’re ready to treat your friends
and family to your own photo show in comfort, right on your TV
screen. Slideshow Viewer’s remote lets you advance and rotate
images. Lightweight and easy to set up, the Viewer requires no
drivers or computer to operate.
Please review this User Manual carefully to ensure that you get
the most from this high-quality product.
Slideshow Viewer offers compatibility with the following
media cards:
• CompactFlash® Type I and Type II
• IBM® Microdrive™
• SmartMedia™ (SM)
• Secure Digital/Mini SD
• MultiMediaCard (MMC)
• Memory Stick® (MS)
• Memory Stick Pro™ (MS PRO)
1
EN
Introduction
Features
Display Interface
• Features embedded TV encoder (NTSC/PAL)
• Supports OSD function on TV
• Provides several image-display functions: Slide Show, Auto
Slide Show, Preview, Zoom, Rotate, and Delete
JPEG/Motion JPEG
• Provides built-in JPEG decoder by 4:4:4, 4:2:2, and 4:2:0
• Supports movie files (*.mov and *.avi) by 320x240x25
• Supports thumbnail-picture decompression
• Supports still-picture resolution up to 6M pixels
System Requirements
• TV with RCA video (NTSC or PAL) and 3.5mm audio connection
• Computer with available USB port (USB 2.0 port for Hi-Speed
Mode)
− Windows® 98 SE, Me, 2000, XP
− Mac OS® 9.x, X v10.2 or higher
Package Contents
• Slideshow Viewer
• Remote Control
• CD Driver
• User Manual
• Power Supply
• Audio Video Cable
• USB Cable
2
EN
1
2
3
4
5
Introduction
Front-Panel Description
1
1
2
3
4
5
2
1. Infrared Receiver
2. Media Card Access Port
Top View/Button Description
5
1
6
2
7
3
8
4
1. Up Key
2. Down Key
3. Left Key/Turn
Counterclockwise
4. Right Key/Turn Clockwise
3
5.
6.
7.
8.
EN
Play/Enter Key
ESC Key
Setup Key
Mode Key
Introduction
Back-Panel Description
3
1
1
2
3
4
1. DC 5V
2. USB Upstream Port
2
4
3. Video Out
4. Audio Out
5
Remote Control Description
Movie Playback
Speed Up
Movie Playback
Speed Down
Main Menu
Mode Switch
Slide Playback
Volume Up
Cancel/Escape
Volume Down
File Delete
Play/Enter
Move Cursor
Up/Down
Move Cursor
Left/Right
Setup Menu
Memory Card
Formatting
4
EN
Hardware Installation (TV)
1
2
3
4
5
1. Plug the AC adapter into the wall outlet or surge protector.
Plug the DC connector into the DC power jack on the rear of
the Slideshow Viewer.
2. Connect the audio video cable to the TV and or audio
system. Connect the yellow plug on the TV to the “Video In”
port; and the 3.5mm plug to your “Audio In” port. (If your
TV does not have a 3.5mm audio in port, you may require a
3.5mm-to-RCA audio adapter.)
3. Connect the audio video cables to the back of the
Slideshow Viewer.
4. Turn on the TV and change the input source on the TV to
the desired input channel (consult your TV manual for more
information on selecting the right source). When the correct
source is selected, a message prompting you to insert a
memory card will appear.
5. The Slideshow Viewer is now ready for use.
5
EN
Using your Slideshow Viewer
1. Insert your flash memory card into the corresponding media
slot. When a card is inserted properly, the LED will blink and
the Slideshow Viewer will read your media.
2. The memory-style menu will appear on your TV and display
your media type.
3. Choose the media you wish to show using the Slideshow
Viewer’s directional arrows. Once you have selected the
correct media, press the “Play” button.
4. Press the “Setup” button, which will switch you to the
“Setup” menu.
5. Press the “Format” button to format the selected media
for viewing.
6. After doing so, you will see the “Photo/Movie” menu on
the screen.
7. Press the up and down arrows to select “Photo” mode or
“Video” mode, then press “Play” to enter.
6
EN
1
2
3
4
5
Using your Slideshow Viewer
1
2
3
4
5
Photo Mode
1. In “Photo” mode, you can preview all the photos in the
selected memory card. Use the up, down, left, and right
arrows to navigate to the picture you wish to view.
2. Press “Play” once you have moved to the picture of
your choice.
• You can zoom in and out of a picture with the “Z+” or
“Z-” buttons.
3. You can press “Slide” to view a slideshow of all the pictures
in the current directory.
4. Press “ESC” to return to the previous menu and cancel
current action.
Movie Mode
1. In “Movie” mode, you can preview all the movies in the
selected memory card. Use the up, down, left, and right
arrows to navigate to the movie you wish to view.
2. Press “Play” once you have moved to the picture of
your choice.
• You can use the “Mode” button to switch from “Photo”
or “Movie” mode.
3. Use the “Speed Up” or “Speed Dn” buttons to adjust play
speed. Press “Play” to resume to normal speed.
4. Press “ESC” to return to the previous menu and cancel
current action
7
EN
Using your Slideshow Viewer
Delete Function
1. Use the up, down, left, and right arrows to navigate to the
photo or movie you wish to delete.
2. Press “Delete” to mark the picture or movie you want
to delete.
3. Press “ESC”.
4. A dialogue window will appear for you to confirm deletion.
Press “Play” to confirm. If you wish to cancel deletion,
press “ESC” again.
Setup Menu
1. Press the “Setup” button.
2. There are four functions for you to choose from in the
setup menu:
• TV system: NTSC (Taiwan, Japan, USA)/PAL (Hong Kong,
China, Europe)
• Slide: Allows you to adjust the speed of slide playback.
• Sound: Allows you to adjust the volume of movie.
• Language: Multi-language selection.
8
EN
1
2
3
4
5
Hardware Installation (Computer)
1
2
3
4
5
1. Connect the Slideshow Viewer’s USB plug to the USB port
on your computer or USB hub.
2. Windows will now detect your Slideshow Viewer and install
the required driver support. (The Windows “Install New
Hardware Wizard” may prompt you to provide your Windows
Installation CD to complete the driver installation process.
Some Windows 98 SE base computers will require extra
drivers, which are on the included CD.)
3. The Slideshow Viewer will be recognized as two individual
removable disk drives. To access the new drive(s), click the
“My Computer” icon found on your Windows desktop display.
When the “My Computer” window opens, you will see the
two new removable disk icons.
9
EN
About your Belkin Software | Product Features
Accessing Files and Data
1. Double-click the drive assigned to your media reader. A
window will open displaying the contents of the current
installed media card.
2. To move files to and from your disk, simply drag the file to
the alternate location or use other file-transfer methods that
are standard in your computer’s operating system.
Note: To avoid losing data or corrupting the card, NEVER
remove the card or disconnect the Slideshow Viewer when
the “Activity” LED is flashing or blinking.
1
2
3
4
5
6
7
8
9
10
10
EN
Information
1
2
3
4
5
FCC Statement
DECLARATION OF CONFORMITY WITH FCC RULES FOR
ELECTROMAGNETIC COMPATIBILITY
We, Belkin Corporation, of 501 West Walnut Street, Compton, CA 90220, declare
under our sole responsibility that the product,
F5U229uk
to which this declaration relates,
Complies with Part 15 of the FCC Rules. Operation is subject to the following two
conditions: (1) this device may not cause harmful interference, and (2) this device
must accept any interference received, including interference that may cause
undesired operation.
CE Declaration of Conformity
We, Belkin Corporation, declare under our sole responsibility that the F5U229, to which
this declaration relates, is in conformity with Generic Emissions Standard EN55022:1998
Class B, EN50081-1, and with Generic Immunity Standard EN50082-1:1992.
Belkin Corporation Limited Lifetime Product Warranty
What this warranty covers.
Belkin Corporation warrants to the original purchaser of this Belkin product that the
product shall be free of defects in design, assembly, material, or workmanship.
What the period of coverage is.
Belkin Corporation warrants the Belkin product for the lifetime of the product.
What will we do to correct problems?
Product Warranty.
Belkin will repair or replace, at its option, any defective product free of charge (except for
shipping charges for the product).
What is not covered by this warranty?
All above warranties are null and void if the Belkin product is not provided to Belkin
Corporation for inspection upon Belkin’s request at the sole expense of the purchaser,
or if Belkin Corporation determines that the Belkin product has been improperly installed,
altered in any way, or tampered with. The Belkin Product Warranty does not protect
against acts of God (other than lightning) such as flood, earthquake, war, vandalism,
theft, normal-use wear and tear, erosion, depletion, obsolescence, abuse, damage due
to low voltage disturbances (i.e. brownouts or sags), non-authorized program, or system
equipment modification or alteration.
11
EN
Information
How to get service.
To get service for your Belkin product you must take the following steps:
1.
Contact Belkin Corporation at 501 W. Walnut St., Compton CA 90220, Attn:
Customer Service, or call (800)-223-5546, within 15 days of the Occurrence.
Be prepared to provide the following information:
1
2
a. The part number of the Belkin product.
3
b. Where you purchased the product.
c. When you purchased the product.
d. Copy of original receipt.
2.
Your Belkin Customer Service Representative will then instruct you on how to
forward your receipt and Belkin product and how to proceed with your claim.
Belkin Corporation reserves the right to review the damaged Belkin product. All costs of
shipping the Belkin product to Belkin Corporation for inspection shall be borne solely by
the purchaser. If Belkin determines, in its sole discretion, that it is impractical to ship the
damaged equipment to Belkin Corporation, Belkin may designate, in its sole discretion,
an equipment repair facility to inspect and estimate the cost to repair such equipment.
The cost, if any, of shipping the equipment to and from such repair facility and of such
estimate shall be borne solely by the purchaser. Damaged equipment must remain
available for inspection until the claim is finalized. Whenever claims are settled, Belkin
Corporation reserves the right to be subrogated under any existing insurance policies the
purchaser may have.
How state law relates to the warranty.
THIS WARRANTY CONTAINS THE SOLE WARRANTY OF BELKIN CORPORATION,
THERE ARE NO OTHER WARRANTIES, EXPRESSED OR, EXCEPT AS REQUIRED BY
LAW, IMPLIED, INCLUDING THE IMPLIED WARRANTY OR CONDITION OF QUALITY,
MERCHANTABILITY OR FITNESS FOR A PARTICULAR PURPOSE, AND SUCH
IMPLIED WARRANTIES, IF ANY, ARE LIMITED IN DURATION TO THE TERM OF THIS
WARRANTY.
Some states do not allow limitations on how long an implied warranty lasts, so the above
limitations may not apply to you.
IN NO EVENT SHALL BELKIN CORPORATION BE LIABLE FOR INCIDENTAL, SPECIAL,
DIRECT, INDIRECT, CONSEQUENTIAL OR MULTIPLE DAMAGES SUCH AS, BUT NOT
LIMITED TO, LOST BUSINESS OR PROFITS ARISING OUT OF THE SALE OR USE OF
ANY BELKIN PRODUCT, EVEN IF ADVISED OF THE POSSIBILITY OF SUCH DAMAGES.
This warranty gives you specific legal rights, and you may also have other rights,
which may vary from state to state. Some states do not allow the exclusion or limitation
of incidental, consequential, or other damages, so the above limitations may not apply
to you.
12
EN
4
5
Slideshow
Viewer
Belkin Tech Support
US: 800-223-5546, ext. 2263
310-898-1100, ext. 2263
Europe: 00 800 223 55 460
Australia: 1800 235 546
New Zealand: 0800 235 546
Belkin Corporation
501 West Walnut Street
Los Angeles, CA 90220, USA
310-898-1100
310-898-1111 fax
Belkin B.V.
Boeing Avenue 333
1119 PH Schiphol-Rijk, The Netherlands
+31 (0) 20 654 7300
+31 (0) 20 654 7349 fax
Belkin Ltd.
7 Bowen Crescent, West Gosford
NSW 2250, Australia
+61 (0) 2 4372 8600
+61 (0) 2 4372 8603 fax
Belkin Ltd.
Express Business Park, Shipton Way
Rushden, NN10 6GL, United Kingdom
+44 (0) 1933 35 2000
+44 (0) 1933 31 2000 fax
© 2006 Belkin Corporation. All rights reserved. All trade names are registered trademarks of
respective manufacturers listed. Mac OS is a trademark of Apple Computer, Inc., registered in
the U.S. and other countries.
P75149uk