1
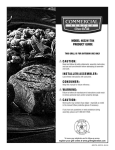
4654870
ASSEMBLY/USE & CARE
MANUAL
UL
®
FOR OUTDOOR HOUSEHOLD USE ONLY. DO NOT
USE INDOORS OR FOR COMMERCIAL COOKING.
CAUTION: Read and follow all safety statements, assembly
instructions and use and care directions before attempting to
assemble and cook.
INSTALLER/ASSEMBLER: Leave these instructions with
consumer.
CONSUMER: Keep this manual for future reference.
! WARNING
Failure to follow all manufacturer’s instructions could result in
serious personal injury and/or property damage.
! CAUTION
Some parts may contain sharp edges — especially as noted in
the manual! Wear protective gloves if necessary.
If you have any questions or need assistance during
assembly, please call 1-800-241-7548.
Visit us on the web at: www.charbroil.com
C O L U M B U S , G A
© 2005 W. C. Bradley Co., All Rights Reserved
4654870 / 0–4165494 (02-02-05)
Printed in USA
Call Grill Service Center For Help And Parts
• If you need help or warranty parts call 1-800-241-7548.
Business hours: Open 24 hours – Seven days a week.
• To order non-warranty replacement parts or accessories (grill
cover, cleaners, paint) call 1-800-993-2677 or send a FAX to
1-706-565-2121.
IMPORTANT: Fill out the warranty information below.
Model Number
Serial Number
See rating label on grill for serial number.
Date Purchased
Safety Symbols
The symbols and boxes shown below explain what each heading
means. Read and follow all of the messages found throughout the
manual.
DANGER
DANGER: Indicates an imminently hazardous situation which, if not
avoided, will result in death or serious injury.
WARNING
WARNING: Be alert to the possibility of serious bodily injury if the
instructions are not followed. Be sure to read and carefully follow all of
the messages.
CAUTION
CAUTION: Indicates a potentially hazardous situation which, if not
avoided, may result in minor or moderate injury.
Certified Grill Parts And Accessories®, Char-Broil and Design®, Char-Broil (Gas Grill Briquettes)®, CharDiamonds®, Cooking Zone and Design®, Diamond Flame®, Executive Chef®, Faststart®, Flare Fighter®,
FlavorMaster®, Gas Grill Silouette and Design®, H2O Smoker®, Lava Flame®, MasterFlame®, MasterFlame Precision
Cooking System®, PowerSpark®, Quantum®, PrecisionFlame and Design®, Sierra® and TruFlame® are registered
Trademarks of the W.C. Bradley Company. Thermos® is a registered trademark of the Thermos Company and its
affiliates.
Artisan Collectiion by Char-Broil™, C3 and Design™, Char-Broil and Design™, Flame Design™, FlavorTents™,
Grill 2 Go™, Grillin’ Stick™, Keeper of the Flame™, Keepers of the Flame™, Natural Grip™, Outdoor Cooking
Collection and Design™, Patio Bistro™, PrecisionFlame™, Pro-Check™, QuickSet Grills and Design™,
SmokerTents™, The Big Easy™. The Minute Grill™, The Edge™, The Tuscan Collection™, and The Urban Grill™ are
Trademarks of the W.C. Bradley Company. Universal Grill Parts and Design™ is a trademark of the Thermos Company
and its affiliates.
Protected under one or more of the following U.S. Patents: 4,598,692; 4,624,240; 4,747,391; 4,747,391;
4,817,583; 4,924,846; 4,989,579; 5,003,960; 5,076,256; 5,076,257; 5,090,398; 5,109,834; 5,224,676; 5,277,106;
5,421,319; 5,441,226; 5,452,707;5,458,309; 5,566,606; 5,579,755; 5,582,094; 5,613,486; 5,649,475; 5,706,797;
5,711,663; 5,765,543; 5,931,149; 5,996,573; 6,095,132; 6,135,104; 6,173,644; 6,279,566; 6,397,731;
6,418,923;6,439,222; 6,523,461; D282,619; D339,714; D341,292; D343,337; D358,059; D361,466; D364,535;
D372,637; D373,701; D377,735; D383,035; D397,910; D405,643; D405,643; D406,005; D406,009; D413,043;
D413,229; D413,229; D414,982; D415,388; D416,164; D416,441; D417,587; D422,516; D423,274; D423,876;
D428,303; D435,396; D463,004; D438,059; D438,060; D438,427; D439,110; D442,505; D443,179; D443,354;
D447,384; D447,385; D447,909; D448,610; D448,614; D448,615; D448,616; D448,975; D449,492; D451,759;
D456,202S; D460,313; D461,359 and D477,501. Canada: 87743; 87744; 92607; 92608 and 1,316,424. Other Patents
Pending. ©2005 W. C. Bradley Co., All Rights Reserved.
Thermsulate® is a registered trademark of ATD, Corp. Insulation bowl and application covered by U.S. Patents 5011743,
5111577, and other Patents pending.
2
IMPORTANT SAFEGUARDS
DANGER
ELECTRIC SHOCK CAN KILL OR RESULT IN SERIOUS
INJURY
To prevent electrical shock:
• Use only with GFI (Ground Fault Interrupter) protected circuit.
• Do not use grill when raining.
• To prevent grill from being splashed or falling into water, do not
use grill within 10 feet of a pool, pond or other body of water.
• Keep grill and electric controller dry and out of rain at all times.
• When connecting controller to grill, plug electric controller into grill
first, make sure controller is set to OFF, then plug into outlet.
When unplugging, turn controller to OFF, disconnect from outlet,
then remove controller from grill.
• Unplug grill when not in use and before moving.
• Do not operate grill with an electric controller that has a damaged
cord, plug or metal probe. Call Char-Broil for a replacement
controller. The electric controller is made specifically for this grill.
• Never remove grounding plug or use with an adapter to two
prongs.
• Keep electric plugs off ground and dry.
• Never put controller, cord or heating element in water or any other
liquid.
• Do not allow cord to touch hot grill.
• Store controller indoors when not in use.
• Do not use water or other liquid spray to clean product without first
unplugging electric controller and removing heating element.
SAVE THESE INSTRUCTIONS
WARNING
Do not use 16 or 18 gauge extension cords. Damage to household
wiring and/or fire could result.
DO NOT USE CHARCOAL. A charcoal fire will result and the grill is
not designed for charcoal. The fire will create an unsafe condition and
damage the grill.
CAUTION
This grill is for residential use only. Do not use for commercial
cooking.
GENERAL SAFETY
1. Do not touch hot surfaces with unprotected hands. Use
handles and knobs provided for operation.
2. Never leave grill unattended when ON.
3. Keep children away from grill both when hot and cold.
4. Use long barbeque utensils for cooking.
5. Allow grill to cool before moving, cleaning or storing.
6. Do not cook under a roof.
7. Keep grill 24” (2 feet) away from
walls and rails.
8. For outdoor household
use only. Do not use
)
1M
. (.6
2FT
indoors or for commercial
OR
”
4
2
cooking.
9. Use only ceramic briquettes
similar to those provided
with the grill.
10. Do not use or store gasoline,
kerosene, or other flammable liquids within 20 feet
of this grill when in use.
11. Store grill in weather protected area or under grill cover
when not in use and electric controller indoors when not
in use.
12. Use only accessory attachments recommended by
manufacturer.
13. It is the responsibility of the assembler/owner to
assemble, install and maintain grill.
24
”O
R2
FT
. (.6
1M
)
EXTENSION CORD USE AND SAFETY
• For best grill performance use of extension cord is not
recommended.
If you must use an extension cord for your safety:
• Use only outdoor type with 3 prong grounding plug, rated for 15
amperes or more, approved by UL, marked with a W-A and a
tag stating “Suitable for Use with Outdoor Appliance”.
• Use the shortest length extension cord required. Do not connect
2 or more extension cords together. A 12 or 14 gauge extension
cord of 50 ft. or less is acceptable.
• Keep connections dry and off ground.
• Do not let cord hang over edge of table top or other items where
it can be pulled by children or tripped over.
GROUND FAULT INTERRUPTER
•Since 1971 the National Electric Code (NEC) has required
Ground Fault Interrupter devices on all outdoor circuits.
• If your residence was built before 1971, check with a qualified
electrician to determine if a Ground Fault Interrupter protector
exists.
• Do not use this appliance if the circuit does not have GFI
protection.
• Do not plug this appliance into an indoor circuit.
Warranty
Char-Broil guarantees the Char-Broil® Electric Patio Caddie™
shall be free from defects in both material and workmanship under
normal and reasonable use (and correct assembly as assembled by
the consumer-purchaser) by the original purchaser, for outdoor
household use, for the following periods as specified herein:
(1) Porcelain top and bottom, legs, base - for five (5) years from
the date of purchase.
(2) Electrical control and heating element - for a period of three
(3) years from the date of purchase.
(3) All other parts including handles, wheels and temperature
gauge - for a period of one (1) year from the date of purchase.
If the product fails to operate due to manufacturing defect the
defective part will be repaired or replaced at Char-Broil’s option. The
product, along with proof of purchase, must be returned postage
prepaid.
If you wish to obtain performance of any obligation under this
limited warranty, you should write to: Char-Broil, Consumer Warranty
/ P. O. Box 1240, Columbus, GA 31902-1240
Char-Broil may require reasonable proof of purchase and we
suggest you keep your receipt. In the state of California only, if
refinishing or replacement of the product is not commercially
practicable, the retailer selling this product or Char-Broil will refund the
purchase price paid for the product, less the amount directly
attributable to use by the original consumer-purchaser prior to
discovery of the nonconformity. In addition, in the state of California
only, you may take the product to the retail establishment from which it
was purchased or to any retail establishment selling this product in
order to obtain performance under this warranty.
This warranty does not include the cost on any inconvenience or
property damage due to failure of the product and does not cover
damage due to misuse, abuse, accident, damage arising out of
transportation of the product, or damage incurred through commercial
use of the product. This express warranty is the sole warranty given by
the manufacturer and is in lieu of all other warranties, express or
implied, including implied warranty of merchantability or fitness for a
particular purpose. Neither CharBroil dealers nor the retail
establishment selling this product has any authority to make any
warranties or to promise remedies in addition to or inconsistent with
those stated above. Char-Broil’s maximum liability, in any event, shall
not exceed the purchase price of the product paid by the original
consumer-purchaser. Some states do not allow the exclusion or
limitation of incidental or consequential damages. So the above
limitations or exclusions may not apply to you. This warranty gives you
specific legal rights and may also have other rights which vary from
state to state.
WARNING
Use care when operating your grill. Be sure you read and
understand all the information and safeguards in this manual
before operating this grill.
3
Parts List
Key Qty. Description
Part #
A.......1 .......Base .......................................................................4154381
B.......1 .......Cooking Grate ........................................................4152860
C ......1 .......Element Assembly..................................................4159277
D ......1 .......Grill Bottom.............................................................4509581
E.......1 .......Grill Lid ...................................................................4509582
F.......1 .......Control Leg w/Slot ..................................................4302497
G ......1 .......Leg .........................................................................4302534
H ......1 .......Leg w/Logo.............................................................4525611
I ........1 .......Briquette Grate .......................................................4156128
J .......1 .......Top Insulation Bowl ................................................4152826
K.......1 .......Bottom Insulation Bowl...........................................4152827
L .......1 .......Controller................................................................4150235
M ......1 .......Leg Handle .............................................................4150357
N ......1 .......Temperature Gauge w/Wing Nut ............................4157142
O ......3 .......Lid Hangers ............................................................4154245
P.......1 .......Lid Handle ..............................................................4154399
Q ......1 .......Grease Cup ............................................................5156609
R ......1 .......Grease Clip ............................................................5156610
- -......1 .......Briquette Bag..........................................................4158125
- -......1 .......Hardware, Misc ......................................................4253860
- - 1 .......Hardware, Elec. #10...............................................4254040
P
N
J
E
B
O
O
C
M
O
I
D
L
R
K
Q
H
A
4
F
G
1
Necessary tools for assembly of your grill include a
Phillips screwdriver, adjustable wrench or pliers.
(A 3/8” nut driver would be ideal).
Items to Assemble
1 Grill Lid
1 Lid Handle
2 Machine Screws
2 Lock Nuts
Nylon insert
Qty: 2
Qty: 2
A Place handle on lid.
Important: Tighten both nuts securely at this time. You will be
unable to tighten these items once the insulation bowl is attached.
2
Items to Assemble
1 Temperature Gauge
1 Top Insulation Bowl
1 Flat Washer
1 Wing Nut
Qty: 1
Qty: 1
A Place temperature gauge. Hold it in place as you turn lid upside down.
B Note: Be sure hole in top insulation bowl is aligned with temperature
gauge. Attach wing nut “DO NOT TIGHTEN” until after Step 3.
A
A
B
3
Items to Assemble
3 Lid Hangers
3 Self-tap Screws
A Place lid hanger bracket on upper lip of insulation
Qty: 3
bowl. Note: Adjust insulation bowl as necessary to align.
B Tighten wing nut.
Lower end of lid hanger
bracket must rest on upper
A
lip of insulation bowl.
4
Items to Assemble
1 Grill Bottom
1 Bottom Insulation Bowl
A Fold flaps inwards and upwards (90 degrees) so they are horizontal
B Align rectangular slots
C Push insulation bowl tabs down and under to temporarily hold bowl in
place while you work.
A
B
Repeat for all three holes
C
5
5
Items to Assemble
1 Control Leg w/Slot
2 Machine Screws
2 Hex Nuts (keps)
2 Tee Nuts
6
Qty: 2
Qty: 2
Qty: 2
A Align rectangular slots
B Attach machine screws into leg, attach hex nuts onto screws.
(Hex nuts will be between leg and grill bottom). Only finger tighten
hex nuts.
C Insert screws/hexnuts into grill bottom , attach tee nuts.
Items to Assemble
1 Leg w/Logo
1 Handle
1 Plain Leg
4 Machine Screws
4 Hex Nuts (keps)
4 Tee Nuts
Qty: 4
Qty: 4
A Attach handle to leg with logo. Only finger tighten hex nuts.
B Attach leg with handle to grill bottom. Tighten tee nuts.
C Attach plain leg with machine screws, finger tighten hex
nuts between leg and grill bottom. Tighten tee nuts.
Logo Leg
A
B
Plain Leg
B
C
A
A
7
Items to Assemble
1 Base
6 Machine Screws
6 Hex Nuts (keps)
Qty: 4
C
Turn upside down to assemble base.
A NOTE: Leg with handle must be opposite wheels in base.
B Slide legs into slots in base support, attach each leg with screws and nuts
Qty: 2
Qty: 2
B
Attach each leg using
screws and nuts as shown.
Leg with handle must be
opposite wheels in base.
A
Complete upright view
6
8
Items to Assemble
1 Briquet Grate
Ceramic Briquets
CAUTION
Do not use more than 10 ceramic briquets and replace
frequently. Persistent grease fires can result.
See Use and Care section on Controlling Grease Fires.
Note pattern of briquets.
Use 10 or less ceramic
9
Items to Assemble
1 Element Assembly
2 Self-Tap Screws
2 Insulator Washers
A IMPORTANT: Orient heating element so that the notch is on top. (”BOTTOM” is stamped on underside of
bracket.)
B Slide element bracket through slot in side of insulation bowl and into rectangular slot in grill body. Element
bracket mounts snugly against inside of grill body. Push insulation side flaps down flush with bowl.
Qty: 2
Qty: 2
A
B
7
10
Items to Assemble:
1 Cooking Grate
A Cooking grate rests on tee nuts.
A
11
Items to Assemble:
1 Grease Clip
1 Grease Cup
NOTE: Legs not shown for clarity
A IMPORTANT: Bend tabs of insulation bowl straight down toward grease
cup to avoid grease spillage.
B Clip grease cup bracket onto bar at notches
B
8
A
12
Items to Assemble:
1 Controller
A Insert controller into element bracket.
B Remove protective film from controller prior to use.
C Raised lip of controller should be inserted until it is snug against element bracket.
Raised Lip
Element Bracket
A
B
Protective Film
Raised Lip
C
Ensure that controller knob is fully rotated
counterclockwise to the OFF position prior to
plugging controller into grill and outlet.
Top View
Congratulations, you have now completed the assembly of your grill. You can now look
forward to hours of enjoyable cooking. For your safety and optimum grill performance finish
reading the instructions on the following pages before using your new grill.
NOTE:
You may have hardware left over after completing assembly of your grill. This is normal as in some cases we have included extra
hardware to ensure that you have enough.
9
USE AND CARE OF YOUR GRILL
Before first use of grill:
• Remove all packaging and sale labels from the grill. Do not use sharp
tools to remove stickers.
• Wash cooking grate with warm soapy water, rinse and dry throughly.
Before each use of grill:
• Use grill only on a firm and level surface to prevent tipping over.
• To prevent household circuit breakers from tripping, keep electric
controller dry and do not use other electrical products on the same
circuit.
• Check grease cup to make sure it is empty and is mounted under the
drain hole.
• For stick-free cooking, apply a thorough coating of vegetable oil or
vegetable oil based spray to the cooking grate.
Turn grill on:
• Ensure electrical controller is turned fully counterclockwise to OFF
position.
• Plug power supply cord into a properly grounded, GFI protected
outlet. If extension cord must be used refer to “Extension Cord Use
and Safety” on page 3.
• With controller fully seated in grill, turn knob clockwise. Indicator light
should come on.
Preheating the grill:
• Keep lid closed.
• Preheat for searing, 15-20 minutes with controller set to MAX. ( See
illustration below)
• For foods requiring a lower cooking grate temperature use a setting
lower than maximum. See cooking chart.
• When the controller light turns off, the maximum temperature has
been reached for the knob setting. During use this light will cycle
on and off.
OFF
MAX
Align settings on controller knob with
light/pointer on controller casing as shown
Grilling:
• For best results, cook with lid on the grill to hold in heat and provide
complete cooking.
• Temperature gauge on the lid indicates approximate cooking
temperature inside the grill.
• During initial cooking phase it is common for the gauge to show the
temperature falling below original preheat value. As time continues
temperature will rise somewhat, indicating food is being properly
heated and cooked.
• Controller setting for various foods are dependant upon conditions
and personal cooking preferences.
10
CAUTION
Do not use sharp or pointed tools to clean grill. These type cleaning
tools may tear or puncture the insulation bow.
Do not use abrasive oven cleaners, steel wool or metal brushes to
clean porcelain grates or grill body. They will damage the finish.
Replace damaged insulation bow(s) only with Char-Broil certified
replacement parts. Do not attempt to repair damaged parts.
DANGER
In case of fire turn controller to OFF, unplug grill from outlet and allow
fire to burn out. Do not use water to put out a fire in this or another
electrical appliance.
To avoid electrical shock disconnect electric cord and remove electric
controller before removing heating element and cleaning grill. Never
immerse electric controller or heating element in any liquid.
To avoid the possibility of burns be sure grill is cool before removing
and/or cleaning electric controller and heating element.
Controlling grease fires:
Although some flare-up is desirable as burning juices give meat that char
-broiled flavor; too much flare-up can result in a fire hazard and overcook
meat. To aid in controlling grease fires use the following precautions:
• Keep grill free from grease; chance of fire is greatly increased by
grease buildup.
• Use 10 ceramic briquets maximum. Replace or remove greasy
briquets to avoid grease fires.
• Removing briquets and grate, or reducing number of briquets to 5 will
decrease chances of flare-up.
• Trim excess fat off meat and use less fatty cuts of meat to reduce
chance of grease fires.
• If flare-up occurs during cooking reduce controller setting and close
lid.
• If flare-up continues turn controller to OFF and unplug the power
cord.
Turn grill off:
• Turn controller knob fully counterclockwise to OFF position.
• Unplug cord from outlet.
• Remove controller from grill and store indoors.
Cleaning electrical controller and heating element bracket:
• Clean controller case by wiping with a damp cloth using a mild
detergent or hot soapy water.
• It is not necessary to clean the heating element. However, the
element bracket may be cleaned with a damp cloth using a mild
detergent or hot soapy water.
• Dry electrical controller and heating element before use.
Cleaning your grill:
Excess build up of burned grease and food particles will reduce the grill’s
cooking performance. To obtain optimum performance.
• Clean the lower insulation bowl at least once a season, more often
with heavy use.
Note: The insulation bowl will darken as it becomes seasoned. Do
not attempt to restore a shiny or aluminum appearance when
cleaning.
• Best results are obtained by brushing particle buildup downward and
through drain hole in bottom of grill.
• Using a mild detergent or hot soapy water, moderately scrub surface
of the lower insulation bowl with a plastic or brass bristle brush.
• Clean porcelain grates regularly with warm soapy water or a baking
soda and water solution. Use non-abrasive scouring powder for
stubborn stains.
• Clean porcelain lid and body with a non-abrasive cleaner. Use Cream
of Tarter for stubborn stains.
• Replace ceramic briquets as frequently as necessary to avoid grease
buildup and flare-ups.
• Replacement of flavored ceramic briquets will restore hickory smoke
and charcoal flavor.
Food safety:
• Food safety is a very important part of enjoying the outdoor cooking
experience. To keep food safe from harmful bacteria, follow these
four basic steps:
Clean: Wash hands, utensils, and surfaces with hot soapy water before
and after handling raw meat and poultry.
Separate: Separate raw meats and poultry from ready-to-eat foods to
Avoid cross contamination. Use a clean platter and utensils when
removing cooked foods.
Cook: Cook meat and poultry throughly to kill bacteria. Use a
Thermometer to ensure proper internal food temperatures.
Chill: Refrigerate prepared foods and leftovers promptly.
•
For more information call: USDA Meat and Poultry Hotline at 1-800535-4555. In Washington DC 1-202-720-3333—10:00 am - 4:00 pm
Eastern time.
Storing your grill:
• Clean cooking grates and discard old briquets.
• Remove electric controller from grill. Store controller indoors.
• Store grill in weather protected area or under grill cover when not in
use.
11
Troubleshooting
Problem
Grill not heating
Possible Cause
Prevention/Solution
• Controller turned off.
• Turn controller knob to maximum setting.
• No power.
• Be sure controller is fully seated in heating element bracket and grill is
properly plugged into outlet.
• Check for tripped household circuit breakers or GFI (Ground Fault
Interrupter). Reset or replace if necessary.
• Try another outlet.
Circuit breaker trips or
fuse blows
Grill will not cook
properly
Flare-ups
Controller indicator light
is OFF
Persistent grease fire
• Faulty controller or heating element.
• Replace controller or heating element.
• Power surge.
• Turn controller to OFF position before plugging into electrical outlet.
• Another appliance plugged into same circuit as grill.
• Do not use other electrical appliances on the same circuit.
• Moisture or water in controller or electrical
connections.
• Keep controller and all electrical connections dry. Do not operate unit when
raining.
• Damaged cord or electrical connections.
• Replace damaged controller or extension cord.
• Lid off of grill.
• Place lid on grill while cooking.
• Insufficient preheat or temperature set too low.
• Preheat 15-20 minutes. Increase controller setting.
• Inappropriate extension cord.
• Replace with appropriately rated cord (15 amps).
• Excessive buildup on insulation bowl.
• Clean lower insulation bowl.
• Too many ceramic briquets.
• Use 10 ceramic briquets maximum.
• Excess fat in meat.
• Trim fat from meat before grilling.
• Excessive cooking temperature.
• Adjust (lower) temperature as needed.
• Grease build up.
• Clean grill and replace briquets (10 maximum).
• Normal controller cycling.
• Increase knob setting or wait for light to cycle on.
• No power.
• See “Grill not heating”.
• Faulty controller.
• Replace controller or heating element.
• Grease trapped by food build up.
• Turn controller knob to OFF. Keep lid on and let fire burn out. After grill
cools, remove briquets and clean insulation bowl.
• Grease soaked briquets.
• Replace with fresh briquets.
• Do not apply water to fire. Personal injury may result.
12
Electric Patio Caddie Cooking Chart
Cooking Zones
Cooking times and temperatures may vary according to specific
recipes, cooking conditions, or barbecue equipment used. Take
this into consideration to insure best results.
First preheat on HIGH to maximum sustained temperature. Then
place food on grill and adjust controller to obtain desired
temperature on cooking chart below.
Vegetables
Pork Chops
Fish
Steaks
Hamburgers
Zone II
Chicken Parts
Whole Chicken
Corn on the Cob
Zone I
Zone II
Size/Quantity
Item
Time
Temperature
Zone
Steak
(T-bone, ribeye, sirloin,
Filet mignon, etc.
1 inch
500°F - 600°F
Rare: 7-10 minutes
Medium: 12-15 minutes
Well: 18-20 minutes
I
Steak
(T-bone, ribeye, sirloin,
Filet mignon, etc.
1/2 inch
500°F - 600°F
Rare: 6-7 minutes
Medium: 8-10 minutes
Well: 12 minutes
I
Hamburgers
1/2 inch
450°F - 500°F
Medium: 8 minutes
Medium/Well: 10 minutes
Well: 12 minutes
I
Pork Chop
1 inch
350°F - 450°F
25 minutes,
Internal temp. 160°F
I Dry Rub II* Marinade
Pork Chop
1/2 inch
350°F - 450°F
20 minutes
Boneless, Skinless,
Chicken Breast
8 ounces
350°F - 375°F
10 minutes per side
I Dry Rub II* Marinade
I Dry Rub II* Marinade
Whole Chicken
1 each
350°F - 375°F
10 minutes per pound
Internal temp. 180°F
Tuna/Sword Fish
1 inch - 8 ounces
350°F - 450°F
Rare: 7 minutes
Medium: 12 minutes
Well: 15 minutes
II
Whole Rainbow Trout Filet
8 ounces
350°F - 450°F
8-12 minutes
II
Shrimp, Medium,
Peeled and de-veined
8 ounces
400°F - 425°F
3-5 minutes
II
Corn on Cob
1 each
350°F - 400°F
30 minutes
Baking Potatoes
1 each
350°F - 400°F
1 hour
Mushrooms, Button, Whole
8 ounces
350°F - 400°F
6 minutes
Yellow Onions
1 each
350°F - 400°F
12-15 minutes
Tomatoes
Half
350°F - 400°F
15 minutes
Zucchini/Yellow Squash,
1 medium size
350°F - 400°F
8-10 minutes
*Increase cooking time 5 minutes or to desired doneness.
*
I Dry Rub II Marinade
II
II
II
II
II
II
13
PAGE BLANK
INTENTIONALLY
14
Please register your grill online at:
WWW.GRILLREGISTRATION.COM
(If you register online, you do not need to send in this registration card.)
15
STOP
Should you encounter any problem
CALL US FIRST
Do not return this product to the store.
WE CAN HELP
1-800-241-7548
24 Hours a Day - 7 Days a week
GRILL SERVICE CENTER
Recipe for Grilling Safely
q Read all Owner’s Manuals
q Complete Warranty Card
q Ensure control knob is on
OFF position
Thank You for Your Purchase!
16
Merci de votre achat
q Lisez tous les manuels d’utilisation
q Remplissez la carte de garantieEnsure
q Assurez-vous que les bouton de commande sont
en position OFF
q Effectuez un essai d’étanchéité
Recette pour grillade en toute sécurité
SERVICE APRÈS-VENTE
DU GRILL
24 heures sur 24 - 7 jours sur 7
1-800-387-6057
NOUS POUVONS VOUS AIDER.
En cas de problème
CONTACTEZ NOUS D’ABORD.
e ramenez pas ce produit au magasin.
ARRÊTEZ