1
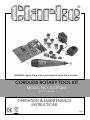
WARNING: Read these instructions before using the machine
CORDLESS ROTARY TOOL KIT
MODEL NO: CCRT266
PART NO: 6461901
OPERATION & MAINTENANCE
INSTRUCTIONS
LS0911
INTRODUCTION
Thank you for purchasing this cordless rotary tool kit.
Please read this manual thoroughly, before attempting to operate, and carefully follow
all instructions given.
It is vitally important that ALL precautions are taken, as specified, which will not only
provide protection for yourself and that of others around you, but will also ensure that
the product will give you long and satisfactory service.
GUARANTEE
This CLARKE product is guaranteed against faulty manufacture for a period of 12
months from the date of purchase. Please keep your receipt as proof of purchase.
This guarantee is invalid if the product is found to have been abused or tampered with
in any way, or not used for the purpose for which it was intended.
Faulty goods should be returned to their place of purchase, no product can be
returned to us without prior permission.
This guarantee does not effect your statutory rights.
SPECIFICATIONS
Operating Voltage:
9.6 V-DC
Battery charge time
3 Hours
No-Load Speed
8000-20000 rpm
Collet Capacity
1 x 1/16”
1 x 3/32”
2 x 1/8” (3.175 mm)
Sound Pressure Level
LpA
88.5 dB
Sound Power Level
LWA
99.5 dB
Vibration
Less than 2.5 m/s2
Dimensions (L x W x H)
235 x 60 x 45 mm
Weight (kg)
1.7 kg
Part Number
6461901
2
Parts & Service: 020 8988 7400 / E-mail: [email protected] or [email protected]
SAFETY PRECAUTIONS
WARNING: READ ALL INSTRUCTIONS. FAILURE TO FOLLOW ALL
INSTRUCTIONS LISTED BELOW MAY RESULT IN ELECTRIC SHOCK, FIRE AND/
OR SERIOUS INJURY. THE TERM “POWER TOOL” IN ALL WARNINGS LISTED
BELOW REFERS TO YOUR BATTERY OPERATED (CORDLESS) POWER TOOL.
WORK AREA
1. Keep work area clean and well lit. Cluttered and dark areas invite accidents.
2. Do not operate power tools in explosive atmospheres, such as in the
presence of flammable liquids, gases or dust. Power tools create sparks which
may ignite the dust or fumes.
3. Keep children and bystanders away while operating a power tool.
Distractions can cause you to lose control.
ELECTRICAL SAFETY
1. Avoid body contact with earthed or grounded surfaces such as pipes,
radiators, ranges or refrigerators. There is an increased risk of electric shock if
your body is earthed or grounded.
2. Do not expose power tools to rain or wet conditions. Water entering a power
tool will increase the risk of electric shock.
3. When operating a power tool outdoors, use an extension cord suitable for
outdoor use. Use of a cord suitable for outdoor use reduces the risk of electric
shock.
PERSONAL SAFETY
1. Stay alert, watch what you are doing and use common sense when
operating a power tool. Do not use a power tool while you are tired or under
the influence of drugs, alcohol or medication. A moment of inattention while
operating power tools may result in personal injury.
2. Use safety equipment. Always wear eye protection. Safety equipment such as
dust mask, non-skid safety shoes, or hearing protection used for appropriate
conditions will reduce personal injuries.
3. Avoid accidental starting. Ensure the switch is in the off position before
inserting the battery.
4. Remove any adjusting key or wrench before turning the power tool on. A
wrench or a key left attached to a rotating part of the power tool may result in
personal injury.
3
Parts & Service: 020 8988 7400 / E-mail: [email protected] or [email protected]
5. Do not overreach. Keep proper footing and balance at all times. This enables
better control of the power tool in unexpected situations.
6. Dress properly. Do not wear loose clothing or jewellery. Keep your hair,
clothing and gloves away from moving parts. Loose clothes, jewellery or long
hair can be caught in moving parts.
POWER TOOL USE AND CARE
1. Do not force the power tool. Use the correct power tool for your application.
The correct power tool will do the job better and safer at the rate which it was
designed.
2. Do not use the power tool if the switch does not turn it on and off. Any power
tool that cannot be controlled with the switch is dangerous and must be repaired.
3. Disconnect the battery before making any adjustments, changing
accessories, or storing power tools. Such preventive safety measures reduce
the risk of starting the power tool accidentally.
4. Store idle tools out of the reach of children and do not allow persons
unfamiliar with the power tool or these instructions to operate the power
tool. Power tools are dangerous in the hands of untrained users.
5. Maintain power tools. Check for misalignment or binding of moving parts,
breakage of parts and any other condition that may affect the power tools
operation. If damaged, have the power tool repaired before use. Many
accidents are caused by poorly maintained power tools.
6. Keep cutting tools sharp and clean. Poorly maintained cutting tools with sharp
cutting edges are less likely to bind and are easier to control.
7. Use the power tool, accessories and tool bits etc., in accordance with these
instructions and in the manner intended for the particular type of power tool,
taking into account the working conditions and the work to be performed.
Use of the power tool for operations different from intended could result in a
hazardous situation.
SERVICE
1. Have your power tool serviced by a qualified repair person using only
identical replacement parts. This will ensure that the safety of the power tool is
maintained.
4
Parts & Service: 020 8988 7400 / E-mail: [email protected] or [email protected]
ADDITIONAL SAFETY INSTRUCTIONS FOR ROTARY
TOOLS
1. Only use accessories supplied for use with this tool.
2. Never use worn or cracked accessories.
3. Hold the tool away from your face when switching on.
4. Keep your fingers away from rotating accessories.
5. Be careful not to accidently hit any foreign objects in the workpiece.
6. If an accessory jams, switch the tool off and disconnect the battery before
attempting to free the accessory.
7. Clamp the workpiece whenever possible especially when using cutting discs.
8. Always wear a dust mask and eye protection.
9. Thoroughly remove all dust after sanding.
10. Take special care when sanding paint which is possibly lead based or when
sanding some woods (e.g. MDF) and metal which may produce toxic dust:
• Wear a dust mask specifically designed for protection against lead paint dust
and fumes and ensure that persons within or entering the work area are also
protected.
• Do not let children or pregnant women enter the work area.
• Do not eat, drink or smoke in the work area.
• Dispose of dust particles and other debris safely.
11. Abrasive wheels should be stored and handled with care. (when not in use,
accessories should be stored in the box provided for protection).
12. Inspect grinding wheels/accessories before use. Do not use chipped, cracked or
otherwise defective products.
13. Ensure that all accessories are fitted in accordance with the manufacturers
instructions.
14. Ensure that the abrasive accessory is correctly mounted and tightened before
use. Run the tool with no-load for 30 seconds in a safe position and stop
immediately if there is vibration or if other defects are detected. If this condition
occurs, check the machine to determine the cause.
15. Check that the work piece is properly supported.
16. Do not use a cut-off wheel for side grinding.
5
Parts & Service: 020 8988 7400 / E-mail: [email protected] or [email protected]
17. Ensure that sparks resulting from use do not create a hazard e.g. do not hit
persons, or ignite flammable substances.
18. Ensure ventilation openings are kept clear when working in dusty conditions. If it
should become necessary to clear dust, first disconnect the battery from the
rotary tool.
19. Personal protective equipment such as dust masks and gloves should be worn as
appropriate.
20. Remember the wheel continues to rotate after the tool is switched off.
6
Parts & Service: 020 8988 7400 / E-mail: [email protected] or [email protected]
THE BATTERY
NOTES ON CHARGING
• During use, the battery pack may become warm. Allow it to cool before
recharging.
• Never store the battery pack when it is discharged, recharge it fully before
storage.
TO REMOVE THE BATTERY
• Press either side of the battery
and pull it out of the rotary tool.
TO CHARGE THE BATTERY
1. Slide it into the charger unit.
• Make sure that the battery is fully
inserted.
• The red LED will light to show that
the battery is charging.
2. When the battery has been fully
charged, the red LED will extinguish
and the green LED will light.
• The charger will continue to deliver
a slow charge to maintain the battery until the charger is disconnected from the
mains supply.
• Whilst charging, the battery pack and charger may become warm. This is
normal and should be expected.
3. When charging is complete, remove the battery from the charger and disconnect
the charger from the mains supply.
7
Parts & Service: 020 8988 7400 / E-mail: [email protected] or [email protected]
INSERTING THE BATTERY
1. Align the battery with the base of the
handle and slide it into the locating
clip.
• Make sure that the battery pack is
fully located and clicks into place.
BEFORE USE
FITTING DISCS & GRINDING STONES TO THE MANDREL
Mount the selected disc on to the
mandrel as shown, ensuring the two
washers are in place.
• DO NOT overtighten the screw.
ASSEMBLING POLISHING CLOTH WHEELS
Screw the cloth wheel on to the mandrel
firmly, but do not overtighten it.
ASSEMBLING SANDING BANDS
Slacken the screw on the end of the
mandrel and slide the appropriate
abrasive band on to the rubber former,
fully.
• Tighten the screw to secure the
band to the former.
8
Parts & Service: 020 8988 7400 / E-mail: [email protected] or [email protected]
FITTING A COLLET
WARNING: MAKE SURE THAT THE BATTERY HAS BEEN REMOVED FROM THE
ROTARY TOOL BEFORE REMOVING, OR FITTING A COLLET OR ACCESSORY
The rotary tool is supplied with 4 interchangeable collets; 0.8mm - 1.6mm - 2.4mm
and 3.2mm (fitted to the rotary tool).
Select the collet to be fitted according to the shaft size of the mandrel or accessory to
be used.
To fit a collet, proceed as follows.
1. Press and hold down the spindle lock.
It may be necessary to rotate the
chuck to fully engage the spindle lock.
2. Remove the chuck by rotating the
chuck sleeve in an anti-clockwise
direction. A spanner is supplied for
this purpose.
3. Pull the collet out of the spindle.
4. Insert the collet required, pushing it
into the spindle as far as it will go.
5. Refit the chuck, pressing the spindle
lock to tighten it.
9
Parts & Service: 020 8988 7400 / E-mail: [email protected] or [email protected]
FITTING AN ACCESSORY
IMPORTANT: Ensure the tool is switched OFF
TO FIT AN ACCESSORY, PROCEED AS FOLLOWS.
1. Make sure that the correct size collet has been fitted.
2. Press and hold down the spindle lock.
• It may be necessary to rotate the
chuck to fully engage the spindle
lock.
3. Rotate the chuck sleeve in an
anticlockwise direction until the collet
jaws are open sufficiently to accept
the accessory.
4. Insert the accessory into the collet as
far as it will go.
5. Press and hold down the spindle lock
and tighten the chuck sleeve using
the spanner supplied.
TO REMOVE THE ACCESSORY FROM THE COLLET, PROCEED AS FOLLOWS.
1. Press and hold down the spindle lock.
2. Using the spanner supplied, rotate the chuck sleeve in an anti-clockwise direction.
3. When the accessory is released, remove it.
10
Parts & Service: 020 8988 7400 / E-mail: [email protected] or [email protected]
OPERATING INSTRUCTIONS
OPERATING THE ROTARY TOOL
WARNING: BEFORE OPERATING THE ON/OFF SWITCH, MAKE SURE THAT
THE COLLET AND ACCESSORIES HAVE BEEN CORRECTLY AND SECURELY
FITTED.
1. To switch the rotary tool on, rotate the
speed control away from 0.
2. Select a suitable speed using the
speed controller.
• The low speed settings should be
used for removing rust, and
polishing.
• The medium speed settings should
be used for drilling, engraving,
sharpening and removing paint.
• The high speed settings should be used for cutting metal and sanding wood.
3. To switch the rotary tool off, set the speed control to 0.
WARNING: ALWAYS WAIT FOR COMPLETE RUN DOWN, AND THE
ACCESSORY TO STOP ROTATING, BEFORE PUTTING THE ROTARY TOOL
ASIDE.
11
Parts & Service: 020 8988 7400 / E-mail: [email protected] or [email protected]
CLEANING AND MAINTENANCE
WARNING: MAKE SURE THAT THE BATTERY HAS BEEN REMOVED FROM THE
ROTARY TOOL BEFORE STARTING ANY CLEANING, OR MAINTENANCE
PROCEDURES.
• After use, thoroughly clean all excess chippings and dust from the rotary tool,
taking special care to clean the cooling vents.
• Clean the spindle lock, the chuck and the spindle collar.
• Keep all accessories sharp and clean.
• There are no user serviceable parts inside this rotary tool.
• Worn, or damaged parts should be replaced by qualified personnel.
• Refer to qualified service personnel if internal maintenance is required.
ENVIRONMENTAL PROTECTION
Recycle unwanted materials instead of disposing of them as waste. All
tools, accessories and packaging should be sorted, taken to a recycling
centre and disposed of in a manner which is compatible with the
environment.
12
Parts & Service: 020 8988 7400 / E-mail: [email protected] or [email protected]
DECLARATION OF CONFORMITY
13
Parts & Service: 020 8988 7400 / E-mail: [email protected] or [email protected]
PARTS LIST
Part
Part number
Part
Part number
1 x Cordless Grinder
ETCCRT26601
3x Aluminium oxide grinding
wheel with shank
ETCCRT26613
1 x Charger Base
ETCCRT26602
2 x Silicon carbide grinding
wheel with shank
ETCCRT26614
1 x Adaptor 12V AC
500mAh
ETCCRT26603
6 x Diamond wheel points
1/8” shank
ETCCRT26615
1 x Battery 700mAh
ETCCRT26604
1 x HSS cutter
ETCCRT26616
1 x Polishing Compound
ETCCRT26605
2 x Polished HSS twist drills
1/16”
ETCCRT26617
30 x Cut off wheel Heavy
Duty 1 5/16" x 1/32”
ETCCRT26606
1 x Polished HSS twist drills
3/32”
44 x Cut off wheel regular
15/16" x 1/64”
ETCCRT26607
1 x Polished HSS twist drills
1/8”
132 x Sanding disc
comprising off
ETCCRT26608
1 x Mandrel for felt wheel
(45 x 180 Grit)
2 x Mandrel for cut off wheel
1/16" screw
(45 x 220 Grit)
1 x Mandrel for cloth wheel
3/32" screw
(42 x 240 Grit)
2 x Collet chrome plated
1/8”
6 x Sanding band 1/4" x
1/2”
ETCCRT26609
ETCCRT26618
ETCCRT26619
1 x Collet chrome plated
3/32”
6pcs sanding band 1/2" x
1/2”
1 x Collet chrome plated
1/16”
1x sanding shank 1/2" x 1/2” ETCCRT26610
1 x Wrench 3/8”
ETCCRT26620
1x sanding shank 1/2" x 1/2”
1 x Rubber emery wheel
7/8" x 5/32”
ETCCRT26621
1x sanding shank 1/4" x 1/2”
1 x Stainless brush axial 3/16" x
1-3/4”
ETCCRT26622
2 x felt polishing wheel 1/2" x
3/8”
ETCCRT26611
1 x Stainless brush axial 1/2" x
1-3/4”
1x felt wheel point 3/8" x
3/4”
1 x Stainless brush radial 13/16"
x 1-3/4”
ETCCRT26623
1x felt polishing wheel 1”
3 x Aluminium oxide grinding
wheel 3/4" x 1/8”
ETCCRT26624
1x Dressing stone sl
carbide 1" x 3/8”
ETCCRT26612
3 x Silicon carbide grinding
wheel 3/4" x 1/8”
14
Parts & Service: 020 8988 7400 / E-mail: [email protected] or [email protected]
ADVERTISEMENT
For heavier duty work you may be interested in our mains powered rotary tool set
Model number CRT40. Also available is our CRT100A- 100pc Accessory Kit for
CRT40
This is available from you Clarke dealer
15
Parts & Service: 020 8988 7400 / E-mail: [email protected] or [email protected]