1
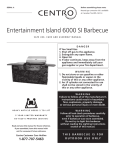
SERIAL #: Attention: Centro® recommends that a qualified gas technician perform the gas supply conversion and orifice replacement for this BBQ model. Natural Gas Conversion Kit F O R U S E W I T H M O D E L : 8 5 - 1 6 2 0 - 6 O N LY / F O R O U T D O O R U S E O N LY DANGER If You Smell Gas 1. Shut off gas to the appliance. 2. Extinguish any open flame. 3. Open lid. 4. If odor continues, keep away from the appliance and immediately call your gas supplier or your fire department. WARNING 1. Do not store or use gasoline or other flammable liquids or vapors in the vicinity of this or any other appliance. 2. An LP cylinder not connected for use shall not be stored in the vicinity of this or any other appliance. WARNING Failure to follow all of the manufacturer’s instructions could result in hazardous fires, explosions, property damage, or serious personal injury or even death. T H I S N AT U R A L G A S C O N V E R S I O N K I T C A N O N LY B E U S E D W I T H C E N T R O E N T E R TA I N M E N T I S L A N D 6 0 0 0 S I MODEL 85-1620-6. Read and save this manual for future reference. If pre-assembled, leave this manual with WARNING Follow all leak check procedures carefully prior to operation of barbecue, even if barbecue was store assembled. Do not try to light this barbecue without reading the Lighting Instructions section of this manual. unit for consumer’s future reference. Centro Customer Care Hotline 1-877-707-5463 THIS BARBECUE IS FOR O U T D O O R U S E O N LY I N S TA L L AT I O N • This kit converts your grill to natural gas at 7 inch water column supply pressure. Verify supply pressure with your local gas company. If supply pressure is different than SAFETY PRECAUTIONS 7 inch, contact a certified plumber for assistance. Not for use with LP gas. • Grill installation must conform with local codes, or in their absence to National Fuel Gas Code, NFPA 54 / ANSI Z223.1. Grill is not for use in or on recreational vehicles and/or boats. • All electrical accessories (such as rotisserie) must be electrically grounded in accordance with local codes, or National Electrical Code, ANSI / NFPA 70. Keep any electrical cords and/or fuel supply hoses away from any hot surfaces. • This grill is safety certified for use in the United States and Canada only. Do not modify for use in any other location. Modification will result in a safety hazard. SAFETY The symbols and boxes shown below explain what each heading means. Read and follow SYMBOLS all of the messages found throughout the manual. DANGER Indicates an imminently hazardous situation which, if not avoided, will result in death or serious injury. WARNING Indicates a potentially hazardous situation which, if not avoided, could result in death or serious injury. CAUTION Indicates a potentially hazardous situation or unsafe practice which, if not avoided, may result in minor or moderate injury. WARNING Do not attempt to repair or alter the hose/valve/regulator for any “assumed” defect. Any modification to this assembly will void your warranty and create the risk of a gas leak and fire. Use only authorized replacement parts supplied by manufacturer. This conversion kit shall be installed in accordance with the manufacturer’s instructions and all applicable codes and requirements of the authority having jurisdiction. If the information in these instructions is not followed exactly, a fire, explosion or production of carbon monoxide may result causing property damage, personal injury or loss of life. The assembler or qualified service agency is responsible for the proper installation of this kit. The installation is not proper and complete until the operation of the converted appliance is checked as specified in the manufacturer’s instructions supplied with the kit. ii USE AND CARE Natural Gas Connections and Service Regulators Above 1/2 psi. Prior to 1998, all residual gas service regulators were set with an outlet pressure of 7 inches water column. In the 1998 edition of NFPA 54, the National Fuel Gas Code, a change was made allowing service regulators of 2 and 5 psi. With this change it was also required that an in line regulator be connected between the service regulator and the appliance regulator if the 2 or 5 psi system is used. This additional regulator is not supplied with the product. It is possible for a consumer, making the connection themselves, or a plumber, not checking, to tap into a 2 or 5 psi line. If a pressure of 2 psi or greater is supplied to the appliance regulator on certain grills it will shut down and not deliver any gas to the grill. Other concerns are the quick disconnect socket and hose which are only rated to 1/2 psi. If the quick disconnect socket, hose, and grill are properly connected and still not getting gas, delivery pressure needs to be verified. If pressure is greater than 1/2 psi, make sure that an in line regulator is present. Once the grill has been over-pressured, the regulator may or may not have been damaged. The best practice is to replace the regulator. WARNING This grill is designed for natural gas use at 7 inch water column supply pressure. Verify supply pressure with your local gas company. If supply pressure is different than 7 inch, contact a certified plumber for assistance. Not for use with LP gas. DANGER Incorrect connection can result in a gas leak with possibility of fire. CAUTION For residential use only. Do not use for commercial cooking. 1 CONNECTING YOUR GRILL TO THE N AT U R A L G A S S O U R C E 1. A professionally-installed shut-off valve between the supply piping and the socket is recommended, but not required, by the National Fuel Gas Code. Socket connection must be made outdoors. 2. Coat the gas supply pipe nipple with gas resistant dope or Teflon tape. Screw socket onto gas supply pipe (house gas source) as shown in Figure A below, and wrench-tighten. CAUTION The quick disconnect socket should never be connected to the grill. Direction of gas flow is indicated on the socket. Fig. A Quick disconnect socket House piping 3. Pull back the sleeve on the quick disconnect socket and insert the unattached end of the gas hose into the socket. Release the sleeve and continue pushing the hose into the socket until the sleeve snaps into the locked position. See Figure B. Fig. B Gas hose 2 Sleeve 4. When the quick disconnect socket and the gas hose are connected, a valve in the socket opens automatically to permit full gas flow. When the gas hose is disconnected, the valve in the socket instantly and positively shuts off the flow of gas. Because the valve in the socket positively shuts off the flow of gas, the grill can be disconnected from the gas source by disconnecting the gas hose from the quick disconnect socket. The socket should be left attached to the gas source (house piping). Figure C, on the following page, shows properly connected hose and socket. Fig. C With proper assembly, the gas hose cannot be removed without pushing the quick disconnect sleeve back. To disconnect, push sleeve back and pull plug out of sleeve (this automatically shuts off gas). Please Note: Hose and assembly are C.S.A. listed for natural gas, manufactured gas, mixed gas and for liquefied petroleum and for LP Gas-Air mixtures on basis of 0.64 specific gravity for 1000 BTU’s per cubic foot of gas at 0.3 in. water column pressure drop. Only ANSI Z21.54 approved hoses should be used with this grill. Pressure Tests: The appliance and its individual shut off valve must be disconnected from the gas supply piping system during any pressure testing on that system at test pressures in excess of 1/2 psig (3.5kPa). The appliance must be isolated from the gas supply piping system by closing its individual manual shutoff valve during any pressure testing of the gas supply piping system at test pressures equal to or less than 1/2 psi (3.5kPa). WARNING Do not use hard metal piping of any kind to connect this type of grill to natural gas source. Use only hose specified by manufacturer. Using hard metal piping or convoluted metal tubing is an unsafe practice. Movement of the grill can cause breakage of metal pipe. 3 WARNING Do not use hard metal piping of any kind to connect this type of grill to natural gas source. Use only hose specified by manufacturer. Using hard metal piping or convoluted metal tubing is an unsafe practice. Movement of the grill can cause breakage of metal pipe. Although all gas connections on the grill are leak tested at the factory prior to shipment, a COMPLETE gas tightness check must be performed following the installation of the NG conversion Kit. Periodically check the whole system for leaks, or immediately check if the smell of gas is detected. WARNING Do not smoke while leak testing. Extinguish all flames. Never leak test with an open flame. Leak Testing 1. Turn all grill control knobs to OFF. 2. Be sure gas hose is tightly connected to gas source. 3. Completely open gas source. If you hear a rushing sound, turn gas off immediately. There is a major leak at the connection. Correct before proceeding. 4. Make a soap solution of one part liquid detergent and one part water. You will need a spray or brush to apply the solution to the fittings. Apply solution. 5. If “growing” bubbles appear, there is a leak. Close gas source immediately and retighten connection. If leaks cannot be stopped do not try to repair. Call for replacement parts. Order new parts by giving the serial, model number and name of items needed to the Grill Service Center at 1-877-707-5463 6. Always close gas source after performing leak test. Hose Check • Before each use, check to see if hoses are cut or worn. Replace damaged hoses before using grill. Use only valve/hose/regulator specified by manufacturer. 4 CAUTION Natural Hazard – Spiders FACT: Sometimes spiders and other small insects climb into the burner tubes attached to the burners. The spiders spin webs, build nests and lay eggs. The webs or nests can be very small, but they are very strong and can block the flow of gas. Clean burners prior to use after storing, at the beginning of grilling season, or after a period of one month not being used. An obstruction can result in a “flashback” (a fire in the burner tubes). The grill may still light, but the obstruction does not allow full gas flow to the burners. If you experience the following: 1. Smell gas. 2. Burner(s) will not light. 3. A small yellow flame from burner (should be blue). 4. Fire coming from around or behind control knob. STOP! Immediately turn off gas at gas source! SOLUTION: Wait for grill to cool. Follow the Burner Maintenance instructions in the Grilling Guide. Clean burners often. Use a 12” pipe cleaner to clean out the burner tubes. You may also force a stream of water from a hose nozzle through burner tubes to clean them. Storing Your Grill • Clean cooking grates. • Store in dry location. • Cover grill if stored outdoors. Choose from a variety of grill covers offered by manufacturer. • Store grill indoors ONLY if gas source is turned off and disconnected. • When removing grill from storage, follow the Burner Maintenance instructions in the Grilling Guide before starting grill. 5 6 PA R T S L I S T A N D D I A G R A M ( 8 5 - 1 6 2 1 - 4 ) The Natural Gas Conversion Kit includes: 1. NG hose 2. Orifice removal tool 3. Screw driver 4. NG orifice 7 A S S E M B LY I N S T R U C T I O N S 1 Remove warming rack, cooking grates, flame tamers, and control knobs from Centro 6000SI BBQ. 8 2 Fig. A Screw Remove all burners including the 3 main U burners, by unscrewing the screw and nut that affix the burner to the burner support bar, Nut as shown in Figure A. Fig. B Figure B shows all 3 main U-Burners removed. Fig. C Sear Burner Electrode 3 Remove the Sear Zone Burner (Figure E) by unscrewing the Sear Zone electrode (Figure C), and 4 screws from the burner (Figure D). These 4 screws have to be taken out Fig. D Fig. E 9 4 Fig. A Using the Orifice removal tool provided, insert into hole on the rear of the control panel (Fig. A and B), inside the burner box. Tool will fit directly around the valve orifice. Once a connection is felt, turn the tool counter-clockwise to remove all orifices, including Sear Zone. Fig. B Fig. C Orifice removal out Valve orifice is taken out Note: When removed, the valve orifice will sit inside of the orifice removal tool as shown (Fig.C). Fig. D Note: View of the valve with LP orifice removed uncovering the inner Natural Gas orifice. All burner valves Inner orifice for NG 10 must appear the same as the image shown (Fig.D). 5 Fig. A Replace Rotisserie and Sear Zone Control knobs (Figure A). Only the 3 Main Burner Valves must be worked on in this step. Using the screwdriver tool provided, place the end of the screw driver into the valve stem (located on the front of the Control Panel as shown in Figure B). Turn the connector 90 degrees to a vertical position. VERY IMPORTANT!! This step must be followed. Fig. B Stem valve Fig. C Starting horizontal (LP) position (Fig.C). Fig. D Final vertical (NG) position (Fig.D). 11 6 Safety Check. Confirm the following: 1. All 4 orifices have been removed from valves (3 main U-Burner and Sear Zone Burner) 2. All 3 main U-Burner valve stems (Step 5) have been adjusted to a horizontal position. Once confirmed, the main burner conversion steps are completed. Reverse Step 3 to Step 1 to re-assemble the burner box components. Fig. A 7 Fig. B Multi-Purpose Side Burner Orifice Replacement a) Remove side burner grate and control knob (Fig. A and B). b) Disassemble the garbage door and garbage basket (Fig. C and D). Fig. D Fig. C c) Use a normal wrench to remove 3 nuts from the bottom of the Multi-purpose Burner Side Heat Shield, visible from the space inside of the garbage door, underneath the Multi-purpose Side Burner (Figure E). Fig. E Fig. F 3 screws that are under the Side Burner Heat Shield 12 Fig. A Fig. 8 8 Remove the side burner from the unit (Fig.A). Fig. B Orifice removal tool Side Burner valve orifice Using the orifice removal tool, remove the side burner valve orifice (Figure B). (View from inside the garbage door, underneath the Multi-purpose Side Burner). Fig. 9 9 Using the screwdriver provided, reach into the side burner valve stem as shown. Turn the thread from horizontal position (LP posi- tion) to vertical position (NG position). VERY IMPORTANT!! This step cannot be forgotten. Multi-purpose Side Burner conversion has been completed. Reverse Step 8, 7d, c, b, and a. 13 Fig. A 10 Rotisserie Burner Orifice Replacement Rear Rotisserie Windshield 5 screws that need to be taken out Unscrew the 5 screws and nuts of the Rotisserie Burner from the Rear Windshield Cover, located on the back of the burner box. Fig. B 11 Fig. C Using a wrench (NOT INCLUDED in the conversion kit) loosen the Rotisserie Burner connector and the Metal Hose, located on the back of the burner box as shown in Figure D. Fig. D Wrench (not included in the Conversion Kit) Rotisserie Burner Venturi Rotisserie Burner valve connector and orifice Metal hose Fig. E Note: Once the Rotisserie Burner connector and metal hose have been loosened, unscrew by hand (Figure E). 14 Fig. A 12 Unscrew the Wing nut by hand so that the orifice can be taken out from the Rotisserie Burner Venturi (Figure A). Result shown in Figure B. Use the orifice removal tool to take out the LP orifice, as shown in Figure C. Then replace with a NG orifice that is provided in the conversion kit package, as shown in Figure D. Fig. B Note: Before beginning re-assembly of Rotisserie Burner orifice, Wing nut ensure that the LP orifice has been removed. Proceed with reassembly by reversing Steps 10 to 12. Rotisserie burner orifice Fig. C Orifice removal tool Rotisserie burner valve orifice Fig. C Fig. D Fig. D LP orifice LP orifice removed Fig. D Replaced with NG orifice 15 Fig. A Regulator hose 13 Gas Supply Conversion Using a wrench, remove the hose and regulator inside the cart, as shown in Figure A. Then connect a NG hose and perform leak test and safety check on all maintenance. Fig. B Fig. C Gas hose Sleeve Fig. D 16 DISTRIBUTOR Trileaf Distribution Trifeuil Toronto, Canada M4S 2B8 17