1
Aussie
TM
LP Gas Grill
Assembly and Use Manual
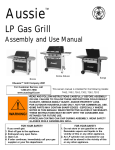
II
Deluxe
TM
TM
Elite
II
For Customer Service, call 1-800-251-7558
!
•READ AND FOLLOW INSTRUCTIONS CAREFULLY BEFORE ASSEMBLY OR USE. FAILURE TO
FOLLOW THESE INSTRUCTIONS COULD RESULT IN DEATH, SERIOUS BODILY INJURY AND/OR
PROPERTY LOSS.
•FOR HOUSEHOLD OUTDOOR USE ONLY. NOT FOR COMMERCIAL USE.
•SOME PARTS MAY CONTAIN SHARP EDGES-ESPECIALLY WHERE NOTED IN THIS MANUAL!
WEAR PROTECTIVE GLOVES IF NECESSARY.
•THESE INSTRUCTIONS MUST BE KEPT WITH THE CONSUMER AND RETAINED FOR FUTURE USE.
FOR YOUR SAFETY
FOR YOUR SAFETY
If you smell gas:
1. Do not store or use gasoline or other flammable
1. Shut off gas to the appliance.
vapors and liquids in the vicinity of this or any
2. Extinguish any open flame.
other appliance.
3. Open lid.
2. An LP cylinder not connected for use shall not
4. If odor continues, immediately call your gas
be stored in the vicinity of this or any other
supplier or your fire department.
appliance.
I.
IMPORTANT SAFEGUARDS.......................................2
C) Operating the LP Gas Grill.....................................16
1) Preparation Before Cooking.................................17
2) Lighting with Igniter.............................................17
3) Lighting the Side Burner.....................................18
4) Manual Lighting of the Grill.....................................19
5) Check Your Flame...........................................20
6) Grill Cooking.....................................................20
7) Roasting................................................................20
8) End of Cooking Session....................................20
9) Turning Off Your LP Gas Grill..............................20
D) Care and Maintenance..............................................20
1) Porcelain Coated Cooking Surfaces..................21
2) Burner Maintenance........................................21
3) Flavor Activator....................................................22
4) Drip Cup...............................................................22
5) Cleaning the Grill Body........................................22
6) Preventive Maintenance.......................................22
7) Storage..................................................................22
II. Parts Diagram................................................................5
Parts List................ .........................................................6
Step 1 - Cart Assembly....................................................8
Step 2 - Attach Axle & Wheels.........................................8
Step 3 - Mount Body Onto Cart.......................................9
Step 4 - Mount Side Tables................................................9
Step 5 - Mount Rear Brace...............................................10
Step 6 - Attach Hood Handle & Shield..............................10
Step 7 - Attach Flavor Activator™.....................................10
Step 8 - Attach Privacy Panel..........................................11
Step 9 - Insert Cooking Grid............................................11
Step 10 - Attach LP Cylinder..............................................12
Step 11 - Leak Test............................................................13
III. Operating and Maintaining Your LP Gas Grill...............14
A) Gas, Cylinder, Hose and Regulator Info..................14
1) LP Hose & Regulator Assembly..........................14
2) LP Gas Cylinder..................................................14
3) Connect/Disconnect LP Gas Cylinder.................14
B) Before Using Your Grill..............................................15
1) Selecting a Location............................................15
2) Precautions..........................................................15
3) Leak Testing..........................................................16
IV. Troubleshooting..............................................................23
V. Important Notice - LP Cylinder with OPD.....................25
VI. Limited Warranty.............................................................26
IMPORTANT SAFEGUARDS
FAILURE TO FOLLOW THESE SAFEGUARDS COULD RESULT IN DEATH, SERIOUS
BODILY INJURY, AND/OR PROPERTY LOSS. READ AND FOLLOW ALL INSTRUCTIONS
CAREFULLY BEFORE ASSEMBLY OR USE OF THE LP GAS GRILL.
1.
California and other authorities to cause cancer,
birth defects and other reproductive harm.
WARNING! Read and follow all instructions.
2. For Household Outdoor Use Only Do Not Use Indoors or on recreational vehicles
or boats. Never use as a space heater. Not for
commercial use.
4. Place your Liquefied Petroleum (LP) gas grill
on a firm, level surface. Grill should be setup
away from high traffic areas and combustible
materials.
3.
5. Locate your LP gas grill at least 10 feet away
from your house or any building. Do not use the
grill in a garage, breezeway, carport, porch, or
in any enclosed area. Do not locate this
appliance under overhead unprotected
combustible surfaces.
WARNING! To reduce the risk of serious or
fatal injury from breathing toxic fumes and from
explosion and fire as a result of leaking gas,
use only outdoors in an open area with good
ventilation. As with all conventional fuels, the
burning process consumes oxygen and
produces toxic gases, including carbon
monoxide. In addition, the combustion products
of such fuels, including liquefied petroleum
(LP), contain chemicals known to the state of
©Aussie Grill Company 2001
6. Have an ABC fire extinguisher accessible.
Never attempt to extinguish a grease fire with
water or other liquids.
2
7.
WARNING! If your grill catches on fire:
• If the fire is in the grill portion and you can safely
reach the control knobs, then turn them off by turning
knobs clockwise. If you cannot safely reach the
control knobs, call the fire department.
• If the fire involves one of the hoses, and you can
safely reach the propane cylinder valve, shut the
valve off by turning LP cylinder valve handle
clockwise to a full stop.
• If the fire involves the cylinder, leave it alone,
evacuate the area and call the fire department.
• If there is any type of fire that threatens either
personal safety or endangers property, call the fire
department.
DANGER! If you see, smell, or hear the hiss of
escaping gas from the LP cylinder:
A. Get away from the cylinder.
B. Do not attempt to correct the problem yourself.
C. Call your local fire department.
19.
WARNING! Do not operate an LP gas grill if you
have knowledge of or suspect a gas leak.
20. Always inspect the gas hose and regulator assembly
before each use. Always turn the LP cylinder to the “Off”
position before inspecting parts. If the hose is cut,
damaged, or showing signs of excessive abrasion or
wear, do not use the LP gas grill. Contact the
manufacturer, as the hose must be replaced with an
assembly specified by the manufacturer prior to further
use of the LP gas grill.
8. Check the Grease Cup for grease buildup. Remove
excess grease to avoid a grease fire in the pan. Never
use the grill without Grease Cup in place.
9.
18.
21.
WARNING! If you notice grease or other hot material
dripping from the grill onto valve, hose, or regulator, turn
off gas supply immediately. After the grill has cooled,
determine the cause and correct it. After cleaning the
valve, hose and regulator, perform a leak test before
continuing use. See Before Using Your LP Gas Grill
section (page 29) of this manual for correct leak test
procedures.
22. If burner does not light, turn off all gas control knobs.
Leave the grill hood open and wait five minutes
before attempting to light.
23. If burner goes out during operation, turn off all gas
control knobs. Open the hood and wait five minutes
before attempting to light.
10. This installation must conform with local codes or, in the
absence of local codes, with either the National Fuel Gas
Code, ANSI Z223.1, or CAN/CGA-B149.2, Propane
Installation Code.
24. Exercise reasonable care when using this LP gas grill.
Never leave grill unattended during use or cleaning.
11. If an external electrical source is utilized, the outdoor
cooking appliance, when installed, must be electrically
grounded in accordance with local codes or, in the
absence of local codes, with the National Electrical
Codes, ANSI/NFPA 70, or the Canadian Electrical Code.
CSA C22.1.
25. Never allow children to operate or play near an LP gas
grill. Keep animals and bystanders out of the grill area.
26. Always turn off the LP gas cylinder at the cylinder valve
when not in use. Allow grill to cool before handling parts
or cleaning.
12. Keep any electrical supply cord and the fuel supply hose
away from any heated surfaces. Electric cords should be
placed away from walkways to avoid a tripping hazard.
27.
13. Combustible materials should never be within
36 in. of the back or sides of your LP gas grill.
28.
14.
WARNING! Before lighting the LP gas grill, open
the hood to prevent an explosion from gas build-up.
See Operation of Your LP Gas Grill section
WARNING! Always Store Lp Cylinders upright
and where temperatures do not exceed 125 degrees
Fahrenheit. Never store a spare or disconnected LP
cylinder under or near this LP gas grill.
WARNING! Do not move an LP gas grill when in
use or hot.
WARNING! Never touch hot surfaces. Use heat
resistant gloves, long-handled tongs, or cooking mitts at
all times. The grill will become very hot. Open the hood
carefully when cooking to avoid burns from the hot air
and steam trapped inside.
29. Use only the hose and regulator assembly
that is supplied with your LP gas grill and/or
specified by the manufacturer.
17. Check the LP gas grill for gas leaks and burner
obstructions before each use.
WARNING! Do not use a flame to check for gas
leaks. See Before Using Your LP Gas Grill section of
this manual for correct leak test procedures. A clogged
burner tube can lead to a fire beneath grill.
3
30. Use of this LP gas grill other than for the intended use,
or alteration of LP gas grill in any way may not be safe
and will void any warranty.
37. Never store an LP gas cylinder indoors (empty or filled).
If storing the gas grill indoors, disconnect LP gas cylinder
and store it outdoors out of the reach of children.
31. Never attempt to repair the LP gas grill or cylinder
yourself. Contact the manufacturer for information
regarding repairs to your grill.
38. Never leave an LP cylinder inside a vehicle which may
become overheated by the sun.
39. Never lean your body over the LP gas grill when lighting
it or while it is in use or hot.
32. LP gas is not natural gas. The conversion or attempted
use of natural gas in an LP unit or LP gas in a natural
gas unit is dangerous and will void your warranty.
40. Do not attempt to disconnect, move or alter any gas
fittings while your LP gas grill is in operation.
33. Do not use charcoal in an LP gas grill. Do not use
aerosols or store flammable liquids or materials near this
LP gas grill.
34.
41. Your LP gas grill should be cleaned on a regular basis.
Refer to Care and Maintenance section in this manual.
42. This LP gas grill is not designed to be used with a solid
plate (griddle). Full coverage of plates will cause
excessive heat and could damage the grill.
WARNING! Do not wear loose clothing (for
example: hanging shirt tails, clothing with frills, etc.)
around an LP gas grill while in use or hot.
43. Never douse the grill with water when its surfaces are
hot because it may cause grease to splatter or the
porcelain cooking grids and hood to break.
35. Never use an LP cylinder if it shows signs of: dents,
gouges, bulges, fire damage, corrosion, leakage,
excessive rust or other forms of visual external damage;
it may be hazardous and should be checked by a
Liquefied Petroleum supplier. Do not use an LP cylinder
with a damaged valve.
44. When not in use, the LP cylinder valve must be
turned to “Off” position.
36. Even though your LP cylinder may appear to be empty,
gas may still be present and the cylinder should be
transported and stored accordingly.
— NOTICE —
AUSSIE GRILL COMPANY STRIVES TO BE A QUALITY SUPPLIER OF CONSUMER PRODUCTS. IF WE INADVERTENTLY
OMITTED ANY PARTS NEEDED FOR ASSEMBLY, OR YOU NEED TROUBLESHOOTING INFORMATION, PLEASE CONTACT
US USING OUR TOLL FREE NUMBER. THANK YOU FOR PURCHASING AN AUSSIE GRILL COMPANY PRODUCT.
CONSUMER SERVICE DEPARTMENT
AUSSIE GRILL COMPANY
1500 INDUSTRIAL ROAD
GREENEVILLE, TN. 37745 USA
1-(800)-251-7558
8 am - 5 pm E.S.T Mon. - Fri.
1-(423)-639-1171 (TELEPHONE)
1-(423)-639-2570 (FAX)
www.aussiegrill.com
4
Parts Diagram - Some small parts may not be depicted
11
18
13
29
12
14
17
20
16
19
10
15
3
4
1
6
9
5
7
8
24
5
2
ASSEMBLY INSTRUCTIONS for BONDI II DELUXE & BONDI II ELITE MODELS
PREPARATION FOR ASSEMBLY: Removing parts from carton and some assembly will require
two people. Before starting assembly, read the instructions and your manual.
This manual covers several Bondi Grill models. Use only the steps that pertain to your model. Remove
all the parts from the carton and lay them on a smooth, clean surface. (You may cut the carton, spread
it out, and use it as a pad to protect part finishes.) Look in the Parts List below under your model number to find the exact parts you need. Do not throw away any packaging until you have located all the
parts.
Follow instructions of each step in the order they are written as you look at the diagrams. This will allow
little confusion and easier assembly.
If you have any questions which require help, contact Customer Service and be sure to mention the
model number of your grill.
PART/ DESCRIPTION
PART#
BONDI II
DELUXE
BONDI II
ELITE
1
Front Leg, Fixed
03.6161.00
1
1
2
Rear Leg, Fixed
03.6162.00
1
1
3
Front Leg, Wheel
03.6163.00
1
1
03.6164.00
1
1
4 Rear Leg, Wheel
5
Clip, Cylinder Retainer
03.6205.01
1
1
6
Bottom Shelf
03.6165.00
1
1
7
Wheel
03.6214.00
2
2
8
Axle
03.6215.01
1
1
9
Wheel Cover
03.6217.01
2
2
10 Rear Support Brace
03.6166.00
1
1
11 Body Assembly
03.6167.00
1
1
12 Hood Handle
03.6168.00
1
1
Left Side Table
13 w/Perforations
03.6169.00
1
6
Part#
BONDI II
DELUXE
BONDI II
ELITE
Right Side Table
14 w/Perforations
03.6170.00
1
1
15 Privacy Panel
03.6172.00
1
1
03.6250.00
1
1
17 Warming Rack
03.6253.00
1
1
18 Cooking Grid, Porcelain
03.6255.00
1
1
19 Hood Shield
03.6289.00
1
1
PART/ DESCRIPTION
16
20
Flavor Activator
TM
Left Side Table with Side
Burner
03.6171.00
1
21 Screw, M5 X 35
03.4099.00
8
8
22 Washer M6
03.4095.00
2
2
23 Nut, M6
03.4098.00
4
4
24 Nut, M8
03.6216.00
2
2
25 Screw, M6 x 20
03.4096.00
6
6
26 Screw, M6 X 35
03.6219.01
4
4
27 Screw, M6 X 70
03.4097.00
2
2
Screw, M6 X 75
03.4094.00
2
2
Handle Spacer
03.6023.00
2
2
28
29
7
STEP 1- Cart Assembly
TOOLS:
ITEM 21 M5 X 35 SCREW 8 pcs
Actual Size
Velcro
Patches
ITEM 4
ITEM 6 Bottom Shelf
ITEM 3
•Using eight M5 X 35
screws, attach the Legs
to the Bottom Shelf as
shown.
ITEM 1
Step 2 - Install Axle, Wheels & Wheel Covers:
ITEM 2
TOOLS:
Push Axle (item 8) through holes in front
and rear legs. Place wheels (Item14) on the
axle. Secure with two M8 Nuts (Item 24) and
tighten with wrench or pliers as shown.
Align Wheel Cover pins into holes on
Wheel and snap in place.
Item 7 Wheel
2 pcs
8
Item 8 Axle 1 pc
Item 24 Nut, M8 2 pcs
Step 3 - Mount Body onto Cart
It may be necessary
to stand grill up
after the legs start
together and
press firmly into
final position.
Secure using 4
M6X35 screws &
nuts.
Lay Cart and Body on its backside.
Align Cart legs with Body legs and press
together until screw holes align.
STEP 4 - Mount Side Tables
Item 26 Screw, M6X35
4 pcs Actual Size
Assemble Right Side
Table (Item 14) to
Frame with 3 M6X20
Screws. Use two
Screws at Front Leg
and one Screw in the
upper hole of the
Rear Leg.
Item 25 Screw, M6X20
3 pcs Actual Size
Assemble Left Side Table (Item 13 or
Item 20, depending on your grill model)
to Frame with 3 M6X20 Screws. Use two
Screws at Front Leg and one Screw in
the upper hole of the Rear Leg.
Item 25 Screw, M6X20 3pcs
Actual Size
9
Item 23 Nut,
M6 4 pcs
Step 5 - Mount Rear Brace
Step 4 Continued - Mount SIde Tables
Item 10 Rear Brace 1 pc
Elite Model Only:
Side Burner Table
Item 27 Screw, M6X70 2pcs
Actual Size
Mount Rear Brace (Item 10) to rear legs
using 2 M6X70 Screws through lower
holes on rear Side Table mount.
STEP 6 - Attach Hood Handle and Shield
•From Inside Hood, Insert M6X75 (Item28) Screw
Item 28 Screw M6X75 2 pcs
through Hood Shield (Item 19), then through Hood and
Actual Size
Hood Handle Spacer into Handle. Repeat for other side
of Handle. NOTE: DO NOT Overtighten mounting screws. You
could crack the porcelain grill coating.
TOOLS:
Item 12
Hood
Handle
1 pc
Item 19 Hood Shield
1 pc
Flavor
Activator™
Mounting
Stud
Step 7 - Attach Flavor Activator™
•Using the holes on each side of the Flavor
Activator™(Item 16), place onto the two
Flavor Activator™ mounting studs so that
it lies above the burner.
Item 16
Flavor
Activator™
Item 16 Flavor Activator™ 1 pc
10
Step 8 - Attach Privacy Panel
(ITEM 15 )
PRIVACY PANEL
1 pc
•Attach Privacy Panel to the velcro
patches on back side of front legs
as shown. Note: Privacy Panel may
be removed to install LP Cylinder
then reattached.
Step 9 - Insert Cooking Grid
(ITEM 18)
Porcelain Cooking Grid
1pc
•Lay Cooking Grid into position
above Flavor Activator™.
11
Step 10 - Attach LP Cylinder
•Swing the Cylinder Retainer Clip to outside of the Bottom Shelf. Place the LP Cylinder in circular
hole on Bottom Shelf. The cylinder should be turned slightly as shown below to allow the Regulator
Hose to reach. Position Cylinder Retainer Clip over round shoulder of the LP Cylinder until it meets
the cylinder carrying handle.
•Turn all control knobs and LP Cylinder valve to the “Off” position.
•Take the protective cap off the cylinder valve. Hold Regulator in a straight line with LP Cylinder
valve so the connection does not cross thread. Insert nipple of regulator into the LP cylinder nozzle
opening. Hand tighten coupling nut in clockwise direction. Do not use tools.
You are now ready to use your grill!
Caution: When swinging Cylinder
Retainer Clip into position, keep
fingers and hands on corners of
Clip to prevent Pinching.
Cylinder
Retainer Clip
Hand tighten
coupling nut
in clockwise
direction
12
Step 11 - Leak Test
•Before using your grill a leak test must be performed on the Control Valves, Burner manifold, and
Regulator/ Hose connections.
Supplies Needed for a Leak Test
Clean paint brush, water, and dishwashing liquid.
How to perform a leak test
WARNING! Never use an open flame to test for gas leaks.
1)Use an LP Cylinder equipped with an OPD (Overfill Prevention Device) and have it filled at an authorized LP gas
dealer by a qualified attendant.
2)Make sure all of the grill control panel knobs are turned to the “off” position and verify that the LP gas cylinder valve
is closed by turning the knob on the LP gas cylinder clockwise until it stops.
3)Remove the protective cap from the LP cylinder gas nozzle.
4)Hold regulator in a straight line with LP cylinder gas nozzle so the connection does not cross thread.
5)Insert nipple of regulator into the LP cylinder nozzle opening.
6)Hand tighten coupling nut in a clockwise direction. Do not use tools.
7)Mix one cup of water with one cup of dishwashing liquid.
8) Open the valve on LP gas cylinder (Turn the knob on the LP gas cylinder counter-clockwise.)
9)Check for leaks by brushing the soap solution on all LP gas connections and fittings (such as those shown by the
heavy arrows in the diagram below.) Make sure you generously
brush the locations with the soap solution,
completely surrounding the connections and fittings.
10)If “growing” bubbles appear on any of the connection points, then you have detected a gas leak. Immediately close
the LP cylinder valve by turning the handle clockwise.
A) If leak appears at either end of hose and regulator assembly, retighten the connection at the leak, but do not
overtighten. (Note: Only hand tighten at coupling nut) Repeat Leak Test.
B) If the leak is coming from the LP gas cylinder, from the valves at the control knobs, or if the leak cannot be
stopped, do not use the grill. Call Customer Service at 1-800-251-7558.
11)Turn all control knobs to the “off” position and turn the handle on the LP gas cylinder clockwise until it stops.
Disconnect LP gas cylinder by turning coupling nut on regulator in a counter-clockwise direction until regulator is
released from threaded LP cylinder gas nozzle.
12)Place the protective cap over LP cylinder gas nozzle.
LP Gas Cylinder
Control Valve
Side Burner Table
Leak Test:
Regulator
Coupling Nut
13
OPERATING AND MAINTAINING YOUR GAS GRILL
GAS, CYLINDER, HOSE AND
REGULATOR INFORMATION
· If you obtain LP gas through a cylinder exchange dealer,
make sure you are getting a safe and adequate O.P.D.
cylinder. Use only a licensed LP gas cylinder dealer.
This LP gas grill was designed to use propane gas. Propane · Keep children away from LP gas cylinder at all times.
cylinders will supply gas all year round, even on cold winter
days.
· Do not use, store, or transport the LP gas cylinder where it
would be exposed to high temperatures. The relief valve
LP HOSE AND REGULATOR ASSEMBLY
may open which will allow a large amount of flammable
gas to escape. Never leave an LP gas cylinder inside a
vehicle which may become overheated by the sun.
· Using a hose and regulator assembly that has
not been supplied by the manufacturer of this LP
gas grill, could result in serious bodily injury
or property loss.
· Use only the hose and regulator assembly that has been
furnished with this LP gas grill. If the hose and regulator
assembly is not working properly and you need a
replacement, contact the manufacturer (1-800-251-7558).
· Inspect the hose before each use. If the hose is cut or
damaged or shows signs of excessive abrasion or wear,
do not use the LP gas grill. Contact the manufacturer, as
the hose must be replaced with an assembly specified by
the manufacturer prior to the further use of the LP gas grill.
LP Cylinder
·
·
Read and follow all warnings on LP gas cylinder.
If you see, smell, or hear the hiss of LP gas
escaping from the cylinder:
1) Evacuate all people from the grilling area.
2) Do not attempt to correct the problem
yourself.
3) Call the local fire department.
· The LP gas cylinder, for use with the Aussie LP gas grills,
must meet the following requirements:
1) 12” diameter x 18” tall, 20 lb maximum capacity
2) Overfill Protection Device (OPD) safety feature (should
be noted on cylinder)
3) Must be constructed and marked in accordance with
the U.S. Department of Transportation (DOT) or the
National Standard of Canada, CAN\CSA-B339. (See
collar for marking)
4) Must have collar to protect LP cylinder valve.
· WARNING! Never store an LP cylinder indoors.
Storage of an outdoor cooking gas appliance indoors is
permissible only if the cylinder is disconnected and
removed from the outdoor cooking gas appliance.
Cylinders must be stored outdoors out of the reach of
children and must not be stored in a building, garage, or
any other enclosed area.
· WARNING! Never store a spare LP gas cylinder
under or near the grill. All spare and disconnected LP
gas cylinders must have safety caps installed on the LP
cylinder valve.
· LP gas is not natural gas. The conversion or attempted
use of natural gas in an LP unit or LP gas in a natural gas
unit is dangerous and will void your warranty.
· Never attempt to repair an LP gas cylinder valve yourself.
See an authorized LP gas cylinder dealer for repairs.
· When transporting an LP gas cylinder, keep it secured in
an upright position with cylinder valve turned to off
position.
Connecting/ Disconnecting LP
Gas Cylinder to Grill
· Do not operate the LP gas grill when the LP gas cylinder
is not attached to the cart as shown in the Assembly
Instructions.
· Always check for gas leaks when you disconnect
and reconnect the regulator to the LP gas cylinder,
especially after a period of storage (for example,
over winter).
· Check tubes that lead into the burner for any
blockage from insects, spiders, or food grease
before using.
· Check grill hoses for cracking, brittleness, holes,
or leaks.
· Make sure there are no sharp bends in the hose or
tubing.
· Make sure Regulator Hose does not contact hot
metal surfaces.
· Never use an LP gas cylinder if it shows signs of: dents,
gouges, bulges, fire damage, corrosion, leakage,
excessive rust or other forms of visual external damage; it
may be hazardous and should be checked by a liquid
propane supplier.
· The LP gas cylinder should never be filled more than 80%
of cylinder volume. (20 lb. maximum) Do not ask the
propane supplier to over-fill the cylinder.
14
Precautions
· Never connect or disconnect LP gas cylinder or fittings
while grill is in use or is hot.
· When the LP gas cylinder is connected, the grill must
be kept outside in a well-ventilated space. Turn off all
of the grill control knobs and the LP cylinder valve
when grill is not in use.
· Move gas hose as far away as possible from hot surfaces.
How to Connect your LP gas cylinder (See STEP 22 of
Assembly Instructions for diagram)
1) Make sure all of the control knobs are turned to the
“off” position and verify that the LP gas cylinder valve is
closed by turning the handle on the LP gas cylinder
valve clockwise until it stops.
2) Remove the protective cap from the LP cylinder gas
nozzle.
3) Hold regulator in a straight line with LP cylinder gas
nozzle so the connection does not cross thread.
4) Insert Regulator nipple into the LP cylinder nozzle opening.
5) Hand tighten coupling nut in a clockwise direction.
Do not use tools.
6) Perform a Leak Test. (See STEP 10 of Assembly
Instructions for Leak Test Instructions)
How to Disconnect your LP gas cylinder
1) Turn all control knobs to the “off” position and turn the
handle on the LP gas cylinder clockwise until it stops.
2) Turn coupling nut on regulator in a counter-clockwise
direction until regulator is released from threaded LP
cylinder gas nozzle.
3) Place the protective cap over LP cylinder gas nozzle.
BEFORE USING YOUR
LP GAS GRILL
Selecting a Location
· Do not use an LP gas grill indoors, on recreational
vehicles, or on a boat.
· This LP gas grill is for outdoor use only and should be
placed on firm, level surface. The grill should be setup in
an open area with good ventilation, away from high traffic
areas and combustible materials.
· Combustible or flammable materials should never be
used or stored within 36 inches of the back or sides of
your LP gas grill.
· Locate your LP gas grill at least 10 feet away from your
house or any building. Do not use the grill in a garage,
breezeway, carport, porch, or under a surface that can
catch fire.
· Carefully read the Important Safeguards section
of this manual (pages 2 through 4). Make sure
you follow and understand all instructions and
warnings. If you have any questions regarding
these pages, call 1-800-251-7558 and ask for a
Customer Service Representative.
· This installation must conform with local codes or, in
the absence of local codes, with either the National
Fuel Gas Code, ANSI Z223.1, or CAN/CGA-B149.2,
Propane Installation Code.
· If an external electrical source is utilized, the outdoor
cooking appliance, when installed, must be
electrically grounded in accordance with local codes
or, in the absence of local codes, with the National
Electrical Codes, ANSI/NFPA 70, or the Canadian
Electrical Code, CSA C22.1.
· If any electric appliance or rotisserie is used with the
LP gas grill, do not allow cords to touch or be near hot
surfaces. Electric cords should be placed away from
walkways to avoid a tripping hazard.
· Grill storage cover must be removed and placed at
least 36 inches from the LP gas grill while in use. The
grill cover is made of a flammable material. The grill
must be completely cooled before putting the cover
back on the grill.
· Never store a spare or disconnected LP gas cylinder
under or near this LP gas grill.
· Inspect the hose and regulator assembly before each
use. If the hose is cut or damaged or shows signs of
excessive abrasion or wear, do not use the LP gas
grill. Contact the manufacturer, as the hose must be
replaced with an assembly specified by the
manufacturer prior to the further use of the LP gas
grill.
· Use only the hose and regulator assembly that is
supplied with your LP gas grill.
· Use of this LP gas grill other than for the intended
use, or alteration of the LP gas grill in any way may
not be safe and will void any warranty.
· LP gas is not natural gas. The conversion or
attempted use of natural gas in an LP unit is
dangerous and will void your warranty.
· Never use an LP gas cylinder if it shows signs of:
dents, gouges, bulges, fire damage, corrosion,
leakage, excessive rust, or other forms of visual
external damage; it may be hazardous and should be
checked by a Liquefied Petroleum supplier. Do not
use an LP cylinder with a damaged valve.
· Never use charcoal in your LP gas grill. Do not use
aerosols or store flammable liquids or materials near
this gas grill.
15
Leak Testing
OPERATING THE LP GAS GRILL
· Always perform a leak test before each use.
· Leak test must be performed in a well ventilated
area.
· Never perform a leak test on a grill while in use or
hot.
· If you detect a gas leak that cannot be corrected
by using the leak test procedures below, do not
use the LP gas grill.
· Never smoke or have an open flame near the grill
during a leak test.
Supplies Needed for a Leak Test
Clean paint brush, water, and dishwashing liquid.
How to perform a leak test (See Step 10 of Assembly
Instructions for leak test diagrams.)
WARNING! Never use an open flame to test for gas
leaks.
1)Use an LP Cylinder equipped with an OPD (Overfill
Prevention Device) and have it filled at an authorized LP
gas dealer by a qualified attendant.
2)Make sure all of the grill control panel knobs are turned to
the “off” position and verify that the LP gas cylinder valve
is closed by turning the knob on the LP gas cylinder
clockwise until it stops.
3)Remove the protective cap from the LP cylinder gas
nozzle.
4)Hold regulator in a straight line with LP cylinder gas
nozzle so the connection does not cross thread.
5)Insert nipple of regulator into the LP cylinder nozzle
opening.
6)Hand tighten coupling nut in a clockwise direction. Do not
use tools.
7)Mix one cup of water with one cup of dishwashing liquid.
8) Open the valve on LP gas cylinder (Turn the knob on the
LP gas cylinder counter-clockwise.)
9)Check for leaks by brushing the soap solution on all LP
gas connections and fittings (such as those shown by the
heavy arrows in the diagram below.) Make sure you
generously brush the locations with the soap solution,
completely surrounding the connections and fittings.
10)If “growing” bubbles appear on any of the connection
points, then you have detected a gas leak. Immediately
close the LP cylinder valve by turning the handle
clockwise.
A) If leak appears at either end of hose and regulator
assembly, retighten the connection at the leak, but do
not overtighten. (Note: Only hand tighten at coupling
nut) Repeat Leak Test.
B) If the leak is coming from the LP gas cylinder, from the
valves at the control knobs, or if the leak cannot be
stopped, do not use the grill. Call Customer Service at
1-800-251-7558.
11)Turn all control knobs to the “off” position and turn the
handle on the LP gas cylinder clockwise until it stops.
Disconnect LP gas cylinder by turning coupling nut on
regulator in a counter-clockwise direction until regulator is
released from threaded LP cylinder gas nozzle.
12)Place the protective cap over LP cylinder gas nozzle.
16
· Before proceeding, make certain that you
understand the Important Safeguards on pages 2
through 4 of this manual.
· Before lighting the LP gas grill, you must open
the the hood to prevent an explosion from
gas build-up.
· If your LP gas grill catches on fire:
- If the fire is in the grill portion and you can safely
reach the control knobs on the control panel, then
turn them to the off position.
- If the fire involves one of the hoses, and you can
safely reach the LP cylinder valve, shut the valve
off.
- If the fire involves the cylinder, leave it alone,
evacuate the area and call the fire department.
- If there is any type of fire that threatens either
personal safety or endangers property, call the
fire department.
· If you notice grease or other hot material dripping
from the grill onto the valve, hose, or regulator, turn
off the gas supply immediately. After the grill has
cooled, determine the cause and correct it. After
cleaning the valve and hose and regulator assembly,
perform a leak test before continuing use. (See Step
10 of Assembly Instructions)
· Do not operate an LP gas grill if you have knowledge
of or suspect a gas leak.
· Never allow children to operate or play near an LP gas
grill. Do not leave grill unattended.
· Always turn off the LP gas cylinder at the LP cylinder
valve when not in use. Allow grill to cool before
handling parts or cleaning.
· Do not move an LP gas grill when in use or hot.
· Never touch hot surfaces. Use heat resistant gloves,
long-handled tongs, or cooking mitts at all times
since the grill will become very hot. Open the hood
carefully when cooking to avoid from the hot air and
steam trapped inside.
· Do not wear loose clothing (example: hanging
shirt tails, clothing with frills, etc.) around a LP
gas grill while in use or hot.
· Never lean your body over the LP gas grill when
lighting it or while it is in use or hot.
· This LP gas grill is not designed to be used with
a solid plate (griddle.) Full coverage of plates will
cause excessive heat and could damage the grill.
Preparation Before Cooking
3) From the “Off” position, push control knob in on the left
side and turn counter-clockwise to the high position.
4) Push the igniter button several times so that it clicks each
time.
5) Check to make sure that the burner is lit.
6) Light the remaining half of the burner by turning the control
knob counter-clockwise. Your grill has a crossover ignition
system that allows the burner to light each side successively.
7) If burners does not light, repeat Step 3. The burner
Lighting the Grill Using Igniter
should light within three or four attempts. If burner still does
not light, try the right side.
WARNING: If both sides of the burner fail to light
after following Steps 3 & 4, turn all knobs to the “off”
position and close the valve on the LP gas cylinder.
· Open Hood before lighting the grill to prevent an
Wait five minutes; then repeat all of the above lighting
explosion from gas buildup.
procedures.
· Always inspect the gas hose and regulator
Note:If the burner still fails to light, refer to the
assembly before each use. If the hose is cut,
Troubleshooting page. The burner can be lit manually, see
damaged, or shows signs of excessive abrasion
Manual Lighting of the Grill.
or wear, do not use the LP gas grill. Contact the
8) After ignition, preheat the grill by turning the control knobs to
manufacturer, as the hose and regulator assembly
“High” for 3-5 minutes. The grill should be pre-heated before
must be replaced with an assembly specified by
every cooking session. The hood should be closed during
the manufacturer prior to further use of the LP gas
preheating.
grill.
WARNING: If a burner goes out during the cooking
cycle,
turn all knobs to the off position and close the
How to light your LP gas grill (See diagram below
valve
on
the LP cylinder. Open hood and wait five
for illustrations)
minutes
before
attempting to relight the grill.
1) Open Hood
· Wash the porcelain or chrome coated Cooking Grids
with a mixture of hot water and baking soda.
· Empty the grease cup after each cooking session so
excessive grease does not accumulate.
Failure to remove grease may result in grease
dripping onto the cart and/or a grease fire in the
tray.
2) Important: Make sure control knobs are turned
“off” first. Open the LP gas cylinder valve by turning
the valve handle counter-clockwise until it stops.
2. Turn LP cylinder handle counter-clockwise to
open.
1. Open Hood
3. Push in left or right control knob and turn
counter-clockwise to the “High” position.
4. Push in the Igniter several times to light.
17
Lighting the Side Burner (Elite Series Only)
How to light your LP Gas Grill Side Burner (See
diagram below for illustrations)
1) Important: Make sure Side Burner Control Knob is
turned “off” first. Make sure the LP gas cylinder valve is
open by turning the valve handle counter-clockwise until
it stops.
2) From the “Off” position, push in the Side Burner Control
Knob (right most knob of the control panel) and turn
counter-clockwise to the “high” position.
3) Push the igniter button several times so that it clicks each
time.
4) Check to make sure that the burner is lit.
5) If the side burner does not light, repeat Steps 2 and 3.
The burner should light within three or four attempts.
WARNING: If burner fails to light after following
Steps 2 & 3, turn Side Burner Knob to the “off”
position and close the valve on the LP gas cylinder.
Wait five minutes; then repeat all of the above
lighting procedures.
Note: If the burner still fails to light, refer to the
Troubleshooting page.
LP Gas Cylinder
Valve
1. Make sure Side Burner Control Knob
is turned “off” first. Make sure the LP
Gas Cylinder valve is open by turning
the valve counter-clockwise until it
stops.
2. Push the Side
Burner Control
Knob and turn
counter-clockwise
to the high position.
3. Push igniter
button to light.
18
Manual Lighting of the Grill
· Open Hood before lighting the grill to prevent an
explosion from gas build-up.
· Always inspect the gas hose and regulator
assembly before each use. If the hose is cut,
damaged, or showing signs of excessive abrasion
or wear, do not use the LP gas grill. Contact the
manufacturer, as the hose must be replaced with
an assembly specified by the manufacturer prior
to further use of the LP gas grill.
How to manually light your LP gas grill
1) Open Hood
2) Important: Make sure Control Knobs are turned “off.”
Open the LP gas cylinder valve by turning counterclockwise until it stops.
3) Insert a lit match through match-lighting hole
underneath the grill bowl on the right side. (See figure
below).
1. Open hood
4) Push in and turn the right main burner control knob counterclockwise to the “high” position.
WARNING: If the burner fails to ignite after
following the above procedure, turn control knob to
the off position and close the valve on the LP cylinder.
Wait five minutes and repeat all of the above manual
lighting procedures. If the grill still fails to light, see
the Troubleshooting page.
5) Check to make sure that the burner is lit.
6) Light the remaining half of the burner by turning the control
knob counter-clockwise. Your grill has a crossover ignition
system that allows the burner to light each side successively.
7) If burner does not light, repeat Step 3. The burner
should light within three or four attempts.8) After ignition,
preheat the grill by turning the control knobs to “High” for 35 minutes. The grill should be pre-heated before every
cooking session. The hood should be closed during
preheating.
WARNING: If the burner goes out during the cooking
cycle, turn the control knob to the “off” position and
close the valve on the LP cylinder. Wait five minutes
before attempting to relight.
2. Turn LP cylinder handle
counter-clockwise until it stops.
3. Match lighting hole in right side of grill body Insert a lit match through the match lighting hole.
4. Push in right control knob and turn
counter-clockwise to
the “High” position.
19
Check Your Flame
Your burner has been preset by the manufacturer for optimal flame performance. A blue flame, possibly with a small
yellow tip, is the result of the optimal air and LP gas mixture. (See diagram below)
Yellow Tip
End of Cooking Session
· Never leave your LP gas grill unattended during use
or cleaning.
After each cooking session, close the hood and turn the
grill burners to the “high” position and burn for five minutes.
This procedure will burn off cooking residue, thus making
cleaning easier.
Turn off Your LP Gas Grill
Primarily Blue
Flame
The flame should be checked before the initial cooking session and periodically throughout the grilling season, especially after storing the grill over a long period of time. If the
flame is significantly yellow in color, then you are not getting
the appropriate amount of LP gas in the air /LP gas mixture.
This could be a result of a blocked burner from grease drippings or from insects building a nest inside the burner or
burner opening. You should follow the Burner Maintenance
section of this manual for cleaning the burners.
Grill Cooking
The burner heats up the Flavor Activator™ underneath the
grid, which in turn heats the food on the grill. The natural
food juices produced during cooking fall onto the hot Flavor
Activator™ below and vaporize. The subsequent rising
smoke bastes the food, as it travels upwards, giving it that
unique barbecued flavor.
Roasting Hood Cooking
The grill is equipped with a roasting hood giving the option
of cooking with hood closed to form an ‘oven’ for roasting
food, such as roasts of meat, whole chickens, etc. When
the hood is closed, a large amount of heat is trapped inside
the grill. Thus, it is IMPORTANT to make sure that the
burner is turned to the low position to prevent burning of
the food. Avoid lifting the hood unnecessarily as heat is
lost every time the hood is opened.
How to turn off your LP gas grill
1) When you have finished using your grill, turn the grill
Control Knobs clockwise to the “Off” position.
2) Turn off the gas at the LP cylinder valve by turning the
handle clockwise until it stops.
3) Wait until the grill is cool before closing the grill hood
and putting on the cover.
WARNING! Never store an LP gas cylinder
indoors (empty or filled). If storing the gas grill
indoors, disconnect LP gas cylinder and store it
outdoors out of the reach of children.
CARE AND MAINTENANCE
· Always turn “off” the LP gas cylinder at the LP
cylinder valve, when not in use. Allow the grill to
cool before handling parts or cleaning.
· Do not move an LP gas grill when in use or hot.
· Never touch hot surfaces. Use heat resistant
gloves, long-handled tongs, or cooking mitts at all
times since grill will become very hot.
· Do not wear loose clothing (for example: hanging
shirt tails, clothing with frills, etc.) around a LP gas
grill while in use or hot.
· Never lean your body over the LP gas grill when
lighting it or while it is in use or hot.
· Never douse the grill with water when its surfaces
are hot because it may cause grease to splatter or
the porcelain cooking grids and hood to break.
20
Burner Maintenance
CARE AND MAINTENANCE
Regularly clean your LP gas grill between uses and especially after extended periods of storage. Ensure the grill
and its components are cool before cleaning. In order to
extend the life and maintain the condition of your grill, we
strongly recommend that the unit be covered when stored
outside for any length of time, especially during the winter
months.
Porcelain coated Cooking Surfaces
(Deluxe & Elite Series Only)
Most residue on the Cooking Grids can be cleaned with a
baking soda and water solution. For stubborn stains, use a
nonabrasive scouring powder. Do not use steel wool or
other like cleaning products on the porcelain coated surfaces. This will scratch the porcelain coating causing foods
to stick.
How to clean the Burner
1) Make sure the LP cylinder and grill control knobs are
turned off, and the grill has completely cooled.
2) Carefully remove Grease Cup, Cooking Grid, and Flavor
Activator™.
3) Remove the Burner, by first removing the Heat Shield
from the bottom of grill Bowl. Remove the two screws
securing the burner (also located underneath the grill
bowl.)
4) Remove Burner from the grill.
5) Use a pipe cleaner to clear obstructions from the Burner
holes and inlet hole. Verify that there are no insects or
· Check the LP gas grill for gas leaks and Burner
obstructions before each use.
· Always turn off the LP gas cylinder at the
LP cylinder valve when not in use. Allow grill to
cool before handling parts or cleaning.
Provided that the Burner is operating correctly, in normal
usage, burning off the residue after cooking will keep the
burner clean. The Burner should be removed and cleaned
annually, or whenever heavy build-up is found, to ensure that
there are no signs of blockage (debris, insects) in either the
burner portholes, the primary air inlet, or the neck of the
burner. (See Burner cleaning instructions below)
insect nests blocking the inlet hole. Normal wear and
corrosion may enlarge some holes, however, if large
cracks or holes are found the Burner should be replaced.
Note: It is normal for surface rust to be present on the
Burner.
6) If grill is to be stored, coat Burner lightly with cooking oil.
and Wrap in a protective cover to keep insects out.
7) After cleaning, reinstall Burner and other parts
removed back into grill. Note: When refitting the Burner,
be careful to check that it is positioned correctly. (Refer
to Step 6 of Assembly Instructions for reinstallation)
Clean all Burner
holes and Burner
tubes with pipe
cleaner or small
wire.
21
Flavor Activator™
Remove and wash the Flavor Activator™ in order to keep it
clean. Burning off the residue after each cooking will make
cleaning easier. Clean with soap and water.
Drip Cup
· Always turn off the LP gas cylinder at the LP
cylinder valve when not in use. Allow grill to cool
before handling parts or cleaning.
· Do not use aerosols or store flammable liquids or
materials near this gas grill.
Preventive Maintenance
· Always turn the LP gas cylinder valve “Off” when
not in use. Allow grill to cool before handling parts
or cleaning.
· Empty the Grease cup after each cooking session so
excessive grease does not accumulate.
Failure to remove grease may result in grease
dripping onto the cart and/or a grease fire in the cup.
· Never light the LP gas grill without the grease cup in
place.
· Before each use, remove all grease from your Grease Cup.
· Make sure Grease Cup is in place before each grilling
session.
· Failure to remove grease from the Grease Cup may result
in grease dripping onto the cart.
Cleaning the Grill Bowl
· Always turn off the LP gas cylinder at the LP
cylinder valve when not in use. Allow grill to cool
before handling parts or cleaning.
How to Clean the Grill Body
1) Remove Cooking Grid, Flavor Activator™, and Burner
before full cleaning.
2) Remove excess grease and/or fat from the grill Bowl
with a soft plastic or wooden scraper. Never use steel
wool or other abrasive cleaning product on porcelain
coated surfaces.
3) For further cleaning, use hot soapy water and a cloth, or
nylon-bristled brush only. Do not immerse the gas
controls or manifold in water. Make sure all water is
removed from Burner.
4) When finished cleaning, replace Burner, Flavor
Activator™ and Cooking Grid.
5) Check burner operation after reassembly.
Periodically check and tighten all nuts, bolts, and screws.
Storage
· Never store an LP gas cylinder indoors (empty or
filled). If storing the gas grill indoors, disconnect
the LP gas cylinder and store it outdoors out of the
reach of children.
· Never leave an LP gas cylinder inside a vehicle
which may become overheated by the sun.
· Never store a spare or disconnected LP gas
cylinder under or near the LP gas grill.
· Always turn off the gas cylinder when not in use.
Allow grill to cool before handling parts or
cleaning.
· Even though your LP gas cylinder may appear to be
empty, gas may still be present and the cylinder
should be transported and stored accordingly.
· Store your LP gas grill in a cool dry place .
· Disconnect LP gas cylinder from grill and store outside, in
a dry, well-ventilated area, away from any sources of heat
or ignition. Re-cap LP cylinder valve with the Safety Cap.
· Remove Burner and wrap with aluminum foil to prevent
insects from entering the burner holes. Store wrapped
Burner on top of cooking grid.
· Before next use, remove aluminum foil and reinstall
Burner, Flavor Activator, and Cooking Grid.
· Check your LP gas grill for gas leaks, deterioration, proper
assembly, and burner obstructions before using the grill
after periods of storage and/or non-use(i.e. over winter).
22
TROUBLESHOOTING
Problem
Burner will not light
using the ignitor
Possible Cause
Burner is not connected to
Valve.
Solution
Insure BurnerTube is on the end of Valve
Not pausing long enough
before clicking the Igniter
Button
When lighting the Burner, push-in and turn control panel knob
counter-clockwise to the high position. Pause 4 seconds, then
push in Igniter button several times so that it clicks each time.
No spark
Gas collector tab is bent (making too large or small of a gap
between electrode and tab). By hand, bend gas collector tab
back within a maximum of 3/16” gap to electrode.
Make Certain gas Collector and Igniter are tight.
LP gas cylinder is empty
Take LP gas cylinder to licensed LP gas supplier to be refilled
Coupling nut is not fully connected to regulator
Tighten coupling nut by hand about one-half to three quarters
additional turn. Do not use tools.
Excess flow valve tripped in
regulator
Turn control knobs to “off” position and turn LP gas cylinder
handle clockwise until it stops. Wait five minutes. Relight LP
gas grill. If flame remains to be low, turn off gas at cylinder and
grill. Disconnect the regulator from the LP gas cylinder.
Reconnect the regulator to the LP gas cylinder. Perform a leak
test. Relight grill. This will reset the excess flow valve.
Obstructions in burner
Clean burner (See Burner Maintenance in Care and
Maintenance section of this manual)
Electrode and burner are wet
Dry electrode with clean cloth
Wire is loose or disconnected Reconnect the wire
Wire is shorting (sparking
between ignitor wire and
electrode
Burner will not light
using a match
Burner is not connected to
Valve.
Replace ignitor wire/electrode assembly (Call the Customer
Service Department)
Insure BurnerTube is on the end of Valve.
LP gas cylinder is empty
Take LP gas cylinder to licensed LP gas supplier to be refilled
Excess flow valve tripped in
regulator
Turn control knobs to “off” position and turn LP gas cylinder
handle clockwise until it stops. Wait five minutes. Relight LP
gas grill.
Coupling nut is not fully connected to regulator
Tighten coupling nut by hand about one-half to three quarters
additional turn. Do not use tools.
Obstructions in burner
Clean burner (See Burner Maintenance in Care and
Maintenance section of this manual)
23
TROUBLESHOOTING
Problem
Possible Cause
Solution
Flames blow out
High or gusting winds
Turn front of grill to face wind or increase flame height.
Gas in LP cylinder is low
Check LP gas cylinder. Refill if necessary.
Excess flow valve tripped
See “Low flame” problem above
Grease build up
Clean grill
Excessive fat in meat
Trim fat from meat before grilling
Persistent grease fire
Grease trapped around burner system
Turn control knobs “off” and turn handle of LP cylinder clockwise until it stops. Open hood carefully and let fire burn out.
After the grill cools, remove and clean all parts.
Unable to fill LP tank
Some dealers have older fill
nozzles with worn threads.
The worn nozzles don’t have enough “bite” to engage the valve.
Try another licensed LP dealer.
Humming or whistling
from the regulator
Outside temperature, humidity, barometric pressure, and
the gas level within the tank
may cause the rubber
diaphragm inside the regulator to vibrate, making a humming or whistling sound.
Although this sound may be alarming, this is NOT dangerous as
long as it is not accompanied by the smell of gas. Simply adjust
the burner settings and usually the sound will subside. If the
humming sound persists, a change in atmospheric conditions
will eventually stop the vibration. Should you smell gas, do not
use the grill and call Customer Service at 1-800-251-7558
Gas in LP cylinder is low
Check LP gas cylinder. Refill if necessary.
Excess flow valve tripped in
regulator
Turn control knobs to “off” position and turn LP gas cylinder
handle clockwise until it stops. Wait five minutes. Relight LP
gas grill. If flame remains to be low, turn off gas at cylinder and
grill. Disconnect the regulator from the LP gas cylinder.
Reconnect the regulator to the LP gas cylinder. Perform a leak
test. Relight grill. This will reset the excess flow valve.
Flare up
Low flame or low heat
If your problem is not resolved from the information provided above, please call Customer Service at
1-800-251-7558.
24
IMPORTANT NOTICE
The gas grill is setup to operate with a LP Gas Cylinder equipped
with an OPD (Overfill Prevention Device).
This is a secondary device to prevent the overfill of your LP Gas cylinder. The
proper methods for the filling of your LP Gas cylinder are by weight or volume, as
described in NFPA 58. Please make sure your filling station fills your LP Gas
cylinder by weight or volume. Ask your filling station to read purging and filling
instructions on the LP cylinder before attempting to fill.
Rises up while filling
then stops when full.
WARNING! Do not exchange the LP Gas cylinder unless the exchange LP
cylinder is equipped with an OPD. Otherwise you will lose the OPD (Overfill
Prevention Device) feature. If there is not an LP cylinder available for exchange
equipped with an OPD, we recommend that you have your cylinder filled at an
authorized LP gas dealer by a qualified attendant.
© AUSSIE™ GRILL COMPANY
25
AUSSIE GRILL COMPANY
LIMITED WARRANTY
This product is warranted to the original consumer purchaser against defects in material and workmanship under normal outdoor household use and correct assembly (if assembled by the consumer-purchaser). Burner and Cooking Grid are warranted for a period of one (1) year from the date of purchase.
All other parts are warranted for a period of one (1) year from the date of purchase. Aussie Grill
Company DOES NOT warrant in any way the propane cylinder (see label on cylinder for cylinder manufacturer’s warranty.) The LP cylinder manufacturer is responsible for the materials, workmanship and
performance of the cylinder. If the cylinder has a defect, malfunctions, or you have a question regarding the cylinder, call the cylinder manufacturer’s customer service center. The phone number is on the
cylinder. If the cylinder manufacturer has not resolved the issue to your satisfaction, then call Aussie
Grill Company at the customer service number listed below.
Aussie Grill Company may require reasonable proof of purchase and we suggest you keep your
receipt. Damages caused by commercial or institutional use, accidental or intentional damage, repairs
made or attempted by unauthorized persons, or misuse are not covered by this warranty. If defective,
the part or product will be repaired or replaced at the option of Aussie Grill Company without charge.
This warranty does not include the cost of any inconvenience or property damage due to failure of the
product and does not cover damage due to misuse, abuse, accident, damage arising out of transportation of the product, damage incurred through commercial use, or failure to perform normal and routine
maintenance. LIABILITY FOR CONSEQUENTIAL PROPERTY OR COMMERCIAL DAMAGES ARE
EXPRESSLY EXCLUDED BY THIS WARRANTY. ANY APPLICABLE IMPLIED WARRANTIES OF
MERCHANTABILITY AND FITNESS ARE LIMITED IN DURATION TO THE PERIOD COVERAGE OF
THIS EXPRESS WRITTEN LIMITED WARRANTY. Some states do not allow limitation on how long an
implied warranty lasts, so this limitation may not apply to you.
Deterioration or damage due to severe weather conditions such as hail, hurricanes, earthquakes or tornados, discoloration due to exposure to chemicals either directly or in the atmosphere, is not covered
by this limited warranty.
No returns will be accepted without prior authorization from Aussie Grill Company. Authorization for
return may be obtained by calling 1-800-251-7558. Handling and transportation costs for returning the
product are not covered by this warranty and will be paid for by the purchaser. Please send your correspondence to:
Aussie Grill Company
1500 Industrial Road
Greeneville, TN 37745
For reference and correspondence, Serial No.___________________
Please use this number in registering
record your Serial number here.
your warranty and any correspondence
(See nameplate on side of grill.)
with Aussie Grill Company.
26
P/N 03.4139.00
REV. 6/2003