1
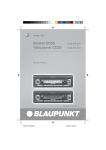
Radio / CD / MP3
Brighton MP35
Essen MP35
7 645 160 510
7 645 150 510
Operating instructions
http://www.blaupunkt.com
2
1
4
3
5
11
2
6
10
9
8
7
9
:
ENGLISH
FRANÇAIS
ITALIANO
NEDERLANDS
7
8
button to eject a CD from the
device.
Volume control
CD compartment
TRAF RDS button
Short press: Switch traffic-information standby on/off.
Long press: Switch the RDS
function on/off.
Arrow buttons
MENU button
Short press: Open the settings
menu.
Long press: Start the scan function.
AUDIO button to adjust the
bass, treble, balance and fader.
To select an equalizer preset.
To activate, deactivate and adjust the X-BASS function.
Keys 1 - 6
SVENSKA
4
5
6
BND•TS button
Short press: Select the FM
memory banks and the MW and
LW wavebands (MW/LW only on
the Brighton MP35).
Long press: Start the Travelstore
function.
ESPAÑOL
3
;
PORTUGUÊS
2
Button to switch the device on/
off and operate the volume mute
function.
button
SRC
Short press: Switch sources between CD/MP3, CD changer (if
connected) and AUX.
Long press: Briefly display the
clock time.
DANSK
1
DEUTSCH
CONTROLS
29
CONTENTS
Notes and accessories .......... 31
Switching on/off .................... 32
Adjusting the volume ............. 33
Setting the power-on volume ......... 33
Quick volume reduction (mute) ..... 33
Switching the confirmation beep
on/off ............................................ 34
Mute while telephoning ................. 34
Radio mode ............................ 34
Adjusting the tuner settings ........... 34
Switching to radio mode ............... 35
RDS functions ............................... 35
Selecting the waveband /
memory bank ................................ 35
Tuning into a station ...................... 35
Setting the sensitivity of station
seek tuning ................................... 36
Storing stations ............................. 36
Storing stations automatically
(Travelstore) .................................. 36
Listening to stored stations ........... 37
Scanning receivable stations
(SCAN) ......................................... 37
Setting the scanning time .............. 37
Programme type (PTY) ................. 37
Optimising radio reception ............ 39
Configuring the display ................. 39
Traffic information ................. 40
CD mode ................................ 41
Switching to CD mode .................. 41
Selecting tracks ............................ 41
Fast track selection ....................... 41
Fast searching (audible) ................ 41
Random track play (MIX) ............... 42
Scanning tracks (SCAN) .............. 42
Repeating tracks (REPEAT) .......... 42
Pausing playback (PAUSE) ........... 42
Configuring the display ................. 42
30
Displaying CD text ........................ 43
Traffic announcements in CD mode . 43
Ejecting a CD ............................... 43
MP3 mode .............................. 44
Preparing an MP3-CD .................. 44
Switching to MP3 mode ................ 45
Configuring the display ................. 45
Selecting a directory ..................... 46
Selecting tracks/files ..................... 46
Fast searching .............................. 46
Random track play (MIX) ............... 46
Scanning tracks (SCAN) .............. 47
Repeating individual tracks or
whole directories (REPEAT) .......... 47
Pausing playback (PAUSE) ........... 47
CD-changer mode ................. 48
Switching to CD-changer mode .... 48
Selecting CDs .............................. 48
Selecting tracks ............................ 48
Fast searching (audible) ................ 48
Configuring the display ................. 48
Repeating individual tracks or
whole CDs (REPEAT) ................... 48
Random track play (MIX) ............... 49
Scanning all the tracks on all the
CDs (SCAN) ................................ 49
Pausing playback (PAUSE) ........... 49
CLOCK time ........................... 50
Sound ..................................... 51
X-BASS .................................. 52
Configuring the level display . 53
External audio sources .......... 53
Specifications ........................ 54
Accessories
Only use accessories approved by Blaupunkt.
Remote control
The RC 08 or RC 10 (available as optional accessories) remote control allows you to access the most important
functions of your car sound system safely and conveniently from your steering
wheel.
You cannot switch the device on/off using the remote control.
Amplifiers
You can use all Blaupunkt and Velocity
amplifiers.
CD changers
You can connect the following Blaupunkt
CD changers: CDC A 08, IDC A 09 and
CDC A 03.
31
02Brighton_EssenMP35 gb®
31
28.06.2005, 11:15 Uhr
ENGLISH
FRANÇAIS
ITALIANO
NEDERLANDS
If you want to install your car sound system yourself, please read the installation and connection instructions that
follow these operating instructions.
SVENSKA
Installation
ESPAÑOL
Road safety has absolute priority. Only operate your car sound system if the road and traffic conditions
allow you to do so. Familiarise yourself with the device before setting off
on your journey.
You must always be able to hear
police, fire service and ambulance
sirens in good time from inside your
vehicle. For this reason, listen to your
car sound system at a moderate volume level during your journey.
PORTUGUÊS
Thank you for choosing a Blaupunkt
product. We hope you enjoy using this
new piece of equipment.
Please read these operating instructions before using the equipment for
the first time.
The Blaupunkt editors are constantly
working on making the operating instructions clearer and easier to understand. However, if you still have any
questions on how to operate the device,
please contact your dealer or the telephone hotline for your country. You will
find the telephone number printed at the
back of this booklet.
We provide a manufacturer guarantee
on our products bought within the European Union. You can view the guarantee conditions at www.blaupunkt.de
or ask for them directly at:
Blaupunkt GmbH
Hotline
Robert Bosch Str. 200
D-31139 Hildesheim
Gerrmany
Road safety
DANSK
Notes and accessories
DEUTSCH
NOTES AND ACCESSORIES
SWITCHING ON/OFF
Switching on/off
You can switch the device on/off in the
following ways:
Switching on/off using the vehicle
ignition
If the device is correctly connected to
the vehicle’s ignition and it was not
switched off using button 1, it will
switch on/off simultaneously with the
ignition.
Switching on/off using button 1
➮ To switch on the device, press button 1.
➮ To switch off the device, press and
hold down button 1 for longer
than two seconds.
The device switches off.
Note:
● To protect the vehicle battery, the
device will switch off automatically
after one hour if the ignition is off.
Switching on by inserting a CD
If the device is switched off and there is
no CD present in the drive,
➮ gently push the CD with its printed
side uppermost into the drive 5
until you feel some resistance.
The drive draws in the CD automatically.
You must not hinder or assist the drive
as it draws in the CD.
The device switches on and starts playing the CD.
32
Note:
● If the vehicle ignition was switched
off before you inserted the CD, you
will first have to switch on the device by pressing button 1 in order
to start playing the CD.
Setting the power-on volume
➮ press the MENU button 8 twice.
Note:
● The device is equipped with a timeout function. If, for instance, you
press the MENU button 8 and select a menu item, the device will
switch back approx. 8 seconds after the last button was pressed.
Any changes to the settings that
you have made will be saved.
You can set the power-on volume.
➮ Press the MENU button 8.
➮ Press the or button 7 repeatedly until “ON VOLUME” appears
in the display.
➮ Adjust the power-on volume using
the
buttons 7.
To help you adjust the setting more easily, the device will increase or decrease
the volume as you make your changes.
If you change the setting to “LAST VOL”,
the volume level that was set the last
time you switched off the device will be
activated again.
Quick volume reduction (mute)
You can quickly decrease the volume
(mute) to a level preset by you.
➮ Briefly press button 1.
“MUTE” appears in the display.
Cancelling mute
To return to your previously set volume
level,
ENGLISH
SVENSKA
➮ briefly press button 1 again.
FRANÇAIS
clockwise.
ITALIANO
➮ turn the volume control 4 anti-
NEDERLANDS
wise.
To decrease the volume,
Setting the mute level
You can adjust the mute level.
➮ Press the MENU button 8.
➮ Press the or button 7 repeatedly until “MUTE LVL” appears in
the display.
➮ Adjust the mute level using the
buttons 7.
When you have finished adjusting the
setting,
➮ press the MENU button 8 twice.
33
ESPAÑOL
➮ turn the volume control 4 clock-
PORTUGUÊS
You can adjust the volume in steps from
0 (off) to 66 (maximum).
To increase the volume,
Note:
● To protect your hearing, the poweron volume is limited to a value of
“38”. If the volume level was higher
than this when the device was last
switched off and the “LAST VOL”
setting is activated, the system will
reset the volume to “38” when you
switch the device on again.
When you have finished adjusting the
setting,
DANSK
Adjusting the volume
DEUTSCH
ADJUSTING THE VOLUME
ADJUSTING THE VOLUME
Switching the confirmation beep
on/off
The system will play a confirmation beep
for some functions if you keep a button
pressed down for longer than two seconds, for instance, when you assign a
radio station to a station button. You can
switch the beep on/off.
➮ Press the MENU button 8.
➮ Press the or button 7 repeatedly until “BEEP ON” or “BEEP
OFF” appears in the display.
➮ Adjust the beep setting using the
buttons 7. “OFF” means the
beep is switched off and “ON”
means the beep is switched on.
When you have finished adjusting the
setting,
➮ press the MENU button 8.
Mute while telephoning
If your device is connected to a mobile
telephone, the car radio’s volume will
be muted as soon as you “pick up” the
telephone. This requires that the mobile telephone be connected to the device as described in the installation instructions.
“PHONE” appears in the display.
34
RADIO MODE
Radio mode
This device is equipped with an RDS
radio receiver. Many of the receivable
FM stations broadcast a signal that not
only carries the programme but also
additional information such as the station name and programme type (PTY).
The station name appears in the display as soon as the tuner receives it.
Adjusting the tuner settings
To ensure that the tuner works properly, the device must be configured for the
region in which you are using it. You can
choose between Europe (EUROPE),
United States (USA), South America (SAMERICA) and Thailand (THAI). By
default, the tuner is set to the region in
which the device was sold. If you encounter problems with radio reception,
please check this setting.
The radio functions described in these
operating instructions refer to the EUROPE tuner setting.
➮ Press and hold down the 1 and 5
buttons : simultaneously and
switch on the device again by
pressing button 1.
“TUNER” is displayed.
➮ Select your tuner region using the
or button 7.
To save the setting,
➮ switch the device off and on again
or wait approx. 8 seconds. The car
sound system starts with the last
setting activated (radio, CD/MP3,
CD changer or AUX).
Switching REGIONAL on/off
If you are in CD/MP3, CD-changer or
AUX mode,
➮ Press the MENU button 8.
➮ Press the or button 7 repeat-
Note:
● REGIONAL must be activated/deactivated separately in the menu.
Switching the RDS function on/off
If you want to use the RDS functions
(AF and REGIONAL),
button 7.
FRANÇAIS
Selecting the waveband /
memory bank
This device can receive programmes
broadcast over the FM frequency range
as well as the MW and LW (AM) wavebands (MW and LW only on the Brighton MP35). There are three memory
banks available for the FM waveband
(FM1, FM2 and FMT) and one for each
of the MW and LW wavebands. Six stations can be stored in each memory
bank.
To switch between the FM memory
banks (FM1, FM2 and FMT) and the
MW and LW wavebands,
➮ briefly press the BND•TS button
;.
Tuning into a station
There are various ways of tuning into a
station.
Automatic station seek tuning
button 7.
➮ press and hold down the TRAF
➮ Press the
RDS button 6 for longer than two
seconds.
The RDS function is active when an
RDS symbol lights up in the display.
The radio tunes into the next receivable station.
or
ITALIANO
or
NEDERLANDS
The convenient RDS functions AF (Alternative Frequency) and REGIONAL
extend your radio’s range of functions.
● AF: If the RDS function is activated, the radio automatically tunes
into the best receivable frequency
for the station that is currently set.
● REGIONAL: At certain times, some
radio stations divide their programme into regional programmes
providing different content. You can
use the REG function to prevent
the car radio from switching to alternative frequencies that are
broadcasting different programme
content.
the
➮ Press the MENU button 8.
SVENSKA
RDS functions
➮ To switch REGIONAL on/off, press
ESPAÑOL
button 2 repeatedly until the memory bank
(e.g. “FM1”) appears in the display.
➮ press the SRC
edly until “REG” appears in the display. “OFF” or “ON” is displayed
alongside “REG”.
35
PORTUGUÊS
or
DANSK
➮ press the BND•TS button ;
ENGLISH
Switching to radio mode
DEUTSCH
RADIO MODE
RADIO MODE
Tuning into stations manually
You can also tune into stations manually.
Note:
● You can only tune into stations
manually if the RDS function is deactivated.
➮ Press the
or
button 7.
Browsing through broadcasting
networks (only FM)
If radio stations provide several programmes, you have the option of browsing through their “broadcasting networks”.
Note:
● The RDS function must be activated before you can use this feature.
or button 7 to
switch to the next station on the
broadcasting network.
➮ Press the
Note:
● When using this feature, you will
only be able to switch to stations
that you have received once before
already. To receive the stations,
use the scan function or the Travelstore function.
Setting the sensitivity of station
seek tuning
You can choose whether the radio
should only tune into stations providing
good reception or whether it can also
tune into those with a weak reception.
➮ Press the MENU button 8.
36
or button 7 repeatedly until “SENS” and the currently
set value appear in the display.
“SENS HI6” means that the tuner is set
to the highest sensitivity setting. “SENS
LO1” means it is set to the lowest sensitivity setting.
➮ Press the
➮ Set the desired sensitivity using the
buttons 7.
When you have finished adjusting the
setting,
➮ press the MENU button 8.
Note:
● You can set different sensitivity
levels for FM and MW or LW (AM)
(MW/LW only on the Brighton
MP35).
Storing stations
Storing stations manually
➮ Select the memory bank that you
want (FM1, FM2, FMT) or one of
the wavebands (MW or LW) (MW/
LW only on the Brighton MP35).
➮ Tune into the station that you want.
➮ Press and hold down one of the
station buttons 1 - 6 : for longer
than two seconds to assign the station to that button.
Storing stations automatically
(Travelstore)
You can automatically store the six stations providing the best reception in the
region (only FM). The stations are stored
in the FMT memory bank.
RADIO MODE
that corresponds to the station that
you want to listen to.
Scanning receivable stations
(SCAN)
You can use the scan function to listen
to all the receivable stations briefly. You
can set the scanning time in the menu
to between 5 and 30 seconds (in steps
of 5 seconds).
Starting SCAN
➮ Press and hold down the MENU
button 8 for longer than two seconds.
Scanning begins. “SCAN” appears
briefly in the display followed by a flashing display of the current station name
or frequency.
➮ press the MENU button 8 twice.
Note:
● The scanning time that you set is
also used when scanning in CD/
MP3 mode and in CD-changer
mode.
Programme type (PTY)
Besides transmitting the station name,
some FM stations also provide information on the type of programme they are
broadcasting. Your car radio can receive
and display this information.
For example, the programme types can
be:
CULTURE
TRAVEL
JAZZ
SPORT
NEWS
POP
ROCK
CLASSICS
You can use the PTY function to select
stations of a particular programme type.
37
ENGLISH
DEUTSCH
buttons 7.
ing the
When you have finished adjusting the
setting,
FRANÇAIS
➮ Set the desired scanning time us-
ITALIANO
edly until “SCAN TIME” appears in
the display.
NEDERLANDS
band.
➮ Press the station button 1 - 6 :
Setting the scanning time
➮ Press the MENU button 8.
➮ Press the or button 7 repeat-
SVENSKA
Listening to stored stations
➮ Select the memory bank or wave-
Scanning stops and the radio continues
playing the station that it tuned into last.
ESPAÑOL
button ; for longer than two seconds.
The storing procedure begins. “FM
TSTORE” appears in the display. After
the process has completed, the radio
will play the station that is stored in
memory location 1 of the FMT memory
bank.
➮ Press the MENU button 8.
PORTUGUÊS
➮ Press and hold down the BND•TS
Cancelling SCAN and continuing
listening to a station
DANSK
Note:
● Any stations previously stored in
this memory bank are deleted in
the process.
RADIO MODE
PTY-EON
If you specify the programme type and
start seek tuning, the radio will switch
from the current station to a station of
the selected programme type.
Note:
● If the tuner does not find a station
that matches the selected programme type, you will hear a beep
and “NO PTY” appears briefly in
the display. The radio will then retune to the station that it received
last.
● If the tuned radio station or another
station on the broadcasting network broadcasts your selected programme type at a later point in
time, the radio will automatically
switch from the currently tuned station or from CD/MP3 mode or CDchanger mode to the station whose
programme type matches the one
you selected.
Switching PTY on/off
➮ Press the MENU button 8.
➮ Press the or button 7 repeatedly until “PTY ON” or “PTY OFF”
appears in the display.
or button 7 to
switch PTY ON or OFF.
➮ Press the
➮ Press the MENU button 8.
38
Selecting the PTY language
You can select the language in which
the programme types are displayed.
The following are available:
“DEUTSCH”, “ENGLISH” and
“FRANÇAIS”.
➮ Press the MENU button 8.
➮ Press the or button 7 repeatedly until “PTY LANG” appears in
the display.
➮ Set your preferred language using
buttons 7.
the
When you have finished adjusting the
setting,
➮ press the MENU button 8 twice.
Selecting a programme type and
starting seek tuning
➮ Press the
or
button 7.
The current programme type appears
in the display.
➮ If you want to select another programme type, you can do so by
pressing the or button 7
whilst this display is visible.
The selected programme type appears
briefly in the display.
or button 7 to start
seek tuning.
The radio will then tune into the next
station it finds that matches your selected programme type.
➮ Press the
Switching HICUT on/off
➮ Press the MENU button 8.
➮ Press the or button 7 repeat-
edly until “TUN DISP” appears in
the display.
or button 7 to
switch between “CLOCK” and
“FREQUENCY”.
➮ Press the
ENGLISH
HICUT
The HICUT function improves reception
during poor radio reception (only FM).
If interference occurs, the interference
level is cut automatically.
➮ Press the MENU button 8.
➮ Press the or button 7 repeat-
➮ Press the MENU button 8 twice.
FRANÇAIS
Optimising radio reception
DEUTSCH
RADIO MODE
edly until “HICUT” appears in the
display.
or button 7 to adjust the HICUT setting.
“HICUT 0” means that the interference
level will not be cut automatically. “HICUT 1” means that it will be cut automatically.
NEDERLANDS
ITALIANO
➮ Press the
➮ Press the MENU button 8.
Configuring the display
DANSK
PORTUGUÊS
ESPAÑOL
SVENSKA
In radio mode you have the option of
displaying the waveband together with
the memory bank / memory location and
the time or the station name / frequency of the current station.
Select “FREQUENCY” to display the
station name / frequency or select
“CLOCK” to display the waveband together with the memory bank / memory
location and the clock time.
39
TRAFFIC INFORMATION
if you retune the radio from a traffic
information station to a station that
does not broadcast traffic information.
If you hear the warning beep, you can
either switch off traffic information priority or tune into a station that broadcasts traffic information.
Traffic information
●
Your device is equipped with an RDSEON receiver. EON stands for Enhanced Other Network.
Whenever a traffic announcement (TA)
is broadcast, the system switches automatically from a station that does not
provide traffic reports to the appropriate traffic information station within the
broadcasting network that does.
Once the traffic report has been played,
the system will switch back to the programme you were listening to before.
Setting the volume for traffic
announcements
➮ Press the MENU button 8.
➮ Press the or button 7 repeat-
Switching traffic information
priority on/off
➮ Briefly press the TRAF button 6.
Traffic announcement priority is active
when the traffic-jam symbol lights up in
the display.
Note:
You will hear a warning beep:
● if you leave the reception area of a
traffic information station that you
are currently listening to.
● if you are receiving a traffic information station and the volume is
set to minimum (0) or if, whilst listening to a CD/MP3, a CD in the
changer or an AUX source, you
leave the reception area of the
tuned traffic information station and
the subsequent automatic search
cannot find a new traffic information station.
40
edly until “TA VOLUME” appears in
the display.
➮ Adjust the volume using the
buttons 7.
When you have finished adjusting the
setting,
➮ press the MENU button 8 twice.
Notes:
● You can use the volume control 4
to adjust the volume during a traffic
announcement for the duration of
that announcement.
● You can set the volume distribution
for the traffic announcements. For
further details, please read the
“Sound” chapter.
Switching to CD mode
If there is no CD inserted in the drive,
➮ Gently push the CD with its printed
side uppermost into the drive 5
until you feel some resistance.
The drive draws in the CD automatically.
You must not assist or hinder the drive
as it draws in the CD.
The CD starts playing.
Fast track selection
For fast track selection (backwards or
forwards),
➮ press and hold down one of the /
buttons 7 until fast-reverse /
fast-forward track selection begins.
Fast searching (audible)
For fast searching (backwards or forwards),
➮ press and hold down one of the
buttons 7 until fast searching
backwards / forwards begins.
ENGLISH
FRANÇAIS
ITALIANO
to select the next or previous track.
If you press the or button 7 once,
the current track will be played again
from the beginning.
NEDERLANDS
Selecting tracks
➮ Press one of the arrow buttons 7
SVENSKA
To ensure the system functions properly, only use CDs labelled with the compact disc logo. Problems might be experienced when playing copy-protected CDs. Blaupunkt cannot guarantee
the proper functioning of copy-protected CDs!
Besides being able to play audio CDs
on this device, you can also play CDs
containing MP3 music files. For further
details, please read the “MP3 mode”
chapter.
ESPAÑOL
Risk of severe damage to the
CD drive!
Contoured CDs (shape CDs) are not
suitable for playback in this unit. We
do not accept responsibility for any
damage to the CD drive that may
occur as a result of the use of unsuitable CDs.
PORTUGUÊS
You can use this device to play standard audio CDs, CD-Rs and CD-RWs
with a diameter of 12 or 8 cm.
Note:
● If the vehicle ignition was switched
off before you inserted the CD, you
will first have to switch on the device by pressing button 1 in order
to start playing the CD.
If there is already a CD inserted in the
drive,
➮ press the SRC button 2 repeatedly until “CD” appears in the
display.
Playback begins from the point at which
it was last interrupted.
DANSK
CD mode
DEUTSCH
CD MODE
41
CD MODE
Random track play (MIX)
➮ Press the 5 MIX button :.
“MIX CD” appears briefly in the display
and the MIX symbol lights up. The next
randomly selected track will then be
played.
Cancelling MIX
➮ Press the 5 MIX button : again.
“MIX OFF” appears briefly in the display and the MIX symbol disappears.
Scanning tracks (SCAN)
track is repeated continuously until you
deactivate RPT.
Cancelling REPEAT
If you want to cancel the repeat function,
➮ press the 4 RPT button : again.
“RPT OFF” appears briefly in the display and the RPT symbol disappears.
Normal playback is then resumed.
Pausing playback (PAUSE)
➮ Press button 3 :.
You can scan (briefly play) all the tracks
on the CD.
“PAUSE” appears in the display.
➮ Press and hold down the MENU
: whilst pause
is activated.
Playback is resumed.
button 8 for longer than two seconds.
The next track will then be scanned.
Note:
● You can set the scanning time. For
further details, please read the section entitled “Setting the scanning
time” in the “Radio mode” chapter.
Cancelling SCAN and continuing
listening to a track
➮ To cancel scanning, press the
MENU button 8.
The currently scanned track will then
continue to be played normally.
Repeating tracks (REPEAT)
If you want to repeat a track,
➮ press the 4 RPT button :.
“RPT TRCK” appears briefly in the display and the RPT symbol lights up. The
42
Cancelling pause
➮ Press button 3
Configuring the display
You can choose between two display
types for CD mode:
● Track number and clock time
● Track number and playing time
➮ Press the MENU button 8.
➮ Press the or button 7 repeatedly until “CD DISP” appears in the
display.
or button 7 to
switch between “PLAY TIME” and
“CLOCK”.
➮ Press the
➮ Press the MENU button 8 twice.
CD MODE
Switching CD text on/off
➮ Press the MENU button 8.
➮ Press the or button 7 repeat-
the CD compartment.
The CD is ejected.
➮ Remove the CD.
Note:
● If a CD is ejected, the drive will automatically draw it back in again after approx. 10 seconds.
● You can also eject CDs whilst the
device is switched off or whilst another audio source is activated.
ENGLISH
DEUTSCH
Ejecting a CD
➮ Press the eject button 3 next to
FRANÇAIS
Some CDs include CD text. The CD text
might contain the names of the artist,
album and track.
You can allow the CD text to be displayed as scrolling text every time you
switch to another track. The default display will appear again after the whole
CD text has been shown once. For further details, please read the section
entitled “Configuring the display”.
ITALIANO
Displaying CD text
edly until “CD TEXT” appears in
the display.
NEDERLANDS
➮ Switch the CD text function on
SVENSKA
(“TEXT ON”) or off (“TEXT OFF”)
using the or button 7.
When you have finished adjusting the
setting,
➮ press the MENU button 8 twice.
ESPAÑOL
Traffic announcements in CD
mode
If you wish to receive traffic announcements whilst CD mode is activated,
➮ press the TRAF button 6.
DANSK
PORTUGUÊS
Traffic announcement priority is active
when the traffic-jam symbol lights up in
the display. For further details, please
read the “Traffic information reception”
chapter.
43
MP3 MODE
MP3 mode
You can also use this car sound system to play CD-Rs and CD-RWs that
contain MP3 music files.
D01
D02
Preparing an MP3-CD
The various combinations of CD burners, CD burning software and CD blanks
may lead to problems arising with the
device’s ability to play certain CDs. If
problems occur with your own burned
CDs, you should try another brand of
CD blank or choose another colour of
CD blank.
The format of the CD must be ISO 9660
Level 1 / Level 2 or Joliet. Other formats
cannot be played reliably.
You can create a maximum of 252 directories on a CD. You can use this device to access each of the directories.
Regardless of the number of directories
on the CD, the device can handle up to
999 MP3 files on a single CD with a
maximum of 255 files in a directory.
D03
T001
T002
T003
T004
T005
T001
T002
T003
T004
T005
T006
D04
T001
T002
T003
T004
T005
T006
T007
T008
T009
T010
T011
D
i
r
e
c
t
o
r
i
e
s
T
r
a
c
k
s
•
F
i
l
e
s
Each directory can be given a name using a PC. The device is capable of displaying the directory name. You should
name the directories and tracks/files
using the method provided by your CD
burner software. The software’s instruction manual will provide details on how
to do this.
Note:
● When naming directories and
tracks/files you should not use accents and special characters.
If you like your files to be in the correct
order, you should use burner software
that places files in alphanumerical order. If your software does not provide
this feature you also have the option of
sorting the files manually. To do so, you
should place a number (e.g. “001”,
44
MP3 mode is activated in the same way
as normal CD mode. For further details,
please read the section entitled “Switching to CD mode” in the “CD mode” chapter.
➮ press the MENU button 8.
➮ Press the or button 7 repeatedly until “CD DISP” appears in the
display.
➮ Select the option that you want using the or button 7.
When you have finished adjusting the
setting,
➮ press the MENU button 8 twice.
45
ENGLISH
FRANÇAIS
ITALIANO
NEDERLANDS
Note:
● After you switch tracks, the device
first displays the MP3 scrolling text
once and then it displays the information continuously.
To switch between the different display
options,
SVENSKA
Configuring the default display
You can display various types of information on the current track:
● Track number and playing time
(“TRCK-TIME”)
● Track number and clock time
(“TRCK-CLK”)
● Directory number and track
number (“DIR-TRCK”)
● Directory number and clock time
(“DIR-CLK”)
● Directory number and playing time
(“DIR-TIME”)
ESPAÑOL
Switching to MP3 mode
An MP3-CD must already be inserted
in the device before you can change the
following settings.
PORTUGUÊS
Note:
To ensure uninterrupted playback,
● do not attempt to change the file
extension to “.MP3” of any files other than MP3 files and then attempt
to play them! The device will ignore
these invalid files during playback.
● Do not use “mixed” CDs containing
both non-MP3 data and MP3
tracks (the device only reads MP3
files during MP3 playback).
● Do not use mix-mode CDs containing both CD audio tracks and MP3
tracks. If you try playing a mixmode CD, the device will only play
the CD audio tracks.
Configuring the display
DANSK
“002”, etc.) at the beginning of each file
name - you must include the leading
zeros.
MP3 tracks can contain additional information such as the artist, album and
track names (ID3 tags). This device can
display ID3 tags (version 1).
When creating (encoding) MP3 files
from audio files, you should use bit rates
up to a maximum of 256 kbits/sec.
This device can only play MP3 files that
have the “.MP3” file extension.
DEUTSCH
MP3 MODE
MP3 MODE
Configuring the MP3 scrolling text
One of the following scrolling texts is
displayed once every time the track is
changed. Afterwards, the configured
default display is shown.
The available scrolling texts are:
● Directory name (“DIR NAME”)
● Track name (“SONG NAME”)
● Album name (“ALBM NAME”)
● Artist name (“ARTIST”)
● File name (“FILE NAME”)
Note:
The artist, track and album names
are part of the MP3-ID tag (version
1) and can only be displayed if they
have been saved with the MP3
files (for further details, please read
the instructions that came with your
PC’s MP3 software or burner software).
To switch between the different display
options,
●
➮ press the MENU button 8.
➮ Press the or button 7 repeatedly until “MP3 DISP” appears in
the display.
or button 7 to select
the MP3 scrolling text that you
want.
When you have finished adjusting the
setting,
➮ Use the
➮ press the MENU button 8 twice.
46
Selecting a directory
To move up or down to another directory,
➮ press the
or
several times.
button 7 once or
Selecting tracks/files
To move up or down to another track/
file in the current directory,
or button 7 once or
several times.
If you press the button 7 once, the
current track will be played again from
the beginning.
➮ press the
Fast searching
For fast searching (backwards or forwards),
➮ press and hold down the
or
button 7 until fast searching backwards / forwards begins.
Random track play (MIX)
To play the tracks in the current directory in random order,
➮ briefly press the 5 MIX button :.
“MIX DIR” appears in the display and
the MIX symbol lights up.
To play all the tracks on the inserted
MP3-CD in random order,
➮ press and hold down the 5 MIX
button : for longer than two seconds.
“MIX CD” appears in the display and the
MIX symbol lights up.
Scanning tracks (SCAN)
Cancelling REPEAT
To stop the current track or current directory from being repeated,
button : for longer than two seconds.
“RPT DIR” appears in the display.
➮ Press and hold down the MENU
➮ briefly press the 4 RPT button :.
button 8 for longer than two seconds. The next track will then be
scanned.
“TRK SCAN” appears in the display
alongside the flashing track numbers.
The tracks on the CD are briefly played
in ascending order.
“RPT OFF” appears briefly and RPT
disappears from the display.
Note:
● You can set the scanning time. For
details on setting the scanning
time, please read the section entitled “Setting the scanning time” in
the “Radio mode” chapter.
: whilst pause
is activated.
Playback is resumed.
ITALIANO
Pausing playback (PAUSE)
➮ Press button 3 :.
“PAUSE” appears in the display.
Cancelling pause
SVENSKA
➮ Press button 3
NEDERLANDS
You can scan (briefly play) all the tracks
on the CD.
➮ press and hold down the 4 RPT
ENGLISH
To play the whole directory repeatedly,
FRANÇAIS
Cancelling MIX
To cancel MIX,
➮ briefly press the 5 MIX button :.
“MIX OFF” appears in the display and
the MIX symbol disappears.
DEUTSCH
MP3 MODE
Cancelling SCAN and continuing
listening to a track
ESPAÑOL
➮ Briefly press the MENU button 8.
The currently scanned track will then
continue to be played normally.
PORTUGUÊS
Repeating individual tracks or
whole directories (REPEAT)
To play the current track repeatedly,
➮ briefly press the 4 RPT button :.
DANSK
“RPT TRCK” appears briefly in the display and RPT lights up.
47
CD-CHANGER MODE
CD-changer mode
Configuring the display
Note:
● Information on handling CDs, inserting CDs and operating the CD
changer can be found in the operating instructions supplied with
your CD changer.
There are five display options available
for CD-changer mode:
● Track number and playing time
(“TRCK-TIME”)
● Track number and clock time
(“TRCK-CLK”)
● CD number and track number
(“CD-TRCK”)
● CD number and clock time
(“CD-CLK”)
● CD number and playing time
(“CD-TIME”)
Switching to CD-changer mode
➮ Press the SRC button 2 repeatedly until “CHANGER” appears in the display.
The device starts playing the first CD
that the CD changer detects.
Selecting CDs
To move up or down to another CD,
➮ press the
or
several times.
button 7 once or
➮ Press the MENU button 8.
➮ Press the or button 7 repeatedly until “CDC DISP” appears in
the display.
or button 7 repeatedly until the option that you want
is displayed.
➮ Press the
Note:
● The device will ignore empty CD
slots in the changer and slots containing invalid CDs.
➮ Press the MENU button 8 twice.
Selecting tracks
Repeating individual tracks or
whole CDs (REPEAT)
To move up or down to another track
on the current CD,
To repeat the current track,
➮ press the
or
several times.
button 7 once or
Fast searching (audible)
For fast searching (backwards or forwards),
➮ press and hold down one of the
buttons 7 until fast searching
backwards / forwards begins.
48
➮ briefly press the 4 RPT button :.
“RPT TRCK” appears briefly and RPT
lights up in the display.
To repeat the current CD,
➮ press and hold down the 4 RPT
button : for longer than two seconds.
“RPT DISC” appears briefly and RPT
lights up in the display.
To play the tracks on the current CD in
random order,
➮ briefly press the 5 MIX button :.
“MIX CD” appears briefly and MIX lights
up in the display.
To play the tracks on all the inserted CDs
in random order,
➮ press and hold down the 5 MIX
button : for longer than two seconds.
“MIX ALL” appears briefly and MIX lights
up in the display.
Note:
● You can set the scanning time. For
further details, please read the section entitled “Setting the scanning
time” in the “Radio mode” chapter.
Pausing playback (PAUSE)
➮ Press button 3 :.
ENGLISH
Random track play (MIX)
FRANÇAIS
“RPT OFF” appears and RPT disappears from the display.
ITALIANO
➮ briefly press the 4 RPT button :.
Cancelling SCAN
To stop scanning,
➮ briefly press the MENU button 8.
The currently scanned track will then
continue to be played normally.
“PAUSE” appears in the display.
Cancelling pause
: whilst pause
is activated.
Playback is resumed.
➮ Press button 3
ESPAÑOL
SVENSKA
Cancelling MIX
➮ Briefly press the 5 MIX button :.
“MIX OFF” appears and MIX disappears
from the display.
NEDERLANDS
Cancelling REPEAT
To stop the current track or current CD
from being repeated,
DEUTSCH
CD-CHANGER MODE
Scanning all the tracks on all the
CDs (SCAN)
DANSK
PORTUGUÊS
To scan (briefly play) all the tracks on
all the inserted CDs in ascending order,
➮ press and hold down the MENU
button 8 for longer than two seconds.
“TRK SCAN” appears in the display and
the number of the current track flashes.
49
CLOCK TIME
CLOCK time
When you have finished adjusting the
setting,
Displaying the clock time
➮ press the MENU button 8.
To display the clock time briefly,
➮ press and hold down the SRC
button 2 until the clock time appears in the display.
Displaying the time continuously
when the device is off and the
ignition is on
Setting the clock time
To display the time when the device is
off and the vehicle ignition is on,
To set the clock time,
➮ press the MENU button 8.
➮ press the MENU button 8.
➮ Press the or button 7 repeatedly until “CLOCK SET” appears in
the display.
➮ Press the
button 7.
The clock time appears in the display.
The hours flash and can be adjusted.
➮ Adjust the hours using the / buttons 7.
Once the hours are set,
➮ press the
button 7.
The minutes flash.
➮ Adjust the minutes using the /
buttons 7.
➮ Press the MENU button 8 twice.
Selecting 12/24-hour clock
mode
➮ Press the MENU button 8.
“MENU” appears in the display.
or button 7 repeatedly until “24 H MODE” or “12 H
MODE” appears in the display.
➮ Press the
or button 7 to
switch between the modes.
➮ Press the
50
“MENU” appears in the display.
or button 7 repeatedly until “CLOCK OFF” or
“CLOCK ON” appears in the display.
➮ Press the
or button 7 to
switch between the ON/OFF settings.
When you have finished adjusting the
setting,
➮ Press the
➮ press the MENU button 8.
Briefly displaying the time when
the device is switched off
To display the time briefly when the device is off,
➮ press the SRC
button 2.
The time is displayed for eight seconds.
or button 7 to adjust the bass.
When you have finished adjusting the
setting,
➮ Press the
or button 7 to adjust the balance (right/left).
When you have finished adjusting the
setting,
➮ Press the
➮ press the AUDIO button 9.
Adjusting the front/rear volume
distribution (fader)
To adjust the front/rear volume distribution (fader),
➮ press the AUDIO button 9.
➮ press the AUDIO button 9.
“BASS” appears in the display.
Adjusting the treble
➮ Press the AUDIO button 9.
➮ Press the
“BASS” appears in the display.
or button 7 to adjust the fader (front/rear).
When you have finished adjusting the
setting,
or button 7 to adjust the treble.
When you have finished adjusting the
setting,
➮ Press the
ENGLISH
➮ Press the
➮ press the AUDIO button 9.
PORTUGUÊS
button 7 repeatedly
until “TREBLE” appears in the display.
➮ Press the
button 7 repeatedly
until “FADER” appears in the display.
FRANÇAIS
button 7 repeatedly
until “BAL” appears in the display.
➮ Press the
ITALIANO
“BASS” appears in the display.
➮ press the AUDIO button 9.
“BASS” appears in the display.
NEDERLANDS
Adjusting the bass
➮ Press the AUDIO button 9.
To adjust the left/right volume distribution (balance),
SVENSKA
You can adjust the sound settings (bass
and treble) separately for each source
(radio, CD/MP3 and CD changer / AUX).
The volume distribution settings (balance and fader) apply to all the audio
sources (except for traffic announcements).
You can only adjust the balance and
fader settings for traffic announcements
whilst a traffic announcement is actually being played.
Setting the left/right volume
distribution (balance)
ESPAÑOL
Sound
DEUTSCH
SOUND
DANSK
➮ press the AUDIO button 9.
51
SOUND
X-BASS
Equalizer presets
X-BASS
This device is equipped with an equalizer that has been preset with settings
for the “ROCK”, “POP” and “CLASSIC”
music styles.
To select an equalizer preset,
You can use the X-Bass feature to boost
the bass at low volume levels.
The selected X-Bass setting affects all
the audio sources (radio, CD/MP3, CD
changer or AUX).
You can set the X-BASS boost in steps
ranging from 1 to 3.
“XBASS OFF” means that the X-BASS
function is switched off.
➮ press the AUDIO button 9.
“BASS” appears in the display.
button 7 repeatedly
until “POP”, “ROCK”, “CLASSIC” or
“EQ OFF” appears in the display.
➮ Press the
or button 7 to select one of the presets or select
“EQ OFF” to switch off the equalizer. If you select one of the presets,
it is shown continuously in the display.
When you have finished adjusting the
setting,
➮ Press the
➮ press the AUDIO button 9.
Adjusting the X-BASS boost
➮ Press the AUDIO button 9.
“BASS” appears in the display.
button 7 repeatedly
until “XBASS” appears in the display together with the current setting.
➮ Press the
or button 7 repeatedly until the setting that you want
appears in the display.
When you have finished adjusting the
setting,
➮ Press the
➮ press the AUDIO button 9.
52
➮ press the MENU button 8 twice.
Switching the AUX input on/off
➮ Press the MENU button 8.
“MENU” appears in the display.
or button 7 repeatedly until “AUX OFF” or “AUX ON”
appears in the display.
➮ Press the
or button 7 to
switch AUX on/off.
When you have finished adjusting the
setting,
➮ Press the
➮ press the MENU button 8.
Note:
● If the AUX input is activated, you
can select it by pressing the SRC
button 2. “AUX INPUT” then appears in the display.
DEUTSCH
ENGLISH
FRANÇAIS
ITALIANO
or button 7 to
switch between “PEAK ON” and
“PEAK OFF”.
When you have finished adjusting the
setting,
➮ Press the
Note:
● If no CD changer is connected, the
AUX input must be activated in the
menu.
NEDERLANDS
or button 7 repeatedly until “PEAK LVL” appears in
the display.
➮ Press the
SVENSKA
➮ Press the MENU button 8.
“MENU” appears in the display.
Instead of connecting a CD changer,
you can connect another audio source
equipped with a line output. Audio sources can, for example, be portable CD
players, MiniDisc players or MP3 players.
If you want to connect an external audio source, you will need an adapter
cable. You can obtain this cable (Blaupunkt no.: 7 607 897 093) from your
authorised Blaupunkt dealer.
ESPAÑOL
The level display temporarily provides
you with a symbolic representation of
the volume and audio settings whilst you
are adjusting them.
When you are not changing any settings, the level display depicts the peak
music/speech output. You can switch
the level display on/off.
External audio sources
PORTUGUÊS
Configuring the level
display
EXTERNAL AUDIO SOURCES
DANSK
LEVEL DISPLAY
53
SPECIFICATIONS
Specifications
Amplifier
Output power:
4 x 25 watts sine
in accordance with
DIN 45 324
at 14.4 V
4 x 45 watts max.
power
Tuner
Wavebands in Europe:
FM :
87.5 - 108 MHz
MW :
531 - 1 602 kHz
LW :
153 - 279 kHz
FM frequency response:
35 - 16,000 Hz
CD
Frequency response:
20 - 20,000 Hz
Pre-amp out
4 channels:
2V
Input sensitivity
AUX input:
2 V / 6 kΩ
Subject to changes!
54
Bitte den ausgefüllten Gerätepass sicher aufbewahren!
Please keep the filled-in radio pass in a safe place!
Prière de conserver soigneusement la carte d’autoradio remplie !
Tenete per favore il libretto di apparecchio, debitamente riempito,
in un posto sicuro!
Bewaar de ingevulde apparaatpas op een veilige plaats!
Vänligen förvara ifyllt apparatpass på säker plats!
¡Favor guardar el documento del aparato debidamente llenado en
un lugar seguro!
Por favor, guardar o cartão preenchido do aparelho num lugar
seguro!
Det udfyldte apparatpas opbevares et sikkert sted!
Country:
Germany
Austria
Belgium
Denmark
Finland
France
Great Britain
Greece
Ireland
Italy
Luxembourg
Netherlands
Norway
Portugal
Spain
Sweden
Switzerland
Czech. Rep.
Hungary
Poland
Turkey
USA
Brasil
(Mercosur)
Malaysia
(Asia Pacific)
Phone:
Fax:
WWW:
(D)
(A)
(B)
(DK)
(FIN)
(F)
(GB)
(GR)
(IRL)
(I)
(L)
(NL)
(N)
(P)
(E)
(S)
(CH)
(CZ)
(H)
(PL)
(TR)
(USA)
0180-5000225
01-610 39 0
02-525 5444
44 898 360
09-435 991
01-4010 7007
01-89583 8880
210 94 27 337
01-4149400
02-369 62331
40 4078
023-565 6348
66-817 000
01-2185 00144
902 52 77 70
08-7501500
01-8471644
02-6130 0441
01-333 9575
0800-118922
0212-335 06 69
800-2662528
05121-49 4002
01-610 39 391
02-525 5263
44-898 644
09-435 99236
01-4010 7320
01-89583 8394
210 94 12 711
01-4598830
02-369 62464
40 2085
023-565 6331
66-817 157
01-2185 11111
91 410 4078
08-7501810
01-8471650
02-6130 0514
01-324 8756
022-8771260
0212-346 00 40
708-6817188
http://www.blaupunkt.com
(BR)
+55-19 3745 2769
+55-19 3745 2773
(MAL) +604-6382 474
+604-6413 640
Gerätepass
Name:
....................................................
Typ:
7 645 ...........................................
Serien-Nr:
BP ...............................................
Blaupunkt GmbH, Robert-Bosch-Straße 200, D-31139 Hildesheim
12/04 - CM/ASA
(DE) Hinweis zum PTY-EON-Empfang
Wenn Ihr Blaupunkt-Gerät von einem gehörten Radioprogramm zu einem anderen
Radioprogramm oder von einer gewählten Quelle (CD oder CD-Wechsler) zu
einem Radioprogramm umschaltet, so überprüfen Sie bitte, ob Sie PTY
(Programm-Typ) eingeschaltet haben.
Möchten Sie diese PTY-EON-Umschaltung nicht haben, so schalten Sie diese im
Menü mit „PTY off” aus. Drücken Sie zuvor eine der Tasten AUDIO, SRC oder
BND.
Bitte lesen Sie dazu auch in der Bedienungsanleitung unter „Radiobetrieb” den
Absatz „Programm-Typ (PTY)”.
(GB) Note regarding PTY-EON reception
If your Blaupunkt system switches from your chosen radio programme to another
radio programme or from your chosen audio source (CD or CD changer) to a radio
programme, please check whether you have activated the PTY (programme type)
function.
If you do not want this PTY-EON switching to occur, you should deactivate it in the
menu by selecting “PTY off”. Press one of the AUDIO, SRC or BND buttons
beforehand.
Please also read about this in the operating instructions in the section entitled
“Programme type (PTY)” under “Radio mode”.
(FR) Remarque concernant la réception PTY EON
Quand votre appareil Blaupunkt commute d’une émission de radio que vous êtes
en train d’écouter à un autre programme radio ou d’une source (CD ou changeur
CD) que vous avez choisie, assurez-vous d’avoir activé PTY (type de programme).
Si vous ne souhaitez pas cette commutation PTY EON, désactivez-la en
sélectionnant « PTY off » dans le menu. Appuyez au préalable sur l’une des
touches AUDIO, SRC ou BND.
Pour plus d’informations, reportez-vous également au paragraphe « Type de
programme (PTY) » du chapitre « Mode radio » du mode d’emploi.
(IT)
Nota sulla ricezione del PTY-EON
Quando il vostro apparecchio Blaupunkt si sintonizza da un radioprogramma in
ascolto ad un altro, oppure si disinserisce dalla fonte audio selezionata (CD o
multilettore CD) e passa alla ricezione di un programma radio, controllate per
favore se avete inserito la funzione PTY (tipo di programma).
8 622 404 794
1
_PTY_20spr.pmd
1
17.11.2005, 11:15 Uhr
Se volete evitare queste commutazioni PTY-EON, selezionate nel menu la funzione
"PTY off". Prima di fare ciò premete uno dei tasti AUDIO, SRC o BND.
Leggete per favore a tale proposito quanto riportato nelle istruzioni d’uso nella
sezione "Esercizio Radio" al punto "Tipo di programma (PTY)".
(NL) Aanwijzing bij de PTY-EON-ontvangst
Wanneer uw Blaupunkt-apparaat van één beluisterde radiozender overschakelt op
een andere, of van een gekozen geluidsbron (cd of cd-wisselaar) op een
radiozender, kunt u controleren of u PTY (programmatype) hebt ingeschakeld.
Wanneer u geen prijs stelt op deze PTY-EON-omschakeling, schakelt u deze in het
menu uit met "PTY off". Druk van tevoren op een van de toetsen AUDIO, SRC of
BND.
Lees hiervoor ook in de gebruiksaanwijzing onder "Radioweergave" de alinea
"Programmatype (PTY)".
(SW) Information om mottagning med PTY-EON
Byter din Blaupunkt bilstereo självmant från inställt radioprogram eller spelad cd/cdväxlare till annat radioprogram? Då är möjligen funktionen Programtyp (PTY-EON)
tillkopplad.
Om Du vill undvika detta, frånkopplar Du funktionen Programtyp (PTY-EON) i
menyn. Tryck först på någon av knapparna AUDIO, SRC eller BND och välj sedan
"PTY off".
För mer information, se avsnittet "Programtyp (PTY)" i bruksanvisningens kapitel
"Radio".
(ES) Observaciones sobre la recepción PTY-EON
Si su equipo Blaupunkt cambia de la emisora de radio que está escuchando a otra,
o de la fuente de sonido seleccionada (CD o cambiadiscos) a una emisora de
radio, verifique si tiene activada la función PTY (tipo de programa).
Si no desea que el equipo cambie automáticamente a emisoras PTY-EON,
desactive dicha función seleccionando la opción “PTY off” en el menú. Pulse
previamente una de las teclas AUDIO, SRC o BND.
Para más detalles, consulte el punto “Tipo de programa (PTY)” en el capítulo
“Modo de radio” de las instrucciones de manejo.
2
_PTY_20spr.pmd
2
17.11.2005, 11:15 Uhr
(PT) Informação sobre a recepção no modo PTY-EON
Se o seu aparelho mudar de um programa para outro programa ou de uma fonte
que está a ouvir actualmente (CD ou CDC) para um programa radiofónico,
verifique se a função PTY (tipo de programa) está activada.
Se não desejar usar a função PTY-EON, desactive-a no menu escolhendo a opção
“PTY OFF”. Prima anteriormente uma das teclas AUDIO, SRC ou BND.
Para tal, leia também o parágrafo “Tipo de programas (PTY)” no capítulo “Rádio”
nas instruções de serviço.
(DK) Oplysning om PTY-EON-modtagelse
Hvis din Blaupunkt radio slår fra det aktuelle radioprogram over i et andet eller fra
en valgt kilde (CD eller Multi CD) over i et radioprogram, bør du tjekke om du har
tændt for PTY (programtype).
Hvis PTY-EON-omskiftningen ikke ønskes, deaktiveres funktionen med "PTY off" i
menuen. Forinden trykkes på en af tasterne AUDIO, SRC eller BND.
Læs også afsnittet om "Programtype (PTY)" under "Radiodrift" i
betjeningsvejledningen.
(SF) PTY-EON-vastaanottoon liittyvä ohje
Jos Blaupunkt-laite vaihtaa kuuntelemastasi radio-ohjelmasta toiseen radioohjelmaan tai valitsemastasi äänilähteestä (CD tai CD-vaihtaja) johonkin radioohjelmaan, tarkista onko PTY (ohjelmatyypin tunnistus) päällä.
Jos et halua laitteen vaihtavan radio-ohjelmaa automaattisesti PTY-EON-toiminnon
avulla, voit kytkeä sen pois toiminnasta valikossa ("PTY off"). Paina ensin jotain
painikkeista AUDIO, SRC tai BND.
Lue myös käyttöohjeen kohdasta "Radiokäyttö" kappale "Ohjelmatyyppi (PTY)".
(PL) Wskazówki dotyczàce odbioru PTY-EON
Gdy urzàdzenie prze∏àcza si´ z jednej stacji radiowej na innà lub z wybranego
êród∏a audio (CD / zmieniacz CD) na odbiór programu radiowego, to nale˝y
sprawdziç, czy w∏àczony program jest programem typu PTY.
Je˝eli nie chcà Paƒstwo korzystaç z funkcji PTY EON, to prosz´ w odpowiednim
menu wybraç opcj´ „PTY off”. Przed wybraniem tej opcji trzeba wcisnàç jeden z
przycisków AUDIO, SRC lub BND.
Dalsze informacje na ten temat znajdà Paƒstwo w instrukcji obs∏ugi w rozdziale
„Tryb obs∏ugi radia”, w punkcie „Typ programu (PTY)”.
3
_PTY_20spr.pmd
3
17.11.2005, 11:15 Uhr
(CZ) Upozornûní k pfiíjmu s funkcí PTY-EON
Pokud se vበpfiístroj pfiepne ze stanice, kterou právû posloucháte, na jinou
rozhlasovou stanici, nebo ze zvoleného zdroje (CD nebo mûniã CD) na jiné
rozhlasové vysílání, zkontrolujte, jestli není zapnutá funkce PTY (typ programu).
Pokud si nepfiejete, aby do‰lo k pfiepínání pfiístroje funkcí PTY-EON, vypnûte ji
v nabídce bodem „PTY off”. Stisknûte nejprve jedno z tlaãítek AUDIO, SRC nebo
BND.
Bliωí informace k tomuto bodu naleznete v návodu k obsluze v kapitole „ReÏim
rádia” v odstavci „Typ programu (PTY)”.
(HU) Utasítás a PTY-EON vételhez
Ha az Ön Blaupunkt készüléke egy hallgatott rádiómæsorról egy másik
rádiómæsorra vagy egy kiválasztott forrásról (CD vagy CD-váltó) egy rádiómæsorra
kapcsol át, úgy kérjük ellenœrizze, hogy bekapcsolta-e a PTY-t (mæsortípus).
Ha Önnek nem megfelelœ ez a PTY-EON átkapcsolás, kérjük, kapcsolja azt ki a
menüben a „PTY off”-fal. Elœtte azonban nyomja le az AUDIO, SRC vagy BND
gombok egyikét.
Kérjük, ezzel kapcsolatban olvassa el a kezelési útmutató „Rádió üzemmód”
fejezetében a „Mæsortípus (PTY)” c. bekezdést.
(KR) Napomena uz PTY-EON-prijem
Ako Va‰ Blaupunkt ure∂aj prebacuje sa jednog radio-programa na neki drugi ili sa
jednog izabranog izvora (CD ili CD-izmjenjivaã) na neki radio-program, onda
molimo da provjerite, da li ste ukljuãili PTY (tip programa).
Ako ne Ïelite ovo PTY-EON-prebacivanje, onda ga iskljuãite u meniju sa „PTY
off”. Prethodno pritisnite jednu od tipki AUDIO, SRC ili BND.
Molimo Vas, o tome proãitajte i u uputama za upotrebu pod „Rad radija” poglavlje
„Tip programa (PTY)”.
(SE) Napomena uz PTY-EON-prijem
Ako Va‰ Blaupunkt ure∂aj prebacuje sa jednog radio-programa na neki drugi ili sa
jednog izabranog izvora (CD ili CD-izmenjivaã) na neki radio-program, onda
molimo da proverite, da li ste ukljuãili PTY (tip programa).
Ako ne Ïelite ovo PTY-EON-prebacivanje, onda ga iskljuãite u meniju sa “PTY
off”. Prethodno pritisnite jedan od tastera AUDIO, SRC ili BND.
Molimo Vas, o tome proãitajte i u uputstvu za upotrebu pod “Rad radija” pasus
“Tip programa (PTY)”.
4
_PTY_20spr.pmd
4
17.11.2005, 11:15 Uhr
(SK) Pokyny pre príjem PTY-EON
Ak Vበprístroj Blaupunkt prepína z poãúvaného rádioprogramu na in˘
rádioprogram alebo z niektorého zvoleného zdroja (CD alebo meniãa CD) na in˘
rádioprogram, tak prosím skontrolujte, ãi ste zapnuli PTY (Program Type).
Ak nechcete toto prepínanie PTY-EON, vypnite ho v menu pomocou “PTY off”.
Stlaãte pred t˘m niektoré z tlaãidiel AUDIO, SRC alebo BND.
Preãítajte si prosím k tomu tieÏ v návode na obsluhu, pod “Rádiová prevádzka”
odsek “Program Type (PTY)”.
(SL) Navodilo za PTY-EON sprejem
Ko se Va‰a Blaupunkt naprava preklopi iz slu‰nega radijskega programma na
drugi radijski program, oziroma iz izbrane zveze (CD ali CD-menjalca) na radijski
program, Vas prosimo, da preverite, ãe ste vklopili PTY (programni-tip).
âe noãete preklop PTY-EON, potem priklopite le-tega v meniju na „PTY off”.
Pritisnite pred tem na tipko AUDIO, SRC oziroma na BND.
Prosimo, da si preberete v navodilih za uporabo pod “radijo delovanje” odstavek
“program-tip (PTY)”.
(TR) PTY-EON yay∂n∂ al∂nmas∂ ile ilgili bilgi
Eπer Blaupunkt cihaz∂n∂z dinlediπiniz bir radyo program∂ndan baµka bir radyo
program∂na veya seçmiµ olduπunuz bir kaynaktan (CD veya CD deπiµtirici) bir
radyo program∂na geçerse, PTY (program tipi) fonksiyonunu açm∂µ olup
olmad∂π∂n∂z∂ lütfen kontrol ediniz.
Eπer bu PTY-EON geçiµini istemiyorsan∂z, bu fonksiyonu menü üzerinden "PTY off"
ile kapat∂n∂z. Bu iµlemden önce AUDIO, SRC veya BND tuµlar∂ndan birine bas∂n∂z.
Lütfen bu konu ile ilgili olarak, kullanma k∂lavuzunda "Radyo modu" bölümündeki
"Program tipi (PTY)" k∂sm∂n∂ okuyunuz.
(GR) Àfi‰ÂÈÍË ÁÈ· ÙË Ï‹„Ë PTY-EON
ŸÙ·Ó Ë Û˘Û΢‹ Û·˜ Blaupunkt ·ÏÏ¿˙ÂÈ ·fi ¤Ó· Ú·‰ÈÔʈÓÈÎfi ÚfiÁÚ·ÌÌ· Ô˘
·ÎÔ‡Ù Û ¤Ó· ¿ÏÏÔ Ú·‰ÈÔʈÓÈÎfi ÚfiÁÚ·ÌÌ· ‹ ·fi ÌÈ· ÂÈÏÂÁ̤ÓË ËÁ‹ (CD
‹ ÙÚÔÊÔ‰fiÙ˘ CD) Û ¤Ó· Ú·‰ÈÔʈÓÈÎfi ÚfiÁÚ·ÌÌ·, ÙfiÙ ÂϤÁÍÙ ·Ú·Î·ÏÒ,
Â¿Ó ¤¯ÂÙ ÂÓÂÚÁÔÔÈ‹ÛÂÈ ÙÔ PTY (Ù‡Ô˜ ÚÔÁÚ¿ÌÌ·ÙÔ˜).
ŸÙ·Ó ‰ÂÓ ÂÈı˘Ì›Ù ӷ ¤¯ÂÙ ·˘Ù‹ ÙËÓ ·ÏÏ·Á‹ ÏÂÈÙÔ˘ÚÁ›·˜ PTY-EON, ÙfiÙÂ
·ÂÓÂÚÁÔÔÈ‹ÛÙ ÙËÓ ÛÙÔ ÌÂÓÔ‡ Ì “PTY OFF”. ¶·Ù‹ÛÙ ÚÔËÁÔ˘Ì¤Óˆ˜ ¤Ó·
·fi Ù· Ï‹ÎÙÚ· AUDIO, SRC ‹ BND.
¢È·‚¿ÛÙ ·Ú·Î·ÏÒ ÁÈ’ ·˘Ùfi ›Û˘ ÛÙȘ Ô‰ËÁ›Â˜ ¯ÂÈÚÈÛÌÔ‡ οو ·fi
“§ÂÈÙÔ˘ÚÁ›· Ú·‰ÈÔÊÒÓÔ˘” ÙËÓ ÂÓfiÙËÙ· “∆‡Ô˜ ÚÔÁÚ¿ÌÌ·ÙÔ˜ (PTY)”.
5
_PTY_20spr.pmd
5
17.11.2005, 11:15 Uhr
(RU) Указание по приему PTY-EON
При переключении тюнера аппарата Blaupunkt на другую радиостанцию или
переключении с радиоприема на другой источник звука (проигрыватель CD
или CD-чейнджер) проверьте, пожалуйста, включена ли функция PTY (тип
программы). Eсли Вы хотите отключить автоматический выбор программ
PTY-EON, то выключите эту функцию опцией меню "PTY off". Для этого
нажмите одну из следующих клавиш – AUDIO, SRC или BND.
Ознакомьтесь, пожалуйста, с соответствующими инструкциями о включении
автоматического режима выбора программ (PTY) в разделе "Прием
радиопередач" пользовательской документации к Вашему аппарату
Blaupunkt.
6
_PTY_20spr.pmd
6
17.11.2005, 11:15 Uhr