1
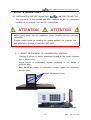
ADF-3200
Installation and Operation Guide
ADF-3200 Installation and Operation Guide
A&D 3D Co., Ltd. - Analogue and Digital 3D
Head Office :
209 Multimedia Center, Chungnam Techno Park, 511, Jiksan-eup,
Seobuk-gu, Cheonan-city, Chungnam-do, 331-858, KOREA
Phone : +81-41-589-0790
Fax : +81-41-589-0799
Email : [email protected]
Website : http://www.bestviewsystem.com
http://www.andkr.co.kr
copyright@2013 A&D 3D Co., Ltd. All right reserved
SAFETY INSTRUCTIONS
The bestView ADF-3200 Installs onto existing equipment : Please follow all directives from the
projector manufacturer in addition to the following safety guidelines.
This equipment is intended for use in a restricted access location. Before installing or operating
your bestView ADF-3200, please read this manual thoroughly, and retain it for future reference.
All instructions for operating and use of this equipment should be followed precisely. Installation
and preliminary adjustments should be performed by qualified A&D 3D Co. Ltd. personal or
authorized A&D 3D Co., Ltd. service dealers.
To avoide any damage :
- The rated voltage of ADF-3200 is AC 110~240V or DC 24~26V.
Serious pro blems can occur if the power isn’t properly supplied.
- The
ADF-3200 should not be used with projectors over 7,000
ANSI lumens.
- The panel window of
ADF-3200 should be placed properly
distance from projectors
- 1 -
Date : July. 1st. 2013
ADF-3200 Installation and Operation Guide
Contents
1. Overview
1-1
ADF-3200 technology highlights
1-2 About this manual
1-3
• • • • • • • •
ADF-3200 requirements
• • • • • • • • • • • • • • • • 4
• • • • • • • • • • • • • • • • • • • • 4
• • • • • • • • • • • • • • • • • • • • 5
2. Description of ADF-3200
2-1 Characteristics
2-2 Package
• • • • • • • • • • • • • • • • • • • • • • • • • • • • • • • 6
• • • • • • • • • • • • • • • • • • • • • • • • • • • • • • • • • • 7
2-3 Descriptions
• • • • • • • • • • • • • • • • • • • • • • • • • • • • • • • • 8
3. Setup & Operations
3-1 Preparation before mounting bestView
• • • • • • • • • • • • • • • • • 10
3-1-1 Height adjustment of polarization window
3-1-2 Check the panel driver cable
3-1-3 Desktop setting
3-1-4 Ceiling mount
3-2 Connection
• • • • • • • • • • • • • • • • • • • 11
• • • • • • • • • • • • • • • • • • • • • • • • • • • 11
• • • • • • • • • • • • • • • • • • • • • • • • • • • • 12
• • • • • • • • • • • • • • • • • • • • • • • • • • • • • • • • 13
3-2-1 System configuration
• • • • • • • • • • • • • • • • • • • • • • • • 13
3-2-1-1 Computer connecting system
• • • • • • • • • • • • • • • • • 13
3-2-1-2 Blu-ray disc player connecting system
3-2-2 Cable connection
3-3 Installation
• • • • • • • • • • • • • 10
• • • • • • • • • • • • 13
• • • • • • • • • • • • • • • • • • • • • • • • • • 14
• • • • • • • • • • • • • • • • • • • • • • • • • • • • • • • • 15
3-4 Starting & Ending
3-4-1 Setting
• • • • • • • • • • • • • • • • • • • • • • • • • • • • • • • 16
3-4-2 Starting
• • • • • • • • • • • • • • • • • • • • • • • • • • • • • • • 16
3-4-3 Ending
• • • • • • • • • • • • • • • • • • • • • • • • • • • • • • • 16
4. Trouble Shooting
• • • • • • • • • • • • • • • • • • • • • • • • • • 17
- 2 -
Date : July. 1st. 2013
ADF-3200 Installation and Operation Guide
5. Maintenance
5-1 Cleaning Dust
• • • • • • • • • • • • • • • • • • • • • • • • • • • • • • 18
5-2 Fingerprints and Smudges
5-3 Resistant Residue
5-4 If your
• • • • • • • • • • • • • • • • • • • • • • • 18
• • • • • • • • • • • • • • • • • • • • • • • • • • • • 18
ADF-3200 system is not working properly
6. Technical Specifications
7. Others
• • • • • • 18
• • • • • • • • • • • • • • • • • • • • • 19
• • • • • • • • • • • • • • • • • • • • • • • • • • • • • • • • • • 20
7-1 LED signals
7-2 Guarantee
• • • • • • • • • • • • • • • • • • • • • • • • • • • • • • • 20
• • • • • • • • • • • • • • • • • • • • • • • • • • • • • • • • 20
7-3 Important safety recommendations
• • • • • • • • • • • • • • • • • • • 20
7-4 Maintenance of the bestView ADF-3200
7-5 Customer support center
• • • • • • • • • • • • • • • • 20
• • • • • • • • • • • • • • • • • • • • • • • • 21
- 3 -
Date : July. 1st. 2013
ADF-3200 Installation and Operation Guide
1. OVERVIEW
1-1
ADF-3200 TECHNOLOGY HIGHLIGHTS
No delicate alignment and installation
The bestView ADF-3200 is a polarization modular that can be placed
simply with your DLP 3D-Ready projector.
Change over 2D to 3D and 3D to 2D simply
Practical design allows the user to switch between 2D and 3D DLP
projector presentations using the same projector.
Low maintenance cost
The bestView ADF-3200 has longer life with automatic control and it
uses inexpensive circular polarizing passive 3D glasses.
Easy installation and removal
The bestView ADF-3200 can be added to and removed very easily only
moving polarization window from projector lens using remote controller.
Multi purpose
The bestView ADF-3200 is for both professionals and consumers and is
perfect for boardroom presentations, conferences, classrooms, lectures,
home theater or any environments.
1-2 ABOUT THIS MANUAL
This manual provides instructions for proper setting of the bestView
ADF-3200, along with recommended daily operation procedures for running
a 3D projector and computer when the bestView ADF-3200 system is
installed. Please use this guide in conjunction with the user manual and
installation instructions for your projector; all warnings, guidelines, and
advisories in the projector's user manual apply.
- Identification of the components of the bestView ADF-3200 system
- Instructions on cleaning and maintaining the bestView ADF-3000.
- Appendices detailing projector-specific installation hardware and procedures.
- 4 -
Date : July. 1st. 2013
ADF-3200 Installation and Operation Guide
1-3
ADF-3200 REQUIREMENTS
In order to use bestView ADF-3200 system. The following equipments are
required for proper functioning of the ADF-3200. You must need a polarized
silver screen, circular polarizing passive 3D glasses, 3D projector, 3D player
(computer or Blu-ray disk player) and 3D contents.
Please contact your A&D 3D representative for a list of approved vendors.
- 3D POLARIZATION PRESERVING SILVER SCREEN
You have to need a polarization preserving silver screen in order to enjoy
3D images designed for 3D projection. If your screen was not manufactured
for 3D use, you might experience uncomfortable and blurry 3D images
with
high level of channel cross-talk. For the best quality of 3D images,
A&D 3D recommends the high quality of silver screen ADS-120M. If you
are interested in our premium 3D polarized silver screen runs on electrical
rolling, Please contact us by e-mail ([email protected])
- DLP 3D-READY PROJRCTOR
DLP 3D-Ready projector is must required for proper functioning of the
bestView ADF-3200 system. If your projector was not DLP 3D-Ready,
you would not able to enjoy the proper 3D images. ADF-3200 should not
be used with projectors over 7,000 ANSI lumens.
- 3D GLASSES
Only circular polarized 3D glasses will work with bestView ADF-3200
presentation. The audience can not use just any kind of 3D glasses. The
polarizing filters in the 3D glasses must match the polarization of the
presentation for an optimum 3D effect of ADF-3200. The circular polarized
3D glasses (ADG-3200) will present best 3D effect with ADF-3200.
ADG-3200 are available from A&D 3D Co., Ltd.
Please contact us by e-mail ([email protected])
- 3D BLU-RAY DISK PLAYER OR COMPUTER WITH 3D CONTENTS
Most 3D blu-ray disk players are compatible with the bestView ADF-3200
system. For 3D projection, a 3D blu-ray disk player (3D contents) or
computer (windows vister or above) are required in order to play
stereoscopic player.
- 5 -
Date : July. 1st. 2013
ADF-3200 Installation and Operation Guide
2. DESCRIPTION OF ADF-3200
2-1 CHARACTERISTICS
QUALITY
High speed switching technology
Designed for high bright projectors with big size of aperture
High bright images with high bright effect of panel
Very low refresh time and channel cross-talk
No panel delay time
EFFICIENCY
Easy
setup
for
use
with
suitable
single-lens
3D projectors
both
mounting on the ceiling and desk-top setting.
3 years guarantee
COMFORTS
For use with lightweight 3D polarized glasses
Premium passive 3D glasses are available from A&D 3D Co., Ltd
50 pieces of ADG-3200 are bundled in the ADF-3200.
- 6 -
Date : July. 1st. 2013
ADF-3200 Installation and Operation Guide
2-2 PACKAGE
① bestView ADF-3200 system
② Premium passive 3D glasses ADG-3200 (50 PCs)
③ Power adapter (AC 110~240V / DC 24V)
④ Power cable (AC 220V)
⑤ RGB cable (D-Sub to D-Sub)
⑥ RJ-14 panel cable (body to panel)
⑦ Cleaning wipe
⑧ Remote controller Transmitter (Opton : Apply to ADF-3200A)
⑨ Remote controller Receiver (Opton : Apply to ADF-3200A)
① bestView ADF-3200 system
② 3D glasses
③ Power adapter
④ Power cable
⑤ RGB cable
⑥ panel cable
⑦ Cleaning wipe
⑧ Transmitter
⑨ Receiver
- 7 -
Date : July. 1st. 2013
ADF-3200 Installation and Operation Guide
2-3 DESCRIPTIONS
3D filter
bestView system body
Panel drive cable
3D filter moving pulley
3D filter moving motor
Height adjustment screw
Panel drive cable
Right moving button
Left moving button
Panel drive signal out
L/R mode change button
3D sync in
RGB(D-Sub) image in
Remote control receiver in
3D indicator LED
Power LED
Power(DV 24V)
- 8 -
Date : July. 1st. 2013
ADF-3200 Installation and Operation Guide
- 3D filter : separator left and right images from each other
- Panel drive cable : connecting between side of body and 3D-filter
- Right moving button : for moving 3d-filter to the right
- Left moving button : for moving 3-filter to the left
- Panel drive signal out : connecting one side of panel drive cable
- L/R mode change button : left & right image switch button
If the 3D image sequences are diverted, press this L/R mode change
button. It enables the conversion of L and R images sequences
- 3D sync in : connecting 3D sync cable from 3D port of projector
- RGB(D-Sub) image in : connecting D-Sub cable from RGB out of projector
- Remote control receiver in : connecting receiver cable from remote controller
- 3D indicator LED : 3D mode indicator
When the 3D images or sync is properly connected, green LED turns on
- Power LED : When system is powered, red LED turns on
- Power(DV 24V) : connecting DC jack from adaptor
- 9 -
Date : July. 1st. 2013
ADF-3200 Installation and Operation Guide
3. SETUP & OPERATIONS
3-1 PREPARATION BEFORE MOUNTING
ON THE PROJECTOR.
The procedure in this section will help installers to set up polarization
modular on to projector and test 3D presentation.
- Before going ahead with this installation, please carefully read the previous
instructions.
- Prepare proper space for installing the system between the projector lens
and polarization window of bestView ADF-3200.
3-1-1 HEIGHT ADJUSTMENT OF POLARIZATION WINDOW
- Unscrew 4 pieces of height adjustment screws to the count clockwise
two or three times.
- Adjust height of polarization window according to the height of
projector lens.
- After adjust the height of polarization window, fasten the adjustment
screws tightly.
Height adjustment screw
set proper height
- 10 -
Date : July. 1st. 2013
ADF-3200 Installation and Operation Guide
3-1-2 CHECK THE PANEL DRIVE CABLE
In order to operate exactly, installers have to check the panel drive
cable. The cable connects between terminal of panel drive signal out
and polarization window panel. The cable connects tightly both sides
with clicking noises.
3-1-3 DESKTOP SETTING
When installers set up projector and polarization modular on the desk,
simply put the projector on the bestView ADF-3200.
In this case, the important thing is that the projector is located with
proper distance from polarization window. (see 3-1 and 3-2)
Left / Right
left / right moving button
Polarization window must be set front of projector lens with Right / Left
moving button. (When case of ADF-3200A is installed, polarization
window will be able to be moved by remote control transmitter. Button
“2”
and “3”
can move polarization window to the left and right.)
- 11 -
Date : July. 1st. 2013
ADF-3200 Installation and Operation Guide
3-1-4 CEILING MOUNT
When installers set up projector and bestView ADF-3200 on the ceiling,
The bestView must be located between projector and projector bracket
which mounted on the ceiling. The projector and bestVew must be
installed upside down.
ceiling mounting bracket for projector
right / left moving button
bestView ADF-3200
Projector
Polarization window must be set front of projector lens with Right / Left
moving button. (When case of ADF-3200A is installed, polarization
window will be able to be moved by remote control transmitter. Button
“2”
and “3”
can move polarization window to the left and right.)
- 12 -
Date : July. 1st. 2013
ADF-3200 Installation and Operation Guide
3-2 CONNECTION
3-2-1 SYSTEM CONFIGURATION
System Configuration is like below.
3-2-1-1 Computer connecting system
bestView
Projector
Computer
3D glasses
Silver screen
① Connecting RGB cable between computer and projector.
② Connecting RGB cable between projector and bestView.
3-2-1-2 Blu-ray disc player connecting system
bestView
Projector
3D Converter data converter
3D glasses
Silver screen
Blu-ray disc player
① Connecting HDMI cable between blu-ray and 3D converter.
② Connecting HDMI cable between 3D converter and data converter.
③ Connecting RGB cable between data converter and projector.
④ Connecting RGB cable between projector and bestView.
- 13 -
Date : July. 1st. 2013
ADF-3200 Installation and Operation Guide
3-2-2 CABLE CONNECTION
①
②
③
④
⑤
⑥
⑦
⑧
① DC 24V IN jack
② Remote control receiver cable
③ RGB cable between projector and bestView
④ 3D-sync cable between projector and bestView
⑤ RGB cable between computer and projector
⑥ RGB cable between data converter and projector
⑦ HDMI cable between 3D blu-ray disc player and 3D converter
⑧ HDMI cable between 3D converter and data converter
- 14 -
Date : July. 1st. 2013
ADF-3200 Installation and Operation Guide
3-3 INSTALLATION
The 3D-filter of vestView ADF-3200 should be placed directly in front of the
lens of the projector at a distance such that the image from the projector
covers as much as possible the entire area of the 3D filter in order to
minimize thermal heating effects. A distance of between 30mm and 60mm
is normally recommended for this purpose.
Setting projector proper distance
Short distance
Not optimized
Proper distance
Optimized
Long distance
Out of the limit
When Setting the projector, compare image size on the 3D filter to polarization
panel.
- 15 -
Date : July. 1st. 2013
ADF-3200 Installation and Operation Guide
3-4 STARTING & ENDING
3-4-1 SETTING
No deliberate adjustment is needed for standard use.
You have only to connect power source through DC(24V) adaptor from
AC power supply and connect RGB cable between RGB image in port
of vestView and RGB out port of projector. Then bestView ADF-3200 is
all standby to operator 3D images presentation.
3-4-2 STARTING
There is no on/off switch. The system start as soon as it is connected
to a power source. Ensure the 3D-filter of bestView ADF-3200 is positioned
directly in front of the lens of the projector and check the connecting of
RGB cable between RGB image in port of vestView and RGB out port
of projector. If you would play 3D images by computer or 3D blu-ray
disc player, the bestView ADF-3200 will start right away synchronized
with 3D images.
1. Set up the computer or blu-ray disc player and projector in waiting mode.
2. Check the RGB cable connection.
3. If 3D sync cable is in setting between projector and bestView, check
connection of the 3D sync cable exactly.
4. Check panel drive cable of RJ-11 connection.
5. Check and insert power plug into power terminal. Then you will see
the red LED on.
6. Set 3D-filter in front of the projector lens using L/R moving button or
“2” or “3” key of remote controller transmitter.
7. Start the 3D film from computer or 3D blu-ray disc player. If 3D image
plays correctly, you can find the green LED on.
8. If L/R shows reverted on the projector, use the L/R mode change
button(green) to correct the problem.
3-4-3 ENDING
1. If 3D image is stopped to play, bestView will stop operating 3D
mode automatically.
2. Move 3D-filter aslant of the projector lens to operate 2D mode.
3. Plug off the DC power adaptor or power off the AC power cord.
- 16 -
Date : July. 1st. 2013
ADF-3200 Installation and Operation Guide
4. TROUBLE SHOOTING
ISSUE
Blurry picture,
low contrast,
“soft” image
CAUSE
RESOLUTION
• Projection lens is out of focus
• Focus projection lens
• Fingerprints or other blemishes
on projection lens or 3D-filter
• Clean projection lens and 3D-filter
• Improper projector parameters
• Use proper projector parameters
• RGB cable is not connected
• Check the RGB cable connection
between projector and ADF-3200
Does not look 3D
Image is too dark
ADG-3200
3D-glasses are not
working
I see 3D but it
just looks wrong
• RJ-14 panel cable is not
connected exactly
• Check the RJ14 cable connection
• Power supply is not enough
• Check the connection of adaptor
• Projector lamp has low output,
or is set too low a setting
or is not properly sized
• Change lamp setting and or
change lamp
• Computer is not sending signal
correctly to projector
• Check and set the monitor
frequency to 120Hz
• Check the contents 3D or not
• RGB cable is not connected
• Check the RGB cable connection
between projector and ADF-3200
• Power adaptor is not connected
• Check the connection of adaptor
• RJ-14 panel cable is not
connected exactly
• Check the RJ14 cable connection
• L/R signal was not correct
•
• Contents is not 3D
• Play the proper 3D contents
push the L/R button
• Projector is not working properly • Check projector working in 120Hz
• Projector is not set-up 3D mode • Set-up projector in 3D mode
Flick in image
• Windows version is low & older
• Check windows version
OS virsion is required Windows Vister
or above to play Stereoscopic-player
• 3D contents is not 120Hz
• Check and set the monitor
frequency to 120Hz
- 17 -
Date : July. 1st. 2013
ADF-3200 Installation and Operation Guide
5. MAINTENANCE
A small amount of dust or dirt on 3D-filter(polarized panel) has minimal effect
on image quality. Clean 3D-filter only when dust, dirt, oil or other marks are
obvious. When doing so, clean the glass according to the instructions in the
following sections : Never touch the optical surfaces with bare hands.
3D-filter is specially treated with an optical, anti-reflective coating.
Always use a high-intensity flashlight to check 3D-filter for particles.
5-1 CLEANING DUST
Tools
- Canned air, Flashlight
Procedure
Use canned air to blow dust off 3D-filter.
Use high intensity flashlight to check for smudges.
5-2 FINGERPRINTS AND SMUDGES
Tools
- Micro-fiber cloth, Flashlight
Procedure
Remove fingerprints or smudges from 3D-filter by rubbing firmly with
micro-fiber cloth using linear or circular motions.
Use high intensity flashlight to check for residue.
5-3 RESISTANT RESIDUE
Tools
- Micro-fiber cloth, anti-reflective glass lens cleaning solution, Flashlight
Procedure
Apply anti-reflection glass lens cleaning solution to micro-fiber cloth.
Use high intensity flashlight to check for streaking.
Use dry portion of micro-fiber cloth to remove streaking by rubbing
gently in a circular motion.
5-4 IF YOUR
ADF-3200 SYSTEM DOES NOT WORK PROPERLY
Please don’t disassemble and repair ADF-3200 system.
If operating errors occur abnormally, we will replace your product as the
same new product.
- 18 -
Date : July. 1st. 2013
ADF-3200 Installation and Operation Guide
6. TECHNICAL SPECIFICATIONS
SPECIFICATION
UNIT
DATA
mm
122 X 122
ANSI Lumen
8,000
Frame
288
Optical light efficiency
%
38
Efficiency through glasses
%
16
Channel cross-talk
%
0.8
Panel refresh time (Dark time)
us
400
Switch delay time
us
0
Operating temperature
℃
0 to 60
Storage temperature
℃
-10 to 70
V DC
24
Aperture
Maximum power of projector
Maximum switching speed
Operating Voltage
- 19 -
Date : July. 1st. 2013
ADF-3200 Installation and Operation Guide
7. OTHERS
7-1 LED SIGNALS
Red LED : The system is powered but not synchronized
Green LED : signal of 3D synchronization (greater than 76Frame)
7-2 GUARANTEE
The bestView ADF-3200 is guaranteed to the original purchaser for 24
months according to Korean legislation. 3D-filter and cables should be
returned in their original package along with the original proof of purchase.
3D-filter that are broken or scratched are not covered.
The bestView may become damaged if it is placed in front of the projector
lens such that the image from the projector does nor cover as mush as
possible the entire area of the polarization panel (see 3-3 INSTALLATION).
Damage caused by placing the 3D-filter of bestView too close to the
projector lens is not covered by guarantee.
A&D 3D will guarantee that faulty product will be made an exchange to
new one with respect to use in working order within the term of warranty.
If operating errors occur abnormally, please don’t disassemble and repair
ADF-3200 system. We will replace your product as the same new one
within the term of warranty. If it would be post warranty, please send us
the product as your convenient method. We will repair it and return to you.
7-3 IMPORTANT SAFETY RECOMMENDATIONS
In case of damage to the bestView ADF-3200 where the skin is exposed
to liquid crystal material, we recommend that you immediately wash the
area with soap and water. In case of eye exposure to liquid crystal material,
please seek medical advice immediately.
7-4 MAINTENANCE OF THE
ADF-3200
- Protect all parts of the bestView system from direct sunlight, heat or water.
Extreme conditions may alter the product’s performance.
- Do not modify the electrical or mechanical components of bestView system.
There is no user accessible part inside the bestView ADF-3200.
- Do not apply force to the panel of 3D-filter.
- Avoid all vibration and shock.
- 20 -
Date : July. 1st. 2013
ADF-3200 Installation and Operation Guide
- Use a clean soft cloth when cleaning the panel of 3D-filter to avoid
scratching, especially on the panel surface.
- Alway transport the bestView system in a rigid case to avoid scratching
the panel and to prevent system body from breaking.
- Do not expose the bestView ADF-3200 system to water.
7-5 CUSTOMER SUPPORT CENTER
Technical support : www.bestviewsystem.com
Sales support : [email protected]
- 21 -
www.andkr.co.kr
[email protected]
Date : July. 1st. 2013