1
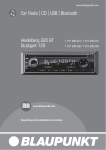
www.blaupunkt.com
Car Radio | DVD | CD | USB | SDHC | VCD | MP3 | WMA
Montevideo 4010 DVD
1 011 103 400
Operating and installation instructions
Mode d’emploi et de montage
Instrucciones de manejo e instalación
Instruções de serviço e de montagem
01_Montevideo4010DVD_gb.indd 1
21.03.11 10:37
Safety Precautions
Contents
Precautions
Disc Notes
• Use only in a 12-volt DC negative-ground
electrical system.
• When replacing the fuse, be sure to use one
with an identical amperage rating. Using
a fuse with a higher amperage rating may
cause serious damage to the unit.
• DO NOT attempt to disassemble the unit.
Laser beams from the optical pickup are
dangerous to the eyes.
• Make sure that pins or other foreign objects
do not get inside the unit; they may cause
malfunctions, or create safety hazards such
as electrical shock or laser beam exposure.
• If you have parked the car for a long time in
hot or cold weather, wait until the temperature in the car becomes normal before operating the unit.
• Keep the volume at a level at which you can
hear outside warning sound (horns sirens,
etc.).
• DO NOT open covers and do not repair
yourself. Consult the dealer or an experienced technician for help.
• Never watch video in the front when driving
to prevent the violation of laws & regulations
and also to reduce the risk of traffic accident.
• Operate the unit correctly according to the
manual instruction to prevent unnecessary
problem.
• Playing a defective or dusty disc can cause
dropouts in sound.
• Hold discs as illustrated.
• Do not touch the unlabeled side.
• Do not attach any seal, label or data protection sheet to either side of a disc.
• Do not expose a disc to direct sunlight or
excessive heat.
• Wipe a dirty disc from the center outward
with a cleaning cloth.
• Never use solvents such as benzine or alcohol.
• This unit cannot play 3-inch (8 cm) discs.
• Never insert a 3-inch disc contained in the
adapter or an irregularly shaped disc.
The unit may not be able to eject it.
Safety Precautions ......................................... 2
Panel Controls ................................................ 3
Remote Controls............................................. 4
General Operation .......................................... 5
Radio Mode .................................................... 7
USB/SD/MMC Mode....................................... 8
Disc Mode....................................................... 9
DVD Setup.................................................... 13
DVD Video Region Numbers ........................ 15
Electrical Connections .................................. 16
Anti-Theft System ......................................... 17
Installation Guide .......................................... 18
Troubleshooting ............................................ 19
Specifications ............................................... 20
Note:
To provide a clear demonstration and an alternative for easy understanding of the operation
of this unit, graphic illustration was used.
However, this illustration is not necessary
printed as the actual image found on the unit.
2
01_Montevideo4010DVD_gb.indd 2
21.03.11 10:37
Panel Controls
to turn on/off the unit.
1. Disc eject
2. - Radio
- Disc play (when disc inserted)
- USB (when USB connected)
- Card (when SD/MMC card inserted)
- AUX-IN
3. & 4. - Radio tune
- Track seek
5. Radio local/distant
6. Panel release
7. AUX-IN jack
8. Band switch:
FM1, FM2, FM3, MW1, MW2
9. - Disc playback
• Button 1: Play/Pause
• Button 2: Turn scan play on/off
• Button 3: Set repeat play mode
• Button 4: Turn random play on/off
• Button 5: -Video system NTSC/PAL 60/
PAL/AUTO
- Select folder down (MP3)
• Button 6: - DVD audio/VCD audio L/R/ST
- Select folder up (MP3)
- Radio preset 1~6
• Press to tune in a preset station.
• Hold for more than 2 seconds to store
station.
ENGLISH
Power on/off: Press
10. - Short press to switch to clock display,
press again to exit.
- Long press to enter clock setting.
11. USB connector
12. SD/MMC card slot
13. - Power on/off (long press)
- Mute
14. Disc slot
15. Loudness on/off
16. Remote sensor
17. Radio station auto preset
18. - Rotate the control to adjust volume level
- Audio mode select.
- Press more than 2 seconds to enter into
menu mode.
3
01_Montevideo4010DVD_gb.indd 3
21.03.11 10:37
Remote Controls
Power on/off: Press
off the unit.
to turn on/
1. Zoom (DVD/VCD only)
2. Title (DVD only)
3. Power on/off
4. Setup
5. Menu cursor
6. Enter
7. Program
8. Digit area
9. - Short press to select audio menu, and
rotate the knob to adjust level.
- Long press to enter into setting menu,
then each press changes the mode.
10. Volume
11. Mute
12. - Radio tune
- Track skip/seek
13. Subtitle (DVD only)
14. - Radio
- Disc (when disc inserted)
- Card (when SD/MMC inserted)
- USB (when USB inserted)
- AUX-IN
15. Repeat
16. Repeat A-B
17. Stop/Return
18. Play/Pause
19. Goto search
20. - DVD menu
- PBC (for VCD 2.0 or up)
21. - OSD: On screen display
- AMS: Radio preset scan / Radio auto
preset
22. - DVD audio
- VCD audio L/R/ST
23. - Short press to switch to clock display,
press again to exit.
- Long press to enter clock setting.
- Return to previous menu (Setting menu)
24. Angle (DVD only)
25. - Video system NTSC/PAL 60/PAL/AUTO
- Radio band (in Radio mode)
Replacing the lithium battery of
remote control unit.
When the range of operation of the card
remote control becomes short or no function,
replace the lithium battery with a new one.
Make sure the battery polarity replacement is
correct.
1. Pull out the battery holder while pressing
the stopper.
2. Insert the button-type lithium battery with
the (+) mark facing upward. Insert the battery holder into the remote control.
(CR 2025)
1
2
4
01_Montevideo4010DVD_gb.indd 4
21.03.11 10:37
General Operation
Warning
Switching on and off
• Store the battery where children cannot
reach. If a child accidentally swallows the
battery, consult a doctor immediately.
• Do not recharge, short, disassemble or heat
the battery or dispose it in a fire.
• Do not leave the battery with other metallic
materials. Otherwise, the battery may start
to give off heat, crack or catch fire.
• When throwing away or saving the battery,
wrap it in tape and insulate.
Press the button to turn the unit on when the
vehicle ignition switch is on. Press and hold
the button to turn the unit off.
Remote control operating range
Rotate the VOL/MENU knob to adjust volume
level. Rotate it clockwise to increase and anticlockwise to decrease the volume.
The remote control can operate within a distance of 3~5 m.
Note:
When you switch off the system or car ignition, the settings, tuner presets and the volume
level will be retained in the unit's memory.
Adjust Volume level
Audio Mute
Remote sensor
Press the
button to mute the volume from
the system. "MUTE" will appear on the display
panel and the volume will be muted. Press the
button again, or rotate the VOL/MENU knob
to return the volume level to the setting in use
before the mute function was activated.
Audio Setting
Press the VOL/MENU knob several times to
select audio setting, and rotate the knob to adjust.
- VOL
Display shows the volume level VOL and number from 0 to 40.
- BAS
Display shows the BASS level.
BASS range: -7 to +7.
ENGLISH
Remote Controls
- MID
Display shows the MIDDLE level.
MIDDLE range: -7 to +7.
- TRE
Display shows the TREBLE level.
TREBLE range: -7 to +7.
- BAL
Display shows the BALANCE level.
BALANCE range: 12 L (full left) to 12 R (full
right).
L = left speaker, R = right speaker.
- FAD
Display shows the FADER level.
FADER range: 12 R (full rear) to 12 F (full
front).
R = rear speaker, F = front speaker.
- BASS F1-4
Display shows the BASS frequency.
F1=60, F2=80, F3=100, F4=200.
- MID F1-4
Display shows the MIDDLE frequency.
F1=500, F2=1K, F3=1.5K, F4=2.5K.
5
01_Montevideo4010DVD_gb.indd 5
21.03.11 10:37
General Operation
- TREB F1-4
Display shows the TREBLE frequency.
F1=10K, F2=12.5K, F3=15K, F4=17.5K.
Clock Display
- BASS Q1-4
Display shows the BASS Q-Factor.
Change the sharpness of the Bass output.
The larger the Q-Factor, the sharper the BASS.
Clock Setting
- MID Q1-4
Display shows the MIDDLE Q-Factor.
Change the sharpness of the Mid output.
The larger the Q-Factor, the sharper the MID.
- LOUD F1-3
Display shows the LOUDNESS frequency.
F1=400, F2=800, F3=2.4K.
Mode Button (SRC)
Press the SRC button to change between
TUNER (Radio), DISC (when disc is in), USB
(when USB is connected), CARD (when SD/
MMC card is in) or AUX (AUX-IN) play, etc.
Auxiliary Input
To access an auxiliary device:
1. Connect the portable audio player to the
AUX interface on the front panel.
2. Press the SRC button to select AUX-IN
mode.
Press DISP once or more to display clock time
for 5 seconds.
1. Press DISP more than 2 seconds, hour
display blinks, then rotate the VOL/MENU
knob to set hour.
2. Press the VOL/MENU knob to confirm, and
minute display blinks, then rotate the VOL/
MENU knob to set minute.
3. Press DISP again to exit.
Menu Setting
Press the VOL/MENU knob more than 2 seconds to enter into menu mode, then each
press changes the mode.
- EQ Mode
The Equalizer function applies preset sound
effects to the unit’s audio output signal. Rotate
the knob to select EQ sound effect:
FLAT - CLASSIC - ROCK - POP - JAZZ - OFF
With the equalizer function activated, if bass or
treble is adjusted, the EQ Mode will revert to
"Off". When the equalizer function is activated,
the most recently selected bass/treble levels
cannot be adjusted. When the equalizer function is not active, the unit will return to the most
recently selected bass and treble levels.
- BEEP ON/ OFF Mode
The beep tone feature allows the selection of
an audible beep tone to be heard each time
the menu is accessed.
- 12 /24 HOURS Mode
12 HOURS MODE:
The clock displays in the type of 12 hours such
as 11:18 AM.
24 HOURS MODE:
The clock displays in the type of 24 hours such
as 20:18.
- AREA SET
This option allows you to select the appropriate
frequency spacing for your area.
Rotate the knob to choose USA or Europe.
- STEREO ON/OFF Mode
Selectable when the current source is Radio
mode.
This option allows you to select radio FM
mono/stereo.
6
01_Montevideo4010DVD_gb.indd 6
21.03.11 10:37
Selecting a Band
Preset Mode
Recalling a Station
Press BAND once or more to select FM1 FM2 - FM3 - MW1 - MW2.
Display shows wave band, frequency, and preset station number if already stored.
Six numbered preset buttons store and recall
stations for each band. The stored stations
(1-6) for the current band can be viewed on the
screen.
1. Select a band (if needed).
2. Press a front panel or remote control
preset button (numbers 1-6) to select the
corresponding stored station.
Selecting a Station
Storing Stations
Press the
or
another station.
- Auto storing
1. Select a band (if needed).
2. Press AMS briefly to search all stations in
the band, the 6 strongest available station
will be automatically saved in the preset
button (numbers 1-6).
tuning button to tune to
Tuning
- AUTO SEEK
Press the
or
buttons to seek the next/
previous station automatically.
- MANUAL SEEK
Press and hold the
or
buttons to enter
manual tuning mode. Press the buttons again
to move the radio frequency number up or
down one step.
Note:
• During manual seeking, if the pause between two operating steps is longer than
5 seconds, when you continue to press the
or
buttons, the unit will enter auto
seeking.
• During manual seeking, when you press and
hold the
or
buttons, the unit will seek
continuously.
ENGLISH
Radio Mode
Note:
• After auto storing, the previous stored stations will be overwritten.
• The unit has 5 bands, such as FM1, FM2,
FM3, MW1, MW2, and each band can store
6 stations.
- Manual storing
1. Select a band (if needed), then select a station.
2. Press and hold a preset button (numbers
1-6) on the front panel or remote control.
3. The preset number and station is displayed
and highlighted.
7
01_Montevideo4010DVD_gb.indd 7
21.03.11 10:37
USB/SD/MMC Mode
1. Load SD/MMC Card
3. Load USB Device
USB/SD/MMC Notes
Insert the SD/MMC card into the slot. The unit
will read the file of the card automatically.
Insert USB device into the USB jack. The unit
will read the file in the USB device automatically.
USB functions (flash memory type) and MP3
music play.
1. SD/MMC card support.
2. USB flash memory 2 in 1 (SD/MMC) support.
3. Support FAT 16 & FAT 32
4. File name: 32 byte / dir name: 32 byte / tag
name: 32 byte.
5. Tag (ID3 tag ver 2.0)
Title / artist / album: 32 byte support.
6. Multi card reader not support.
7. USB 1.1 support.
2. Take out SD/MMC Card
Press SRC button to non-SD mode, press the
SD/MMC card to pop out.
4. Take out USB Device
Press the SRC button to non-USB mode and
take out the USB device from the USB jack.
Not all kinds of USB devices are compatible
with the unit.
8
01_Montevideo4010DVD_gb.indd 8
21.03.11 10:37
Accessing Disc Mode
Insert a Disc
If a disc is already in the disc slot but is not
playing, press the SRC button on the front
panel or on the remote control to switch to the
DISC source. To play files from an SD or USB
that is already inserted, choose the CARD or
USB source. If a external monitor is connected
with the unit, the disc playback screen is indicated below:
Insert the disc into the slot, and the unit will
change to disc mode automatically.
1
2
3
4
Note:
• Please confirm whether there is a disc in the
unit before you insert another one.
• The unit will exit current playing source and
enter DVD mode when one disc is inserted.
Eject the Disc
Press
to eject the disc.
Note:
7
• After ejecting the disc, the unit reverts to radio mode.
• You can eject a disc with the unit powered
off. The unit remains off after the disc is
ejected.
6
5
Disc Playback
1. Source Indicator
2. Current Track/Total Track
3. Name of the Song Display
4. Time/Clock
5. Video Folder
6. Picture Folder
7. Audio Folder
1. When disc inserted, display shows READ.
For MP3 or disc with mixed files, reading
time may exceed 1 minute.
2. ERROR will be displayed if error found in
disc operation.
3. For VCD/CD, VCD or CD icon will appear
on the display.
4. While MP3/WMA files playback, MP3/WMA
icon will appear on the display.
5. For DVD, DVD icon will appear on the display and TITLE appears. Press ENTER or
to play.
ENGLISH
Disc Mode
File Type Supported
Audio file: MP3 (*.mp3), WMA (*.wma)
Video file:
MP4 (*.avi, DIVX3.11/4.0/5.0/6.0)
MPEG 2 (*.vob)
MPEG 1 (*.dat)
Picture file: JPEG (*.jpg)
MP3 file:
ISO 9660 or ISO 9660 + Joliet format - Max.
30 characters.
Max. nested directory is 8 levels.
The max. album number is 99.
The max. length of each track is 99 minutes
59 seconds.
Supported sampling frequency for MP3 disc:
8 kHz to 48 kHz (44.1 kHz preferably).
Supported bit-rates of MP3 disc are: 32 - 320
kbps (128 kbps preferably).
Disc and File NOT Supported
*.AAC, *.DLF, *.M3U, *.PLS, MP3 PRO files
and files with DRM.
Open session discs.
9
01_Montevideo4010DVD_gb.indd 9
21.03.11 10:37
Disc Mode
Audio/Picture/Video File Playback
File Select
Entering ID3 Tag
When AUDIO/PICTURE/VIDEO file is played,
Category/Folder/File list will be displayed on
the external screen, and file/folder name being
played will be displayed on top. Current selected item will be highlighted.
Use / to enter file list and use / to select desired file, press ENTER to play back.
For PICTURE, press
to slide show the pictures, press PROG to select picture showing
style.
For MUSIC, press will enter power on logo,
then press
to return.
This unit supports ID3 tag version 2.0.
For character codes, refer to the table to the
below.
Category Select
Use
/
on the remote control to select:
AUDIO
PICTURE
VIDEO
Press ENTER to confirm.
Folder Select
Use / to enter folder list and use / to
select desired folder, press ENTER to confirm.
Note:
MP3 and WMA (Windows Media Audio) music
files are digital audio files that are compressed
to allow more files to be stored. This unit
can play MP3/WMA and video directly from
files contained on a CD-R/RW, DVD-ROM,
DVD+RW, DVD-RW, DVD+R, DVD-R and
DVD-VIDEO, or an SD card or USB Device.
Many types of software are available for converting audio files into MP3/WMA formats.
Nero or Roxio Easy CD Creator are recommended. This unit can play MP3 (MPEG1, 2,
2.5 Audio Layer 3). However, the MP3 recording media and accepted formats are limited.
0
1
2
3
4
5
6
7
8
9
A
B
C
D
E
F
0 1 2 3
0
! 1
" 2
# 3
$ 4
% 5
& 6
' 7
( 8
) 9
* :
+ ;
, <
- =
. >
/ ?
4
@
A
B
C
D
E
F
G
H
I
J
K
L
M
N
O
5
P
Q
R
S
T
U
V
W
X
Y
Z
[
\
]
^
_
6
`
a
b
c
d
e
f
g
h
i
j
k
l
m
n
o
7 8 9 A B C D E F
p
° À Ð à ð
q
¡ ± Á Ñ á ñ
r
¢ ² Â Ò â ò
s
£ ³ Ã Ó ã ó
t
¤ ´ Ä Ô ä ô
u
¥ μ Å Õ å õ
v
¦ ¶ Æ Ö æ ö
w
§ · Ç × ç ÷
x
♪ † È Ø è ø
y
© ¹ É Ù é ù
z
ª º Ê Ú ê ú
{
« » Ë Û ë û
|
¬ ¼ Ì Ü ì ü
}
℗ ½ Í Ý í ý
~
® ¾ Î Þ î þ
¯ ¿ Ï ß ï ÿ
10
01_Montevideo4010DVD_gb.indd 10
21.03.11 10:37
Entering File and Folder Names
Names using the code list characters are the
only file names and folder names that can be
entered and displayed. Using any other character will cause the file and folder names to be
displayed incorrectly. The unit recognizes and
plays only files with the MP3/WMA extension.
Fast Forward/Backward During
Playback
A file name entered with characters not on the
code list may not play correctly.
Press
or
for more than 2 seconds once
or more to select X2, X4, X8, X20 to fast backward or forward track during playback.
• During the fast forward or backward operation, press
briefly to playback again.
If you do no control, normal playback will
resume until next track start.
• During the fast forward or backward operation, the volume will be muted.
Electronic Shock Protection
Intro (for CD/VCD only)
• 10 seconds for CD-DA (CDA)
• >45 seconds for MP3 recorded at 44.1 kHz,
128 kbps
• >90 seconds for WMA recorded at 44.1 kHz,
128 kbps
You can play the beginning of every track for
15 seconds in sequence.
1. During playback, press INT once.
INT ON/OFF will appear on the display.
2. Press INT again to select the current track.
Note:
Bit Rates
The unit supports bit rates from 32 - 320 kbps.
Select Desired Track
1. Press
or
to skip to the next track.
2. Use 1-9 and 0, 10+ buttons on the remote
control to select desired track number.
Repeat
During playback, press RPT once or more.
RPT icon will appear on the display.
• For VCD/CD: Display appears RPT OFF
RPT TRK
RPT ALL
• For DVD: Display appears RPT CHAP
RPT TITL
RPT OFF
• For File disc: Display appears RPT OFF
RPT TRK
RPT FOLD
RPT ALL
Note: If you do not select RPT on, when the
entire disc or TITLE playback has finished,
the system will stop. If no other control, after
5 minutes the unit will turn into standby mode.
On the remote
control
Repeat A
On the panel
Random Track Playback
(for CD/VCD/MP3 only)
You can play all the tracks in random order.
1. During playback, press RDM once or more.
RDM icon will appear on the display.
2. Press RDM again to select normal playback.
On the panel
ENGLISH
Disc Mode
On the panel
B
Select desired passage to repeat playback.
1. Press A
B once to select starting point.
Display shows REPEAT A.
2. Press A
B again to select ending point.
Display shows REPEAT A
B, and selected passage start to replay.
3. Press A
B once again to exit.
Display shows A
B CANCEL.
On the remote control
11
01_Montevideo4010DVD_gb.indd 11
21.03.11 10:37
Disc Mode
Pause
GOTO
1. During playback, press
to pause playback.
The sound will be muted.
Display "PAUSE" in the TV screen, display
and blink "PAUSE" on the panel display.
2. Press
again to continue playback.
Goto desired track/chapter or time point directly.
Press GOTO button on the remote control,
track or DVD Title/Chapter and time display on
top of the screen. Current item is highlighted.
Use / to select desired item. Use digit button to select number. Press ENTER to confirm.
On the remote
control
PROGRAM
On the remote
control
On the panel
PBC - Playback Control
(for VCD only)
If you insert a VCD with PBC, playback starts
from the beginning of the 1st track automatically.
or
or
Press PBC to show menu, use
digit button to select desired track. Press to
return to power on logo. Press PBC again to
exit menu.
On the remote control
On the remote control
Program
• Press PROG to enter program list. Use /
or / cursor and digit button to enter number. The external monitor displays as below
shown.
For DVD and File disc, select title and chapter number.
For VCD and CD, select track number.
• Press
to play, or move the cursor to select "PLAY" and press ENTER to play.
• If you want to delete the list, move the cursor to "CLEAR", press ENTER to delete all
the list set before.
• Press PROG again to exit program play.
VCD and CD
PROGRAM
DVD and File disc
12
01_Montevideo4010DVD_gb.indd 12
21.03.11 10:37
DVD Setup
DVD Audio Select
DVD Title Select
Press AUDIO or R/L to select audio language to
listen if the DVD has multiple audio languages.
Press TITLE to display title or chapter list, use
/ or / cursor or digit number to select,
press ENTER to play.
Press SETUP to display setup menu on the
external screen connected with the unit.
Use / to select setup items:
SYSTEM - LANGUAGE - VIDEO
On the remote control
On the remote control
On the panel
On the remote
control
VCD Audio Select
Press R/L to select audio channel to listen.
DVD Angle Select
Press ANGLE to select different angle to view
if the DVD has multiple-angle views.
ENGLISH
Disc Mode
DVD System Setup
Use
firm.
/ ,
/
to select and ENTER to con-
On the panel
On the remote control
DVD Subtitle Select
Zoom
Press SUB.T to select the subtitle language to
show if the DVD has multiple language subtitles.
Press ZOOM button, the picture will be zoomed
accordingly.
On the remote control
On the remote control
- TV SYSTEM: NTSC/PAL 60/PAL/AUTO
Select the TV system in the setting menu.
- TV TYPE: 4:3PS/4:3LB/16:9
Select TV type to watch wide screen movies.
4:3 Pan Scan: For 4:3 TV, left and right edges
will be cut.
4:3 Letter Box: For 4:3 TV, black bars will appear on top and bottom.
16:9: For 16:9 wide screen TV.
13
01_Montevideo4010DVD_gb.indd 13
21.03.11 10:37
DVD Setup
- PASSWORD
1. Press number button " 0000 " on the remote
control, then press the ENTER button to
confirm.
2. Press the desired 4-digit password, and
then press ENTER button to confirm.
3. Record the password and keep it in a safe
place for future reference.
DVD Language Setup
Use
firm.
/ ,
/
to select and ENTER to con-
Note:
- MENU LANG
Select one language that you are familiar with
to display DVD menu.
If you forget the password, please enter 0000
to reset a new password.
The password: 0000
- RATING:
1 KID SAFE/2 G/3 PG/4 PG13/5 PG-R/6 R/
7 NC-17/8 ADULT
The rating of the disc is from 1 to 8:
(1) with the most limits when playing.
(8) with the least limits when playing.
Original setting: 8
Note:
The rating can be selected only under the
password unlocked status, and the limits can
be worked only under the password locked
status.
- DEFAULT: RESTORE
If this item is selected, the unit will return to
original setting.
- SUBTITLE LANG
Select one language that you are familiar with
to display DVD subtitles.
If the DVD disc has the subtitle file in the selected language, the subtitle will be displayed
in the selected language.
If the DVD disc does not contain the subtitle
file in the selected language, the subtitle will be
displayed in the default language.
- OSD LANGUAGE
Select one language that you are familiar with
to display system menu.
- AUDIO LANG
Select one dialogue language that you are familiar with when playing back DVD discs.
Note:
If the DVD disc has the audio file in the selected language, the dialogues you listened to
will be in the selected language.
If the DVD disc does not contain the audio file
in the selected language, the dialogues you
listened to will be in the default language.
You can change the language by pressing
AUDIO key of the remote controller.
Note:
If the DVD disc has the selected language, the
DVD MENU/TITLE will be displayed in the selected language.
If the DVD disc does not contain the selected
language, the DVD MENU/TITLE will be displayed in the default language.
- DivX(R) VOD
In order to play DivX VOD (video on demand)
content on this unit, you first need to register
the unit with your DivX VOD content provider.
If you enter the DivX VOD setting, the external
screen will display the register code and register web site.
- DEACTIVATION
You can deactivate DivX VOD following the
indications on the screen.
14
01_Montevideo4010DVD_gb.indd 14
21.03.11 10:37
DVD Video Region Numbers
DVD Video Setup
DVD video discs that have incompatible region
numbers can not be played on this player.
The region number of the player can be found
on the bottom of this unit.
The illustration below shows the regions and
corresponding region numbers.
Use
firm.
/ ,
/
to select and ENTER to con-
- BRIGHTNESS
Set the brightness of the video output with
/ from 0 to 12.
- CONTRAST
Set the contrast of the video output with
from 0 to 12.
- HUE
Set the hue of the video output with
-6 to +6.
/
- SATURATION
Set the saturation of the video output with
from 0 to 12.
ENGLISH
DVD Setup
Note:
/
The DVD video system assigns a region number to DVD players and DVD discs by sales
area. The DVD video region number playable
in this system is marked on the disc jacket, for
example as shown below:
from
5
/
- SHARPNESS
Set the sharpness of the video output with
/ from 0 to 8.
15
01_Montevideo4010DVD_gb.indd 15
21.03.11 10:37
Electrical Connections
Wiring Diagram
Video out
(Yellow)
Antenna
(Black)
Fuse 15 A
Ground Lead
To car battery (+)
continuous +12V DC
Yellow
Filter
Box
FRONT
SPEAKER
White/Black
Stripe
Blue
Motor/Electric Antenna relay control Lead
Amplifier relay control Lead
Red
Ignition key +12V DC
when ON/ACC
Black
White
Left Speaker
(Front)
Grey/Black
Stripe
Grey
Right Speaker
(Front)
Line-out
R (Red)
(Grey)
L (White)
REAR
SPEAKER
Green/Black
Stripe
Green Purple/Black
Stripe
Left Speaker
(Rear)
Purple
Right Speaker
(Rear)
16
01_Montevideo4010DVD_gb.indd 16
21.03.11 10:37
Anti-Theft System
Removing the Panel
1.
2.
3.
4.
Switch off the power of the unit.
Press
button.
At an angle hold the panel to pull it out.
Place the panel into the case and take it
with you when you leave the car.
Installing the Panel
ENGLISH
This unit is equipped with a detachable panel.
Panel can be detached and taken with you,
helping to deter theft.
1. Hold the panel and ensure the panel faces
toward you, and set the right side of the
panel in the panel bracket.
2. Press the left side of the panel until it locks.
Detachable panel case
Removing the Unit
1. Remove the panel and the trim plate.
2. Insert both L-Keys into hole on the front of
the set until they lock.
3. Pull out the unit.
17
01_Montevideo4010DVD_gb.indd 17
21.03.11 10:37
Installation Guide
Installation Procedures
First complete the electrical connections, and
then check for correctness.
Important: Remove these two screws before installation. Otherwise, the player will not work.
Reset
Press
button. At an angle hold the panel to
pull it out. Then press the RESET button with
a pointed object to reset the unit to the original
status.
Note: Press the RESET button will erase the
clock and stored stations.
Reset
Installation Opening
This unit can be installed in any dashboard
having an opening as shown below.
The dashboard should be 4.75 mm - 5.56 mm
thick in order to be able to support the unit.
Mounting bolt
rubber cushion
Transport
screws
Lock lever
1. Insert mounting collar into the dashboard, and bend the mounting tabs out with a screwdriver.
Make sure that lock lever
is flush with the mounting collar (not projecting outward).
2 Secure the rear of the unit.
After fixing mounting bolt and power connector, fix the rear of the unit to the car body by rubber
cushion.
3. Insert trim plate.
18
01_Montevideo4010DVD_gb.indd 18
21.03.11 10:37
Troubleshooting
Problem
Possible cause
Solution
Car ignition is not on.
Cable is not correctly connected.
Fuse is blown.
Volume is set at minimum or the mute
function is on.
Turn your car's key to ACC or ON.
Check connection.
Replace fuse.
Check the volume or switch the mute function off.
ENGLISH
If you suspect something is wrong, immediately switch power off. Immediately stop using it and call the store where you purchased it.
Never try to repair the unit yourself because it is dangerous to do so.
General
No power or no sound.
If the above solutions cannot help.
Press the RESET button.
Disc
Disc is inside but no sound.
Disc is upside down.
Disc is dirty or damaged.
Place disc in the correct direction, and the label side up.
Clean disc or change another disc.
Disc sound skips, tone quality is low.
Disc is dirty or damaged.
Clean CD or change another CD.
Sound skips due to vibration.
Mounting angle is over 30°.
Unstable mounting.
Adjust mounting angle to less than 30°.
Mount the unit securely with the mounting parts.
Noise in broadcasts.
Station is too far, or signals are too weak.
Select other stations of higher signal level.
Preset station lost.
Battery cable is not correctly connected.
Connect the battery cable to the terminal that is always live.
Radio
Error Display Messages
Display shows ERROR.
Disc is dirty, damaged or upside down.
Press
When video file initializing time is too long.
File read error or file type not supported.
Press SRC to exit. Then press SRC to play disc again.
to eject the disc.
19
01_Montevideo4010DVD_gb.indd 19
21.03.11 10:37
Specifications
General
Power supply:
12 V DC (11 V - 16 V)
Test voltage 14.4 V, negative ground
Maximum power output:
40 W x 4 channels
Continuous power output:
20 W x 4 channels (4 Ω 10 % T.H.D.)
Maximum current consumption: 12 A
Suitable speaker impedance:
4 - 8 ohm
Pre-Amp output voltage:
2.0 V (CD play mode: 1 kHz, 0 dB,
10 kΩ load)
Fuse:
15 A
Dimensions (WxHxD):
178x50x166 mm
Weight:
2.2 kg
AUX-IN level:
≥300 mV
FM Stereo Radio
Frequency range:
Usable sensitivity:
Frequency response:
Stereo separation:
Image response ratio:
IF response ratio:
Signal/noise ratio:
MW (AM) Radio
Frequency range:
Usable sensitivity (S/N=20dB):
87.5 - 108.0 MHz (Europe)
87.5 - 107.9 MHz (America)
8 dBμ
30 Hz - 15 kHz
30 dB (1 kHz)
50 dB
70 dB
>55 dB
522 - 1620 kHz (Europe)
530 - 1710 kHz (America)
30 dBμ
Disc Player
System:
Frequency response:
Signal/noise ratio:
Total harmonic distortion:
Channel separation:
Video signal format system:
Video output:
Disc digital audio system
20 Hz - 20 kHz
>80 dB
Less than 0.20 % (1 kHz)
>60 dB
NTSC/PAL 60/PAL/AUTO
1 ± 0.2 V
Components
Mounting collar
Machine screws M5x6 mm
Mounting bolt (50 mm)
Wire connector
Removable face plate case
Trim plate
Removal key
Operating instructions
Rubber cushion
Remote control unit
Battery (CR 2025)
1
4
1
1
1
1
2
1
1
1
1
Note:
Specifications and the design are subject to change without notice due
to improvements in technology.
20
01_Montevideo4010DVD_gb.indd 20
21.03.11 10:37
This product is protected by certain intellectual property rights of Microsoft. Use or distribution of such technology outside of this product is prohibited
without a license from Microsoft.
DivX®, DivX Certified® and associated logos are trademarks of Rovi Corporation or its subsidiaries and are used under license.
Covered by one or more of the following U.S. patents: 7,295,673; 7,460,668; 7,515,710; 7,519,274
ABOUT DIVX VIDEO: DivX® is a digital video format created by DivX, Inc. This is an official DivX Certified® device that plays DivX video. Visit divx.com
for more information and software tools to convert your files into DivX video.
ABOUT DIVX VIDEO-ON-DEMAND: This DivX Certified® device must be registered in order to play purchased DivX Video-on-Demand (VOD) movies.
To obtain your registration code, locate the DivX VOD section in your device setup menu. Go to vod.divx.com for more information on how to complete
your registration.
DivX Certified® to play DivX® video, including premium content.
© 2011 All rights reserved by Blaupunkt. This material may be reproduced, copied or distributed for personal use only.
78
04_Montevideo4010DVD_pt.indd 78
04.07.11 15:54
CLASS 1
LASER PRODUCT
79
04_Montevideo4010DVD_pt.indd 79
04.07.11 15:54
Blaupunkt AudioVision GmbH & Co. KG
Robert-Bosch-Straße 200
D-31139 Hildesheim
http://www.blaupunkt.com
5 101 030 002
07/11
04_Montevideo4010DVD_pt.indd 80
450 165 – gb, fr, es, pt
04.07.11 15:54