1
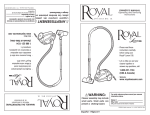
OWNER’S MANUAL
Operating and Servicing
Instructions
• Please read these
instructions carefully
before using your Heavy
Duty Commercial
Upright.
• Let us help you put your
vacuum together or
answer any questions,
call:
1-800-321-1134
(USA & Canada)
www.royalvacuums.com
For quick reference, please record your
vacuum information below.
WARNING:
Model #:
Mfg. Code:
(Mfg. code located on the lower backside of cleaner)
Cleaner assembly may
include small parts.
Small parts can present
a choking hazard.
Esapañol - página E1
©2002 All rights reserved # 1-670096-001
2/02
THIS APPLIANCE IS INTENDED FOR COMMERCIAL USE
IMPORTANT SAFETY INSTRUCTIONS
When using an electrical appliance, basic precautions should always be followed, including the following:
• READ ALL INSTRUCTIONS BEFORE USING THIS APPLIANCE
• ALWAYS FOLLOW THESE SAFETY INSTRUCTIONS
• WARNING - THE CORDS, WIRES AND/OR CABLES SUPPLIED WITH THIS PRODUCT CONTAINS CHEMICALS, INCLUDING LEAD OR LEAD COMPOUNDS, KNOWN
TO THE STATE OF CALIFORNIA TO CAUSE CANCER AND BIRTH DEFECTS OR
OTHER REPRODUCTIVE HARM. WASH HANDS AFTER USING.
READ ALL INSTRUCTIONS BEFORE USING THE APPLIANCE
WARNING: TO REDUCE THE RISK OF
FIRE, ELECTRIC SHOCK OR INJURY:
•
•
•
•
•
•
•
•
•
•
•
•
•
•
•
•
•
•
Do not leave appliance when plugged in. Unplug from outlet when not in use and
before servicing.
Do not use outdoors or on wet surfaces.
Do not allow to be used as a toy. Close attention is necessary when used by or
near children.
Use only as described in this manual. Use only Royal’s recommended attachments.
Do not use with damaged cord or plug. If appliance is not working as it should, has
been dropped, damaged, left outdoors, or dropped into water, return it to a service
center for inspection. Call 1-800-321-1134 for the nearest service center.
Do not pull or carry by cord, use cord as a handle, close a door on cord, or pull
cord around sharp edges or corners. Do not run appliance over cord. Keep cord
away from heated surfaces.
Do not unplug by pulling on cord. To unplug, grasp the plug, not the cord.
Do not handle plug or appliance with wet hands.
Do not put any object into openings. Do not use with any opening blocked; keep
free of dust, lint, hair and anything that may reduce air flow.
Keep hair, loose clothing, fingers, and all parts of body away from openings an
moving parts.
Do not pick up anything that is burning or smoking, such as cigarettes, matches,
or hot ashes.
Do not use without dust bag and/or filters in place.
Turn off all controls before unplugging.
Use extra care when cleaning on stairs.
Do not use to pick up flammable or combustible liquids, such as gasoline, or use
in areas where they may be present.
Do not use an extension cord with this cleaner.
Look on your vacuum cleaner and follow all label and marking instructions.
Store the vacuum cleaner indoors. Put the vacuum cleaner away after use to prevent
tripping accidents.
2
•
•
•
Always turn off the vacuum cleaner before connecting or removing the hose.
Using improper voltage may damage motor and injure user.
Connect to a properly grounded outlet only. See grounding instructions.
SAVE THESE INSTRUCTIONS
GROUNDING INSTRUCTIONS
(only for 3-wire models, those that include 2 blades and 1 grounding pin)
This appliance must be grounded. If it should malfunction or breakdown, grounding provides a path of least resistance for electric current to reduce the risk of electric shock.
This appliance is equipped with a cord having an equipment-grounding conductor and
grounding plug. The plug must be plugged into an appropriate outlet that is properly
installed and grounded in accordance with all local codes and ordinances.
WARNING: Improper connection of the equipment-grounding conductor can result
in a risk of electric shock. Check with a qualified electrician or service person if you are
in doubt as to whether the outlet is properly grounded. Do not modify the plug provided with the appliance--if it
will not fit the outlet, have a
proper outlet installed by a
qualified electrician.
This appliance is for use on
a nominal 120-volt circuit
and has a grounding plug
that looks like the plug illustrated in the sketch above.
Make sure that the appliance is connected to an
outlet having the same configuration as the plug. No adapter should be used with this
appliance.
WARNING:
Electrical shock could occur if used outdoors or on wet surfaces.
3
THANK YOU FOR YOUR PURCHASE
You are now the proud owner of the Royal® Commercial
Metal upright. We trust your new purchase will bring you
many years of satisfaction.
We are very proud of our products and hope that you are
equally satisfied with their quality and performance.
Thank you for your support of Royal® products.
Visit our website at www.royalvacuums.com
TABLE OF CONTENTS
Safety Instructions............................................ Page 2,3
Feature Descriptions........................................ Page 5
How to Assemble............................................. Page 6
Attach Belt............................................ Page 6
How to Operate................................................ Page 7
Paper Bag Removal and
Installation........................................................ Page 8
Brush and Belt Replacement and Installation.. Page 8
Maintenance..................................................... Page 9
Accessories/Options.........................................Page 9
Attachment Kit.................................................. Page 10
WARRANTY
To the consumer, Royal Appliance Mfg. Co. warrants this vacuum cleaner to be free of defects in material or workmanship.
The period of the warranty is a LIFETIME on the housing (nozzle, fancase and motor housing) and a limited number of years
(stated on original carton) on all other components, depending on model purchased. The warranty commences upon the
date of original purchase and receipt of your warranty card.
If the vacuum cleaner should become defective within the warranty period, complete service (parts and labor) will be
provided free of charge:
1. at the store where machine was purchased, if the store is an AUTHORIZED DEALER and WARRANTY STATION.
In the event of a charge in the purchaser’s residence of 50 or more miles from residence at time of purchase from an AUTHORIZED DEALER, such service will be provided by the nearest warranty station.
The warranty does not cover the following:
1. Parts that normally require replacement such as flat belts, bags, brushes and bulbs.
2. Failure, loss or deterioration due to ordinary wear and tear or from misuse or unauthorized repair.
3. Machines used for other than normal personal, family or household purposes. Commercial purposes are warrantied for one year.
4. Costs of any transportation to and from any place of repair, all of which costs are to be paid by the owner.
This warranty gives you specific legal rights and you may also have other rights which may vary from state to state.
4
8
1
2
3
9
10
22
16
17
11
12
4
5
6
21
13
14
18
15
7
19
20
FAMILIARIZE YOURSELF WITH THESE FEATURES
1.
2.
3.
Fingertip Toggle Switch-conveniently located for quick control.
Eyelet of Upper Cord Hook
*Special Bag Assembly-Outer bag resists wear and has full length metal zipper for easy access to top-filling “TossOut” paper filter bag OR Cotton top-filling shake-out bag.
4. Handle Fork
5. Bag Coupling
6. Exhaust Couplet
7. *Wheel Arrangement
8. Heavy Duty Vinyl Comfort Grip-curved to fit your hand comfortably.
9. *Strong Metal Cord Hooks
10. UL Approved Power Cord-permits wide range cleaning.
11. Adjustable Handle-made of chrome-plated tubular steel. Centered on motor housing for balance and maximum
maneuverability.
12. Wing Nut
13. Handle Lock-holds handle securely in 3 positions.
14. *Headlight-hinged housing with protective vinyl bumper guard and exclusive deodorizing, demothing, sanitizer chamber OR standard, brilliant headlight as shown.
15. Wrap Around Vinyl Nozzle Bumper-protects walls and furniture.
16. Belt Lifter Lip
17. Belt Lifter Base
18. Cast Aluminum Nozzle, Fancase, and Motor Housing
19. Adjustable Revolving Brush, beater bar or double helical brush
20. Metal Rug Nozzle Guard
21. *“Rite-Hite” Adjustor Knob-lets you set nozzle to exact height for carpet plushness.
22. *Five Position Height Adjustor-lets you set the nozzle at five different carpet heights with the touch of your toe.
*Style of feature may differ according to model.
5
GET TO KNOW YOUR NEW VACUUM CLEANER
Your new upright has many special features. All were designed for effortless cleaning because suction alone
does not make a vacuum cleaner clean. There must be “air movement” to have cleaning power. That’s why the
nozzle has deep, wide air vents at both ends. These vents permit air to circulate between the nozzle and carpet
at all times; the result...our special self-propelling Cushionaire Cleaning. Your new upright also has exclusive
curved fan blades which create more air volume per minute at less motor speed than straight blades. This means
more efficient carpet cleaning and less electricity consumption; thus you save time and money.
EASY TO ASSEMBLE
NOTE: Do not connect cleaner to electrical outlet until
Square neck
1 Upper handle
it is assembled.
curved head bolt
Assemble the Handle (Diagram 1)
7/16” Nut
1. Slide the upper and lower handle sections
together, aligning the square or round holes on
both handle sections.
2. From the literature pack, get the square neck
Lower handle
curved head bolt, curved washer and 7/16” nut.
Curved washer
3. Insert square neck curved head bolt through
square aligned hole opening, until curved head is flush with handle.
WARNING: DO NOT FORCE HANDLE BOLT. MAY SEVER CORD, COULD CREATE SHOCK.
4. Place curved washer over threaded end of bolt and tighten 7/16” nut with appropriate tool (tool not included).
All except models below: Remove wing nut and bolt from fork completely. Insert handle and power cord
into the fork. Tighten.
Models with a pigtail: Loosen the large wing nut on the handle fork located on the motor unit. Inset the
handle into the fork and tighten the large wing nut.
5. Connect the cords at the handle bottom and the motor unit. Wind the extra-long electrical cord over the
cord hooks when cleaner is not being used. The electrical cord is permanently attached to the upper part
of the handle and a short connector plug is at the other end.
Check to be sure the belt is in place.
If not, follow these easy steps:
ATTACH BELT
1
2
3
1.
Pry belt cover from front of cleaner with screwdriver to remove or rotate the grey rubber nozzle cover*
(Diagram 1).
2. Insert belt lifter tool through belt loop, being sure to hook belt around the lip of the belt lifter tool from
the left (Diagram 2). Using the tool as a pry bar, slip the belt onto the motor shaft until the belt lifter
base meets the shaft. Gently turn the tool to the right (clockwise) to insure proper belt placement.
Remove tool.
3. The front of the belt will be to your right when installed properly (Diagram 3). Snap belt cover or rotate
the grey rubber nozzle cover over the belt access opening.
*Feature may differ according to model
ATTACH THE BAG
Place the bag coupling over the exhaust outlet of the machine. Slide it on and twist to the right to lock.
Attach the top of the bag by snapping the hook on the bag chain into the eyelet on the upper cord hook.
6
HOW TO OPERATE
YOUR NEW UPRIGHT IS READY TO GO!
PLUG IN THE CLEANER
Plug the electrical cord into your most convenient outlet, making sure the voltage indicated on the serial
number plate of your cleaner is the same as your electrical source.
SET THE NOZZLE HEIGHT
Infinite Height Settings: Lets you clean every type of
carpet. Your new upright will glide easily over your carpets
and rugs, “air-lifting” them as it vacuums.
To adjust the nozzle on models with an “Adjustor Knob”:
1. Turn the “Rite-Hite” knob (located above rear wheels)
counter-clockwise to raise the nozzle off the carpeting.
2. Turn on the vacuum cleaner. Use the finger switch conveniently located on the handle. Push down to start--up
to stop.
3. Now, gradually turn the “Rite-Hite” knob clockwise to
lower the nozzle to the carpet.
1.
2.
SETTINGS
FOR LOW
PILE
CARPET
SETTINGS
FOR HIGH
PILE
CARPET
*Pull knob is not provided on commercial models.
FIVE POSITION HEIGHT SETTINGS
Adjust carpet settings for floor surface to be cleaned. Set the nozzle at five
different carpet heights with the touch of your toe. The illustrations show the
height adjustor in the lowest (Diagram 1) and highest (Diagram 2) positions.
The setting should be low enough for effective cleaning, yet high enough that
the cleaner is not difficult to push.
NOTE: If cleaner is difficult to push, adjust to a higher carpet setting height.
RELEASE THE CORD
On models equipped with a quick cord release (Diagram 3), simply push the
quick release cord hook forward or backward until it is upside down. The
cord will slide off easily. Return quick release cord hook to its upright position so it is ready to store the cord when you complete your cleaning tasks.
TILT NOZZLE
To clean throw rugs and carpets with fringed edges, push handle down below
normal operating position thereby raising the nozzle (so fringe or binding will
not catch). Throw rugs should be cleaned by working from the center toward
and over the fringe, tilting the nozzle upward and over the edge of the carpet.
3.
LOWER HANDLE
To clean carpeted stairways and under low furniture and beds, start with handle back in tilting position. Then lift handle lock lever (located where handle
meets motor housing) with your toe and lower handle to floor. For stairways,
depress handle lock lever so cleaner can be held in a horizontal position. To
raise handle, release handle lock lever.
7
PAPER BAG REMOVAL AND INSTALLATION
NOTE: Disconnect machine from electrical outlet prior to performing
any maintenance function.
“TYPE B” PAPER BAGS
1. Pull cardboard connector of paper bag away from top-fill tube and
dispose of used paper bag.
2. Place new paper bag into cloth bag. Keep cardboard connector facing top-fill tube.
3. Tuck paper bag down into cloth bag as far as possible.
4. Push cardboard connector over top-fill tube opening as far as possible.
5. Close outer bag.
If your cleaner has the wide-opening cloth “shake-out” bag, follow these directions when dirt reaches
the half-full point:
1. Unhook bag at the top and remove from cleaner by turning inlet copling counter-clockwise.
2. Turn bag upside down and shake vigorously until dirt settles at bag clamp end.
3. Slide off bag clamp and empty dirt on papers spread on floor or in suitable waste container.
NOTE: Regardless of type of bag, empty frequently for maximum cleaning efficiency and machine life.
BRUSH AND BELT REPLACEMENT AND INSTALLATION
(UNPLUG CLEANER)
If you have occasion to remove the revolving brush, either for making adjustments or for replacing belt:
1. Pry the belt cover* with a screwdriver or rotate the grey rubber nozzle cover* on the front of the nozzle.
2. Lift the belt off the drive shaft with belt lifter tool (reverse directions for attaching belt shown on page 6).
3. Remove the metal guard on the bottom of the nozzle. Remove the belt and brush.
4. To adjust the height of the brushroll or to change the brush, pull the brush out of the nozzle. Slip the
belt over the revolving brush before brush is put into the new position. Align the arrow on the brushroll
with the direction of the arrow on the nozzle guard as shown in (Diagram 1).
1
For ALL brushrolls, arrows on brushroll and nozzle guard must match
(Diagram 1).
5. The belt is then placed over the motor drive shaft as described in
“Attach Belt” on page 6. Place the belt so that the right hand side of the belt is nearest to you. If the
belt dislodges when you turn the unit “on”, the belt is on “backwards”. Reverse the belt, twist and place
over motor drive shaft. Replace round nozzle name plate* or grey rubber nozzle cover*.
CAUTION: Never place any fingers, tools, etc. in nozzle or belt area while the unit is operating. The nozzle
name plate* or grey rubber nozzle cover* must be securely installed whenever operating the unit without
attachments.
*Feature may differ according to model
8
MAINTENANCE
TO REPLACE LIGHT BULB: Press bulb in and turn counter-clockwise to remove. Insert new bulb, press in
and turn clockwise until it is in place.
TO USE DEODORIZING UNIT: If your vacuum cleaner is equiped with a deodorizing, demothing unit under
the headlight, use the sanitizing crystals to eliminate musty odors or repel moths by following the directions
printed on the container.
BRUSH BRISTLES: Rinse in soapy water, then in clear water. Dry thoroughly before using. The Round
Dusting Brush bristles, 10” Floor Brush Bristles and 6” nozzle insert are removable for washing.
TO USE YOUR CLEANER FOR BLOWING
Sometimes only a powerful blast of air will do the cleaning job needed. You may wish to blow-clean open
bookcases, stereos, piano interior, refrigerator or freezer
coils. When blowing, be conscious of where you will be
blowing the dust. Our suggestion is to always blow it
toward a dampened towel which will trap the dust and not
scatter it in the air to resettle on other furniture. When you
are finished, just toss the “dusty” towel into your washer.
TO BLOW: Unplug cleaner. Detach outer cloth bag coupling from exhaust outlet. Attach metal end of hose in its
place. Insert crevice tool at opposite end of hose. Plug in
cleaner. Place dampened towel behind object to be cleaned
and direct air so that it blow the dust against the towel.
When you are finished, turn off and unplug the cleaner;
remove the hose. Twist and lock the cloth bag to its usual
cleaning position.
ACCESORIES/OPTIONS
ACCESSORIES/OPTIONS (available from participating dealers)
ABOVE THE FLOOR CLEANING IS EASY:
1.
Disconnect the cleaner from the electrical outlet, remove the belt cover * or rotate grey rubber nozzle cover* and disengage the belt.
2.
Snap in the hose connector adaptor by sliding
spring into nozzle slot. It will stay firmly in
place without twisting or turning.
3.
Twist and lock the end of the hose to the adaptor. Add either the extension wands or the
cleaning tool you plan to use. Plug in the
cleaner, flip the switch and you’re ready to go.
*Feature may differ according to model
USING THE FELT POLISHER PAD:
The convenient accessory makes light work of dusting
and polishing hardwood, linoleum, and other hard surface floors. Made of special felt composition, the Pad
loosens dirt and surface film without scratching.
When you want to use the Felt Polisher Pad, exchange
it for the metal Rug Nozzle Guard. Adjust the Pad to the
hard surface floor as you would for a rug or carpet, until the button pops IN. At this point, the cleaner’s front
wheels will be “floating” slightly so that the Pad makes full contact with the floor.
9
ATTACHMENT KITS
Deluxe Model 305
1.
2.
3.
4.
5.
6.
7.
Extension Wands-Lightweight steel
or plastic wands extend your reach
and give you firm control while
cleaning high and low places.
7-foot Twist-O-Flex Hose-Light, pliable, durable vinyl for long hard service.
Floor and Wall Brush-10” brush has
soft bristles for cleaning paper or
painted walls and ceiling, linoleum,
tile bare wood or unpainted concrete
floors.
Round Dusting Brush-Long, soft
Economy Model 304
bristles for dusting drapes, lampshades, picture frames, bookcases,
screens, clothing.
Upholstery Nozzle-6” tool with ribbed bottom plate lifts deeply embedded dirt from furniture, curtains,
stairways, bedding, clothing, car upholstery.
Crevice Tool-Narrow nozzle for hard-to-reach places like deep furniture crevices, behind the refrigerator and range, baseboard corners, dresser drawers, and more.
Hose Connector Adapter-The connecting link between your upright and accessory hose.
10
WARRANTY
Royal Appliance Mfg. Co. warrants this Royal ® vacuum cleaner to be free from defects in material and workmanship. The period of the warranty is a LIFETIME on the housing (nozzle, fancase, and motor housing)
and a limited number of years (stated on original carton) on all other components, depending on model purchased. The warranty commences upon the date of original purchase and receipt of your warranty card.
If the vacuum cleaner should become defective within the warranty period, complete service (parts and
labor) will be provided free of charge:
1) at the store where the machine was purchased, if the store is an AUTHORIZED DEALER and
WARRANTY STATION.
In the event of a change in the purchaser’s residence of 50 or more miles from residence at time of purchase
from an AUTHORIZED DEALER, such service will be provided by the nearest warranty station.
This warranty does not cover the following:
1) Parts that normally require replacement such as belts, bags, brushes, and bulbs.
2) Failure, loss, or deterioration due to ordinary wear and tear or from misuse or unauthorized
repair.
3) Machines used for other than normal personal, family, or household purposes. Commercial
purposes are warrantied for one year.
4) Costs of any transportation to and from any place of repair, all of which costs are to be paid by
the owner.
This warranty gives you specific legal rights and you may also have other rights which may vary from state
to state.
11