1
CHILD BOOSTER
SEAT
Child
Booster
seat
Series No.: 4103/A/2004
Series BL4103A
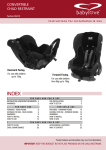
Instructions for Installation & Use
Forward Facing.
To be used only with a lap-sash
seat belt or with a seat belt and
child harness for a child weighing
from 14kg to 26kg.
(Suitable for use only with the
Safe-n-Sound Protecta™Child
Safety Harness - Series
120/2004).
INDEX
CHILD BOOSTER SEAT FOR VEHICLE USE
INTRODUCTION & IMPORTANT INFO
WHO TO CONTACT
WARNINGS
PRE-INSTALLATION
FEATURES
SUITABLE FOR USE
2.
2.
3.
4.
6.
7.
WARNINGS
HOW TO SET-UP
HOW TO REMOVE
HOW TO INSTALL
HOW TO USE
HOW TO CLEAN
7.
8.
9.
10.
11.
19.
Product features and decoration may vary from illustrations.
IMPORTANT: KEEP THIS BOOKLET IN THE PLACE PROVIDED ON THE CHILD RESTRAINT.
INTRODUCTION & IMPORTANT INFORMATION
This Booster Seat is designed for use by children from 14kg to 26kg in vehicles using
a lap-sash seat belt or with a seat belt and Child Safety Harness. It must not be used
with just a lap only seat belt as the upper body of the child is not protected. This
Booster Seat is fitted with the Versa-Tether™ catch that allows it to be used with a child
safety harness. Only the Series 120/2004 Protecta™ child safety harness is suitable
for use with this product.
C A R E F U L LY R E A D A L L T H E I N S T R U C T I O N S F O R I N S TA L L AT I O N .
IN THE EVENT OF DOUBT ABOUT THE METHOD OF INSTALLATION, CONSULT
BABYLOVE OR A CHILD RESTRAINT FITTING STATION AUTHORIZED BY A RELEVANT
TRANSPORT AUTHORITY. IN NEW ZEALAND, CONTACT THE AGENT FOR THE
VEHICLE.
No child restraint can guarantee absolute protection from injury in every crash.
However, to ensure that your child gets all the protection designed into the restraint
PLEASE READ AND FOLLOW THESE INSTRUCTIONS EXACTLY.
AUSTRALIA
Nursery Elegance Pty Ltd
ACN 122 443 387
Unit 10, 339 Williamstown Rd. Port Melbourne, Victoria 3207
Ph: 1300 131 477
2
Child Booster Seat For Child Use
WARNINGS
Use the restraint exactly as shown in the instructions.
Supervision of children is needed because they may be able to undo buckles
and adjusters.
DO NOT LEAVE CHILDREN UNATTENDED IN THE CAR.
Do not alter or modify this restraint, use only recommended parts and
accessories. Repairs must only be done by the manufacturer or agent.
Do not allow the restraint to come into contact with polishes, oils, bleach and other
chemicals.
Destroy the restraint if it has been in a severe crash, even if no damage is
visible.
DO NOT USE WITH JUST A LAP BELT. You must use with lap-sash seat belt, or with a
seat belt and child harness.
DO NOT USE THIS BOOSTER SEAT IF THE CHILD’S EYE LEVEL IS ABOVE THE
TOP OF THE BOOSTER SEAT BACK WHEN THE CHILD IS SEATED.
DO NOT USE THIS RESTRAINT IF THE CHILD’S EYE LEVEL IS ABOVE THE TOP
OF THE CAR SEAT BACK OR HEADREST WHEN THE CHILD IS SEATED ON THE
CHILD RESTRAINT.
DO NOT USE THIS RESTRAINT WITHOUT THE COVER.
IF INSTALLED IN A POSITION WHERE AN AIRBAG IS FITTED ENSURE THAT YOU
FOLLOW ANY WARNINGS IN THE OWNERS MANUAL.
THIS RESTRAINT MUST BE ATTACHED TO A CHILD RESTRAINT ANCHORAGE
POINT IN THE CAR. REFER TO CAR OWNER'S HANDBOOK FOR LOCATION OF
ANCHORAGE POINTS. REFER TO A CHILD RESTRAINT FITTING STATION IF NO
ANCHORAGE POINTS ARE IN THE MOTOR CAR.
THIS RESTRAINT IS NOT SUITABLE FOR USE IN A HATCHBACK OR WAGON
WHERE THE ANCHORAGE STRAP MAY FALL INTO A SPLIT IN THE SEAT BACK.
THIS RESTRAINT MUST BE USED IN CARS WITH FORWARD FACING SEATS
WITH A LAP SASH SEAT BELT OR WITH A SEAT BELT AND CHILD HARNESS.
Regularly check the restraint components, straps and other fitments for correct
function & condition. Seek prompt repair.
Do not use seat belt extenders, even if the car seat belt is not long enough to
secure the child restraint.
Straps may be damaged by unsecured cargo in a collision. Secure or remove
hazardous cargo before using this strap.
Securely stow all heavy objects, feeding bottles, etc that could become missiles
during an accident and cause injury to any occupant.
The restraint should not be purchased or sold as a second hand item. It is
recommended not to use child restraints older than 10 years as the protection in
an accident may be reduced.
Child Booster Seat For Child Use
3
PRE-INSTALLATION
Consult the vehicle owner's handbook for location of anchorage fittings or
anchorage points and the possible use of spacers. Some vehicles may have an
anchor fitting fitted by the vehicle manufacturer. If anchorage points cannot be
found refer to car manufacturer or local child restraint fitting station or traffic
authority for optimum position of anchorage point and the use of spacers.
UPPER ANCHORAGE STRAP
IMPORTANT WARNING: THE ATTACHMENT CLIP COVER MUST ALWAYS BE
USED AS IT PREVENTS THE RISK OF INCORRECT FITMENT OF THE
ATTACHMENT CLIP TO THE ANCHOR FITTING. ALWAYS ENSURE THAT THE
ATTACHMENT CLIP IS CORRECTLY ENGAGED TO THE ANCHOR FITTING AND NOT
HOOKED OR FITTED TO ANY OTHER OBJECT BEFORE EACH USE OF THE
RESTRAINT. THIS IS ESPECIALLY IMPORTANT IN VEHICLES SUCH AS STATION
WAGONS, VANS, HATCH BACKS OR VEHICLES WITHOUT A FIXED PARCEL SHELF,
SINCE THE ANCHOR POINT IS USUALLY NOT VISIBLE.
IMPORTANT INSTALLATION NOTE:
In some vehicles the anchor fitting in the rear vertical panel can only be installed in
one way. Please refer to vehicle owner's handbook or a child restraint fitting station for
correct method.
Extension Strap distance to be measured.
Length 300mm (Babylove part K304 or equivalent)
Length 600mm (Babylove par K305 or equivalent)
Available from all major child restraint retailers.
Rear facing installation may require a longer extension strap.
Front of vehicle
CORRECT ENGAGEMENT
OF ATTACHMENT CLIP TO
ANCHOR FITTING WHEN
THE ATTACHMENT CLIP
COVER IS USED.
The shaded areas of this diagram illustrate the possible locations of the anchor fitting.
Within each shaded area is an anchor fitting showing the correct way to install the
fitting. Ensure the anchor fitting is aligned as illustrated unless stated otherwise in the
vehicle owner’s handbook.
4
Child Booster Seat For Child Use
PRE-INSTALLATION
ANCHOR FITTING:
WARNING: CHILD RESTRAINTS MUST NOT BE ATTACHED TO UNSOUND
METAL OR TO WOOD, OR SYNTHETIC STRUCTURES. WHEN DRILLING 9 MM
HOLE DO NOT DRILL THROUGH FUEL LINES, FUEL TANKS, ELECTRICAL WIRING, OR
RADIO SPEAKERS. WEBBING STRAPS MUST BE PROTECTED FROM SHARP
CORNERS AND EDGES. THE ANCHOR FITTING MUST BE USED ONLY AS DESCRIBED
ABOVE. IT MUST NOT BE HOOKED ONTO ANY OTHER OBJECT.
If the car is fitted with child restraint anchorage point...
Locate the anchorage point behind the rear seating position to
be used. Consult the car owners handbook for the location of
the anchorage points. The anchorage point should be directly
behind and central to the restraint. Remove thread plug from
the parcel shelf, floor/roof, etc. and install anchor bolt and
Trim
fitting as shown right.
CAUTION: Do not overtighten anchor bolt. Overtightening
may fracture or break bolt. Maximum torque is 20 N.m.
(14.75 ft.lb.) Note: Minimum of five full turns of anchor bolt
is required before tightening force is applied.
Do not overtighten.
If the car is not fitted with child
restraint anchorage points...
For Sedans only - Drill 9mm diameter hole
in the parcel shelf on the centreline of the
seating position as shown right. Before drilling
the hole, check the underside for accessibility.
For vehicles other than Sedans - In Australia,
consult your nearest child restraint fitting
station or traffic authority for vehicle inspection
to find the best, correct position for the
placement of the anchorage point, and for the
correct attachment bolt length and use of spacers.
In New Zealand, consult the agent for the vehicle.
Anchor bolt
Lock washer
Anchor
fitting
Spacers
(if required)
Metal
panel
Front of vehicle
200 mm
min.
Drill 9 mm
diameter hole.
Do not drill
through fuel
lines, fuel tanks,
Centre line of
electrical wiring
seating position
or radio speakers.
Note to Queensland purchasers: The installation
of anchorage points must be approved by
authorised officers appointed by Queensland
Trim
Transport. Authorised officers can be
Metal panel
sourced from all Queensland Transport
Securing nut
Customer Service and Queensland
Ambulance Service Centres.
ONLY USE A 5/16 UNC GRADE 5 BOLT. IF THE BOLT IS NOT THE
CORRECT LENGTH THE CAR MANUFACTURER’S HAND BOOK
CAN PROVIDE ADVICE ON THE CORRECT LENGTH BOLT.
Anchor bolt
Anchor fitting
Spacers
(if required)
Reinforcing
washer
Lock washer
Front of vehicle
Child Booster Seat For Child Use
5
FEATURES
1
2
3
4
5
6
Front of vehicle
13
12
7
11
8
9
10
1.
2.
3.
4.
5.
6.
7.
6
Headrest Adjuster (behind headrest).
Upper Anchorage Strap Adjuster.
Adjustable Upper Anchorage Strap.
Versa-Tether™Catch.
Anchor Fitting.
Attachment Clip.
Sash Guide (1 each side).
Child Booster Seat For Child Use
8.
9.
10.
11.
12.
13.
Car Seat Belt.
Seat Belt Recess Area.
Padded Cover for Comfort.
Cup Holder (1 each side).
Armrest (1 each side).
Adjustable Height Headrest.
SUITABLE FOR USE
To be used only with a lap-sash seat belt or with a seat belt and child harness for a
child weighing from 14kg to 26kg.
CAUTION: UPPER ANCHORAGE STRAP MUST BE
USED AND PROPERLY CONNECTED AT ALL TIMES.
THIS RESTRAINT MUST BE USED IN CARS WITH FORWARD-FACING SEATS WITH A
LAP-SASH SEAT BELT OR WITH A SEAT BELT AND CHILD HARNESS.
WARNINGS
Do not use the restraint without the Upper Anchorage Strap attached.
If your vehicle is not fitted with an anchor point, please contact a Safety Restraint
Fitting Station authorised by the relevant State Government Body for correct fitment of
the restraint. In New Zealand contact the agent for the vehicle. The upper anchorage
strap must be attached to an anchorage point using an extension strap if necessary.
DO NOT USE WITH JUST A LAP BELT. You must use with lap-sash seat belt, or with a
seat belt and child harness.
Do not use in a front seat, unless it has a child restraint anchorage point.
NEVER USE THIS CHILD RESTRAINT FACING REARWARD.
Do not use on any vehicle seat which faces sideways or rearwards.
IF INSTALLED IN A POSITION WHERE AN AIRBAG IS FITTED ENSURE THAT YOU
FOLLOW ANY WARNINGS IN THE OWNERS MANUAL.
IMPORTANT: Use lap-sash seat belt to hold the child restraint when not in use.
Child Booster Seat For Child Use
7
HOW TO SETUP
ADJUSTING THE HEADREST
The headrest can be adjusted to lock into different height locations:
A
A
Pull
Pull up the headrest adjuster and then pull
or push the headrest higher or lower until
it is at the desired position for your child.
A
B
Sash Guide
level with or
just above
child's
shoulders
Adjust the headrest height so that the sash
guide is level with or just above your child’s
shoulder. (But not more than 25 mm above).
C. Release the adjuster and check that the headrest has locked into position
by gently pushing down on it.
ADJUSTING THE BACKREST
A. To adjust the backrest, place one hand on the seat section and push firmly
on the backrest until you feel and hear a click. The backrest will now be
able to pivot freely.
B. Push the restraint back until it is touching the car’s seat back. The car’s seat
backrest can be moved to a desired angle if it is adjustable.
Note: In some vehicles, the vehicle headrest may need to be raised or even removed
to allow the booster seat to sit correctly, the vehicle headrest may also interfere with
the routing of the upper anchorage strap. If removed, store the vehicle headrest in a
safe place.
8
Child Booster Seat For Child Use
HOW TO REMOVE
TO REMOVE RESTRAINT FROM VEHICLE
A. If a Safe-n-Sound Protecta™ Child safety Harness (Series120/2004) is used, feed seat
belt out through harness loops.
B
B
A
Storage
Strap
It may be easier to lengthen the Upper Anchorage Strap. Press Adjuster Button (A) while
pulling Upper Anchorage Strap (B).
C
Attachment
Clip
Anchor fitting
Lift the plastic keeper tab and spring, then disengage Attachment Clip from Anchor Fitting.
The Booster Seat is now disconnected and can be removed from the motor car.
Child Booster Seat For Child Use
9
HOW TO INSTALL
INSTALLING INTO VEHICLE
A
B
Attachment
Clip
Anchor fitting
Position the restraint in the car forward
facing in the chosen seating position.
Adjust the headrest to the correct height
for your child (refer to page 8).
Hook the attachment clip to the anchor
fitting. Make sure to remove multiple
twists from the upper anchorage strap.
THIS TETHER STRAP MUST ALWAYS BE
FITTED WHEN THE CHILD RESTRAINT IS
USED IN A VEHICLE.
C
C
D
Pull to
remove slack
Pull the Upper Anchorage Adjuster Strap to
remove slack. Do not over-tighten causing
the restraint base to lift off the vehicle seat.
10 Child Booster Seat For Child Use
Fold up excess strap and use storage strap
to neatly store away from child's reach.
HOW TO USE
USING LAP-SASH SEAT BELT (WITHOUT
CHILD SAFETY HARNESS)
A
Place the restraint Foward Facing facing in
your car, ensuring it is pushed firmly into
the car seat and the backrest touches the
backrest of the car seat. Sit your child on
the seat. Ensure the headrest is set to the
correct height for your child.
B
Position the lap-sash belt over the child
ensuring the lap portion is positioned over
the thighs of the child and under the
armrests. Fit the sash portion of the belt
through the sash guide on the headrest as
shown.
B
B
Lap belt
under
arm rest
C
Engage Seat
Belt
Sash
Guide
Engage seat belt buckle and tongue
ensuring there are no twists in the belt. If
the seat belt buckle is adjustable, adjust
the buckle as low as possible away from
the child.
Child Booster Seat For Child Use 11
HOW TO USE
D
Adjust lap and sash portion of seat belt
firmly but comfortably across the child’s
lap and chest.
If using the Inertia Reel Retractor seat belt,
adjust the lap portion of the seat belt firmly
around the child and restraint, then let the
slack sash portion retract up into the sash
retractor.
IMPORTANT: Always ensure the seat belt is correctly restraining the child on
the restraint. The sash must not be under the arm or behind the back of the
child.
The child should sit upright so that the lap belt is across the top of the thighs.
TO REMOVE CHILD
Disengage seat belt tongue and buckle. Remove belt from child. When Booster is not
being used, secure in position, by engaging seat belt over the booster seat or store in
a safe place.
12 Child Booster Seat For Child Use
HOW TO USE
USING WITH A SERIES 120/2004
PROTECTA™ CHILD SAFETY HARNESS
(PURCHASED SEPARATELY)
Refer to Safe-n-Sound Protecta™ Child Safety Harness (Series 120/2004) instructions
for full details of using and installing the Child Safety Harness. When installing the harness
into the vehicle, connect the upper anchorage strap to the Versa-Tether™ Catch on the
Booster Seat’s upper tether strap (as shown below).
Use the extension strap supplied for all other instances to attach the harness to
anchor points in the luggage area such as the vehicle floor or ceiling.
INSTALLING PROTECTA™ CHILD SAFETY
HARNESS (SERIES 120/2004) INTO VEHICLE
WITHOUT EXTENSION STRAP
1.
2.
3.
4.
5.
1
2
Attachment Clip from Harness.
Versa-Tether™ Catch.
Attachment Clip & Cover.
Anchor Bolt.
Anchor Fitting.
3
4
5
Hook attachment clip of Harness (1) onto Versa-Tether™ Catch (2). Then hook
attachment clip (3) onto anchor fitting. Ensure that none of the straps are twisted or
catching on sharp edges.
Child Booster Seat For Child Use 13
HOW TO USE
INSTALLING SAFE-N-SOUND PROTECTA™ CHILD
SAFETY HARNESS WITH EXTENSION
STRAP INTO VEHICLE (SERIES 120/2004 CHILD
SAFETY HARNESS)
1
Pull to
remove
slack
2
3
4
5
1.
2.
3.
4.
5.
Protecta™ Child Safety Harness
Versa-Tether™ Catch.
Upper Anchorage Strap.
Anchor Fitting.
Extension Strap
(Supplied with Protecta™ Child Safety Harness).
IMPORTANT WARNING: THE HOOK CONNECTION MUST NOT COME INTO
CONTACT WITH THE CHILD’S HEAD. IT MUST BE LOCATED BEHIND THE CAR
SEAT.
CHOOSING METHOD OF INSTALLATION
The Protecta™ Child Safety Harness (Series 120/2004) can be installed using either of
the following methods.
Method 1 - Using a lap sash seat belt in conjunction with Gated Slide provided
to convert to lap belt.
Method 2 - Using lap seat belt.
Before installing the Protecta™ Child Safety Harness determine which method
of installation is required and follow instructions carefully.
REFER TO THE PROTECTA™ CHILD SAFETY HARNESS INSTRUCTIONS FOR
FULL DETAILS ON HOW TO USE AND INSTALL THE CHILD SAFETY HARNESS.
14 Child Booster Seat For Child Use
HOW TO USE
INSTALLING SAFE-N-SOUND PROTECTA™ CHILD
SAFETY HARNESS SERIES 120/2004.
A. Decide which seating position you are going to use and which seat belt
type is installed in that position. If using a lap-sash seat belt then a Gated
Slide must be used (see Method 1).
B
C
Feed harness
shoulder
straps under
headrest
Hook Attachment Clip from Harness
onto Versa-Tether™ Catch
Ensure
shoulder
straps are of
equal length
Feed Harness shoulder straps under head
rest of Booster Seat and allow to sit over
child’s shoulders. The shoulder straps of
the harness should rest between the
backrest and headrest of the seat.
Make sure that the Anchor Clip also feeds
through to the back of the restraint. Hook
the Attachment Clip from the harness onto
the Versa-Tether™ Catch.
D. Ensure the headrest is set to the correct height for your child.
(See page 8).
E
Attachment Clip
If not already connected, hook the
attachment clip to the anchor fitting and
tighten (refer page 10). Make sure to
remove multiple twists from the upper
anchorage strap. THIS TETHER STRAP
MUST ALWAYS BE FITTED WHEN THE
BOOSTER SEAT IS USED IN A VEHICLE
WITH THE PROTECTA™ CHILD SAFETY
HARNESS.
Anchor Fitting
Child Booster Seat For Child Use 15
HOW TO USE
Connect the Protecta™ Child Safety Harness to the Versa-Tether™ Catch as detailed on
page 15.
1
7
2
3
6
1.
2.
3.
4.
5.
6.
7.
RH Harness Strap.
LH Harness Strap.
Cover Pad (not shown).
Cross Strap.
Cross Strap Loop.
RH Harness Strap Loop.
Storage Strap.
4
5
A. With the child seated, place each of the harness straps over each shoulder.
B. Feed the RH strap (loop end) into the cross strap loop to connect the two sides.
C. Feed the adult belt (lap belt or converted lap/sash) through the harness loops,
ensuring that the cross strap loop does not disconnect. Also ensure there are no
twists in the harness, cross strap and seat belt.
D. Engage the seat belt tongue to the buckle and adjust the seat belt to sit firmly but
comfortably around the child's pelvis. The seat belt buckle should be located as
low as possible below the child's hip.
E
Pull
Adjustment
Strap to
remove slack
Fully press
Adjuster Button (1)
whilst pulling
Upper Anchorage
Strap (2) to
lengthen.
2
1
Adjuster
16 Child Booster Seat For Child Use
With the lap belt (or converted lap/sash)
adjusted to be a firm fit on the child's
thighs, then adjust the Protecta™ Child
Safety Harness to remove all slack in the
shoulder straps. Once adjusted, further
adjustments are necessary only to the
upper extension straps and to
accommodate the growth of the child. Use
the reverse procedure to remove the child
from the harness.
WARNING: The lap position of the seat
belt must be adjusted firmly first, and then
the harness, so that the belt is not lifted off
the child's lap when the harness is
adjusted.
HOW TO USE
Finally, fold the free end of the adjuster
strap, secure using the storage strap,
then place it into the top of the adjuster
cover as shown left.
F
Fold the Adjuster
Strap and
secure with
Storage Strap.
Storage
Strap
Adjuster
Cover
USING LAP-SASH SEAT BELT WITH SAFE-NSOUND PROTECTA™ CHILD SAFETY HARNESS.
(USING GATED SLIDE PROVIDED WITH CHILD HARNESS.)
Slide Gated Slide until as close
as possible to the base of vehicle seat.
Converted
lap-sash
seat belt.
Refer to Protecta™ Child Safety Harness
instructions to fit gated slide and
adjusting the car seat belt.
Fit the Safe-n-Sound Protecta™ Child
Safety Harness as detailed on page
15. Thread the converted lap-sash
seat belt through the harness strap
loops as shown left. Ensure there are
no twists in the harness, cross strap
and seat belt.
USING LAP SEAT BELT WITH PROTECTA™ CHILD
SAFETY HARNESS.
Harness Strap
Loops.
Fit the Protecta™ Child Safety Harness as
detailed on page 15. Thread the lap seat
belt through the harness strap loops as
shown left. Ensure there are no twists in
the harness, cross strap and seat belt.
Important Note: Some vehicle seat belts are too short and you may experience some
difficulty fitting the converted lap-sash around your child. If so, adjust the gated slide
nearer to your child, ideally under the armrest and lap belt recess area, (ensure the
slide does not touch your child). This should provide more belt length to fit your child,
but if the belt still will not fit, try another location in the vehicle, eg. side seat. If the
vehicle belts are still too short, then contact the vehicle manufacturer for advice on
longer seat belts.
Child Booster Seat For Child Use 17
HOW TO USE
B
B.
Engage seat belt buckle and tongue and
adjust the seat belt to sit firmly but
comfortably around the child’s pelvis.
Engage Seat
Belt
Remove slack in the Protecta™ Child Safety Harness shoulder straps as shown on
page 16.
IMPORTANT WARNING: If used with a child harness, the lap strap of the seat
belt must be adjusted firmly first, and then the harness, so that the lap-strap is
not lifted off the child’s lap when the harness is adjusted.
TO REMOVE CHILD
Disengage seat belt tongue and buckle and remove harness and belt from child.
When Booster is not being used, secure in position, by engaging seat belt over the
booster seat or store in a safe place.
When not in use, the harness may be flipped onto the parcel shelf or disconnected
from the anchor fitting and stored.
Lift harness strap
over child's head
CUP HOLDERS
The Booster Seat has a cup holder on either side of the seat. Pull the cup holder
out from the seat to use. Push away when not in use.
Ensure the cup holder and its contents cannot be crushed by the car door. Use
the cup holder on the opposite side as required.
WARNING: Do not use cup holder for hot drink or liquids.
18 Child Booster Seat For Child Use
HOW TO CLEAN
The restraint has a flame retardant cover which is removable for cleaning. Cleaning
instructions are on the care label attached to the cover. Use only mild soap and
water to clean all metal and plastic parts of the restraint. Do not use chemicals or
cleaning agents.
TO REMOVE COVER
Follow the sequence below A to G to remove the cover.
A Unhook
G Peel top
Elastic Loops
on both sides.
cover away
from shell.
F Peel centre
cover away
from shell.
B Unhook
Elastic
Loops at top
& bottom.
C Unhook
Elastic
Loops.
D Undo Velcro.
E Peel bottom cover
away from shell.
TO REPLACE COVER
A.
B.
C.
D.
E.
F.
G.
H.
Align and fit bottom cover over base of restraint.
Re-attach elastic loops C and velcro D for bottom cover.
Ensure headrest impact pad is in position.
Align and fit top cover over headrest and headrest impact pad.
Re-attach elastic loops A at top & bottom C .
Align and fit centre cover over backrest.
Re-attach elastic loops B at top & bottom.
Ensure all loops and clips, and velcro are fastened on both Left
and Right sides of seat.
Child Booster Seat For Child Use 19
We reserve the right to alter this product without notice in our constant
endeavour for improvement.
2007 Nursery Elegance Pty. Ltd.
Babylove is a trademark owned by Nursery Elegance Pty. Ltd..
Protecta™ is a trademark of Britax Childcare Pty. Ltd.
This product is covered by Australian and overseas patents and applications.
Part Number: 2109357