1
FR-2-couverture.fm Page 1 Mardi, 12. août 2003 10:30 10
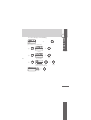
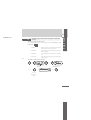
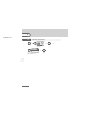
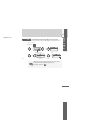
Belgacom DDS 100 / DDS 200
Belgacom ForumTM 700
First
User manual
1
ATIMU000-005
how
2
2
User manual
ATIMU000-001
how
Thank you for choosing the DDS 100 or 200: this is a reliable telephone designed
to make life easier.
3
To find out the essential functions of the DDS 100 or 200, we suggest that you
read carefully the first chapters of this guide.
The availability of certain functions described in this guide may depend on the
version or configuration of your system.
If in doubt, consult the person responsible for your system.
3
Contents
generated
Toc
Precautions for use . . . . . . . . . . . . . . . . . . . . . . p.8
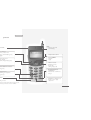
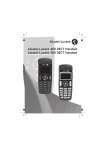
Your telephone . . . . . . . . . . . . . . . . . . . . . . . . . p.10
1.
Display and corresponding icons . . . . . . . . . . . p.12
1.1
1.2
1.3
1.4
2.
3.
Installing the battery in the telephone . . . . . . . . . . . . . .
Charging your telephone battery . . . . . . . . . . . . . . . . . .
Switching on your telephone . . . . . . . . . . . . . . . . . . . . .
Accessing the MENU and navigating. . . . . . . . . . . . . . . .
p.16
p.17
p.18
p.19
Using your telephone . . . . . . . . . . . . . . . . . . . . p.20
3.1
3.2
3.3
3.4
3.5
3.6
3.7
4
p.12
p.13
p.14
p.15
Getting started . . . . . . . . . . . . . . . . . . . . . . . . . p.16
2.1
2.2
2.3
2.4
4
Status icons . . . . . . . . . . . . . . . . . . . . . . . . . . . . . . . . . . .
MENU icons . . . . . . . . . . . . . . . . . . . . . . . . . . . . . . . . . .
Call icons . . . . . . . . . . . . . . . . . . . . . . . . . . . . . . . . . . . .
How to read this guide . . . . . . . . . . . . . . . . . . . . . . . . . .
Making a call . . . . . . . . . . . . . . . . . . . . . . . . . . . . . . . . . .
Calling from your personal directory (Individual
number) . . . . . . . . . . . . . . . . . . . . . . . . . . . . . . . . . . . . . .
Calling your correspondent by name (company
directory). . . . . . . . . . . . . . . . . . . . . . . . . . . . . . . . . . . . .
Receiving a call . . . . . . . . . . . . . . . . . . . . . . . . . . . . . . . .
Redialling* . . . . . . . . . . . . . . . . . . . . . . . . . . . . . . . . . . . .
Requesting automatic callback if internal number is busy
During a call. . . . . . . . . . . . . . . . . . . . . . . . . . . . . . . . . . .
p.20
p.20
p.21
p.22
p.22
p.23
p.24
Contents
4.
During a conversation . . . . . . . . . . . . . . . . . . . . p.26
4.1
4.2
4.3
4.4
4.5
4.6
4.7
5.
6.
p.26
p.27
p.28
p.29
p.30
p.31
p.32
Sharing . . . . . . . . . . . . . . . . . . . . . . . . . . . . . . . . p.33
5.1
5.2
5.3
5.4
5.5
5.6
5.7
5
Make a second call . . . . . . . . . . . . . . . . . . . . . . . . . . . . .
Receiving a second call . . . . . . . . . . . . . . . . . . . . . . . . . .
Switching between two calls (Broker call) . . . . . . . . . . .
Transferring a call . . . . . . . . . . . . . . . . . . . . . . . . . . . . . .
Three-way conference with internal and/or external
correspondents (conference) . . . . . . . . . . . . . . . . . . . . .
Placing an outside call on hold (parking) . . . . . . . . . . . .
Store a number* . . . . . . . . . . . . . . . . . . . . . . . . . . . . . . .
Answering a general bell . . . . . . . . . . . . . . . . . . . . . . . . .
Call pick-up . . . . . . . . . . . . . . . . . . . . . . . . . . . . . . . . . . .
Password . . . . . . . . . . . . . . . . . . . . . . . . . . . . . . . . . . . . .
Diverting hunting group calls . . . . . . . . . . . . . . . . . . . . .
Sending a written message to an internal correspondent
Send a voice message copy . . . . . . . . . . . . . . . . . . . . . . .
Sending a recorded message to a number / a
distribution list . . . . . . . . . . . . . . . . . . . . . . . . . . . . . . . .
p.33
p.34
p.35
p.36
p.36
p.38
p.40
Keep in touch . . . . . . . . . . . . . . . . . . . . . . . . . . . p.42
6.1
6.2
6.3
6.4
6.5
6.6
6.7
6.8
6.9
Selecting calls to be diverted . . . . . . . . . . . . . . . . . . . . .
Diverting calls to your voice mailbox. . . . . . . . . . . . . . .
Consulting your voice mailbox . . . . . . . . . . . . . . . . . . . .
Activating/deactivating the personal assistant . . . . . . . .
Personal assistant: reaching you with one number only
Diverting calls to another number (immediate
diversion). . . . . . . . . . . . . . . . . . . . . . . . . . . . . . . . . . . . .
Different types of diversions Example of diversion on
busy . . . . . . . . . . . . . . . . . . . . . . . . . . . . . . . . . . . . . . . . .
Cancelling all diversions . . . . . . . . . . . . . . . . . . . . . . . . .
Consulting messages left while you were away . . . . . . .
p.42
p.42
p.43
p.45
p.46
p.48
p.49
p.50
p.51
5
Contents
7.
Programming your telephone . . . . . . . . . . . . . p.52
7.1
7.2
7.3
7.4
7.5
7.6
7.7
7.8
7.9
7.10
7.11
7.12
7.13
6
8.
p.63
p.64
p.65
p.66
p.66
Making a call . . . . . . . . . . . . . . . . . . . . . . . . . . . . . . . . . .
Receiving a call . . . . . . . . . . . . . . . . . . . . . . . . . . . . . . . .
Calling from your personal directory . . . . . . . . . . . . . . .
Redialling the last number dialled (redial). . . . . . . . . . . .
Sending DTMF signals . . . . . . . . . . . . . . . . . . . . . . . . . . .
Sending a calibrated cut-off. . . . . . . . . . . . . . . . . . . . . . .
Programming your personal directory . . . . . . . . . . . . . .
Modifying a name or number . . . . . . . . . . . . . . . . . . . . .
Deleting a card . . . . . . . . . . . . . . . . . . . . . . . . . . . . . . . .
Customizing and adjusting your telephone . . . . . . . . . .
Adjusting your telephone functions . . . . . . . . . . . . . . . .
p.67
p.67
p.68
p.68
p.68
p.68
p.69
p.70
p.71
p.72
p.74
Registering the telephone. . . . . . . . . . . . . . . . . p.75
9.1
9.2
6
p.52
p.53
p.55
p.56
p.59
p.60
p.61
p.62
Using the telephone in GAP mode . . . . . . . . . p.67
8.1
8.2
8.3
8.4
8.5
8.6
8.7
8.8
8.9
8.10
8.11
9.
Initializing your voice mailbox. . . . . . . . . . . . . . . . . . . . .
Customising your voice greeting . . . . . . . . . . . . . . . . . .
Modifying your personal code . . . . . . . . . . . . . . . . . . . .
Adjusting the audio functions . . . . . . . . . . . . . . . . . . . . .
Activating headset mode. . . . . . . . . . . . . . . . . . . . . . . . .
Adjusting your telephone functions . . . . . . . . . . . . . . . .
Adjusting screen brightness . . . . . . . . . . . . . . . . . . . . . .
Selecting language . . . . . . . . . . . . . . . . . . . . . . . . . . . . . .
Programming your personal directory (Individual
number) . . . . . . . . . . . . . . . . . . . . . . . . . . . . . . . . . . . . . .
Modifying a card in the personal directory . . . . . . . . . .
Programming an appointment reminder . . . . . . . . . . . .
Identify the terminal you are on . . . . . . . . . . . . . . . . . . .
Locking your telephone . . . . . . . . . . . . . . . . . . . . . . . . .
Registering the telephone on a system for the first time p.75
Registering the telephone on other systems . . . . . . . . . p.77
Contents
10.
Accessories. . . . . . . . . . . . . . . . . . . . . . . . . . . . . p.80
10.1
10.2
10.3
10.4
10.5
10.6
11.
Chargers . . . . . . . . . . . . . . . . . . . . . . . . . . . . . . . . . . . . .
Characteristics of the mains power adapter . . . . . . . . .
Battery . . . . . . . . . . . . . . . . . . . . . . . . . . . . . . . . . . . . . . .
Headphone / external microphone . . . . . . . . . . . . . . . .
Cleaning your telephone. . . . . . . . . . . . . . . . . . . . . . . . .
Transporting and protecting your telephone . . . . . . . . .
p.80
p.80
p.81
p.82
p.82
p.82
Glossary . . . . . . . . . . . . . . . . . . . . . . . . . . . . . . . p.83
Declaration of compliance . . . . . . . . . . . . . . . . p.85
7
7
Precautions for use
ATIMU000-002
Coverage area
howtoc
The DECT functions provided by your Belgacom system allow user mobility
management via DECT cordless telephones.
Radio coverage of the Belgacom system is ensured by a network of radio
terminals. The coverage area of a radio terminal is called a cell.
•
Mobility:
A user can make or receive calls in any cell.
•
Radio transfer:
This function enables the user to move during a conversation and go from one cell
to another. The transfer takes place automatically and has no effect on the
conversation. In some cases, slight crackling may be audible at the moment of
transition.
Use of approved DECT equipment
8
This DECT telephone is designed to be used with a private automatic branch
exchange (PABX) without an Belgacom wire.
The CE symbol means that this product is compliant with current Community
directives, more especially the following directives:
n 89/336/CEE
n 73/23/CEE
n 1999/5/CE
Electromagnetic Compatibility
(low voltage)
(R&TTE)
Pursuant to directive 1999/5/CE (R&TTE) published in the Official Journal of the
European Community of April 7, 1999, these items of equipment use the DECT
harmonized frequency spectrum and can be used in all the countries of the
European Community, in Switzerland and Norway.
No guarantee is given concerning possible interference
affecting DECT equipment, due to other authorised
utilisation of the radio frequencies concerned.
8
Precautions for use
Operating conditions
The following conditions must be respected, notably concerning the use of
radioelectric frequencies:
•
DECT equipment can only be used to establish links between fixed points if
these links are temporary and the equivalent isotropically radiated power at the
antenna is less than 250 mW.
•
This telephone is specially designed for use with an Belgacom system such as is
described in the manual.
•
As this telephone complies with the GAP standard, it can be used in simplified
mode on another DECT/GAP system (other PABX or private residential base
station). Utilization in GAP mode involves a particular mode of operation that
can lead to functional limitations for which no claims will be considered under
the terms of the guarantee.
•
Do not expose your telephone to severe conditions (rain, sea air, dust, etc.).
•
Correct operation of your telephone is not guaranteed at temperatures outside
the range -10°C to +45°C.Between -5ºC and -10ºC the display may not be
readable. This is a temporary phenomenon and does not affect the performance
of your telephone in any way.
•
You must not switch on or use your telephone near gas or inflammable liquids.
9
9
Your telephone
Telephone
ATIMU000-008
Headset socket
n Erase a character
n Return to previous menu
n Delete an entire field (long press)
n
n
n
n
Hang up
Return to first screen
Switch off ringer
Lock/unlock keypad (long press)
n Activate/disable the vibrator (1)
(long press)
n Company directory
n Customizing your telephone
(long press) (2)
Microphone
Light
•
Ex
(r
n A
n A
n N
n A
n L
n R
n B
(d
n A
lo
n A
ch
n S
n R
a
(1)
Depending on model
(2)
Special case: from the personal directory, the long press
enables a directory card to be created or modified
10
Telephone
generated
et socket
se a character
urn to previous menu
ete an entire field(long press)
ng up
urn to first screen
tch off ringer
k/unlock keypad (long press)
tivate/disable the vibrator
ong press)
Light
•
Exit from radio field
(rapid flashing)
n Adjust audio volume
n Access MENU
n Navigate
n Apply
n Lift the receiver
n Redial (long press)
n Broker call
(during enquiry call)
n Activate/deactivate
loudspeaker
mpany directory
tomizing your telephone
g press) (2)
n Activate mute on hands free
phone
n Switch on / off (long press)
n Rapid access to ringer
nding on model
charger
adjustment
al case: from the personal directory, the long press
a directory card to be created or modified
11
1
ATIMU010-005
Display and corresponding icons
Other
Features 1 line of status icons and 3 lines of 16 alphanumeric characters. The DDS
200 also has a back-lit display and keypad.
1.1
ATIMU010-010
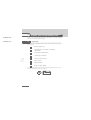
Status icons
The status icons are displayed on the welcome screen and indicate the status of
the telephone.
Battery charge level
Initializing the voice mailbox / Consulting
information
Programmed call-back time
Call diversion activated
Vibrator active (DDS 200)
12
Ringer active
Ringer disabled
Radio reception quality
You can obtain details on the status icons from the tooltips that appear on the
welcome screen when you use the navigator:
Battery
full power
12
ATIMU010-020
1.2
MENU icons
The MENU is accessible from the welcome screen by pressing the OK key.
(OK:
)
It provides access to all the functions available on your system.
Directories:
manage your personal directory and access the company
directory.
Redial:
call back the last number dialled.
Divert:
divert your calls to another number.
Mailbox:
consult and send voice and text messages.
13
Call pick-up:
answer a call intended for another telephone.
Appointment:
program a call-back time.
Display and corresponding icons
1
System lock:
prohibit outgoing calls and modification of the programming.
Customizing the telephone:
program your voice mailbox, select the ringer tune, language,
etc.
Adjustment:
adjust contrast, activate or deactivate the beeps, lighting, etc.
System selection
Installation
13
Dis
1
ATIMU010-030
1.3
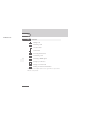
Call icons
Making a call
Answering a call*
In conversation*
Call on hold*
Accessing the directories
Transferring a call
Switching to DTMF signals
14
Setting up a conference
Putting on common hold
Parking an external communication
* In the event of a multiple call, the icons are given indices to represent the
different correspondents
14
1
1.4
Display and corresponding icons
ATIMU010-040
How to read this guide
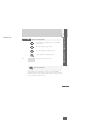
Press briefly on the navigation key to access the MENU
and to confirm.
Move the navigation key up or down.
Move the navigation key to the left or right.
Use the keypad to enter digits and letters.
15
Description of an action or context.
Important information
These symbols can be supplemented by small icons or texts. All default or
customized function codes are given in the table of codes in the appended sheet.
The features described in this manual and indicated with an asterisk (*) can only
be accessed with some software versions.
15
Dis
2
Getting started
ATIMU020-010
Other
2.1
Installing the battery in the telephone
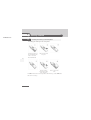
• Installing the battery in the telephone
Position the battery in
the slide following the
mark on the label
Slide it until it clicks
into place
• To remove it
16
Slide the battery
towards the bottom
of the telephone
Remove it from the
slide
The DDS 100 functions exclusively with the Ni-Mh battery, and the DDS 200
with the Li-Ion battery.
16
ATIMU020-020
2.2
Charging your telephone battery
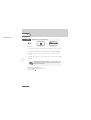
Connect the charger and
place the telephone in
the charging holder
17
Getting started
2
Battery being charged*
Recharge your telephone battery regularly. The telephone can be on or off when
recharging the battery. If the telephone is to remain unused or out of its charger
for several weeks, remove the battery and store it separately.
* battery charged in 3 hours or 5 hours, depending on the model.
17
Get
2
ATIMU020-030
2.3
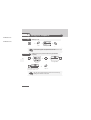
Switching on your telephone
MARTIN Paul
Wed 24 May 16:30
Switch on
(long press)
Wait a few seconds
(about 3s).
Your telephone is
switched on
If the display fails to light up or the battery icon is flashing, recharge the battery.
If the radio reception icon doesn’t appear on the telephone display :
•
Check that you’re in an area covered (if you’re not, move close to a radio
terminal).
•
Check that the telephone is properly installed in the system (consult the PABX
manager).
18
If the display indicates: 'System 1 — Auto install ?', see
paragraph 'Registering the telephone' or contact your
installation technician.
Switching off your telephone:
Press the switch on/off key (long press).
(switch on/off :
18
)
ATIMU020-040
2.4
Accessing the MENU and navigating
The MENU is accessible from the welcome screen by pressing the OK key.
(OK:
)
MARTIN Paul
Wed 24 May 16:30
Apply
Getting started
2
Accessing the functions:
mbx greeting
OK?
Select a function in the
MENU
19
Apply
You can move horizontally
along the various icons
within the function
19
Get
3
Using your telephone
ATIMU030-010
Other
3.1
Making a call
ATIMU030-020
John
in conversation
Transfer
Dial
Send the call
Speak
Hang up
To make an external call, dial the outside line access code
before dialling your correspondent's number.
3.2
Calling from your personal directory (Individual
number)
Pers Sp Dial
Directory
20
Select the
'Directories'
function
Apply
Confirm access to
'Pers Sp Dial'
1-JOHN
2-PAUL
3-
Select the name of the
person you wish to call
Send the call
The call can be sent directly from the list of names by
dialling the number of the card.
20
ATIMU030-030
3.3
Calling your correspondent by name (company
directory)
Pers Sp Dial
Directory
Select the
'Directories' function
Apply
Select 'Directory'
Type surname :
Apply
21
Enter the first letter of your
correspondent's surname*
Select the
desired name
Send the
call
Using your telephone
3
* If several names come up, you can refine the search by entering the successive
letters (second, third, etc.) of the name you are looking for.
Press 1 when you do not know one of the letters of the name.
For fast access to this function from the home screen page,
press the directory key. (directory:
)
21
Usi
3
ATIMU030-040
3.4
ATIMU030-050
Receiving a call
Sophie
is calling
Sophie
in conversation
Transfer
You are receiving a
call
Lift the
receiver
Speak
Hang up
The ringer does not ring if:
. the vibrator is active, the vibrator active icon is displayed
on the screen saver.
. the ringer is disabled, the ringer disabled icon is displayed
on the screen saver.
22
Disabling the ringer:
Press the hang up key when your telephone rings: it is still possible to answer by
pressing the unhook key.
(Hang up :
3.5
, Lift the receiver :
)
Redialling*
Select the 'Redial'
function
Apply
1-JOHN
2-PAUL
3-0123456789
Select the No. in the
last ten issued
22
Send the call
ATIMU030-060
3.6
Requesting automatic callback if internal number is
busy
The telephone of the internal correspondent you are trying to contact is busy, and
you want the person to call you back as soon as they are free.
Sophie
Please wait
Cback
MARTIN
Wed 24 May 16:30
active Callback
Confirm the
function
To cancel the automatic callback request, enter the 'Cancel
automatic callback' function code.
Using your telephone
3
23
23
Usi
3
ATIMU030-070
3.7
During a call
During a call and without losing the connection, there are several ways to access
the options offered by your system, using:
• the list of icons at the top of the screen
• the list of items at the bottom of the screen
Sophie
in conversation
Transfer
2nd Call
Send MF Code
24
Conference
Manual Hold
Parking
Call in progress
Slot for second call
(reception of a call:
waiting: )
Directory
Transfer
Put through a second call
Voice frequency
Call transfer
Common standby
Camp-on (external call)
24
ou call
• Example: sending DTMF signals
During a call, you sometimes have to send DTMF signals, for example, for a voice
message service, an automatic switchboard or when remotely consulting an
answering machine:
0123456789
in conversation
Transfer
In conversation
0123456789
in conversation
Send MF Code?
Select the 'Send MF
Code' icon
0123456789
in conversation
Send MF Code?
Apply
25
Using your telephone
3
All digits dialled are then sent
in DTMF
To deactivate the function, from the Send MF code screen, re-enable.
25
Usi
4
During a conversation
ATIMU040-010
Other
4.1
Make a second call
Number?
Paul
in conversation
Transfer
102
Dial the number
Send the call
John
in conversation
Transfer
The first call is on hold
Hang up the ongoing
call
You can also call a second correspondent by selecting the
icon or 2nd call text, or else by using your personal
directory or the company directory.
26
26
ATIMU040-020
4.2
Receiving a second call
You are in conversation and a correspondent is trying to contact you:
Paul
is calling
John
in conversation
Transfer
The caller’s name is displayed for 3 seconds, and
a beep is sent
Lift the receiver
Paul
in conversation
Transfer
The first call is on hold
27
Hang up the ongoing
call
During a conversation
4
Over 3 seconds, move with the navigate-left-right key to
the receiving a second call icon, to see the identity of the
second caller (and off-hook if necessary)
( navigate-left-right:
, Receive second call:
, Lift
2
the receiver:
)
27
Dur
4
ATIMU040-030
4.3
Switching between two calls (Broker call)
During a call, to recover the correspondent on hold:
Paul
in conversation
Transfer
John
in conversation
Transfer
Recover the
correspondent on hold
You can establish the identity of the waiting call without
taking it by using the navigate-left-right key. (navigateleft-right:
)
Paul
in conversation
Transfer
28
John
on hold
Retrieve?
Recover the correspondent on
hold
John
in conversation
Transfer
Recover the
correspondent on hold
28
ATIMU040-040
4.4
Transferring a call
To transfer your correspondent to another person:
Number?
0123456789
in conversation
Transfer
102
Dial the destination number
Paul
in conversation
Transfer
You are in
conversation with
the destination
number
29
Confirm the
'Transfer'
option
During a conversation
4
After dialling the destination number, you can transfer the
call directly without waiting for your correspondent's
reply by validating the 'Transfer' option.You can initiate
the transfer by using the icon or the 'Transfer' text.The
transfer between two external correspondents and the
transfer by pressing the hang-up key depend on the
system configuration.
29
Dur
4
ATIMU040-050
4.5
Three-way conference with internal and/or external
correspondents (conference)
Paul
in conversation
Transfer
Paul
in conversation
Conference?
Select
'Conference'
John, Paul
Conference
Conference?
Apply
You are in
conference mode
To cancel the conference, press the OK key. This will put you back to the other
party. (OK:
30
30
)
ATIMU040-060
4.6
Placing an outside call on hold (parking)
You can park an outside correspondent in order to take the call on another set.
0612457845
in conversation
Transfer
0612457845
in conversation
Park call?
You are holding an
Select the 'Parking' icon
external
conversation
Your correspondent is parked and hears the hold melody.
Apply
To recover your parked call:
Select the function 'Call
pick-up'
31
During a conversation
4
Apply
Parking
OK?
Select the icon
'Reconnection (call
park)'
Apply
0612457845
in conversation
Transfer
Dial the number of the set that
originated parking
You are in
conversation
If the parked call is not recovered within a preset time (by
default 1 minute 30), it is directed to the operator.
31
Dur
4
ATIMU040-070
4.7
Store a number*
To store the displayed number in the personal directory while a communication
is in progress:
John
in conversation
Transfer
Select the
'Directories'
function
Pers SP Dial
Directory
»Pers SP Dial
Apply
Confirm access to
'Pers Sp Dial'
Apply
1-............
2-............
3-............
Select the chosen card
Apply
Name?
32
MARTIN
Enter the name*
Apply
(twice)
*To key in the name: the keys in the keypad include letters that you can display by
pressing them successively.
Example: press '8' twice to display the letter 'U'.
32
5
Sharing
ATIMU050-010
Other
5.1
Answering a general bell
When the operator is absent, incoming external calls are diverted to a general bell.
You can answer these calls:
Select the 'Pick-up'
function
Apply
Ans Gen Bell
OK?
Select the 'Answer
general bell' function
Confirm to take the
call
33
33
5
ATIMU050-020
5.2
Call pick-up
You hear a telephone ringing in an office where no-one can answer. If authorised,
you can answer the call on your own telephone.
Select the 'Pick-up'
function
Apply
Number?
Pick-up Ind
. . . . . . .
OK?
Confirm access to
Enter number of ringing
'Terminal call pick-up'
telephone
If the telephone ringing is in your own pick-up group:
Apply
34
Select the 'Pick-up'
function
Apply
Pick-up Grp
OK?
Select the 'Group call
pick-up' icon
Apply
The system can be configured to prevent call pick-up on
certain telephones.
34
ATIMU050-030
5.3
Password
Hunting group call:
Some extensions can be associated to form a group. You can contact any one of
them by dialling the group number.
Sharing
5
Belonging to a group does not affect the management of
direct calls. A specific telephone within a group can always
be called by using its own number.
Temporary exit from your hunting group:
Display of exit
acceptance
35
Code of the
your group
'Group exit'
number
function
Return into your group:
Lift the
receiver
Display of exit
cancellation
Code of the
'Return to
group' function
Group No.
Lift the
receiver
35
Sha
5
ATIMU050-040
5.4
Diverting hunting group calls
You can divert your own group calls:
ATIMU050-050
Diversion
acknowledgement is
displayed
Code of the
'Group call
diversion'
function
No. of
diversion
telephone
Lift the
receiver
To cancel this function, refer to chapter 6 'Cancelling all diversions'.
5.5
Sending a written message to an internal
correspondent
36
Select the 'Mail' function
Apply
Number?
0 Text mail
. . . . . . .
OK?
Select the 'Text mails'
icon
Apply
Dial the destination number
CALL ME BACK
OK?
Apply
36
Select the message to be
sent
Apply
The following 27 predefined messages exist:
37
1
2
3
4
5
6
Call me back
Call me back tomorrow
CALL ME BACK AT xx: xx (*)
CALL BACK xx.xx.xx (*)
Call the attendant
Call the secretary
7
I will call back at _:_ (*)
8
9
Use paging
Please fetch your fax
10
11
12
13
14
Please fetch your mail
Please cancel your forwarding
Visitors are waiting
You are expected at reception
MEETING AT xx: xx (*)
15
16
17
18
19
20
MEETING ON xx.xx.xx (*)
MEETING ON xx.xx.xx AT xx: xx (*)
Out for a while
Absent for the rest of the day
ABSENT, BACK AT xx: xx (*)
ABSENT, BACK ON xx.xx.xx AT xx:
xx (*)
21 ON VACATION, BACK ON
xx.xx.xx (*)
22 External meeting
23 EXTERN MEETING, BACK ON
xx.xx.xx (*)
24 I am in room nr __ (*)
25 In a meeting - do not disturb
26 At lunch
27 Indisposed
(*) Messages to be completed using numeric
keypad
Sharing
5
If selected message has to be completed:
CALL BACK
XXXXXXXX
OK?
Confirm access to the
message to be completed
CALL BACK
. . . . . . .
OK?
Complete the message
Apply
When editing a message to be completed you can use the
delete key to delete any characters key ined. (delete: C )
37
Sha
5
ATIMU050-060
5.6
Send a voice message copy
1 voice mail
OK?
Confirm access to the
'Mail' function
Confirm access to the
voice mailbox
Read a msg
New 1 Old 4
OK?
Personal code
Apply
Select the message to copy
01/05 107
10 May 9:15
Send copy?
Apply
38
Number?
01/05
150
Confirm?
. . . . . . .
Number or name of the
recipient or list
Apply
Send copy
OK?
Apply
38
*
Apply
Sharing
5
* To record a comment
Send copy
Rec comment
OK?
OK?
Apply
Record
Recording ...
OK?
Stop?
Start recording
Apply
Recording in
progress
Apply
Please confirm
OK?
Apply
39
While recording a comment you can select other functions
using the navigate-up-down key
(navigate-up-down:
)
39
Sha
5
ATIMU050-070
Sending a recorded message to a number / a
distribution list
5.7
OK?
Confirm access to the
'Mail' function
Confirm access to
the voice mail
Send a msg
OK?
Apply
Apply
Number?
. . . . . . .
No. or name of the
recipient or the list (000 050) *
40
Apply
01/05
150
Confirm?
Select the message
to be sent
•
•
Apply
* Distribution lists:
000: the message is sent to all voice mailboxes
001 to 050: the message is sent to a group of voice mailboxes
40
• To record the message
Record
Recording ...
OK?
Stop?
Start the recording
Apply
Recording in
progress
Apply
Sharing
5
Please confirm
OK?
send message
Apply
While the message is being recorded, you can select other
functions with the navigate-up-down key.
(navigate-up-down:
)
41
41
Sha
6
Keep in touch
ATIMU060-010
Other
6.1
Selecting calls to be diverted
This function enables you to select the calls to be diverted. These can be: external
calls, internal calls (local) or all calls.
ATIMU060-020
Select the 'Diversion'
function
Apply
All calls
Extern calls
Local calls
Select the 'List of calls'
icon
42
6.2
Select the type of call Confirm the
to divert
selection
Diverting calls to your voice mailbox
Select the 'Diversion'
function
Div Imm VMU
OK?
Select the 'Diverting to
your voice mailbox'
icon
42
Apply
Apply
Return to
idle
ATIMU060-030
6.3
Consulting your voice mailbox
When you have received a message, the Message icon is displayed on the
welcome screeen.
(Message:
)
1 voice mail
Keep in touch
6
OK?
Confirm access to the
'Mail' function
Confirm access to the
voice mailbox
display number of new
and old messages
Personal code
Apply
43
01/05 107
10 May 9:15
Play new?
Apply
43
Ke
6
• To access voice mail functions
You can move horizontally along the various icons.
01/05 107
10 May 9:15
Play new?
Listen to the messages
Erase the current message
Call back the person who left the message
Send a copy of a message
Pause while listening to the message
44
Go back 10 seconds
Go forward 10 seconds
44
ATIMU060-040
6.4
Activating/deactivating the personal assistant
As well as leaving a message in the voice mailbox, the personal assistant directs
the caller to an extension number, an outside number, a DDS or the switchboard.
Select the 'Customizing your
telephone' function
Apply
Keep in touch
6
perso assist
OK?
Select the 'Personal
Assistant' icon
45
Apply
Forward ON
Forward OFF
Select active/inactive as
you wish
Apply
If the personal assistant and immediate forwarding are
activated simultaneously
the personal assistant functions are deactivated for as
long as the forwarding function remains active.
45
Ke
6
ATIMU060-050
6.5
Personal assistant: reaching you with one number
only
Select the 'Customizing
your telephone'
function
perso assist
OK?
Select the
'Personal
Assistant' icon
Apply
Menu
46
OK?
Select the 'Menu'
icon
46
Apply
Apply
• To select the type of forwarding
Internal Nb
Modify?
Enter the name of a colleague or
your assistant or any other name
Apply
External Nb
OR
Keep in touch
6
Modify?
Key in an outside
number
Apply
Mobile Nb
OR
Modify?
Key in the number
of your DDS
47
Apply
Choice ON
Choice OFF
OR
Activate/deactivate the
transfer to the switchboard
Apply
Number?
. . . . . . .
Dial the number
Apply
47
Ke
6
ATIMU060-060
6.6
Diverting calls to another number (immediate
diversion)
The number can be your home, portable or car phone, voice message or an
internal extension (operator, etc.).
Select the 'Diversion'
function
Apply
Number?
Div Imm
. . . . . . .
OK?
Confirm access to
immediate diversion
48
Dial the
destination
number
Apply
You can continue to make calls while your telephone is
diverted.
General remark concerning diversions: you can only
activate a single diversion on your telephone.
Programming a new diversion will cancel the previous
one.
48
ATIMU060-070
Different types of diversions Example of diversion
on busy
• Different types of diversions
6.7
You can initiate different types of forwarding from the call forward list. (call
forward list:
49
)
n Div Busy
When you are in conversation, all your calls are
diverted to the number you choose.
n Div DND
Your telephone is momentarily inaccessible to
all incoming calls.
n Div Follow
Your calls follow you when you are at another
set.
n Div to Pag
Your calls are diverted to your portable radio
paging receiver.
Keep in touch
6
• Example of diversion on busy
Div Busy
Div DND
Div Follow
Select the 'Diversion'
function
Apply
Select the 'List of
diversions' icon
Number?
. . . . . . .
Confirm
access to
diversion on
busy
Dial the destination number
Apply
49
Ke
6
ATIMU060-080
6.8
Cancelling all diversions
Select the 'Diversion'
function
Div Cancel
OK?
Select the 'Diversion
cancellation' icon
50
50
Apply
Apply
ATIMU060-090
6.9
Consulting messages left while you were away
When you have received a message, the Message icon is displayed on the
welcome screeen.
(Message:
)
2 Text mail
Keep in touch
6
OK?
Confirm access to the
'Mail' function
Select the 'Text mails'
icon
150
20 May 16:30 2/4
Read a msg?
Apply
51
Select the desired
message
<Message>
Call
Confirm to Read the message
read it
While the message is being read you can select other
functions with the navigate-up-down key.
(navigate-up-down:
)
51
Ke
7
Programming your telephone
ATIMU070-010
Other
7.1
Initializing your voice mailbox
You can use the Message icon on the welcome screen to initialize your voice
mailbox. (Message:
)
Init
your
voice mail
Apply
Enter your password and record your name in accordance with the
spoken instructions
Your personal code is used to access your voice mailbox
and to lock your telephone.
52
52
ATIMU070-020
7.2
Customising your voice greeting
You can replace the greeting message by a personal message.
Select the 'Customizing
your telephone'
function
mbx greeting
Greeting: Dfault
Mode: Record
Custom?
OK?
Select the 'Voice-mail
Acceptance'
53
Apply
Apply
Record
Confirm access to
the voice mailbox
Recording ...
OK?
Stop?
Start recording
Apply
Programming your telephone
7
Recording in
progress
Please confirm
OK?
Apply
Apply
While recording the message you can select other
functions with the navigate-up-down key.
(navigate-up-down:
)
53
Pro
7
• To go back to the default message
Select the 'Customizing
your telephone'
function
mbx greeting
OK?
Select the 'Voice-mail
Acceptance'
Apply
Greeting: Custom
Mode: Record
Default?
54
Select the 'Default
Message' icon
54
Apply
Apply
ATIMU070-030
7.3
Modifying your personal code
Your personal code is used to access your voice mailbox and to lock your
telephone.
Select the 'Customizing
your telephone'
function
user options
Password
OK?
OK?
Confirm access to
'Options'
55
Apply
Select the
'Password' icon
Old password?
Enter the old
password
Programming your telephone
7
Apply
New password?
Enter the new
password
Apply
Apply
Until your voice mailbox is initialised, the password is
0000.
Each digit of the code is symbolized by an asterisk.
55
Pro
7
ATIMU070-040
7.4
Adjusting the audio functions
You can choose the ring melody of your telephone (6 options) and adjust the
audio volume (4 levels). A progressing ringing tone (meeting mode) can be used.
• Choose the tune:
Select the 'Customizing
your telephone'
function
phone set
Apply
Ring. Melody
OK?
OK?
Select the Setting icon
Apply
56
Select the
'Melody' icon
Melody 1
Melody 2
Melody 3
Apply
56
Select the melody of your
choice
Apply
• Adjusting the ringer volume:
Select the 'Customizing
your telephone'
function
Apply
phone set
Ring. level
OK?
OK?
Select the Setting icon
Apply
Select the
'Volume' icon
Level 1
Level 2
Level 3
57
Apply
Select the volume of your
choice
Apply
Programming your telephone
7
• Activate the buzzer or the ringer (DDS 2000):
MARTIN Paul
Wed 24 May 16:30
Long press
Vibrator activated
and ringer disabled
MARTIN Paul
Wed 24 May 16:30
Long press
Vibrator disabled
and ringer
activated
This key can be used to switch rapidly from the ringer to the vibrator and viceversa.
57
Pro
7
• Rapid customizing of the ringer:
Depending on your activity, the ringer settings can be modified via a quick press
on the switch on/off key followed by the OK key.
(switch on/off:
, OK:
)
Switch off the
set?
Switch off the telephone
Activate/disable the vibrator (DDS 200)
Activate/disable the ringer
Activate/disable meeting mode (progressive ringing)
Lock the keypad
58
Press the OK key to confirm (OK:
58
)
ATIMU070-050
7.5
Activating headset mode
This mode allows you to answer calls automatically (without doing anything) and
to direct the call to the external headset.
phone set
OK?
Select the 'Customizing
your telephone'
function
Apply
Select the Setting
icon
Headset mode
OK?
Apply
Select the 'Headset
mode' icon
59
OFF
ON
OK?
Select active/inactive as
you wish
Apply
Programming your telephone
7
Apply
59
Pro
7
ATIMU070-060
7.6
Adjusting your telephone functions
Select the 'Adjustment'
function
Apply
Ringer
Keypad beep
Warning beep
Select the function* you
Activate /
Return to
want to activate or disable
disable
idle
*You can activate or disable the following functions:
n Lighting
n
n
60
n
n
n
n
60
(DDS 200)
Bell
Buzzer
(DDS 200)
Keypad bleep
Error bleep
Outside area
bleep
Standby screen
The telephone lights up when you press a key
The telephone rings when a call is received
The buzzer goes off when a call is received
The phone bleeps each time you press a key
The phone will bleep each time it detects an error
The phone bleeps if the radio link can no longer be
detected
Screen proposed after an idle period
ATIMU070-070
7.7
Adjusting screen brightness
Select the 'Adjustment'
function
Apply
Contrast: 3/5
Select the 'Contrast' icon
61
Increase or decrease
the contrast
Return to
idle
Programming your telephone
7
61
Pro
7
ATIMU070-080
7.8
Selecting language
Select the 'Customizing
your telephone'
function
Apply
Languages
user options
OK?
OK?
Confirm access to
'Options'
Apply
Select the
'Language' icon
Deutsch
Français
English
62
Apply
Select the language of your
choice
Apply
The initial language selection is made automatically by the
system.
62
ATIMU070-090
7.9
Programming your telephone
7
Programming your personal directory
(Individual number)
Your personal directory can contain up to 10 numbers.
Select the
'Directories' function
Apply
Pers Sp Dial
Directory
1-............
2-............
3-............
Confirm access to
'Pers Sp Dial'
Select the chosen card
Confirm
(long press)
Name?
MARTIN
63
Enter the name*
Apply
Number?
0123456789
Enter the number
Apply
*To key in the name: the keys in the keypad include letters that you can display by
pressing them successively.
Example: press '8' twice to display the letter 'U'.
63
Pro
7
ATIMU070-100
7.10
Modifying a card in the personal directory
Select the
'Directories' function
Apply
Pers Sp Dial
Directory
1-MARTIN
2-SOPHIE
3-VANESSA
Confirm access to
'Pers Sp Dial'
Select the card to be
modified
Confirm (long
press)
Name?
MARTIN
64
Move onto the letter to be
modified
Modify
the
name
Apply
Number?
0123456789
Move to the digit to be
modified
Modify the
number
Apply
To delete an index card, delete the name and the number by holding down the
delete key for a few seconds. (delete: C )
To delete a character, briefly press the delete key. ( delete: C )
64
ATIMU070-110
7.11
Programming an appointment reminder
Select the
'Appointment' function
Apply
Time?
Temp Appt
. . . : . . .
OK?
Select the 'Permanent
Appointment' or
'Temporary
Appointment' icon
Enter the time of the
appointment
•
Temporary appointment: call back within the next 24 hours
•
Permanent appointment: call back every day at the same time
Apply
65
Programming your telephone
7
At the programmed time, your telephone rings:
Press hang up or Off-hook to confirm the answer.
(Hang up:
, Lift the receiver:
)
If you are in conversation, the display flashes, a tone is
sent and you will hear a beep. After a third unanswered
call, the temporary call request will be cancelled but the
permanent call will remain in memory. If your line is
diverted to another number, your call will not follow the
diversion.
To cancel your appointment call-back request:
Select the meeting to be cancelled and press the delete key to delete the preset
time. (delete: C )
65
Pro
7
ATIMU070-120
7.12
Identify the terminal you are on
The identifier or telephone number are displayed permanently when the
telephone is within the radio coverage zone and is not being used (when standby
screen not displayed).
ATIMU070-130
7.13
Locking your telephone
This service enables you to prohibit outside calls and any programming changes
on your telephone:
Select the 'Lock' function
Apply
Password?
. . . .
Locking accepted
66
Enter your password
Apply
Follow the same procedure to unlock your telephone.
Each digit is represented by an asterisk.
To select or modify your telephone interlock code, see
paragraph 'Modify your password'
66
8
ATIMU080-005
Using the telephone in GAP mode
Other
Your telephone complies with the GAP standard and can be used in simplified
mode on another DECT/GAP system (other PABX or indoor relay unit).
Unless otherwise specified, the functions described below are available on your
telephone in combination with the mandatory functions provided by your fixed
GAP system.
Automatic transfer between radio cells:
This telephone function enables you to move around between radio relay units,
without any break in communications. However, this facility depends on the
inherent limitations of the fixed system, notably its ability to manage several radio
relays.
Display function:
When a call is made from the telephone, the digits dialled are displayed. When you
receive a call, the display indicates the caller’s number or name, if this function is
provided by the fixed system.
ATIMU080-010
ATIMU080-020
This utilisation may involve functional restrictions outside
the coverage of our guarantee.
67
8.1
Making a call
John
01:20
dial number Send the call
required
8.2
Speak
Hang up
Receiving a call
Sophie
Sophie
00:50
You are receiving a Lift the receiver
call
Speak
Hang up
67
8
ATIMU080-030
8.3
Calling from your personal directory
ATIMU080-040
Select the 'Directories'
function
ATIMU080-050
Apply
1-MARTIN
2-SOPHIE
3-
ATIMU080-060
Select the name of the
person you wish to call
8.4
Send the call
Redialling the last number dialled (redial)
Press the unhook key (hold down for a few seconds). (Lift the receiver:
68
8.5
)
Sending DTMF signals
During a call, you sometimes have to send DTMF signals, for example, for a voice
message service, an automatic switchboard or when remotely consulting an
answering machine. To do this:
Press the star key (hold down for a few seconds). ( star:
8.6
)
Sending a calibrated cut-off
The calibrated cut-off activates functions such as transfer to another telephone
set.
To make a calibrated cut-off:
Press the 0 key (hold down for a few seconds).
68
ATIMU080-070
8.7
Programming your personal directory
Your directory can contain up to 12 numbers.
1-............
2-............
3-............
Select the 'Directories'
function
Apply
Select the chosen card
1-Edit
2-Delete
3-Call
Apply
Apply
Name?
MARTIN
69
Enter the name (10
characters maximum)
Apply
Number?
0123456789
Enter the number
Apply
Using the telephone in GAP mode
8
Return to
idle
To key in the name : the keys in the numeric keypad
include letters that you can display by pressing them
successively. Example: press twice in succession on 8 to
display the letter 'U'.
To insert a pause in a number, press the 1 (hold down for
a few seconds).
To insert a measured break, press 0 (hold down for a few
seconds).
69
Usi
8
ATIMU080-080
8.8
Modifying a name or number
1-MARTIN
2-SOPHIE
3-
Select the
'Directories' function
Apply
Select the card to be
modified
1-Edit
2-Delete
3-Call
Apply
Select 'Edit'
Apply
Name?
MARTIN
70
Move onto the letter to be
modified
Modify
the digit
Apply
Modify
the digit
Apply
Number?
0123456789
Move to the digit to be
modified
To delete a character, use the delete key. ( delete: C )
70
ATIMU080-090
8.9
Deleting a card
1-MARTIN
2-SOPHIE
3-
Select the 'Directories'
function
Apply
Select the card to be
deleted
1-Edit
2-Delete
3-Call
Apply
71
Select 'Delete'
Apply
Using the telephone in GAP mode
8
71
Usi
8
ATIMU080-100
8.10
Customizing and adjusting your telephone
Choosing your melody:
Melody 1
Melody 2
Melody 3
Select the 'Ringer'
function
Apply
Apply
Select the melody of your
choice
Return to
idle
Adjusting the ringer volume:
72
Volume: 3/4
Select the 'Ringer'
function
Increase /
reduce the
volume
72
Return to
idle
Apply
Select the 'Volume' icon
Selecting language:
Français
Deutsch
English
Select the 'Language'
function
Apply
Apply
1
2
3
Select the language
of your choice
Return to
idle
Adjusting screen contrast:
Contrast: 3/5
73
Select the 'Adjustment'
function
Increase /
reduce the
contrast
Apply
Select the 'Contrast' icon
Using the telephone in GAP mode
8
Return to
idle
73
Usi
8
ATIMU080-110
8.11
Adjusting your telephone functions
Select the 'Adjustment'
function
Apply
Ringer
Keypad beep
Warning beep
Select the function* you
want to activate or disable
Activate /
disable
Return to
idle
*You can activate or disable the following functions:
74
n
n
n
n
n
n
Lighting (DDS 200)
Bell
Buzzer (DDS 200)
Keypad bleep
Error bleep
Outside area bleep
n Standby screen
74
The telephone lights up when you press a key
The telephone rings when a call is received
The buzzer goes off when a call is received
You will hear a bleep each time you press a key
You will hear a bleep each time an error is detected
The phone bleeps when the radio link can no longer
be detected
Screen proposed after an idle period
9
Registering the telephone
ATIMU090-010
Other
9.1
Registering the telephone on a system for the first
time
For the DDS telephone to function, it must be registered on at least one Belgacom
or GAP system (registration operation).
If when first switched on the display indicates: 'System 1 — Auto install ?'
your telephone has not been registered on any system; consult your installation
technician or proceed as follows:
1. Prepare your system for registration (see system installation guide).
2. When the system is ready, the station always displays the starting screen:
SYSTEM 1
Auto install?
Launch
Subscription?
Confirm to install Registration can
the telephone
begin
3. You have two subscription possibilities:
a- If the system does not use an AC code
75
Subscription
Running…
Launch
subscription
b- If the system uses an AC (authentication code)
AC Code
. . . . . . .
Configure
AC code ?
Select 'AC'
Apply
Launch
Subscription?
Apply
Enter the code
Subscription
Running…
Launch subscription
The registration operation can last up to 2 minutes.
75
9
n If the operation has been done correctly (subscription accepted), the telephone
is ready to be used and the radio reception quality icon is displayed. ( Radio
reception quality:
)
n If the registration operation has not been successful, the station proposes
launching the subscription again.
Launch
Subscription?
Utilization of the telephone in GAP mode can lead to
functional limitations for which no claims will be
considered under the terms of the warranty.
76
76
ATIMU090-020
9.2
Registering the telephone on other systems
The telephone can be declared on several systems (maximum of 5).
Note: the input is usually reserved for use with your main Belgacom system. You
can select the other inputs to register the telephone under another system
(Belgacom or other system).
To make a new registration, when the telephone has already been
registered on one or more systems, proceed as follows:
1. Prepare your system for registration (see the system installation manual or
consult your installation manager).
2. When the system is ready:
Password?
. . . .
77
Select the 'Installation'
function
Apply
Enter the
installation
password
(314987)
Registering the telephone
9
SYSTEM 1
SYSTEM 2
SYSTEM 3
Apply
Select a system
Apply
SYSTEM 2
Install
Edit name
Launch
Subscription?
Select 'Install'
Apply
3. You have two subscription possibilities:
a- If the system does not use an AC code
Subscription
Running…
Launch
subscription
b- If the system uses an AC (authentication code)
77
Reg
9
AC Code
. . . . . . .
Launch
Subscription?
Select 'AC'
Apply
Launch
Subscription?
Apply
Subscription
Running…
Launch subscription
n If the registration operation runs correctly (Subscription accepted), the
telephone is ready for use, and the radio coverage icon appears.
n If the registration operation has not been successful, the station proposes
launching the subscription again.
78
Launch
Subscription?
n Depending on the type of system concerned, registration may require one or
more additional operations on the system.
78
Selecting your telephone system
Your telephone can be programmed to function on 5 different DECT systems
(Belgacom or GAP).
SYSTEM 1
SYSTEM 2
Lock to any
Select the
'System' function
Apply
Select the desired input (the
chosen option is indicated by
the radio button with a central
dot)
Apply
79
The selection is retained even after switching the
telephone on/off. The selection of a specific system
(SYSTEM...) forces operation on a specific system. This
selection must be changed if one wishes to change system.
Selecting 'Lock to any' enables the telephone to connect
automatically when it enters a system coverage zone. If
the systems programmed in the telephone have common
coverage zones, the telephone selects the first system
found.
Registering the telephone
9
79
Reg
10
Accessories
ATIMU100-010
Other
10.1
Chargers
ATIMU100-020
The 'Basic Desktop' charger includes:
1.
a telephone support,
2.
a mains cable,
via an AC/DC adaptor.
The 'Voice Desktop' charger includes:
1.
a support with :
- a place for the telephone,
- a loudspeaker and a microphone for
use in 'hands free' mode,
- two buttons +/- for volume adjustment.
2.
a mains cable,
via an AC/DC adaptor.
Press the 'loudspeaker' key to cut off or
reactivate the microphone. (loudspeaker:
)
80
10.2
Characteristics of the mains power adapter
n Input: 230V- 50 Hz
n Output: 12V DC - 500 mA
The mains power socket used must be close to the charger/
holder and easily accessible, so that it can be used as an
'on/off' facility.
80
10
10.3
Accessories
ATIMU100-030
Battery
n The DDS 200 is supplied with a Li-lon 600 mAh - 3.6V battery.
n The DDS 100 is supplied with a NiMh 550 mAh - 3.6V battery.
Autonomy of your telephone
Li-Ion
battery
NiMh
battery
On standby in the radio coverage zone
135 hours
120 hours
In continuous conversation
15 hours
13 hours
Initial charge:
81
Place the
telephone in
the charging
holder
Battery
icon
flashing
On charge
(minimum 3
or 5 hours)
The
battery is
charged
Maximum battery performance is only reached after
around 10 charge/discharge cycles.
These batteries contain polluting substances: do not
dispose of them in a dustbin - take them to a specialized
collection point.
81
Acc
10
ATIMU100-050
10.4
Headphone / external microphone
ATIMU100-060
The side of the telephone features a headphone / external microphone socket.
Contact your retailer to find out the characteristics of the various headphone
models.
ATIMU100-070
10.5
Cleaning your telephone
Your telephone does not require any particular servicing. However, it may be
cleaned using a soft, damp cloth.
Do not use soap or detergent that would risk altering the
colours or damaging the surface of the telephone.
10.6
82
Transporting and protecting your telephone
To avoid losing your telephone, get into the habit of clipping it onto your belt.
Your telephone can also be carried in a protective case.
Various models of carrying case are available. Ask your
installation technician for information. It is vital to use the
special protective carrying case if your telephone is to be
used in an industrial environment (presence of dust,
filings, vapours of diverse origins and risk of being
dropped). If the telephone is used with a carrying case, the
belt clip must be removed.
82
11
ATIMU110-005
Glossary
Other
n Broker call:
Function enabling the user to switch back and forth between several simultaneous
calls.
n Call transfer:
Function enabling a call to be transferred to another telephone within the system.
n Common directory:
This directory contains all the speed-dial numbers accessible to the users of the
system.
n Conference:
83
The conference function allows the user, in contact with two correspondents, to
set up a three-way conference.
n DECT:
European cordless telephone standard: Digital Enhanced Cordless
Telecommunication.
DECT telephone: cordless telephone complying with the DECT
standard.
n GAP (Generic Access Profile):
Specific operating mode defined in the European DECT standard. The telephone
GAP mode is a basic and simplified form of operation compatible with other
DECT GAP systems (other PBX or indoor relay).
n Hunting groups:
Several telephones grouped under one directory number. A call to this number is
directed to one of the free telephones within the group.
83
11
n Intrusion:
Function allowing intrusion into a conversation between two correspondents.
n Personal assistant:
This facility enables the caller to avoid having to leave a message in the voice
mailbox and directs him/her to an extension number, an outside number, a DDS
or the switchboard.
n Parking:
This function places an outside call on hold, for subsequent recovery on another
“authorised” extension within the system.
n Password:
84
This password controls access to the programming and terminal locking functions
by the user (default password: 0000).
n Personal directory:
This directory contains the personal numbers of the user of a terminal.
n Pick-up group:
This function enables you to answer a call ringing on another terminal. Calls can
only be picked up within the pick-up group.
n Broker call:
During a conversation, DTMF codes are sometimes required. These codes are
used when a user wants to consult a voice server, access a PABX or remotely
consult an answering machine.
84
FR-2-couverture.fm Page 3 Mardi, 12. août 2003 10:30 10
Declaration of compliance
howtoc
We,
Alcatel Business Systems,
hereby declare that we assume
Digital terminal DDS 100/200 (Alcatel Reflexes 4076)
product to be compliant with the essential requirements of Directive 1999/5/CE
of the European Parliament and Council.
Any unauthorised modification to the product shall render this declaration of
compliance null and void. A copy of the original of this declaration of compliance
can be obtained by post from:
3
ALCATEL BUSINESS SYSTEMS
Technical Services - Approvals Manager
1, route du Dr. Albert Schweitzer
F 67408 Illkirch - France
3EH 21035 UCAB Ed.01
85
Technical support
for your Forum® telephone exchange
User instructions
.
All the user instructions for our Forum® telephone exchanges are available on the included
CD ROM, and on our Internet site at: www.belgacom.be/pabx.
Diagnosing the problem
.
In the event of a technical failure or problem, we request that you systematically carry out
the following tests before contacting our technical support service.
To facilitate the diagnosis, please inform the helpdesk operator(1) of these test results.
Our helpdesk can solve certain problems remotely. This will avoid a technician’s visit and
reduce repair time considerably.
Problem with a telephone connected to your exchange
1. Reset the telephone by unplugging it and plugging it back in again.
2.
3.
Check the connections, cables and the various plugs. Try it out with the cables from
another telephone that is working properly.
Test the defective telephone in another socket into which a functioning telephone is
plugged.
Problem with a cordless DECT telephone
1.
2.
3.
Remove and then reinsert the batteries.
Ensure that the charger is properly connected.
Test the DECT telephone near each of the antennas.
General external or internal communication problem
1.
2.
Check that the installation is always powered by 230V.
Reset the PABX : press on the button “On/Off” (in top on the right on the
front face of the PABX) until the led `POWER' remains lit red.
To wait a few minutes that the system starts again.
Note: the system will be unusable during this phase of restarting
(until 20 min.).
If the problem persists, contact our technical support service.
(1)
Contact our technical support service
.
If the problem persists after these few tests :
Consult our Internet site www.belgacom.be/pabx or contact our technical support 24/24 at
the following numbers:
– for SMEs and residential customers: 0800/55700
– for large companies 0800/55100
Change your configuration
To change your installation, add equipment or adapt the programming on your Forum®,
contact our Customer Service Department at the following numbers:
– for SMEs and residential customers: 0800/55800
– for large companies 0800/55200
Belgacom SA under public law, Bd. du Roi Albert II 27, B-1030 Brussels, VAT No. BE 202 239 951
Brussels Register of Legal Entities
.