1
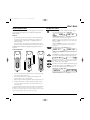
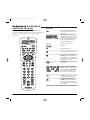
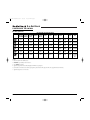
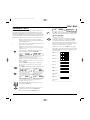
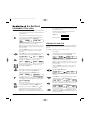
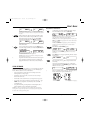
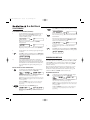
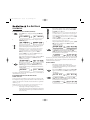
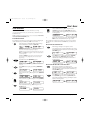
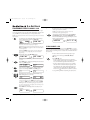
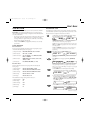
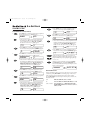
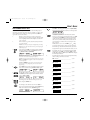
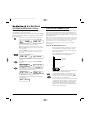
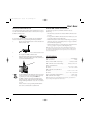
RS 8in1 IR/RF UG rev
1/2/03
10:59 AM
Page 2
8-IN-ONE REMOTE
TABLE OF CONTENTS
INTRODUCTION
Introduction. . . . . . . . . . . . . . . . . . . . . . . . . . . . . . . . . . . . . . . . . . . . . . . . . . . . . . . . . . . . . . . . . . . 2
Installing Batteries . . . . . . . . . . . . . . . . . . . . . . . . . . . . . . . . . . . . . . . . . . . . . . . . . . . . . . . . . . . . 3
Setting The Clock . . . . . . . . . . . . . . . . . . . . . . . . . . . . . . . . . . . . . . . . . . . . . . . . . . . . . . . . . . . . . . 3
A Quick Look At The Controls . . . . . . . . . . . . . . . . . . . . . . . . . . . . . . . . . . . . . . . . . . . . . . . . . . . . 4
The RadioShack 8-in-One Remote is our latest high-performance universal
remote control. It is designed to operate up to eight home entertainment
devices, including TV, video, and audio components. Moreover, this remote
control contains sophisticated technology that will allow you to consolidate
the clutter of all of the original remote controls into one easy-to-use product. It’s packed with advanced features such as:
Key Functions . . . . . . . . . . . . . . . . . . . . . . . . . . . . . . . . . . . . . . . . . . . . . . . . . . . . . . . . . . . . . . . 4
Key Table. . . . . . . . . . . . . . . . . . . . . . . . . . . . . . . . . . . . . . . . . . . . . . . . . . . . . . . . . . . . . . . . . . . 6
Programming A Device . . . . . . . . . . . . . . . . . . . . . . . . . . . . . . . . . . . . . . . . . . . . . . . . . . . . . . . . . 9
Programming A TV/VCR Combo . . . . . . . . . . . . . . . . . . . . . . . . . . . . . . . . . . . . . . . . . . . . . . . . . 10
Searching For Your Code . . . . . . . . . . . . . . . . . . . . . . . . . . . . . . . . . . . . . . . . . . . . . . . . . . . . . . . 10
Using Learning . . . . . . . . . . . . . . . . . . . . . . . . . . . . . . . . . . . . . . . . . . . . . . . . . . . . . . . . . . . . . . 11
Programming A Learning Key. . . . . . . . . . . . . . . . . . . . . . . . . . . . . . . . . . . . . . . . . . . . . . . . . . . 11
Deleting A Function From A Learning Key . . . . . . . . . . . . . . . . . . . . . . . . . . . . . . . . . . . . . . . . . . 12
Changing Volume Lock . . . . . . . . . . . . . . . . . . . . . . . . . . . . . . . . . . . . . . . . . . . . . . . . . . . . . . . . 12
Programming Volume Lock . . . . . . . . . . . . . . . . . . . . . . . . . . . . . . . . . . . . . . . . . . . . . . . . . . . . 12
Programming Volume Unlock. . . . . . . . . . . . . . . . . . . . . . . . . . . . . . . . . . . . . . . . . . . . . . . . . . . 13
Using Macros . . . . . . . . . . . . . . . . . . . . . . . . . . . . . . . . . . . . . . . . . . . . . . . . . . . . . . . . . . . . . . . . 13
Programming A Favorite Channel . . . . . . . . . . . . . . . . . . . . . . . . . . . . . . . . . . . . . . . . . . . . . . . 13
Programming A Master Power Key With Instant Channel Selection . . . . . . . . . . . . . . . . . . . . . . . 14
Clearing A Macro. . . . . . . . . . . . . . . . . . . . . . . . . . . . . . . . . . . . . . . . . . . . . . . . . . . . . . . . . . . . 14
Using Keymover . . . . . . . . . . . . . . . . . . . . . . . . . . . . . . . . . . . . . . . . . . . . . . . . . . . . . . . . . . . . . . 15
Programming Keymover. . . . . . . . . . . . . . . . . . . . . . . . . . . . . . . . . . . . . . . . . . . . . . . . . . . . . . . 15
Restoring A Single Keymoved Key. . . . . . . . . . . . . . . . . . . . . . . . . . . . . . . . . . . . . . . . . . . . . . . . 15
Restoring All Keymoved Keys In A Single Mode. . . . . . . . . . . . . . . . . . . . . . . . . . . . . . . . . . . . . . 15
Programming Favorite Channel Scan . . . . . . . . . . . . . . . . . . . . . . . . . . . . . . . . . . . . . . . . . . . . 16
Using Channel Scan . . . . . . . . . . . . . . . . . . . . . . . . . . . . . . . . . . . . . . . . . . . . . . . . . . . . . . . . . . 16
Using My System . . . . . . . . . . . . . . . . . . . . . . . . . . . . . . . . . . . . . . . . . . . . . . . . . . . . . . . . . . . . . 17
Control Organization . . . . . . . . . . . . . . . . . . . . . . . . . . . . . . . . . . . . . . . . . . . . . . . . . . . . . . . . . 17
Programming My System . . . . . . . . . . . . . . . . . . . . . . . . . . . . . . . . . . . . . . . . . . . . . . . . . . . . . 17
Operating My System . . . . . . . . . . . . . . . . . . . . . . . . . . . . . . . . . . . . . . . . . . . . . . . . . . . . . . . . 18
Reassigning Device Keys. . . . . . . . . . . . . . . . . . . . . . . . . . . . . . . . . . . . . . . . . . . . . . . . . . . . . . . 19
Restoring Factory Default Settings . . . . . . . . . . . . . . . . . . . . . . . . . . . . . . . . . . . . . . . . . . . . . . 20
Using The IR/RF Command Center . . . . . . . . . . . . . . . . . . . . . . . . . . . . . . . . . . . . . . . . . . . . . . 20
Setting Up The IR/RF Command Center . . . . . . . . . . . . . . . . . . . . . . . . . . . . . . . . . . . . . . . . . . . 20
Adding The IR Signal Extension Cord . . . . . . . . . . . . . . . . . . . . . . . . . . . . . . . . . . . . . . . . . . . . . 21
Optimizing IR/RF Command Center Reception . . . . . . . . . . . . . . . . . . . . . . . . . . . . . . . . . . . . . . 21
Specifications . . . . . . . . . . . . . . . . . . . . . . . . . . . . . . . . . . . . . . . . . . . . . . . . . . . . . . . . . . . . . . . . 21
Troubleshooting . . . . . . . . . . . . . . . . . . . . . . . . . . . . . . . . . . . . . . . . . . . . . . . . . . . . . . . . . . . . . . 22
Error Messages . . . . . . . . . . . . . . . . . . . . . . . . . . . . . . . . . . . . . . . . . . . . . . . . . . . . . . . . . . . . . . . 22
Care . . . . . . . . . . . . . . . . . . . . . . . . . . . . . . . . . . . . . . . . . . . . . . . . . . . . . . . . . . . . . . . . . . . . . . . . 23
Instruction To The User . . . . . . . . . . . . . . . . . . . . . . . . . . . . . . . . . . . . . . . . . . . . . . . . . . . . . . . . 23
Limited Warranty . . . . . . . . . . . . . . . . . . . . . . . . . . . . . . . . . . . . . . . . . . . . . . . . . . . . . . . . . . . . . 23
•
Liquid Crystal Display (LCD) – with 15 alphanumeric characters,
real-time clock, and icons for constant visual feedback of operations
and programming sequences
•
My System – a unique mode that combines different device controls
under one mode for operating convenience
•
Macros – for instant activation of favorite key sequences
•
Learning – to capture unique functions from your devices’ original
remote controls
•
Key Mover – for copying keys from one device to another, or to a different position in the same mode
•
Code Search and Verification – help you quickly set up the remote
control to operate your devices
•
Channel Scan and Favorite Channel Scan – let you “channel surf ” all
available and favorite channels
•
Volume Lock – to assign volume controls to individual devices or to
one global device
•
Dedicated Menu/Guide Keys – for instant access to cable and satellite
program guides and menus
•
IR/RF Command Center - to extend the remote’s signal range
•
Searchable Code Library – contains world’s largest and most efficient
group of infrared remote control codes for virtually every current
brand and make.
Guía Del Usuario . . . . . . . . . . . . . . . . . . . . . . . . . . . . . . . . . . . . . . . . . . . . . . . . . . . . . . . . . . . . . 24
•
Low Battery Icon – to notify you when batteries are getting low
Manufacturer’s Codes (Códigos De Fabricantes) . . . . . . . . . . . . . . . . . . . . . . . . . . . . . . . . . . . 48
•
Backlighting – to aid operation in low ambient light
Setup Codes For Audio Amplifiers (Códigos De Configuración Para Amplificadores De Audio) . . 48
Setup Codes For Audio Cassette Decks (Códigos De Configuración Para Reproductores De
Audiocasetes) . . . . . . . . . . . . . . . . . . . . . . . . . . . . . . . . . . . . . . . . . . . . . . . . . . . . . . . . . . . . . . 48
Setup Codes For Audio Receivers (Códigos De Configuración Para Receptores De Audio) . . . . . . 48
Setup Codes For Audio Services (Códigos De Configuración Para Servicios De Audio). . . . . . . . . 48
Setup Codes For Audio Turntables (Códigos De Configuración Para Tornamesas De Audio) . . . . 48
Setup Codes For Cable Converters (Códigos De Configuración Para Convertidores De Cable) . . . 48
Setup Codes For CD Players (Códigos De Configuración Para Reproductores De CDs) . . . . . . . . 49
Setup Codes For DAT Decks (Códigos De Configuración Para Reproductores DAT) . . . . . . . . . . . 49
Setup Codes For DVD Players (Códigos De Configuración Para Reproductores DVD) . . . . . . . . . . 49
Setup Codes For Home Automation (Códigos De Configuración Para La Automatización
Del Hogar) . . . . . . . . . . . . . . . . . . . . . . . . . . . . . . . . . . . . . . . . . . . . . . . . . . . . . . . . . . . . . . . . . 50
Setup Codes For Home-Theater-In-A-Box Devices (Códigos De Configuración Para
Dispositivos Home-Theater-In-A-Box). . . . . . . . . . . . . . . . . . . . . . . . . . . . . . . . . . . . . . . . . . . . . 50
Setup Codes For LD Players (Códigos De Configuración Para Reproductores LD) . . . . . . . . . . . . 50
Setup Codes For Satellite Receivers (Códigos De Configuración Para Receptores De Satélite) . . 50
Setup Codes For TVs (Códigos De Configuración Para Televisores) . . . . . . . . . . . . . . . . . . . . . . . 50
Setup Codes For TV/VCR Combos (Códigos De Configuración Para Aparatos Combinados
Televisor/Videograbadora) . . . . . . . . . . . . . . . . . . . . . . . . . . . . . . . . . . . . . . . . . . . . . . . . . . . . . 51
Setup Codes For VCRs (Códigos De Configuración Para Videograbadoras) . . . . . . . . . . . . . . . . . 52
Setup Codes For Video Accessories (Códigos De Configuración Para Accesorios De Vídeo) . . . . . 53
2
Table Of Contents/Introduction
After installing four (4) new AAA alkaline batteries (not included, see
next page), you can immediately use the remote to control an RCA TV,
VCR, and satellite receiver, a Motorola (General Instruments) cable converter, and Pioneer CD and DVD players, and audio devices.
To control other brands, please perform the instructions in Programming
A Device on page 9 and Programming A TV/VCR Combo on page 10.
RS 8in1 IR/RF UG rev
1/2/03
10:59 AM
Page 3
USER’S GUIDE
INSTALLING BATTERIES
SETTING THE CLOCK
Your remote requires four AAA batteries (not supplied) for power. For the
best performance and longest life, we recommend using RadioShack
alkaline batteries.
1.
On the remote, press and hold P until the display changes
from the default device and time to [CODE SET].
CAUTIONS:
•
Use only fresh batteries of the required size and recommended type.
NOTE: Default values for device, its code, and time are shown
above.Your remote control settings may be different.
•
Do not mix old and new batteries, different types of batteries (e.g.,
standard, alkaline, or rechargeable), or rechargeable batteries of
different capacities.
NOTE: If you wish to exit the programming mode at any time, press
EXIT once. An [EXIT] message appears as the remote control returns
to normal operation.
•
If you do not plan to use the remote for an extended period, remove
the batteries. They can leak chemicals that can destroy electronic parts.
NOTE: If an [INVALID] message appears, you have inadvertently
pressed an incorrect key. Simply note your error and continue
programming.
WARNING: Dispose of old batteries promptly and properly. Do not burn or
bury them.
Press ▲ four times until [CLOCK SET] appears.
2.
(x 4)
TO INSTALL BATTERIES:
NOTE: If you go past [CLOCK SET], press ▼ one or more times to
return to it.
❶
❷
❸
3.
Press SELECT once to begin programming. The default setting
(12:00 a.m.) or the current time (if previously set) appears.
4.
Press ▲ one or more times until the desired hour for morning or evening (a.m. or p.m.) appears.
5.
Press ▼ one or more times until the desired minute appears.
6.
Once the time is correctly set, press SELECT once to accept
the values. The display will confirm your entry with
[SUCCESS] and then [EXIT SETUP].
The remote will return to normal operation.
1. Press the tab on the battery compartment cover (located on the back
of the remote) and lift off the cover.
2. Place the AAA batteries in the compartment as indicated by the
polarity symbols (+ and –) marked inside.
3. Align the cover key with the compartment opening and replace the cover.
4. If batteries are inserted correctly, the entire LCD will turn on. After
5 seconds of inactivity, the remote control will turn itself off to conserve battery life.
5. Perform the steps in Setting The Clock (on the right) to set the correct time.
NOTE: When a battery icon appears in the display (see page 4, “Key Functions”),
the batteries are low. Simply replace them as soon as possible and the remote will be
restored to full functionality, complete with your favorite settings.
Installing Batteries/Setting The Clock 3
RS 8in1 IR/RF UG rev
1/2/03
10:59 AM
Page 4
8-IN-ONE REMOTE
A QUICK LOOK AT THE CONTROLS
Use the illustration below to locate controls and then study the Key
Functions (on the right and the next two pages) to learn how they function.
NOTE: Also refer to the “Key Table” (on page 6) to learn key functions for
specific devices.
KEY FUNCTIONS
The red LED (Light Emitting Diode)
blinks to show that the remote control is
sending signals.
The LCD (Liquid Crystal Display) has
15 alphanumeric characters that display
status messages during remote control
operation and programming.Also, one or
more icons will appear in the LCD to
indicate the following conditions:
Morning or Afternoon Time
Low Battery
IR Signal Transmission
Use P for all programming sequences.
Use to turn on or off the key backlight.
When this feature is activated, keys will
remain backlit for 5 seconds after the last
key press. In the setup mode, backlighting
will remain on for 30 seconds.
Press POWER once to turn on or off the
selected device.
Press VCR, CBL, SAT, TV, CD, AUX, DVD, or
AUDIO once to select a device to control.
After programming, press MY SYSTEM
once to select your custom system controls. See Using My System on page 17.
Use GUIDE to display the program, guide,
or setup menu for the selected device.
In the VCR, CBL, SAT, and TV modes, use
SCAN (FAV) to scan favorite channels
and/or all channels. See Programming
Favorite Channel Scan and Using Channel
Scan on page 16.
4
A Quick Look At The Controls
1/2/03
10:59 AM
Page 5
USER’S GUIDE
Press EXIT once to exit the selected
device’s program, guide, or menu.
Use PIP to switch the Picture-In-Picture
feature on or off (if available on your TV).
During programming, press EXIT once to
exit the program mode.
Press FREEZE once to capture a frame of
video in the main picture (if available).
Press it again to resume normal viewing.
Also see the Key Table on page 6 to learn
how EXIT functions when using
other devices.
Use INFO to display the current channel
and program information.
Press MENU once to display the menu for
the selected device.
▲
Use the cursor keys (▲, ▼, , or ) to
move the cursor in the program guide
and menu screens. Use SELECT to choose
options from your selected device’s menu
or guide.
▲
RS 8in1 IR/RF UG rev
During programming, use SELECT to set
program options.
Also see the Key Table on page 6 to learn
how the cursor keys and SELECT function
when using other devices.
Use VOL+ (or VOL-) to raise (or lower)
the audio volume.
Also see the Key Table on page 6 to learn
how VOL+ (or VOL-) functions when
using other devices.
Press MUTE once to turn the audio off
or on.
Also see the Key Table on page 6 to learn
how MUTE functions when using
other devices.
Use SWAP to switch images and sound
(if available) between the main and window pictures.
Use MOVE to move the window picture (if
available) to different positions in the
main picture.
Use the keypad (1 ~ 9 and 0) to directly
enter channels.
If you have access to over 100 channels,
add a 0 before the channel numbers (e.g.,
for channel 71, press 0, then 7, and then
1). If the original remote control required
pressing an Enter key to change the channel, also press the ENTER key after the
channel number (e.g., press 0, then 7,
then 1, and then ENTER).
Also see the Key Table on page 7 to learn
how the keypad functions when using
other devices.
Use +100 to enter channels over 100
(e.g., for channel 131, press +100, then 3,
and then 1).
Press ENTER once after entering the channel numbers on some TVs.
Also see the Key Table on page 7 to learn
how ENTER functions when using
other devices.
Use CH+ (or CH-) to select the next
higher (or lower) channel or tracks.
Use TV/VIDEO (A/B) to switch the TV’s
input to view TV or VCR programs, or act
as your cable box’s A/B switch.
Also see the Key Table on page 6 to learn
how CH+ (or CH-) functions when using
other devices.
Use SLEEP to activate your device’s sleep
timer (if one is available for the device).
Press LAST once to recall the last-viewed
channel or to page back one screen on
the main menu.
Also see the Key Table on page 7 to learn
how LAST functions when using
other devices.
Use the transport keys,
(REW),
(PLAY),
(FFWD), (STOP), and
(PAUSE), to control your VCR. To record a
VCR program, press (REC) twice.
Also see the Key Table on page 8 to learn
how the transport keys function when
using other devices.
A Quick Look At The Controls 5
RS 8in1 IR/RF UG rev
1/2/03
10:59 AM
Page 6
8-IN-ONE REMOTE
A QUICK LOOK AT THE CONTROLS (Continued)
KEY TABLE
KEY FUNCTIONS FOR SELECTED DEVICE
KEY
6
AUDIO
AUDIO
AMP./RCVR./ CASSETTE/
TUNER/HTIB1 DAT DECK
AUDIO
AUDIO
CABLE
RCVR./DVD TURNTABLE CONVERTER/
COMBO
VIDEO ACC.
CD
PLAYER
DVD/LD
PLAYER
HOME
AUTOMATION
SATELLITE
RECEIVER
TV
TV
COMBO
VCR/
PVR
Power
On/Off
Power
On/Off
Power
On/Off
Power
On/Off
Power
On/Off
Power
On/Off
Power
On/Off
All
On
Power
On/Off
Power
On/Off
Power
On/Off
Power
On/Off
Program
–
GUI
–
Guide
Menu/
Program
Setup
Menu
–
Guide
Guide
Guide
Program/
Guide3
–
–
–
–
Favorite/
Ch. Scan2
–
Favorite/
Ch. Scan
–
Favorite/
Ch. Scan
–
Favorite/
Ch.Scan
Favorite/
Ch. Scan
Exit
–
Return
–
Exit
Clear
Exit
Clear
Exit
Exit
Exit
Exit
–
–
–
–
Info./
Display
Info.
Display
–
Info./
Display
Display
Display
(TV)
–
Menu/
Front
Menu
Menu
–
Menu
–
Front
Channels
Menu
Menu
Menu
Menu
Menu
Up/Rear
Vol.Up
–
Up
–
Up
Up/
Disc Up
Up
–
Up
Up
Up
Up
Down/Rear
Vol. Down
–
Down
–
Down
Down/
Disc Down
Down
–
Down
Down
Down
Down
Left/
Balance
Left
–
Left
–
Left
Left/
Previous
Track
Left
–
Left
–
Left
Left
Right/
Balance
Right
–
Right
–
Right
Right/
Next
Track
Right
–
Right
–
Right
Right
Select/
Surr. Sound
On/Off
–
Enter
(DVD)
–
Select/
Enter
Select/
Disc
Select
Select/
Enter
–
Select/
Enter
Select
Select
Select
Volume
Up
Volume
Up
Volume
Up
Volume
Up
Volume
Up
Volume
Up
Volume
Up
Lights
Up
Volume
Up
Volume
Up
Volume
Up
Volume
Up
Volume
Down
Volume
Down
Volume
Down
Volume
Down
Volume
Down
Volume
Down
Volume
Down
Lights
Down
Volume
Down
Volume
Down
Volume
Down
Volume
Down
Mute
Audio
Mute
Audio
Mute
Audio
Mute
Audio
Mute
Audio
Mute
Audio
Mute
Audio
All
Off
Mute
Audio
Mute
Audio
Mute
Audio
Mute
Audio
Channel
Up
Channel
Up
Preset
Up
–
Channel
Up
Preset
Up
Skip
Curtains Channel
Forward Open (On)
Up
Channel
Up
Channel
Up
Channel
Up
Channel
Down
Channel
Down
Preset
Down
–
Channel
Down
Preset
Down
Skip
Curtains Channel
Reverse Close (Off) Down
Channel
Down
Channel
Down
Channel
Down
A Quick Look At The Controls
RS 8in1 IR/RF UG rev
1/2/03
10:59 AM
Page 7
USER’S GUIDE
KEY TABLE (CONTINUED)
KEY FUNCTIONS FOR SELECTED DEVICE
KEY
AUDIO
AUDIO
AMP./RCVR./ CASSETTE/
TUNER/HTIB1 DAT DECK
AUDIO
AUDIO
CABLE
RCVR./DVD TURNTABLE CONVERTER/
COMBO
VIDEO ACC.
CD
PLAYER
DVD/LD
PLAYER
HOME
AUTOMATION
SATELLITE
RECEIVER
TV
TV
COMBO
VCR/
PVR
Band
FM/AM
–
Repeat
Play On/Off
–
Last
Random
Channel Play On/Off
–
–
Last
Channel
Last
Channel
Last
Channel
Last
Channel
–
–
–
–
PIP On
–
–
–
PIP On/
Instant
Replay
PIP On
PIP On
PIP On/
Instant
Replay
–
–
–
–
PIP Off/
Freeze
–
–
–
PIP Off/
Freeze
PIP Off/
Freeze
PIP Off/
Freeze
PIP Off/
Freeze
–
–
–
–
PIP
Swap
–
–
–
PIP Swap/
Return To
Live
PIP
Swap
PIP
Swap
PIP Swap/
Return To
Live
–
–
–
–
PIP
Move
–
–
–
PIP Move/
Quick
Skip
PIP
Move
PIP
Move
PIP Move/
Quick
Skip
Source 1/
Digit 1
Digit
1
FM
Mode
–
Digit
1
Track 1/
Digit 1
Digit
1
Scene 1/
Digit 1
Digit
1
Digit
1
Digit
1
Digit
1
Source 2/
Digit 2
Digit
2
Tuner
–
Digit
2
Track 2/
Digit 2
Digit
2
Scene 2/
Digit 2
Tuner
Digit
2
Digit
2
Digit
2
Source 3/
Digit 3
Digit
3
Band
FM/AM
–
Digit
3
Track 3/
Digit 3
Digit
3
Scene 3/
Digit 3
Band
FM/AM
Digit
3
Digit
3
Digit
3
Source 4/
Digit 4
Digit
4
DVD
–
Digit
4
Track 4/
Digit 4
Digit
4
Scene 4/
Digit 4
DVD
Digit
4
Digit
4
Digit
4
Source 5/
Digit 5
Digit
5
Tape
–
Digit
5
Track 5/
Digit 5
Digit
5
Scene 5/
Digit 5
Tape
Digit
5
Digit
5
Digit
5
Source 6/
Digit 6
Digit
6
VCR
–
Digit
6
Track 6/
Digit 6
Digit
6
Scene 6/
Digit 6
VCR
Digit
6
Digit
6
Digit
6
Source 7/
Digit 7
Digit
7
Aux.
–
Digit
7
Track 7/
Digit 7
Digit
7
Scene 7/
Digit 7
Aux.
Digit
7
Digit
7
Digit
7
Source 8/
Digit 8
Digit
8
TV
–
Digit
8
Track 8/
Digit 8
Digit
8
Scene 8/
Digit 8
TV
Digit
8
Digit
8
Digit
8
Source 9/
Digit 9
Digit
9
Satellite
–
Digit
9
Track 9/
Digit 9
Digit
9
Scene 9/
Digit 9
Satellite
Digit
9
Digit
9
Digit
9
Source 10/
Digit 0
Digit
0
Tuning
Mode
–
Digit
0
Track 10/
Digit 0
Digit
0
Scene 10/
Digit 0
Tuning
Mode
Digit
0
Digit
0
Digit
0
Enter/
Select
–
Enter
–
Enter/
Select
+10
Enter/
Select
–
Enter
–
Enter/
Select
+10
Input
A/B
Disc
Skip
–
A/B/
Bypass
–
TV/
DVD (LD)
–
TV/
Satellite
TV/
VCR
TV/
VCR
TV/
VCR
continued on next page...
A Quick Look At The Controls 7
RS 8in1 IR/RF UG rev
1/2/03
10:59 AM
Page 8
8-IN-ONE REMOTE
A QUICK LOOK AT THE CONTROLS
KEY TABLE (CONTINUED)
KEY FUNCTIONS FOR SELECTED DEVICE
KEY
AUDIO
AUDIO
AMP./RCVR./ CASSETTE/
TUNER/HTIB1 DAT DECK
AUDIO
AUDIO
CABLE
RCVR./DVD TURNTABLE CONVERTER/
COMBO
VIDEO ACC.
CD
PLAYER
DVD/LD
PLAYER
HOME
AUTOMATION
SATELLITE
RECEIVER
TV
TV
COMBO
VCR/
PVR
Rewind
Tape4
Rewind
Skip Rev.
DVD
Rewind
Rewind
VOD5
Rewind
Rewind
–
Rewind
VOD5
Rewind
VCR
Rewind
VCR
Rewind
VCR/PVR
Play
Tape4
Play
Play
DVD
Play
Play
VOD5
Play
Play
–
Play
VOD5
Play
VCR
Play
VCR
Play
VCR/PVR
F. Fwd
Tape4
Fast
Forward
Skip Fwd.
DVD
Fast
Forward
F. Fwd.
VOD5
Fast
Forward
Fast
Forward
–
FFWD
VOD5
FFWD
VCR
FFWD
VCR
FFWD
VCR/PVR
Record
Tape4
Record
–
–
Record
VOD5
Record6
–
–
Record
VOD5
Record
VCR
Record
VCR
Record
VCR/PVR
Pause
Tape4
Pause
Pause
DVD
Pause
Pause
VOD5
Pause
Pause
–
Pause
VOD5
Pause
VCR
Pause
VCR
Pause
VCR/PVR
Stop/Eject
Tape4
Stop/
Eject
Stop/Eject
DVD
Stop
Stop
VOD5
Stop/
Eject
Stop/
Eject
–
Stop
VOD5
Stop
VCR
Stop
VCR
Stop
VCR/PVR
or Eject
Tape
NOTES:
1. Home-Theater-In-A-Box (HTIB) device.
2. FAV/SCAN is only available for Cable Converters.
3. Select GUIDE for PVR codes.
4. Applicable only if Audio Receiver/Tuner/Amplifier or HTIB has a tape transport.
5. If VOD (Video On Demand) is not available, pressing this key will control the VCR (only if the VCR code is programmed under VCR mode).
6. Applicable only if device is a CD recorder.
8
A Quick Look At The Controls
RS 8in1 IR/RF UG rev
1/2/03
10:59 AM
Page 9
USER’S GUIDE
PROGRAMMING A DEVICE
The remote is preprogrammed at the factory to operate an RCA TV,VCR,
and satellite receiver, a Motorola (General Instruments) cable converter,
and Pioneer CD and DVD players, and audio devices. To control devices
other than the default brands, perform the following steps and repeat them
as needed for each device to be programmed; otherwise skip this section:
NOTE: To control a TV/VCR Combo, see “Programming A TV/VCR Combo” on page 10.
1.
Find the codes for the devices you want to program in
Manufacturer’s Codes (starting on page 48) and write them
down or highlight them.
2.
Turn on a device (e.g.,VCR or DVD player) and, if necessary,
load media (e.g., cassette or disc).
NOTE: Please read steps 3 through 9 completely before proceeding.
Highlight or write down the codes and device you wish to program
before starting step 2.
3.
On the remote, press and hold P until the display changes
from the default device and time to [CODE SET].
NOTE: Default values for device, its code, and time are shown
above.Your remote control settings may be different.
NOTE: If you wish to exit the programming mode at any time, press
EXIT once. An [EXIT] message appears as the remote control returns
to normal operation.
NOTE: If an [INVALID] message appears, you have inadvertently
pressed an incorrect key. Simply note your error and continue
programming.
4.
Press SELECT once to begin programming. The last-selected
device and its current code (e.g., TV and 0051) appear.
7.
Press EXIT to exit the programming mode.An [EXIT SETUP]
message appears as the remote returns to normal operation.
8.
To verify the code works, aim the remote at the desired
device, press its device key once and then press POWER
once. The device should turn off. If it does not respond,
repeat steps 3 through 7, trying each code for your brand
until you find one that works. If you cannot find a code that
works, try Searching For Your Code on page 10.
NOTE: If the device does not have a POWER key, press
9.
(Play).
Repeat steps 1 through 8 for each device you want to control.
For future reference, write down each working device code
in the boxes below:
VCR Code:
CBL Code:
SAT Code:
TV Code:
CD Code:
DVD Code:
AUDIO Code:
5.
Press a desired device key once (e.g., VCR). The desired
device and its current code (e.g., VCR and 0035) appear.
Audio Device
Type:________________________________
AUX Code:
NOTE: Use the AUX key to program home automation devices, video
accessories, audio services, and other audio/video devices. See
“Reassigning Device Keys” on page 19.
6.
Aux. Device
Type:________________________________
Use the keypad to enter the first four-digit code for your
device and press SELECT once.
For example, to enter the first GE VCR code (on page 52),
press 0 twice, 6 once, 0 once, and then SELECT once.
If the code is entered correctly, [SUCCESS] appears.
Programming A Device 9
RS 8in1 IR/RF UG rev
1/2/03
10:59 AM
Page 10
8-IN-ONE REMOTE
If you cannot find a code that works, try Searching For Your
Code in the next section.
PROGRAMMING A TV/VCR COMBO
1.
Find the codes for the devices you want to program in Setup
Codes for TV/VCR Combos on page 51 and write them down
or highlight them.
2.
Turn on the TV/VCR Combo and insert a videocassette.
3.
On the remote, press and hold P until the display changes
from the default device and time to [CODE SET].
9.
For future reference, write down the working TV/VCR
combo code in the below boxes:
TV/VCR Code:
TV Code (if used):
NOTE: Default values for device, its code, and time are shown
above.Your remote control settings may be different.
SEARCHING FOR YOUR CODE
NOTE: If you wish to exit the programming mode at any time, press
EXIT once. An [EXIT] message appears as the remote control returns
to normal operation.
If your device does not respond to the remote after trying all codes listed for
your brand, or if your brand is not listed at all, try manually searching for
your code.
NOTE: If an [INVALID] message appears, you have inadvertently
pressed an incorrect key. Simply note your error and continue
programming.
For example, to manually search for a code for your TV:
1.
Turn on the TV.
4.
Press SELECT once to begin programming. The last-selected
device and its current code (e.g., TV and 0051) appear.
2.
On the remote, press and hold P until the display changes
from the default device and time to [CODE SET] .
5.
Press VCR once. [VCR] and its current code appear.
6.
NOTE: Default values for device, its code, and time are shown
above.Your remote control settings may be different.
NOTE: If you wish to exit the programming mode at any time, press
EXIT once. An [EXIT] message appears as the remote control returns
to normal operation.
Use the keypad to enter the first four-digit code for your
device and press SELECT once.
For example, to enter the first Sony TV/VCR Combo on
page 51, press 0 four times and then SELECT once.
NOTE: If an [INVALID] message appears, you have inadvertently
pressed an incorrect key. Simply note your error and continue
programming.
3.
Press ▼ once. [MAN SRCH] appears.
If the code is entered correctly, [SUCCESS] appears.
NOTE: If you go past [MAN SRCH], press ▲ one or more times to
return to it.
7.
Press EXIT to exit the programming mode.An [EXIT SETUP]
message appears as the remote returns to normal operation.
4.
Press SELECT once to begin programming. The last-selected
device and its code (e.g., VCR and 0035) appear.
8.
To verify the code works, aim the remote at the TV/VCR
Combo, press VCR once and then press POWER once.
5.
Press TV once. The desired device and the first code in the
manual search list (e.g., TV and 0047) appear.
6.
Aim the remote at the TV and press SELECT once. The red
LED blinks and the (IR) icon flashes, indicating IR codes
are being transmitted.
NOTE: If the device does not have a POWER key, press
(Play) .
The unit should turn off or start playing if you pressed
(Play). If it does not respond, repeat steps 3 through 9,
trying each code for your brand until you find one that works.
10 Programming A TV/VCR Combo/Searching For Your Code
RS 8in1 IR/RF UG rev
1/2/03
10:59 AM
Page 11
USER’S GUIDE
PROGRAMMING A LEARNING KEY
NOTE: In the manual search mode, the remote will send IR codes
from its library to the selected device, starting with the most popular
code first.
7.
On the remote, press and hold P until the display changes
from the default device and time to [CODE SET].
1.
If the TV turned off, skip to the next step. If it did not turn
off, aim the remote at the TV and press ▲ once to advance
the manual search to the next code (e.g., TV and 0054).
Again the red LED blinks and the (IR) icon flashes.
NOTE: Default values for device, its code, and time are shown
above.Your remote control settings may be different.
NOTE: If you wish to exit the programming mode at any time, press
EXIT once. An [EXIT] message appears as the remote control returns
to normal operation.
NOTE: If an [INVALID] message appears, you have inadvertently
pressed an incorrect key. Simply note your error and continue
programming.
Repeat this step as often as needed until you find a code that
turns off the device.
8.
Once you have found a working code, press SELECT once to
save it. The display confirms your entry with [SUCCESS] and
then [EXIT SETUP].
Press ▼ twice until [IR LEARN] appears.
2.
(x 2)
NOTE: If you go past [IR LEARN], press ▲ one or more times to
return to it.
The remote returns to normal operation.
3.
Press SELECT once to begin programming. The last-selected
device appears.
4.
Press a device key once (e.g., TV) to assign a desired mode
for learning.
5.
Select a key for learning and press it once.As the remote
enters the learning mode, [LEARNING] appears and the red
LED turns on for 5 seconds.
6.
Place your original remote control (e.g., TV remote control)
head-to-head (about 2" apart) from the remote.
NOTE: For future reference, write down the working device code in
the appropriate boxes on page 9.
9.
To perform a manual code search for another device, repeat
steps 1 through 8, but this time (in step 5) substitute the
appropriate device key for the device you are searching for.
USING LEARNING
The remote includes a Learning feature so you can add functions that are
unique to your home entertainment devices (e.g., VCR Tracking Up or
Down). However, there are some considerations:
•
Your original remote controls must be in working order for the
learning feature to work properly.
•
Learned keys are mode specific, so each one can store a unique
function for each mode.
•
Learned keys can be used in macros (see Using Macros on page 13).
•
You can also use any key for learning, except device keys, P, , and
POWER. However, using them as learned keys will overwrite their
original functions.
•
For optimum learning, avoid high levels of ambient light such as
natural sunlight or energy-efficient fluorescent lights.
2"
continued on next page...
NOTE: Please have your original remote controls handy before programming
learning. Be sure to press each key within 5 seconds of the previous entry. If not,
the remote will exit the programming mode.
Searching For Your Code/Using Learning 11
RS 8in1 IR/RF UG rev
1/2/03
10:59 AM
Page 12
8-IN-ONE REMOTE
USING LEARNING
3.
Press SELECT once to begin programming. The last-selected
device (e.g., TV) appears.
4.
Press a device key once (e.g.,TV) for the mode that contains the
learned function.
5.
Press the key once where the learned function (to be deleted) is stored. The display changes to [DELETED] and then
returns to last-selected mode (e.g., TV).
6.
If desired, repeat steps 4 and 5 to delete other learned
functions.
7.
Press EXIT to exit the programming mode.An [EXIT SETUP]
message appears as the remote returns to normal operation.
PROGRAMMING A LEARNING KEY (CONTINUED)
7.
On the original remote control, press and hold the key (i.e.,
feature) to be learned until [SUCCESS] appears on the
remote. The display will return to the device mode you
selected for learning (e.g., TV).
If the key was not learned, you will see an [ERROR]
message instead.
Repeat steps 5 through 7 as needed to achieve [SUCCESS].
8.
To learn functions onto other keys, repeat steps 4 through 7
for each key.
9.
Press EXIT to exit the programming mode.An [EXIT SETUP]
message appears as the remote returns to normal operation.
CHANGING VOLUME LOCK
10.
To test a learned feature, aim the remote at the desired
device and press its device key once (e.g., TV, where the
learning mode was assigned). Then press the key where the
learned feature is stored. The feature should activate. If not,
try programming the key again, starting with step 1 (on
page 11).
DELETING A FUNCTION FROM A LEARNING KEY
On the remote, press and hold P until the display changes
from the default device and time to [CODE SET].
1.
In its default (unlocked) state, the remote allows each device to control its
own volume only in its own mode (e.g., TV volume in the TV mode, VCR
volume in VCR mode, etc.). However, using our Volume Lock feature, you
can lock the volume controls for each device to all modes (e.g., AUDIO
volume in all modes).
Moreover, using the Volume Unlock feature (see the next page), you can
further customize the settings so that a device’s volume controls are
unlocked in one mode, but remain locked in all other modes (e.g., TV
volume in the TV mode and AUDIO volume in other modes).
PROGRAMMING VOLUME LOCK
NOTE: Default values for device, its code, and time are shown
above.Your remote control settings may be different.
NOTE: If you wish to exit the programming mode at any time, press
EXIT once. An [EXIT] message appears as the remote control returns
to normal operation.
NOTE: If an [INVALID] message appears, you have inadvertently
pressed an incorrect key. Simply note your error and continue
programming.
Press ▼ three times until [IR DELETE] appears.
2.
(x 3)
NOTE: If you go past [IR DELETE], press ▲ one or more times to
return to it.
12 Using Learning
1.
On the remote, press and hold P until the display changes
from the default device and time to [CODE SET].
NOTE: Default values for device, its code, and time are shown
above.Your remote control settings may be different.
NOTE: If you wish to exit the programming mode at any time, press
EXIT once. An [EXIT] message appears as the remote control returns
to normal operation.
NOTE: If an [INVALID] message appears, you have inadvertently
pressed an incorrect key. Simply note your error and continue
programming.
RS 8in1 IR/RF UG rev
1/2/03
10:59 AM
Page 13
USER’S GUIDE
b. Press a mode key once (e.g., TV) to unlock it. [UNLOCKED]
and then [SEL MODE] appear.
Press ▼ four times until [VOL LOCK] appears.
2.
(x 4)
NOTE: If you go past [VOL LOCK], press ▲ one or more times to
return to it.
3.
Press SELECT once to begin programming. [TO MODE]
appears.
4.
Press a mode key (e.g., AUDIO) to lock a device’s volume controls to all modes. [SUCCESS] and then [EXIT SETUP] appear
as the remote control automatically exits the programming
mode and returns to normal operation.
5.
If desired, repeat steps 1 through 4 as needed to lock volume
controls for other devices to all modes.
Programming Volume Unlock
On the remote, press and hold P until the display changes
from the default device and time to [CODE SET].
1.
Press ▼ five times until [VOL UNLOCK] appears.
2.
(x 5)
NOTE: If you go past [VOL UNLOCK], press ▲ one or more times to
return to it.
Press SELECT once to begin programming. [ALL MODE]
appears.
3.
c. If desired, repeat step 4b as needed to unlock volume
controls for other devices. Otherwise, press EXIT to exit the
programming mode.An [EXIT SETUP] message appears as
the remote returns to normal operation.
USING MACROS
With Macro programming, your remote can be setup to perform repetitive, time-consuming operations for easy, convenient access through the
press of a single key. Macros are ideal for home theater operations, setting
a favorite channel, guide steps, or other multiple functions you would like
to control with one key press. Moreover, each macro can hold up to 15 key
presses total.
NOTE: Programming a new macro over an existing one will erase the original macro.
PROGRAMMING A FAVORITE CHANNEL
With so many channels available through your cable or satellite system
provider, you can program a macro that directly selects a favorite channel
with one key press. For example, let’s assume your favorite cable programs
are on channel 71. Perform the following steps to program a macro for
direct access of this channel:
NOTE: This example assumes the TV connects directly to the cable and not through
a cable converter.
On the remote, press and hold P until the display changes
from the default device and time to [CODE SET].
1.
To unlock one mode, skip to step 4. Otherwise press SELECT
once to unlock all modes. [UNLOCKED] and then [EXIT
SETUP] appear as the remote automatically exits the
programming mode and returns to normal operation.
NOTE: Default values for device, its code, and time are shown
above.Your remote control settings may be different.
NOTE: If you wish to exit the programming mode at any time, press
EXIT once. An [EXIT] message appears as the remote control returns
to normal operation.
NOTE: If an [INVALID] message appears, you have inadvertently
pressed an incorrect key. Simply note your error and continue
programming.
(Optional) Press ▲ (or ▼) once. [ONE MODE] appears.
4.
or
Press ▼ six times until [KEY MACRO] appears.
2.
a. Press SELECT once. [SEL MODE] appears.
(x 6)
NOTE: If you go past [KEY MACRO], press ▲ one or more times to
return to it.
continued on next page...
Changing Volume Lock/Using Macros 13
RS 8in1 IR/RF UG rev
1/2/03
10:59 AM
Page 14
8-IN-ONE REMOTE
USING MACROS
2.
PROGRAMMING A FAVORITE CHANNEL (CONTINUED)
Enter a macro sequence of up to 15 keys. For our example,
press the following keys once in this order: CBL - POWER TV - POWER - 0 - 3 - CBL- 1 - 1
3.
Press SELECT once to begin programming. [SEL MACKEY]
appears.
NOTE: If you have access to over 100 channels, add an 0 before each
set of channel numbers (e.g., 0 - 0 - 3 and 0 - 1 - 1). If the original
remote control required pressing an Enter key to change the channel,
also press ENTER after each channel number (e.g., 0 - 0 - 3 - ENTER
and 0 - 1 - 1 - ENTER).
4.
Select a key you want to use as a macro and press it once.
[ENTER SEQ] appears.
NOTE: An [ERROR] message, followed by [MAX = 15] alerts you
that the macro sequence must be 15 keys or less.
5.
3.
After pressing the first key (in the macro sequence), [SEL TO
END] appears as a reminder to use SELECT to end the
sequence (see next step).
4.
To end the macro sequence, press and hold SELECT until you
see [SUCCESS] appear in the display, followed by [EXIT
SETUP]. The remote will automatically exit the programming
mode and return to normal operation.
Enter a macro sequence of up to 15 keys. For our example,
press the following keys once in this order: TV - 7 - 1.
NOTE: If you have access to over 100 channels, add a 0 before the
channel numbers (e.g., 0 -7 - 1). If the original remote control
required pressing an Enter key to change the channel, also press
ENTER after the channel number (e.g., 0 - 7 - 1 - ENTER).
NOTE: An [ERROR] message, followed by [MAX = 15] alerts you
that the macro sequence must be 15 keys or less.
After pressing the first key (in the macro sequence), [SEL TO
END] appears as a reminder to use SELECT to end the
sequence (see next step).
Now when you press the key with this assigned macro, the cable converter
and TV will turn on, the TV will tune to channel 03, and then the cable
converter will tune to channel 11.
CLEARING A MACRO
6.
To end the macro sequence, press and hold SELECT until
[SUCCESS] appears, followed by [EXIT SETUP]. The remote
will automatically exit the programming mode and return to
normal operation.
1.
Perform steps 1 through 4 of the earlier section,
Programming A Favorite Channel., that starts on the previous page. However, this time in step 2, select a macro key
you want to be cleared.
2.
Press and hold SELECT to clear the macro key. [SEL TO END]
appears as a reminder to use SELECT to end the sequence
(see next step).
3.
Press SELECT until [SUCCESS] appears, followed by [EXIT
SETUP]. The remote will automatically exit the programming
mode and return to normal operation.
Now when you press the key with this assigned macro, you will instantly see
cable channel 71 on your TV set.
PROGRAMMING A MASTER POWER KEY WITH INSTANT
CHANNEL SELECTION
A macro key can be programmed to turn on and off your devices as well.
For example, let’s set up a sequence that will turn on the TV and tune it to
channel 3, and then turn on the cable converter and tune it to a premium
channel (e.g., 11).
NOTE: This example assumes all equipment is turned off and that the TV is connected through the cable converter with TV tuning set to channel 3.
1.
Perform steps 1 through 4 of the previous section,
Programming A Favorite Channel, that starts on the previous
page. However, this time in step 4, substitute another key for
use as a macro key.
14 Using Macros
RS 8in1 IR/RF UG rev
1/2/03
10:59 AM
Page 15
USER’S GUIDE
USING KEYMOVER
7.
Select a destination key (e.g., VOL+) and press it once.
[SUCCESS] appears, followed by [EXIT SETUP]. The remote
will automatically exit the programming mode and return to
normal operation.
8.
Repeat steps 1 through 7 twice more, substituting VOL– and
MUTE as source and destination keys in steps 5 and 7.
The remote includes a Keymover feature that allows you to map
(or copy) keys from one mode (i.e., source mode) to another mode (i.e.,
destination mode).
NOTE: The following keys cannot be used as a source or destination: VCR, CBL, SAT,
TV, CD, AUX, DVD, MY SYSTEM, AUDIO, and P.
PROGRAMMING KEYMOVER
For example, if your VCR does not have volume control, try mapping the
volume and mute keys from TV mode to VCR mode as follows:
On the remote, press and hold P until the display changes
from the default device and time to [CODE SET].
1.
Upon completion of the above procedure, you can now use your remote
to control the TV’s volume and mute in the VCR mode, as well as in the
TV mode.
RESTORING A SINGLE KEYMOVED KEY
1.
Perform steps 1 through 7 of the previous section,
Programming Keymover. However, this time in step 6, make
the destination mode the same as the source mode (e.g., TV).
[CLR KMVR] appears.
2.
Press SELECT once to clear the keymoved key. [DELETED]
appears, followed by [EXIT SETUP]. The remote will
automatically exit the programming mode and return to
normal operation.
NOTE: Default values for device, its code, and time are shown
above.Your remote control settings may be different.
NOTE: If you wish to exit the programming mode at any time, press
EXIT once. An [EXIT] message appears as the remote control returns
to normal operation.
NOTE: If an [INVALID] message appears, you have inadvertently
pressed an incorrect key. Simply note your error and continue
programming.
Press ▲ five times until [KEYMOVER] appears.
2.
(x 5)
NOTE: If you go past [KEYMOVER], press ▼ one or more times to
return to it.
3.
Press SELECT once to begin programming. [FROM MODE]
appears.
4.
Select a source mode (e.g., TV) and press it once. [FROM KEY]
appears.
5.
Select a source key (e.g., VOL+) and press it once. [TO MODE]
appears.
6.
Select a destination mode (e.g., VCR) and press it once.
[TO KEY] appears.
RESTORING ALL KEYMOVED KEYS IN A SINGLE MODE
1.
Perform steps 1 through 4 of the earlier section,
Programming Keymover. However, this time in steps 3 and 4,
make the source mode and source key the same mode (e.g.,
TV). [CLR KMVR] appears.
2.
Press SELECT once to clear all keymoved keys from this
mode. [DELETED] appears, followed by [EXIT SETUP]. The
remote will automatically exit the programming mode and
return to normal operation.
Using Keymover 15
RS 8in1 IR/RF UG rev
1/2/03
11:00 AM
Page 16
8-IN-ONE REMOTE
PROGRAMMING FAVORITE CHANNEL SCAN
6.
In the TV, VCR, DVD, SAT, or CBL mode, the remote can store a list of up to
10 favorite channels, in any order, that will be immediately scanned when
you press FAV once (see the following section, Using Channel Scan).
NOTE: Only channels of one mode can be stored and any previously-stored channels
will be cleared.
NOTE: Once the tenth channel is entered, the remote will
automatically exit the programming mode.
7.
On the remote, press and hold P until the display changes
from the default device and time to [CODE SET].
1.
If desired, repeat step 5 for each favorite channel to be
stored, up to a total of 10 channels.
(Optional) To exit programming, press and hold SELECT
until [SUCCESS] appears, followed by [EXIT SETUP]. The
remote will automatically exit the programming mode and
return to normal operation.
NOTE: Default values for device, its code, and time are shown
above.Your remote control settings may be different.
NOTE: If you wish to exit the programming mode at any time, press
EXIT once. An [EXIT] message appears as the remote control returns
to normal operation.
NOTE: If an [INVALID] message appears, you have inadvertently
pressed an incorrect key. Simply note your error and continue
programming.
2.
USING CHANNEL SCAN
In the VCR, CBL, SAT, TV, and DVD modes, use the SCAN (FAV) key to start a
3-second scan of all favorite channels (if programmed – see Programming
Favorite Channel Scan in the previous section) and/or all channels for the
selected mode.
Press ▲ three times until [FAV CHAN] appears.
1.
If Favorite Channel Scan has been set up, skip to step 2.
Otherwise, on the remote, press VCR, CBL, SAT, TV, or
DVD once.
NOTE: If you go past [FAV CHAN], press ▼ one or more times to
return to it.
2.
Press SCAN (FAV) once.
• If Favorite Channel Scan has been set up, scanning of
favorite channels will start and, upon completion, continue to scan all channels upward for the same device.
(x 3)
3.
4.
Press SELECT once to begin programming. The last-selected
device (e.g., [VCR]) appears.
• If Favorite Channel Scan has not been set up, scanning
will start with the current channel, then proceed to the
next channel up, and continue until all channels of the
selected device are scanned.The red LED and IR transmission icon ( ) blink each time a channel is scanned.
Select a mode (e.g., TV) for favorite channel scanning and
press it once. Then press SELECT once. [FAV] appears.
3.
5.
Use the keypad to enter a favorite channel number (e.g.,
031). The display shows your entry.
NOTE: If the original remote control required pressing an Enter key
to change the channel, also press ENTER after the channel number
(e.g., 0 - 3 - 1 - ENTER). However, the display will not show ENTER.
NOTE: If you made a mistake during entry, press any number key
one or more times until you see the display clear out. Then try entering the correct numbers again.
Press SELECT once. The display clears out, ready for your
next entry.
16 Programming Favorite Channel Scan/ Using Channel Scan
To stop scanning channels at any time, press any key once.
RS 8in1 IR/RF UG rev
1/2/03
11:00 AM
Page 17
USER’S GUIDE
USING MY SYSTEM
PROGRAMMING MY SYSTEM
The remote includes a custom My System mode for your devices.After the
MY SYSTEM key is programmed, it will allow you to access five groups of
remote control keys without having to change device modes. However, there
are some considerations.
For example, let’s assume you have a TV, a cable converter, and a VCR in
your home theater system.You can program the My System mode so that
selected controls are assigned to these devices as follows:
•
•
On the remote, press and hold P until the display changes
from the default device and time to [CODE SET].
1.
Keymoved, Learned, and Macro functions are affected by the My System
mode. If keys are moved (using Keymover) or learned onto (using
Learning) and they are placed on keys not within the Control Groups,
the keys will be ignored when pressed.
NOTE: Default values for device, its code, and time are shown
above.Your remote control settings may be different.
A Macro on the POWER key (if applicable) will carry over to the My
System mode.
NOTE: If you wish to exit the programming mode at any time, press
EXIT once. An [EXIT] message appears as the remote control returns
to normal operation.
CONTROL ORGANIZATION
ABOUT CONTROL GROUPS
NOTE: If an [INVALID] message appears, you have inadvertently
pressed an incorrect key. Simply note your error and continue
programming.
For My System programming, the remote’s keys are grouped by type of
control into the following five control groups:
REW, PLAY, FFWD, REC, STOP, and PAUSE
(2) Audio Controls:
VOL+, VOL-, and MUTE
(3) Channel Controls:
CH+, CH-, Keypad (0 ~ 9), ENTER, LAST, SLEEP,
INFO, and TV/VIDEO
(4) Menu Controls:
MENU, GUIDE, Cursor Controls (▲, ▼,
SELECT, and EXIT
(5) PIP Controls:
PIP, FREEZE, SWAP, MOVE, and +100
,
▲
▲
(x 2)
ABOUT DEVICE GROUPS
Moreover, the remote’s devices are grouped into the following five
device groups:
(1) Playback Group:
VCR, CBL, SAT, CD, AUDIO, and DVD
(2) Audio Group:
VCR, CBL, SAT, TV, CD, AUDIO, DVD and AUX
(3) Channel Group:
VCR, CBL, SAT, TV, CD, AUDIO, DVD and AUX
(4) Menu Group:
VCR, CBL, SAT, TV, and DVD
(5) PIP Group:
VCR, CBL, SAT, and TV
The default Device Group settings from the factory is:
(1) Playback Group:
VCR
(2) Audio Group:
TV
(3) Channel Group:
CBL
(4) Menu Group:
CBL
(5) PIP Group:
TV
Press ▲ two times until [MY SYSTEM] appears.
2.
(1) Playback Controls:
),
NOTE: If you go past [MY SYSTEM], press ▼ one or more times to
return to it.
3.
Press SELECT once to begin programming. [PLAYBACK]
appears.
NOTE: The program will automatically step through each Control
Group (from Playback to PIP) as you perform steps 3 through 7.
However, you can use the ▲ or ▼ keys to navigate to a specific group
to make further changes.
a. Press SELECT once to enter Playback Control Group
assignment. The last-selected device (e.g., [TV]) appears.
b. Select a device for Playback Control Group assignment.
For this example, press VCR once. This will assign the
entire group of Playback Controls (i.e., REW, PLAY, FFWD,
REC, STOP, and PAUSE) to the VCR.Your device choice
(e.g., [VCR]) appears.
c. Press SELECT once to accept the assignment in step 3b.
The next Control Group assignment, [AUDIO]) appears.
continued on next page...
Using My System 17
RS 8in1 IR/RF UG rev
1/2/03
11:00 AM
Page 18
8-IN-ONE REMOTE
USING MY SYSTEM
b. Press SELECT once to accept the assignment in step 6a.
The next Control Group assignment, [PIP]) appears.
PROGRAMMING MY SYSTEM (CONTINUED)
Press SELECT once to enter Audio Control Group assignment.
The last-selected device (e.g., [VCR]) appears.
Press SELECT once to enter the PIP Control Group assignment. The last-selected device (e.g., [CBL]) appears.
7.
a. Select a device for Audio Control Group assignment. For
this example, press TV once. This will assign the entire
group of Audio Controls (i.e., VOL+, VOL-, and MUTE) to
the TV. Your device choice (e.g., [TV]) appears.
a. Select a device for PIP Control Group assignment. For this
example, press TV once. This will assign the entire group
of PIP Controls (i.e., PIP, FREEZE, SWAP, MOVE, and
+100) to the TV. Your device choice (e.g., [TV]) appears.
b. Press SELECT once to accept the assignment in step 4a.
The next Control Group assignment, [CHANNEL]) appears.
5.
Press SELECT once to enter Channel Control Group assignment. The last-selected device (e.g., [TV]) appears.
b. Press SELECT once to accept the assignment in step 7a.
The first Control Group assignment, [PLAYBACK]) appears.
8.
or
a. Select a device for Channel Control Group assignment. For
this example, press CBL once. This will assign the entire
group of Channel Controls (i.e., CH+, CH-, Keypad (0 ~ 9),
ENTER, LAST, SLEEP, INFO, and TV/VIDEO) to the cable
converter.Your device choice (e.g., [CBL]) appears.
b. Press SELECT once to accept the assignment in step 5b.
The next Control Group assignment, [MENU]) appears.
6.
Press SELECT once to enter Menu Control Group assignment.
The last-selected device (e.g., [CBL]) appears.
▲
Otherwise, to exit programming, press and hold SELECT
until [SUCCESS] appears, followed by [EXIT SETUP]. The
remote will automatically exit the programming mode and
return to normal operation.
OPERATING MY SYSTEM
After programming the My System mode (see the previous section), simply
activate it by pressing MY SYSTEM once. Instantly, groups of remote keys
will be assigned to their programmed devices. In the above example,
pressing MY SYSTEM once would assign the following keys to the VCR, TV,
and cable converter:
VCR:
REW, PLAY, FFWD, REC, STOP, and PAUSE
TV:
VOL+, VOL-, MUTE, PIP, FREEZE, SWAP, MOVE, and +100
Cable Converter: CH+, CH-, Keypad (0 ~ 9), ENTER, LAST, SLEEP, INFO,
TV/VIDEO, MENU, GUIDE, Cursor Controls (▲, ▼, , ),
SELECT, and EXIT
▲
18 Using My System
▲
a. Select a device for Menu Control Group assignment. For
this example, press CBL once. This will assign the entire
group of Menu Controls (i.e., MENU, GUIDE, Cursor
Controls (▲, ▼, , ), SELECT, and EXIT) to the cable
converter.Your device choice (e.g., [CBL]) appears.
At this point, all Control Groups have been assigned. To
change an assignment, use ▲ or ▼ to navigate to a specific
group and make changes by repeating the appropriate step
(3, 4, 5, 6, or 7).
▲
4.
RS 8in1 IR/RF UG rev
1/2/03
11:00 AM
Page 19
USER’S GUIDE
REASSIGNING DEVICE KEYS
7.
The remote can be set up to control a second TV, VCR, DVD player, or
other device not listed on the device keys. For example, to control a TV, a
cable converter, and two VCRs,you can reassign the unused AUX key to
operate the second VCR as follows:
Press EXIT to exit the programming mode.An [EXIT SETUP]
message appears as the remote returns to normal operation.
8.
To verify the code works, aim the remote at the desired
device (e.g.,VCR), press the reassigned device key (e.g., AUX)
once and then press POWER once. The device should turn
off. If it does not respond, repeat steps 3 through 8, trying
each code for your brand until you find one that works. If
you cannot find a code that works, try Searching For Your
Code on page 10.
1.
Find the codes for the device you want to program in
Manufacturer’s Codes (starting on page 48) and write them
down or highlight them. For this example, locate the VCR
codes on page 52.
2.
Turn on a device (e.g.,VCR) and, if necessary, load media
(e.g., videocassette).
NOTE: Please read steps 3 through 9 completely before proceeding.
Highlight or write down the codes and device you wish to program
before starting step 2.
9.
On the remote, press AUX once. Then press and hold P until
the display changes from the current AUX device and code
(e.g., RCVR and 1023) to [CODE SET].
3.
NOTE: Default values for device, its code, and time are shown
above.Your remote control settings may be different.
To reassign other device keys, repeat steps 1 through 8, but
this time in step 3 substitute another device key you want to
reassign. Then in step 4, locate and select the device you own.
For example, let’s say you own a LD player instead of DVD
player. In step 3, press DVD once (instead of AUX). In step 4,
use ▲ or ▼ to navigate to LDP instead of VCR. Then complete
the remaining instructions.
10.
For future reference, write down each reassigned device key
and its working code in the boxes below:
VCR = Device: _____________________ Code =
NOTE: If an [INVALID] message appears, you have inadvertently
pressed an incorrect key. Simply note your error and continue
programming.
CBL = Device: _____________________ Code =
Press SELECT once to begin programming. The last-selected
device and its current code (e.g., RCVR and 1023) appear.
5.
Use ▲ or ▼ to navigate to the device type you want to assign
to the AUX key. For this example, locate VCR and its default
code (e.g., VCR and 0060).
or
(Play).
NOTE: If you wish to exit the programming mode at any time, press
EXIT once. An [EXIT] message appears as the remote control returns
to normal operation.
4.
6.
NOTE: If the device does not have a POWER key, press
SAT = Device:______________________ Code =
TV = Device: ______________________ Code =
CD = Device: ______________________ Code =
Use the keypad to enter the first four-digit code for your
device and press SELECT once.
AUX = Device: _____________________ Code =
For example, to enter the first Sony VCR code (0035 on
page 52) press 0 twice, then 3, then 5, and then SELECT once.
DVD = Device______________________ Code =
If the code is entered correctly, [SUCCESS] appears.
AUDIO = Device:____________________ Code =
Reassigning Device Keys 19
RS 8in1 IR/RF UG rev
1/2/03
11:00 AM
Page 20
8-IN-ONE REMOTE
RESTORING FACTORY DEFAULT SETTINGS
USING THE IR/RF COMMAND CENTER
The remote includes an Operation Reset program that you can use to
restore the unit to factory default settings.
The remote package includes an IR/RF Command Center which receives
radio-frequency (RF) signals from the remote control, anywhere in your
home, up to 100 feet away. Once it is set up, the IR/RF Command Center
will convert the RF signals into Infrared (IR) signals to control your home
entertainment devices.
IMPORTANT: Executing this program will erase all custom settings, including
Home Theater assignments, Macros, Learned Keys, Keymoved Keys, and all
device assignments.
1.
On the remote, press and hold P until you see the display
change from the default device and time to [CODE SET].
NOTE: Default values for device, its code, and time are shown
above.Your remote control settings may be different.
NOTE: If you wish to exit the programming mode at any time, press
EXIT once. An [EXIT] message appears as the remote control returns
to normal operation.
NOTE: If an [INVALID] message appears, you have inadvertently
pressed an incorrect key. Simply note your error and continue
programming.
2.
Press ▲ once. [OPS RESET] appears.
NOTE: The remote transmits both an IR and an RF signal simultaneously. It is your
option whether you want to install the IR/RF Command Center for extended remote
control range. If you choose to do so, during testing do not aim the remote at your
home entertainment devices to verify that RF transmission is working.
NOTE: The RF signal transmitted by the remote, only works with the IR/RF
Command Center.
SETTING UP THE IR/RF COMMAND CENTER
1.
Find a location approximately 8 feet in front of your home
entertainment devices. It should provide (line-of-sight)
access to your equipment and a power outlet to plug in the
IR/RF Command Center.
2.
Plug in the IR/RF Command Center’s power cord into an
active outlet and raise the telescoping antenna.
Telescoping
Antenna
NOTE: If you go past [OPS RESET], press ▼ one or more times to
return to it.
3.
Press SELECT once to begin programming. [CLR SETUP]
appears.
4.
Press SELECT once to start the process. [RESET RAM] appears
as the active memory is cleared, followed by [RESET E2] as
the preprogrammed memory is restored.
IR Lens
3.
Position the IR/RF Command Center so the black IR Lens is
aimed at your home entertainment devices.
4.
To test the IR/RF Command Center, take the remote into
another room in your home, up to100 feet away. Select a
device key (e.g., TV) and press it once. Then press POWER
once. The device (e.g., TV) should turn on.
An [EXIT SETUP] message appears as the remote
automatically exits the programming mode and returns to
normal operation.
If it does not turn on, review the steps 1 through 3 and make
any adjustments. Try step 4 again. If you continue to have a
problem, perhaps there is an IR line-of sight problem. Try
adding the enclosed IR Signal Extension Cord (see next
page).Also review the tips in Optimizing IR/RF Command
Center Reception on the next page.
20 Restoring Factory Default Settings/Using The IR/RF Command Center
RS 8in1 IR/RF UG rev
1/2/03
11:00 AM
Page 21
USER’S GUIDE
ADDING THE IR SIGNAL EXTENSION CORD
OPTIMIZING IR/RF COMMAND CENTER RECEPTION
Also included with the remote package is an IR Signal Extension Cord for
use with a home entertainment device that is not in direct line-of-sight of
the IR/RF Command Center.
To optimize the operation of your IR/RF Command Center, try
the following:
If you are having problems remotely controlling a home entertainment
device from another room, try performing the following installation:
1.
•
Aim the remote toward the room where the IR/RF Command Center
is located.
•
Do not position the IR/RF Command Center near metal objects, such
as heat ducts. Metal can absorb RF signals.
•
Make sure the batteries in the remote are fully charged. Try replacing
them if you are not sure (see Installing Batteries on page 3). Weak batteries will affect the signal range.
•
Make sure that the remote is not being affected by other RF transmissions (e.g., garage door openers, cordless telephones, etc.).
Plug the 4-foot IR Signal Extension Cord into the back of the
IR/RF Command Center.
NOTE: The tests for range limits of the remote and the IR/RF Command Center
were conducted in open-air distance tests. Actual signal distance will be based on
the construction of the building the unit is being used in, as well as other factors,
such as outside interference.
2.
Run the IR Signal Extension Cord to the device that is not in
line-of-sight of the IR/RF Command Center.
3.
Using the supplied double-sided tape, attach the IR Signal
Extension Cord so that its LED is over or next to the IR sensor
of your home entertainment device.
SPECIFICATIONS
Remote Control Power . . . . . . . . . . . . . . . . . . . . . . . . . . . . . . . . 4 AAA Batteries
IR/RF Console Power. . . . . . . . . . . . . . . . . . . . . . . . . . . . . . . . . . . . . . . . . 120 Vac
LED
Remote Control to IR/RF Console Range . . . . . . . . . . . . . . 100 Feet (30.48 m)
IR/RF Command Console to Device Range . . . . . . . . . 25 Feet (7.62 m) ± 30˚
Remote Control Dimensions
(H x W x D). . . . . . . . . . . . . . . . . . . . . . . . . . . . . . . . . . . . 9.21 x 2.52 x 1.34 in.
(H x W x D). . . . . . . . . . . . . . . . . . . . . . . . . . . . . . . . . . . . . . 234 x 64 x 34 mm
IR/RF Command Console Dimensions
(H x W x D) . . . . . . . . . . . . . . . . . . . . . . . . . . . . . . . . . . 1-9⁄16 x 5-1⁄16 x 4 in
(H x W x D) . . . . . . . . . . . . . . . . . . . . . . . . . . . . . . . . 39.7 x 128.6 x 101.6 mm
4.
Test the installation by again taking the remote into another
room in your home, up to 100 feet away. Select a device key
(e.g., TV) and press it once. Then press POWER once.
The IR/RF Command Center will convert the RF signal
from the remote into an IR signal and transmit that signal
through the IR Signal Extension Cord to turn on your device
(e.g., TV).
Remote Control Weight (without Batteries) . . . . . . . . . . . . . . . . 0.45 lb (204 g)
IR/RF Command Console Weight . . . . . . . . . . . . . . . . . . . . . . . . 10.4 oz (300 g)
NOTE: Specifications are typical. Individual units might vary. Specifications are
subject to change and improvement without notice.
If it does not turn on, try repositioning the LED until the
device can be controlled, then re-attach the LED.
Using The IR/RF Command Center/Specifications 21
RS 8in1 IR/RF UG rev
1/2/03
11:00 AM
Page 22
8-IN-ONE REMOTE
TROUBLESHOOTING
PROBLEM:
LCD (Liquid Crystal Display) begins to fade, does not appear,
or the LOW BATTERY (
)icon appears.
SOLUTION:
Replace the batteries with four (4) new AAA alkaline
batteries (see page 3).
PROBLEM:
Red LED and IR ( ) icon blinks when you press a key, but
device does not respond.
SOLUTION:
Be sure to select the correct device key for the device you want
to control.Also, aim the remote at the device not farther than
15 feet away. Or try installing the IR/RF Command Center for
greater range (see page 20).
PROBLEM:
The remote does not control devices or commands are not
working properly.
SOLUTION:
Try all listed codes for the device. Make sure the device
operates with an infrared remote control.
PROBLEM:
TV/VCR combo does not respond properly.
SOLUTION:
Use the VCR codes for your brand. Some combo units may
require both a TV code and a VCR code for full operation.
PROBLEM:
The remote does not turn on a Sony or Sharp TV/VCR combo.
SOLUTION:
These models require TV codes to turn on power. For Sony,
use TV code 0000 and VCR code 0032. For Sharp, use TV
code 0093 and VCR code 0048.
PROBLEM:
Changing channels does not work properly.
SOLUTION:
If the original remote control required Enter to be pressed to
change channels, press ENTER on the remote after entering
the channel number.
PROBLEM:
During learning, the remote’s display shows an [ERROR]
message after pressing and holding a key to be learned.
SOLUTION:
A bad capture has occurred.Avoid high-ambient light sources,
such as direct daylight and fluorescent bulbs.Also, try
readjusting positions of remote controls before performing the
procedure again. Make sure the key(s) on the original remote
control is (are) operating correctly.
PROBLEM:
CH+, CH-, and LAST do not work for your RCA TV.
SOLUTION:
Due to RCA design from 1983 to 1987, only the original
remote control will operate these functions.
PROBLEM:
No volume on a second TV.
SOLUTION:
Follow instructions in Changing Volume Lock on page 12.
PROBLEM:
Cannot find a working code using the instructions in
Searching For Your Code.
SOLUTION:
See our website www.radioshack.com for help or take the
remote to your local RadioShack store.
22 Troubleshooting/Error Messages
PROBLEM:
The remote turns on audio devices and controls volume, but
does not change preset channels.
SOLUTION:
Some products may need both a Tuner (or Receiver) code
and an Audio Amplifier code for remote control of all features
on your audio device.
PROBLEM:
Your satellite (DSS) receiver does not respond to the codes
listed on page 50.
SOLUTION:
Make sure the satellite (DSS) receiver can be operated with an
infrared (IR) remote control and is not set up to receive only
radio frequency (RF) signals.
NOTE: If you have any other problems, call customer service at 1-800-763-9232.
ERROR MESSAGES
A wrong key sequence or incorrect data has
been entered. Try entry again.
Requested manufacturer’s code has not
been found in the remote’s database. Try
another code.
Macro sequence being entered has reached the
maximum limit of 15 keystrokes. Try entry
again with fewer keystrokes.
A complete cycle of code search in the
remote’s database has been completed. Try
another code search or see our website
www.radioshack.com for help. Or take the
remote to your local RadioShack store.
An error has occurred during a learning or
programming sequence. Try entry again.
Indicates a check result of E2 status is either
bad or is not present. See our website
www.radioshack.com for help or take the
remote to your local RadioShack store.
Indicates data captured during learning has
filled the remote’s memory. Try deleting older
learned keys to free up memory space (see
page 14).
Indicates data captured during learning has
caused a error in the remote’s memory. Try
learning again.
RS 8in1 IR/RF UG rev
1/2/03
11:00 AM
Page 23
USER’S GUIDE
CARE
LIMITED 90-DAY WARRANTY
•
Keep the remote dry. If the remote gets wet, wipe it dry immediately.
•
Handle the remote gently and carefully. Don’t drop it.
This product is warranted by RadioShack against manufacturing defects in material and
workmanship under normal use for ninety (90) days from the date of purchase from
RadioShack company-owned stores and authorized RadioShack franchisees and dealers.
•
Use and store the remote only in normal temperature environments.
•
Keep the remote away from dust and dirt.
•
Wipe the remote with a damp cloth to keep it looking new.
Modifying or tampering with internal parts can cause damage and invalidate
the warranty.If your remote is not performing as it should,please contact us at:
www.radioshack.com
or visit your local RadioShack store for help.
INSTRUCTION TO THE USER
This equipment has been tested and found to comply with the limits for a
class B digital device, pursuant to part 15 of the FCC Rules. These limits are
designed to provide reasonable protection against harmful interference in a
residential installation. This equipment generates, uses and can radiate radio
frequency energy and if not installed and used in accordance with the
instructions, may cause harmful interference to radio communications.
However, there is no guarantee that interference will not occur in a particular
installation. If this equipment does cause harmful interference to radio or
television reception, which can be determined by turning the equipment off
and on, the user is encouraged to try to correct the interference by one or
more of the following measures:
•
Reorient or relocate the receiving antenna.
•
Increase the separation between the equipment and receiver.
•
Connect the equipment into an outlet on a circuit different from that to
which the receiver is connected.
•
Consult the dealer or an experienced radio/TV technician for help.
This equipment has been verified to comply with the limits for a class B
computing device, pursuant to FCC Rules. In order to maintain compliance
with FCC regulations, shielded cables must be used with this equipment.
Operation with non-approved equipment or unshielded cables is likely to
result in interference to radio and TV reception. The user is cautioned that
changes and modifications made to the equipment without the approval of
manufacturer could void the user's authority to operate this equipment.
EXCEPT AS PROVIDED HEREIN,RadioShack MAKES NO EXPRESS WARRANTIES AND
ANY IMPLIED WARRANTIES,INCLUDING THOSE OF MERCHANTABILITY AND FITNESS
FOR A PARTICULAR PURPOSE,ARE LIMITED IN DURATION TO THE DURATION OF THE
WRITTEN LIMITED WARRANTIES CONTAINED HEREIN.EXCEPT AS PROVIDED HEREIN,
RadioShack SHALL HAVE NO LIABILITY OR RESPONSIBILITY TO CUSTOMER OR ANY
OTHER PERSON OR ENTITY WITH RESPECT TO ANY LIABILITY,LOSS OR DAMAGE
CAUSED DIRECTLY OR INDIRECTLY BY USE OR PERFORMANCE OF THE PRODUCT OR
ARISING OUT OF ANY BREACH OF THIS WARRANTY,INCLUDING,BUT NOT LIMITED
TO,ANY DAMAGES RESULTING FROM INCONVENIENCE,LOSS OF TIME,DATA,PROPERTY,REVENUE,OR PROFIT OR ANY INDIRECT,SPECIAL,INCIDENTAL,OR CONSEQUENTIAL DAMAGES,EVEN IF RadioShack HAS BEEN ADVISED OF THE POSSIBILITY
OF SUCH DAMAGES.
Some states do not allow limitations on how long an implied warranty lasts or the
exclusion or limitation of incidental or consequential damages, so the above limitations
or exclusions may not apply to you.
In the event of a product defect during the warranty period, take the product and the
RadioShack sales receipt as proof of purchase date to any RadioShack store. RadioShack
will, at its option, unless otherwise provided by law: (a) correct the defect by product
repair without charge for parts and labor; (b) replace the product with one of the same
or similar design; or (c) refund the purchase price.All replaced parts and products, and
products on which a refund is made, become the property of RadioShack. New or
reconditioned parts and products may be used in the performance of warranty service.
Repaired or replaced parts and products are warranted for the remainder of the original
warranty period.You will be charged for repair or replacement of the product made after
the expiration of the warranty period.
This warranty does not cover: (a) damage or failure caused by or attributable to acts of
God, abuse, accident, misuse, improper or abnormal usage, failure to follow instructions,
improper installation or maintenance, alteration, lightning or other incidence of excess
voltage or current; (b) any repairs other than those provided by a RadioShack Authorized
Service Facility; (c) consumables such as fuses or batteries; (d) cosmetic damage; (e)
transportation, shipping or insurance costs; or (f) costs of product removal, installation,
set-up service adjustment or reinstallation.
This warranty gives you specific legal rights, and you may also have other rights which
vary from state to state.
RadioShack Customer Relations,
200 Taylor Street, 6th Floor,
Fort Worth, TX 76102
Cat. No. 15-2117
01/03
Fort Worth, Texas 76102
Care/Instruction To The User/Warranty 23