1
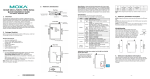
EDIMAX HP-8501APg
Quick Installation Guide
HP-8501APg
Powerline Wireless Access Point
Quick Installation Guide
1
EDIMAX HP-8501APg
Quick Installation Guide
1. Introduction
1.1
Preface
Congratulations on your purchase of an Instant Powerline 85M Wireless Extender. The
Powerline Extender is the perfect choice for a small group of PCs or wireless clients. While
integratng wireless ability to powerline networks, this device is able to extend the network
coverage of your home / office network.
1.2
Package Contents
Open the package carefully, and make sure that none of the items listed below are missing.
z Edimax HP-8501APg x 1
z Quick Installation Guide x 1
z CD-ROM (with Management Utility) x 1
z Ethernet RJ-45 Cable x 1
z 4.5dBi Antenna x 1
z Power cord x 1
If any item is missing or damaged, please contact your local resellers for service.
Attention: It is recommended to keep the original packing materials, in case of product service;
the returned product shall be packed in the original or equivalent materials to protect it from
damage during delivery.
1.3
Hardware Introduction and Installation
LED
LED
State
POWER
ON
Description
The HP-8501APg is powered on.
OP
Flashing The HP-8501APg is running well.
PL
Flashing Other PowerLine devices detected
LAN
1-4
ON
Ethernet link is present at this port
Flashing TX or RX activity
2
EDIMAX HP-8501APg
Quick Installation Guide
WLAN
OFF
Ethernet link is not present at this port
ON
Wireless function on
Flashing Data transferring between HP-8501APg and wireless clients
OFF
Wireless function off
Rear Ports
Connector
POWER
Description
Connect to power cord.
LAN (1-4)
Wireless Extender is connected to a device through the corresponding port
(1, 2, 3 or 4). While data is sending or receiving by that port, corresponding
LED will be flashing
Antenna
4dbi high gain antenna with R/SMA connecter.
The Bottom Port ( reset port )
Connector
Reset
Description
Press and hold this button for few seconds to clear all settings of
HP-8501APg
3
EDIMAX HP-8501APg
Quick Installation Guide
Application:
Please setup your HP-8501APg as the following map .
4
EDIMAX HP-8501APg
Quick Installation Guide
2. Configuration
2.1 Connecting the Powerline Access Point to your network
Please connect the your PC to one of LAN ports of HP-8501APg by Ethernet cable, then follow
the instructions given in next section to configure your HP-8501APg. You can also connect other
wired Ethernet devices to LAN ports of HP-8501APg at this time, too. However, before the
configuration process of HP-8501APg is completed, wireless devices cannot connect to
HP-8501APg.
2.2 Configuring with Web Browser
It is highly recommended to change the default administrator password to avoid unauthorized
access to your Wireless AP. To configure the Wireless Extender, launch your browser, and type
'http://192.168.2.1' in the address bar and click 'Go' to get to the Wireless AP
login page.
Note:If you can not login the HP-8501APg , please study the Appendix A to check out your IP
setting .
At the Password prompt, the User name is 'admin' and the password is ’1234’. You can change
these later if you wish. Click 'OK' to login.
5
EDIMAX HP-8501APg
Quick Installation Guide
You can use "Quick Setup" to setup the device, and choose the connection method you want to
use.
Wireless Settings
Wireless Mode
You can select wireless operating mode here. Available options are: Auto (both 802.11b and
802.11g), 802.11b only, 802.11g only, and Disable (Wireless disabled)
6
EDIMAX HP-8501APg
Quick Installation Guide
SSID
SSID is the short for ‘Service Set IDentifier’. Wireless devices use this identifier to identify which
access point they should connect. You can change SSID here, and all your wireless devices
should set to the same SSID.
Channel
The radio channel number that wireless network uses. All your wireless devices should set to the
same channel. If you select ‘Auto’, Wireless Extender will choose a channel automatically, and
your wireless clients should set channel to ‘Auto’ too. (In most cases, you don’t have to set
wireless channel for your wireless clients, they will pick a channel automatically)
Wireless Security
The Authentication type supports “Open system”, “Shared key”, “WPA-PSK”, “WPA2-PSK” and
"WPA-PSK/WPA2-PSK".
Example :When you select WEP key, you have to enter WEP keys to encrypt data. You can
generate the key by yourself and enter it. You can enter four WEP keys and select one of them
as default key. Then the router can receive any packets encrypted by one of the four keys
7
EDIMAX HP-8501APg
Quick Installation Guide
System Setup
1) You can change the name of super user (administrator) account from admin to any name you
wish to use by inputting a new name in ‘Account’ field.
2) If you downloaded latested firmware file from Edimax website, you can upload and update the
firmware here. Click ‘browse’ to select firmware file you just downloaded, and click ‘Update’ to
start update procedure. DO NOT CLOSE WEB BROWSER WINDOW OR REMOVE NETWORK
CONNECTION DURING UPDATE, IF THE FIRMWARE UPDATE PROCESS FAILS, WIRELESS
EXTENDER MAY NOT BE ABLE TO FUNCTION AGAIN!
3) Click ‘Factory Default’ to restore all settings of Wireless Extender to factory default settings.
4) Click ‘System Restart’ to restart the Wireless Extender.
8
EDIMAX HP-8501APg
Quick Installation Guide
3. Utility
Powerline Networking Utility
Note: The device is able to detect other powerline devices which is on the same power circuit
automatically. You only need to install.this utility program when you want to enable the encrypt
function of Powerline Extender to secure your data, or you have problem connecting other
powerline devices.
Introduction of Configuration Utility
The configuration utility for Windows OS enables the user to search all Powerline Ethernet
devices on the Powerline network; check data rate and performance, enables encryption, and
performing diagnostics.
Installation
Please verify that no other Powerline Management Utilities are installed before installing this
software. If other utilities are installed, uninstall them first and restart your computer before
installing this software.
To install, insert the Windows OS configuration utility setup utility CD-ROM into the computer's
CD-ROM or DVD-ROM drive. The Setup utility shall run automatically. Alternatively this can also
be done manually by double clicking the setup.exe file on the CD. A welcome screen will be
shown as Figure 1.
Click the Next button to continue.
Figure 1: Install Shield Screen
9
EDIMAX HP-8501APg
Quick Installation Guide
After you finish the Utility installation , you can double click the following icon to enable the
Utility .
If you want to know the detail setting of the Utility , please study user’s manual in the CD-ROM .
10
EDIMAX HP-8501APg
Quick Installation Guide
Appendix A:TCP/IP Settings
If you could not login the HP-8501APg , please check out PC’s IP setting as follow :
For Windows 2000/XP
‧Click Start, then click Run.
‧Type cmd then click OK.
‧From the command prompt, type ipconfig. It will return with your IP Address, subnet mask,
and default gateway information.
‧Type exit to close the command prompt.
‧Please check the IP address of default gateway. It should be the address of Wireless
Access Point. By default, the IP address of Wireless Access Point is 192.168.2.1.
Assign a Static IP Address in Windows XP
‧Click on Start > Control Panel > Network and Internet Connections > Network
connections.
‧Assign a static IP address 192.16.2.XXX . The range of XXX is 1~253 , and the “Default
gateway” should be 192.168.2.1 as follows.
11
EDIMAX HP-8501APg
Quick Installation Guide
‧Launch your Web browser and enter the IP Address of your Wireless Access Point in the
address bar. You should be able to see the login page of Wireless Access Point. Input
administrator account and password to login.
12