1
Multilingual Version
English
中文
Français
日本語
Deutsch
Español
Italiano
AVN801 / 701
NETWORK CAMERA SERIES
OPERATION GUIDE
Please read instructions thoroughly before operation and retain it for future reference.
n801_701_operation_V1.2
IMPORTANT SAFEGUARD
All lead-free products offered by the company comply with the requirements of the
European law on the Restriction of Hazardous Substances (RoHS) directive, which means
our manufacture processes and products are strictly “lead-free” and without the hazardous
substances cited in the directive.
The crossed-out wheeled bin mark symbolizes that within the European Union the product
must be collected separately at the product end-of-life. This applies to your product and
any peripherals marked with this symbol. Do not dispose of these products as unsorted
municipal waste. Contact your local dealer for procedures for recycling this equipment.
This apparatus is manufactured to comply with the radio interference requirements.
Federal Communications Commission Interference Statement
This equipment has been tested and found to comply with the limits for a Class B digital service, pursuant to
Part 15 of the FCC rules. These limits are designed to provide reasonable protection against harmful
interference in a residential installation.
Any changes or modifications made to this equipment may void the user’s authority to operate this equipment.
This equipment generates, uses, and can radiate radio frequency energy. If not installed and used in
accordance with the instructions, may cause harmful interference to radio communications. However, there is
no guarantee that interference will not occur in a particular installation. If this equipment does cause harmful
interference to radio or television reception, which can be determined by turning the equipment off and on, the
user is encouraged to try to correct the interference by one or more of the following measures:
Reorient or relocate the receiving antenna.
Increase the separation between the equipment and receiver.
Connect the equipment into an outlet on a circuit different from that to which the receiver is connected.
Consult the dealer or an experienced radio/TV technician for help.
FCC Caution: Any changes or modifications not expressly approved by the party responsible for
compliance could void the user's authority to operate this equipment.
All external cables connecting to this basic unit must be shielded.
For cables connecting to PCMCIA cards, see the option manual or installation instructions.
This device complies with Part 15 of the FCC Rules. Operation is subject to the following two conditions:
(1) This device mat not cause harmful interference, and
(2) This device must accept any interference received, including interference that may cause undesired
operation.
Trademark Acknowledgements
iPad® & iPhone® are the registered trademarks of Apple Inc.
Android™ is a trademark of Google Inc. Use of this trademark is subject to Google Permissions.
Microsoft®, Windows® & Internet Explorer® are registered trademarks of Microsoft Corporation in the United
States and/or other countries.
Disclaimer
AVTECH reserves the right to revise or remove any content in this manual at any time. We do not warrant or
assume any legal liability or responsibility for the accuracy, completeness, or usefulness of this manual. The
content of this manual is subject to change without notice.
This product doesn’t have a standby / off mode.
MPEG4 Licensing
THIS PRODUCT IS LICENSED UNDER THE MPEG4 VISUAL PATENT PORTFOLIO LICENSE FOR THE
PERSONAL AND NON-COMMERCIAL USE OF A CONSUMER FOR (i) ENCODING VIDEO IN
COMPLIANCE WITH THE MPEG4 VISUAL STANDARD (“MPEG-4 VIDEO”) AND/OR (ii) DECODING
MPEG4 VIDEO THAT WAS ENCODED BY A CONSUMER ENGAGED IN A PERSONAL AND
NON-COMMERCIAL ACTIVITY AND/OR WAS OBTAINED FROM A VIDEO PROVIDER LICENSED BY
MPEG LA TO PROVIDE MPEG4 VIDEO. NO LICENSE IS GRANTED OR SHALL BE IMPLIED FOR ANY
OTHER USE. ADDITIONAL INFORMATION INCLUDING THAT RELATING TO PROMOTIONAL INTERNAL
AND COMMERCIAL USES AND LICENSING MAY BE OBTAINED FROM MPEG LA, LLC. SEE
HTTP://WWW.MPEGLA.COM.
GPL Licensing
This product contains codes which are developed by Third-Party-Companies and which
are subject to the GNU General Public License (“GPL”) or the GNU Lesser Public License
(“LGPL”).
The GPL Code used in this product is released without warranty and is subject to the
copyright of the corresponding author.
Further source codes which are subject to the GPL-licenses are available upon request.
We are pleased to provide our modifications to the Linux Kernel, as well as a few new
commands, and some tools to get you into the code. The codes are provided on the FTP
site, and please download them from the following site or you can refer to your distributor:
http://download.dvrtw.com.tw/GPL/076D_Series/arm-linux-2.6.tar.gz
TABLE OF CONTENTS
1. OVERVIEW......................................................................................................................................... 1
1.1 Product Features....................................................................................................................................... 1
1.2 Package Content....................................................................................................................................... 1
1.3 Product Overview ...................................................................................................................................... 1
1.4 Rear Panel ................................................................................................................................................ 1
1.5 External I/O Port........................................................................................................................................ 2
1.6 Status Indicator.......................................................................................................................................... 2
2. CAMERA ACCESS WITH INTERNET EXPLORER............................................................................ 3
2.1 Camera Login............................................................................................................................................ 3
2.2 Control Panel Overview ............................................................................................................................ 3
2.3 Digital PTZ (DPTZ) Operations (AVN801 Only) ........................................................................................ 5
2.4 Event Record Search & Playback ............................................................................................................. 5
3. CAMERA CONFIGURATIONS............................................................................................................ 7
3.1 System configuration menu....................................................................................................................... 7
3.2 Network ..................................................................................................................................................... 8
3.2.1 Network ............................................................................................................................................................8
3.2.2 QoS ..................................................................................................................................................................8
3.2.3 DDNS ...............................................................................................................................................................8
3.2.4 SNTP................................................................................................................................................................9
3.2.5 FTP...................................................................................................................................................................9
3.2.6 MAIL .................................................................................................................................................................9
3.2.7 Filter ...............................................................................................................................................................10
3.2.8 UPnP / Bonjour...............................................................................................................................................10
3.3 Camera ................................................................................................................................................... 11
3.3.1 Camera........................................................................................................................................................... 11
3.3.2 Video ..............................................................................................................................................................12
3.3.3 Color...............................................................................................................................................................12
3.3.4 Audio ..............................................................................................................................................................12
3.3.5 Advance..........................................................................................................................................................13
3.4 Record..................................................................................................................................................... 13
3.4.1 Record............................................................................................................................................................13
3.4.2 Record Timer..................................................................................................................................................14
3.5 Storage.................................................................................................................................................... 14
3.5.1 Memory ..........................................................................................................................................................14
3.6 Trigger ..................................................................................................................................................... 14
3.6.1 Trigger ............................................................................................................................................................14
3.6.2 Push Video .....................................................................................................................................................16
3.7 General ................................................................................................................................................... 16
3.7.1 General...........................................................................................................................................................16
3.7.2 Time................................................................................................................................................................17
3.7.3 Server Log......................................................................................................................................................17
3.7.4 Online .............................................................................................................................................................18
3.7.5 Account...........................................................................................................................................................18
3.7.6 Maintenance...................................................................................................................................................19
APPENDIX 1 PRODUCT SPECIFICATIONS........................................................................................ 20
APPENDIX 2 BIT RATE TABLE FOR REFERENCE ............................................................................ 21
APPENDIX 3 Q&A ................................................................................................................................ 24
APPENDIX 4 RECORDING TIME TABLE ............................................................................................ 25
1. OVERVIEW
1.1 Product Features
Easy network setup with your iPhone / iPad / Android mobile devices
External alarm I/O device connection
Microphone built-in for audio recording
Remote Surveillance
-- Fully compatibility on iPhone & iPad, and Internet Explorer® on Windows® operating system
(For AVN801) 1.3 Megapixel H.R. sensor with HDTV 720p quality, allowing users to notice minor details more easily
1.2 Package Content
□ Network camera
□ Quick Setup with iPhone / iPad
□ RJ45 Network cable
□ Camera Bracket
□ Adapter
□ CD Manual
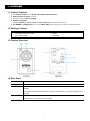
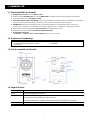
1.3 Product Overview
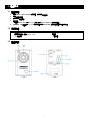
1.4 Rear Panel
RJ45 Port:
Connect your network cable.
Power:
Connect the supplied regulated power supply.
Reset:
With the power connected, press to reset all parameters, including the IP address to factory default
settings.
The camera will reboot after default reset. Please do not disconnect your camera during the reset
process.
External I/O Port
A 4-pin I/O terminal is supplied with the camera for external alarm device connection. For details,
please refer to “1.5 External I/O Port” at page 1.
1
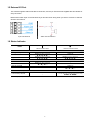
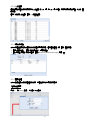
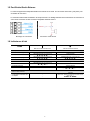
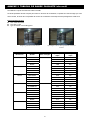
1.5 External I/O Port
This camera supports external I/O device connection, and a 4-pin I/O terminal is supplied with this camera for
easy connection.
Below shows which input on the I/O terminal you should use for wiring when you want to connect an external
device to this camera.
4-pin I/O Terminal
Alarm Out Connection
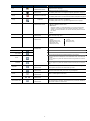
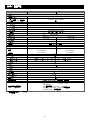
1.6 Status Indicator
ICON
LAN connection status
Internet connection status
Always on
Blinking (on 250 ms, off 250 ms)
z{z{z{z{z{
Blinking (on 250 ms, off 250 ms)
z{z{z{z{z{
Always on
Always off
System Status
During powering on
Reset default
Upgrade
Connection Status
LAN connected
LAN disconnected
Internet connected
Internet disconnected
Always on
Blinking (on 100 ms, off 500 ms)
z{{z{{z{{
---
Blinking (on 250 ms, off 250 ms)
z{z{z{z{z{
--Always on
Blinking (on 100 ms, off 500 ms)
z{{z{{z{{
Network Setup Incomplete
Port forwarding required
Blinking
--
(on 5 sec, off 0.5 sec, on 0.5 sec, off 0.5 sec, on 5 sec)
--
zzzz{z{zzzz
* LED blinking frequency - z LED on / { LED off
2
2. CAMERA ACCESS WITH INTERNET EXPLORER
This network camera can be accessed via Microsoft® Internet Explorer® and iPhone / iPad / Android mobile devices
with our self-developed program “EagleEyes” installed depending on different using situations.
Note: For details about accessing network cameras via iPhone / iPad / Android mobile devices, please
refer to http://www.eagleeyescctv.com.
Before using the camera, make sure you have configured the network settings, and the network connection is fine.
For network configurations, please refer to:
“Quick Setup With iPhone / iPad” supplied with your camera if you’re using iPhone / iPad, and your network
environment is wireless.
“ADVANCED NETWORK SETUP” downloadable from www.surveillance-download.com/user/n801.swf if your network
environment is not wireless.
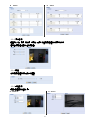
2.1 Camera Login
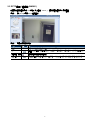
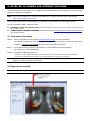
Step1: Open your web browser, and key in http://ipaddress:portnum in the URL address box.
For example, for the IP address 60.121.46.236 and port No. 888, please key in ”http://60.121.46.236:888” into
the URL address box, and press “Enter”.
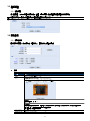
Step2: In the login page, key in the user name and password, and enter the security code from the image below if any.
Then, click “LOGIN”.
Step3: The wizard is then started.
‧ To skip the wizard and directly access the camera live view, click “Close”.
‧ To directly access the camera live view without starting the wizard for the login next time, check “Do not start wizard at login”.
Note: If you’re prompted to install “VLC player”, “Software” or “H264 Streaming Viewer”, please agree
to proceed the installation. Or, you might not be able to see the live view properly.
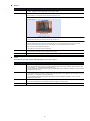
Step5: When the login is successful, the live view is shown.
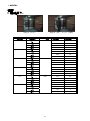
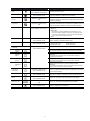
2.2 Control Panel Overview
Note: The buttons available depend on the camera model you have, and the user level used to log in.
3
Function
Icon
User Level
Description
Live
Supervisor / Power User
/ Normal User / Guest
Switch to the live view page.
DPTZ*
Supervisor / Power User
/ Normal User
Backup
Supervisor / Power User
Config.
Supervisor
Switch to the DPTZ configuration page.
For details, please refer to “2.3 Digital PTZ (DPTZ) Operations” at page 5.
Enter the event record list for video playback.
For details, please refer to “2.4 Event Record Search & Playback’ at page 5.
Switch to the system configuration page, and the functions available for
“Supervisor” and “Power User” are different.
For details, please refer to “3.1 System configuration menu” at page 7.
Media Type
--
Supervisor / Power User
/ Normal User / Guest
Select the image player from the drop-down list:
H.264 / MPEG-4 / Motion JPEG
QuickTime
QuickTime is Apple Inc.’s multimedia software. You need to have QuickTime
installed in your operating system before selecting “QuickTime”. When it is
selected, you will be promoted to enter the user name and password to access
the camera.
VLC
Quality
--
Supervisor / Power User
/ Normal User
Click & drag the slider to select the video quality:
Basic / Normal / High / Best.
Video Resolution
--
Supervisor / Power User
/ Normal User
Select the image resolution from the drop list:
AVN801
SXGA (1280 x 1024)
HD720P (1280 x 720)
VGA (640 x 480)
QVGA (320 x 240)
AVN701
D1 (720 x 480)
CIF (352 x 240)
Supervisor / Power User
/ Normal User
Live View Size:
The current live view size is the same as the selected resolution.
Normal Size*
The selected resolution is resized to fit into the current live view size.
Fit to screen*
This icon doesn’t work when the selected resolution is VGA or QVGA.
Click and hold the movable square on the left bottom corner of the live view
to move
Scale*
This icon appears only when the selected resolution is larger than the current live
view size.
The QVGA resolution is resized to fit into the current live view size.
CIF Resize
This icon appears only when the selected resolution is QVGA (CIF) or CIF (352 x
240).
Snapshot
Supervisor / Power User
/ Normal User
Click to take a snapshot of the current view on a new window. Right click
on the picture and re-save it to the location you want.
Full Screen
Supervisor / Power User
/ Normal User
Click to display the image in full screen.
DPTZ*
Supervisor / Power User
/ Normal User
Click to enable digital PTZ functions.
Supervisor / Power User
/ Normal User
Click to switch the audio-in on / off.
Supervisor / Power User
/ Normal User
Click to force the connected alarm-out device to work. For example, when
your alarm device is a buzzer, click this button and your buzzer will start to
sound even if there’s no alarm event.
Audio On / Off
Manual Alarm Out
/
* AVN801 Only
4
To exit the full screen mode, press “Esc” on your keyboard.
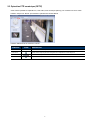
2.3 Digital PTZ (DPTZ) Operations (AVN801 Only)
This camera has PTZ capability, i.e. digital PTZ (hereafter called “DPTZ”), for wide area monitoring.
STEP1: Click “DPTZ” to show the DPTZ control panel.
STEP2: Select the functions when needed:
FUNCTION
Resolution
ICON
--
Alarm Out
Select the video resolution for the DPTZ function. Only “VGA” and “QVGA” are available.
Click to take a snapshot of the current view on a new window. Right click on the picture and re-save it to the
location you want.
Take snapshots
Audio On / Off
DESCRIPTION
/
Click to switch the audio-in on / off.
Click to force the connected alarm-out device to work. For example, when your alarm device is a buzzer, click
this button and your buzzer will start to sound even if there’s no alarm event.
2.4 Event Record Search & Playback
This camera can only save up to three alarm recordings.
Note: To save more recorded data, it’s recommended to use this camera with the compatible NVR.
5
/
Previous / Next Hour
Click to jump to the next / previous time interval in an hour, for example, 11:00 ~ 12:00 or 14:00
~ 15:00, and start playing the earliest event video clip recorded during this whole hour.
Fast Forward
Increase the speed for fast forward. Click to get 2X, 4X, 8X & 16X speed forward eventually.
Fast Rewind
Increase the speed for fast rewind. Click to get 2X, 4X, 8X & 16X speed rewind eventually.
Play
Click to play the current video clip.
Pause
Click to pause the video playback.
Stop
Click to stop the video playback.
Step
Audio
In the pause mode, click to get one frame forward.
Click to mute the playback if necessary, and click again to restore.
Click to download the current video clip to the specified path in your PC.
Download
The downloaded video can only be opened by our own video player. Please go to “General” → “Maintenance” to
download the video player, or get the player from the CD supplied with the sales package.
6
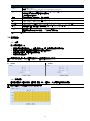
3. CAMERA CONFIGURATIONS
Users can further configure this network camera by accessing via Internet Explorer.
3.1 System configuration menu
Click “Config.” to enter the configuration page.
Note: You need to be “Supervisor” to enter the system configuration page. If you’re not a “Supervisor”,
please re-log into the camera with the correct user name and password.
The functions are categorized into six menus: Network, Camera, Record Timer, Storage, Trigger and General.
For details about “Network”, please refer to “3.2 Network” at page 8.
For details about “Camera”, please refer to “3.3 Camera” at page 11.
For details about “Camera”, please refer to “3.4 Record” at page 13.
For details about “Storage”, please refer to “3.5 Storage”’ at page 14.
For details about “Trigger”, please refer to “3.6 Trigger” at page 14.
For details about “General”, please refer to “3.7 General” at page 16.
Main Menu
Sub-Menu
Reference
Network
Network
Configure network settings.
QoS
Limit the data flow for live streaming.
DDNS
Enter DDNS information when the network type is PPPOE or DHCP.
SNTP
Synchronize your camera time with the networked computer systems.
FTP
Enter the FTP information for event notifications when “FTP” is chosen in “Trigger” →
“Trigger”.
Mail
Enter Email information for event notifications when “Email” is chosen in “Trigger” → “Trigger”.
Filter
Choose to permit or block the IP address(es) which can access this camera.
*Suitable for Windows-based operating system.
UPnP
Allow this camera to be detected among devices within the same network area for easy and
quick usage.
*Suitable for Apple Mac-based operating system.
Bonjour
Camera
Camera
Allow this camera to be detected among devices within the same network area for easy and
quick usage.
1. Set the camera title.
2. Specify the display position of the camera title.
Video
Adjust video-related settings in different video format.
Color
Adjust the color performance.
Audio
Adjust the audio volume of the built-in microphone.
Advance
Adjust the camera parameters if necessary.
Record
Configure the record function.
Record Timer
Schedule human detection recording and external alarm recording.
Storage
Memory
Check the current storage capacity and clear all recorded data when needed.
Trigger
Trigger
Record
1. Enable / disable the motion, alarm, and human detection.
2. Set the motion detection area.
3. Configure how the camera reacts for any event.
Push Video
1. Set Push Video rules.
2. Enable and schedule when to enable Push Video.
7
Main Menu
Sub-Menu
Reference
1. Select the language of the web browser.
General
General
2. Check the MAC address of the camera.
3. Lock camera access after the specified time.
4. Enable or disable LED status indication.
Time
Set daylight saving time and the current time.
Server Log
Check the system event logs.
Online
Check the current online user(s).
Account
1. Create a new user account with different access privilege.
2. Modify or delete an existing user account.
1. Check the current firmware version and upgrade your camera.
Maintenance
2. Copy system configurations.
3. Reboot the camera.
4. Download the video player to play the recorded data.
3.2 Network
3.2.1 Network
You can set the network configuration of the network camera depending on your network type.
For details, please refer to “Advanced Network Setup” from www.surveillance-download.com/user/n801.swf.
3.2.2 QoS
QoS, Quality of Service, is the ability to control the data flow for real-time streaming. This function is important if
your network bandwidth is insufficient and you have other devices to share the network bandwidth.
Check “QoS Enable”, and set the max. upload rate from 256 to 10240 kbps.
3.2.3 DDNS
Select “On” when the selected network type in “Network” is “PPPOE” or “DHCP”.
For details, please refer to “Advanced Network Setup” from www.surveillance-download.com/user/n801.swf.
8
3.2.4 SNTP
SNTP (Simple Network Time Protocol) is used to synchronize your camera time with the networked computer
systems.
Function
Description
GMT
Once users choose the time zone, the network camera will adjust the local area time of the system
automatically.
NTP Server
Simply use the default SNTP server (For example, tock.stdtime.gov.tw) or change to another server with
which users are familiar.
Sync. Period
Select “Daily” to synchronize the camera time with the network time every day or “None” to turn off this
function.
Sync
Click and the network camera will synchronize the time with the network time.
3.2.5 FTP
Enter the detailed FTP information and click “Save” to confirm. The information you set here will be applied
when “FTP” is selected in “Trigger” → “Trigger”.
3.2.6 MAIL
Enter the detailed e-mail information and click “Save” to confirm. The information you set here will be applied
when “Email” is selected in “Trigger” → “Trigger”.
Function
Description
SMTP Server
Enter the SMTP server address provided from your e-mail system supplier.
Port
Enter the port number provided from your e-mail system supplier. If this column is left blank, the e-mail server will use
port 25 to send e-mails.
Mail From
Enter the name of the sender.
SSL Encryption
Select “Yes” if your e-mail server is using SSL encryption to protect your e-mail content from unauthorized access.
9
Function
Description
Verify Password
Some mail servers are required to verify the password. Please enter the “user name” and “password”.
E-Mail Address List
Add the e-mail address(s) of the assigned recipient(s).
Test
When all information is entered, click “Test Mail” to try if the receipt.
3.2.7 Filter
Choose to permit or block the IP address(es) which can access this camera, and click “Save” to confirm.
Function
Description
Filter Configuration
Error Count
Set the maximum count for login failure. When the maximum count is reached, the IP address trying to access the
network camera will be locked.
Error Lock Time
Set the lock time in minutes when the maximum count of error login for an IP address is reached.
Echo Request
Select “Non-Block” to allow other users to use the ping command to detect the IP address of your network camera, or
“Block” to deny the ping command request.
IP/MAC Filter Configuration
IP/MAC Filter
Choose to enable or disable the filter function.
IP/MAC Filter Policy
If “Enable” is selected, choose whether you want to permit (Allow) or block (Deny) the IP address list below.
IP/MAC Filter Rules
Rule
‧
‧
To add an item to the IP address list, key in the IP address in “Rule”, and click “Add”.
To remove an existing item in the IP address list, click the item you want to remove, and click “Delete”.
3.2.8 UPnP / Bonjour
“UPnP” stands for “Universal Plug and Play”, which allows devices to connect seamlessly in the home and
corporate environments and simplify installation of computer components, and is only suitable for Microsoft
Windows-based operating system.
“Bonjour” functions the same as “UPnP”, but it’s only suitable for Apple Mac-based operating system.
UPnP
Bonjour
10
Check “Enable” to allow the network camera to be detected among devices within the same network area, and
set the identification name of the camera in “Friendly name”.
When this function is activated, the other PC within the same domain as this camera will be able to search this
camera in:
“Network Neighbor” with the identification name set in “Friendly name” for Windows-based PC, or
“
” (finder) or “Bookmark” with the identification name set in “Device Name” for Mac-based PC.
Double-click it to quickly open the web browser for camera access.
Port Mapping (Available only in UPnP)
This function can eliminate the need to additionally access the router for port forwarding.
For details, please refer to “Advanced Network Setup” from www.surveillance-download.com/user/n801.swf.
Note: Before using this function, make sure your router supports UPnP, and this function is enabled. If
not, please access your router additionally for port forwarding.
When “Port Mapping” is set to “Enable”, the system will automatically assign an IP address or port number for
you if no IP address or port number is entered.
Note: When the configurations are saved successfully, you’ll see a message indicating the IP address
and port number assigned to this network camera.
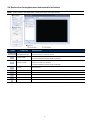
3.3 Camera
3.3.1 Camera
In this menu, you can set the camera title, and specify where to display this title on the display.
11
3.3.2 Video
Adjust video-related settings in different video format.
“Quality” is related to image clearness.
“FPS” is related to the fluency of the video. The more the FPS, the more fluent the video.
“Max Bit Rate” is the maximum limitation of data transmission in the selected image format and resolution.
Note: QQVGA & QCIF are for mobile surveillance only.
AVN801
AVN701
3.3.3 Color
Adjust the color performance from Brightness, Contract, Hue and Saturation. Click and drag the slider to preview
the color change on the right side of ths page and adjust the image color.
To restore the default values, click “Back to Default”.
3.3.4 Audio
Drag the slider to adjust the volume of the microphone for audio streaming.
12
3.3.5 Advance
Adjust the camera parameters if necessary.
AVN801
AVN701
Item
Description
Shutter Speed*
Set the shutter speed based on your need.
The options are: Up to 1/10 sec, Up to 1/30, Up to 1/15, Up to1/6, Up to 1 and Up to 2.
Back Light
It is the function to adjust the image to compensate for an area that is overpowered by brightness because of excessive light.
The image will be properly exposed for clearness. Select to activate (ON) or disable (OFF) this function.
Note: This function is available only in the day mode.
Mirror
Select “ON” to rotate the images horizontally based on your installation situation when necessary.
Flip
Select “ON” to rotate the image 180° when necessary.
De-noise*
Click and drag the slider to adjust the level from 0 ~ 10 to decrease the noise shown in the dark environment.
White Balance*
Process the current image to retain color balance over a color temperature range.
The options are: Auto, Incandescent Light, Cool Light, sun Light, Cloudy & Sun Shade.
Sharpness
Sharpness enhances the clarity of image detail by adjusting the aperture and sharpening the edges in the pictures.
Hold and drag the slider to adjust the level of sharpness from 0 ~ 100. The higher the value, the sharper the image.
* AVN801 Only
3.4 Record
3.4.1 Record
In “Record Configuration”, you can:
Enable or disable the alarm record function. When “Enable” is set to “No”, the alarm record function is
disabled even if you enable it in other configuration pages.
Select if the data should be overwritten when the memory storage is full.
Enable or disable the audio record function.
Select the video resolution for event recording.
Note: The higher resolution you choose, the more accuracy and higher image quality the recording will
be, but the faster the memory storage is consumed and become full.
AVN801
AVN701
13
3.4.2 Record Timer
To schedule alarm recording or human detection recording, click “External Alarm” or “Internal Alarm” (human
detection) to enable the recording, and select the day and time for recording.
Note: The timer must be enabled for the record function to work properly.
3.5 Storage
3.5.1 Memory
In “Memory”, you can check the remaining capacity for recording, or clear all recorded data saved if needed.
Note: The recorded data will be removed also when you reset or reboot this camera.
This camera can only save up to three alarm recordings.
Note: To save more recorded data, it’s recommended to use this camera with the compatible NVR.
Note: To know the total recording time per recording resolution, please refer to “APPENDIX 4
RECORDING TIME TABLE” at page 25.
3.6 Trigger
3.6.1 Trigger
You can configure how this camera reacts when there’s an alarm, a motion or a PIR event.
14
Detect
Item
Description
External Alarm
Enable or disable detection from external alarm-in device, and click the title “External Alarm” (in blue) to set “N.O.”
or “N.C.” depending on the configuration of your alarm-in device.
Motion
Enable or disable motion detection.
Motion detection is not supported when the stream format is Motion JPEG.
When “ON” is selected, click “Detection” to enter the motion detection area setting page as follows:
Sensitivity:
Set the detection sensitivity from the drop-down list: High, Normal or Low.
Area Setting:
Set the motion detection area by selecting the area grids with your mouse. Pink grids represent the area that is not being
detected while the transparent grids are the area under detection. You can set multiple areas under detection.
Click “Clear All” to set the whole area undetected.
Click “Select All” to set the whole area under detection.
PIR
Enable (ON) or disable (OFF) PIR detection.
For Push Video to work properly, make sure this function is enabled.
Duration
Set the duration time for trigger recording (5 / 10 / 20 / 40 seconds).
Action
Here defines how the camera delivers alerts to you for any event.
Item
Description
E-Mail
Select the event type you want to receive E-mail notifications when it occurs.
Then, click the title “E-Mail” (in blue) to configure the media type (H264 / JPEG / MPEG4), file format (AVC / AVI),
and record time (1 ~ 5 seconds) for the event video clip.
The camera will send the captured video clip to the E-mail address(s) you assigned in “Network”
selected event type occurs.
FTP
“Mail” once the
Select the event type you want to receive FTP notifications when it occurs.
Then, click the title “FTP” (in blue) to configure the media type (H264 / JPEG / MPEG4), file format (AVC / AVI), and
record time (1 ~ 5 seconds) for the event video clip.
The camera will upload the captured video clip to the FTP site you assigned in “Network”
selected event type occurs.
Alarm Out
Select the event type you want to trigger the alarm-out device to work when it occurs.
Then, click the title “Alarm Out” (in blue) to configure the trigger rule (LOW / HIGH).
Record
Select the event type you want to enable event recording when it occurs.
15
“FTP” once the
3.6.2 Push Video
“Push Video” is an active notification system, different from traditional FTP and Email notification methods.
Note: For Push Video to work properly, make sure the record function is on in “Record”
the record timer for the external alarm is on in “Record”
“Record”, and
“Record Timer”.
Item
Description
Guard
Select to enable or disable Push Video. This function can also be enabled from your iPhone or Android mobile devices.
When this function is enabled, the image resolution is fixed to “VGA”.
Slow Shutter Lock
Select to fix the slow shutter level to level 2 (Enable) or remain the current slow shutter level (Disable) when Push Video
is enabled.
When this function is enabled, it could ensure Push Video recording to get clear images when the environment is dark.
This function is set to “Enable” by default.
Guard Rule
Select the rule to enable Push Video from “External Alarm”, “Internal Alarm”, or “Internal Alarm OR External Alarm”.
External Alarm – The alarm device additionally connected to your camera
Internal Alarm – The human detection function built in this camera
This function is set to “Internal Alarm OR External Alarm” by default.
Message
Define the context when you receive the Push Video message on your iPhone or Android mobile device. Up to 28
characters are allowed.
To schedule when to enable or disable Push Video, please enable the Push Video timer, and select and day and
time to enable this function.
3.7 General
3.7.1 General
To change the language of UI interface, select from the drop-down list in “Language”.
To allow the status LED indicators to show the status as indicated in “1.6 Status Indicator” at page 2, select
“Enable” in “Status LED Mode”; to hide the status, select “OFF”; to only show the error status, select “Temporary
Disable”.
Note: The status LED mode will be restored to “Enable” after camera reboot when “Temporary OFF” is
selected.
To lock camera access when it’s not used after the specified time, select “5 MIN”, “15 MIN” or “30 MIN” from the
drop-down list of “Auto Lock Time”, or select “NEVER” to disable this function.
Note: When the camera access is locked after the specified time, to resume camera access, please
enter the password.
16
3.7.2 Time
Set daylight saving time and the current time, and click “Save” to confirm.
Function
Description
Time Configuration
Date
Set the current date.
Time
Set the current time.
Daylight Saving Time Configuration
Daylight Saving Time
Specify whether to use daylight saving time (Enable / Disable).
If this function is enabled, set the time period (Start Time / End Time), and adjust the daylight
saving time in hours (Adjust Time).
3.7.3 Server Log
To quickly search the system logs you want by event type, click “Prev. Page” or “Next Page” to find the logs you
want, or check the event type(s) and click “Reload” to start searching.
To clear all system event logs, click “Clear All”.
17
3.7.4 Online
You can check the current online user(s) with respective online information. To refresh the list, click “Reload”.
To allow anonymous login, select “Enable” in “Anonymous Viewer Login”.
To disable image code verification at login, select “No” in “Login with CAPTCHA Image”.
3.7.5 Account
You can create a new account with different user access privilege, or delete or modify an existing account
setting.
How to create a new account
Step1: Click “New”, and fill in the following columns.
Column
Description
User Name
Set a user name that will be used for camera access. The user name allows up to 16 alphanumeric characters.
Password
Set the password that will be used for remote login. The password allows up to 16 alphanumeric characters.
Confirm Password
Enter the password again to confirm.
User Level
Set the security level of an account to give the permission to control different functions. There are four user levels:
SUPERVISOR, POWER USER, NORMAL USER and GUEST.
Life Time
Select how long this account is allowed to stay online (1 MIN / 5 MIN / 10 MIN / 1 HOUR / 1 DAY / INFINITE)
Step2: Then, click “Save” to save your setting and create a new account.
How to modify or delete an existing account
Step1: Select the account you want to modify or delete.
Step2: To modify the account, click “Edit” to change the settings, and click “Save”.
To remove the account, click “Delete”.
Note: It’s not allowed to remove an account when there’s only one account in the account list.
18
3.7.6 Maintenance
Firmware Upgrade
This function is used when users need to upgrade the camera for function scalability.
Note: Before using this function, make sure you have the correct upgrade files provided by your
installer or distributor.
Note: The event videos saved in the camera will be removed after firmware upgrade. Make sure you’ve
copied important events to your PC before firmware upgrade.
Step1: Select “ ” to browse to where you save the upgrade files, and select them one by one until all files are
selected (up to four files).
Step2: Select “Upgrade” to start system upgrading.
Note: You’ll be prompted to keep current configurations. It’s recommended to keep them, or all
configurations will be restored to default values after upgrade.
Note: It takes a few minutes to finish the upgrade process. Do not disconnect the power during
firmware upgrade, or the upgrade may be failed. The camera will reboot after the upgrade.
System Configuration Backup
This function is used to copy your system configuration to a “System.bin” file.
You may import the same system configuration to another camera, or restore your system configuration when
the camera is reset to default values.
Select “System.bin” in “Firmware Upgrade”, and select “Upgrade” to import the system configuration.
System Reboot
Select “Reboot” to restart your camera if needed.
Player Download
To see the event video clips downloaded to your PC, you need to first install our own video player in your PC.
Select “Free Download” to download the video player, and double click the file to install it.
19
APPENDIX 1 PRODUCT SPECIFICATIONS
AVN801
AVN701
▓ Network
Network Compression
H.264 / MPEG4 / MJPEG
Multiple Video Streaming
(Encode Modes, IPS, Resolution)
3 (H.264, MJPEG, MPEG4)
LAN Port
YES
LAN Speed
Supported Protocols
10/100 Based-T Ethernet
DDNS, PPPoE, DHCP, NTP, SNTP, TCP/IP, ICMP, SMTP, FTP,
HTTP, RTP, RTSP, RTCP,IPv4, Bonjour, UPnP, DNS,UDP,IGMP, QoS
Frame Rate
NTSC:30, PAL:25
Number of Online Users
10
Security
1. Multiple user access levels with password
2. IP address filtering
3. Digest authentication
Remote Access
1. Internet Explorer on Windows operating system
2. EagleEyes on iPhone, iPad and Android mobile devices
▓ Camera
Image Sensor
1/4" SONY H.R. image sensor
1/3” image sensor
Video Resolution
SXGA / HD720P / VGA / QVGA / QQVGA
D1 / CIF / QCIF
Min Illumination
0.1 Lux / F1.5
0.25 Lux / F2.0
Shutter Speed
--
1/2 to 1/10,000 sec.
S/N Ratio
Lens
Viewing Angle
PIR Range
More than 48dB (AGC off)
f3.8mm / F1.5
f3.6mm / F2.0
62.7°(Diagonal)
53.7° (Horizontal)
34.1° (Vertical)
90° (Diagonal)
69° (Horizontal)
53° (Vertical)
Detection Range 76° wide angle with up to 6m long distance at 2m height (under 30°C)
White Balance
ATW
AGC
Auto
IRIS Mode
AES
External Alarm I/O
YES
Microphone
YES
Power Source (±10%)
5V / 1A
Operating Temperature
5V / 0.5A
0℃~40℃
▓ Others
Mobile Surveillance
iPad, iPhone & Android mobile devices
RTC (real-time clock)
YES
Motion Detection
YES
Digital Pan / Tilt / Zoom
YES
Push Video / FTP / Email
Event Notification
Minimum Web Browsing Requirements
‧Pentium 4 CPU 1.3 GHz or higher, or equivalent AMD
‧256 MB RAM
‧AGP graphics card, Direct Draw, 32MB RAM
‧Windows 7, Vista & XP, DirectX 9.0 or later
‧Internet Explorer 7.x or later
** The specifications are subject to change without notice.
** Dimensional tolerance: ± 5mm
20
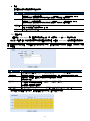
APPENDIX 2 BIT RATE TABLE FOR REFERENCE
The data below is for reference only.
The bit rates listed here may vary depending on the resolution, image quality & frame rate you choose, the
complexity of your monitoring area, and how often the moving objects show in your monitoring area.
AVN801
Testing Environment
Place: Office Entrance
Network translation: H.264
Camera type: Megapixel camera
Static: No one coming in and out
Dynamic: One or two people coming in and out
Resolution
Quality
Frame Rate
(Dynamic) kbps
(Static) kbps
SXGA
Best
FULL
3253
3216
High
2375
2160
Normal
1571
1266
Basic
1465
873
Best
2010
1261
High
1042
1034
Normal
685
572
Basic
457
350
Best
646
366
High
482
350
Normal
302
286
Basic
168
161
1163
1076
High
989
715
Normal
855
534
Basic
719
443
Best
789
571
High
451
447
Normal
349
237
Basic
217
165
Best
269
147
High
182
131
Normal
164
113
Basic
97
71
VGA
QVGA
SXGA
VGA
QVGA
Best
1/4
21
Resolution
Quality
Frame Rate
(Dynamic) kbps
(Static) kbps
SXGA
Best
1/15
581
374
High
405
342
Normal
487
248
Basic
337
141
Best
358
79
High
201
63
Normal
180
28
Basic
92
15
Best
111
84
High
99
68
Normal
97
54
Basic
58
42
VGA
QVGA
22
AVN701
Testing Environment
Place: Office Entrance
Network translation: H.264
Static: No one coming in and out
Dynamic: One or two people coming in and out
Resolution
Quality
Frame Rate
(Dynamic) kbps
(Static) kbps
D1
Best
FULL
2786
1546
High
1375
705
Normal
1234
425
Basic
441
245
Best
955
290
High
364
171
Normal
328
111
Basic
161
68
935
474
High
506
272
Normal
297
175
Basic
223
108
Best
222
109
High
133
67
Normal
81
49
Basic
71
32
127
70
High
197
20
Normal
61
11
Basic
50
4
Best
42
7
High
38
2
Normal
22
1
Basic
28
0
CIF
D1
CIF
D1
CIF
Best
Best
1/5
1/30
23
APPENDIX 3 Q&A
For more details about EagleEyes Q&A, please visit our official website: www.eagleeyescctv.com/supp_QnA.aspx.
Question
Answer
I can connect to this camera in my
house or office where it’s installed
with wireless network.
You didn’t configure this camera to Internet, but only in LAN.
But when I leave my house or office, I
can’t connect to it from my mobile
phone (with 3G network), or other PC
(connected to Internet). Why?
My live images are not fluent. Why?
Please follow the steps in this manual to complete network
configurations, or it’s recommended for you to check with your local
installer or reseller for this service because it’s usually hard for a person
who doesn’t have network knowledge to set network configurations.
Image fluency could be affected by the local network upload bandwidth,
router efficiency, client network download bandwidth, complexity of live
view, and more.
(Recommended for megapixel camera models) To have the best image
fluency, select QVGA; to have the best image quality, select “SXVGA”;
to have normal image fluency and quality, select “VGA”.
“Push Video” is an active notification system, different from traditional
FTP & Email notification methods.
What’s “Push Video”?
The detection range of the built-in
human detection sensor seems too
short and the sensor is not sensitive
enough. Did I do anything wrong on
installation?
When “Push Video” is enabled and any human detection event occurs,
you’ll be able to receive notifications on your iPhone / iPad / Android
mobile device within 5 seconds.
The human detection sensor might be influenced by the temperature of
ambient environment and human beings, and the applicable working
temperature is up to 30ºC. To get more accurate and precise detection,
you may connect external alarm devices, such as magnetic contacts.
There’re some tips for installation. For details, please go to
www.eagleeyescctv.com/supp_QnA.aspx.
Please try adjusting the power line frequency to “60 Hz” or “50 Hz” for
the camera.
The live video keeps flickering. Why?
” on the top right
For iPhone users, access the camera, and select “
corner to enter IPCAM Configuration page. Then, go to “Advance
Setup”
“Camera” to change setting.
For access from Internet Explorer, log into the camera, and select
“Config.”
“Camera”
“Camera”.
24
APPENDIX 4 RECORDING TIME TABLE
Below shows the estimated total recording time for each recording resolution.
The recording time per resolution is the average value collected from the both alarm trigger conditions indicated in
“Testing Environment”, and is for reference only.
The time may vary depending on the resolution, image quality & frame rate you choose, the complexity of your
monitoring area, and how often the moving objects show in your monitoring area.
Testing Environment
Place: Office
Monitoring area: 1.5 meters away from the camera
Alarm trigger conditions:
(1) One person walks by the monitoring area and leaves immediately.
(2) Two persons walk by the monitoring area. One goes away immediately, and the other one stays a while and
goes away.
Recording Resolution
Recording time (second)
SXGA
VGA
QVGA
25
115
211
25
AVN801 / 701
網路攝影機系列
操作指南
在使用本機前請務必詳細閱讀安全須知及操作說明,並保存此手冊以備後續參考。
中文_n801_701_system_V1.2
安全須知
本公提供的所有無鉛產品皆符合歐盟有害物質使用限制指引 (Restriction of Hazardous
Substances, (RoHS)),意即本公司的生產流程與產品均嚴格遵守無鉛守則,而且不包含該指
引內提供的任何有害物質。
此劃叉的滾輪垃圾筒圖示代表在歐盟境內,本產品於丟棄時必須另行收集。此原則適用於您
的產品與任何標有此圖示的週邊設備。請勿隨意丟棄這些產品。請洽詢您當地的經銷商,以
得知回收此設備的程序。
此機器的製造符合無線電波干擾的規範。
FCC (Federal Communications Commission) 聲明
This equipment has been tested and found to comply with the limits for a Class B digital service, pursuant
to Part 15 of the FCC rules. These limits are designed to provide reasonable protection against harmful
interference in a residential installation.
Any changes or modifications made to this equipment may void the user’s authority to operate this equipment.
This equipment generates, uses, and can radiate radio frequency energy. If not installed and used in
accordance with the instructions, may cause harmful interference to radio communications. However, there is
no guarantee that interference will not occur in a particular installation. If this equipment does cause harmful
interference to radio or television reception, which can be determined by turning the equipment off and on, the
user is encouraged to try to correct the interference by one or more of the following measures:
Reorient or relocate the receiving antenna.
Increase the separation between the equipment and receiver.
Connect the equipment into an outlet on a circuit different from that to which the receiver is connected.
Consult the dealer or an experienced radio/TV technician for help.
This device complies with Part 15 of the FCC Rules. Operation is subject to the following two conditions:
(1) This device mat not cause harmful interference, and
(2) This device must accept any interference received, including interference that may cause undesired
operation.
FCC Caution:
Any changes or modifications not expressly approved by the party responsible for compliance could void
the user's authority to operate this equipment.
All external cables connecting to this basic unit must be shielded.
For cables connecting to PCMCIA cards, see the option manual or installation instructions.
商標聲明
iPad® 和 iPhone® 是 Apple Inc. 的註冊商標。
Android™ 是 Google Inc. 的商標。此商標的使用必須依 Google Permissions 的規定使用。
Microsoft®、Windows® 和 Internet Explorer® 是 Microsoft Corporation 在美國和/或其他國家的註冊商標。
免責聲明
本公司保留可隨時修改或刪除說明書內容的任何權利。本公司不保證此說明書的內容完全無誤、完整或實用。
此說明書內容更改以實際產品為準,將不另行通知。
本產品不支援待機 / 關機模式。
MPEG-4 授權
THIS PRODUCT IS LICENSED UNDER THE MPEG4 VISUAL PATENT PORTFOLIO LICENSE FOR
THE PERSONAL AND NON-COMMERCIAL USE OF A CONSUMER FOR (i) ENCODING VIDEO IN
COMPLIANCE WITH THE MPEG4 VISUAL STANDARD (“MPEG-4 VIDEO”) AND/OR (ii) DECODING
MPEG4 VIDEO THAT WAS ENCODED BY A CONSUMER ENGAGED IN A PERSONAL AND
NON-COMMERCIAL ACTIVITY AND/OR WAS OBTAINED FROM A VIDEO PROVIDER LICENSED BY
MPEG LA TO PROVIDE MPEG4 VIDEO. NO LICENSE IS GRANTED OR SHALL BE IMPLIED FOR ANY
OTHER USE. ADDITIONAL INFORMATION INCLUDING THAT RELATING TO PROMOTIONAL INTERNAL
AND COMMERCIAL USES AND LICENSING MAY BE OBTAINED FROM MPEG LA, LLC. SEE
HTTP://WWW.MPEGLA.COM.
GPL 授權
This product contains codes which are developed by Third-Party-Companies and which
are subject to the GNU General Public License (“GPL”) or the
GNU Lesser Public License (“LGPL”).
The GPL Code used in this product is released without warranty and is subject to the
copyright of the corresponding author.
Further source codes which are subject to the GPL-licenses are available upon request.
We are pleased to provide our modifications to the Linux Kernel, as well as a few new
commands, and some tools to get you into the code. The codes are provided on the FTP
site, and please download them from the following site or you can refer to your
distributor:
http://download.dvrtw.com.tw/GPL/076D_Series/arm-linux-2.6.tar.gz
目錄
1. 產品概述............................................................................................................................................. 1
1.1 產品特點 ................................................................................................................................................... 1
1.2 包裝明細 ................................................................................................................................................... 1
1.3 產品概觀 ................................................................................................................................................... 1
1.4 背板 .......................................................................................................................................................... 2
1.5 外接 I/O 裝置埠.......................................................................................................................................... 2
1.6 狀態指示燈 ................................................................................................................................................ 2
2. 使用 INTERNET EXPLORER 登入攝影機 .......................................................................................... 3
2.1 登入攝影機 ............................................................................................................................................... 3
2.2 控制面板簡介 ............................................................................................................................................ 3
2.3 DPTZ 操作 (僅適用 AVM801) ................................................................................................................... 5
2.4 錄影事件搜尋與回放 ................................................................................................................................. 6
3. 攝影機設定 ......................................................................................................................................... 7
3.1 系統設定選單............................................................................................................................................. 7
3.2 網路設定 .................................................................................................................................................... 8
3.2.1 網路設定 ...........................................................................................................................................................8
3.2.2 頻寬控制設定 ...................................................................................................................................................8
3.2.3 DDNS ...............................................................................................................................................................8
3.2.4 網路對時 ...........................................................................................................................................................9
3.2.5 影像上傳 ...........................................................................................................................................................9
3.2.6 郵件管理 ...........................................................................................................................................................9
3.2.7 過濾器.............................................................................................................................................................10
3.2.8 UPnP / Bonjour...............................................................................................................................................10
3.3 攝影機設定 .............................................................................................................................................. 11
3.3.1 攝影機設定 ..................................................................................................................................................... 11
3.3.2 影像設定 ........................................................................................................................................................ 11
3.3.3 顏色設定 ........................................................................................................................................................12
3.3.4 聲音 ...............................................................................................................................................................12
3.3.5 進階設定 ........................................................................................................................................................12
3.4 定時錄影 .................................................................................................................................................. 13
3.4.1 錄影 ................................................................................................................................................................13
3.4.2 定時錄影 .........................................................................................................................................................13
3.5 儲存裝置 .................................................................................................................................................. 14
3.5.1 記憶體............................................................................................................................................................14
3.6 觸發設定 .................................................................................................................................................. 14
3.6.1 觸發設定 .........................................................................................................................................................14
3.6.2 推播通知 .........................................................................................................................................................15
3.7 常用設定 .................................................................................................................................................. 16
3.7.1 常用設定 .........................................................................................................................................................16
3.7.2 時間設定 .........................................................................................................................................................16
3.7.3 系統日誌 .........................................................................................................................................................17
3.7.4 連線使用者 .....................................................................................................................................................17
3.7.5 權限管理 .........................................................................................................................................................17
3.7.6 韌體更新 .........................................................................................................................................................18
附錄 1 產品規格..................................................................................................................................... 20
附錄 2 傳輸速度參照表.......................................................................................................................... 21
附錄 3 常見問題..................................................................................................................................... 24
附錄 4 錄影時間表 ................................................................................................................................. 25
1. 產品概述
1.1 產品特點
使用 iPhone / iPad / Android 行動裝置,快速完成網路設定
支援外接警報裝置
內建麥克風收音功能
遠端監控
-- 可由 iPhone & iPad,以及 Windows® 作業系統的 Internet Explorer® 進行遠端監控
(AVN801) 130 萬畫素的 LIVE MOS 感應元件並支援 HDTV 720p,讓使用者能看到更細微的內容
1.2 包裝明細
□ 網路攝影機
□ 攝影機支架
□ 快速設定指南 (使用 iPhone / iPad)
□ 變壓器
□ RJ45 網路線
□ CD 說明書
1.3 產品概觀
1
1.4 背板
Ethernet 網路孔:
連接網路線。
DC 5V 電源孔:
連接隨附的電源變壓器。
重設鍵:
在攝影機上電的情況下,長按此鍵會重設所有參數回原廠設定值,包括 IP 位址。
重設完成後,攝影機會重新啟動。請勿在攝影機重設期間拔除攝影機電源。
外接 I/O 裝置埠:
攝影機有隨附一個 4 PIN 的 I/O 端子,專門用來外接警報裝置。詳情請參閱第 2 頁的「1.5 外接 I/O 裝
置埠」。
1.5 外接 I/O 裝置埠
攝影機有隨附提供一個 4 PIN 的外接 I/O 端子,讓您可以輕鬆連接到警報裝置。
下圖顯示 I/O 端子各個連接 PIN 腳的用途,以及連接 Alarm Out 裝置的接線示意圖。
4 PINI/O 端子
Alarm Out 連接示意圖
1.6 狀態指示燈
圖示
LAN 區網連線狀態
Internet 連線狀態
系統狀態
在開機時
回復原廠值
升級
連線狀態
區網已連線
區網斷線
Internet 已連線
Internet 斷線
恒亮
閃爍 (亮 250 毫秒,滅 250 毫秒)
z{z{z{z{z{
閃爍 (亮 250 毫秒,滅 250 毫秒)
z{z{z{z{z{
恒亮
閃爍 (亮 100 毫秒,滅 500 毫秒)
z{{z{{z{{
---
恒亮
恒滅
閃爍 (亮 250 毫秒,滅 250 毫秒)
z{z{z{z{z{
--恒亮
閃爍 (亮 100 毫秒,滅 500 毫秒)
z{{z{{z{{
網路設定未完成
需做服務埠轉傳
(Port Forwarding)
閃爍
--
(亮 5 秒、滅 0.5 秒、亮 0.5 秒、滅 0.5 秒、亮 5 秒)
--
zzzz{z{zzzz
* LED 燈閃爍頻率示意 - z LED 燈亮 / { LED 燈滅
2
2. 使用 INTERNET EXPLORER 登入攝影機
視您的使用環境而定,您可以使用 Microsoft® Internet Explorer® 登入此攝影機,或者在 iPhone / iPad / Android 行動
裝置安裝本公司研發的行動小程式 EagleEyes 來進行登入。
註: 如需得知使用 iPhone / iPad / Android 行動裝置登入此攝影機的詳細資訊,請參閱
http://www.eagleeyescctv.com。
在使用此攝影機之前,請先確認您已做好網路設定,而且網路連線正常。
如需得知網路設定的相關資訊,請參閱:
隨附攝影機提供的「快速設定 (使用 iPhone / iPad)」– 若您有 iPhone / iPad,而且您是使用無線網路來上網
「進階網路設定」
,可從 www.surveillance-download.com/user/n801.swf 下載 – 若您不是使用無線網路來上網
2.1 登入攝影機
步驟 1:開啟您的網路瀏覽器,然後在位址列輸入 http://IP 位址:埠號。
舉例來說,若 IP 位址為 60.121.46.236 且埠號為 888,請在 URL 網址列中輸入 http://60.121.46.236:888,然
後按 Enter。
步驟 2:在登入頁面中,輸入預設的使用者名稱和密碼,然後輸入下圖顯示的驗證碼。接著,按 [LOGIN] 登入。
步驟 3:設定精靈隨即啟動。
‧ 若要離開精靈並直接登入攝影機,請按 [關閉]。
‧ 若不要在每次登入時都啟動精靈,而是直接進入攝影機畫面,請按 [登入時不啟動精靈]。
註: 若系統要求您安裝「VLC player」、「Software」和「H264 Streaming Viewer」,請同意完成安裝。
步驟 4: 登入成功後就會看到即時畫面。
2.2 控制面板簡介
註: 視各機種和登入權限的不同,可使用的按鈕也會不同。
3
功能
圖示
使用者權限
說明
即時影像
系統使用者 / 超級使用者 /
一般使用者 / 訪客
DPTZ*
系統使用者 / 超級使用者 /
一般使用者
備份
系統使用者 / 超級使用者
系統設定
系統使用者 / 超級使用者
即時播放器
--
系統使用者 / 超級使用者 /
一般使用者 / 訪客
切換到即時影像頁面。
切換到 DPTZ 設定頁面。
詳情請參閱第 5 頁的「2.3 DPTZ 操作」。
進入事件錄影清單,搜尋要播放的錄影檔案。
詳情請參閱第 6 頁的「2.4 錄影事件搜尋與回放」。
切換到系統設定頁面;使用「系統使用者」和「超級使用者」登入時
看到的功能是不同的。
詳情請參閱第 7 頁的「3.1 系統設定選單」。
從下拉式清單選擇播放軟體:
H.264 / MPEG-4 / Motion JPEG
QuickTime
QuickTime 是 Apple 公司的多媒體播放軟體。在選取 QuickTime 之前,
您必須先將 QuickTime 安裝到您的作業系統。選取 QuickTime 後,系
統會提示您輸入使用者名稱和密碼來登入攝影機。
VLC
影像品質
--
系統使用者 / 超級使用者 /
一般使用者
按住並拖曳滑桿來選取影像畫質:低 / 一般 / 高 / 最好。
影像規格
--
系統使用者 / 超級使用者 /
一般使用者
從下拉式選單選取影像解析度:
AVN801
SXGA (1280 x 1024)
HD720P (1280 x 720)
VGA (640 x 480)
QVGA (320 x 240)
AVN701
D1 (720 x 480)
CIF (352 x 240)
系統使用者/ 超級使用者 /
一般使用者
即時影像顯示方式
目前影像大小與選取的影像規格相符。
原來大小*
選取的影像大小已被重新調整以符合螢幕尺寸。
符合螢幕大小*
當選取的影像規格為 [VGA] 或 QVGA (CIF) 時,就無法使用此功能。
按住即時影像左下角的可移動方框來移動畫面。
拉框檢視*
當選取的影像規格大於目前的即時影像大小時,才能使用此功能。
QVGA 影像大小已被重新調整以符合螢幕尺寸。
CIF 調整大小
當選取的影像規格為 QVGA (CIF) 時,才能使用此功能。
快照
系統使用者 / 超級使用者 /
一般使用者
截取即時影像的畫面;影像檔會儲存在您於 [系統設定] [攝影機設
定] [攝影機設定] [快照存放路徑] 指定的位置裡。
全螢幕
系統使用者 / 超級使用者 /
一般使用者
按此鈕來全螢幕顯示影像。
DPTZ*
系統使用者 / 超級使用者 /
一般使用者
聲音開啟 / 關閉
警報發出
/
系統使用者 / 超級使用者
系統使用者 / 超級使用者 /
一般使用者
* 僅適用 AVN801
4
若要離開全螢幕顯示,請按一下鍵盤上的 [Esc] 鍵。
啟動數位 PTZ 功能。
開啟或關閉收音功能。
強制警報裝置啟動。例如,若您連接了一台蜂鳴器,一旦按下此鈕,
就算沒有發生警報,警鳴器也會放聲大響。
在使用此功能之前,請確認您已接妥警報裝置,並在 [系統設定]
定] 裡完成設定。
[觸發設
2.3 DPTZ 操作 (僅適用 AVM801)
此攝影機擁有所謂的數位 PTZ 功能 (之後都稱「DPTZ」),讓使用者能看到更清楚的畫面。
步驟 1: 按 [DPTZ] 顯示 DPTZ 控制面板。
步驟 2: 選擇您想使用的功能:
功能
解析度
圖示
--
警報發出
選擇 DPTZ 功能的影像解析度,包括 VGA 及 QVGA 選項。
截取即時影像的畫面;影像檔會儲存在您於 [系統設定] [攝影機設定] [攝影機設定] [快照存放路徑] 指定的
位置裡。
快照
收音 開啟 / 關閉
說明
/
點選此按鈕切換開啟或關閉收音功能。
強制警報裝置啟動。例如,若您連接了一台蜂鳴器,一旦按下此鈕,就算沒有發生警報,警鳴器也會放聲大響。
5
2.4 錄影事件搜尋與回放
此攝影機最多可以儲存三筆警報錄影事件。
註: 若想要儲存更多錄影資料,建議可搭配相同的 NVR 使用。
/
往前一小時 /
往後一小時
往前或往後一小時,例如 11:00 ~ 12:00 或 14:00 ~ 15:00,並開始播放在該時段最早的錄影資料。
快轉
增加快轉的速度。點一次以 4 倍的速度快轉,兩次 8 倍,以此類推,最高速為 16 倍。
倒轉
增加倒轉的速度。點一次以 4 倍的速度倒轉,兩次 8 倍,以此類推,最高速為 16 倍。
播放
播放目前的錄影片段。
暫停
暫停影片播放。
停止
停止影片播放。
單張播放
在暫停影片播放時,按一下格放前進一張影像。
聲音
關閉或開啟錄音播放。
備份
將目前播放的錄影片段儲存在電腦的指定位置。
下載的影片只能使用我們專用的影片播放程式開啟。您可以從 [常用設定] → [韌體更新] 下載此程式,或者從隨附的光碟裡取得。
6
3. 攝影機設定
使用者可以透過 Internet Explorer 登入攝影機進行更多設定。
註: 您必須以「系統使用者」或「超級使用者」的權限登入才能進入設定頁面。若不是以「系統使用者」或「超級使
用者」登入,請以該權限重新登入攝影機。
3.1 系統設定選單
按 [系統設定] 進入設定頁面。
註: 您必須以「系統使用者」的權限登入才能進入設定頁面。若您不是以此權限登入,就無法進入設定頁面。
系統設定選項分成六個主要目錄選單:
「網路設定」
、
「攝影機設定」
、
「定時錄影」
、
「儲存裝置」
、
「觸發設定」和「常
用設定」。
如需得知「網路設定」的相關資訊,請參閱第 8 頁的「3.2 網路設定」
。
如需得知「攝影機設定」的相關資訊,請參閱第 11 頁的「3.3 攝影機設定」。
如需得知「儲存裝置」的相關資訊,請參閱第 14 頁的「3.5 儲存裝置」。
如需得知「觸發設定」的相關資訊,請參閱第 14 頁的「3.6 觸發設定」。
如需得知「常用設定」的相關資訊,請參閱第 16 頁的「3.7 常用設定」。
主選單
子選單
說明
網路設定
網路設定
設定網路連線。
QoS
啟動頻寬限制。
DDNS
若使用的網路類型為 PPPOE 或 DHCP,需輸入 DDNS 資訊。
網路對時
將攝影機的時間和網路電腦系統同步化。
影像上傳
若在 [觸發設定] → [觸發設定] 裡選擇 [FTP],需在此輸入 FTP 資訊。
郵件管理
若在 [觸發設定] → [觸發設定] 裡選擇 [E-Mail],需在此輸入 E-Mail 資訊。
過濾器
選擇要允許或封鎖能登入此攝影機的 IP 位址。
UpnP
Bonjour
攝影機設定
儲存裝置
攝影機設定
* 適用於 Windows 操作系統
允許在相同網域下的其他裝置能偵測得到這隻攝影機並可快速使用。
* 適用於 Mac 操作系統
Bonjour 是一項能夠在區網自動設定並偵測特定的網路服務。
1. 設定攝影機名稱。
2. 指定快照儲存位置。
影像設定
調整不同影像格式的相關影像設定。
顏色設定
調整色彩效能。
聲音
調整收音和擴音的音量。
進階設定
調整攝影機參數。
SD 記憶卡
查看記憶卡容量,還可清除所有錄影資料。
1. 啟動 / 關閉 位移偵測功能。
觸發設定
觸發設定
2. 設定位移偵測範圍。
3. 設定攝影機在遇到各個事件時的回應。
推播通知
設定 Push Video 主動式影像通知規則。
7
主選單
子選單
說明
1. 選擇語言。
常用設定
常用設定
2. 查看攝影機的 MAC 位址。
3. 設定攝影機在指定時間過後自動上鎖禁止存取。
4. 啟動或關閉 LED 指示燈。
時間設定
設定日光節約時間和目前的時間。
系統日誌
查看系統事件日誌。
連線使用者
查看目前的線上使用者資訊。
權限管理
1. 建立具有不同存取權限的使用者帳號。
2. 修改或刪除現有使用者帳號。
1. 查看目前的韌體版本與升級。
韌體更新
2. 複寫系統相關設定。
3. 重新啟動攝影機。
4. 下載影片播放器播放影片。
3.2 網路設定
3.2.1 網路設定
依您的網路類型而定,在此可設定攝影機的網路設定。
詳情請參閱「進階網路設定」,請由 www.surveillance-download.com/user/n801.swf 下載。
3.2.2 頻寬控制設定
頻寬控制設定 ( Quality of Service ),是一種控制機制,它提供了針對不同使用者或者不同資料流採用相應不同的優先順
序,或者是根據應用程式的要求,保證資料流的效能達到一定的水準。勾選 [開啟],設定最大上傳速率,設定範圍可從
每秒 256 位元 到 10240 位元。
3.2.3 DDNS
若在 [網路設定] 選取的網路類型為 [PPPOE] 或 [DHCP],請選擇 [開啟]。
詳情請參閱「進階網路設定」,請由 www.surveillance-download.com/user/n801.swf 下載。
8
3.2.4 網路對時
網路對時是用來同步化攝影機和網路電腦系統的時間。
功能
說明
GMT
只要選好時區,網路攝影機就會自動調整系統的本機時間。
NTP 伺服器
您可以選擇保留預設的 SNTP 伺服器 (例如,tock.stdtime.gov.tw),或者改成您知道的其他伺服器。
同步週期
選擇 “每天” 將每天的網路時間同步到攝影機,或選擇 “無” 來關閉此功能。
時間同步
按此按鈕後,網路攝影機的時間即會與網路時間同步。
3.2.5 影像上傳
輸入詳細的 FTP 資訊,然後按 [儲存] 確認。在 [觸發設定] → [觸發設定] 選取 [FTP] 時,則會套用設定於此的
功能。
3.2.6 郵件管理
輸入詳細的電子郵件資訊,然後按 [儲存] 確認。在 [觸發設定] → [觸發設定] 選取 [E-Mail] 時,則會套用設定
於此的功能。
功能
說明
郵件主機名稱
輸入您從電子郵件系統供應商取得的 SMTP 伺服器位址。
埠號
輸入您從電子郵件系統供應商取得的埠號。若沒有填寫此欄,則會預設使用 25 做為傳送郵件的埠號。
寄件人信箱
輸入寄件人名稱。
SSL 加密
如果您是使用 SSL 加密協定來防止重要的資訊遭到攔截,請選擇 “是” 。
密碼驗證
有些郵件伺服器需要驗證密碼。請輸入 [帳號] 和 [密碼]。
收件人信箱
新增指定收件人的電子郵件位址。
Test
當您輸入完所有資料,請點選 “測試” 來確認是否可以收到訊息。
9
3.2.7 過濾器
選擇要允許或封鎖能登入此攝影機的 IP 位址,然後按 [儲存] 確認。
功能
說明
過濾器設定
錯誤次數
設定登入失敗的最大可接收次數。登入失敗次數達到設定上限後,該 IP 位址就會被封鎖。
錯誤封鎖時間
設定被封鎖的 IP 位址,要被封鎖多久時間。
回應要求
選擇 [不封鎖] 讓其他使用者可以 ping 到此網路攝影機的 IP 位址,而選擇 [封鎖] 則可拒絕回覆 ping 指令。
IP/MAC 過濾設定
IP/MAC 過濾
選擇要啟用或停用過濾器功能。
IP/MAC 過濾方法
若選擇 [開啟],請確認要允許或拒絕指定的 IP 位址。
IP/MAC 過濾條件
條件
‧ 若要新增 IP 位址,請在 [條件] 輸入 IP 位址,然後按 [新增]。
‧ 若要刪除現有 IP 位址,先點選要刪除的位址,然後按 [刪除]。
3.2.8 UPnP / Bonjour
UPnP 為 Universal Plug and Play (通用隨插即用) 的縮寫,即允許此裝置可以在家用與企業的網路環境中被偵測
與使用,且可簡化安裝與設定流程。
勾選 [開啟] 後,此網路攝影機就可以被位在同一網域的其他裝置偵測到。而且,您還可在 [裝置名稱] 處為此攝
影機設定一個好記的名稱。
Bonjour 在功能面和 UPnP 完全一樣,不過 Bonjour 只適用在 Mac 作業系統。
UpnP
Bonjour
10
勾選 [開啟] 讓此攝影機可以在同網域下被偵測到,並將您的 [裝置名稱] 設定為好記的名稱。
啟用此功能後,其他與此攝影機位在相同網域下的電腦就可在 [網路上的芳鄰] 搜尋到此攝影機。
在 Windows 作業系統環境下,請將 [網路芳鄰] 和 [裝置名稱] 皆設定為好記的名稱。
在 Mac 作業系統環境下,請將 “
” (finder) 或是 “Bookmark” 及 [裝置名稱] 皆設定為好記的名稱。
連按兩下找到的攝影機,即可快速開啟網路瀏覽器並進入登入頁面。
埠號轉址設定
依此功能,您不需要額外進入 Router,也可設定埠號轉址。
詳情請參閱「進階網路設定」,請由 www.surveillance-download.com/user/n801.swf 下載。
註: 在使用此功能之前,請先確認您的 Router 有支援 UPnP,而且此功能已開啟。如果沒有,您就還是要另外進入
Router 設定埠號轉址。
將 [埠號轉址] 設為 [開啟] 後,若沒有特別指定 [路由器 IP] 或 [HTTP 埠號],系統就會自動偵測一組 IP 位址或
指定一個埠號給您使用。
註: 當設定成功時,您會在此頁面看到分配給此攝影機的 IP 位址和埠號。
3.3 攝影機設定
3.3.1 攝影機設定
您可以在此設定攝影機的基本設定。
3.3.2 影像設定
在不同影像格式下變更影像相關設定
畫質與畫面清晰度相關。
FPS 表示影像的流暢度。FPS 的值越大,影像呈現越順暢。
Max Bit Rate 表示在選定的影像格式和像素內,資料所能傳輸的最大限度。
註:QQVGA 和 QCIF 為手機監控專用格式。
11
AVN801
AVN701
3.3.3 顏色設定
調整色彩效能:亮度、對比度、色度和飽和度。按住滑桿做調整即可預覽色彩變更。
若要回復預設值,請按 [回到預設值]。
3.3.4 聲音
拖曳滑桿來調整麥克風和喇叭的音量。
3.3.5 進階設定
視需求調整攝影機相關參數。
AVN801
AVN701
12
Item
Description
快門速率*
依您的需求設定快門速率。
選項有: Up to 1/10 sec, Up to 1/30, Up to 1/15, Up to1/6, Up to 1 and Up to 2.
此功能是用來調整光線過曝的畫面,讓影像不會因為過曝而造成特定區域看不清楚。
背光**
請選擇 [開啟] 或 [關閉] 決定是否要啟動背光補償功能。
註:此功能僅適用於日間模式。
鏡射
依您需求的架設環境,點選此功能後,畫面將水平旋轉。
翻轉
依您需求的架設環境,點選此功能後,畫面將旋轉 180 度。
消除雜音*
依您需求的架設環境,按住並拖曳滑桿來選取在黑暗環境下的適當參數。等級從 0 ~ 10,級數越高,雜音越少。
白平衡*
白平衡的設定是為了表現出當時的色溫,並且讓原本白色的東西,在不同色溫下仍看到白色。
選項有:自動、白燈、冷光、日光、陰天及遮陽。
清晰度
藉由調整相機光圈大小及影像邊緣銳利化,可以讓影像的小細節看起來更清楚。
按住並拖曳滑桿來選取適當參數。等級從 0 ~ 10,級數越高,影像越清晰。
* 僅適用 AVN801
* 僅適用 AVN701
3.4 定時錄影
3.4.1 錄影
在 [定時錄影設定] 下:
啟動或停用所有錄影功能。將 [啟動] 設成 [否] 時,就會停用所有的錄影功能。
選擇是否要在儲存裝置容量滿時覆蓋之前的檔案繼續錄下去。
選擇在事件發生時,是否要啟用預錄功能。
選擇錄影影像解析度。
註: 選擇越高的解析度,影片的畫質就會越好,但記憶體就會消耗的越快。
AVN801
AVN701
3.4.2 定時錄影
若要設定警報或人體偵測錄影,請選擇 [警報] 或 [人體偵測],然後選擇要啟動錄影的時間。
註:警報功能請務必選擇開啟以使錄影功能正常進行。
13
3.5 儲存裝置
3.5.1 記憶體
在 [記憶體],您可以查看可錄影的剩餘容量,還可選擇清除所有儲存在記憶體中的錄影資料。
註:已記錄的資料將會在您按重設鍵後及重新開啟攝影機時被移除。
3.6 觸發設定
3.6.1 觸發設定
設定在發生警報、位移偵測和人體偵測後,攝影機的後續回應動作。
偵測
項目
說明
警報
視您連接的警報裝置而定,選擇 [N.O.] 或 [N.C.]。
移動
開啟或關閉位移偵測功能。
若將影像格式設為 [Motion JPEG],就無法使用位移偵測功能。
選取 [開啟] 後,按 [移動偵測] 進入移動偵測區域頁面如下:
靈敏度:
設定偵測靈敏度,從 1 到 10。
區域設定:
使用電腦滑鼠設定移動偵測區域。粉紅色格子代表未被偵測的區域,而透明的格子代表有偵測的區域。您可以設定多個偵測區域。
按 [全部清除] 清除先前選擇的偵測區域,變成全部不偵測。
按 [全部選擇] 選取全區域進行偵測。
警報持續時間
設定觸發時的錄影時間 (5 / 10 / 20 / 40 秒)。
14
動作
設定攝影機在發生事件時傳送通知的方式。
項目
說明
E-Mail
先選取要收到 E-Mail 通知的事件類型。
接著,按 [E-Mail] 字樣設定媒體類型 (H.264 / JPEG / MPEG4),檔案格式 (AVC / AVI) 及事件錄影時間 (1 到 5 秒)。
當發生選取事件時,攝影機就會將錄好的影片傳送給在 [網路設定]
FTP
[郵件管理] 內指定的收件人。
先選取要收到 FTP 通知的事件類型。
接著,按 [FTP] 字樣設定媒體類型 (H.264 / JPEG / MPEG4),檔案格式 (AVC / AVI) 及事件錄影時間 (1 到 5 秒)。
當發生選取事件時,攝影機就會將錄好的影片上傳到在 [網路設定]
警報發出
[影像上傳] 內指定的位置。
先選取要觸發警報裝置的事件類型。
接著,按 [警報發出] 字樣設定觸發規則。(低 / 高)
錄影
選取要啟動事件錄影的事件類型。
3.6.2 推播通知
「推播通知」(Push Video) 是一種主動式事件通知系統,與一般常見的 FTP 和 Email 通知方式不同。
此系統一旦啟動,部分功能或設定會無法使用或者固定在特定值,以確保「Push Video」能取得最佳的事件影像。
註:請確認錄影功能已開啟,以利推播通知功能正常運作。另外,若外部警報需要定時錄影,請確認 [定時錄影] 功能
已開啟。
項目
說明
警戒
選擇要開啟或關閉「推播通知」(Push Video) 功能。此功能也可從 iPhone 或 Android 行動裝置開啟。
開啟此功能後,影像解析度會固定在 [VGA]。
警戒自動曝光
選擇要在開啟「推播通知」(Push Video) 功能時,設定曝光時間等級為 2 (開啟) 或維持目前的曝光時間設定 (關閉)。
開啟此功能後,就能確認「推播通知」功能在周遭環境太暗時也能得到清楚的影像。
此功能預設為 [開啟]。
警戒規則
選擇「推播通知」的觸發規則:[外部警報]、[內部警報],或 [內部警報或外部警報]。
外部警報 – 另外連接到攝影機的警報裝置
內部警報 – 攝影機內建的人體偵測功能
此功能預設為 [內部警報或外部警報]。
簡訊通知訊息
輸入當發生事件時,要傳送到 iPhone 或 Android 行動裝置的「推播通知」訊息內容。最多只能輸 28 個字元。
當您開啟或關閉推播通知功能時,請開啟推播通知定時功能,並選擇日期及時間。
15
3.7 常用設定
3.7.1 常用設定
在 [常用設定] 裡,您可以選擇介面語言並查看攝影機的 MAC 位址。
若要讓 LED 狀態指示燈如第 2 頁的「1.6 狀態指示燈」所述顯示各個狀態,請在 [狀態 LED 使用模式] 選擇開啟;
若要隱藏狀態,請選擇 [關閉];若只要顯示錯誤狀態,請選擇 [暫時關閉]。
註: 若重新啟動攝影機,狀態 LED 模式就會從[暫時關閉]回復為 [開啟]。
若要在閒置一段時間後鎖住攝影機登入,請在 [自動鎖定時間] 選擇 [5 分鐘]、[15 分鐘] 或 [30 分鐘],或選擇
[從不鎖定] 關閉此功能。
註: 要從攝影機鎖定的狀態下回復,請輸入登入時使用的密碼。
3.7.2 時間設定
設定日光節約時間和目前的時間,然後按 [儲存] 確認。
功能
說明
時間設定
日期
設定今天的日期。
時間
設定現在的時間。
日光節約時間設定
日光節約時間
選擇是否要使用日光節約功能 (開啟 / 關閉)。
若啟動了此功能,請設定 [開始時間] 和 [結束時間],並調整日光節約時間,以小時為單位。
16
3.7.3 系統日誌
若要依事件類型來快速搜尋想要的系統日誌,按 [上一頁] 或 [下一頁],或者勾選想要搜尋的事件類型,然後按 [重
新查詢]。
若要清除所有系統日誌,請按 [清除全部日誌]。
3.7.4 連線使用者
您可以查看目前連線到此攝影機的使用者與其連線資訊。若要重新整理清單,請按 [重新查詢]。
若要允許匿名登入,請在 [影像匿名登入] 選擇 [開啟]。
若不要在登入時輸入影像驗證碼,請在 [Login with CAPTCHA Image] 選擇 [否]。
3.7.5 權限管理
您可以新增擁有不同使用者權限的帳號,或者刪除或修改現有帳號設定。
如何新增帳號
步驟 1: 按 [New] (新增),然後輸入以下欄位。
17
欄位
說明
帳號
設定要用來登入攝影機的帳號。帳號最多只允許 16 個由字母和數字組成的字元。
密碼
設定要用來進行遠端登入的密碼。密碼最多只允許 16 個由字母和數字組成的字元。
確認密碼
再輸入一次密碼確認。
權限
設定帳號的安全權限,以允許控制不同的功能。使用者權限共有四種:
「系統使用者」
、
「超級使用者」
、
「一般使用者」和「訪客」。
登入時間
選擇此帳號可停留線上的時間:1 分鐘 / 5 分鐘) / 10 分鐘) / 1 小時) / 1 天) / 永久
步驟 2: 接著,按一下 [儲存設定] 來儲存與完成帳號的建立。
如何修改或刪除現有帳號
步驟 1:選取想要修改或刪除的帳號。
步驟 2: 若要修改帳號,請選擇 [修改] 變更設定,然後再按 [儲存設定]。若要刪除帳號,請按 [刪除]。
註: 若帳號清單中只有一個帳號,則無法刪除該帳號。
3.7.6 韌體更新
此功能可用來升級與更新攝影機功能。
註: 在使用此功能之外,請確認已從安裝商或經銷商處取得升級檔案。
註: 一次只能更新一個檔案。若要完成所有檔案更新,請在更新完一個檔案後,再從步驟 1 開始更新其他檔案。
步驟 1:按 [
] 搜尋儲存更新檔的位置,然後選擇其中一個。
步驟 2:按 [開始更新] 即可開始系統升級。
註: 升級需要一些時間,請勿在這期間中斷電源,否則升級可能會失敗。升級完成後,攝影機會重新啟動。
系統組態備份
此功能是將您的系統設定複製到 System.bin 的檔案裡。
您可以匯入相同的系統設定到另一台攝影機 (舉例:AVN801),當 AVN801 重新被設為預設值時,您將可以選擇
恢復為您原先的系統設定值。
在 [韌體更新] 選項裡,選擇 System.bin 檔案,並點選 [開始備份] 以匯入系統設定。
18
系統重新開機
若您需要重新啟動您的系統,請按下 [重新開機] 以進行系統重新啟動。
播放器下載
若您要播放下載之影像,請先下載並安裝播放器。
選擇 [免費下載] 以進行播放器下載,點選兩下即開始安裝。
19
附錄 1 產品規格
AVN801
AVN701
▓ 網路
H.264 / MPEG4 / MJPEG
壓縮格式
多重影像傳輸
(Encode 模式、IPS、解析度)
3 (H.264、MJPEG、MPEG4)
LAN 埠
是
LAN 速度
10/100 Based-T Ethernet
支援的協定
DDNS, PPPoE, DHCP, NTP, SNTP, TCP/IP, ICMP, SMTP, FTP, HTTP, RTP, RTSP, UPnP
Frame 速率
NTSC:30、PAL:25
10
線上使用者人數
安全性設定
多種使用者存取權限與密碼設定
在 Windows 作業系統使用 Internet Explorer
網路管理
▓ 攝影機
影像感測器
1/3" Live MOS 影像感測器
1/3” 影像感測器
影像解析度
SXGA / SXVGA / 720P / VGA / QVGA / QQVGA
D1 / CIF / QCIF
最低照度
0.1 Lux / F1.5
0.25 Lux / F2.0
快門速度
--
1 / 60 (1/50) to 1 / 100,000 sec.
超過 48dB (AGC 關閉)
信噪比
鏡頭
f3.8mm / F1.5
f3.6mm / F2.0
角度
62.7°(Diagonal)
53.7° (Horizontal)
34.1° (Vertical)
90° (Diagonal)
69° (Horizontal)
53° (Vertical)
白平衡
ATW
AGC
自動
IRIS 模式
AES
人體偵測感應器
在高度 2 米的情況下,最多可偵測長達 6 米寬 76 的範圍 (溫度在 30C 以下)
外接警報 I/O 埠
是
麥克風
是
電源 (±10%)
5V / 1A
5V / 0.5A
-0℃~40℃
操作溫度
▓ Others
行動監控
iPad、iPhone & Android
儲存裝置
內建 10 MB
RTC (網路對時)
是
移動偵測
是
數位 PTZ
是
事件通知方式
網路瀏覽最低設備需求
推播通知 (Push Video) / 影像上傳 / 郵件傳送
‧Pentium 4 CPU 1.3 GHz 或更高等級,或同級 AMD
‧256 MB RAM
‧AGP 圖形顯示卡、Direct Draw、32MB RAM
‧Windows 7、Vista & XP,DirectX 9.0 或更新版本
‧Internet Explorer 7.x 或更新版本
** 規格變動以實際產品為準,將不另行通知。
** 尺寸誤差範圍:± 5mm
20
附錄 2 傳輸速度參照表
以下資料僅供參考用。
下表所列的傳輸速度會因您實際選取的影像大小、影像品質和影像張數,以及監控畫面複雜度和物體移動頻繁度而有
所差異。
AVN801
測試環境
地點:辦公室入口
網路傳輸格式:H.264
攝影機類型:百萬畫素網路攝影機
靜態畫面:無人出入
影像規格
SXGA
VGA
QVGA
SXGA
VGA
QVGA
動態畫面:僅有一、兩人出入 (不頻繁)
影像品質
Frame 速率
(動態畫面) kbps
(靜態畫面) kbps
最好
FULL
3253
3216
高
2375
2160
一般
1571
1266
基本
1465
873
最好
2010
1261
高
1042
1034
一般
685
572
基本
457
350
最好
646
366
高
482
350
一般
302
286
基本
168
161
1163
1076
高
989
715
一般
855
534
基本
719
443
最好
789
571
高
451
447
一般
349
237
基本
217
165
最好
269
147
高
182
131
一般
164
113
基本
97
71
最好
1/4
21
影像規格
影像品質
Frame 速率
(動態畫面) kbps
(靜態畫面) kbps
SXGA
最好
1/15
581
374
高
405
342
一般
487
248
基本
337
141
最好
358
79
高
201
63
一般
180
28
基本
92
15
最好
111
84
高
99
68
一般
97
54
基本
58
42
VGA
QVGA
22
AVN701
測試環境
地點:辦公室入口
網路傳輸格式:H.264
靜態畫面:無人出入
動態畫面:僅有一、兩人出入 (不頻繁)
影像規格
影像品質
Frame 速率
(動態畫面) kbps
(靜態畫面) kbps
D1
最好
FULL
2786
1546
高
1375
705
一般
1234
425
基本
441
245
最好
955
290
高
364
171
一般
328
111
基本
161
68
935
474
高
506
272
一般
297
175
基本
223
108
最好
222
109
高
133
67
一般
81
49
基本
71
32
127
70
高
197
20
一般
61
11
基本
50
4
最好
42
7
高
38
2
一般
22
1
基本
28
0
CIF
D1
CIF
D1
CIF
最好
最好
1/5
1/30
23
附錄 3 常見問題
如需得知更多常見問題與解答,請至我們的官網:www.eagleeyescctv.com/supp_QnA.aspx。
問題
解答
當我在家中或是辦公室時,即使是沒有
無線網路的情況下,還是可以成功連上
攝影機。但是一旦離開家裡或是辦公
室,我卻無法從手機 (已連上 3G 網路)
或是桌電 (已連上網路) 登入攝影
機,為什麼?
您尚未成功連上網際網路,您連上的網路為區域網路。所以,請參閱產品隨
附光碟內或從 www.surveillance-download.com/user/n801.swf 下載「進階
網路設定」來完成網路設定,或是建議您與當地安裝商或供應商聯繫,協助
安裝事宜。因為網路設定對於初次設定的人而言,難度較高。
影像看起來很不流暢。為什麼?
影像的流暢度會受到 iPhone / iPad 上傳頻寬、Router 的硬體效能、攝影
機下載頻寬和畫面複雜度等因素有關。
(僅適用百萬畫素攝影機) 如需看到非常流暢的影像,解析度請選取
[QVGA];如需看到最好的畫質呈現,解析度請選取 [SXVGA];如對影像流
暢度和畫面沒有特殊要求,建議解析度則選取 [VGA]。
何謂「推播通知」(Push Video)?
「推播通知」(Push Video) 是一種主動式事件通知系統,與一般常見的
FTP、Email 和 SMS 通知方式不同。
當偵測到人或外接警報器被觸發時,Push Video 系列智慧型攝影機會即時
在 5 秒內傳送監控影像到您的手機,並啟動 EagleEyes 軟體,讓您立即觀
看事件回放影片。
此攝影機內建的人體偵測感應器,感應
距離好像不遠,而且還會有感應不到的
情形發生。為什麼?
此人體偵測感應器可能會受到周遭環境的溫度和人體溫度的影響而失判
斷,其適用工作溫度應在 30oC 以內。若想要提升偵測的準確度和感應率,
建議可外接其他警報裝置,例如:磁簧開關。
在安裝此攝影機時有一些小訣竅,詳情請至
www.eagleeyescctv.com/supp_QnA.aspx。
即時的影像畫面一直閃爍。為什麼?
請試著切換電源頻率為 [60 Hz] 或 [50 Hz]。
若您是使用 iPhone,請登入到攝影機,然後在選擇畫面右上角的 [
入設定頁面。接著,選擇 [進階設定]
[攝影機] 變更設定。
若您是使用 Internet Explorer,請登入攝影機,然後選擇 [系統設定]
影機設定]
[攝影機設定]。
24
] 進
[攝
附錄 4 錄影時間表
下表列出在各個錄影解析度下能錄製的總預計時間。
每種解析度測出的錄影時間,是在以下兩種警報觸發情況時所得出的平均值,僅供參考。
錄影時間會因您選擇的錄影解析度、影像品質和影錄張數、監視畫面複雜度,以及監視畫面出現移動物體的頻繁度,而
有所不同。
測試環境
地點:辦公室
監控區域:離攝影機 1.5 公尺遠的位置
警報觸發情境:
(1) 一個人經過監控區域,然後馬上離開。
(2) 兩個人經過監控區域,一個人馬上離開,另一個人停留一會兒才離開。
錄影解析度
錄影時間 (秒)
SXGA
VGA
QVGA
25
115
211
25
CAMERA RESEAU
MEGAPIXEL
SERIES AVN801
MANUEL UTILISATEUR
Veuillez lire les instructions avant toute l’utilisation, et conserver ce manuel pour une future consultation
n801_guide_V1.1, décembre 2011
NOTE DE SECURITE IMPORTANTE
Tous les produits commercialisés par notre société sont conformes à la directive
européenne (2002/95/CE) visant à limiter l'utilisation de six substances dangereuses
RoHS.
Cet appareil entre dans la catégorie 9.1 : Instruments de surveillance et de contrôle sans
écran, selon la directive européenne 2002/96/CE visant à rendre obligatoire la valorisation
des DEE. Ne pas jeter ce produit en fin de vie avec des déchets ménagers.
Prendre contact avec votre revendeur pour les démarches à suivre concernant le
recyclage de ce produit.
Cet appareil est conçu, fabriqué et a été testé conformément aux exigences essentielles
de sécurité pour les matériels électroniques et électromagnétiques.
FCC
Cet appareil a été testé et se trouve conforme avec les limitations d’équipements
numériques de classe B, d’après la partie 15 des lois FCC. Ces limitations sont conçues
pour fournir une protection raisonnable contre les interférences nuisibles d’une installation
résidentielle.
AVERTISSEMENT
Cet appareil utilise et génère de l’énergie radio fréquence. Si son installation ou utilisation n’est pas
conforme aux instructions, il peut produire des interférences nuisibles à la communication radio
fréquence.
Cet appareil est conçu pour l’utilisation à l’intérieur. Ne pas l’exposer à la pluie ni à la chaleur.
La surveillance d’un lieu ouvert au public et de la voie publique est soumise à l’autorisation municipale et
préfectorale.
Le bloc d’alimentation est conçue spécialement pour la caméra, ne pas l’utiliser pour alimenter d’autres
appareils
Toute modification de l’appareil peut le rendre non-conforme aux réglementations en vigueur. Ne pas
procéder à sa modification sans notre accord écrit au préalable.
Aucun produit modifié ne sera pris en charge dans le cadre de la garantie légale.
Trademark Acknowledgements
iPad® & iPhone® sont des marques déposées d’Apple Inc.
Android™ est une marque commerciale de Google Inc. L’utilisation de cette marque est soumise à
l’autorisation de cette dernière (Google Permissions).
Microsoft®, Windows® & Internet Explorer® sont des marques déposées de Microsoft Corporation aux
Etats-Unis et/ou dans d’autres pays.
Information
Nous nous réservons le droit de réviser ou de supprimer à tout moment tout ou une partie du contenu de ce
manuel. Nous ne garantissons pas la totale exactitude ni assumons la responsabilité légale quant à
l’utilisation des informations contenues dans ce manuel.
Le contenu de ce manuel peut faire l’objet d’une révision sans préavis.
MPEG4 Licensing
THIS PRODUCT IS LICENSED UNDER THE MPEG4 VISUAL PATENT PORTFOLIO LICENSE FOR THE
PERSONAL AND NON-COMMERCIAL USE OF A CONSUMER FOR (i) ENCODING VIDEO IN
COMPLIANCE WITH THE MPEG4 VISUAL STANDARD (“MPEG-4 VIDEO”) AND/OR (ii) DECODING
MPEG4 VIDEO THAT WAS ENCODED BY A CONSUMER ENGAGED IN A PERSONAL AND
NON-COMMERCIAL ACTIVITY AND/OR WAS OBTAINED FROM A VIDEO PROVIDER LICENSED BY
MPEG LA TO PROVIDE MPEG4 VIDEO. NO LICENSE IS GRANTED OR SHALL BE IMPLIED FOR ANY
OTHER USE. ADDITIONAL INFORMATION INCLUDING THAT RELATING TO PROMOTIONAL INTERNAL
AND COMMERCIAL USES AND LICENSING MAY BE OBTAINED FROM MPEG LA, LLC. SEE
HTTP://WWW.MPEGLA.COM.
GPL Licensing
This product contains codes which are developed by Third-Party-Companies and which
are subject to the GNU General Public License (“GPL”) or the GNU Lesser Public License
(“LGPL”).
The GPL Code used in this product is released without warranty and is subject to the
copyright of the corresponding author.
Further source codes which are subject to the GPL-licenses are available upon request.
We are pleased to provide our modifications to the Linux Kernel, as well as a few new
commands, and some tools to get you into the code. The codes are provided on the FTP
site, and please download them from the following site or you can refer to your distributor:
http://download.dvrtw.com.tw/GPL/076D_Series/arm-linux-2.6.tar.gz
TABLE DE MATIERE
1. GENERALITE ..................................................................................................................................... 1
1.1 Fonctionnalités du Produit......................................................................................................................... 1
1.2 Contenu de l’emballage ............................................................................................................................ 1
1.3 Vue d’ensemble du Produit ....................................................................................................................... 1
1.4 Façade Arrière........................................................................................................................................... 1
1.5 Port Entrée/Sortie Externe ........................................................................................................................ 2
1.6 Indicateurs d’état ....................................................................................................................................... 2
2. ACCES DE LA CAMERA PAR INTERNET EXPLORER ..................................................................... 3
2.1 Connexion à la caméra ............................................................................................................................. 3
2.2 Panneau de contrôle ................................................................................................................................. 3
2.3 Opération PTZ numérique (DPTZ) ............................................................................................................ 5
2.4 Recherche d’enregistrement événementiel et lecture ............................................................................... 6
3. CONFIGURATION DE LA CAMERA................................................................................................... 7
3.1 Menu configuration système ..................................................................................................................... 7
3.2 Réseaux .................................................................................................................................................... 8
3.2.1 Réseau local.....................................................................................................................................................8
3.2.2 QoS ..................................................................................................................................................................8
3.2.3 DDNS ...............................................................................................................................................................8
3.2.4 SNTP................................................................................................................................................................9
3.2.5 FTP...................................................................................................................................................................9
3.2.6 EMAIL...............................................................................................................................................................9
3.2.7 Filtre ...............................................................................................................................................................10
3.2.8 UPnP / Bonjour...............................................................................................................................................10
3.3 Caméra ................................................................................................................................................... 11
3.3.1 Caméra........................................................................................................................................................... 11
3.3.2 Vidéo .............................................................................................................................................................. 11
3.3.3 Couleur...........................................................................................................................................................12
3.3.4 Audio ..............................................................................................................................................................12
3.3.5 Paramètres Avancés ......................................................................................................................................12
3.4 Enregistrement ........................................................................................................................................ 13
3.4.1 Enregistrement...............................................................................................................................................13
3.4.2 Planning d’Enregistrement .............................................................................................................................13
3.5 Stockage ................................................................................................................................................. 13
3.5.1 Mémoire .........................................................................................................................................................13
3.6 Evénement .............................................................................................................................................. 14
3.6.1 Evénement .....................................................................................................................................................14
3.6.2 Push Vidéo .....................................................................................................................................................15
3.7 Général ................................................................................................................................................... 16
3.7.1 Général...........................................................................................................................................................16
3.7.2 Date et heure .................................................................................................................................................16
3.7.3 Historique du serveur .....................................................................................................................................17
3.7.4 Connexion ......................................................................................................................................................17
3.7.5 Compte utilisateur ..........................................................................................................................................18
3.7.6 Maintenance...................................................................................................................................................19
ANNEXE 1 SPECIFICATIONS DU PRODUIT ...................................................................................... 20
ANNEXE 2 TABLEAU DE BANDE PASSANTE informatif .................................................................... 21
ANNEXE 3 QUESTIONS & REPONSES.............................................................................................. 23
1. GENERALITE
1.1 Fonctionnalités du Produit
Configuration réseau facile avec iPhone / iPad
Capteur live MOS 1.3 Megapixel avec la qualité HDTV 720p, permettant d’examiner plus facilement le moindre détail
Support de carte SD, pour le stockage de vidéo
Push Video (Alerte vidéo instantanée) permet l’envoi immédiat d’un message d’alerte sur votre téléphone mobile iPhone
et Android, lorsqu’un événement préprogrammé survient. Vous pouvez alors visualiser la vidéo enregistrée.
LED Blanche intégrée dont l’allumage peut être commandé manuellement ou automatiquement selon un planning, ou
déclenché par un événement tel que détection de mouvement, détection de son, ou réception d’un signal d’alarme externe.
Interconnexion avec d’autres dispositifs d’ Alarme Externe, en entrée comme en sortie
Microphone & haut-parleur intégrés, transmission bidirectionnelle
Surveillance à distance
-- Compatible avec iPhone & iPad, et Internet Explorer® sous le système Windows®
1.2 Contenu de l’emballage
□ Caméra réseau
□ Guide d’installation rapide iPhone / iPad
□ CD Manuel
□ Support de fixation
□ Adaptateur
1.3 Vue d’ensemble du Produit
Indicateurs
D’état
Objectif Caméra
Connecteur
Alimentation
Port RJ45
Port E/S
Externe
Microphone
Point de fixation
Support
Détecteur de
Présence
Bouton
Reset
Façade avant
Façade arrière
1.4 Façade Arrière
Ethernet:
Connecter ici le câble réseau.
DC 5V:
Connecter l’adaptateur de courant.
Reset:
Alimentation connectée, appuyez sur ce bouton pour réinitialiser les paramètres, y compris l’adresse
IP, de la camera par les valeurs par défaut de l’usine.
La caméra redémarrera. , Veuillez ne pas l’éteindre pendant l’initialisation de la camera.
Port E/S Externe
Ce connecteur 4 broches est prévu pour la connexion d’autres dispositifs d’alarme externes.
1
1.5 Port Entrée/Sortie Externe
La caméra supporte des dispositifs d’alarme en entrée et en sortie. Un connecteur 6 broches y est prévu pour
en faciliter la connexion.
Le schéma suivant illustre la définition de chaque broche. Le câblage doit être fait conformément à ce schéma si
vous voulez connecter à votre caméra un dispositif d’alarme externe.
Brochage du connecteur
Connexion sortie alarme
1.6 Indicateurs d’état
ICONE
Etat de connexion réseau local
Etat de connexion Internet
Toujours Allumé
Clignote (allumé 250 ms, éteint 250 ms)
z{z{z{z{z{
Clignote (allumé 250 ms, éteint 250 ms)
z{z{z{z{z{
Toujours Allumé
Toujours éteint
Etat système
Pendant le démarrage
Réinitialisation
Mise à jour Microprogramme
Etat de connexion
Connecté au réseau local
Déconnecté du réseau local
Connecté à Internet
Toujours Allumé
Clignote (allumé 100 ms, éteint 500 ms)
z{{z{{z{{
--
Non connecté à Internet
--
Clignote (allumé 250 ms, éteint 250 ms)
z{z{z{z{z{
--Toujours Allumé
Clignote (allumé 100 ms, éteint 500 ms)
z{{z{{z{{
Erreur de connexion 3G
iPhone / iPad / Android
Configuration Connexion 3G
incomplète
* Fréquence de clignotement LED
Clignote
--
(Allumé 5 sec, éteint 0.5 sec, allumé 0.5 sec, éteint 0.5 sec,
allumé 5 sec …)
--
zzzz{z{zzzz
- z LED allumé / { LED éteint
2
2. ACCES DE LA CAMERA PAR INTERNET EXPLORER
Cette caméra réseau est accessible via un ordinateur équipé de Microsoft® Internet Explorer® et via smart phones
équipés de notre logiciel “EagleEyes”
Note: Pour plus de détails sur l’accès par Smartphones, veuillez consulter notre site internet
http://www.eagleeyescctv.com.
Avant d’utiliser cette caméra, veuillez vérifier la configuration de votre réseau local, et le câblage réseau.
Pour la configuration réseau, veuillez consulter:
“Installation rapide avec iPhone / iPad” fourni avec la caméra, si vous avez un iPhone / iPad, et que votre réseau
est un réseau sans fil.
“CONFIGURATION RESEAU ADVANCEE” téléchargeable depuis www.surveillance-download.com/user/n801.swf si
votre réseau est filaire.
2.1 Connexion à la caméra
Etape1:
Ouvrir le navigateur Internet, et saisir http://ipaddress:portnum sur la barre d’adresse.
Par exemple, si l’adresse IP de la caméra est 60.121.46.236 et le numéro de port 888, saisir sur la barre
d’adresse ” http://60.121.46.236:888” et appuyer sur la touche Enter du clavier.
Etape2:
Sur la page d’ouverture, saisir le code utilisateur, le mot de passe et le code de sécurité,
puis cliquer sur le bouton Connexion.
Etape3:
L’assistant de démarrage est lancé.
‧ Cliquer sur le bouton Fermer pour afficher la vidéo de la caméra en direct, sans exécuter l’assistant de démarrage.
‧ Cocher la case “Ne pas démarrer l’assistant”, pour accéder directement à la vidéo la prochaine fois.
Note: Si le système vous demande l’installation de “VLC player”, “Software” et “H264 Streaming
Viewer”, veuillez accepter la demande.
Etape 5: La vidéo est affichée en direct.
2.2 Panneau de contrôle
Note: Les boutons disponibles dépendent du droit de l’utilisateur connecté.
Information streaming actuel
FR : Nombre d’images par seconde
DR : Taux de transmission
Date: Date et heure système
Q : Qualité
R : Résolution
3
Fonction
Icône
Droit utilisateur
Description
Direct
Superviseur / Utilisateur avec
droit / Utilisateur normal/ Invité
DPTZ
Superviseur / Utilisateur avec
droit / Utilisateur normal
Archive
Superviseur / Utilisateur avec
droit
Configuration.
Superviseur / Utilisateur avec
droit
Type de Média
--
Superviseur / Utilisateur avec
droit / Utilisateur normal/ Invité
Accéder à la vidéo en direct.
Accéder à la page de configuration PTZ numérique.
Explication détaillée “2.3 Opération PTZ numérique ”
Accéder à la liste de vidéo enregistrée localement
Explication détaillée “2.4 Recherche d’enregistrement événementiel
et lecture“ à la page 6.
Accéder à la page de configuration système, et les fonctions
disponibles sont différentes pour Superviseur et Utilisateur avec droit.
Pour plus de détails, consulter “3.1 Menu configuration système”.
Sélectionner le lecteur de vidéo dans la liste déroulante:
ActiveX
QuickTime
QuickTime est un logiciel multimédia de la société Apple Inc. Vous
devez avoir installé au préalable ce logiciel sur votre ordinateur avant
de le choisir. Une fois sélectionné, vous sera invité d’entrer l’utilisateur
et le mot de passe pour accéder à la camera.
VLC
Qualité
Résolution*
---
Superviseur / Utilisateur avec
droit / Utilisateur normal
Cliquer et faire glisser pour sélectionner la qualité de vidéo:
Superviseur / Utilisateur avec
droit / Utilisateur normal
Sélectionner dans la liste déroulante la résolution de vidéo:
BASIC / NORMAL / SUPERIEUR/ MEILLEUR.
SXGA (1280 x 1024)
QVGA (320 x 240)
720P (1280 x 720)
VGA (640 x 480)
Superviseur / Utilisateur avec
droit / Utilisateur normal
Résolution
d’affichage:
La résolution d’affichage actuelle est celle choisie pour la caméra.
Résolution
Caméra
La résolution d’affichage actuelle est adaptée à la fenêtre
d’affichage.
Résolution
fenêtre
Cet icône apparaît uniquement quand la résolution de la caméra est
supérieure à la fenêtre active.
Déplacer le carré rouge pour afficher la zone sélectionnée.
Echelle
Cet icône apparaît uniquement quand la résolution de la caméra est
supérieure à la fenêtre active.
Redimensionner la vidéo pour qu’elle remplisse la fenêtre
d’affichage.
Redimension
CIF
Cet icône apparaît uniquement quand la résolution de la caméra est QVGA
(CIF) et qu’elle est inférieure à la fenêtre d’affichage.
Cliquer sur l’icone pour prendre une photo de la vue actuelle et la
stocker à l’emplacement spécifié dans la configuration de la caméra
(chemin de sauvegarde).
Prise de vue
instantanée
Superviseur / Utilisateur avec
droit / Utilisateur normal
Plein écran
Superviseur / Utilisateur avec
droit / Utilisateur normal
DPTZ
Superviseur / Utilisateur avec
droit / Utilisateur normal
Cliquer sur l’icône pour activer les fonctions PTZ numérique.
Superviseur / Utilisateur avec
droit
Cliquer sur l’icône pour activer/désactiver le haut-parleur.
Superviseur / Utilisateur avec
droit / Utilisateur normal
Cliquer sur l’icône pour faire sonner l’alarme, même si le dispositif
d’alarme ne détecte aucun événement.
Audio On / Off
Sonner Alarme
/
** DPTZ & Smart Zoom ne peuvent être activés en même temps.
4
Cliquer sur l’icône pour afficher la vidéo en plein écran.
Appuyer sur « Echap » du clavier pour sortir du mode plein écran.
2.3 Opération PTZ numérique (DPTZ)
Cette caméra possède la capacité PTZ, c’est-à-dire, PTZ numérique (DPTZ), pour contrôler une zone vaste.
ETAPE1: Cliquer sur “DPTZ” pour afficher le panneau de contrôle DPTZ.
ETAPE2: Sélectionner les fonctions voulues
FONCTION
Résolution
ICONE
--
Sonner Alarme
Choisir la résolution vidéo pour la fonction DPTZ : “VGA” ou “QVGA”
Cliquer sur l’icone pour prendre une photo qui s’affichera dans une nouvelle fenêtre. Puis cliquer avec le
bouton droit sur la photo prise et la sauvegarder à un emplacement de votre disque dur
Prise de vue
Audio On / Off
DESCRIPTION
/
Cliquer sur l’icône pour activer/désactiver le haut-parleur
Cliquer sur l’icône pour faire sonner l’alarme, même si le dispositif d’alarme ne détecte aucun événement.
5
2.4 Recherche d’enregistrement événementiel et lecture
Note: Cette fonction est disponible uniquement pour les superviseurs
ICONE
/
FONCTION
Heure
Précédente/Suivante
Lecture rapide
DESCRIPTION
Cliquer dessus pour aller au créneau horaire précédent / suivant et commencer la lecture à
partir du premier clip ce créneau horaire.
Accélérer la vitesse de lecture. Cliquer dessus pour multiplier la vitesse de lecture par 2.
La vitesse maximale est 16X (5 cliques consécutifs).
Cliquer dessus pour lire la vidéo à l’envers à 2 fois la vitesse normale.
Lecture inversée
Cliquer de nouveau pour accélérer.
La vitesse maximale est 16X (5 cliques consécutifs)
Lecture
Cliquer dessus pour commencer la lecture du clip vidéo sélectionné ou revenir à la vitesse de
lecture normale
Pause
Cliquer pour arrêter momentanément la lecture.
Stop
Cliquer dessus pour arrêter la lecture.
Image par image
En mode Pause, cliquer dessus pour faire avancer une image.
Audio
Cliquer dessus pour activer/désactiver la sortie son.
Télécharger
Cliquer dessus pour sauvegarder une copie du clip vidéo sur votre PC.
6
3. CONFIGURATION DE LA CAMERA
Note: Seuls les comptes Superviseur ou Utilisateur avec droit ont les droits nécessaires pour
accéder aux menus de configuration système et un Utilisateur avec droit ne peut accéder à
l’historique, connexion, compte utilisateur et mise à jour du menu général. Connectez avec un
compte utilisateur adéquat en fonction des opérations que vous voulez faire.
3.1 Menu configuration système
Cliquer sur Config. en haut de l’écran pour afficher les menus de configuration.
La configuration système est subdivisée en six menus: Réseau local, Caméra, Enregistrement, Stockage,
événement et Général.
Pour plus de détails sur “Réseaux”, veuillez consulter “3.2 Réseaux” ,page 8.
Pour plus de détails sur “Caméra”, veuillez consulter “3.3 Caméra”, page 11.
Pour plus de détails sur “Enregistrement”, veuillez consulter “3.4 Enregistrement” ,page 13.
Pour plus de détails sur “Stockage”, veuillez consulter “3.5 Stockage”’ , page 13.
Pour plus de détails sur “Evénement”, veuillez consulter ”3.6 Evénement , page 14.
Pour plus de détails sur “Général”, veuillez consulter “3.7 Général”, page 16.
Menu
Sous-Menu
Description
Réseaux
Réseau local
Configurer les paramètres réseau local.
QoS
Limiter la bande passante de la vidéo streaming.
DDNS
Entrer les informations DDNS, indispensable pour un réseau de type PPPOE ou DHCP.
SNTP
Entrer les informations du serveur SNTP et Synchroniser l’heure de la caméra avec le serveur.
FTP
Entrer les informations du serveur FTP pour la notification d’événements.
Email
Entrer les informations emails pour la notification par email.
Filtre
Etablir les filtres pour autoriser/refuser l’accès à la caméra IP.
UPnP
Activer ou désactiver UPnP, protocole réseau qui permet la détection de la caméra sur le
réseau local, pour en faciliter l’usage. Disponible pour les systèmes basés sur Windows
Bonjour
Activer ou désactiver UPnP, protocole réseau qui permet la détection de la caméra sur le
réseau local, pour en faciliter l’usage. Disponible pour les systèmes basés Mac-OS
Caméra
Caméra
1. Définir le surnom de la caméra.
2. Définir l’emplacement où le surnom de la caméra est affiché.
Vidéo
Régler les paramètres vidéo suivant leurs formats.
Couleur
Régler la performance couleur.
Audio
Régler le volume audio de lu microphone intégré.
Paramètres Avancés
Régler des paramètres avancés de la caméra.
Enregistrement
Définir les paramètres d’enregistrement
Planning d’enregistrement
Etablir un planning d’enregistrement déclenché par des alarmes Interne et Externe.
Stockage
Mémoire
Vérifier la capacité de la mémoire et effacer les enregistrements si besoin est.
Evénement
Evénement
Enregistrement
1. Activer/désactiver la détection d’événements: Mouvement, alarme et présence humaine.
2. Définir la zone de détection de mouvement.
3. Définir les actions à prendre pour chaque événement détecté.
Push Vidéo
1. Définir les règes de garde.
2. Etablir un planning pour la fonction Push Vidéo.
7
Menu
Sous-Menu
Description
1. Choisir la langue d’affichage de l’interface.
Général
Général
2. Vérifier adresse MAC de la caméra.
3. Spécifier le délai maximum d’inactivité avant le verrouillage de l’interface.
4. Définir le mode de fonctionnement des indicateurs d’état
Date et heure
Réglage de date et heure, et prise en compte de l’heure d’été.
Historique
Vérifier l’historique système.
Connexion
Définir les paramètres de connexion et visualiser les utilisateurs connectés.
Utilisateur
Gestion des comptes utilisateurs.
1. Consulter la version du microprogramme et le mettre à jour.
2. Sauvegarder la configuration du système.
Maintenance
3. Redémarrer à distance la caméra.
4. Télécharger le logiciel de lecture, qui, installé sur d’autres ordinateurs, permet de lire la
vidéo enregistrée.
3.2 Réseaux
3.2.1 Réseau local
Menu de configuration du réseau local où est installée la caméra. Pour plus de détails, consulter “Configuration
Réseau Avancée” téléchargeable www.surveillance-download.com/user/n801.swf.
3.2.2 QoS
QoS, Qualité de Service (Quality of Service en Anglais), est la capacité de contrôler le flux de données en temps
réel. Cette fonction est d’autant plus importante si la bande passante de votre réseau est insuffisante et vous
avez d’autres matériels qui partagent la bande passante.
Cochez la case Activer, puis définir le taux maximum pour la transmission remontante allant de 256 kbps to
10240 kbps.
3.2.3 DDNS
DDNS doit être activé si votre réseau est de type “PPPoE” ou “DHCP”. Pour plus de détails, veuillez consulter
“Configuration Réseau Avancée” téléchargeable sur www.surveillance-download.com/user/n801.swf.
8
3.2.4 SNTP
SNTP (Simple Network Time Protocol) permet de synchroniser l’heure de la caméra avec un serveur de temps.
Fonction
Description
GMT
Choisir un fuseau horaire pour régler automatiquement l’heure de la caméra.
Serveur NTP
Définir un serveur de temps. Vous pouvez utiliser le serveur par défaut ou opter pour un autre serveur que
vous connaissez.
Période
Choisir ‘Quotidien’ pour synchroniser tous les jours et ‘Non’ pour ne pas synchroniser automatiquement.
Synchroniser
Cliquer sur ce bouton pour synchroniser manuellement l’heure de la camera.
3.2.5 FTP
Permet de paramétrer un serveur FTP, à qui la caméra doit envoyer la vidéo quand survient un événement.
3.2.6 EMAIL
Permet de paramétrer l’expéditeur et les adresses mail des destinataires à qui un email sera envoyé quand
survient un événement programmé.
Gestion de la liste des destinataires
1) Ajouter
Saisir l’adresse mail puis cliquer sur Ajouter
2) Editer
Sélectionner l’adresse à éditer puis cliquer sur Editer
3) Supprimer
Sélectionner l’adresse puis cliquer sur Supprimer
Champ
Description
Serveur SMTP
Saisir l’adresse du serveur SMTP.
Port
Saisir le N° de port du serveur SMTP. Si aucun N° n’est saisi, la valeur par défaut 25 est utilisée (Le N° de port par défaut
de la plupart des serveurs de mail).
Expéditeur
Saisir le nom de l’expéditeur, informatif.
Encryptage SSL
Indiquer si la connexion avec le serveur doit se faire avec un mot de passe sécurisé. L’authentification de l’utilisateur est
requise par les serveurs email, cochez la case Oui, et saisissez un compteur utilisateur et son mot de passe.
Vérifier mot de passe
L’authentification de l’utilisateur est requise par les serveurs email, cochez la case Oui, et saisissez un compteur
utilisateur et son mot de passe.
Compte utilisateur
Saisir le compte d’utilisateur de l’expéditeur
Mot de passe
Saisir le mot de passe.
Liste destinataires
Gérer les adresses mail des destinataires.
Tester
Après la saisie de toutes les informations, le bouton ‘Tester’ permet d’envoyer un email de test.
9
3.2.7 Filtre
Permet de filtrer l’accès à la caméra.
Fonction
Description
Configuration de Filtre
Nombre d’essai max
Saisir le nombre d’essais maximum autorisé pour la connexion. Passé ce nombre, l’adresse IP, qui essaie de se
connecter à la caméra avec un mot de passe incorrect, sera automatiquement bloquée.
Temps de blocage
Définir le temps de blocage en minutes, avant de débloquer une adresse IP qui a dépassé le nombre de d’essais
maximum autorisé.
Requête Echo
Choisir Refuser si vous ne souhaitez pas que la camera réponde aux requêtes Echo (commande PING).
Choisir Accepter dans le cas contraire.
Configuration de Filtre IP/MAC
Filtre IP/MAC
Activer ou désactiver les filtres IP/MAC.
Politique de filtres
IP/MAC
Si le filtrage est activé, définir si l’accès est autorisé ou interdit aux adresses IP/MAC figurant dans liste ci-dessous..
Règles de filtres IP/MAC
‧
‧
Règle
Pour ajouter une entrée, saisir l’adresse IP, puis cliquer sur Ajouter.
Pour supprimer une entrée existante, sélectionner l’adresse IP à enlever et cliquer sur Supprimer
3.2.8 UPnP / Bonjour
“UPnP” signifie “Universal Plug and Play”, qui permet la connexion transparente d’un matériel réseau, simplifiant
ainsi son installation et son utilisation, sur les systèmes basés sur Microsoft Windows.
.“Bonjour” agit de la même façon que “UPnP”, mais prévu pour des systèmes fonctionnant sous le système Mac
OS d’Apple.
UPnP
Bonjour
Choisir Activer afin de faciliter la détection de votre caméra sur le réseau local. Puis lui attribuer un surnom qui
permet de l’identifier facilement.
Quand UPnP est activé, tous les ordinateurs sous Microsoft Windows connectés à votre réseau local
peuvent rechercher et trouver la caméra dans le voisinage réseau, identifiable par le surnom attribué
Quand Bonjour est activé, tous les ordinateurs sous Mac OS connectés à votre réseau local peuvent
rechercher et trouver la caméra dans marque-pages et le menu Finder (
attribué
Un double-clique dessus permet d’ouvrir le navigateur et accéder à la camera.
10
), identifiable par le surnom
Redirection de Port (Port Mapping)
Pour accéder via Internet à une caméra connectée derrière un routeur, la redirection de port est nécessaire.
L’activation de la fonction UPnP peut rendre automatique la redirection de port sur le routeur. Pour plus de
détails, consulter “Configuration Réseau Avancée” www.surveillance-download.com/user/n801.swf.
Note: Avant d’activer cette fonction, vérifiez que votre routeur supporte UPnP, et que ce dernier est
activé. Sinon, vous devez effectuer manuellement la redirection de port.
Laissez les zones à blanc, le système attribuera des valeurs lors de la validation.
Note: Lorsque la configuration est sauvegardée avec succès, un message apparaîtra à l’écran,
indiquant l’adresse IP et le numéro de port à utiliser pour un accès via Internet.
3.3 Caméra
3.3.1 Caméra
Permet de définir le surnom de la caméra et l’emplacement d’affichage de ce surnom.
3.3.2 Vidéo
Permet d’ajuster les paramètres vidéo pour chaque format que la caméra supporte.
“Qualité” est la qualité d’image.
“IPS” le nombre d’images par seconde, plus le nombre est grand, plus la vidéo est fluide, et plus la bande passante utilisée est
élevée.
“ Taux de transfert Max.” est la limite à ne pas dépasser par la caméra lors de la transmission de données.
11
3.3.3 Couleur
Permet d’ajuster les performances couleur de la caméra : Luminosité, contraste, nuance et saturation. Cliquer et
faire glisser le curseur pour modifier le réglage.
La vidéo à droite permet de contrôler en direct l’effet du réglage.
Cliquer sur le bouton 'Réinitialiser' pour restaurer les valeurs par défaut
3.3.4 Audio
Cliquer et faire glisser le curseur pour régler le volume du microphone.
3.3.5 Paramètres Avancés
Permet de régler les paramètres avancés de la caméra.
Champs
Description
Vitesse obturateur
Sélectionner dans la liste déroulante la vitesse d’obturateur maximum selon votre besoin.
Miroir
La valeur ‘Activé’ permet de retourner l’affichage horizontalement.
Flip
La valeur ‘Activé’ permet de retourner l’affichage verticalement.
Débruitage
Cliquer et faire glisser le curseur pour régler le niveau de débruitage ( de 0 ~ 10) pour diminuer les parasites dans un
environnement sombre.
Balance des blancs
Permet de traiter les images de façon à rester dans une certaine limite de température de couleur.
Les valeurs possibles sont : Auto, Lumière Incandescente, Lumière froide, Lumière du jour, Nuageux et ombragée.
Vivacité
Permet d’améliorer la clarté d’image, en réglant l’aperture et clarifiant les bordures d’images.
Cliquer et faire glisser le curseur pour régler le niveau de vivacité (de 0 ~ 100). Plus la valeur est grande, plus l’image sera
vivace. pour diminuer les parasites dans un environnement sombre.
12
3.4 Enregistrement
3.4.1 Enregistrement
Ce menu permet de:
Activer ou désactiver la fonction enregistrement. Si elle est désactivée, aucun enregistrement sur
événement alarme ne sera possible, même si l’enregistrement sur événement est activé.
Indiquer au système s’il peut écraser d’anciennes écritures si mémoire d’enregistrement est pleine.
Indiquer au système s’il doit enregistrer le son
Choisir, dans la liste déroulante, la résolution d’enregistrement : SXGA / HD720P, VGA, et QVGA
Note: Une haute résolution permet d’avoir des images hautes en qualité, mais a le désavantage
d’user plus rapidement la mémoire disponible.
3.4.2 Planning d’Enregistrement
Permet d’établir le planning d’enregistrement déclenché automatiquement par la détection de présence
humaine (onglet PIR) ou par l’alarme (onglet Alarme Externe).
Note: La fonction planning doit être activée avant d’établir le planning.
3.5 Stockage
3.5.1 Mémoire
Permet de vérifier la capacité de mémoire disponible pour enregistrement, ou d’effacer les données stockées.
Note: Les données enregistrées seront perdues lors du redémarrage de la caméra.
13
3.6 Evénement
3.6.1 Evénement
Permet de définir des actions à prendre quand survient un événement inhabituel : alarme externe, détection de
mouvement, détection de présence humaine (PIR).
Détection
Champ
Description
Alarme externe
Choisir
Mouvement
“N.O.” ou “N.C.”
selon la configuration de l’Alarme externe, connecté sur Entrée alarme de la caméra.
Activer ou désactiver la détection de mouvement.
Cette fonction n’est pas supportée quand le format de flux vidéo est Motion JPEG.
Si la détection est activée, cliquer sur le bouton Détection pour définir la ou les zones de surveillance:
Niveau de Sensibilité:
Choisir un niveau de sensibilité dans la liste déroulante.
Zones de détection:
Définir des zones de détection à l’aide de votre souris. Un carré rose n’est pas sous surveillance alors un carré transparent l’est.
Plusieurs zones de surveillance sont possibles.
Le bouton Tout effacer permet de supprimer toutes les zones de détection.
Le bouton Tout sélectionner permet de mettre toute la zone sous surveillance.
PIR
Activer ou désactiver la détection PIR.
Activez la détection PIR si la règle de garde de Push Vidéo est : Alarme Interne ou Alarme Interne OU Alarme Externe
Durée d’alerte
Définir la durée d’enregistrement déclenché par un événement d’alerte, de 5 / 10 / 20 / 40 secondes.
Action
Permet de définir les actions que la caméra doit exécuter suite aux différents événements d’alerte.
Lignes
Description
E-Mail
Cocher les événements pour lesquels une notification par email doit être envoyée.
Cliquer sur le mot Email souligné, pour définir le format et la durée de la vidéo à envoyer par email.
Le clip de vidéo capturée sera diffusé à l’ensemble d’adresses configurées pour la caméra( Réseau
FTP
Email)
Cocher les événements pour lesquels une notification par FTP doit être envoyée.
Cliquer sur le mot FTP souligné, pour définir le format et la durée de la vidéo à envoyer au serveur FTP.
Le clip de vidéo capturée sera envoyé au serveur FTP configuré pour la caméra( Réseau
Sortie alarme
Cocher les événements pour lesquels un signal doit être envoyé à l’alarme externe.
Cliquer sur le mot Sortie Alarme souligné, pour définir les règles.
Enregistrement
Cocher les événements pour lesquels un enregistrement doit être effectué.
14
FTP)
3.6.2 Push Vidéo
“Push Vidéo” est un système de notification active, une méthode de notification différente de celles utilisées
pour la notification traditionnelle par Email ou FTP.
Note: Avant d’activer la fonction Push Vidéo, vérifiez que la fonction Enregistrement est activée (menu
Enregistrement
Enregistrement),
et le planning d’enregistrement est correctement
établi s’il est activé (menu Enregistrement
Planning Enregistrement).
Champ
Description
Monter la garde
Activer ou désactiver la garde de Push Vidéo. Cette fonction peut être aussi active via un Smartphone iPhone ou
Android.
Verrouillage Exposition
Activer ou désactiver le réglage automatique du niveau d’exposition par la fonction Push Vidéo.
Quand cette fonction est activée, elle permet à la fonction Push Vidéo de fixer le niveau d’exposition à 2 lors de
l’enregistrement si la lumière ambiante n’est pas suffisante.
La valeur par défaut est Activé.
Règle de garde
Choisir l’événement qui doit déclencher la fonction Push Vidéo.
Alarme Externe = Dispositif d’alarme externe connecté à la caméra
Alarme Interne = Dispositif de détection de présence humaine, intégré à la caméra.
La valeur par défaut est Alarme Interne OU Alarme Externe
Taux d’images
enregistrement
Choisir le taux d’images lors de l’enregistrement déclenché par et pour la fonction Push Vidéo.
Texte SMS
Définir le texte de message qui sera envoyé lors de Push Vidéo sur votre iPhone ou Android, jusqu’à 28 caractères.
Le planning de Push Vidéo, s’il est activé, permet de choisir pour chaque jour de la semaine des plages horaires
où la fonction Push Vidéo est effectivement activée.
15
3.7 Général
3.7.1 Général
Ce menu permet de sélectionner la langue de l’interface web, de définir le mode de fonctionnement des
indicateurs d’état, de paramétrer le temps d’inactivité maximum avant de verrouiller l’accès à la caméra, de
consulter l’adresse MAC de votre caméra.
Note: Les indicateurs seront réactivés lors d’un redémarrage si le mode des indicateurs d’état est
‘Désactiver temporairement’
Pour verrouiller l’accès à la caméra suite à une période d’inactivité, choisir dans la liste déroulante Délai de
verrouillage automatique une valeur (“5 MIN”, “15 MIN” ou “30 MIN”). Choisir Jamais pour désactiver le
verrouillage automatique.
Note: Si l’accès à la caméra est verrouillé, vous devez entrer de nouveau le mot de passe lorsque vous
essayez d’accéder à la caméra.
3.7.2 Date et heure
Permet de régler la date et heure de la caméra, et de saisir les paramètres d’heure d’été . Cliquer sur le bouton
Sauvegarder pour valider.
Champ
Description
Configuration date et heure
Date
Réglage de la date.
Heure
Réglage de l’heure.
Configuration heure d’été
Heure d’été
Activer ou désactiver la prise en compte d’heure d’été.
Si la prise en compte d’heure d’été est activée, entrer la date de début et la date de fin, ainsi que
le décalage horaire à appliquer.
16
3.7.3 Historique du serveur
Note: Cette fonction est disponible uniquement pour le superviseur.
Permet d’afficher l’historique du système. Cliquer sur les boutons Page précédente / Page suivante pour
naviguer dans la liste, ou spécifier le type d’événement puis cliquer sur Actualiser pour afficher une liste filtrée.
Cliquer sur Tout effacer pour supprimer l’historique.
3.7.4 Connexion
Note: Cette fonction est disponible uniquement pour le superviseur.
Ce menu permet de définir les paramètres de connexion et de visualiser les utilisateurs connectés ainsi que les
informations relatives à ces connexions.
Cliquer sur Actualiser pour rafraîchir la liste.
Vous pouvez également décider si les connexions anonymes sont autorisées et si le code de vérification est
obligatoire lors d’une connexion.
17
3.7.5 Compte utilisateur
Ce menu permet de gérer les comptes d’utilisateurs, et de définir le niveau d’accès.
Création d’un compte utilisateur
Etape 1: Cliquer sur Ajouter et remplir les informations sur la page affichée
Champ
Description
Nom utilisateur
Saisir le nom d’utilisateur à utiliser lors d’une connexion, champ alphanumérique de 16 caractères maximum.
Mot de passe
Saisir le mot de passe de l’utilisateur, 16 caractères alphanumériques maximum.
Confirmation
Confirmer le mot de passe.
Niveau d’utilisateur
Spécifier le niveau de sécurité de l’utilisateur, qui lui permet d’accéder à des fonctions différentes : SUPERVISEUR,
UTILISATEUR AVEC DROIT, NORMAL, INVITE.
Temps de connexion
Spécifier la durée maximum de chaque connexion.
Etape 2: Cliquer ensuite sur Sauvegarder pour valider la création.
Modification ou suppression d’un compte utilisateur existant
Etape 1: Sélectionner dans la liste le compte utilisateur à modifier ou à supprimer.
Etape 2: Cliquer sur Editer ou Supprimer.
Note: Un utilisateur connecté ne peut supprimer son propre compte.
18
3.7.6 Maintenance
Mise à jour du microprogramme
Cette fonction permet de mettre à jour le microprogramme de la camera, pour enrichir ses fonctionnalités.
AVERTISSEMENT: Vous devez mettre à jour le système, fichier par fichier. Après la mise à jour d’un
fichier la caméra redémarre automatiquement. Vous pouvez alors procéder à la mise à jour du
fichier suivant. NE PAS ETEINDRE LA CAMERA ENTRE DEUX FICHIERS
Etape 1: Cliquer sur le bouton
pour localiser et sélectionner un par un les fichiers à mettre à jour.
Etape 2: Cliquer sur Mettre à jour pour effectuer la mise à jour, après la sélection de tous les fichiers.
Note: Le système propose de garder la configuration actuelle. Il est fortement recommandé de garder
les paramètres en répondant Oui, sinon tous les paramètres seront réinitialisés à leur valeur par
défaut.
AVERTISSEMENT: La mise à jour d’un fichier peut prendre plusieurs minutes. NE PAS ETEINDRE LA
CAMERA PENDANT LA MISE A JOUR du microprogramme, cela peut endommager
irrémédiablement la caméra.
Sauvegarde de la Configuration Système
Cette fonction permet de sauvegarder la configuration système dans un fichier system.bin (nom par défaut).
Cela permet de configurer plus facilement une autre camera ou de restaurer la configuration de la caméra
modifiée malencontreusement.
Pour ce faire, choisir “System.bin” comme le fichier de microprogramme et puis cliquer sur le bouton ‘Mettre à
jour’ pour restaurer la configuration sauvegardée.
Redémarrer la caméra
Cliquer sur ce bouton pour redémarrer la caméra.
Télécharger le lecteur
Pour visualiser une séquence de vidéo sur votre PC, ce lecteur propriétaire doit y être installé.
Télécharger ce lecteur de vidéo et l’installer sur votre PC.
19
ANNEXE 1 SPECIFICATIONS DU PRODUIT
AVN801
▓ Réseau
Compression de données
H.264 / MPEG4 / MJPEG
Streaming Vidéo Multiple
(Modes de codage, IPS, Résolution)
3 (H.264, MJPEG, MPEG4)
PORT LAN
OUI
Vitesse LAN
10/100 Based-T Ethernet
Protocoles Supportés
DDNS, PPPoE, DHCP, NTP, SNTP, TCP/IP, ICMP, SMTP, FTP,
HTTP, RTP, RTSP, RTCP,IPv4, Bonjour, UPnP, DNS,UDP,IGMP, QoS
Taux d’image maximum
NTSC:30, PAL:25
Nombre de connexions simultanées
10
Droit utilisateur et mot de passe
Filtrage des adresses IP / MAC
Code de vérification
Sécurité
Internet Explorer sous Windows
EagleEyes sur Smartphone iPhone, iPad et Android.
Interface d’accès
▓ Caméra
Capteur d’Image
Capteur Sony H.R 1/4"
Résolution Vidéo
SXGA, HD720P, VGA, QVGA
Luminosité Minimum
0.1 Lux / F1.5
Temps d’exposition
1/2 to 1/10,000 sec.
Ratio S/N (Signal / Bruit)
More than 48dB (AGC off)
Objectif
f3.8mm / F1.5
Angle de vue
62.7°(Diagonal)
Balance de blanc
ATW
AGC
Auto
Mode IRIS
AES
Capteur PIR (Détecteur de présence
humaine)
Grand angle de 76°, Longue distance de 6m, Hauteur 2m (à moins de 30°C)
Extension E/S Alarme
OUI
Microphone
OUI
Alimentation (±10%)
5V / 1A
Température de travail
0℃~40℃
▓ Autres
Surveillance Mobile
iPad, iPhone & Android
Mémoire
Intégrée (10MB)
RTC (Horloge temps réel)
OUI
Détection Mouvement
OUI
PTZ (Pan / Tilt / Zoom) numérique
OUI
Push Video / FTP / Email
Notification Evénement
Navigateur requis
‧Pentium 4 CPU 1.3 GHz ou supérieur, ou équivalent AMD
‧256 MB RAM
‧Carte graphique AGP, Direct Draw, 32MB RAM
‧Windows 7, Vista & XP, DirectX 9.0 ou supérieur
‧Internet Explorer 7.x ou supérieur
** Les spécifications sont susceptibles de faire l’objet d’une révision, sans préavis.
20
ANNEXE 2 TABLEAU DE BANDE PASSANTE informatif
Les tableaux ci-après sont donnés à titre informatif.
La bande passante donnée ci-après peut varier en fonction de la résolution, la qualité et le taux d’image que vous
aurez choisis, et aussi de la complexité de la zone de surveillance et la fréquence de passage dans cette zone.
Environnement de test
Lieu: entrée du bureau
Flux vidéo: H.264
Type de caméra: Caméra Megapixel
Statique: personne n’entre ni sort
Dynamique: une ou deux personnes entrent et
sortent
Résolution
Qualité
Taux d’images
Dynamique
kbps
Statique
kbps
SXGA
MEILLEUR
FULL
3253
3216
SUPERIEUR
2375
2160
NORMAL
1571
1266
BASIC
1465
873
MEILLEUR
2010
1261
SUPERIEUR
1042
1034
NORMAL
685
572
BASIC
457
350
MEILLEUR
646
366
SUPERIEUR
482
350
NORMAL
302
286
BASIC
168
161
1163
1076
SUPERIEUR
989
715
NORMAL
855
534
BASIC
719
443
MEILLEUR
789
571
SUPERIEUR
451
447
NORMAL
349
237
BASIC
217
165
MEILLEUR
269
147
SUPERIEUR
182
131
NORMAL
164
113
BASIC
97
71
VGA
QVGA
SXGA
VGA
QVGA
MEILLEUR
1/4
21
Résolution
Qualité
Taux d’images
Dynamique
kbps
Statique
kbps
SXGA
MEILLEUR
1/15
581
374
SUPERIEUR
405
342
NORMAL
487
248
BASIC
337
141
MEILLEUR
358
79
SUPERIEUR
201
63
NORMAL
180
28
BASIC
92
15
MEILLEUR
111
84
SUPERIEUR
99
68
NORMAL
97
54
BASIC
58
42
VGA
QVGA
22
ANNEXE 3 QUESTIONS & REPONSES
Pour plus de détails concernant EagleEyes, veuillez consulter notre site officiel:
www.eagleeyescctv.com/supp_QnA.aspx.
Question
J’arrive à me connecter à la caméra
avec un Smartphone ou un PC
connecté au même routeur, mais je
n’arrive pas à me connecter via le
réseau 3G, ou avec un autre PC
pourtant connecté à Internet.
Pourquoi ?
La vidéo n’est pas fluide, pourquoi?
Qu’est ce “Push Video”?
Le périmètre de travail du détecteur
de présence humaine semble assez
limité et la sensibilité de détection
reste à désirer. Comment faire?
Réponse
La configuration réseau n’a pas été effectuée complètement. Veuillez
consulter le chapitre 1.3.2 Configurer l’accès par Internet du
manuel CONFIGURATION RESEAU AVANCEE et, en cas de besoin, procéder à
la redirection manuelle de port (cf. ANNEXE 5)
Vérifiez également l’adresse de la passerelle, qui doit être identique à
celle du routeur.
La fluidité de la vidéo dépend de beaucoup de facteurs, parmi lesquels
la bande passante remontante de votre réseau local, l’efficacité du
routeur, la bande passante descendante du réseau à distance, la
complexité du lieu de surveillance etc.
Nous vous recommandons d’ajuster la résolution, la qualité d’images,
afin d’obtenir une fluidité de vidéo satisfaisante, par exemple choisir la
résolution VGA, au lieu de SXGA qui nécessité plus de bande
passante.
“Push Video” est un système de notification active, différent de celui
utilisé pour la notification traditionnelle par Email ou FTP.
En effet, le détecteur de présence humaine peut être influencé par la
température ambiante et il devient moins précis au-delà de 30°C. Pour
ceux qui désirent plus de précision, la solution est de connecter la
caméra à un détecteur externe.
Des informations utiles pour la connexion d’un dispositif externe
peuvent être trouvées sur le site
www.eagleeyescctv.com/supp_QnA.aspx.
23