1
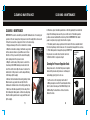
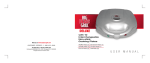
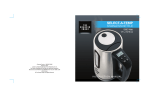
STAINLESS STEEL
PRESSURE COOKER
BIG BOSS™ PRESSURE COOKER OVEN ITEM#: 0000
Distributed By EMSON® NY, NY, 10001 ©Copyright 2011 EMSON®
All Rights Reserved. Printed In China.
INSTRUCTION
MANUAL
CONTENTS
IMPORTANT SAFEGUARDS................................................................ 3
UNPACKING - PACKAGE CONTENTS.................................................. 6
PARTS AND FEATURES...................................................................... 7
USAGE - PRESSURE SETTING .......................................................... 9
USAGE - STEAM SETTING ................................................................ 11
USAGE - BROWN SETTING ...............................................................13
USAGE - WARM SETTING ................................................................ 14
USAGE - SLOW COOK ...................................................................... 15
USAGE - DELAY TIME ...................................................................... 17
CLEANING-MAINTENANCE .............................................................. 19
SUGGESTED COOKING TIMES ......................................................... 21
HELPFUL TIPS ................................................................................. 22
TROUBLESHOOTING ........................................................................ 23
2
IMPORTANT SAFEGUARDS
Before using the electrical appliance, basic precautions should always be followed,
including safeguards below:
1. Read all instructions.
2. Keep pressure cooker out of reach of children.
3. Before use, check that the voltage of wall outlet corresponds to the one shown on the
rating plate.
4. Do not operate any appliance with a damaged cord or plug or after the appliance
malfunctions, or is dropped or damaged in any manner. Return appliance to the nearest
authorized service facility for examination, repair or electrical or mechanical adjustment.
5. If the supply cord is damaged it must be replaced by the manufacturer or an authorized
service agent or a qualified technician in order to avoid a hazard.
6. NEVER deep fry or pressure fry in the pressure cooker. It is very dangerous and may
cause a fire, serious burns and/or damage.
7. Keep hands and face away from pressure regulator knob when releasing pressure.
8. After completing cooking, use extreme caution when removing the lid. Burns can
result from steam inside the unit.
9. Never use without the removable cooking pot inside the pressure cooker.
10. Never cover the appliance while in operation. Keep the pressure valves clear.
11. Do not fill the pressure cooker more than 1/2 full with food or 2/3 full with liquid. When
cooking foods that tend to expand during cooking, do not fill the cooker over 1/2 full.
12. Unplug from outlet when not in use, before putting on or taking off parts, and before
cleaning.
3
IMPORTANT SAFEGUARDS
13. Do not cook foods like oatmeal, pearl barley, other cereals, cranberries, applesauce,
rhubarb, split peas, noodles and pasta - as these foods tend to froth and foam, blocking
the floating valve.
13. Do not let cord hang over edge of table or hot surface.
14. Do not immerse plug, cord or housing into water due to the risk of electric shock.
15. Close supervision is necessary when your appliance is being used near children.
16. This appliance is not intended for use by persons (including children) with reduced
physical, sensory or mental capabilities, or lack of experience and knowledge, unless
they have been given supervision or instruction concerning use of the appliance by a
person responsible for their safety. Children should be supervised to ensure that they
do not play with the appliance.
17. Do not touch hot surfaces. Use knobs or handles.
18. Do not place near hot gas or electric burner.
19. Keep away from flammable material such as curtains, draperies and such during
operation.
20. The use of accessories not recommended by the manufacturer may cause injuries to
persons.
21. Do not operate the appliance for other than its intended use.
22. Do not use outdoors.
23. To avoid the risk of electric shock, cook in the removable cooking pot ONLY.
24. Extreme caution should be used when moving any appliance containing hot food
or liquid.
4
IMPORTANT SAFEGUARDS
25. Servicing and repair should only be conducted by a qualified technician.
CAUTION: Perishable foods like meat, poultry, fish, shellfish and dairy products cannot
be left at room temperature for more than 2 hours. When cooking the above mentioned
foods, do not use the delay time function for more than 1 to 2 hours.
POLARIZED PLUG
This appliance has a polarized plug (one blade is wider than the other). To reduce the
risk of electric shock, this plug will fit in a polarized outlet only one way. If the plug
does not fit fully into the outlet, reverse the plug. If it still does not fit, contact a qualified
electrician. Do not attempt to modify the plug in any way.
SAVE THESE INSTRUCTIONS
FOR HOUSEHOLD USE ONLY
PACKAGE CONTENTS:
MIXING SPOON
MEASURING CUP
MAIN COOKER WITH LID
REMOVABLE COOKING POT
5
UNPACKING - PACKAGE CONTENTS
UNPACKING / BEFORE FIRST USE
1. Before using the unit for the first time, wipe the outside of the unit with a clean damp
cloth to remove any dust from shipping. Dry it thoroughly. Do not immerse the housing
in water or any other liquid.
2. Wash all of the removable parts in warm soapy water. Rinse and dry.
3. The pressure cooker is NOT dishwasher safe.
4. Check to make sure that the rubber gasket is positioned properly inside the lid.
To do that fill the removable cooking pot with water, about 2/3.
5. Place the lid on the pressure cooker and turn it counter-clockwise until it locks in
place. You will hear the locking pin click into place.
6. Turn the pressure regulator knob located on the lid of the appliance to PRESSURE.
7. Next, press the HIGH button on the control panel, located on the front of the appliance.
The digital display will show 00:01 for 1 minute of cooking time.
8. Keep pressing the button until you reach 15 minutes. You can also press and
hold the button.
9. When the time is set, press the START/STOP button to start the cooking process.
10. When done, the unit will beep. Press the START/STOP button to turn the unit off.
Turn the pressure regulator knob to STEAM in short bursts to release the pressure.
The floating valve will drop.
BE CAREFUL AS HOT STEAM AND SMALL DROPLETS OF WATER WILL BE EJECTED.
11. Let the pressure cooker cool down to about room temperature. Empty and clean.
6
PARTS AND FEATURES
PARTS AND FEATURES
4
1
2
5
3
3
6
4
7
11
9
Mixing
Spoon
10
8
Measuring
Cup
11
7
1. Pressure Regulator Knob-pressure/steam settings, removable for cleaning.
2. Self Locking Lid-prevents from opening until all the pressure is gone.
3. Floating Valve-indicates presence of pressure, keeping the lid in locked position.
4. Pressure Safety Valve-allows excess pressure to escape if too much pressure inside.
5. Rubber Gasket-creates a super tight seal for proper pressure cooker operation.
6. Anti-Blocking Case-take off for cleaning.
7. Removable Cooking Pot-non-stick pot where food is cooked.
8. Main Housing-contains stationary pot with temperature sensor and control panel.
9. Condensation Reservoir-collects excess condensation while the unit is in use.
10. Temperature Sensor-detects right temperature for cooking
11. Control Panel-includes functions like: High and Low (for pressure cooking), Warm,
Brown, Steam, Slow Cook, Delay Time.
LCD DISPLAY-displays the elapsed cooking time.
HIGH/LOW (for pressure cooking)-cooks food on 2 settings under pressure in a short
amount of time.
BROWN-browns the food prior to cooking it on the Pressure Setting to enhance the flavor.
WARM-keeps cooked food warm for a long period of time as well as to reheat food.
SLOW COOK-cooks foods over a long period of time.
STEAM-quickly brings liquids to a boil for steaming food or cooking rice.
DELAY TIME-allows to begin cooking foods up to 24 hours later.
START/STOP-allows to stop and start the cooking process.
8
USAGE-PRESSURE SETTING
USAGE - Pressure Setting
NOTE: Always check to make sure that the rubber gasket and the pressure regulator
valve are clean and positioned properly before EACH use. Refer to p.19 for all steps.
1. Plug the pressure cooker into the wall outlet.
2. Place the removable cooking pot inside the pressure cooker. Then place food inside
it. Always use 1 cup (8 oz) of liquid when cooking on this setting.
3. See Diagram on right. Place the lid on the pressure cooker
and turn it counter-clockwise until it locks in place. You will
hear the locking pin click into place.
4. Turn the pressure regulator knob located on the lid of the
TO
appliance to PRESSURE.
LOCK
5. Next, select the desired cooking mode by pressing on the
HIGH or LOW button on the control panel, located on the front of the appliance. The light
on the selected button will flash and the digital display will show 00:01 for 1 minute of
cooking time.
6. Keep pressing the button until you reach the desired time. You can also press and
hold the button.
7. When the time is set, press the START/STOP button to start the cooking process. The
indicator light will stop flashing. To cancel or reset, press the START/STOP button again.
8. If you forget to set the desired cooking time or do not press the START/STOP button,
the digital display will go back to a default display of 00:00 after 30 seconds.
9
USAGE-PRESSURE SETTING
9. The digital display will enter a waiting mode (the first 2 digits of the display will move).
The display will continue to show the entered cooking time until the right amount of
pressure is reached, depending on the amount of food and liquid used. It will not count
down right away.
10. When the pressure is reached, the Floating Valve will rise and the cooker will begin
counting down the minutes.
11. Once the cooking time has elapsed, you will hear a series of periodical beeps.
The pressure cooker will automatically enter a WARM function.
12. The beeping will continue until the Floating Valve drops and unit no longer detects
any pressure. To manually drop the valve, perform the Quick Pressure Release by
turning the Pressure Regulator knob towards steam in short bursts until the all of the
pressure is released.
CAUTION: WHEN MANUALLY RELEASING PRESSURE BY TURNING THE PRESSURE REGULATOR KNOB, HOT
STEAM AND DROPLETS OF WATER WILL BE EJECTED. QUICK PRESSURE RELEASE SHOULD NOT BE
PERFORMED WHEN PRESSURE COOKING STEWS, SOUPS, OR ANY OTHER RECIPE THAT INVOLVES LARGE
AMOUNTS OF LIQUID, AS IT WILL EJECT FROM THE PRESSURE RELEASE KNOB, RESULTING IN SERIOUS
INJURY.
13. You may also turn the unit off by pressing the START/STOP button, the beeping will
stop. You have to wait until all of the pressure is released (the Floating Valve will
drop) or perform the Quick Release as described above in #12.
14. Once all of the pressure is released, unlock and carefully lift the lid. Use caution
when removing the lid. Keep your face away from the cooker as steam will escape
as soon as the lid is opened.
10
USAGE-STEAM SETTING
USAGE - Steam Setting
This function allows you to quickly bring liquids to a boil for steaming food or cooking rice.
1. Plug the pressure cooker into the wall outlet.
2. Place the removable cooking pot inside the pressure cooker. Place a small,
heat-resistant rack or basket (not included) inside the cooker. Add at least 1 cup (8 oz)
of water, so the bottom of the rack or basket is above the water level.
3. Add the food on top of the rack or in basket. Do not fill the pot more then 2/3 full.
NOTE: When steaming rice, place it inside the bowl and then on top of the rack.
4. Place the lid on the pressure cooker and turn it counter-clockwise until it locks in
place. You will hear the locking pin click into place.
5. Turn the pressure regulator knob located on the lid of the appliance to STEAM.
6. Press the STEAM button on the control panel, located on the front of the appliance.
The light on the selected button will flash and the digital display will show 00:01 for
1 minute of cooking time.
7. Keep pressing the button until you reach the desired time. You can also press and
hold the button.
11
USAGE-STEAM SETTING
8. When the time is set, press the START/STOP button to start the cooking process.
The indicator light will stop flashing. To cancel or reset, press the START/STOP button
again.
9. If you forget to set the desired cooking time or do not press the START/STOP button,
the digital display will go back to a default display of 00:00 after 30 seconds.
10. You may open the lid by turning it clockwise to unlock it to check on the food.
USE CAUTION WHEN REMOVING THE LID. KEEP YOUR FACE AWAY FROM
THE COOKER AS STEAM WILL ESCAPE AS SOON AS THE LID IS OPENED.
SERIOUS BURNS CAN OCCUR.
12
USAGE-BROWN SETTING
USAGE-WARM SETTING
USAGE - Brown Setting
USAGE - Warm Setting
This function allows you to brown the food prior to cooking it on the Pressure Setting
to enhance the flavor.
IMPORTANT: Do not leave the pressure cooker unattended while browning foods.
1. Plug the pressure cooker into the wall outlet.
2. Place the removable cooking pot inside the pressure cooker.
3. Add the appropriate amount of oil as per individual recipe. Do not place the lid on
the pressure cooker.
4. Press the BROWN button. The light on the button will start flashing and the digital
display will show 00:00.
5. Press the START/STOP button to begin. The indicator light will stop flashing.
6. While pre-heating, pat the food dry before placing it inside the removable cooking
pot. BE CAREFUL AS OIL MAY SPLATTER WHILE BROWNING.
7. After approximately 1 minute of pre-heating, add desired food to begin the browning
process. For best results, make sure the oil is hot before adding your meat or poultry.
When browning, do not overfill the removable cooking pot. Brown in batches to keep
the oil at the same temperature.
This function allows you to keep cooked food warm for a long period of time as well as
to reheat food.
1. Plug the pressure cooker into the wall outlet.
2. Place the removable cooking pot inside the pressure cooker. Then place cooked
food in removable cooking pot.
3. Place the lid on the pressure cooker and turn it counter-clockwise until it locks in
place. You will hear the locking pin click into place.
4. Turn the pressure regulator knob located on the lid of the appliance to STEAM.
5. Press the WARM button. The light on the button will start flashing and the digital
display will show 00:00.
6. Press the START/STOP button to begin. The indicator light will stop flashing.
13
14
USAGE-SLOW COOK
USAGE - Slow Cook Setting
This function allows you to cook foods over a long period of time.
1. Plug the pressure cooker into the wall outlet.
2. Place the removable cooking pot inside the pressure cooker. Add the food to be slow
cooked.
3. Place the lid on the pressure cooker and turn it counter-clockwise until it locks in
place. You will hear the locking pin click into place.
4. Turn the pressure regulator knob located on the lid of the appliance to STEAM.
5. Press the SLOW COOK button on the control panel, located on the front of the
appliance. The light on the selected button will flash and the digital display will show
00:30 for 30 minutes of cooking time.
6. Keep pressing the button until you reach the desired time. You can also press and
hold the button. The longest cooking time is 24 hours with a temperature of 180˚F
(Low setting on a regular slow cooker).
7. When the time is set, press the START/STOP button to start the cooking process.
The indicator light will stop flashing. To cancel or reset, press the START/STOP button
again.
8. If you forget to set the desired cooking time or do not press the START/STOP button,
the digital display will go back to a default display of 00:00 after 30 seconds.
15
USAGE-SLOW COOK
9. The cooker will begin counting down the minutes once the 180˚F temperature is
reached. Once the cooking time has elapsed, you will hear a beep.
10. Press the START/STOP button.
16
USAGE-DELAY TIME
USAGE - Delay Time Setting
This function allows you to begin cooking foods up to 24 hours later. You may use the Delay
Time function with Slow Cook, Steam, High and Low Pressure.
CAUTION: Perishable foods like meat, poultry, fish, shellfish and dairy products
cannot be left at room temperature for more than 2 hours. When cooking the
above mentioned foods, do not use the delay time function for more than 1
to 2 hours.
USAGE-DELAY TIME
6. When the time is set, press the START/STOP button to start the cooking process. The
indicator light will stop flashing. To cancel or reset, press the START/STOP button again.
7. The cooker will begin cooking after the set time has elapsed.
IMPORTANT: Do not use the delayed time function when cooking foods that are
perishable and may spoil if left at room temperature.
NOTE: Always check to make sure that the rubber gasket and the pressure regulator
valve are clean and positioned properly before EACH use. Refer to p.19 for all steps.
1. Plug the pressure cooker into the wall outlet.
2. Place the removable cooking pot inside the pressure cooker. Add the food to be
cooked.
3. Place the lid on the pressure cooker and turn it counter-clockwise until it locks in
place. You will hear the locking pin click into place.
4. Press the DELAY TIME button for the delayed time setting.
5. Select the desired cooking mode and time by pressing the cooking mode button until
you reach the appropriate time. Refer to p. 9 for Pressure Setting, p. 11 for Steam
Setting and p. 15 for Slow Cook Setting.
17
18
CLEANING -MAINTENANCE
CLEANING - MAINTENANCE
IMPORTANT: Pressure Cooker and its parts are NOT dishwasher safe. To ensure proper
operation of the unit, always clean the pressure cooker thoroughly after each use and
if it hasn’t been used for a long period of time. Use the below steps.
1. Unplug and always let the unit cool down before cleaning.
2. Wash the removable cooking pot with warm soapy water,
don’t use abrasive cleaners or pads. Make sure to clean
the bottom of the pot as well. Dry the outside thoroughly
before placing back in the pressure cooker.
3. Wipe the outer housing of the pressure cooker with a
clean damp cloth. NEVER submerge in water due to the
risk of the electric shock. Wipe the sensor located on the
inside bottom of the pressure cooker housing with damp
cloth. Always dry thoroughly.
4. Remove the Condensation Container by pulling it down.
Wash in warm soapy water, rinse and dry. Place the
Condensation Container back on the unit by pushing it up.
5. Next, clean the rubber gasket by first removing it from
the lid. Grasp the rubber gasket on either side and pull up.
Clean the rubber gasket in warm soapy water. Rinse and
dry thoroughly.
19
CLEANING -MAINTENANCE
6. When done, place the rubber gasket back on the lid by pushing it down inside the
edge of the lid. Always make sure the groove in the center of the rubber gasket is
positioned around and behind the metal ring of the lid. IMPORTANT: If the rubber
gasket is not placed on properly, the unit will not operate.
7. The rubber gasket is always positioned on the inside of the lid, around and behind
the metal ring. Always check to make sure it’s clean and not damaged before each use.
8. If the rubber gasket is damaged in any way, DO NOT USE
Press and turn
the pressure cooker and contact customer service at
to unlock
1-800-423-4248 for a replacement part.
Cleaning the Pressure Regulator Knob
Always make sure to check that the pressure regulator
knob and the pressure safety valves are not damaged
and working properly prior to each use.
1. Let the unit cool off completely, take the lid off.
2. While pressing down on the Pressure Regulator Knob,
turn it counter-clockwise past the STEAM setting to the
CLEAN setting. You should hear a click as it unlocks.
Remove the knob.
20
CLEANING -MAINTENANCE
3. Turn the lid over and place it on the table. Pull out the
anti-blocking case. See Diagrams on right.
4. Check around the floating valve area for any food
particles, remove with brush. Place the anti-blocking
case back on the lid.
5. Replace the pressure regulator knob by lining the
notches up to the inside wall of the pressure regulator
chamber in the lid and turn clockwise.
STORAGE
Store the pressure cooker with the lid turned upside
down (and resting on the pot) to protect pressure
regulator, valves and knobs located on the top of the lid.
21
FLOATING VALVE
SUGGESTED COOKING TIMES
NOTE: The below cooking times are approximate and depend on the size and/or variety of foods.
Use these cooking times as a reference only. All the cooking times are for HIGH pressure cooking.
Vegetables
ANTI-BLOCKING
CASE
PRESSURE
SAFETY VALVE
Artichokes-whole
Asparagus-whole
Beans-green
Beets-whole peeled
Broccoli spears//florets
Brussel Sprouts-whole
Cabbage-quartered
Carrots-slices
Cauliflower florets
Corn-on the cob
Eggplant
Peas
Potatoes-chunks/slices
Potatoes-whole-small
Potatoes-whole-medium
Rice-brown
Rice-white
Spinach-fresh
Squash-fall-chunks
Squash-summer-sliced
8-10 minutes
1-2 minutes
2-3 minutes
12-15 minutes
2-3 minutes
3-4 minutes
3-4 minutes
1-2 minutes
2-4 minutes
3-5 minutes
2-3 minutes
1-1 1/2 minutes
5-8 minutes
5-8 minutes
10-12 minutes
15-20 minutes
5-7 minutes
2-3 minutes
4-6 minutes
1-2 minutes
Meat/Poultry/Fish
Beef/Pork/Lamb
1-2” cubes
Beef/ Veal roast-brisket
Beef/ Veal shank 1 1/2
Meatballs-browned
Lamb-boneless roast
Pork-loin roast
Pork-smoked butt
Pork-ham shank
15-20 minutes
Chicken-boneless
breast,thigh
Chicken-pieces
Chicken-whole
Turkey breast-whole
8-10 minutes
Fish fillets, steaks 3/4”
Fish fillets, steaks 1”
Fish fillets, steaks 1 1/4”
Fish fillets, steaks 1 1/2”
4 minutes
5 minutes
6 minutes
7 minutes
22
50-60 minutes
25-35 minutes
8-10 minutes
45-55 minutes
40-50 minutes
20-25 minutes
30-40 minutes
10-12 minutes
15-20 minutes
30-40 minutes
HELPFUL TIPS
- When cooking on the PRESSURE setting, for best cooking results always use at least
1 cup (8 oz) of water or liquid so enough steam can build up to produce pressure.
- Do not fill the Pressure Cooker more than 1/2 full with food or 2/3 full with liquid. There
must be enough liquid to create steam, otherwise the food will not be cooked properly.
- If you are not sure of the cooking time for certain foods while cooking on Pressure
Setting, it is recommended to under cook and check the doneness by performing the
Quick Pressure Release method (on p.10). Continue cooking if the food requires more
time.
- When using the High and Low pressure setting, the timer should not begin counting
down until the right amount of pressure has been created.
- Always cook fresh fruit on low pressure.
- You may choose tougher, less expensive cuts of meat to be cooked on pressure setting,
as the meat will break down and get tender.
- When cooking beans, add a tablespoon of oil to reduce foaming during the cooking
process.
23
TROUBLESHOOTING
PROBLEM
SOLUTION
If the steam is leaking from
under the cover, because the
cover is not properly closed,
the gasket isn’t positioned
properly or is damaged, or the
pressure cooker is overfilled.
1. UNPLUG THE POWER CORD FROM THE POWER OUTLET.
2. Turn the pressure regulator knob to STEAM, using short bursts,
until the pressure is fully released.
3. ONLY THEN remove the lid. Check the gasket for any tears or cracks.
4. Check to make sure the gasket is positioned properly
(p.19 steps 5-7)
5. If too full, remove excess liquid and continue cooking.
If you have not added enough
liquid to the pressure cooker,
and the floating valve has not
risen, while the timer is
counting down.
1. Stop the pressure cooking by pressing the STOP/START button.
2. Turn the pressure regulator knob to STEAM, using short bursts,
until the pressure is fully released.
3. ONLY THEN remove the lid and add approx. 1 cup (8 oz) of water
or liquid. Stir to mix all food.
4. Place the lid back on, turn to counter clockwise to lock.
5. Press the LOW or HIGH pressure button and set the desired time.
6. Press the START/STOP button to begin cooking again.
24
TROUBLESHOOTING
PROBLEM
If you can’t open or remove
the cover.
SOLUTION
1. Make sure all of the pressure has been released. Perform the quick
release by turning the pressure regulator knob to STEAM, using short
bursts, until the pressure is fully released.
2. If you still cannot open the lid, bring the contents of the cooker up
to pressure by pressing the LOW or HIGH pressure button and setting
the desired time. Press the START/STOP button.
3. If the cover still won’t come off, call customer service at
1-800-423-4248
25