1
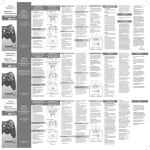
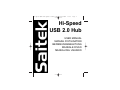
Hi-speed USB Hub update 300903.qxd
12/03/2004
15:45
Page 1
Hi-Speed
USB 2.0 Hub
USER MANUAL
MANUEL D’UTILISATION
BEDIENUNGSANLEITUNG
MANUALE D’USO
MANUAL DEL USUARIO
Hi-speed USB Hub update 300903.qxd
12/03/2004
15:45
Page 2
INTRODUCTION
Thank you for purchasing the Saitek Hi-Speed USB 2.0 Hub. This hub brings the latest
in USB 2.0 technology to your PC or Mac® compatible computer. We hope it gives
many hours of trouble-free use and high-speed data transfer convenience.
FEATURES
•
Adds 4 USB 2.0 Hi-Speed ports to your PC*
•
AC Power Supply included
•
Simple ‘Plug and Play ’Install
•
Compatible with all USB devices
•
Over-current protection (per port) prevents damage to your computer and
peripherals
•
40 times faster connection speeds than USB 1.1 (480 Mbps data rate)
•
LED illumination effects show port status
•
Power-save switch
•
Ideal for use with large digital data files (e.g., digital camera image downloads, etc)
* Note: If your computer does not support Hi-Speed USB 2.0 transfer rates, don’t
worry, the Saitek USB 2.0 Hub will still transfer data at the optimum speed for your
computer.
GETTING STARTED
1
Firstly, plug your hub’s power adapter into the power source, and then plug the
power adapter cable into the power socket on your USB hub and press the hub’s
Power-save Button to turn it on. The On/Off light in the button will illuminate to
show that the unit is receiving power.
2
Plug the Hi-Speed USB 2.0 Cable (the smaller mini-B type end) into the upstream
port of your Hi-Speed USB 2.0 Hub.
Hi-speed USB Hub update 300903.qxd
3
4
12/03/2004
15:45
Page 4
Plug the Hi-Speed USB 2.0 Cable (the larger type A end) into the computer’s HiSpeed USB 2.0 port and you will receive on-screen notification that the hub has
been recognized and installed.
When the installation is complete, you can plug all kinds of USB peripherals into
your new Hi-Speed USB 2.0 Hub.
TROUBLESHOOTING
Q The Power-save Button is not illuminated and the hub and attached peripherals
are not working properly. What is wrong?
A
Make sure that the AC adapter is plugged in properly and that the power cable is
firmly attached to the hub.
USING YOUR HI-SPEED USB 2.0 HUB
Q I have plugged a USB peripheral into a hub port and there is no light illuminated
and the peripheral is not working. What can I do?
Hi-Speed Data Transfer
A
After you have successfully installed the Saitek Hi-Speed USB 2.0 Hub you can use it
to simultaneously attach all manner of USB devices, such as digital cameras,
scanners, PDAs, web cams, printers and mice. To really see and appreciate the
difference in speed from your old 1.1 USB connection why not try transferring some
large digital files from sources such as digital cameras – you’ll be amazed!
TECHNICAL SUPPORT
LED Port Status
Did you know that nearly all the products that are returned to us as faulty are not faulty
at all - they have just not been installed properly?
To indicate that a USB device has been attached to your hub, the corresponding
indicator light will illuminate and glow green to indicate a successful connection. A red
LED state shows an over-current situation, ie, the attached device is malfunctioning.
So, if you experience any difficulty with this product, please visit our website or contact
one of our friendly technical support staff who will be pleased to help you.
All USB peripherals need product drivers to function, so when you first attach the
USB peripheral to your hub, check to see if the computer automatically recognizes
the product and loads the drivers or asks for an install CD.
Can’t get started – don’t worry, we’re here to help you!
To save power when you are not using your USB peripherals, simply press the
Power-save button in the center of your hub and the light will go out - indicating that
the hub has powered down.
Our website www.saitek.com is designed to help you get the best performance from
your Saitek product, and if you still have problems, we also have teams of product
specialists around the world you can call for advice and support. Contact details are
provided on the Technical Support Center list provided with this product. Saitek is
dedicated to helping you enjoy your purchase – please call us if you have any
difficulties or worries.
Adding more USB Hubs
The Saitek Website
If you want to add more USB peripherals to your computer, you can add more USB
hubs to the Saitek Hi-Speed USB 2.0 Hub’s ports.
If you have access to an Internet connection, many of your technical queries may be
answered with a simple visit to the Saitek Website at:
Power-save Switch
www.saitek.com
Hi-speed USB Hub update 300903.qxd
12/03/2004
15:45
Page 6
The technical support area will provide you with all the information you need to get the
most out of your product and solve any problems you might have.
Federal laws, rules and/or obligations shall not be enforceable in that particular
territory and Saitek will adhere to those laws, rules, and/or obligations.
5
When returning the product for repair, please pack it very carefully, preferably
using the original packaging materials. Please also include an explanatory note.
If you do not have access to the Internet, or if the website cannot answer your
question, you will need to contact your local Saitek Technical Support Team.
6
IMPORTANT: To save yourself unnecessary cost and inconvenience, please check
carefully that you have read and followed the instructions in this manual.
At Saitek, we aim to offer comprehensive and thorough technical support to all of our
users. So, before you call, make sure you have all the relevant details at hand.
7
This warranty is in Lieu of all other expressed warranties, obligations or liabilities.
ANY IMPLIED WARRANTIES, OBLIGATIONS, OR LIABILITIES, INCLUDING BUT
NOT LIMITED TO THE IMPLIED WARRANTIES OF MERCHANTABILITY AND
FITNESS FOR A PARTICULAR PURPOSE, SHALL BE LIMITED IN DURATION
TO THE DURATION OF THIS WRITTEN LIMITED WARRANTY. Some states do
not allow limitations on how long an implied warranty lasts, so the above limitations
may not apply to you. IN NO EVENT SHALL WE BE LIABLE FOR ANY SPECIAL
OR CONSEQUENTIAL DAMAGES FOR BREACH OF THIS OR ANY OTHER
WARRANTY, EXPRESS OR IMPLIED, WHATSOEVER Some states do not allow
the exclusion or limitation of special, incidental or consequential damages, so the
above limitation may not apply to you. This warranty gives you specific legal rights,
and you may also have other rights which vary from state to state.
Contacting Saitek
To contact your local Saitek Technical Support Center, please look up the relevant
contact details on the separate Technical Support Center sheet that came packaged
with this product.
Conditions of Warranty
1
Warranty period is 2 years from date of purchase with proof of purchase
submitted.
2
Operating instructions must be followed.
3
Product must not have been damaged as a result of defacement, misuse, abuse,
neglect, accident, destruction or alteration of the serial number, improper electrical
voltages or currents, repair, alteration or maintenance by any person or party other
than our own service facility or an authorized service center, use or installation of
non-Saitek replacement parts in the product or the modification of this product in
any way, or the incorporation of this product into any other products, or damage to
the product caused by accident, fire, floods, lightning, or acts of God, or any use
violative of instructions furnished by Saitek plc.
4
Obligations of Saitek shall be limited to repair or replacement with the same or
similar unit, at our option. To obtain repairs under this warranty, present the
product and proof of purchase (e.g. bill or invoice) to the authorized Saitek
Technical Support Center (listed on the separate sheet packaged with this product)
transportation charges prepaid. Any requirements that conflict with any state or
FCC Compliance and Advisory Statement
Warning: Changes or modifications to this unit not expressly approved by the party
responsible for compliance could void the user’s authority to operate the equipment.
This device complies with Part 15 of the FCC Rules. Operation is subject to the
following two conditions:
1 This device may not cause harmful interference, and
2 This device must accept any interference received, including interference that may
cause undesired operation
NOTE: This equipment has been tested and found to comply with the limits for a Class
B digital device, pursuant to Part 15 of the FCC Rules. These limits are designed to
provide reasonable protection against harmful interference in a residential installation.
This equipment generates, uses and can radiate radio frequency energy and, if not
Hi-speed USB Hub update 300903.qxd
12/03/2004
15:45
Page 8
installed and used in accordance with the instructions, may cause harmful interference
to radio communications. However, there is no guarantee that interference will not
occur in a particular installation. If this equipment does cause harmful interference to
radio or television reception, which can be determined by turning the equipment off
and on, the user is encouraged to try to correct the interference by one or more of the
following measures:
• Reorient or relocate the receiving antenna
• Increase the separation between the equipment and receiver
• Connect the equipment into an outlet on a circuit different from that to which the
receiver is connected
• Consult the dealer or an experienced radio/TV technician for help
Saitek Industries, 2295 Jefferson Street, Torrance, CA 90501, USA
INTRODUCTION
Félicitations pour l’achat du hub Saitek Hi-Speed USB 2.0. Ce hub vous apporte la
dernière technologie USB 2.0 pour PC ou Mac®. Profitez d’une utilisation simple et
d’une transmission de données supérieures !
CARACTERISTIQUES
•
4 ports USB 2.0 Hi-Speed supplémentaires*
•
Adaptateur AC/DC
•
Installation automatique via simple Plug & Play
•
Compatible avec toutes sortes de périphériques USB
•
Protection contre surtension (par port) pour éviter des défauts sur les ordinateurs
ou les périphériques
•
40 times plus vite que USB 1.1 (480 Mbps)
•
Effets d’illumination montrent l’utilisation
•
Système pour économiser de l’énergie
•
Idéal pour l’utilisation avec des grands fichiers (ex., téléchargement des images)
* Note: Si votre ordinateur ne transmet pas en Hi-Speed USB 2.0, votre hub Saitek
USB 2.0 Hub fonctionne quand même avec la vitesse optimale déterminée par votre
ordinateur.
COMMENCER
1
D’abord, branchez l’adaptateur AC/DC sur une prise. Puis, connectez-le avec le
hub et appuyez la touche au milieu du hub pour l’allumer. La lampe ON/OFF
s’allume pour montrer que l’appareil est activé.
2
Branchez le câble Hi-Speed USB 2.0 sur le port Upstream de votre hub.
3
Branchez l’autre connectique du même câble sur un port USB de votre ordinateur.
L’installation s’effectue automatiquement et vous recevez un message indiquant
que le hub est installé.
Hi-speed USB Hub update 300903.qxd
4
12/03/2004
15:45
Page 10
Lorsque l’installation est terminée, vous pouvez connecter des périphériques USB
sur les ports USB de votre hub
Hi-Speed.
UTILISER VOTRE HUB HI-SPEED USB 2.0
Transmission en Hi-Speed
Après avoir installé votre hub Saitek Hi-Speed USB 2.0 vous pouvez brancher toutes
sortes de périphériques comme par example des appareils photo numériques, des
scanners, des PDAs, des imprimantes, des souris etc. Pour vraiment noter l’avantage
en vitesse de USB 2.0, nous vous recommandons de transférer des images digitales –
vous serez étonné!
QUESTIONS ET REPONSES
Q La touche ON/OFF ne s’allume pas et le hub n’est pas activé. Qu’est-ce qu’il faut
faire?
A
Assurez-vous que l’adaptateur est bien branché et connecté.
Q J’ai branché un appareil USB sur un port du hub mais il marche pas. Quel est le
problème?
A
Tous les appareils USB nécessite un pilote pour fonctionner. Lorsque vous
branchez un appareil sur un port du hub, regardez-bien si votre ordinateur
commence avec l’installation automatique ou s’il affiche un message indiquant un
problème d’installation.
ASSISTANCE TECHNIQUE
Indication avec diodes LED
Pour indiquer qu’un appareil USB était branché sur votre hub, la lampe du port actif
reste allumée. Si une lampe rouge s’allume, l’appareil branché a un défaut et
fonctionne mal.
Economiser de l’énergie
Pour économiser de l’énergie, appuyez simplement sur la touche ON/OFF au milieu
du hub. La lampe s’éteint pour montrer que le hub n’est plus activé.
Ajouter plus de hubs USB
Si vous voulez connecter plusieurs hubs USB, branchez-les simplement sur les ports
du hub Saitek Hi-Speed USB 2.0.
Ça ne marche pas… Pas de panique, nous sommes là pour vous aider !
Si vous avez un problème technique avec ce produit, veuillez donc visiter notre site
Internet ou contacter une personne de notre équipe technique : nous serons ravis de
vous aider.
Notre site Internet www.saitek.com est conçu pour vous aider à apprécier votre
produit Saitek aux meilleures de ses performances. Si malgré cela, vous n’arrivez pas
à résoudre votre problème, nos équipes de spécialistes dans le monde sont à votre
disposition pour vous conseiller et vous aider. Les numéros de contact figurent dans la
liste des Centres d’assistance fournie avec ce produit : n’hésitez pas à nous appeler
pour toute question ou tout problème.
Le site Saitek
Si vous avez accès à Internet, vous pourrez probablement trouver la réponse à vos
questions techniques en visitant notre site web à l’adresse suivante :
www.saitek.com
Hi-speed USB Hub update 300903.qxd
12/03/2004
15:45
Page 12
La section “Assistance technique” vous fournira toutes les informations nécessaires
pour profiter au maximum de votre produit. Elle vous permettra de résoudre tout
problème technique que vous pourriez avoir et de télécharger les profils de jeux les
plus récents.
Contacter Saitek
Si vous n’avez pas accès à Internet, ou si vous ne trouvez pas la réponse à votre
question sur notre site, vous pourrez alors contacter une équipe locale d’assistance
technique.
Saitek s’efforce de fournir à tous ses clients un service et un support technique
complet. Pour cette raison, avant de nous contacter, veuillez vous assurer que vous
disposez de tous les détails.
Pour contacter votre équipe locale d’assistance technique, veuillez consulter la fiche
des Centres d’assistance technique fournie avec votre produit.
EINLEITUNG
Herzlichen Glückwunsch zum Kauf des Saitek Hi-Speed USB 2.0 Hub. Dieser Hub
bietet Ihnen modernste USB 2.0 Technologie – die perfekte Erweiterung für Ihren PC
oder Mac®. Wir wünschen Ihnen mit dem Hub viele Stunden problemloses Arbeiten
kombiniert mit den Vorteilen und dem Komfort der 2.0 High-Speed Datenübertragung.
FEATURES
•
Erweitert Ihren PC um 4 USB 2.0 Hi-Speed Ports*
•
Externer Netzadapter
•
Einfache ‘Plug & Play’ Installation
•
Kompatibel mit allen USB Geräten
•
Überspannungsschutz auf jedem Port verhindert Schäden an Ihrem Computer und
Peripheriegeräten
•
40mal schneller als eine Verbindung via USB 1.1 (480 Mbps)
•
LED-Leuchteffekte zeigen den Status von jedem Port an
•
Energie-Spar-Funktion
•
Ideal für die Nutzung von großen, digitalen Datenmengen (z.B. Bilderdownload
von einer Digitalkamera)
* Bitte beachten Sie: Unterstützt Ihr Computer keine Hi-Speed USB 2.0 Transferrate,
funktioniert der Saitek USB 2.0 Hub dennoch, mit der durch den PC vorgegebenen
optimalen Transferrate.
ANSCHLIESSEN DES HUBS
1
Bitte stecken Sie zuerst das mitgelieferte Netzteil des Hubs in eine Steckdose und
anschliessend das Stromkabel in den Stromanschluss des USB Hubs. Drücken
Sie dann den Knopf in der Mitte des Gerätes, um ihn anzuschalten. Das Ein/Aus
Licht im Knopf wird sich einschalten und somit die Stromversorgung des Gerätes
anzeigen.
Hi-speed USB Hub update 300903.qxd
12/03/2004
15:45
Page 14
2
Stecken Sie das Hi-Speed USB 2.0 Kabel mit dem kleineren Stecker in den
Anschluss ihres Hi-Speed USB 2.0 Hubs.
3
Schliessen Sie nun das Hi-Speed USB 2.0 Kabel mit dem größeren, flacheren
Stecker an dem USB Port Ihres Computers an. Auf dem Bildschirm erhalten Sie
eine Nachricht, dass der Hub erkannt und installiert wurde.
4
Wenn die Installation vollständig ist, können Sie nun alle Arten von USB
Peripheriegeräten an Ihren neuen Hi-Speed USB 2.0 Hub anschliessen.
NUTZUNG IHRES HI-SPEED USB 2.0 HUB
Hi-Speed Datenübertragung
Nach der erfolgreichen Installation des Saitek Hi-Speed USB 2.0 Hub können Sie
gleichzeitig alle Arten von USB Geräten anschliessen, wie z-B. Digitalkameras,
Scanner, PDAs, Webcams, Drucker und Mäuse. Um den Unterschied zu Ihrer alten
USB 1.1 Verbindung zu sehen und zu schätzen, übertragen Sie doch einfach ein paar
große Dateien von Datenquellen wie z.B. Digitalkameras – Sie werden erstaunt sein!
LED Port Status
Wenn ein USB Gerät korrekt an Ihren Hub angeschlossen wurde, wird das
entsprechende Indikator-Licht angehen und grün leuchten, um eine erfolgreiche
Verbindung anzuzeigen. Eine rot leuchtende LED zeigt Überstrom an, wenn z.B. ein
angeschlossenes Gerät gestört ist.
Energiespar-Schalter
Um Energie zu sparen, drücken Sie einfach den On/Off-Knopf in der Mitte ihres Hubs,
um ihn auszuschalten. Das Licht geht aus, der Hub bleibt inaktiv.
Weitere USB Hubs dazufügen
Wenn Sie noch weitere USB Geräte mit ihrem Computer verbinden möchten, können
sie mehrere USB Hubs an den Saitek Hi-Speed USB 2.0 Hub anschliessen.
FEHLERBESEITUNGUNG
Q Der Knopf in der Mitte leuchtet nicht und der Hub sowie angeschlossene Geräte
funktionieren nicht.
A
Bitte stellen Sie sicher, dass das Netzteil richtig eingesteckt wurde und dass das
Kabel fest an den Hub angeschlossen sind.
Q Ich habe ein USB Peripheriegerät an einen Hubport angesteckt aber es leuchtet
kein Licht und das Peripheriegerät funktioniert auch nicht. Was kann ich tun?
A
Alle USB Peripheriegerät benötigen Treiber, um zu funktionieren. Wenn Sie also
Ihr Peripheriegerät zum ersten Mal in den Hub einstecken, überprüfen Sie, ob Ihr
Computer dieses Produkt automatisch erkennt und selber Treiber lädt, oder ob er
nach einer Installations-CD fragt.
TECHNISCHER SUPPORT
Probleme – keine Angst, wir lassen Sie nicht im Stich!
Wussten Sie, dass fast alle Produkte, die als fehlerhaft an uns zurückgeschickt
werden, überhaupt nicht defekt sind? Sie wurden einfach nicht richtig installiert!
Sollten Sie Probleme mit diesem Produkt haben, besuchen Sie doch bitte unsere
Website oder wenden Sie sich an einen unserer Mitarbeiter im Bereich Technischer
Support. Wir helfen Ihnen gerne.
Unsere Website, www.saitek.de, wurde erstellt, damit Sie von Ihrem Saitek-Produkt
die bestmögliche Leistung erhalten. Sollten Sie trotzdem noch Probleme haben, dann
stehen Ihnen unsere Produktspezialisten in aller Welt zur Verfügung, die Sie
telefonisch um Rat und Hilfe bitten können. Rufnummern und Adressen finden Sie auf
Hi-speed USB Hub update 300903.qxd
12/03/2004
15:45
Page 16
der mit dem Produkt gelieferten Liste der Zentren für Technischen Support. Wir
möchten, dass Sie viel Freude an Ihrem Gerät haben, bitte rufen Sie uns an, falls Sie
Probleme oder Fragen haben.
INTRODUZIONE
Die Saitek-Website
Grazie per aver acquistato il Saitek Hi-Speed USB 2.0 Hub. Questo hub fornisce la più
recente tecnologia USB 2.0 al vostro PC o computer Mac® compatibile. Siamo certi vi
darà molte ore di utilizzo senza problemi e vi consentirà il trasferimento dei dati ad alta
velocità.
Wenn Sie Zugang zum Internet haben, lassen sich viele technische Fragen oft schon
durch einen Besuch auf der Saitek-Website beantworten.
FUNZIONALITÀ
www.saitek.de
•
Aggiunge 4 porte USB 2.0 Hi-Speed al PC*
Unter der Überschrift Technischer Support finden Sie jede Menge Tipps und
Informationen, um das Beste aus Ihrem Produkt zu holen und mögliche Probleme zu
lösen, sowie die neuesten Spielkonfigurationen.
•
Alimentazione CA inclusa
•
Semplice installazione plug-and-play
•
Compatibile con tutti i dispositivi USB
Wenn Sie sich an Saitek wenden müssen
•
Wenn Sie keinen Zugang zum Internet haben oder wenn die Website Ihre Fragen
nicht beantworten kann, dann können Sie sich an das Saitek-Team für Technischen
Support wenden.
La protezione da sovracorrente (per porta) previene i danni al computer e alle
periferiche
•
Velocità di collegamento 40 volte più veloci di USB 1.1 (velocità dati 480 Mbps)
•
Gli effetti di illuminazione a LED indicano lo stato della porta
Von Saitek erhalten Sie im Falle von technischen Problemen kompetente
Unterstützung. Vergewissern Sie sich bitte vor dem Anruf in unserem Call Center, dass
Sie alle relevanten Informationen zur Hand haben.
•
Interruttore di risparmio energetico
•
Ideale per l’uso con file di dati digitali di grandi dimensioni (es. download di
immagini di fotocamere digitali, ecc.)
Sie finden Angaben über Ihr örtliches Saitek-Zentrum für Technischen Support auf
dem Informationsblatt zum Technischen Support, das mit Ihrem Produkt geliefert
wurde.
* NB: se il computer non supporta le velocità di trasferimento Hi-Speed USB 2.0, ciò
non costituisce un problema, perché il Saitek USB 2.0 Hub è sempre in grado di
trasferire i dati alla velocità ottimale per il vostro computer.
ISTRUZIONI INIZIALI
1
Prima di tutto, inserire la spina dell’adattatore di alimentazione dell’hub nella fonte
di alimentazione, e poi inserire la spina del cavo dell’adattatore di alimentazione
nella presa di corrente sull’hub USB e premere il Center Gem/Button dell’hub per
accenderlo. La luce On/Off nel pulsante si accende per indicare che l’unità è
alimentata.
Hi-speed USB Hub update 300903.qxd
12/03/2004
15:45
Page 18
2
Inserire il cavo Hi-Speed USB 2.0 (il lato tipo mini-B più piccolo) nella porta a
monte dell’Hi-Speed USB 2.0 Hub.
3
Inserire il cavo Hi-Speed USB 2.0 (il lato tipo A più grande) nella porta Hi-Speed
USB 2.0 del computer. Viene visualizzata sullo schermo la notifica che l’hub è
stato riconosciuto e installato.
4
Quando l’installazione è completa, è possibile inserire la spina di periferiche USB
di tutti i tipi nel nuovo Hi-Speed USB 2.0 Hub.
USO DELL’HI-SPEED USB 2.0 HUB
Trasferimento di dati ad alta velocità
Dopo aver installato il Saitek Hi-Speed USB 2.0 Hub è possibile utilizzarlo per
collegare simultaneamente tutti i tipi di dispositivo USB, come fotocamere digitali,
scanner, PDA, web cam, stampanti e mouse. Per vedere e apprezzare effettivamente
la differenza nella velocità dal vecchio collegamento 1.1 USB, perché non provate a
trasferire file digitali di grandi dimensioni da fonti come le fotocamere digitali – sarete
strabiliati!
Stato porta LED
Per indicare che un dispositivo USB è stato collegato all’hub, la spia corrispondente si
accende (verde) per indicare il collegamento riuscito. Un LED rosso indica la presenza
di sovracorrente, cioè che il dispositivo collegato non funziona correttamente.
Interruttore di risparmio energetico
Per risparmiare energia quando non si utilizzano le periferiche USB, premere il tasto
On/Off nel centro dell’hub e la luce si spegne, per indicare lo spegnimento avvenuto
dell’hub.
Aggiunta di altri hub USB
Per aggiungere, se necessario, altre periferiche USB al computer, è possibile
aggiungere altri hub USB alle porte del Saitek Hi-Speed USB 2.0 Hub.
RISOLUZIONE DI PROBLEMI
D
Il Center Gem/Button non è acceso e l’hub e le periferiche collegate non
funzionano. Perché?
R
Accertatevi che l’adattatore CA sia inserito correttamente e che il cavo di
alimentazione sia correttamente collegato all’hub.
D
Ho inserito la spina di una periferica USB in una porta dell’hub, ma la luce non è
accesa e la periferica non funziona. Perché?
R
Tutte le periferiche USB richiedono driver di prodotto per funzionare, per cui
quando si collega per la prima volta la periferica USB all’hub, controllare che il
computer abbia riconosciuto automaticamente il prodotto e carichi i driver o
richieda l’inserimento di un CD di installazione.
SUPPORTO TECNICO
Impossibile iniziare? Non preoccupatevi, siamo qui per assistervi!
Sapevate che quasi tutti i prodotti restituiti a noi come difettosi non lo sono affatto –
non sono stati semplicemente installati correttamente.
Perciò, se avete delle difficoltà con questo prodotto, visitate il nostro sito Web o
contattate uno dei nostri addetti all’assistenza tecnica clienti che sarà lieto di
assistervi.
Il nostro sito Web www.saitek.com è studiato per assistervi ad ottenere la prestazione
ottimale dal vostro prodotto Saitek. E se avete ancora dei problemi, potete consultare i
nostri team di specialisti del prodotto in tutto il mondo per richiedere consigli e
assistenza. I particolari per i contatti sono forniti nell’elenco Centri Assistenza Tecnica
Hi-speed USB Hub update 300903.qxd
12/03/2004
15:45
Page 20
allegato a questo prodotto. Saitek s’impegna ad assistervi ad ottenere il meglio dal
vostro acquisto – chiamateci se avete difficoltà o per richiedere chiarimenti.
Il sito Web di Saitek
Se potete accedere a Internet, potete trovare la risposta a molte delle vostre domande
tecniche visitando semplicemente il sito Web di Saitek a:
www.saitek.com
INTRODUCCIÓN
Le agradecemos haber adquirido el concentrador de USB 2.0 de gran velocidad de
Saitek. Este concentrador lleva la tecnología USB 2.0 más avanzada a su PC u
ordenador compatible con Mac®. Confiamos en que le aporte muchas horas de uso
sin problemas y la comodidad de una transmisión de datos a gran velocidad.
CARACTERÍSTICAS
•
Agrega a su PC 4 puertos USB 2.0 de gran velocidad*
•
Se incluye un suministro de alimentación CA
•
Instalación sencilla “Plug & Play”
•
Compatible con todos los dispositivos USB
Come contattare Saitek
•
Se non avete accesso ad Internet, o se il sito Web non può rispondere alla vostra
domanda, rivolgetevi al vostro team Assistenza Tecnica Saitek locale.
La protección contra sobrecorriente (por puerto) evita el daño al ordenador y a los
periféricos
•
Saitek è impegnata ad offrire il supporto tecnico completo e generale a tutti i suoi
utenti. Prima di telefonare, accertatevi di avere tutti i dati pertinenti a portata di mano.
Velocidades de conexión 40 veces más rápidas que con el USB 1.1 (velocidad de
transmisión de datos de 480 Mbps)
•
Los efectos de iluminación de LED muestran el estado del puerto
•
Conmutador de ahorro de energía
•
Ideal para utilizar con archivos digitales de datos grandes (p. ej., descargas de
imágenes de cámara digital, etc.)
Nella sezione dell’assistenza tecnica troverete tutte le informazioni di cui avete
bisogno per ottenere il meglio dalla prodotto, risolvere qualsiasi problema e ottenere le
più recenti configurazioni di gioco.
Per contattare il vostro Centro Assistenza Tecnica Saitek di zona contattate i dati
rilevanti sulla tabella separata dei Centri Assistenza Tecnica fornita nella confezione
con questo prodotto.
* Nota: Si su ordenador no soporta velocidades de transmisión USB 2.0 de gran
velocidad, no se preocupe, el concentrador de USB 2.0 de Saitek transmitirá datos a
la velocidad óptima para su ordenador.
PUESTA EN MARCHA
1
En primer lugar, enchufe el adaptador de corriente del concentrador en la fuente
de alimentación y luego enchufe el cable adaptador de corriente en la toma de
corriente del concentrador de USB y pulse la gema/el botón del centro del
concentrador para encenderlo. La luz de Encendido/Apagado del botón se
encenderá para mostrar que la unidad está recibiendo corriente.
Hi-speed USB Hub update 300903.qxd
12/03/2004
15:45
Page 22
2
Enchufe el cable del USB 2.0 de gran velocidad (el cabo más pequeño tipo miniB)
en el puerto ascendente del concentrador de USB 2.0 de gran velocidad.
3
Enchufe el cable del USB 2.0 de gran velocidad (el cabo más largo tipo A) en el
puerto USB de gran velocidad del ordenador y recibirá una notificación en pantalla
de que el concentrador ha sido reconocido e instalado.
4
Una vez completada la instalación, puede enchufar todo tipo de periféricos de
USB en su concentrador de USB 2.0 de gran velocidad.
USO DEL CONCENTRADOR DE USB 2.0 DE GRAN VELOCIDAD
Transmisión de datos a gran velocidad
Una vez que haya instalado con éxito el concentrador de USB 2.0 de gran velocidad
de Saitek lo puede utilizar para acoplar simultáneamente todo tipo de dispositivos
USB, como cámaras digitales, escáneres, PDA, cámaras web, impresoras y ratones.
Para poder ver y apreciar realmente la diferencia entre la velocidad de su antigua
conexión USB 1.1 transfiera algunos archivos digitales desde dispositivos fuente como
cámaras digitales: ¡se sorprenderá!
LED de estado de puerto
Agregar más concentradores de USB
Si desea agregar más periféricos USB al ordenador, puede añadir más
concentradores de USB a los puertos del concentrador de USB 2.0 de Saitek de gran
velocidad.
RESOLUCIÓN DE FALLOS
P
El botón/la gema central no se enciende y el concentrador y los periféricos
acoplados no funcionan correctamente. ¿Qué sucede?
R
Asegure que esté bien enchufado el adaptador de CA y que el cable de corriente
esté bien conectado al concentrador.
P
He enchufado un periférico USB a un puerto del concentrador y no se enciende
ninguna luz y el periférico no funciona. ¿Qué puedo hacer?
R
Todos los periféricos USB necesitan controladores del producto para funcionar, de
manera que la primera vez que conecte un periférico USB al concentrador
compruebe si el ordenador reconoce automáticamente el producto y carga los
controladores o pide un CD de instalación.
ASISTENCIA TÉCNICA
Para indicar que un dispositivo USB se ha acoplado al concentrador se iluminará la
luz indicadora correspondiente y brillará en verde para indicar una conexión con éxito.
Un LED de estado de color rojo indica una situación de sobrecorriente, es decir, el
dispositivo acoplado no funciona bien.
¿No puede realizar la instalación? No se preocupe… ¡estamos aquí
para ayudarle!
Conmutador de ahorro de energía
Si tiene cualquier tipo de problema con este producto, rogamos visite nuestro sitio
web o se ponga en contacto con nuestro amable personal de asistencia técnica, que
estará encantado de ayudarle.
Para ahorrar energía cuando no se utilicen periféricos USB, sólo tiene que pulsar el
botón de Encendido/Apagado del centro del concentrador y se apagará la luz,
indicando que se ha desenergizado el concentrador.
¿Sabía que casi todos los productos que nos retornan como defectuosos en realidad
no son defectuosos, sino que no han sido instalados correctamente?
Nuestro sitio web, www.saitek.com, está diseñado para ayudarle a conseguir los
mejores resultados de su producto Saitek. Si sigue experimentando problemas,
Hi-speed USB Hub update 300903.qxd
12/03/2004
15:45
Page 24
disponemos de equipos de especialistas del producto en todo el mundo a los que
llamar para obtener consejo y apoyo. Encontrará los detalles de contacto en la lista de
Centros de Asistencia Técnica junto a este producto. Saitek le ayudará a disfrutar de
su adquisición: rogamos se ponga en contacto con nosotros si experimenta cualquier
tipo de dificultad o duda.
El sitio web de Saitek
Si tiene usted acceso a Internet, podemos responder a un gran número de sus
preguntas técnicas con una simple visita al sitio web de Saitek en:
www.saitek.com
La división de asistencia técnica le ofrecerá toda la información necesaria para que su
producto rinda al máximo, resolverá cualquier tipo de problema que pueda tener y le
ofrecerá las más nuevas configuraciones de juegos.
Cómo ponerse en contacto con Saitek
Si no tiene acceso a Internet, o si el sitio no puede responder a su pregunta, deberá
ponerse en contacto con el Equipo Técnico Saitek local.
En Saitek tratamos de ofrecer un soporte técnico amplio y completo a todos nuestros
usuarios. Así que, antes de llamar, asegure que tiene a mano todos los detalles
relevantes.
Para ponerse en contacto con el Centro de Asistencia Técnica de Saitek local,
consulte la dirección/teléfono/fax/correo electrónico en la hoja individual de Centros de
Asistencia Técnica que encontrará junto a este producto.
Hi-speed USB Hub update 300903.qxd
12/03/2004
15:45
Page 28
Hi-Speed USB 2.0 Hub
V.2.0 300903
© 2003 Saitek Ltd. Made and printed in China.
All trademarks are the property of their respective owners.
PZ04
P/N