1
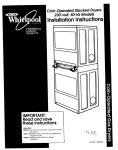
Stacked Dryers
Instructions
Part No. 3395314 Rev. E
‘h!
Before you start...
Check locatlon where dryers will be
used. Proper installation is your
responsibility. The dryer must not be
installed or stored in an area where it
will be exposed to water and/or
weather. Make sure you have
everything
necessary for correct
installation.
Each of the dryers is equipped
with a
timer, selector switches and indicator
lights. The timers are set to provide 45
minutes (4 pins) of drying time when
activated
by the coin slide. Timer
cams for 30-minute (6 pins) and 60minute (3 pins) drying timers are
supplied with the unit in the parts
bag. See Pages 8 and 9 for timer
cam changing
instructions.
I
Protectlon trom weather:
roper
operation
requires tempe $ tures
above 45°F (7.2”C).
The wiring diagram is
the control panel and ac
Important: Observe all
governing codes and
ordinances.
ed inside
ess panels.
Check utllltles Proper
supplv connednonrSlk
m&t be available.
Ii84nEii‘NPT plugged
tapplng Is requlred.
See “Gas supply
The coin-slide mechanisms,
control
panel lock and key, coin box and
coin box locks and keys are not
included and are available
from
usual industry sources.
Fire Hazard
For your sat&y, the Intormatlon In
this manual must be tollowed to
mlnlmlze the rlsk ot fire or exploslon
3r to prevent property damage,
personal Injury or loss 0r iire.
- Do Not store or use gasoline or
other tlammable vapors and
llqulds In the vlclnlty ot thls or any
other appliance.
- WHAT TO DO IF YOU SMELLGAS:
Do Not try to light any
appliance.
Do Not touch any electrlcal
switch; Do Not use any phone
In your bulldlng.
Clear the room, bulldlng or area
0r all occupants.
lmmedlately call your gas
suppller tram a nelghbor’s
phone. Follow the gas suppller’s
Instructlons.
. It you cannot reach your gas
suppller, call the tire department.
. Never Install dryer up agalnst
draperles or curtains or on carpet.
Keep any and all Items tram klllng
or collecting behlnd the dryer.
nstallatlon and service must be
,erformed by a quailtied Installer,
iervlce agency or the gas suppller.
~li;ili;iii:i’-‘i’i-i:irequirements,
n Page 3.
ixhausted from
bottom, rear, left
lr right side. See
I‘Exhaust
3quirements, I
*ounded electrlcal
l
l
l
l
support the total weight of 315
I
pounds per unit.
Level floor: Maximum flbor slope
under dryers - 1 inch.
Page 2
Locatlon must be large enough to
fully open dryer doors. See Page 8 for
recessed area requirements
and
product dimensions.
Electrlcal Shock Hazard
It Is the customer’s responslblllty:
To contact a licensed electrlclan.
To have dryers Installed
according to all natlonal and
local codes and ordinances.
Failure to do so could result In a tire,
electrlcal shock or other personal
InJury.
Personal Injury Hazard
More than one person Is requlred to
Iltt, tilt, or move the dryers because
ot their welght and size.
Failure to tallow these lnstructlons
may result In personal Injury.
l
l
Post thls warnlng In a promlnent
locatlon.
It is recommended
that the operator
post, in a prominent
location,
instructions for the customer’s use in
the event that the customer smells
gas. This information
should be
obtained
from your local gas supplier.
outlet is
Wrequired.
See “Electrical
requirements,”
Page 4.
tar thls Installation.
Failure to tallow these I structlons
could result In a tire or t xploslon.
Tools needed for
installation:
adjustable wrench
utility knife
Phillips screwdriver
flat-blade screwdriver
n This installation
ust conform
with American
Nationa Standard,
National Fuel Gas Cod ANSI Z223.V
latest edition, and all lo al codes and
4
ordinances.
IWSI
pliers
duct tape
Parts supplied for
installation:
2 slide protectors
2 slide extensions
2 bolt and washer
assemblies
8 screws
2. 30-minute cams
2,60-minute cams
4,314” wood
screws
B
H The design of this dryer has
been certified by the A erican Gas
Association for use at a itudes up to
10,000 feet above sea I vel at the
B.T.U. rating indicated
n the
model/serial
plate. Bur r input
adjustments
are not re uired when
the dryer is operated
u to this
i
elevation.
Parts owner must
supply:
1 control panel lock and key
2 coin vaults and keys (E.S.D. vault must
have projecting lock.)
2 coin-slide mechanisms (vertical 8)
Parts may be ordered from
Greenwald
Industries, Inc. or
Equipment Systems and Devices,
l
Greenwald
Industries, Inc.
1340 Metropolitan
Avenue
Brooklyn, NY 11237
telephone
(7 18) 821-9000 or
toll free (800) 22 l-0982
faxno. (718)417-7412
l
Equipment Systems and
Devices, Inc.
270 New Jersey Dr.
Fort Washington,
PA 19034
telephone
(215) 628-0860 or
toll free (800) 523- 1510
fax no. (215) 643-4623
Fire Hazard
These dryers must be connected
to a regulated gas supply.
Failure to do so could result In hlghpressure gas release, resultlng In a
tire or exploslon.
Have L.P. gas checked by a
qualltled person betore lnstalllng
the dryer. The L.P. gas supply must
not exceed a pressure ot 13”
water column.
New tlexlble tublng should be
used. Reuslng old, tlexlble tublng
mlght result In possible leaks or
tire hazard.
Failure to tallow these lnstructlons
could result In tlre or exploslon.
l
G
your local service
corn
the particular type o
Burner information wi
n The supplv line shall be
equipped
with a shutoff valve. This
valve should be located in the same
room as the dryers and should be in a
location that allows ease of opening
and closing. Do Not block access to
shutoff valve.
main gas supply line, a
combination
of fittings must be
used to obtain an in-line connection
to the dryers.
see your dealer.
n Make sure lower edges, back
and sides of the cabinet are free of
obstructions to permit adequate
clearance
of air openings for
combustion
air. See ‘Recessed area
and closet installation instructions” for
minimum spacing requirements,
D
n These drvers are/ shipoed for
use with NATURAL GAS. hey are
certified by the Americ
n Gas
Association for manufa
tured, mixed
and L.P. (propane
and i utane) gases
with appropriate
conv&sion.
No
attempt shall be made o convert the
appliance
from the gas specified on
the rating plate for use ith a
different gas without c
suiting the
serving gas supplier. Co verslon must
be done by a qualltled ervlce
technician. Gas conver Ion klt part
numbers are llsted on t e gas valve
1
burner base.
l
OBSERVEALL GOVERNING CODES
AND ORDINANCES.
shutofl valve
Inc.
Gas supply
requirements
l
F
n If local codes and ordinances
permit, it is recommended
that new
flexible metal tubing, design-certified
by the American Gas Association,
be
used for connecting
the dryers to the
gas supply line. (The gas feed pipe,
which extends through the lower rear
of each dryer, is provided with 3/8inch male pipe thread.)
supply
line is more than
usage,
3/8-inch,
appro
J
n For ease of installation,
operating
and servicing (if ever
needed),
adequate
space should be
provided around the dryers.
K
n A l/&inch,
NPT plugged
tapping, accessible for test-gauge
connection,
must be installed
immediately
upstream of the gas
supply connector
to the dryers.
The dryers and their individual shutoff
valves must be disconnected
from
the gas supply piping system during
any pressure testing of that system at
test pressures in excess of l/2 psig
(3.4 kPa).
The dryers must be isolated from the
gas supply piping system by closing
their individual manual shutoff valves
during any pressure testing of the gas
supply piping system at test pressures
equal to or less than l/2 psig
(3.4 kPa).
Page 3
Elect&al
requlremen s
f
outlet, have a pro
Installed by a quall
electrlclan.
l
Rebrdmended
grounding
For your personal safety, these dryers
must be grounded.
Each dryer is
equipped
with a power supply cord
having a 3-prong grounding
plug. To
minimize shock hazard, the cords
must be plugged into mating 3-prong
grounding-type
wall receptacles,
grounded
in accordance
with
National Electrical Code ANSVNFPA
70 - latest edition, and all local
codes and ordinances.
If a mating
wall receptacle
is not available,
it is
the personal responsibility and
obligation
of the customer to have a
properly grounded,
3-prong wall
receptacle
installed by a qualified
technician.
See Figure 1.
Spron
groun 8 ng-type
wall receptacle 1
Do Not use an exte
J-Drona
gioundlng
Plug
properly grounded
L
Page 4
PoysuPPtY
It codes permit and
groundlng wire Is us
recommended that a q
electrlclan determlne t
A 120-volt
4
I
death.
n
If the dryers are installed in a
confined area such as a bathroom
or
closet, they must be exhausted
to the
outside and provision made for
enough air for combustion
and
ventilation.
(Check governing
codes
and ordinances.
Also refer to the
section of this instruction covering
“Recessed and closet installations.“)
w/
&I-Hz AC-
t
grounding
prong
Figure 1
Exhaust
requirements
If dryers are Installed In a conflned
area such as a bedroom, bathroom
Fire/Health Hazard
Do Not use non-metal, flexible
duct.
Do Not use metal duct smaller
than four Inches In diameter.
Do Not use exhaust hoods wlth
metal latches.
B Check that exhaust system Is not
longer than speclfled. Exhaust
system longer than speclfled will:
- Accumulate Ilnt.
- Shorten the life of the dryer.
- Reduce the petformance,
resulting In longer drying times
and Increased energy usage.
Iallure to kii0w speclflcatlons may
‘esult In a IIre.
b Do Not exhaust dryers Into a
chimney. turnace cold alr duct,
attlc or crawl space, or any other
duct used for ventlng.
1 Clean the exhaust system every
other year.
) Do Not Install flexible duct In
enclosed walls, celllngs or floors.
iccumulated
llnt could result In a
Ire or cause molsture damage.
1Exhaust dryers outslde to prevent
exposure to substances In gas
duels and combustion which may
be harmtul to your health.
.he molsture and llnt Indoors may
cause:
. FIREHAZARD from llnt collected In
dryer.
. Molsture damage to woodwork,
turnlture, palnt, wallpaper, carpet,
etc.
nHousecleanlng problems and
possible health problems.
:allure to tallow these lnstructlons
:ould result In tlre damage or
3ersonal Injury.
or closet, they must be exhausted
to
the outside and provision must be
made for enough air for combustion
and ventilation.
(Check governing
codes and ordinances.
Also refer to
the ‘Recessed area and closet
installation instructions,” Page 8.)
An exhaust hood should cap the
exhaust duct to prevent exhausted
air from returning into the dryers. The
outlet hood must be at least 12
inches from the ground or any object
that may be in the path of the
exhaust.
l
l
l
Allow as much roo
ossible when
Four-Inch outlet hood Is preterred.
However, a 2-l/2-inch
outlet exhaust
hood may be used. (A 2-l/2-inch
outlet creates greater back pressure
than other hoods.)
A maln exhaust duct can be used for
exhausting a group of dryers. Main
exhaust duct should be sized to
remove 200 CFM of air per dryer.
Large-capacity
lint screens of proper
design may be used in the main
exhaust duct if checked
and
cleaned frequently. The room where
the dryers are located should have
make-up air equal to or greater than
the CFM of all the dryers in the room.
The external exhaust
routed
up, down
requirements
are
length of the exhaust
exhausted
out the sid
feet with two externa
hood.
Rear exhaust: The ma
the exhaust
system
(
Thls chart applies only [to Indlvldually
exhausted unlts.
I
MAXIMUM
MAXIMUM
LENGTH OF I-INCH
LENGTH OF 4.lNCH
DIA
DIAM
TER RIGID METAL DUCT
ER FLEXIBLE METAL DUCT
Exhaust materials are not
supplied.
/$fya.
airtlow
*tie
-
main
colktorduct
-
4
Back-draft damper klts (Part No.
3391910) are available
from your
Whirlpool dealer and should be
installed in each dryer’s exhaust duct
to prevent exhausted
air from
returning into the dryers and to keep
the exhaust balance
within the main
exhaust duct. Unobstructed
air
openings are required.
Each exhaust duct should enter the
available
from your Wb irlpool parts
distributor.
exceed
0.6 inches of
main duct at an angle pointing in the
direction of the airflow. Ducts
entering from the opposite side
should be staggered
to reduce the
exhausted
air from interfering with the
other ducts.
The maxlmum angle of each duct
entering the main duct should be no
more than 30”.
Four-Inch metal exhaust duct is
required. Plan installation
fewest number of elbows
to use the
and turns.
Page 5
Product Damage
Keep alr openlngs tree ot drycleaning fluld fumes. Fumes
create acids which, when drawn
through the dryer heatlng unlts,
can damage dryers and loads
being dried.
A clean-out cover should be located
on the main exhaust duct for
periodically
cleaning the exhaust
system.
An exhaust hood should cap the
outside end of the main duct to
prevent exhausted
air from returning
to the dryers. If an exhaust hood
cannot be used, the outside end of
the main duct should have a sweep
elbow directed downward.
If the
main duct travels vertically through
the roof rather than through the wall,
install 180” sweep elbow on the end
of duct at least 2 feet above the
highest part of the building. The
opening wall or roof shall have a
diameter
l/2 inch larger than the
exhaust duct diameter. The exhaust
duct should be centered
in the
opening.
Exhaust du t
connection
Electrlcal Shock Hazard
Disconnect both pow r supply
cords before maklng hese
changes.
Failure to do so may r suit In
electrical shock or
sonal Injury.
k
be exhausted
Personal Injury Hazard
Wear gloves to protect hands tram
sharp edges that may be present.
Failure to do so may result In
personal Injury.
2. Remove the duct tape from the
internal exhaust duct and the straight
duct. Repeat for the other dryer.
through
Next, determine
the le
To connect exha
straight out the b
th of exhaust
3. Remove the screw from the duct
clip that attaches the straight duct to
the back of the cabinet.
Depress the
clip to remove the straight duct using
a twisting motion through the rear
exhaust opening. Repeat for the
other dryer.
exhaust
hood or
hortzontal duct
2 tl. min.
180’
maln collector
exhaust
hoods or main
To connect exha
through the right
4. Reach through the rear exhaust
opening and depress center of tabs
on the plastic opening cover on the
side you want to exhaust through.
Remove the cover. Repeat for other
dryer.
90” elbow
(Not supplied
with unit.)
Do Not install screening
of duct.
cap over end
plain
end
1. Remove
other access
Page 6
access
panel.
a /
tape
joint
,,LL-
pa
5. Attach a three- or four-section
elbow to the straight duct using duct
tape. Repeat with the other elbow
and straight duct.
3. Remove duct tape f m internal
exhaust duct and the s aight duct.
t
9. Cut opening
through
the floor.
f
internal
exhaust duct
6. Insert elbow end of duct pieces
through the side opening.
Reach
through the access panel opening
and attach elbow to the internal
exhaust duct. Check the length of
straight duct extending
out the side
of the cabinet.
If duct extends too far
to make the exhaust duct
connection,
mark a line around the
straight duct one inch out from the
cabinet. Remove the duct and elbow
and cut the straight pipe to the
length needed. Reinsert the duct
pieces. Use duct tape to connect the
elbow to the internal exhaust duct.
Repeat for the other dryer.
7. Insert the plastic cover
rear exhaust opening.
8.
Replace
the access
9. Use duct tape
4. Remove the screw fr m the duct
clip that attaches the s aight duct to
the back of the cabine
Depress the
clip and remove the str ight duct
using a twisting motion
rough the
rear exhaust opening.
1i
5. Measure from the
straight duct and mark
Cut the straight duct
to seal all joints.
6.
Reach through the r
opening and depress c
on one of the side,
covers. Remove the co
dryer
a
1 1. Insert
12. Slide the straight
elbow approximately
of
dryer
duct into the
one inch. Use
duct tape to seal both Jolnts.
screw
head
edge
of cabinet)-
cabinet
rear
(fastens against
Note: You must use a three-section
elbow to connect exhaust duct
through the bottom of the lower
dryer.
2. Remove the lower dryer access
panel by releasing the two locking
clips with a small, flat-blade
screwdriver.
The clips are located
four inches in from each side of the
access panel, Lift access panel off
the bottom clips and set aside.
Of
I
L3 I.--
II IL-/iah
To connect exhaust duct
through the bottom of the
lower dryer only -
1. Check that the legs extend one
inch from the bottom of the dryer.
front
+
the elbow through the rear
exhaust opening. Insert elbow into
the bottom exhaust opening.
into the
panels.
10. Push the four-inch, straight duct
through the rear exhaust opening
and onto the internal duct as far as it
will go.
7. With a Phillips screw river, reach
through the rear exhau
opening
and remove the screw
at attaches
the cover to the dryer
se. Carefully
remove the cover and
rew through
the rear exhaust openin % .
Floor Damage
Slide dryers onto cardboard or
hardboard betore moving across
tloor.
Failure to do so may cwse damage
to tloor coverlng.
8.
Move dryers into
position. Reach throug
opening and mark the
13. Insert the
bottom exhaust
cover through the
side exhaust
opening. Put the
cover over the rear
exhaust opening
with the tab
pointing down to
bottom of dryer.
Insert screw through
the hole in the cover
inside of the cabinet.
14. Replace
bottom
of dryer
c
t
that is on the
Tighten screw.
the side exhaust
15. Move the dryers
position. Check that
through the bottom
Replace the access
16. Connect
Then connect
exhaust hood
duct tape to
tab
cover.
into operating
the elbow is
exhaust opening.
panel.
elbow to exhaust duct.
exhaust duct to
or main exhaust. Use
seal all joints.
Page 7
Recessed area and
closet installations
Side view
O”-D
Additional
;p;lza
Fire/Health Hazard
Exhaust dryers to the outslde to
prevent exposure to substances In
the gas tuels and combustion
byproducts which may be harmful
to your health.
Failure to do so may result In a tlre
or health hazard.
-4 Ill
Closet vi w
+
nn
’ II
0
c
1
for exhaust
7”
Closet
48’sq.
Thls appliance may be Installed In a
recessed area.
The installation spacing is the
minimum allowable.
Additional
spacing should be considered
for
ease of installation, servicing and
compliance
with local codes and
ordinances.
If closet door is installed, the minimum
unobstructed
air openings in the top
and bottom are required. Door must
have two centered
openings as
illustrated. Both openings must
provide a minimum of 72 square
inches of unobstructed
airflow as
shown. Louvered doors with
equivalent
air openings are
acceptable.
Additional
clearances for
wall, door and
floor moldings
may be
required.
Opening is
minimum for
closet door.
Louvered
door with
equivalent air
oljenings is
acceptable.
door
in:’
I
24’sq.
i
Fr+nt view
spacing
You can
0”
Additional
clearances may
be requlrsd for
wall, door and
floor moldings If
external exhaust
elbow Is used.
1810
install
the Dminute
minute timing cam (shipped
each dryer) as follows:
No other tuel-burnlng a pllance may
be Installed In the same 1closet.
or &Iwith
1. Unlock control panel. Lift up and
rotate out from cabinet. Control
panel will still be attached
to cabinet.
Product dimensiohs
Slde vlew
2. Reach into control panel area. Use
a Phillips screwdriver to loosen (but
not remove) timer mounting bracket
screw. Lift up to remove timer
assembly and bracket from cabinet.
FOR CLOSET INSTALLATIONS,TO
PREVENTLARGE AMOUNTS OF LINT
AND MOISTUREFROM
ACCUMULATING, TO MAINTAIN
DRYING EFFICIENCY, AND TO PREVENT
EXPOSURETO POSSIBLEHEALTH
HAZARDS, DRYERSMUST BE
EXHAUSTEDOUTDOORS.
i ___
-
4
Electrlcal Shock Hazard
Disconnect both power supply
cords tram the electric power
supply betore maklng these
changes. Change tlmlng cams
betore completing electrlcal
connectlon.
Failure to tallow these lnstructlons
may result In electrlcal shock or
personal Injury.
Each dryer is equipped
with a 45
minute timer cam that provides 4.5
minutes of drying time when
activated
by the coin slide.
:~,
Companion
appliance
should be considered.
To than e to a
30- or 6%-minute
timing cam
r
I.
\\
ratchet
tooth
approx.
Rear view
,
Im
ex’haust
4
timing cam
3. Turn the timing cam by hand until
the ‘V-shaped
notch lines up below
the ratchet tooth.
exhaust
Recessed Wont vlew
Page 8
Now start...(
timing cam
ratchet
tooth
I
f
With dryers in lauddry area.
Check that each leg is bpproximately
1 inch from base.
m-1
2.
Line up notch
to clear
ratchet tooth.
Wipe the interior of the
thoroughly
with a dam
3.
4. Insert a narrow, flat-blade
screwdriver
under the timing cam
near the clock shaft. Gently lift cam
straight up and off shaft making sure
that the “V”-shaped
notch clears the
ratchet tooth.
5. Place new cam (hub
over clock shaft, Line up
shaft with flat side of cam
Check that drive lug is in
Install coin vaults and lo’ ks (not
supplied) into meter ca f e openings.
4.
Install control
supplied)
panel
Open control panel and rest it on the
bottom edge of the opening. Attach
slide extension (with flange pointing
down) to one of the coin-slide
mechanisms.
Insert the coin-slide
mechanism
through the opening to
the left of the control panel.
lock and key (not
side down)
flat side of
hole.
place.
Electrlcal Shock
6. Turn cam until “V-shaped
lines up with ratchet tooth.
notch
7. Press cam down in place on motor
shaft. Make sure that “V-shaped
notch clears the ratchet tooth.
Secure coin-slide mechanism
from
inside the control panel using the
3/l 6” bolt and washer supplied. Install
coin box.
8. Reattach the timer bracket
assembly; tighten the screws.
9. Repeat
steps for other timer.
10. Close
and lock the control
8.
Repeat Steps 6 and 7 for the other
coin-slide mechanism.
Close control
panel.
panel.
Jl
5.
If you wish to change th 45-minute
dryer timing cams to eit 1 er 30- or 60minute timing cams,
to a 3C- or 60-minute
Pages 8 and 9. Complet
steps given in that secti
going to Step 6.
i
9.
Electrlcal Shock
Disconnect electrlcal
service panel (ruse bo
breaker box).
Failure to do so could r
serlous Injury or death. i
azard
wer at the
or clrcult
Insert top of wire guard into holes on
each side of the coin-slide
mechanism.
Insert screws through
hooked ends of guard and tighten.
Repeat for other wire guard.
sult In
Page 9
16
;I
14.
Remove
pipes.
11
the red caps from the gas
I
n
Checklevelness
of dryers by placing
a carpenter’s
level on top of the
dryers or collar, first side to side, then
front to back. If dryer is not level,
adjust the front legs up or down.
Make the final check with the level.
,
Plug power supply cord into
grounded
outlets. Turn ( I electrical
power supply.
‘1
n
Connect gas supply to each dryer.
Use pipe-joint compound
resistant to
the action of Natural and L.P. gas for
gas connections,
rhutofl valve
nm
Floor Dama 5 8
Slide dryers onto card b‘oard or
hardboard before mo \‘IIng across
rloor.
5ult In
Failure to do so may r(EC
damage to floor cove r w.
Move unit to its pc31rmanent
location.
12.
Open the shutoff valves
supply lines.
in the gas
Fire Hazard
Do Not use an open flame to test
tar leaks from gas connections.
Checking for leaks wlth a flame
may result In a flre or explosion.
13 w
Use a brush and liquid detergent
to
test all gas connections
for leaks,
Bubbles around connections
will
indicate a leak. If a leak appears,
shut off gas valve controls and adjust
connections.
Then check
connections
again, NEVERTESTFOR
GAS LEAKSWITH A FLAME. Close the
access panels.
All connectlons
tlghtened.
Page 10
must be wrench-
15.
Turn one dryer on to rer r<ove air from
the gas supply line. Usin (1 a full heat
cycle (not the air cycle: 1, let the dryer
run for at least five mint I 1es. If the
burner does not ignite cI- Id you can
feel no heat inside the (:I yer, shut off
the dryer for five minute I’. Check that
all supply valve controls ;( are in “ON”
position and that the pc:\ tier supply
cord is plugged in. Repc ,Jt the fiveminute test.
17
WTO exhaust the dryers, see
‘Exhaust requirements”
and “Exhaust
duct connection,”
pages 5 to 7.
Personal InJury Hazard
To prevent tlpplng, tether bracket
must be secured to wall studs or
concrete wall.
Failure to do so could result In
personal Injury.
Tether bracket.
bracket, located
rear ot
of the top ‘dryer.
dryer.
at
I
18.
Attach both ends of tether located at
the rear of the top dryer to a secured
2x4.
r
I
I
16.
18.
17.
10.11.
14.
Check
tools.
to make sure you have all your
The installation is now
complete.
17.
10.11.
(with step .
I
Page 11
to a
...
If dryers do not
operate properly.. .
Check the folIowIng to be sure that:
1. Electrical
supply is connected.
2. Circuit breakers
fuses blown,
are not tripped
Floor Dama
Slide dryers onto card
hardboard before mo
rloor.
Failure to do so may r
damage to floor cove
i
or
3. Doors are closed.
4. Timer has been
actuated.
5. Controls are set in a running
‘ON” position.
or
6. Gas shutoff valves are open
on dryer and supply line.
both
l
l
l
l
l
l
l
Shut off electric suppl
Disconnect
power su
Tape securely to drye
Shut off the gas suppl
gas supply line.
Disconnect
gas pipe
from dryer and cap
line. Tape end of drye
Tape the drums to the
i
Tape doors.
Adjust leveling legs all
8
oard or
Ing across
suit In
ng.
to dryers.
ply cords.
valves
If you need
assistance...
The Whirlpool Consumer Assistance
Center will answer any questions
about operating
or maintaining
your
dryers not covered in the Installation
Instructions. The Whirlpool Consumer
Assistance Center is open 24 hours a
day, 7 days a week. Just dial l-(800)
253-1301 - the call is free.
When you call, you will need the
dryer model number and serial
number. Both numbers can be found
on the serial/rating
plate located in
the door well behind the dryer door
and on the front of the opening.
in the
nd fittings
gas supply
gas pipes.
front panel.
he way in.
Before installing dryers i a new
location, check with yo r gas supplier
or dealer to see that yo r dryer is
equipped
with the corr ct burner for
the particular type of g s in your new
building. Burner informa ion may be
found on the rating pla
in the door
1
well of the dryer.
Part No. 3395314 Rev. E
0 1994 Whirlpool Corporation
Printed on recycled paper
10% post consumer waste/
50% recovered
materials.
Prepared
by Whirlpool
Corporation,IBenton
Harbor,
Michigan
49022
Printed in U.S.A.