1
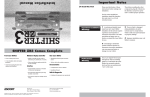
Important Notes Installation Manual Read This First D I G I T A L R A D A R • L A S E R • S A F E T Y D E T E C T O R Important Installation Warnings Please read both sides of these instructions before starting your installation. 1 A professional installer must install your new STi-R. Installation of this system requires experience and expertise in automotive electronics. Car Audio specialists and many car dealers can install STi-R for you. 2 Attempting to install this product without expertise in automotive electronics installation can cause personal injury, or damage to your vehicle. STi-R Comes Complete Front Radar Receiver Miniature Controller Documentation • Weather-proof Front Radar and Laser Receiver • Controller mounts easily to console for easy to reach access • Comprehensive Owner’s Manual • Mounting bracket with stainless steel hardware Miniature Display • Built-in 6 foot shielded cable with water proof connector • 13 foot shielded cable with in-line waterproof connector • Wire ties to secure cable • Miniature Display easily mounts to instrument pod, dashboard or console • Installation Manual Built-in Diagnostics • Confirms all components are operational • In-Dash trim bezel allows custom in-dash installation Interface • Central module connects to switched 12-volt power and ground • All components plug directly in using modular connections • 3M connector taps into existing vehicle wiring Beltronics 5442 West Chester Road West Chester OH 45069 ©2007 BELTRONICS, STi-R, TotalShield Technology and AutoScan are trademarks of BELTRONICS USA Inc. Safety Warning System is a registered trademark of Safety Warning System L.L.C. Customer Service 800-341-2288 www.beltronics.com Performance Warning To get the best performance possible, the mounting location of the front Radar and Laser Receiver is critical. Although radar signals will pass through some types of plastic, it is critical that this receiver be mounted level, and have an unobstructed “view” of the road. 3 If your vehicle is damaged during installation, its safety systems may be compromised, which could cause personal injury or property damage. 4 Improper installation may void STi-R’s warranty. STi-R Installation Manual A Radar/Laser Receiver 1 Determine the best location for the Receiver. The best location is typically under the bumper, or inside the front grill of the vehicle. For the best performance, install the Receiver horizontally, with a clear “view” of the road. 2 Using the supplied mounting hardware, mark the hole locations and drill pilot holes in the vehicle if necessary. It’s best to check and double-check clearances BEFORE drilling the holes. B D Radar/Laser Receiver Cable 1 Connect the receiver cable to the Receiver. 2 Route cable to firewall, and secure with zip-ties (included). 3 Route receiver cable into the vehicle’s interior. If there is not a suitable opening, drill a 13/32" or 7/16" hole. 4 Pull cable through firewall, and plug connector into the jack labeled “Front Receiver” on the Interface. 3 Mount the Receiver using the supplied hardware. (If right-angle mounting bracket is used, secure Receiver to the right-angle bracket first, then install bracket with Receiver to the vehicle.) 5 Pull grommet (located on the receiver cable itself) through the firewall to seal the hole. Use silicone sealant (not supplied) if necessary. Optional Concealed Display 1 Drill a 1/4" hole, and install the LED clip. 2 Snap LED into clip from behind. 3 Plug the modular connector into STi-R’s Interface marked “Concealed LED Display.” Note: 1. Connection between the Receiver and the receiver cable, must be located in a dry location under the hood. 2. Only drill hole in firewall after thoroughly investigating location first, ensuring no other wires, hoses, etc. will be damaged. 3. Keep all cables away from moving parts, and hot surfaces (radiator, hoses, etc.). 4. DO NOT splice cable. E Display 1 Determine the best location for the Display Controller in the vehicle’s interior. (Consult customer if necessary.) 2 Install Display using double-sided tape on the back. Simply remove paper backing and press onto clean surface. You may also custom-install the display into the dashboard using the supplied template. Seek professional assistance for this. 2 Install Controller using supplied doublesided tape located on the back. Simply peal off the paper backing and press onto clean surface. 3 Route cable and plug into jack marked “Display” on Interface. Note: Make certain that the Display is clearly visible from the driver’s position. D 12 Volt Power Line ± E Interior of Vehicle A F C A G C Interface G Amplified Speaker 1 Install Interface under the dash using supplied zip-ties. DO NOT MOUNT IN ENGINE COMPARTMENT. 1 Determine the best location for the Speaker in the vehicle’s interior. (Consult customer if necessary.) 2 Connect black wire (–) to ground, and redstriped wire (+) to a switched 12-volt supply. (If STi-R is left in the “on” position, it will automatically power on and off with the ignition). Use blue 3M connector (provided) to tap into existing circuit if needed. Note: The speaker is loud enough to be mounted under the dash so it is not seen. 3 The front Receiver, Display and Controller all plug into the Interface. (Be sure to plug all cables into the correct labeled jacks.) 2 Mount the Speaker bracket using the supplies hardware. TEST 3 Plug the audio line (ear phone jack connector) into the Interface jack marked “Speaker”. 4 Connect the (+) to a switched power connection on the fuse panel, and connect the (–) to ground. Controller 1 Determine the best location for the Display in the vehicle’s interior. (Consult customer if necessary.) Note: 1. Do not drill holes in the Receiver itself. 2. Thoroughly investigate location before drilling any holes. 3. Keep all cables away from moving parts, and hot surfaces (radiator, hoses, etc.). 4. DO NOT splice cable. B F After all components are installed correctly: 1 Turn vehicle’s ignition to the “on” position. 2 Turn the STi-R on by pressing the “PWR” button on the Controller. 3 The STi-R will cycle through a startup sequence. 4 If any error messages come up, see page 23 of the Owner’s Manual for details. 3 Route cable and plug into jack marked “Controller” on the Interface. Note: Make certain that the Controller can be easily accessed without interfering with normal driving.