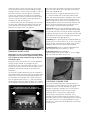
1
The
A LPHA
Collection
Instruction Manual
Model AL357i-B Alpha Inset Boiler
Multi Fuel and Wood Burning Inset Boiler Stove
Published September 2012
Please note This appliance has been independently
CE tested and approved for the burning of wood
and multi fuels and must, at all times, be used in
accordance with these instructions to ensure safe
and efficient operation.
You will need to refer to the serial number of your
stove should you ever need to make a claim under
the Alpha Warranty. You will find the serial number,
beginning with AL, on the CE plate at the rear of the
stove as well as on the lid of the outer packaging.
Write the date the stove was delivered to you below
as this is likely to differ from the purchase date.
Remember to keep your receipt as proof of purchase.
-
-
Ref: AL357i-B / UK-NI-ROI / V1.01-09-12
www.alphastoves.com
CONTENTS
INTRODUCTION
Page
General Dimensions
4
General Specifications
5
Replacement Consumables
5
Standard Features
5
Important Safety Advice
6
Boiler Stoves: Specific Safety Issues
6
Health and Safety
7
Building Control and Hetas
7
Installation Regulations
7
UK Smoke Control Areas
8
Buildings Insurance
8
Packing List
8
Assembling the Stove
9
Thank-you for purchasing the Alpha Inset
Boiler stove. We are confident that it will
warm your home even on the coldest winter
days and provide you with many years of
pleasurable heat.
Before you install or operate your inset boiler
stove however, in the interests of safety,
please read this booklet which contains
important safety advice as well as
instructions which will help you make the
most of your new boiler stove.
All users of this stove should be aware of the
contents of this handbook. If other people
are going to operate the stove then please
keep this booklet handy so that it can always
be quickly referred to. Never let anyone use
the stove who is unfamiliar with its correct
operation.
Removing the Baffle Plate
10
Recommended Fuels
11
Prohibited Fuels
11
Understanding Fuel Types
12
Controlling The Combustion Air
12
IMPORTANT
Burning Wood Logs
13
Lighting a Wood Fire
13
Burning Mineral Fuels
15
Overnight Burning
16
Removing Ash
17
Installation Check-list
17
Even if you have installed or operated stoves
before, remember manufacturer’s requirements
can vary and can also change with updates to
building regulations. If you are installing this
stove in a UK Smoke Control Area the Alpha
Inset Boiler can only be fuelled with approved
smokeless fuels – it will be illegal to burn wood
in it.
Appliance installation Guidelines
18
System installation Guidelines
20
Basic System Essentials
20
Basic System Diagram
21
Fitting Instructions
23
Commissioning
25
Important: First Fires
25
Condensation
25
System Balance
26
Trouble-shooting
26
Routine Checks
30
Routine Maintenance
30
PLEASE NOTE
Standing Down
31
The Alpha Warranty
32
Alpha Spare Parts
32
Annual Service
33
Service Record
33
This instruction manual is also used for a number
of other inset stove models in the Hi-Flame product
range and therefore some of the stove photographs
and diagrams used, which are used for guidance
purposes only, may differ slightly from your new
Alpha Inset stove. However, the principles illustrated
here remain the same.
System Notes and Settings
34
Hi-Flame Fireplace (UK) Limited
3
���
���
���
Vertical view
Vertical view
���
���
������
���
���
���
���
���
Vertical view
GENERAL DIMENSIONS
L.H.Side view
L.H.Side
view
L.H.Side
view
L.H.Side
view
��
��
�� ��
���
���
���
���
���
���
���
������
���
���
���
��
���
���
���
���
���
L.H.Side view
���
���
���
���
���
���265
L.H.Side view
���
���
��
Vertical view
Vertical
view
Vertical
view
Vertical
view
���
���
���
���
���
���
������
��
��
��
��
���
���
��� ���
���
���
���
���
35
56
All sizes in mm
4
GENERAL SPECIFICATION
RECOMMENDED FUELS
Alpha Inset Boiler
Model Name
AL357i-B
Model Number
Maximum Wood Fuel Load
H605 W490 D 95
Dimensions (mm): Facia
3.6 kg (approx 8 lb)
275 mm (11”)
Maximum Log Length
Dimensions (mm): Firebox External H515 W380 D175
Or Approved Smokeless Fuels (www.solidfuel.co.uk)
109 kg
Net Weight
<20%
Wood Logs: Moisture content
Maximum Mineral Fuel Load 3.7 kg (approx 8 lb 2 oz)
PERFORMANCE
REPLACEMENT CONSUMABLES
From Kiwa GasTec BS EN13229: 2001 Test Aug 2012
Heat Resistant Glass
WOOD
Door Rope Seal 10 mm dia x app 1700 mm (5’8”) long
Intermittent Burning – 1.0 hour refuel period
Ash Pit Rope Seal
Nominal Heat Output
10 mm dia x 370 mm (15”) long
To Room
4.8 kW
NB There are no firebricks on the Alpha inset Boiler
To Water
7.5 kW
STANDARD FEATURES
12.3 kW
TOTAL
Efficiency (net)
80.2%
Mean CO Emission (at 13%)
0.52%
Mean Flue Gas Temperature
296ºC
Flue Gas Mass Flow
7.0 g/s
1 Primary Air Control Air which enters under the
grate for multi fuel burning and to assist a wood log
fire to get started
2 Secondary Air Control Air which enters at the top
of the fire chamber to ensure a cleaner burn and
effective wood burning (pull out to open)
3 Airwash System Part of the secondary Air control
system which diverts hot air down along the front of
the glass to burn off unwanted sooty particulates and
help keep it clean
MINERAL FUELS (Ancit)
Continuous Burning – 2.0 hour refuel period
Nominal Heat Output
285 x 325 x 4 mm
To Room
3.7 kW
To Water
8.9 kW
4 Thermostat Control This adjusts the temperature
of the water leaving the boiler from low to high by
controlling part of the combustion air supply to the
fire chamber
12.6 kW
TOTAL
Efficiency (net)
75.8%
Mean CO Emission (at 13%)
0.47%
Mean Flue Gas Temperature
333ºC
4 System Ports There are four 1” BSP water ports –
two on either side of the firebox
7.6 g/s
Flue Gas Mass Flow
MINIMUM DISTANCES
Minimum Distance from Combustible Materials
Top (shelf)
200 mm
Sides
100 mm
2
5
3
FLUE
top only
Flue configuration
Flue outlet diameter
150 mm (6”)
4
Minimum flue height from top of Inset 4,500 mm (15’)
BOILER
5
Factory pressure tested to 3.5 Bar maximum
Water capacity
Maximum operating Pressure
Pipework ports
10kg / 10L (2.2 Gal)
<1.5 Bar
1
Four x 1” BSP
5
IMPORTANT SAFETY ADVICE
BOILER STOVE SYSTEMS –
SPECIFIC SAFETY ISSUES
• Ensure that an approved carbon monoxide detector
(BS EN50291:2001) is fitted in the same room as the
stove. It should be powered by a battery designed for
the working life of the alarm. Please note this is now a
requirement under UK Building Regulations.
• This stove requires a dedicated non-closable air
vent of the appropriate size for its maximum heat
output and this should be located in the same room
as the stove. An adequate supply of combustion air
is essential for the safe operation of this stove – see
page 5 for maximum outputs.
• External surfaces including the fire chamber door
and operating handles, windows and stove bodywork
will become extremely hot. Always use the tool
provided and avoid touching these parts of the stove
without proper protection, such as heat-resistant
gloves or other protective aids.
• The system should not rely solely on gravity fed
circulation but must also incorporate a circulation
pump.
• This stove should not be connected directly to a
sealed or pressurised system without including a
safety ‘buffer’ between the systems such as a thermal
store, heat exchanger or specialist link-up component.
This will also help neutralise any pipe size difference
between the two systems which could adversely affect
performance.
• Potentially combustible material or objects such as
soft furnishings should never be left on or near any
of the stove’s hot surfaces. Ensure that wood supplies
and log baskets are kept at a safe distance from the
stove. See Minimum Distance to Combustibles page 3
• Never leave children unattended in the room where
your stove is being operated. Ensure that children are
aware of the potential danger and make sure that
they keep clear of the stove when it is in operation.
Where children, the elderly or the infirm are present
always use an approved safety fireguard (BS6539) to
prevent accidental contact with the stove.
•The cold feed and open vent flows must not be
fitted with any manual or automatic valve. The system
flow must not be able to be ‘closed off’ so that there
is always a clear flow route from the stove to the
system’s open vent
• This stove should not be fitted in a room with an
extractor fan (eg kitchen) as this will adversely effect
the air quality in the room and could be dangerous for
the room’s occupants. It will also starve the stove of
combustion air and reduce the stove’s efficiency.
• In the event of a power cut or circulation pump
failure your stove will continue to produce hot
water which could be potentially dangerous. Your
system design should therefore provide for the safe
dissipation of excess hot water through a heat loss or
heat leak radiator.
• To ensure your safety make sure that your stove’s
installation complies with all local, national and
European building regulations’ ventilation requirements.
Low energy houses have their own particular
requirements and should be strictly adhered to.
• Motorised valves must revert to the open position in
the event of a power failure. This will allow heat to be
safely dissipated through the system’s natural gravity
circulation process.
• Although it is common practice for heat leak
radiators to be located in an upstairs bathroom it is
worth noting that on some boiler stove systems the
heat leak radiator can get very hot and therefore we
recommend installing a low surface temperature type
radiator and / or locating it where young children or
the infirm won’t accidentally come into contact with it
• Do not use flammable liquids to ignite the fire. In
the confined space of the stove’s fire chamber there is
a real potential to cause a life-threatening flash flame
or explosion.
• Never over-fire the stove. If any external parts of
your stove glow red during operation then immediate
action should be taken to reduce the supply
of combustion air to the fire chamber through the
Primary and Secondary Air controls which should
quickly limit the intensity of the fire.
• The heat output to water from this boiler stove must
not be significantly greater than any potential usage.
The system’s heat release feature, especially if linked,
must be sufficient to prevent the system from overheating.
• This stove is CE approved and tested to EU EN13229
standards in the United Kingdom by Kiwa GasTec at
CRE of Stoke Orchard, Gloucestershire. Alterations to
its construction could be potentially dangerous and
will also render your product warranty void.
• The system design must incorporate a drain point,
preferably near the boiler stove, and be sufficient
to empty the system of any residue water during
maintenance or removal.
• Do not use aerosol products in the vicinity of the
stove when it is in use.
• Check and clean the stove’s flue way and the top
of the baffle plate regularly to help avoid potential
blockages.
• All electrical connections, for example to system
valves, the circulating pump and the link-up
component must comply with current Building
Regulations. Ensure that the pipework is correctly
earthed. See page 7 for relevant regulations.
• Clean your chimney regularly.
• The mains water connection to the system must
6
BUILDING CONTROL AND HETAS
comply with local water authority regulations in order
to safeguard water quality and public health – see
page 7.
In the United Kingdom most installations of solid fuel
and wood burning appliances and systems are subject
to the requirements of Building Regulations. These
regulations must be observed and such installations
need to be notified to the relevant Local Authority
Building Control department by law.
• The hot water cylinder thermostat should be set at
60ºC (and tested) to prevent scalding – see page 20.
ASBESTOS
Hetas (www.hetas.co.uk) is the official body
recognised by the Government to approve solid fuel
domestic heating appliances and the registration of
competent installers.
This stove does not contain Asbestos. However, check
that there is no possibility of disturbing any asbestos
based materials during its installation. You may
intend removing an older appliance prior to installing
your new stove, and you should be aware that the
old appliance or installation could incorporate heat
protective asbestos sheet – if in doubt seek guidance
at www.hse.gov.uk/asbestos – do not underestimate
the potential dangers of Asbestos.
HETAS registered installers in England and Wales
can self-certificate their work thus avoiding the
need for costly and time consuming Building
Notice applications to the local Building Control
department. They will provide you with a certificate
of compliance upon completion of the installation
and send a copy to Hetas for onward notification to
your local authority. The certificate of compliance is
an important record demonstrating that the work was
carried out legally and in accordance with the relevant
Building Regulations and by a trained and competent
installer of a registered business.
FIRE CEMENT
Prolonged contact with fire cement and skin should
be avoided. Protective gloves and glasses should be
worn when applying fire cement. Care should also be
taken to avoid contact between the stove’s surfaces
and fire cement as this will damage the paintwork.
Any excess fire cement should be quickly removed
before it hardens. Always follow the manufacturer’s
instructions.
Should you ever come to sell your property, the
information about work carried out under Building
Regulations is required and used by solicitors on their
enquiry forms. Failure to demonstrate compliant work
could adversely affect the sale of your property.
HEALTH & SAFETY
More information on the Building Regulations
process can be found on the Communities and Local
Government website www.labc.uk.com
During the installation of this stove and any related
building works you must comply with any current
Health & Safety at Work regulations. Always use
protective gloves and use the tool when adjusting the
air controls. When using fire cement always follow the
manufacturer’s instructions.
INSTALLATION REGULATIONS
You must ensure that your boiler stove is installed by
a recognised competent person who is appropriately
qualified in the installation of boiler stoves and that
the installation complies with all local, national and
European building regulations.
In the UK we strongly recommend using a Hetas
registered installer (www.hetas.co.uk) and in Ireland
a registered installer from INFO – the Irish
Nationwide Fireplace Organisation (www.fireplace.ie).
For further information please consult:
England & Wales
Building Regulations Document J (revised October
2010) – Combustion Appliances and Fuel Storage
Systems www.planningportal.gov.uk
Scotland
Building Standards (2001) Domestic
www.sbsa.gov.uk
Northern Ireland
The Building Regulations (Northern Ireland) 2000 /
Amendment 2006 / Amendment No 2 2006
www.buildingcontrol-ni.com
7
PACKING LIST
Isle of Man
Building Regulations (2007) – Isle of Man
www.gov.im
As soon as you receive your new stove please check
that you have a full set of components as set out in
the list below. In the unlikely event of a shortage,
please report this immediately to the dealer you
bought the stove from. Never attempt to operate the
stove with missing or damaged components.
Republic of Ireland
Approved Document J – Heat Producing Appliances
www.environ.ie
Other Information Points
For additional useful information and links to the
government websites above, including informative
downloads, visit www.soliftec.com.
Product Information
The Solid Fuel Association website is also a very good
source of practical information and downloads
www.solidfuel.co.uk.
Stove Components
A This Instruction Booklet and Warranty Card
B Stove Serial Number
C Handle Cover and Handle Cover Securing Bolt
D Flue Spigot and 2 Securing Bolts
E Flue Spigot
F Ash Lip
G Screw and Anchor for base fixing
H Fire Grate and integral Log Bar (in place)
J Baffle Plate (Located inside roof of fire chamber)
The British Flue and Chimney Manufacturers
Association website, accessed through
www.feta.co.uk/bfcma, produces an authoritative and
informative download Yellow Guide to solid fuel flues
and chimneys.
Equipment
UK SMOKE CONTROL AREAS
K Ash Pan
L Operating Tool
The Clean Air Act 1993 and Smoke Control Areas
Under the Clean Air Act local authorities may declare
the whole or part of the district of the Authority to
be a Smoke Control Area. It is an offence to burn an
‘unauthorised fuel’ (ie non-smokeless fuel) in a Smoke
Control Area. It is a legal requirement that fuels burnt
or obtained for use in Smoke Control Areas have been
‘authorised’ and officially designated “Smokeless
Fuels’. Wood log are not classified as a Smokeless
Fuel and therefore should not be burned in the Alpha
Inset stove if it is located in a building within a Smoke
Control Area. In such a case you must only use an
Approved Smokeless Fuel.
Tool Bag
M Safety Mitten
G Spare Glass Retaining Clips
G Spare Glass Retaining Clip Screws
G Allen key (for door hinges)
M Spare Door Rope Seal
Further information on the requirements of the Clean
Air Act can be found here:
www.smokecontrol.defra.gov.uk.
Your local authority is responsible for implementing
the Clean Air Act 1993 including designation and
supervision of Smoke Control Areas and you can
contact them for details of Clean Air Act requirements.
Even if you don’t live in a Smoke Control Area it is still
the householder’s legal responsibility not to cause
nuisance smoke. Your inset stove therefore should,
at all times, be operated in accordance with these
instructions which have been written to help you
minimise the amount of smoke produced from your
stove.
See page 11 for recommended fuels for your Alpha
Inset Boiler stove.
BUILDINGS INSURANCE
It is a requirement by some building insurance
companies to inform them of the installation of a new
fixed heating appliance and a relevant certificate of
compliance produced.
8
ASSEMBLING THE STOVE
acid content of certain mineral fuels.
Your new inset boiler stove is extremely heavy. Always
handle with care and make sure that you have
additional strong help when you move it.
Should it not be possible to fit a liner then in the
interests of safety another means of being able to
clean the flue system and top of the stove, for
example a soot box, should be created in the chimney.
The householder should ensure that the chimney is
regularly swept (at least twice a year when burning
wood) and at the same time if possible, the stove
removed so that the top can be thoroughly cleared
of any soot and debris build-up. See page 18 for
instructions on safely sealing the fireplace back plate.
The door and door handle, should never be used to
grip the stove as they could be damaged from
supporting the stove’s weight. Items, such as the
fire grate and baffle plate can all be easily removed
to help reduce the weight. Under no circumstances
should the door be removed as this will invalidate your
Alpha Warranty.
• System ports Each of the four water ports on your
inset boiler has been fitted with a bolt seal. To avoid
the internal threads being contaminated with grit
and other debris please ensure that these are only
removed when the system pipework is ready to be
connected.
Always lift the stove to finally position it. Alternatively
it may be possible to place the stove on heavy duty
plastic sheeting or thick floor covering to slide the
stove into position, being careful not to
damage any finished floor or decorative hearth
surfaces with trapped grit or building debris.
• Unpack Remove the stove from its recyclable
packaging. You must retain this until the stove is
installed and is fully operational. Unfasten retaining
wires and remove any components, including those
inside the ash pan, from inside the stove.
• Inspect Please inspect the stove to check that it
has not been damaged in transit – never attempt to
install a stove which has been damaged. If damage is
suspected then report this immediately to your stove
dealer.
• Check List Study the Packing List on page 8
and make sure that you have received all of the
components listed before proceeding. Some
components are contained within the ash pan or
will already be fitted to the stove.
• Ash Lip The ash lip is simply fitted to the installed
stove by positioning it at the front and pushing it
underneath to make a snug fit. It can then be easily
removed for cleaning the hearth.
• Baffle Plate Check the position of the baffle plate
(sometimes known as the throat plate) inside the
‘roof’ of the stove to ensure that it has not moved
during transit. This is a heavy metal plate which directs
flames and helps retain heat inside the stove to warm
the water.
It is best to fully familiarise yourself with the baffle
plate’s correct location by practising removing it and
re-fitting it prior to the stove’s installation as you will
need to regularly check the top of this plate and the
access to the flue way to avoid potential soot build up
and blockages. Once you know how to do this it is a
very easy operation. See page 10
• Handle Assembly Thread the split washer along
the handle bolt. Feed the bolt and washer through the
handle grip. Use a Phillips crosshead screwdriver to
attach the assembled grip to the door handle clamp
mechanism on the door, being careful not to
over-tighten. Remember not to lift or position the
stove using the door or handle.
• Flue spigot plate To maximise efficiency and safety
the AL357i-B Inset Boiler stove has been designed to
work best in conjunction with a 150mm (6”) flexible
flue liner connected to the purpose-designed spigot
housed on top of the stove. To avoid soot build-up
on the stove bodywork, which could potentially ignite
and cause a chimney fire, we therefore strongly
recommend that a liner is always used. If you are
proposing to burn mineral fuels then 904L grade liner
is recommended as this will provide greater resistance
to the combined corrosive affects of moisture and the
Your inset boiler stove is now ready for installation.
9
REMOVING THE BAFFLE PLATE
inevitably be some sooty debris removed with the
baffle. When the stove and boiler are cold, simply put
your hand inside the ‘roof’ of the fire chamber and
push upwards. This will release the plate which should
then be pulled forward slightly and dropped down on
one side to clear the fixed retainers ready for inspection and cleaning.
Regular checking of the baffle plate will ensure that
the stove’s flueway stays clear of soot as well as
ensure its continued safe and efficient operation. If
you have never owned a stove before it is important
to understand how critical this aspect of operating
a stove is. As stated previously it is best to familiarise yourself with this procedure before the stove is
installed.
To replace the baffle, simply reverse the operation –
ensuring that it sits securely along the retaining ledge
at the back of the fire chamber and that there are no
air gaps between the retainer sand the baffle.
With the Alpha Inset Boiler there are no baffle fixing
brackets, bolts or fire bricks to remove.
Remember, only attempt to remove the baffle when
you are sure that the inside of the stove is cold.
Firstly, Protect any decorative finishes such as porous
stonework, tile grout or carpets as there will
1 Push upwards and pull forward
To back of stove
2 Drop down at angle
3 Carefully remove from the fire chamber
10
RECOMMENDED FUELS
• Unpleasant smoky smells both inside and sometimes
outside the house
Please note If you live in a UK Smoke Control Area
you must only burn approved smokeless fuels. The
following fuels are approved by Alpha for use in the
AL357i-B Inset Boiler stove:
In the event of a problem with your stove – always
check your choice of fuel first!
Manufactured or finished wood products, such as
plywood and chipboard, must also be strictly avoided
because of the high chemical adhesive content used
in their production which will also leave harmful,
potentially corrosive, residue inside the stove and flue
system.
• Wood Logs Only ever use dried, fully seasoned
chopped wood logs with a moisture content of less
than 20%.
Wood which is well seasoned makes a distinctive
‘clack’ rather than a dull ‘thud’ when knocked
together. It will also feel much lighter than an
unseasoned log. Other indicators include bark peeling
away and cracking and splitting around the outside.
For more information about wood fuel visit the
DEFRA funded National Energy Foundation website
Logpile at www.nef.org.uk/logpile.
• Peat or ‘Turf’ Peat is an excellent cost-effective fuel
alternative and provides a similar calorific heat output
to wood. It’s also clean and easy to handle with low
atmospheric emissions. However, you must ensure
that the peat is kept thoroughly dry as it absorbs and
retains unwanted moisture very easily.
Ideally wood should be seasoned outdoors for
between 18 to 24 months – the harder the wood
then the longer the seasoning. It should be stacked
off the ground with plenty of space between the logs
to allow air movement and with the top covered to
keep rain and snow out. Seasoned wood will give
you approximately 50% more heat output than the
equivalent unseasoned log.
Peat has traditionally been used as a heating fuel in
both Scotland and Ireland and you can find out more
by visiting these suppliers’ useful websites – �www.
peatheat.co.uk (Scotland) and www.bnm.ie/fuels
(Ireland).
Most types of hardwood, for instance Ash (generally
regarded as the best), Birch, Beech, Oak and Elm can
be used. However, avoid woods with a high resin
content. As a rule of thumb, the heavier the wood,
then the greater the heat output and the longer burn
time – the time between refills. All of this is providing
it is fully seasoned wood.
Should you prefer to burn peat then we would
strongly recommend using 904L grade flexible liner to
line your chimney.
• Multi Fuels (Other than Wood or Peat) If you
cannot burn wood then we recommend burning a
smokeless alternative, such as smokeless nuggets, as
this is better for the stove and flue system as well as
the environment. Your stove is also approved to burn
coal – however, we do not recommend prolonged use
of bituminous house coal because of the excessive
soot it produces. There are many different brands of
high quality smokeless coal nuggets available in the
UK and Ireland. The most popular include Phurnacite,
Taybrite, Ancit and Homefire.
Never use wet or unseasoned (green) wood as this will
cause nuisance smoke and a very disappointing fire.
Its use could quickly result in the build up of soot and
creosote – a matter of weeks sometimes, which
because of the higher temperatures of stove flue
gases, could easily cause a flue or chimney fire. In
addition, burning wet wood creates other
environmental problems, a less efficient fuel economy
and can eventually clog your flue system
and cowl. It will also reduce the effectiveness of the
stove’s Airwash system thus causing staining and
blackening of the glass.
Your local fuel merchant will be able to advise you on
the best types of coals suitable for multi fuel stoves,
as well as natural mineral fuel alternatives such as
anthracites which burn cleanly. The following fuel
merchant’s website also has good descriptions of the
comparative benefits that the brands listed above
have to offer – www.coalproducts.co.uk.
Wet or unseasoned would produces the following
poor performance:
• Hard to light fires
• Fires that are difficult to keep going or to keep
burning well
You can also find out more by visiting the Hetas
website www.hetas.co.uk.
• Smoky fires with fewer flames which are also of a
dull orange colour
• Increased dense grey / blue smoke from the chimney
PROHIBITED FUELS
• Shorter burn times
Never use your stove like an incinerator. Burning
prohibited ‘fuels’ in a Smoke Control Area is illegal.
• Low heat output
Burning the following materials could also damage
your stove and flue system, rendering the product
warranties on the stove and flue system components
void.
• Dirty glass and firebricks
• Excessive and rapid creosote build-up in the flue
system and chimney
11
• Petroleum Coke Never burn petroleum coke as this
burns at a very high temperature and its continued
use will almost certainly cause irreparable damage to
components such as the grate, baffle plate and fire
bars.
The stove is not designed to be operated with the
door left open continuously – this will reduce its
operating efficiency and it will consume more fuel
very quickly and produce less heat.
• Bituminous House Coal is not recommended
because it produces excessive soot deposits, which is
not good for the environment, and thus considerably
increases the need for frequent cleaning of the stove
and flue system.
CONTROLLING THE COMBUSTION AIR
Your Alpha Inset Boiler stove has three simple to use
air controls:
1 Primary Air Control This is the large control knob
in the centre at the base of the stove front. Primary
Air is required when burning mineral fuels (and to
quickly aid the supply of air during the initial
combustion of wood). Using the tool provided, turn it
anti-clockwise to open and add air.
• Household Rubbish Printed matter (excluding very
small amounts of newspaper for starting the fire),
plastic, rubber, lacquered or impregnated wood,
plywood, chipboard and household rubbish, such as
milk cartons, should also be avoided. During
combustion some of these materials may develop
substances which could be hazardous to your health
and be harmful to the environment.
The Primary Air Control
• Flammable Liquids Never use methylated spirits,
petrol or other highly inflammable liquids for
lighting the fire as these could cause an explosion
in the confined spaces of the fire chamber.
UNDERSTANDING HOW
DIFFERENT FUELS BURN
Wood and solid or mineral fuels (multi fuels) burn in
different ways and you will need to understand these
differences if you are a newcomer to wood burners
and multi fuel stoves.
2 Secondary Air Control This is the silver control
knob on the right hand side of the stove – pull it out
to open the air supply. Secondary Air is needed when
burning wood and is not usually needed when
burning mineral fuels (unless it is to maximise the air
supply to aid the initial combustion).
Putting it simply, mineral fuels, such as coal or
smokeless nuggets, need a flow of combustion air
through the bottom grate which is known as Primary
Air, whereas wood fuel works much better when its
combustion air is taken from above the grate. This
source of air is known as Secondary Air. Wood always
burns best on a bed of its own embers and the ashes
shouldn’t need to be riddled. Again mineral fuels
differ because they need combustion air from below
the grate therefore needs to be riddled to keep the air
passage clear.
The Secondary Air Control
See the section below to help you understand how
to control the different types of combustion air that
wood and mineral fuels need.
Your new stove can burn very well, or very poorly,
depending on how you light the fire, how you refuel
the fire, and, of course, the type and quality of the
fuel that you are burning. A log moisture meter is a
cost-effective investment if you want to maximise the
efficiency of your stove and wood fuel.
Wear protective gloves when loading a burning stove
and place the fuel precisely where you want it in the
fire chamber by using heat-resistant tongs. Always
open the stove door gently to avoid unnecessary air
turbulence which could cause fly ash or small lighted
embers to be drawn from the fire chamber and
beyond the protective hearth.
3 Thermostat Control Zero is closed and 8 fully
open. This adjusts the temperature of the water
leaving the boiler from low when closed off (approx
50Cº) to high (approx 90Cº) by controlling part of the
combustion air supply to the fire chamber.
The effectiveness of adjustment will involve the
interaction of the Primary and Secondary Air supply
12
and other factors such as the fuel type, the system
set-up and the pump flow speed. Finding the right
setting(s) will be a matter of trial and error as well as
personal preference. For example the Thermostat
Control, can sometimes be used for simultaneous
control of both the water temperature and the burn
rate of a mineral fuel load by shutting of both the
Secondary Air and the Primary Air.
the ash pan get over-filled. Once you have lived with
your stove for a while you’ll soon get to know how
often you should do this.
Ensure that there is a gap of approximately 25mm
(1”) between both ends of the logs and the boiler
sides. Log ends placed against the boiler sides restrict
combustion and can create unwanted cold spots in
both the log and the water. As the end grain of the
wood produces more of the remaining moisture and
gases, whenever possible point the log ends away
from the glass to help keep the glass clean.
It is worth noting that this control does not ‘turn off’
the hot water production completely and that your
system design must therefore include a means to
dissipate any surplus heat. See page 20
Fuel Load Ideally the logs should be approximately
275mm (11”) long. A typical fuel load should weigh
2.5 kg (5lb 8oz) with a maximum load of 3.6kg (8lb).
Thermostat Control
To get the best out of your stove, ideally you will need
three different thicknesses of wood log as you build
the fire through each lighting phase:
1 Kindling This is generally finely chopped wood, approximately 5 to 10mm thick (1/4” to 1/2”) from your
supply of logs. Alternatively use dried twigs or small
branches which have also been fully seasoned
2 Lighting Logs These are slightly bigger diameter
logs, approximately 25 to 50mm (1” to 2”)
3 Refuelling Logs These should be
approximately 75 to 100mm thick (3” to 4”). Bigger
logs should be split down to this size
BURNING WOOD LOGS
Important: Try not to exceed the recommended
log length. This size allows approximately 25mm
(1”) of space at either end of the log to prevent
cold water spots.
Remember, these instructions are an initial guideline
to help you get started. As you begin to gain
experience of your stove and choice of fuel(s), as well
as your flue system, you will be able to adjust these
procedures and control settings to your personal
preference.
As previously stated wood burns best on a bed of its
own embers which also forms a barrier to reflect heat
and protect the fire grate from being damaged. You
can therefore leave a bed of ash in place to create a
layer of approximately 25mm (1”), only occasionally
removing the surplus ash from the grate. Ash should
still be regularly removed from the ash pan – never let
LIGHTING A WOOD FIRE
The main difference between smoke and flame is
temperature, so when lighting a fire you need to get
the temperature in the fire chamber as high as
possible as quickly as possible. This is also critical in
creating a good ‘draw’ within the flue system,
especially when it is particularly cold outside.
Avoid abutting the logs against the
boiler sides which creates cold water spots
When flue gas temperatures are below 120°C,
creosote tars form within the gases and the fire will
be smoky and burn with a dull orange flame. Burning
the stove like this for a sustained period will create
unnecessary smoke and not be good for the chimney
or flue system.
13
1 The Lighting Phase
For best results:
Primary Air (bottom control) – fully open
Secondary Air (top control) – fully open
Thermostat Control – fully open (8)
Door – slightly ajar (optional)
‘play off’. For example a single dense piece of wood
or log will not burn as well as 2 or 3 smaller logs of
equivalent mass. The more contact the wood has with
each other piece, the hotter the embers will be. 3 or 4
logs tightly packed to each other will burn longer but
at a lower temperature than loosely criss-crossed logs.
Avoid trying to light the fire with excessive amounts
of paper as this has a very high ash content which can
‘smother’ the ash bed. If you have good dry kindling
or sticks then paper should not be needed at all.
Approximately 1.5kg to 2.5kg of wood logs can be
added at this stage. Be careful not to add too many
logs as they may ‘smother’ the fire or cause the stove
to over-fire.
The size of the logs used at each stage is also
important. If the kindling wood is too large this will
not light well and will be slow to get started. Two
handfuls of smaller pieces of kindling (equivalent to
the weight of typical log) layered in a criss-cross or
‘wig-wam’ and a small firelighter will get the fire well
established and up to operating temperature quickly.
Try to avoid setting the ends of the logs pointing
towards the glass as this is where some of the gases
and moisture from the logs escapes and this can
cause staining which the Airwash may find difficult to
remove.
Only reduce the Secondary Air control when the wood
has ‘carbonised’ and the fire is burning at a high
temperature. This is when the ash on the burning
wood looks light grey and virtually covers all of the
wood. You will be able to tell when the stove is at this
stage by studying the colour of the burning surfaces
– the ‘lighter’ they are the better the wood is burning.
If the log surface is predominately black and / or the
flames are a dull orange then there is still some time
to go before the fire is operating at full temperature.
If you feel you have a weak chimney draught, then
keeping the stove door slightly ajar for the first 10
– 15 minutes will assist, after which it should be
closed. This will also help prevent the build-up of
condensation on the door glass until the glass warms
up, especially if you have not used the stove for a few
days. During the lighting phase the Primary and
Secondary Air settings, as well as the Thermostat
Control, on the stove should be fully open.
Avoid leaving the stove unattended after refuelling
until the flames are well established on the new logs.
Always load onto a bed of hot embers.
2 The First Refuel Phase
For best results: After 10 minutes...
Primary Air (bottom control) – close completely
Secondary Air (top control) – fully open
Thermostat Control – fully open (8)
Door – closed
Once the fire is established the flame pattern can
then be adjusted to your requirements with the top
Secondary Air (Airwash) control.
Getting the balance right between a gently burning
stove and one that is burning too slowly, creating
smoke and causing the Airwash to fail and
consequently the glass to stain, is very much a matter
of trial and error. If you are burning well-seasoned
wood then a quick ‘blast’ of the stove operating at
‘full throttle’, with Secondary and Primary Air fully
open, should quickly burn off any deposits left from
any slower burning phase.
Once the embers are starting to glow and the flames
start to calm down, the first refuelling can take place.
For this stage use slightly larger pieces of wood than
the lighting wood – but smaller than the main
refuelling wood in the next phase. The reason for this
is that the embers from the kindling wood are small
and will not hold a high temperature for too long.
If unnecessarily large pieces of wood are placed on
the embers at this stage and do not ignite well there
is a risk that the firebox will quickly cool down and the
wood start to smoke. When the first refuelling wood
is burning well (say, after about 10 minutes from the
start) the Primary Air can be completely shut off.
If you are lighting the stove to firstly provide hot water
and heat into your central heating, rather than heat
into the room, you should not need to adjust the
Secondary Air or Thermostat Control until you are
satisfied that both of these have been achieved. This
could take as long as two hours and will probably
require at least one full refuel.
3 The Main Firing Phase
For best results: After 17 or 18 minutes...
Secondary Air (top control) – remains open
Primary Air (bottom control) – remains closed
Thermostat Control – remains fully open (8)
Door – remains closed
Once the embers of the first refuel phase are glowing
then these can be evenly spread with a poker or
companion tool and the main larger refuelling wood
can be quickly set.
4 Refuelling
For best results: Just before you refuel...
Primary Air (bottom control) – fully open
Secondary Air (top control) – fully open
Thermostat Control – fully open (8)
After loading and when new fuel is burning well...
Primary Air – close completely
Secondary Air– adjust to suit
Thermostat Control – adjust to suit (0 – 8)
Wood burns best if the flames have other wood to
14
Regular, smaller loads are better because they keep
the fire chamber at a higher temperature, without
over-firing it. The higher operating temperature helps
prevent nuisance smoke and sooty deposits.
We therefore recommend burning your Alpha Inset
Boiler on high output for at least 30 minutes each day
to help burn off any potential soot or creosote buildup – but be careful not to over-fire the stove.
Never overfill the fire chamber and also avoid
over-sized pieces of wood which will ‘slow’ the fire
down at the start but then could lead to over-firing.
2 Small regular loads when refuelling will produce a
more efficient and cleaner burning performance.
3 Avoid burning large amounts of wood with the
Secondary Air supply turned down as this will reduce
the effectiveness of the Airwash system, as well as
produce excessive smoke and create potential
creosote build-up.
Before refuelling open the Primary and Secondary
Air supply, as well as the Thermostat Control, so that
there is a good strong fire and the embers are glowing
red to help the new fuel to start burning quickly. This
will also ensure that there is no build-up of harmful
gas which could be released into the room when the
fire chamber door is opened.
4 Never overload the stove – it will be smoky and
inefficient as well as very slow to establish a good
burn and could eventually possibly over-fire when it
does get established.
Rake the embers and spread them out to make an
even bed. You may need to add some kindling to
re-establish the fire. Add the new wood as before
ensuring that the logs are not tightly packed.
5 Bright vibrant flames and a clean fire chamber
indicates that your stove is operating well.
Newly refuelled wood always requires some
additional air so make sure the Secondary Air and the
Thermostat Control are back in the fully open position
after refuelling. Do not adjust the Secondary Air or
Thermostat Control until the fire is burning well and
you can see bright yellow vigorous flames.
BURNING MINERAL FUELS
Once the fire is established, usually after about five
minutes, close the Primary Air and adjust the flame
pattern again to your requirements with the
Secondary Air and Thermostat Controls.
Mineral fuels require much more combustion air
from below the fuel load than wood. This means
that Primary Air is generally needed throughout the
initial burning phases. The Primary Air control should
always be in the fully open position at the start of the
lighting phase (you may also need to leave the stove
door open slightly). Burning mineral fuels also requires
the grate to be riddled more often to allow the free
flow of combustion air from the Primary Air source
– therefore, always ensure that the firegrate is clear.
These instructions are an initial guideline to help you
get started. As you begin to gain experience of your
stove and choice of fuel(s), as well as your flue system,
you will be able to adjust these procedures and
control settings to your personal preference.
If the new wood fuel is slow to catch alight, even with
the Primary, Secondary and Thermostat Air fully open
then try opening the stove door slightly to provide
additional combustion air and until strong vibrant
flames are established. This should only take a matter
of a minute or so and on no account should the stove
be left unattended while this is happening as the
stove could very easily over-fire.
The maximum recommended mineral fuel load for
this stove is 3.7kg (8lb 2oz).
5 Controlling the boiler temperature
1 The Lighting Phase
This will be very much a matter of trial and error
using the guidelines above. When the stove has been
running at operating temperature for a number of
hours the Thermostat Control, can be used for
simultaneous control of both the water temperature
and the burn rate of wood fuel load (and therefore
the heat into the room). To do this, ensure the Primary
Air is fully closed, adjust the Secondary Air so that
some combustion air is still provided to ensure the
Airwash will continue to work. Then simply control
the flame pattern and burn rate with the Thermostat
Control. if the glass begins to soot up provide more
Secondary Air.
For best results:
Primary Air (bottom control) – fully open
Secondary Air (top control) – fully open
Thermostat Control – fully open (8)
Door – slightly ajar (optional)
Some simple wood burning tips
For best results: After 10 -15 minutes...
Primary Air (bottom control) – fully open
Secondary Air (top control) – adjust to suit
Thermostat Control – fully open (8)
Door – closed
Light your fire in the traditional way with a small
wood kindling fire and small amounts of your choice
of mineral fuel placed lightly on top making sure to
leave plenty of air space. On very cold days increase
the amount of kindling used to ensure a good updraught in your flue system is quickly established.
2 The First Refuel Phase
1 Boiler stoves operate at a much lower temperature
than non-boiler stoves and consequently the potential
to create soot or creosote build-up in the flue system
is also much greater, especially when operating the
stove in ‘slumber’ mode during overnight burning.
Once the mineral fuel is burning well then add some
15
additional fuel (but not too much so that it ‘kills’
the mineral fuel that’s already alight), until there is a
good bed of burning fuel. Avoid stacking too much
fuel against the back and sides of the boiler as this
could potentially overheat the stove’s components and
cause permanent damage. Ideally, when fully burning
the fuel load should look like a shallow dome.
achieve the correct balance of combustion air for your
stove and flue system draught.
OVERNIGHT BURNING
The Alpha Inset Boiler stove is designed to allow overnight burning. To do this put a good fuel load into the
stove and allow it to burn for about 15 – 20 minutes
in the normal way. If burning wood, then limit the
Secondary Air supply and ensure the Primary Air
supply is closed. Adjust both the Thermostat
Control and Secondary Air to achieve a slower burn
rate. If the glass begins to soot up then add some
more Secondary Air (Airwash).
When burning good quality mineral fuels Secondary
Air (Airwash) should not be needed to keep the glass
clean, therefore the Secondary Air can be reduced or
shut off completely. The Primary Air control should
then be used to adjust the flame pattern in the early
stages. You may find that a combination of subtle
adjustments to both air controls may best suit your
individual requirements. Leave the Thermostat Control
fully open until the heating and hot water system is at
the desired temperature – this is usually after a couple
of hours and depends on the system requirements.
Do not ‘starve’ the fuel of combustion air as this could
create a very inefficient smoky burn and cause heavy
soot and creosote build-ups in the flueway and fuel
system. The best setting to achieve the best burn and
cleanest glass will be a matter of experimentation.
3 Refuelling
For mineral fuels close the Secondary Air supply and
adjust the Primary and Thermostat Air supply to
achieve a slower burn rate.
For best results: Just before you refuel...
Primary Air (bottom control) – fully open
Secondary Air (top control) – fully open
Thermostat Control – fully open (8)
When you return to your stove, check the ash pan
does not need emptying, then fully open all three air
supply controls. If the firebed shows that it still has
sufficient burning embers then simply add a small fuel
load as if lighting the fire from the start (see above)
and add more fuel until you have a good fire.
After loading and when new fuel is burning well...
Primary Air – adjusted to suit
Secondary Air– fully close or adjust to suit
Thermostat Control – adjust to suit (0 – 8)
When refuelling it is better to use smaller fuel loads
more often which will provide you with a cleaner,
more efficient burn.
Immediately after refuelling, open the Primary Air to
maximise the combustion air delivered to the
remaining fuel so that when the new fuel is added it
can get quickly established without ‘damping’ the fire.
If you have been burning mineral fuels you will
probably need to riddle the firegrate to re-establish
the Primary Air flow. Do not add a full fuel load until
the firebed is hot and any initial small fuel load has
been allowed to fully ignite. A large ‘cold’ fuel load
could easily starve the embers of combustion air and
put out the fire.
Spread the embers with a poker just before adding
the new fuel. Re-adjust the air settings once all the
fuel is burning normally.
Always operate fully burning for approximately 30
minutes to burn off any overnight soot deposits
before you revert to your preferred operating levels.
Empty the ash pan regularly – at least once a day and
do not let the ash build up under the grate as this will
create a strong hot spot which could eventually warp
or burn-out your grate. It will also eventually limit the
flow of Primary combustion air and could affect the
stove’s performance.
During overnight burning the stove glass may blacken
but if dry wood fuel has been used and a hot fire is
re-established then these deposits should quickly burn
off. However, if there are no burning embers and you
need to start the fire again, simply wipe any deposits
from the glass using kitchen roll or newspaper. Do not
use a damp cloth or proprietary cleaning fluids unless
you are sure that the stove glass at least is at room
temperature.
4 Controlling the boiler temperature
As previously stated this will be very much a matter of
trial and error using the guidelines above. When the
stove has been running at operating temperature for a
number of hours the Thermostat Control, can be used
for simultaneous control of both the water
temperature and the burn rate of the mineral fuel
load (and therefore the heat into the room). To do
this, ensure the Primary and Secondary Air is fully
closed. Then simply control the flame pattern and
burn rate with the Thermostat Control. However, you
may still need to undertake some subtle adjustments
to both the Primary and Secondary Air supply to
16
REMOVING ASH
INSTALLATION CHECK-LIST
Remember, you do not need to riddle wood ash
during firing, but possibly only at the start when some
Primary Air is needed to aid the initial combustion.
This information is intended to outline the general
principles of installing your inset stove. However, as
each installation will vary and must comply with local,
national and European building regulations, which
could be different from country to country, it is
unfortunately not possible, nor is it intended, for
these guidelines to be comprehensive.
Riddling allows mineral fuel ash to fall into the
collection pan below the fire bed to help maintain a
flow of Primary combustion air to the fuel. The ash
pan should never be allowed to over-fill as this will
limit the Primary Air flow and could cause excessive
heat build-up which could eventually warp or burn
out the grate.
Legal Requirements
Please note that, not only is it a legal requirement to
ensure that your stove installation complies with all
applicable building regulations, it is also a requirement
of your Warranty that the stove is installed by a
competent person such as a Hetas or INFO registered
installer who will be fully aware of any building and
safety regulations which apply to stove installations in
your location.
Locate the operating tool in the slot at the front of
the ash pan to make a handle and lift the pan from
the stove. For safety reasons ash should be removed
when the stove is cold. If this is not always possible
then extra care should be taken and decorative and
combustible surfaces, such as laminate floors or
carpets, should be protected against potential
accidental spillage. Even if the ash appears to be cold
protective gloves should be worn and the refuse ash
placed in a non-combustible container. The ash could
still be hot with the possibility of hidden live embers
Inset Stove Location Checklist
• The existing constructional hearth (the main part of
the hearth) is suitably constructed and is of a
thickness that conforms to all applicable building
regulations.
As you remove the ash from your home ensure that
it is covered to protect it from any draught or wind
which could blow the ash out of your container.
• The back hearth (the part of the hearth that the
inset stove sits upon and which is usually within the
fireplace recess or opening) is also suitably constructed
and conforms to all applicable building regulations.
Wood ash can be composted or used in the garden.
• The superimposed hearth (the thinner, usually
decorative surface, which sits on the constructional
part of the hearth) is suitably constructed and
conforms to all applicable building regulations.
• The fireplace recess or opening is suitably
constructed and conforms to all applicable building
regulations and can accommodate the stove along
with the safe minimum operating distances required.
• Any adjacent walls, next to which the stove is
installed, are of a suitable thickness and are of noncombustible material and conform to all applicable
building regulations.
• The air supply is sufficient for full combustion of the
stove’s fuel and the health and safety of the room’s
occupants. Any extractor fans inside the room should
be removed or permanently disabled. Note that in the
UK stoves above 5kW output require a permanently
open dedicated air supply within the room which
must conform to applicable building regulations. The
AL357i-B Alpha Inset Boiler stove has been officially
rated at a maximum output of 12.6kW and therefore
the installation must incorporate an appropriately
sized air vent.
The forked end of the tool is inserted underneath the ash pan grip
as shown above to create the ash pan handle.
• The chimney is of sufficient height, is suitably
constructed and is in good condition and conforms
to all applicable building regulations regarding stove
installation. The minimum flue height required for the
Alpha Inset is 4.5 metres (15’) from the hearth to the
top of the chimney terminal.
17
• The chimney has been swept and tested prior to
installation.
of 225mm (9”) from the front of the stove (which
includes the edge of the ash lip). As a general rule it is
best to extend the hearth to at least 75mm (3”)
beyond the furthest out-swing of the stove door if
possible to avoid any potential live ash held on the
inset door falling on to combustible flooring or floor
coverings. If the top of the hearth and any
combustible floor coverings are level with each other
then a retaining fender should be fitted to warn
occupants of the hearth area. Alternatively, a 28mm
(1.1”) change in level provided by a decorative noncombustible material such as stone, marble, granite,
ceramic tiles etc could be used.
• The proximity of all combustible materials to the
intended stove installation conforms to the minimum
requirements outlined within this handbook as well
as local, national and European building regulations,
whichever is the greater. A combustible material is
anything which can burn once it gets hot enough
and includes skirting boards, wooden fire surrounds,
wooden mantles, wallpaper, fabrics and floor
coverings. Remember these materials could be concealed behind other materials which on the surface
may appear to be non-combustible, for example, stud
partitioned walls. It also worth noting that heatresistant materials will eventually combust should they
inadvertently reach the required higher combustion
temperatures.
Please note that some materials, such as marble, may
not be suitable when used in a single sheet. This may
prove problematic if, for example, the inset stove is
being installed within an existing fire surround which
features a one-piece back panel which the inset stove
is intended to sit inside. Non-combustible fire
surrounds intended for use with solid fuel open fires
and stoves feature smaller panels pieced together
which allow space for expansion when hot. Your stove
dealer or installer should be able to advise you about
the suitability of an existing fire surround.
Important Minimum Distances For This Stove
The minimum distances to combustible materials for
the AL357i-B Alpha Inset are as follows:
Top (eg mantel shelf)
200 mm
Sides (eg fire surround)
100 mm
The ‘Fireplace’
APPLIANCE INSTALLATION:
GENERAL GUIDELINES
The stove must be sited within a brick or stone fireplace recess. It is unsafe to use this inset stove as a
free-standing stove.
Please refer specifically to current building regulations
which apply to your country or region. Adopt
whichever provides the highest / safest margin.
The fireplace side and rear walls should be at least
75mm thick and made of non-combustible brick or
stone. Any gaps at the back and sides of the stove
and the fireplace aperture should be filled with noncombustible insulation material such as rockwool or
vermiculite. This will not only improve the efficiency of
the stove but also help avoid the potential build-up of
combustible soot along the sides – this is an especially
important requirement if you are not using a flue liner.
Asbestos
This stove does not contain Asbestos. However, check
that there is no possibility of disturbing any asbestosbased materials during its installation. You may
intend removing an older appliance prior to installing
your new stove, and you should be aware that the
old appliance or installation could incorporate heat
protective asbestos sheet or other asbestos-based
materials – if in doubt seek guidance at www.hse.
gov.uk/asbestos – do not underestimate the potential
health hazards of handling Asbestos.
Inset Stove Fireplace Opening
Your Alpha Inset stove has been designed to fit
relatively easily within a 16” x 22” (400mm x 550mm)
standard builders’ fire opening.
The Hearth
• Redundant back boilers or ‘Baxi’ type ash pits and
air intakes ideally should be removed, filled and
levelled.
The hearth should be made of solid non-combustible
material, set on a firm and level base and should be at
least 125mm (5”) thick. This can include the
thickness of any non-combustible floor under the
hearth or non-combustible decorative surface. It must
be capable of supporting the weight of the stove
(when loaded) and boiler (with water add 10kg) along
with any attached flexible flue liner which may bear
down on the stove. This hearth must conform to local
building regulations which may vary from country to
country.
• Existing fireplaces and hearths must be made of
non-combustible materials as well as be suitable for
use with a solid fuel stove. For example the hearth
and backplate ideally should be ‘slabbed’ with
concrete and any decorative surface finishes, such as
marble, should be ‘tiled’ to allow for heat expansion.
• Ensure that any existing fire surround or fireplace
back plate you propose to re-use or leave in position is
secure and that any air gaps between it and the back
wall are sealed, particularly around the actual fireplace
opening and the backplate interface. It is important
for safety reasons that this seal is air tight.
In England and Wales there is a minimum requirement
for the hearth to project 500mm (20”) in front of any
brick or stone recess and 150mm (6”) at each side of
the recess. The hearth should extend by a minimum
18
• Where possible once the stove position has been
settled upon any significant gaps along the side and
back of the inset stove should be filled with a suitable
inert material such as rockwool. A vermiculite and
cement mix (6 parts vermiculite to 1 part cement)
can be used for filling large spaces – but under no
circumstances should it be packed against the stove
sides or pipework thus limiting the potential for the
stove to be accessed or easily removed at some later
point.
temperature than those produced by an open fire or
gas appliance it does not necessarily follow that your
chimney will function adequately (or safely) when
your new stove is installed. The best way to ensure
that you have a fully functioning flue system is to fit
an approved flexible multi fuel flue liner. If you intend
to predominantly burn mineral fuels then 904L grade
liner will provide greater resistance to any acidic
condensates produced by burning certain mineral
fuels.
Flue Draught
Alpha strongly recommend fitting a chimney liner for
the following reasons:
The Alpha Inset has been tested with a flue
draught pressure of 12pa and therefore to ensure
performance which is line with the test results on
page 3 the ideal flue draught pressure should be
approximately 12Pa.
• A flue liner is a major ‘quantifiable’ component in
a total and fully functioning flue system. As such it
will provide a consistent flue draught from the stove
through to the chimney terminal and when back-filled
with vermiculite will deliver much needed insulation
to keep flue gases as hot as possible (particularly
important for boiler stoves) which will help minimise
the amount of smoke produced. It will also improve
the stove’s operation with greater control over the
fuel burn rate and improve environmental and fuel
efficiency.
The Chimney, Flue and Flexible Liners
Other flued appliances must not share or be
connected to the same flue system or chimney as this
stove.
Generally speaking, the chimney or flue terminal
must be above the height of the apex of the building
and any other obstructions, such as trees, which are
within 3m (10’) of the flue terminal. Failure to do this
could affect the efficiency of the stove and may also
cause unwelcome down-draughts which would mean
potentially dangerous flue gases could be emitted into
room.
• Your existing chimney could leak smoke, fumes and
potentially dangerous ‘invisible’ carbon monoxide into
other parts of the building.
• Condensation or creosote ‘tar’, often associated
with burning wood, could eventually seep through the
walls, particularly if they are made of old or porous
brick and / or are jointed with lime mortar, eventually
causing unsightly stains on decorative coverings.
If you are using an existing chimney and it has been
checked for condition and suitability (see below), in
the interests of safety you must ensure that it is swept
before the stove is installed, even if it has never been
used or you intend to use a flexible liner. To find a
local registered sweep visit The National Association of
Chimney Sweeps at www.chimneyworks.co.uk or the
Guild of Master Chimney Sweeps at
www.guildofmasterchimneysweeps.co.uk.
• Stoves work best with the correct draught. Pre-1965
chimneys which have been built for open fires have
larger (and irregular shaped) voids than those best
suited for a modern stove and thus could reduce the
effectiveness of the flue draught by making the flue
too cold and difficult to warm. This is a particular
problem if the chimney breast is on an outside wall
and / or is subject to a strong prevailing wind.
The recommended minimum height for the chimney /
flue system from the top of the stove to the top of the
chimney terminal is 4.5m (15’). If this is not possible
then a ‘spinner’ type cowl, to compensate for any potential limited up-draught, should always be specified
and specialist advice sought on the correct type.
• The interior surfaces of older flues could be eroded
and also have rough surfaces which could cause
resistance to the smooth flow of gases and
consequently result in poor up-draught.
• Unfortunately many houses built since 1965 with
clay or concrete chimney liners suffer from these
being poorly installed, either through being fitted the
wrong way up or not receiving an appropriate
application of mortar to make a complete seal on
each joint. Even though not particularly old, this could
still potentially cause leaking smoke and fumes or
condensation stains
Under no circumstances should the stove’s 150mm
(6”) diameter flue be reduced in any part of the flue
system as this could cause a build-up of dangerous
carbon monoxide gas.
When your new inset boiler stove is installed with a
flexible flue liner it should be possible to sweep the
chimney through the stove by simply removing the
baffle plate inside the ‘roof’ of the stove. However, if
you do not use a liner the installer should, if possible,
provide an alternative means, such as a soot door
with adequate air-tight seal, in the chimney wall to be
able to clean the whole of the chimney / flue system.
Your approved installer will be able to advise you on
the suitability of your chimney after undertaking a
thorough inspection and smoke test. Any solid fuel
flexible liner which is specified should be double
skinned stainless steel, either 904L or 316Ti grade and
be CE marked and / or Hetas Approved.
Since stoves create flue gases at a much greater
19
The British Flue and Chimney Manufacturers
Association website, accessed through
www.feta.co.uk/bfcma, produces an authoritative and
informative download Yellow Guide to solid fuel flues
and chimneys.
The most common problem with link up systems is
a failure to understand the existing system which
may have faults which are then exacerbated by the
new link. Our advice when linking this boiler stove
to any system is therefore to consult the appropriate
installation expert who will develop an understanding
of your requirements and provide you with a
thorough survey of any existing system.
The Chimney Terminal
The existing chimney pot or terminal must be suitable
for stove installation and should not restrict the smoke
and fumes from the stove. It must provide at least the
same outlet area as the flue pipe. It may be that your
existing chimney terminal has been replaced with a
ventilating terminal if the fireplace has been closed off
at some point and this will need replacing.
There are various Government competent persons
schemes listing installers trained in designing and
installing linked systems:
• Hetas www.hetas.co.uk
• Association of Plumbing & Heating Contractors
(Certification) www.aphc.co.uk
• Building Engineering Services Accreditation
www.besca.org.uk
• NICEIC www.niceic.org.uk
Your installer will be able to advise you on the correct
specification of any new cowl or terminal. Cowls have
the additional advantage of limiting rain entering the
flue system which could cause the inside of the stove
to rust when it is not being used, particularly during
the long periods outside the heating season.
BASIC SYSTEM ESSENTIALS
Important: If you are not using a chimney liner
you must provide a means of inspecting the flue
system and the top of the stove.
The basic system diagram on the opposite page
should be used for general guidance purposes only
and is included here to demonstrate basic system
principles. Combined with the at-a-glance list below
this should provide you with a basic understanding of
the essential requirements your system should have.
As each system and its requirements will vary the list
below is by no means meant to be comprehensive.
SYSTEM INSTALLATION:
GENERAL GUIDELINES
Central heating systems
A pumped central heating circuit combined with a
gravity hot water circuit is generally the accepted
specification for multi fuel boiler systems which are
not linked to another system. However, achieving
the correct balance between the pumped and gravity
flows in such a system is critical to the efficient
performance of the boiler stove and should be left
to an experienced Hetas wet installer or appropriate
specialist registered on a Competent Persons scheme.
Increasingly new systems are specified as ‘fully
pumped’ to provide improved operational control and
this is a feature that we would recommend for your
system.
A good system should adhere to the following:
• Adjustable flow circulating pump
• High and low limit thermostats
• Cold feed pipework must be minimum 22mm dia’
• Open vent pipework must be minimum 22mm dia’
• Overflow pipe must be 22mm dia’ copper
• All pipework must be able to operate at
above 100ºC
• Feed / expansion tank must be galvanised steel
or copper
Dual fuel linked systems
• Float valve should also be copper
You may have purchased your new Alpha Inset Boiler
stove with the intention of adding it to an existing
heating system powered by a different fuel type. This
is likely to be to a non-pressurised oil or gas system,
but could also be solar powered, probably in a new
pressurised system.
• No automatic or manual valves on cold feed
or open vent pipework
Linking two such systems requires specialist
knowledge to ensure a fully functioning system which
is efficient, safe and legal. Such systems require the
installer to possess a knowledge and understanding
which will be beyond the provisions and intentions of
these general installation and operating guidelines.
The United Kingdom’s Solid Fuel Association
through their website www.solidfuel.co.uk, provides
informative downloads on various link-up system
solutions.
• Hot water cylinder and thermostat
• Heat leak radiator fitted to gravity circuit
• Exposed pipework (eg lofts) must be insulated
to prevent freezing
• System should be capable of being completely
drained
Heat leak radiator
A heat leak radiator with a minimum rating of 10%
of the boiler’s total output to water should be fitted
to the gravity circuit. Heat leak radiators rated at
approximately 2kW (6,800BTU) tend to be the norm
in most systems. Pipes to and from the heat leak
radiator can be reduced to 15mm diameter provided
20
����������
����������
�������
�����
�����������
����
������
��������������
�����������
���������������
�������������
�������������
����������
����
����������
��������
��������
�����������
������������
����������
�����������
����������
���
�����
�������������
����������������
�����������
��������������
����
��������������������
���������������������������
��������������������
������������������
�����������������������
����
����
����
���
����
����
����
21
��������
�����
High and low limit thermostats
the run is no further than 300mm (12”) away from
the 22mm gravity circuit. No thermostatic or manually
adjusted valves should be fitted to the heat leak
radiator to ensure that it can never be shut down. If
a thermostatic control over-heat valve, which controls
the flow when the water in the hot water cylinder
has reached a predetermined unsafe temperature, is
specified as part of the system then you must ensure
that the heat leak radiator has a rating to cope with
the extra demands made on it when the hot water
cylinder is isolated.
A high limit over-heat thermostat set at 80ºC should
be fitted to the gravity flow pipework and connected
to the circulating pump so that should the system
temperature exceed 80ºC then the pump will
automatically be switched on. This safety precaution
will ensure that the gravity circuit does not overheat.
A low limit thermostat set at 45ºC should be fitted
to the gravity return pipework and connected to the
circulating pump. This should be set to come on when
the water temperature reaches above 45ºC to begin
the circulation process.
Adjustable circulating pump
Hot water cylinder
It is important that the system flow can be adjusted
via the circulating pump to ensure the best operation.
A system flow which is too slow could potentially
over-heat or at the very least take a long time to
warm the house. One that is too fast could reduce the
time it takes for the water pass through the boiler and
absorb heat, thus reducing the overall effectiveness
of the system. Ensure that isolation valves are fitted
on either side of the pump to allow for easy pump
maintenance and safe removal in the event of a fault.
Allow a minimum of 1.5 metres (5’) of static head and
always follow the pump manufacturer’s instructions.
Electrical connections to the pump, like the stove
installation itself, are subject to current Building
Regulations.
This should be fitted with a thermostatic control
valve which turns off the flow when the water in the
cylinder has reached a predetermined temperature.
If your boiler stove is part of a new heating system
this is now a building regulations requirement. You
must ensure that this water setting is not too hot
to use, especially if there are children in the house.
A temperature set at 60ºC or just slightly above is
recommended. Please note that temperatures below
60ºC may encourage the growth of harmful bacteria
such as legionella.
During commissioning, as the thermostat may not
be accurate, it is important that after the system has
been operating for at least three hours the hot water
temperature is tested at the tap closest to the hot
water cylinder to ensure that it will not scald children
or the elderly who use it. It is important that the heat
leak radiator is specified with a rating to cope with
the extra demands made on it when the hot water
cylinder is isolated from the system.
Electrical connections
Electrical connections to the circulating pump,
motorised valves or link-up components are subject to
Building Regulations compliance and must be carried
out by a qualified electrician or by a person registered
with the appropriate Competent Person scheme. In
England and Wales building regulations Approved
Document P sets out the overall criteria and
requirements to ensure electrical safety and have been
introduced to help reduce the number of deaths,
injuries and fires caused by faulty installations.
Thermostatic radiator valves (TRVs)
The UK’s Domestic Heating Compliance Guide
stipulates that any new heating system is temperature
zoned. For properties with a floor area of less than
150m2 (which includes most UK homes) this can really
only be achieved by incorporating TRVs. However, two
radiators on the pumped central heating circuit should
not have TRVs fitted, as they will be needed to allow
any excess heat to safely dissipate should the overheat thermostat switch on. Please note these radiators
could become excessively hot and we therefore
recommend that these two at least should be of
the low surface temperature type to help prevent
accidents.
Mains water connection
In order to safeguard water quality and public health,
when connecting the boiler stove heating system to
the mains water you must ensure that the connection
complies with all local water authority regulations. A
legal duty is placed on all users, owners or occupiers
and anyone who installs plumbing systems or water
fittings to ensure that they are installed and used in
accordance with UK Water Supply (Water Fittings)
Regulations 1999.
System Balance
Gravity circuit pipework
See the section on the importance of ensuring
that your heating system is correctly balanced. An
unbalanced system is inefficient and therefore costly
to run. See page 26
Motorised valves fitted in the gravity circuit pipework
must be configured to revert to the open position
should the power fail. In addition the hot water
cylinder and heat leak radiator should be positioned
as near to vertically above the boiler stove as possible
and with sufficient height to encourage the natural
flow. Any horizontal runs in this pipework should be
inclined, again to encourage the natural flow.
22
FITTING INSTRUCTIONS
Securely attach the liner to the spigot plate using selftapping screws and the three pre-drilled screw holes
in the spigot. Seal the joint with fire cement and / or
fire rope before you finally position and fix it to the
top of the inset boiler stove.
Fire Cement
Always read the Fire Cement manufacturer’s
instructions first. Prolonged contact with fire cement
and skin should be avoided. Protective gloves and
glasses should be worn when applying fire cement.
The spigot fits around the flue liner so that any
potential creosote will run down the inside of the liner
and then into the stove rather than cause a build-up
on top of the stove bodywork which could eventually
leak and cause an unsightly mess and possible fire
hazard.
Care should also be taken to avoid unnecessary
contact between the stove’s surfaces and the fire
cement as this could damage the paintwork. Any
excess fire cement should be quickly removed before
it hardens.
Fitting the flexible liner spigot plate
An outer flue spigot plate (or collar) is provided to
fit to the top of stove if you are using an approved
flexible liner which you should have already dropped
inside the chimney.
Flue
Spigot
The spigot with the liner attached can then be
easily bolted into place from inside the stove (see left)
once the stove’s baffle plate has been temporarily
removed. See page 10
Back-filling the gap between chimney and the flexible lining with vermiculite should only be undertaken
when the stove is securely fixed in its final position.
Insulating at the sides and back of the stove
If you are not using a chimney lining then any gaps at
the back and sides of the stove and the fireplace
aperture should be filled with non-combustible
insulation material such as rockwool or vermiculite.
This will not only improve the efficiency of the stove
but also help avoid the potential build-up of
combustible soot along the sides – this is an especially
important requirement if you are not using a flue liner.
Some installations may require you to do this by
removing the stove baffle plate and feeding the
insulating material through the stove flueway and
then manipulating it with your hand so that it
completely fills the voids at the sides and back of the
inset stove.
Attaching the stove to the fireplace
There are two ways that the Alpha Inset Boiler stove
can be secured to the fireplace or fire surround depending on the particular opening. To ensure that you
create a firm and safe fix it may be appropriate to use
both methods.
23
1 Base fixing
2 Front fixing
Firstly, remove the ash pan, log bar and firegrate. You
will then see a pre-drilled hole in the centre of the
base of the stove.
There are also two additional pre-drilled fixing holes
on either side of the stove fire chamber opening that
can be used to attach the stove to the fireplace (see
below).
Lift the Fire Fence upwards
and remove
Carefully position the stove within the fireplace
opening and mark the two holes on to the fireplace
front. Remove the stove and carefully drill the holes
using the appropriate drill bit and insert the screw
plugs. Re-position the stove and insert and tighten
both screws.
Remember, if you are fitting a liner then the liner,
attached to the spigot, should already be dropped and
positioned inside the chimney before the stove is fixed
in place.
Lift the Fire Grate upwards from the front
and remove (you may have to push from
underneath)
Front fixing: Use the two
pre-drilled fixing holes on either side
of the fire chamber frame
Creating an air-tight seal
When using this fixing method, carefully push the
insert into position, locating it precisely in the fireplace
opening before marking the position of the drill hole
on the hearth through the stove base. Allow for some
compression of the rope seal at the back of the stove
to ensure a good seal between the stove and the fireplace front.
You must ensure a good seal between the back of the
stove and the face of the fireplace. This is especially
important if you are not using a liner since any air
leaks here could impair the performance of the stove
and also render it unsafe.
Fire rope has already been attached at the back of
the stove (allow for this in the base fixing method).
Uneven surfaces such as stone may need additional
sealing. The front fixing method will increase the
security of this seal by drawing the stove tight against
the fireplace face and this is therefore the preferred
fixing methods when a liner is not used.
Remove the stove and then drill an 8mm diameter
hole in the hearth. Fit the steel plug (or alternative)
in the hole and carefully re-locate the stove. Fix the
screw through base hole. Be sure to use the correct
drill bit so as not to damage or crack any decorative
hearth plate. See below
Fire rope seal: Rough surfaces
such as stone may require
additional sealing
Remove fire grate to
access base fixing hole
24
COMMISSIONING
6 Legal Requirements Explain the householder’s
legal requirement to use an approved fireguard whenever children (or the elderly and the infirm) are likely
to be in the vicinity of the stove. If the installation is
in a designated Smoke Control Area then also explain
the householder’s responsibility only to use approved
smokeless fuels.
1 Internal Parts
Confirm that all internal parts of the stove are
correctly fitted, including the baffle plate.
2 Doors and Seals Confirm that the door closes
correctly and that the door seals make an all round
air-tight seal.
7 Instruction Manual
Make sure that the customer receives this copy
of the Instruction Manual
3 Smoke Test
When the installation is complete it is important that
a final safety smoke test is carried out.
8 Warranty Card
Complete the relevant parts of the Alpha Warranty
Card with your Hetas / INFO or competent persons
registration number and contact details
Fully open the Primary and Secondary Air controls, as
well as the Thermostat Control, and warm the flue
by using a blow torch, being careful not to let the
flame damage any painted surfaces etc. After about
10 minutes of warming, quickly place an approved
smoke pellet in the middle of the fire grate, light it,
and close the stove door. Check the flue terminal
to ensure sufficient smoke is escaping. Repeat this
with the room doors (and any open windows) fully
closed.
IMPORTANT: FIRST FIRES
Use smaller and shorter ‘gentle’ fires the first five or
six times that you fire up the stove, making these
progressively bigger, as this will avoid any potential
thermal shock and allow the cast iron components to
‘acclimatise’ with each other. Allow the stove to fully
cool down between these fires.
Remember, this stove should not be installed in the
same room as an extractor fan. However, if there is an
extractor fan in an adjacent room then this requires
a separate test with the fan switched to full and the
room door left open to establish the worst case
scenario.
When first using the stove it is normal to experience
paint fumes or see light smoke rising from some of
the stove’s painted surfaces. During this stage ensure
that the room has additional ventilation by opening
doors and windows to minimise any adverse
effects. The hotter you burn the stove the more
intense these fumes will be, which is one of the
reasons that we advise that you use smaller fires to
start with. Every time the stove reaches a new higher
temperature it may still be possible to smell these
fumes or see some gentle smoke until the paintwork
is fully cured.
After completing a successful smoke test, then
a spillage test should also be undertaken (see below).
4 Spillage Test
Boiler stove fire chambers operate at a much lower
temperature than non-boiler stoves and therefore,
in the interests of safety and to avoid any potential
carbon monoxide (CO) leakage, it is critical that a
spillage test is carried out by the approved installer.
If smoke and fumes persist do not use the stove and
immediately consult your installer, as this may indicate
that there could be a possible problem with the
installation.
Light the stove in the normal way (see pages 13 – 15)
and make sure that the stove is at full operating
temperature – this will be with a completely burning
fuel load and could take around 30 minutes, however
it cannot be rushed. Check that smoke or any other
combustion products do not enter the room during
this stage. Please see the note on paint fumes. See
right – ‘Important: First Fires’
CONDENSATION
It is not unusual for condensation to form on a
cooling boiler or pipework under certain atmospheric
conditions. Such condensation should not be
confused with a boiler leak. In the unlikely event of a
boiler leak a profuse supply of water, which is usually
hard to stem, will occur. This is significantly different
from condensation which can be easily dried out with
a sponge or by re-lighting the stove. Please refer to
our Boiler Warranty terms and conditions on page 32.
Also ensure that the Primary and Secondary Air
controls, as well as the Thermostat Control, are all
fully operational.
4 System Balance
When the heating system is fully running after
approximately 2 hours, the central heating system
should be ‘balanced’. See page 26
5 Safe Operation
Explain the safe operation of the stove to the user
and the importance of using the correct fuel types.
See pages 11 – 16
25
SYSTEM BALANCE
TROUBLE-SHOOTING
With all wood burning and multi fuel boiler stoves,
given their particular heat cycle and the natural gravity
fed flow, it is extremely important that the radiators
are balanced to ensure an efficient distribution of heat
as well as an even heat balance from one radiator to
the next. The idea is to reduce the flow to the hottest
radiators so that more hot flow is available to heat the
coolest ones. The system is ‘balanced’ when there is a
good hot water flow through every central heating
radiator.
CHIMNEY FIRE
If your stove has been installed correctly and you have
also operated it correctly and regularly carried out the
recommended routine checks then it is unlikely that
you will ever experience a chimney fire, which can be
highly dangerous.
Chimney fires can be detected by an unusual roaring
sound and / or unusual vibrations coming from the
chimney breast or the stove itself. The sound is not to
be confused with the gentle ‘rushing’ sound you may
normally hear when a stove has a well performing
up-draught. You may also see sparks or flames exiting
from the chimney terminal outside.
To undertake this, all of the system valves should be
set to open (including any lock shield valves (LSVs)
on the heat leak radiator) and the circulation pump
adjusted to the correct flow speed. Thermostatic
radiator valves (TRVs) should also be set to maximum
to ensure that these are not activated during the
balancing process. All radiators should be fully bled
of air and the system should be at full operating
temperature. Please note it could take the system 2
– 3 hours, depending on the size of the system and
the fuel loads, to reach full operation.
• Prevention
If you suspect a chimney fire then immediately close
the Primary and Secondary Air controls, as well as the
Thermostat Control, evacuate the building and call
the Fire Service. Never open the stove door as this will
make the chimney fire worse by providing additional
combustion air. Do not re-enter the building until you
have been advised by the Fire Service that it is safe.
The objective is to get a consistent temperature
difference of approximately 10ºC between the flow
(80ºC) and the return (70ºC) on each radiator. If the
circulating pump flow rate is set too high then the
temperature drop between flow and return will be
less than 10ºC. Balancing the system means adjusting
all of the various thermostatic valves, thermostats,
lock shield valves on each radiator and the circulating
pump speed to give the desired temperature in each
room for the least amount of fuel used. This can be
a time-consuming process, but is well worth it, and
therefore is best left to an experienced installer.
Do not re-light the stove until the flue system has
been thoroughly inspected by an approved installer or
chimney sweep and any necessary repairs have been
carried out.
• Causes: Inadequate cleaning
Chimney fires occur when soot and creosote have
built up to such a level that they ignite. It is important
therefore that your flue system has as many cleaning
access points as practicable to enable comprehensive
removal of soot, creosote and other debris. This will
also minimise the amount of time it takes for a
qualified sweep to clean the system making the
system safer and its cleaning more cost-effective in
the long run.
With the system at full operating temperature and
all of TRVs fully open, if the temperature drop is
different from 10ºC but consistent across all of the
radiators then it will be a simple matter of adjusting
the circulating pump flow to achieve the desired
10ºC drop. Slow down the pump flow to increase the
drop difference and speed it up to reduce it. In reality
it does not matter if some radiators have a slightly
smaller temperature drop, hence a higher flow, so
long as there is enough flow to get all of the radiators
at a desirable temperature.
• Causes: Continuous low burning
To discourage the potential for such soot and
creosote build-ups, long periods of consistent
‘slumber’ or overnight burning should be avoided
or that these should at least be compensated for by
regular burning on full output for short periods (eg 30
minutes per day) to help burn off any likely deposits
before they become problematic.
Fortunately, a balanced system does not mean
that all of the radiators have to be set at the
same temperature. How hot a radiator is once the
thermostatic valve is operating will depend on many
variables including the size of the, room, how high the
TRV is set and how big the radiator is. Radiators are
likely to be slightly hotter at the top than the bottom
but this will vary from system to system and the
design of the radiator itself. Provided the temperature
difference from the top to the bottom of the radiator
is no more than the 10ºC flow and return difference,
then this is not generally an indication of a system
problem.
• Causes: Poor fuel choice As previously mentioned
unseasoned or damp wood or fuel should always be
avoided as these produce excessive soot and creosote.
This is particularly problematic for boiler stoves where
the fire chamber temperatures are much lower than
in a non-boiler stove and therefore the potential to
promote the conditions for dangerous deposits from
damp fuel is much greater.
26
STOVE, FLUE OR OTHER
COMPONENTS GLOWING RED
• Causes: Inadequate supply of combustion air
Check that any permanent air vent fitted to supply the
extra combustion air required for the stove has not
been accidentally blocked. Remember there should
never be an extractor fan in the same room as a stove.
A simple way of checking whether or not the stove is
receiving enough combustion air is to open a
window in the same room as the stove whilst the
stove is operating. If this improves the problem then
this would certainly indicate that the stove is being
starved of combustion air and the advice of the
original installer should be sought.
• Prevention
The Primary and Secondary Air controls, as well as the
Thermostat Control, should be immediately closed
to let the fire die down to an acceptable level and to
reduce the heat output which will in turn eliminate
the glow from the over-heated components. At the
same time ensure that water within the system is not
‘boiling’. Your central heating system should have
the requisite safety valves to prevent this, but if in
doubt run off excess hot water and ensure the central
heating pump is working to dissipate the excess heat
and hot water. Over-firing is dangerous and could
permanently damage or warp your boiler stove and
its components. The effects of over-firing are fairly
obvious to anyone in the stove industry and will
invalidate your Alpha Warranty. Check the stove, the
flue system and the central heating for any signs of
damage or system failure before you re-use the stove.
• Causes: Extreme weather conditions High winds
or extremes of temperature can also temporarily
affect the performance of the chimney draught and
consequently its effectiveness in removing smoke and
fumes from the stove’s fire chamber. In the case of
freezing temperatures it is important to build a larger
pre-fire than normal to quickly provide the additional
heat needed to warm the flue system and to
counteract the much lower temperatures at the exit
point of the chimney. This is particularly important for
boiler stoves which have the disadvantage of the fire
chamber being surrounded by very cold water.
• Causes: Over-Firing This is caused by using the
stove at a higher output than recommended for
prolonged periods of time and / or over-filling the
firebox with fuel. The excessive heat in the flue system
produced by over-firing could potentially also lead to
a chimney fire (See ‘Chimney Fire’ above). Ensure you
are using the correct fuel load. See page 5
Unusually hot sunny days in the Autumn can
sometimes produce negative pressure which will
affect the up-draught and in these instances you
should open a window or door to the outside to help
re-balance the interior and exterior pressures which
create the up-draught mechanism. Once you are confident that the up-draught has re-started you can then
close any doors or windows.
SMOKE AND FUMES ESCAPING
INTO THE ROOM
When properly installed and operated your stove
should not normally emit fumes or smoke into the
room. When first using the stove it is normal to
experience paint fumes or see light smoke rising from
some of the stove’s painted surfaces, but these should
eventually pass as the paint cures. Occasional minor
smoke escape may also occur during the refuelling
process. However, persistent smoke or fumes could be
dangerous and in this situation you should take
immediate avoiding action.
• Causes: High winds If the problem is associated
with high winds and it becomes a regular
occurrence, then you will need to fit a specialist
chimney cowl. These are designed to provide a stable
draught and prevent specific types of problems.
Specifying the right cowl should always be left to an
approved installer.
• Causes: Flue Exit Check, especially at the
beginning of the heating season, that summer tree
growth has not interfered with the free passage of
smoke and flue gases from the chimney top.
• Prevention
Open doors and windows to ventilate the room and
let the fire go out to allow the stove to cool. Never
pour water onto the fire as this could cause the cast
iron components to break.
OVERHEATING AND EXCESSIVE
FUEL CONSUMPTION
Most importantly, never re-light the stove until the
problem has been identified and solved. If in doubt, in
the first instance always seek the expert advice of your
approved installer, or authorised Alpha dealer.
This can be caused by a number of factors.
• Causes: Excessive Chimney Draught This limits
the effectiveness of the air controls so that the fire
burns with very strong bright yellow flames and with
very little difference when the air controls are
operated. In such circumstances, and where possible,
an adjustable draught stabiliser in the flue system may
need to be fitted to ensure that the stove will always
operate under a stable draught to allow the stove’s
controls to function correctly. In the interests of safety,
because draught stabilisers limit the exit of flue gases
There are a number of factors, either alone or
combined, which could cause such problems:
• Causes: A blockage When safe to do so, examine
the flue-way above the baffle plate as well as the
chimney system via any inspection hatches and clear
any soot blockages. Excessive deposits could also
indicate that the chimney or flue itself also needs
cleaning.
27
from the stove, they should only ever be specified,
fitted and subsequently tested by an approved
installer.
will provide limited heat output. Check that any
permanent air vent fitted to supply the extra
combustion air required for the stove has not been
accidentally blocked. Remember there should never
be an extractor fan in the same room as a stove.
• Causes: Fuel The fuel itself may be of poor quality.
For example pine and other softwoods used in the
building trade will burn much quicker than a good
hard wood log, such as Oak.
A simple way of confirming whether or not the stove
is receiving enough combustion air is to open a
window in the same room as the stove. If this
improves the problem then this would certainly
indicate that the stove is being starved of combustion
air and the advice of the original installer should be
sought.
• Causes: Faulty Door Seals The rope seals around
the fire chamber door could have become worn and
may not create the air-tight seal needed for the
Primary and Secondary Air controls to function
correctly. When the stove is cold, you can easily check
this seal by placing strips of paper at various points
between the door and chamber and checking that
when the door is closed it grips this paper. Any paper
which can be removed easily would indicate
a weakness of the door seal in that particular spot, in
which case a complete new rope seal should be
fitted.
• Causes: Blockages When safe to do so, examine
the flue-way above the baffle plate as well as the flue
liner or chimney system, either through the stove or
via any inspection hatches. Clear any soot blockages.
Excessive deposits could also indicate a poor choice
of fuel or that the chimney or flue itself also needs
cleaning more often than previously thought.
• Causes: Circulation Pump This may needs
re-adjusting to slow down the system’s flow because
it does not provide the water with a slow enough
passage through the stove’s boiler to heat up the
water sufficiently. This in turn prevents the fire
chamber from ever reaching a good operating
temperature. It could also be that the central
heating system may need to re-balanced at the same
time. See pages 22 and 26
STOVE NOT PROVIDING ENOUGH HEAT
This problem is also usually indicated by dull orange
lifeless flames and wood that remains black when
burning instead of light grey.
• Causes: Poor fuel Poor heat output is more than
likely caused by poor fuel, such as ‘green’ or
unseasoned wood or even wet wood. We cannot
over-estimate how critical it is to use fully seasoned
dry wood in a boiler stove. The easiest way to check
whether your wood is fully seasoned is to invest in
a moisture meter specifically designed for testing
wood fuel. These are relatively inexpensive and can be
purchased from your stove dealer. When you bear in
mind that seasoned wood with a moisture content of
less than 20% will give you approximately 50% more
heat than unseasoned wood, a moisture meter is a
modest investment which will more than pay for itself.
GLASS STAINING OR BLACKENING
Glass can be cleaned easily if it is undertaken regularly
and the deposits are not allowed to build up. A
proprietary stove glass spray or gel is strongly
recommended.
• Causes: Air Controls Ensure that you fully
understand how the Airwash system works and that
you have determined, through some trial and error
that you have the correct balance between the
Primary, Secondary and Thermostat Controls that your
stove needs. Generally, try to use more Secondary Air
when burning wood as this air flows down and over
the glass to help burn and wash away any particulates
that have accumulated there.
Wet or unseasoned wood introduces unwanted
moisture into the fire chamber, again, this is more
problematic with boiler stoves which are already
operating at a lower temperature because of the
‘radiator’ affect of the boiler. Wet wood reduces the
boiler stove’s fire chamber temperature and thus the
effectiveness of the air wash system. In addition it will
cause problems of increased soot and harmful
creosote deposits within the flue system.
• Causes: Poor fuel Burning damp or unseasoned
wood will cause the glass to stain as the moisture
from the fuel considerably reduces the fire chamber
temperature reducing the effectiveness of the
Airwash system. ‘Green’ wood will also encourage
sticky deposits on the glass which will prove difficult
for the impaired Airwash system to remove.
Softwoods such as Pine produce significantly less heat
output than hardwoods.
• Causes: Air controls Ensure that you fully
understand the difference that using the Primary,
Secondary and Thermostat controls make to the
performance of the stove and how they need to be
balanced to determine the best way to burn your fuel.
• Causes: Continuous low burning Continuously
burning your stove with a very low flame, such as
slow overnight burning will also cause this problem
because the Airwash does not get hot enough and
some blackening of the glass should be considered a
‘trade-off’. In this instance, if you’re sure that the fuel
• Causes: Inadequate Combustion Air A stove
starved of combustion air, even when the Primary and
Secondary Air controls are in the fully open position,
28
is seasoned and dry, then burning the stove at very
high temperature for a short period after a long slow
burn will usually burn off any sooty deposits. Glass
can be cleaned easily if it is undertaken regularly and
the deposits are not allowed to build up. A proprietary
stove glass spray or gel is strongly recommended.
balanced) your radiators and there is still a lack of
heat then the chances are that your radiators will be
full of sludge. This is a thick black sediment which
inhibits the flow of hot water. Your system will need
flushing with the appropriate chemical agent. This can
be a time-consuming and messy job and is best left to
a plumber or heating engineer.
CONDENSATION IN THE FIRE CHAMBER
• Causes: Atmospheric conditions It is not unusual
for condensation to form on a cooling boiler or
pipework under certain atmospheric conditions.
Such condensation should not be confused with a
boiler leak. In the unlikely event of a boiler leak a
profuse amount of water, which is usually hard to
stem, will occur. This is significantly different from
condensation which can be easily dried out with a
sponge or tissue or by re-lighting the stove. After the
fire has gone out, open all the air controls and leave
the stove door slightly open, as this can sometimes
help. Please refer to our boiler Warranty terms and
conditions on pages 25 and 32 if you suspect a leak.
CENTRAL HEATING SYSTEM NOT PROVIDING
ENOUGH HEAT OR HOT WATER
If you have ensured that the stove is functioning
properly ie that it has vibrant yellow flames and is
providing heat to the room, but still not delivering
sufficient heat through the central heating radiators or
hot water then it is more than likely to be a problem
with the system. The simplest way to determine this
is, if possible, to check that the top water pipe from
the stove is hot and that the lower pipe is cooler. If
this is the case then this indicates that there is a
problem with the system and not the stove.
• Causes: Circulation pump or thermostatic
valve failure A fault in one of the system’s key
components could restrict the system flow thus
limiting heat to the radiators and / or hot water
cylinder. For example, a thermostatic valve may have
been activated due to a potential temperature
anomaly or have stuck in the wrong position.
Identifying the precise problem is a job best left to
the original installer or heating engineer.
• Causes: Unbalanced central heating system
With all multi fuel boiler stoves, given their particular
heat cycle and the natural gravity fed flow, it is
extremely important that the radiators are balanced to
ensure an efficient distribution of heat as well as an
even heat balance from one radiator to the next.
If you have linked your new boiler stove to an existing
or old system then it is likely that the system needs
re-balancing to work in conjunction with your stove.
See page 26
• Causes: ‘Sludge’ in radiators
If you have linked your new boiler stove to an old
central heating system and you have bled (and / or
29
ROUTINE CHECKS
REGULAR MAINTENANCE
During routine checks if you notice anything wrong
with your stove then it should be rectified
immediately. Never use a stove that you know is not
fully functioning – this includes flue components.
• Baffle Plate and Flue Way During the heating
season check the flue way and baffle plate at least
once a month to start with and remove any soot
deposits. Should these be excessive then have your
chimney and flue cleaned. At the same time review
your choice of fuel and the way that you operate the
stove. See page 10 ‘Removing The Baffle Plate’.
• Check your flue system at least once a month
using one of the systems recommended inspection
methods. After a few checks you will notice a
pattern of soot build-up to enable you to determine
the inspection and cleaning period best suited to your
stove’s operation.
Regular long periods of slow or overnight burning
can create excessive soot because the stove is not
operating at the temperature required to burn off
most of the sooty deposits. Damp or unseasoned
wood will also have similar effect. To find a local
registered sweep visit www.guildofmasterchimneysweeps.co.uk or www.chimneyworks.co.uk.
• Check and clear the stove’s baffle plate and flue way
at least once a month. Lift and slide the baffle pate
forward, drop down and remove. See page page 10
• Make sure the door maintains a good tight fit and
visually inspect the door rope seals for fraying or other
signs of wear. Test the seal if you suspect that it is no
longer air-tight. See page 31
• Chimney Cleaning The Alpha Inset can be swept
through the stove by simply removing the baffle plate.
The baffle plate can be slid forward and dropped
down. See page 10 ‘Removing The Baffle Plate’.
• Check that the glass is not chipped or cracked and
that the glass sealing tape is still in good condition.
Replace if necessary. See page 31
Sweep your chimney before installation and then at
the end of each heating season when you stand down
your stove. Burning seasoned dry wood means that
you will probably need to sweep every three months.
The amount of soot deposits removed each time is a
good indication of how often you should sweep and
as you begin to understand your stove and the wood
you burn you can adjust the cleaning intervals
accordingly. If in doubt seek the advice of a registered
chimney sweep who has experience of stoves.
• Firebricks There are no firebricks on the Alpha Inset
Boiler stove.
• Cleaning the Glass Using damp or ‘green’
unseasoned wood, filling with small fuel loads or
operating the stove at low temperatures (slow
overnight burning) will reduce the effectiveness of the
Airwash system and cause the glass to stain. Do not
allow such staining to build up as it will become more
difficult to remove after each firing. When used
regularly, a proprietary scratch-resistant stove glass
cleaning gel or spray, which can be supplied by your
stove dealer, applied with a soft cloth, should be
sufficient to keep the glass in pristine condition. Make
sure the glass is cold before you apply such cleaners,
as applying a cold solution to hot glass could create
a thermal shock within the glass causing the glass to
crack. Also make sure that all traces of the cleaning
fluid have been removed and the glass is thoroughly
dry as any residue can be ‘baked’ on causing unsightly
smearing.
• Replacing Glass Never use your stove if it has
cracked or missing glass. Your Alpha dealer can
quickly supply you with a new piece of heat-resistant
glass should you ever need it – just let them know
the stove name and model number. Only use
heat-resistant glass as this is made to withstand
temperatures of up to 800ºC.
30
Remove the screws and glass clamp washers from
each corner and place them in a safe place. Note the
gasket spacers on the top corners. Do not attempt to
re-tighten the clamps without these spacers. Always
use the correct sized Phillips crosshead screwdriver
and use releasing oil if the screws prove difficult to
remove. Be careful not to dislodge the ribbon seal. If
this is damaged or worn replace it completely. Loose
ribbon can be held in place with rope seal glue
available from your dealer. Lubricate the screws and
holes and reverse the process, being careful not to
over-tighten the screws and clamps in case you break
the glass.
seal for the door. To replace, carefully remove the old
seal and completely clean the seal channel of debris
and old glue. Use liberal amounts of proprietary heatresistant fire rope glue to secure the rope and glue
both ends to ensure a well-sealed joint.
The recommended rope seal diameter is 12mm.
• Air flow through stove The heat from your inset
stove comes in the form of radiated heat from the hot
castings and convection of hot air. This convection is
achieved by the stove drawing colder air in through
the two side air intake vents at the base, drawing and
heating this through the back of the hot stove and
then letting it rise out through the vents on the top of
the exposed bodywork.
• Paint Finish Your stove has been finished with
heat-resistant paint (except for enamelled models)
and is very easy to maintain. Regularly remove ash
and dust from surfaces with a soft cloth or brush. To
maintain the original paint finish you can use
traditional ‘stove black’ polish which your Alpha
dealer can supply. Make sure the stove is cold and use
protective gloves as this type of polish can cause deep
staining to the skin and fingernails.
In order to maximise this convection process please
ensure these airways are kept free. They may draw
household dust into them and therefore they should
be vacuumed regularly to help keep the air in the
room dust free.
STANDING DOWN
There will be some point in the year when you will not
need to use your stove for a considerable time and
taking care to clean it thoroughly then will save you
much time later. This is also a good time to get your
chimney swept too as this will prevent any soot build
up from falling inside the stove or ‘caking’ and
blocking the flue way or flue system.
Repair worn or scratched surfaces with a proprietary
heat-resistant spray paint made specially for stoves,
also available from your stove dealer. Never use an
aerosol spray on, or near, the stove when it is burning
or it is hot.
• Door Rope Seals It is important that you maintain
a tight door seal as this prevents unwanted air leaking
into the fire chamber and helps make the Primary and
Secondary Air more effective in controlling the fire.
• Remove and clean any deposits from the top of the
baffle plate and check for wear.
• Remove any debris and deposits from the inside of
the stove particularly at the entrance to the flue way.
When the stove is cold, to check the door stove seal,
place strips of paper between the door and ‘door
frame’ and shut the door. If you have to pull hard to
remove these or they tear, then you have an effective
door seal. If these can be easily removed or if they
slide around you will need to replace the door seal.
Your new Alpha stove is supplied with a spare rope
• Empty the ash pan and thoroughly clean out the ash
pan chamber.
• Check all rope seals and replace damaged ropes that
do not provide a good seal.
• Check the fire cement bonds around the liner joint
and outer spigot plate. Remove any loose cement and
re-seal.
12mm dai door rope seal
• Check the firebricks and replace any that have
become thin or worn.
• Check the grate for signs of wear. Excessive wear,
such as grate bars or log retaining bars which are bent
or warped, could be an indication of over-firing or
using inappropriate fuels such as petroleum coke.
Order genuine replacement components from your
authorised Alpha dealer.
Note the important glass gasket spacer on
the top left and right glass corners
31
ALPHA WARRANTY
incidental or consequential damage claims of any
nature whatsoever arising from the non-conformance
of the stove under the terms of the manufacturer’s
warranty. These include loss of profit, commercial
losses, transport costs and damage during transport,
costs in connection with any dismantling and
reassembling of the stove and its installation
components.
Your new stove has been CE tested in the UK to
ensure that it meets strict constructional, performance
and safety standards. It is not the responsibility of
Alpha to ensure that the appliance is installed and
operating correctly at the time of the installation.
Alpha offers the original retail purchaser a limited
5 year warranty. Claims under this warranty must be
reported in the first instance to the dealer you
purchased the stove from. All claims must follow this
procedure.
ALPHA SPARE PARTS
In the interests of safety, only ever use genuine Alpha
replacement components. Once you have identified
the component you need this will be readily available
from your authorised Alpha dealer.
Your stove is guaranteed against defects subject to
the following conditions.
1 The stove must have been installed by an
appropriately qualified installer and upon
completion of the installation a certificate of
compliance to local building regulations issued
2 The sales receipt or invoice must be kept as proof
of purchase
3 The serial number of the stove must not be
damaged or missing
4 You must not have used the stove to burn any of
the prohibited fuels listed
Log Retaining Bar
5 The stove must have been continuously kept in a
serviceable condition and you must not have
allowed the stove to corrode
6 You must not have modified the construction of
the stove in any way
7 The stove must not have been used for commercial
purposes (eg rented or holiday accommodation,
public bar, where the stove’s operation could be
subject to abuse)
Alpha guarantees that your product will be free from
defective parts, materials and workmanship at the
time of purchase by the original consumer for a period
of 1 year for components (parts and labour),
excluding consumable parts and 5 years for the
bodywork casing, door and boiler (parts and 1 year
labour).
Fire Grate
The warranty does not cover parts deemed to be
consumables. These include paint, firebricks, fire
grates, vermiculite panels, smoke deflection plates
(baffle plates), gaskets, rope seals and glass.
Alpha will repair or replace at its option any stove or
stove part thereof found to be defective under these
terms.
Limits of Warranty
This warranty is not transferable and applies to the
original retail purchaser only. It does not cover the
failure of the appliance due to accidental damage,
misuse or abuse, modification, illegal installation,
repairs (other than those by the authorised dealer) or
failure to maintain the stove in a serviceable condition.
Baffle Plate
Under no circumstances shall Alpha be liable for any
32
ANNUAL SERVICE
External Bodywork All external surfaces should be
dusted with a soft cloth or light brush.
In the interests of safety it is important that your
Alpha Inset Boiler stove is serviced on an annual basis
in accordance with the instructions outlined below.
This should be carried out by a suitably qualified
person such as your original approved installer, a
Hetas or INFO registered installer or your authorised
Alpha dealer.
• Examine all paintwork for signs of wear and re-paint
these areas using an appropriate heat-resistant black
aerosol paint. Warning: do not use the aerosol if the
stove is alight or hot.
• When the aerosol paint has dried, apply traditional
stove black polish to all painted surfaces
When the stove is cold strip, clean and inspect it.
• Lightly oil the hinges and locking mechanism
Internal Components Remove and inspect the
following: Baffle Plate, Grate Assembly and Ash Pan.
Air Controls When standing down at the end of
the heating season these should be left in the open
position to allow some movement of air which will
help avoid condensation and moisture building up
inside the stove and flue system. These can be closed
up to 50% if it gets too draughty.
Use a wire brush to clean the baffle plate and grate
assembly. Carefully wire brush the inside of the stove
which is essentially the outside of the boiler and
remove all ash and debris from inside the stove and
the ash pan chamber.
Liner Connection If a chimney liner has been
installed then if possible check that the liner is secure
and that the cement seal is still good. Repair any
crumbling or failed seals.
Check all parts for wear or damage and replace as
necessary. Re-fit all the internal parts.
Stove Glass Check the glass for chips or cracks and
the glass seal condition and replace if necessary.
Thoroughly clean the stove glass on both sides.
Important In the interests of safety use only genuine
Alpha replacement parts which are readily available
from your authorised dealer.
Door Seal Check that this makes an air-tight seal and
replace if necessary. Ensure that the new rope joint is
also in the middle at the base of the rope seal channel
FIRST SERVICE
NB It is advisable to have the chimney or flue system
swept at the same time.
Next Service Due
Date
Work carried out:
Signed
Print
Dealer’s Stamp or HETAS Registration Number
SECOND SERVICE
Next Service Due
Date
Work carried out:
Signed
Print
Dealer’s Stamp or HETAS Registration Number
THIRD SERVICE
Next Service Due
Date
Work carried out:
Signed
Print
Dealer’s Stamp or HETAS Registration Number
FOURTH SERVICE
Next Service Due
Date
Work carried out:
Signed
Print
Dealer’s Stamp or HETAS Registration Number
FIFTH SERVICE
Next Service Due
Date
Work carried out:
Signed
Print
Dealer’s Stamp or HETAS Registration Number
33
SYSTEM NOTES AND SETTINGS
For future reference include a basic drawing of the
system and notes on the circulation pump and system
thermostat settings etc as well as their location and
the location of the system drain point.
34
The
A LPHA
Collection
Alpha multi Fuel Stoves
Hi-Flame Fireplace (UK) Limited
Holmes Chapel Business Park
Manor Lane, Holmes Chapel
Cheshire
CW4 8AF
United Kingdom
www.hi-flame.com
© Alpha Multi Fuel Stoves 2010, 2011 and 2012.
All rights reserved. Booklet contents may not be copied
in whole or in part without the prior written permission
of the copyright holder. Alpha is the trading name of
Hi-Flame Fireplace (UK) Limited
www.alphastoves.com