1
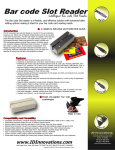
OWNERS’ MANUAL
PAC 290 U Portable Windowless
Air-Conditioner
IMPORTANT: NOTE MAINTENANCE NEEDS ON PAGE 14
PAC290
IMPORTANT INFORMATION
When using electrical appliances, basic safety precautions should
always be followed, including the following:
- Read all instructions.
- To protect against fire, electrical shock and personal injury, do not
immerse cord, plug or appliance in water or other liquid.
- Close supervision is necessary when any appliance is used by or
near children.
- Do not operate with a damaged cord or plug, or after the appliance
malfunctions, or has been damaged in any manner. Return the
appliance to the nearest authorized service facility for examination,
repair or adjustment.
- The use of accessory attachments or spare parts not recommended
by the appliance manufacturer may result in fire, electrical shock or
personal injury.
- Do not use outdoors.
- Do not use the appliance for other than the intended use.
- Do not place any strain on the power cord. Avoid twisting and/or
tangling.
- Ensure that outlet vent of exhaust hose is kept debris-clear and
obstruction free.
- Ensure that ventilation holes on the rear of the machine and front
louvers are not blocked.
- The Pinguino should not be installed where the atmosphere could
contain combustible gases.
- Avoid using Pinguino in oily or sulphurous atmospheres or near
sources of heat.
- Wait at least 3 minutes before restarting, after the air-conditioner has
been switched off or the thermostat setting changed.
- Before moving the air-conditioner, remove tank and empty water
from collecting tray (see instructions for drainage at page 12).
- Do not place hot or heavy objects on the appliance.
- Clean air filter every week (see instructions at page 13).
- Important: If you need to use an extension cord, please be sure to
use a heavy duty extension cord (minimum 14 gauge).
SAVE THESE INSTRUCTIONS
2
Dear user,
We thank you for purchasing the
Pinguino
air-conditioner
and
congratulate you on your wise choice.
For optimal results please read this
manual carefully before installing or
operating.
We know that the Pinguino will
maintain your environment pleasingly
comfortable at all times.
With best wishes
DeLonghi America, Inc.
If you have any questions about the operation
or service of your Pinguino, please call our
toll-free service number 1-800-322-3848 or
1 - 877-235-1052 in the U.S. or no. (905) 2381313 in Canada.
3
SPECIFICATIONS
Power supply voltage
V
110-120
Hz
60
With water
Btu
8500*
With air
Btu
7500*
Current consumption
A/W
6,5/ 990
Water tank capacity
pints
30.65
Air flow capacity
cfm.
212
Frequency
Cooling capacity:
adjustable
Room thermostat (34° to 102°F)
Dimensions:
width
height
depth
Net weight
in.
in.
in.
lbs.
Refrigerant system
(freon)
Compressor protection
Freon charge
22”,05
28”,74
15”,35
97
R 22
Overload relay
lb. (gr)
see rating label
*Data according to pending standard testing procedures subject to review by the U.S. Dept. of
Energy.
OPTIMUM OPERATING RANGE
ROOM TEMPERATURE
ROOM HUMIDITY FACTOR
POWER
SUPPLY
4
70°F - 90°F
50% - 80% RH
FREQUENCY
60 HZ
VOLTAGE
115V
ILLUSTRATED MAIN FEATURES LIST
Air outlet grid
Control panel
Programmer (timer)
Water container
Castor
Castor stops
Water collecting tray
Water container compartment door
Air filter
Air intake grid
Exhaust hose
Power cable comp.
Manually resettable red button
Handle
Water collecting tray drainage tube
5
ILLUSTRATED ACCESSORY LIST
Table 1
DESCRIPTION
ACCESSORY CHECK
Check that all parts listed in Table 1 are included.
6
SUPPLIED
Exhaust hose
1
Permanent wall vent
1
Caster stop
2
Descaling fluid
1
Window nozzle
1
Adjustable window bracket
1
Suction disc
2
PERMANENT INSTALLATION
The Pinguino accessories include one wall vent for
exhausting your Pinguino. Once installed, this vent
is the only item needed for using Pinguino.
fig. 1
Permanent installation outlet holes must be in an
exterior wall and opening diameter should not
exceed 4”1/2.
OUTSIDE
INSIDE
fig. 2
INSIDE
;;
;;
;;
A1
in a window pane
OUTSIDE
4”.17
4”.17
INSIDE
fig. 3
A2
through the wooden basesection of a door or window
OUTSIDE
4”.17
1”
fig. 4
A3
through the wall
In case of fixed installation, air discharged
from rear hose has been extracted from the
room where the appliance is installed.
Check that the room (especially if small) is
not “air-tight”; a drop in pressure would
cause irregular functioning, which could
consequently activate reset switch. Air
entering through door and window cracks
is normally sufficient. If deemed, necessary
leave a door ajar (approx. 1/2 inch is
enough).
7
TEMPORARY INSTALLATION
Note: In both cases (permanent and temporary installations) make sure that the Pinguino is
positioned on level ground. If necessary use the two caster stops for the front casters
This installation makes it easy to
use Pinguino in any room,
provided there is a window or a
door: it allows you to use the
Pinguino immediately (Fig. 5).
Suction discs may be used to
keep window or door closed (Fig.
6).
Note: Additional exhaust hoses are available through Dè longhi
America. For best results we do not recommend using
more than one.
30
Pinguino is equipped with an
adjustable window bracket. If you
have a sash window, place the
bracket on the window sill, extend
the bracket fully within the window
frame and lower the window onto
the bracket. Insert the nozzle of the
exhaust hose into the slot, then
connect the hose to the air
conditioner (Fig. 7).
Thanks to the wing nut, it’s possible to
use the window bracket also for sliding
windows. Position the hole of the
bracket so to allow a correct
installation of the exhaust hose (see
the following instructions).
window
bracket
cm
fig. 5
fig. 6
fig. 7
PREPARING THE UNIT FOR USE
1) Fit the exhaust tube in place; if your conditioner is
supplied with a bayonet tube, it is fitted as illustrated in
the diagram.
2) For permanent installation, place the appliance near the
wall or window outlet. Make sure it is standing on a
level surface and fit the special shock absorbers/castor
stops underneath the castors.
1) Water collects at this point
fig. 8
NO
2) Bend this section
YES
1
2
3) Bend this section
YES
ELECTRICAL CONNECTION
Check that the power supply voltage is 115 V ~ 60 Hz.
Important: if you need to use and extension cord, please be sure to
use a heavy duty extension cord (minimum 14 gauge).
Before connecting the Pinguino to power supply, make sure that all
switches on the front control panel are in the OFF position.
Connect power cord found in storage compartment at rear of the
Pinguino (Fig. 9).
8
fig. 9
FINAL CHECK
In order to obtain the maximum performance from your air-conditioner make sure that:
fig. 10
-
Doors and windows of room to be airconditioned are closed (with the
exception of temporary installation where
a partially opened window is necessary).
fig. 11
fig. 13
fig. 12
-
Shade the room as far as possible from
direct sunlight by drawing curtains and/or
lowering blinds or shutters, for economical
and efficient air-cooling.
-
Ensure that intake and outlet vents (fig. 2
and 3) are not blocked.
Make sure there are no sources of heat in
the room.
SPECIAL NOTE
This machine is designed to be used with or without water. Maximum performance is obtained
using water. When used without water, Pinguino will maintain a full 88% of its cooling
capacity.
HOW TO PREPARE WATER CONTAINER
Use only clean, salt-free tap water. The water is essential for the air cooling operation and si
discharged in the form of steam through the exhaust outlet. A container full of water lasts for a period
that depends on a number of conditions such as temperature, humidity, insulation, exposure of the
room, number of people present, etc. On average it will last approximately 7 to 10 hours.
When the container is empty, the appliance automatically changes function from water to air. At the
same time, the quantity of air discharged from the rear hose will increase.
fig. 14
Open the water container compartment
door, tip the container forwards and lift
up to remove.
Remove the cap, pull out the
extendable tube and fill the container,
standing it on the floor.
After filling, replace the extendable
tube, screw the cap on tightly and
return the container to its place, making
sure the word FRONT is facing out.
During “water condensation” cooling function and in particularly quiet surroundings (eg. bedroom), a
slight gurgling noise may be heard. This may be regarded as perfectly normal.
Warning: Do not use water containing salt, eg. seawater or water treated using softening systems
that utilize kitchen salt.
9
DESCRIPTION OF PINGUINO PAC 290U CONTROLS
ON/OFF pilot light
ON/OFF button
Thermostat
A
B
“Alarm” pilot light
Timer
C
Timer ON/OFF
button
Selecting fan
speed button
Timer ON/OFF
pilot light
SETTING THE TIMER
The programmer/timer, like all clocks, must be
set to the exact time. If for example it is 4.00
p.m., turn the dial in a clockwise direction
(following the direction of the arrow) until the
number 4 is lined up with the arrow pointer (the
arrows indicates 4:00 p.m. approximately).
PROGRAMMED MODE
1) Release B timer button.
2) Set the operating times by pushing out the
notches on the dial corresponding to the
period required (each notch represents 15
mins.).
3) Check that the timer indicates the correct
time (see instructions on setting).
Funzionamento
Operating
time
11
10
9
4
eg. from 9 to 11 a.m.
11
10
9
4
arrow pointer
Note:Never turn the dial in an anti-clockwise
direction!
The timer is in effect, an electric clock and
works only if the plug is connected to the
power supply. Whenever the plug is
disconnected or there is a power failure, the
programmer stops (the clock is then “slow”)
and must be re-set.
The unit can be used in either programmed or
non-programmed mode.
N.B:
4) Select the desired function as shown in the
chart overleaf.
The unit will now switch on and off each
day at the selected times.
Note: To override the programmed operating
times, simply press the ON/OFF key.
NON-PROGRAMMED MODE
1) B TIMER button must be pressed
2) Select the desired function as shown in the
chart on the following page.
For technical reasons, the temperature is not expressed in degrees but by a line increasing
in thickness. We therefore recommend that when starting up the appliance, the thermostat
be turned to maximum (thick green line = maximum cold). When the desired temperature
has been reached, turn the thermostat slowly away from the maximum cooling position until
the appliance switches off. Leave the thermostat in this position. The air-conditioner is now
programmed to maintain the exact temperature at all times.
After switching the appliance off, wait at least 3 min. before switching on again.
10
HOW TO START UP THE CONDITIONER
(see control panel on the previous page)
Plug the appliance into the wall socket.
Select the “programmed” or “non
programmed” mode (see previous page)
Select the fan speed required pressing
“Fan speed” key C.
AIR-CONDITIONING
Key A ON/OFF
(conditioning) must
be released
Turn the thermostat
to Max. Cold.
Press
key
A
(ON/OFF).
ON/OFF signal lamp
(conditioning) will
come on.
The appliance comes on.
If not, refer to pag. 14.
To switch off the appliance, press key A
(ON/OFF main switch).
11
MAINTENANCE
PRECAUTIONS
fig. 15
fig. 16
During cleaning and normal maintenance operations
remember to disconnect plug.
Under no circumstances should appliance be
washed with running water. Damage could be
caused to the electrical circuit.
¢¢
;;
QQ
;;
QQ
¢¢
CLEANING OF EXTERNAL HOUSING
Use only mild soap and water.
Do not use chemical cleaners.
fig. 17
Clean with a damp cloth and dry thoroughly
with a clean dry cloth.
fig. 18
BEGINNING THE SEASON
Carefully
follow
installation procedure.
Check for any defects in
power cord and plug.
fig. 19
CLEANING OF COLLECTING TRAY
12
fig. 20
;;
QQ
¢¢
¢¢
;;
QQ
1) Open water container
compartment door and
remove tank.
2) Keep the air-conditioner
working until the water
level indicator light goes
on.
3) Switch off the airconditioner
and
disconnect electrical
fig. 21
plug.
4) Remove plug from
drainage tube, located
at rear of appliance and
empty water.
5) When
draining
is
finished, replace plug
of drainage tube.
6) Remove sediment from
the collecting tray by
rubbing with a cloth.
AIR FILTER CLEANING
Maintenance of air filter
A clogged air filter reduces the quantity of
circulating air and the efficiency of the
appliance. Clean filter every week using a
vacuum cleaner.
fig. 22
Remove dust with a
vacuum cleaner
Removal and replacement of air filter
Gently pull filter upwards.
Push down to replace.
fig. 23
Rinse with running
water
fig. 24
Cleaning procedure
To remove dust deposited on filter, use a vacuum cleaner. If it is very dirty, soak in lukewarm water
and rinse thoroughly. The temperature of the water must be kept below 104°F. After washing, leave
filter to dry before replacing.
END OF SEASON OPERATIONS
5) Remove exhaust hose.
6) Clean filter and dry well before replacing.
7) Cover appliance with a polyethylene bag to
prevent dust from entering.
You can use the polyethylene bag included
into the packaging.
fig. 25
1) Disconnect plug.
2) Remove tank and empty it.
3) Some water may remain into the tank. To
avoid unpleasant odors, pour two spoons of
bleach into the tank.
4) Drain water from collecting tray.
fig. 26
13
PERIODIC MAINTENANCE
Calcium deposits may build up on some working parts of Pinguino during operation. Monthly cleaning
(more often in hard water areas) should be done per the following procedure:
-
Unplug the machine. Remove the water tank. Run the air-conditioner until water level indicator
light turns on.
-
Remove drainage tube plug and empty water. Replace drainage tube plug and add one quart of
clean water to the collecting tray.
-
Empty contents of one 8-ounce bottle of Descaling Fluid into the collecting tray. Plug in the
machine and operate until water level indicator light goes on. Turn off and unplug machine.
-
Drain the remaining liquid and re-plug the drainage tube.
-
Refill the tank with clean water and replace in the machine.
-
Plug in and turn on the machine. While the air-conditioner is operating, unplug the drainage tube
and drain until the water looks clean. Replace the drainage tube plug.
TROUBLESHOOTING
SYMPTOMS
CAUSE
SOLUTION
The Pinguino does not
function:
-
power failure
plug is disconnected
ON/OFF switch is off
Timer key is in STOP position
-
insert plug
switch on
release the TIMER key
-
exhaust hose blocked
-
-
exhaust hose twisted or bent
ventilation holes on the rear of
the machine or front louvers
blocked
-
Check for obstruction of air
outlet vent
eliminate irregularities
remove obstacles to allow
proper airflow
-
-
close window
re-insert exhaust hose
-
window open
air exhaust hose has become
disconnected
thermostat set too low
-
-
air filter blocked
water tank empty
-
set thermostat
number
clean filter
refill it
The Pinguino does not
function
- function fault warning
light is on (pag. 10 “Alarm” light)
After correcting problem,
press reset button (see
pag. 5)
The Pinguino produces
cold air but room does
not maintain comfortable
temperature:
to
higher
SERVICING
In case of malfunction turn off and disconnect the Pinguino from power outlet and contact our Service
Centre for qualified assistance, toll-free number 1-800-322-3848 or 1 - 877-235-1052 in America or
no. (905) 238-1313 for Canada.
14
FOR UNITED STATES ONLY:
LIMITED WARRANTY
We warrant each DELONGHI AIR-CONDITIONER to be free from defects in material and
workmanship. Our obligation under this warranty is to provide one year parts and labor
free from purchase date, with an additional four (4) years on any part of the sealed system
consisting of the compressor, evaporator, condenser and factory connected refrigerant
tubing. This warranty shall apply only if the AIR-CONDITIONER is used in accordance with
the factory directions which accompany it, and on Alternating Current (AC) circuit. This
warranty is in lieu of all other warranties and representations, expressed or implied, and all
other obligations or liabilities on our part. We do not authorize any other person or
company to assume for us any liability in connection with the sale or use of our AIRCONDITIONER. This warranty shall not apply to assume for us any liability in connection
with the sale or use of our AIR-CONDITIONER. This warranty shall not apply to any AIRCONDITIONER which shall have been repaired or altered outside our factory nor shall it
apply to any AIR-CONDITIONER which has been subjected to misuse, negligence or
accidents.If repairs become necessary or spare parts are needed, please write to:
DELONGHI America Inc.
Park 80 West Plaza One, 4th floor
Saddle Brook NJ 07663
or call Service Tel. No 1-800-322-3848
15