1
INSTALLATION INSTRUCTIONS
1. Remove all packing materials
from the oven cavity. Check the unit for any damage,
such as a
misaligned
door, damaged door seals around the door or dents inside the oven cavity or on the door.
lfthere isanydamage,
please do not operate the oven until it has been checked by a SERVICE CENTRE
APPROVED BY SHARP and repaired, if necessary.
2. Accessories
provided
1) Turntable
tray
2) Roller stay
3) Operation
manual and cooking guide
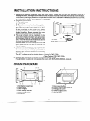
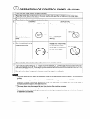
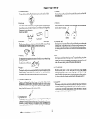
3. Fitting the roller stay and turntable.
Locate
the roller stay in the centre of the oven, then
fit the turntable
on the roller stay. Make
sure the turntable
is centrally
located and
locked together.
Never operate the oven
without
the roller stay and turntable.
4. The oven should not be installed
in any
area where heat and steam are generated,
for example,
next to a conventional
oven
unit. The oven should be installed so as not
to block ventilation
openings.
Allow at least 10 cm on the top, 5 cm on the
both sides and at the rear of the oven for
free air space.
nor the distribu5. Neither the manufacturer
tors can accept any liability
for damage to
the machine or personal injuryforfailure
to
observe the correct electrical
connecting
procedure.
The A.C. voltage must be single phase
Australia
24OV, 50Hz.
New Zealand 230-24OV, 50Hz.
6. Operate the oven from a general purpose domestic outlet.
If a generator
is used, do not operate the oven with NON-SINUSOIDAL
l
l
outputs.
OVEN DIAGRAM
1. Ventilation
openings
2. Oven lamp
3. Door hinges
4. Door safety latches
5. See through door
6. Coupling
7.
8.
9.
10.
11.
Door open button
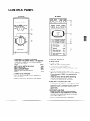
Control panel (See page 4)
Waveguide
cover
Power supply cord
Rating label
3
-