1
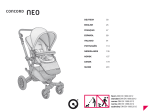
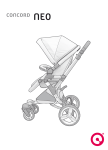
DEUTSCH01
ENGLISH15
FRANÇAIS29
ESPAÑOL43
ITALIANO57
PORTUGUÊS71
NEDERLANDS85
NORSK99
DANSK113
SUOMI127
Norm DIN EN 1888:2012
standard DIN EN 1888:2012
norme DIN EN 1888:2012
norma DIN EN 1888:2012
szabvány DIN EN 1888:2012
01
02
03
04
05
06
07
08
09
10
11
12
13
_ENGLISH
THANK YOU
15
OVERVIEW16
INSTRUCTIONS18
CONCORD ORIGINAL ACCESSORY PARTS
19
UNFOLDING THE CONCORD QUIX
20
COLLAPSING THE CONCORD QUIX
21
USING THE HARNESS SYSTEM
22
USING THE PARKING BRAKE
24
LOCKING THE FRONT WHEELS
24
SETTING THE SEAT TILT ANGLE
25
SETTING THE FOOTREST
25
USING THE SUN VISOR
26
USING THE RAIN COVER
27
MAINTENANCE27
WARRANTY28
_Thank you
Thank you for purchasing a Concord quality product.
You will be amazed with the versatility and safety of this product.
We hope that you will enjoy using your new CONCORD QUIX.
15
_OVERVIEW
01 Handlebar (with clip)
02 Sun roof
03 Harness guide
09 Parking brake
operation
04 Sun roof attachment
10 Seat tilt adjustment
05 Harness lock
06 Footrest
operation
07 Footrest
11
Transport lock
12 Operation
TWINLOCK
08 Frontwheel
lock operation
13 Baggage net
16
17
_INSTRUCTIONS
CAUTION!
• Read these instructions carefully before use and keep them for future
reference. Your child‘s safety may be affected if you do not follow these
instructions.
• Keep these instructions for future reference.
WARNING!
• This vehicle is intended for children from 6 months and up to 15 kg.
• This seat unit is not suitable for children under 6 months.
• The CONCORD QUIX must only ever be used for transporting ONE child.
• The CONCORD QUIX is not a car seat! Make sure to use only certified and
approved car seats for transporting your child in a vehicle.
• Never leave your child unattended.
• Do not let your child play with this product
• Always use the restraint system.
• Always use the crotch strap in combination with the waist belt.
• The parking device shall be engaged when placing and removing the
children.
• Any load attached to the handle and/or on the back of the backrest and/or
on the sides of the vehicle will affect the stability of the vehicle.
• The clip on the handlebar (01) is designed to support max. 1 kg of weight.
• The maximum amount carried in the basket must never exceed the weight
indicated on the basket (2 kg).
• Remove the child from the CONCORD QUIX when negotiating stairs or
steep inclines.
• This product is not suitable for running or skating.
• Never let a child stand on the frame of the CONCORD QUIX. To do so
could cause damage to the CONCORD QUIX and impair its safety.
• Ensure that all the locking devices are engaged before use.
• Periodically check all components of the CONCORD QUIX and any
accessories used.
• To avoid injury ensure that your child is kept away when unfolding and
folding this product.
• Never use accessories that have not been approved by CONCORD.
18
• Only replacement parts supplied or recommended by CONCORD shall be
used.
• Any damage to the CONCORD QUIX due to overloading, incorrect use,
or the use of non-OEM accessory parts will lead to a lapse of the product
warranty.
• Extended exposure to direct sunlight may lead to a slight discolouration of
parts of the CONCORD QUIX.
• Try to avoid exposing the CONCORD QUIX to extreme temperatures.
• Immediately dispose of any plastic packaging. These could pose a fatal
hazard to children.
_CONCORD ORIGINAL ACCESSORY PARTS
For more information about Concord original accessory parts, contact your
specialist retailer or Concord directly.
Concord GmbH
Industriestrasse 25
95346 Stadtsteinach
Germany
Phone +49 (0)9225.9550-0
Fax +49 (0)9225.9550-55
[email protected]
www.concord.de
19
_ UnFOlDinG THE COnCORD QUiX
_ COllaPSinG THE COnCORD QUiX
LaytheCONCORDQUIXontoaflatsurfaceforunfolding.
CaUTiOn!
• NevercollapsetheCONCORDQUIXwithyourchildinit.
Unlock the transport
lockbypressingthe
tubes together and
moving the locking lever
of the transport lock (11)
outward.
Pull the two handlebars (01) backwards and
uptounfoldtheCONCORDQUIXcompletely.
Press the lower
TWINLOCK control
button (12) down
completelyuntilyou
hear an audible click.
CaUTiOn!
• Makesurethatallattachmentmechanismsaresecurelylockedintoplace
and closed before each use of the CONCORD QUIX.
• Alwaysusethesafetyharnesswhenyourchildissittingorlyinginthe
CONCORD QUIX (see USING THE HARNESS SYSTEM).
20
Remove all items from the baggage net (13) and the seat before collapsing
the CONCORD QUIX.
Bring the backrest into its most upright position
(see SETTING THE SEAT TILT ANGLE),
fold the front part of the
sun visor inward, and tilt
the entire sunroof back
completely.
Move the upper and
lower TWINLOCK
control buttons (12)
upsimultaneouslyand
bring together the two
handlebars (01) of
the CONCORD QUIX
forward and downward.
Collapse the CONCORD QUIX
completelyuntilyouhearthetransport
lock (11) locking into place.
21
_ USinG THE HaRnESS SySTEM
Makesurethatyourchildisalwayssecurelyharnessedwhenusingthe
buggy.
Adjusttheharnessstrapsuntiltheysit
snug and tight on the child.
Slidethebeltadjustersupordownto
adjustthelengthoftheharness.
Shoulder harness
Lap harness
Central harness
Open the harness lock and place the harnesses to the sides and downward.
Placeyourchildontotheseatasfarbackaspossible.
Guide the central harness with the harness
lock up between the legs of the child. Click the
harness lock adapters of the shoulder and lap
harnesses into their respective receptacles in
the harness lock.
Simplypressthecentralbuttonontheharness
lock to release the individual harness adapters.
Youwillhavetoadjustthelengthsofthe
shoulderstrapsperiodicallyasyourchild
grows. Thread the harnesses out of the
openings in the backrest (03) and thread
them back through the openings (03)
matchingyourchild’ssize.
Alwaysmakesuretothreadtherightand
left shoulder harness into an opening of
the same height.
Make sure that the plastic anchors at the ends of the harnesses are threaded
tightlythroughtheopenings(03) and that the harnesses are not twisted.
Testforcorrectadjustmentbytuggingontheshoulderharnesseswith
moderate strength.
Ensure that none of the harness straps are twisted.
Thechildsafetylockislocatedonthebackof
the harness lock.
Itcanbeactivatedanddeactivatedbysimply
turningit.Theactivatedchildsafetylock
blocks the opening mechanism of the harness
lock.
WaRninG!
• Onlyusetheshoulderandlapharnessincombinationwiththecentral
harness.
22
23
_USING THE PARKING BRAKE
_SETTING THE SEAT TILT ANGLE
Push the control button (09) on the right of the
handlebar (01) downward to activate the parking
brake.
The adjustment straps (10) on the back of the CONCORD QUIX allow you to
steplessly adjust the tilt angle of the backrest.
Pulling the upper
adjustment strap will
raise the backrest.
Press the release button and move the operating
lever (09) on the right handle bar (01) upward to
release the parking brake.
Pulling the lower
adjustment strap will
lower the backrest.
_LOCKING THE FRONT WHEELS
Turn the front wheels until they face
backwards and turn the control knob (08)
a quarter turn until it clicks into place if
you wish to lock the front wheels of the
CONCORD QUIX for straight forward
movement.
_SETTING THE FOOTREST
The footrest (07) can be locked in its top-most position.
Press the two release levers (06) on the left and
right on the bottom of the footrest to release it.
Now adjust the footrest (07) downwards and let
go of the release lever (06).
Turn the control knob (08) another
quarter turn to release the front wheel
lock.
24
25
_ USinG THE SUn ViSOR
_ USinG THE Rain COVER
Thesunvisorissteplesslyadjustableandcanbe
locked in its front-most position.
The rain cover can be stored in the baggage net.
Unfoldtheraincovercompletelybeforeuse.
Pull it over the CONCORD QUIX from the top
down.Usethevelcrostrapstoaffixtherain
cover on the tube structure of the CONCORD
QUIX.
Push the arresters on
both sides of the sun visor
upward to release them.
Open all connections to the cover of the CONCORD
QUIX to remove the sun visor (02). Push the attachment
clips of the sun visor (04) upward from their holders and
then pull the visor forward and off.
Leavetheraincovertodryoutcompletely
beforerefoldingandstoring!
_ MainTEnanCE
Donotexposethecovertosunlightforlongperiods.
Washtheplasticpartswithwarmwaterandsoapandcarefullydryallthe
components after.
Regularlycheckthebrakes,harnessesandfasteningelementsthatmay
suffer wear and tear through use.
To attach the sun visor, clip the attachments (04) of the sun visor (02) onto
thetubeframeoftheCONCORDQUIXandmovethemdownuntiltheyclick
intoplace.Nowyoucanconnectthesunvisorwiththerestofthecoverof
the CONCORD QUIX. Check that all attachments are closed.
The cover can be removed for washing.
The individual elements of the CONCORD QUIX cover are interconnected
and attached to the tube frame via snap fasteners and velcro straps.
Open all fastenings before attempting to remove the cover. Pull the cover off
the seat area first, and then from the backrest.
Whenreattachingthecover,simplyreversetheprocess.Threadthe
harnesses through the relevant openings of the cover. Make sure that all
fastenersandconnectionsarepositionedcorrectlyandareclosedsecurely.
• Thecolourofthecovermayrunwhen
wet or in the wash.
• Donotusesolventsonthecover!
26
27
_WARRANTY
The guarantee begins on the day of purchase. The guarantee period
corresponds to the statutory warranty period in the end-user’s country
concerned. At the manufacturer’s discretion, the guarantee shall cover
rectification, replacement or a price reduction.
The guarantee is valid for the original purchaser only. In the event of any
defect, claims can not be considered unless the specialist dealer is notified
of the fault as soon as it occurs for the first time. If the specialist dealer
is unable to remedy the problem himself, he must return the product to
the manufacturers together with details of the complaint, official proof of
purchase and the purchase date. The manufacturers assume no liability for
faulty goods that they did not supply.
The guarantee does not apply where:
• the product has been modified;
• the product is not brought back to the specialist dealer complete with
proof of purchase within 14 days of the defect occurring;
• the defect was caused by improper usage or maintenance or due to
anything else deemed to be the fault of the user, in particular failure to
comply with the instructions for use;
• repairs have been carried out on the product by third parties;
• the defect was caused as the result of an accident.
• the serial number has been damaged or removed
The guarantee makes no provision for any alteration or deterioration to the
product that is incurred through normal usage (wear and tear). The period
of guarantee shall not be extended by any remedial measures carried out by
the manufacturers in the event of a claim.
28
Concord GmbH
Industriestraße 25
95346 Stadtsteinach
Germany
Phone +49 (0)9225.9550-0
Fax +49 (0)9225.9550-55
[email protected]
www.concord.de
Einbau- und Bedienungsanleitung
Instructions for attachment and use
Directives d‘installation et mode d‘emploi
Instrucciones de montaje y de uso
Istruzioni per l‘uso e il montaggio
Manual de montagem e de utilização
Inbouw- en bedieningshandleiding
Bruksanvisning og monteringsveiledning
Monterings- og betjeningsvejledning
Kiinnitys- ja käyttöohjeet
QX 03/1112
_DEUTSCH
_ENGLISH
_FRANÇAIS
_ESPAÑOL
_ITALIANO
_PORTUGUÊS
_NEDERLANDS
_NORSK
_DANSK
_ SUOMI