1
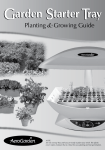
TM
Master Gardener Deluxe
GUIDE
Plant & Grow
Your Own Seeds
Welcome
Thank you for
your purchase of the
Master Gardener
Deluxe Kit, created for
AeroGardeners™ like you
who want to use your own
seeds and design a custom
garden. In this Guide we
give you the tools you need
to have a successful and
pleasurable year-round
gardening experience.
Introduction
Master Gardener Basics
“What’s Inside” . . . . . . . . . . . . 4
Additional Supplies . . . . . . . . . 5
Designing Your Garden
Plant Type . . . . . . . . . . . . . . . . . 6
Plant Height . . . . . . . . . . . . . . . 6
Water and Light . . . . . . . . . . . . 7
Nutrients . . . . . . . . . . . . . . . . . 7
Life Span . . . . . . . . . . . . . . . . . 8
Plant Habit & Layout . . . . . . . . 8
I sincerely hope you enjoy
planting a garden of your
own design.
Planting Depth . . . . . . . . . . . . . 9
Best Regards,
Getting Ready . . . . . . . . . . . . 10
Michael Bissonnette
Founder and CEO
AeroGrow International, Inc.
Building a Seed Pod
Number of Seeds . . . . . . . . . . 10
Placing Seeds in
Grow Sponge . . . . . . . . . . . . . 11
Labeling Seed Pods . . . . . . . . 13
CONTENTS
Planting Your Garden
Placing Seed Pods in Garden . .
Adding Water . . . . . . . . . . . . . .
Lowering Lamp Hood . . . . . . .
Setting Light/Water Cycle . . . . .
14
15
15
16
Feeding Your Garden
Harvesting Your Garden
Leafy Greens . . . . . . . . . . . . . 36
Bunching Herbs . . . . . . . . . . . 37
Branching Herbs . . . . . . . . . . 38
Preparing for Your
Next Garden . . . . . . . . . . . . . 39
Choosing a Nutrient Regime . . 18
Appendices
Nutrient Feeding Schedule
Options . . . . . . . . . . . . . . . . . 20
Transplanting Seedlings . . . . . 42
Adding Nutrients . . . . . . . . . . . 21
Signs of Stress . . . . . . . . . . . . . . 22
Tending Your Garden
Removing Domes . . . . . . . . . . . 23
Adding Water . . . . . . . . . . . . . . 24
Raising Lights . . . . . . . . . . . . . . 25
Thinning . . . . . . . . . . . . . . . . . . 26
Pollinating . . . . . . . . . . . . . . . . 27
Pruning . . . . . . . . . . . . . . . . . . 28
Keeping Your
Garden Healthy . . . . . . . . . . . . 34
Plant Problems & Remedies . . . 35
Supporting Plants . . . . . . . . . . 44
Rinsing and Refilling . . . . . . . 47
Questions and Answers . . . . . 48
Troubleshooting . . . . . . . . . . . 49
Setting Your Light Timer . . . . . 53
Reminders About Your
AeroGarden Setup . . . . . . . . . 55
Gardener’s Reference
and Log . . . . . . . . . . . . . . . . . 57
Seed Information . . . . . . . . . . 61
I
ntroduction
The Master Gardener Deluxe
Kit is designed for the experienced AeroGardener. It includes
the supplies you’ll need to plant
and grow three custom gardens
in your AeroGarden.
While the AeroGarden provides
the ideal environment for
growing plants, there are many
decisions you need to make that
will impact the outcome of your
garden. This Guide will assist
you in deciding what to plant,
how to plant your seeds and
how to care for your plants
once they are growing. We
recommend that you read the
entire Guide before starting
your garden.
Note: Planting an AeroGarden with your own seeds is a bit of an experiment.
We hope that most of your efforts will be successful and that you enjoy
the discovery process. If you have not used an AeroGarden with one of
our Seed Kits, we highly recommend that you do so before planting
your own seeds. The knowledge you’ll gain by planting, tending, and
harvesting a garden from one of our Seed Kits will help guide your
choices about what to plant and how to use your AeroGarden.
3
Introduction
Master Gardener Basics
The Master Gardener Deluxe Kit has supplies for planting three
custom gardens – that’s enough for one year’s worth of indoor
gardening!
What’s Inside…
Domes (7)
Seed Pod Labels (21)
Grow Sponges (21)
Split-Apart Baskets (7)
Small Nutrient Tablets
Large Nutrient Tablets
Introduction
4
Master Gardener Basics (Continued)
In addition to what is included in your Master Gardener Deluxe
Kit, there are a few additional items that you will need.
Additional Supplies Needed…
An Iron
An AeroGarden
A Permanent Marker
Glue
Seeds
!
5
Remember to replace your Grow Bulbs after 6 months of use. Grow
Bulbs can be ordered from our website at: www.aerogrow.com.
Introduction
D
esigning Your Garden
SELECTING PLANTS
The following guidelines will
help you plant and grow a
thriving indoor garden. Take
the time up front to plan your
garden and you’ll reap the
rewards of beautiful plants and
bountiful harvests.
Plant Type
While we encourage you to try
growing a variety of plant types
in your AeroGarden, there are a
few that will just not do well in an
aeroponic system. Subterranean
plants, such as carrots, beets,
potatoes or peanuts should not be
planted in your AeroGarden. In
addition, plants that
require very dry
conditions and
have very
low water
requirements,
such as cactus
and succulents,
will not thrive in
your AeroGarden.
Plant Height
The maximum height of the AeroGarden Lamp Hood is 12 inches
12”
HELPFUL HINT: When choosing seeds
for your AeroGarden, look for dwarf or
miniature varieties.
from the Grow Surface, which
means it is important to select
plants that will not grow taller
than this – or to choose plants that
can be pruned to stay within this
height restriction, such as basil.
If you decide to grow a garden
with a variety of different plants,
you will also need to consider
their relative heights. Try to grow
plants that will be about the same
height as they mature. Again, you
may be able to prune some of the
(Continued on next page)
Designing Your Garden
6
Designing Your Garden (Continued)
plants in your garden to achieve
this. Using plants that grow at the
same rate lets you adjust the Lamp
Hood so that they all receive the
amount of light they need to grow
and thrive.
What happens when you combine plants of different heights?
Leaves of tall plants touch the
lights and brown and burn. The
shorter plants will be shaded and
the light they need to grow will be
blocked. Short plants may start to
“stretch” to reach the lights and
look floppy and unhealthy.
Water and Light
The plant setting on the Control
Panel regulates the amount of light
and water for the entire garden.
This means that you will have the
most success if you plant a garden
with similar water and light needs.
For example, we found that
lettuces grow extremely well if
there is a constant flow of water
over the roots. On the other hand,
herbs, such as basil or cilantro,
do best when the water pump is
shut off for some period of time
each day.
7
Designing Your Garden
HELPFUL HINT: Plant a garden with
plants that have similar growth rates
and heights, as in the Salad Greens
Garden (shown).
Nutrients
Choose plants that have similar
nutrient requirements to avoid
overfeeding some plants while
underfeeding others. For example,
mixing plants with fairly low
requirements (such as lettuces)
with plants that have much higher
nutrient requirements (such as
basil) is not recommended. There
are 2 different types of nutrients
to choose from in the Master
Gardener Deluxe Kit and more
specific guidelines on which
one(s) to use are provided in the
“Feeding Your Garden” section of
this Guide.
Life Span
Try to choose plants that have
similar life spans so that you do
not end up with empty spots in
your garden. For example, dwarf
tomatoes and cilantro are a great
flavor combination, but they
would be hard to grow in the
same AeroGarden. The cilantro
will be near the end of its
growing season just as your dwarf
tomatoes are starting to ripen!
Plant Habit and Layout
Some plants are bushy, others
feathery, some grow straight,
others branch out. As you plant
your garden, think about the
shape and growth habit of the
plants. You may want to put the
feathery leafed plants in the front
where they can be seen. Save the
back row for the plants that grow
straight or bushy to make a nice
background for the more delicate
plants in the front. You can always
experiment with arrangements.
Even after you’ve planted your
garden, you can remove the Seed
Pods and rearrange your garden.
(Just be gentle with the roots!)
Horizontal Spreading
If you grow a garden with plants
that have extensive branching or
will spread horizontally, you may
want to leave some of the Grow
Surface Openings empty. (For
example, we recommend planting
only 3 Seed Pods for dwarf tomatoes and peppers, and leaving the
remaining 4 Grow Surface Openings empty.) This will give the plants
room to grow and assure that each
plant gets the light it needs.
If you do this, be sure to cover the
unplanted Grow Surface Openings
to prevent algae growth.
HELPFUL HINT: To cover unplanted
Grow Surface Openings, choose a
material that will stand up to a moist
environment, such as aluminum foil
or the plastic top from a milk jug (shown).
Designing Your Garden
8
B
uilding a Seed Pod
Once you have collected the
extra supplies needed (shown),
and decided which seeds to
plant in your AeroGarden,
there are two additional
variables that you need to
consider when building a
Seed Pod: How deep to plant
the seeds and how many
seeds to plant per Seed Pod.
Here are some general guidelines that will help you with
these choices.
Additional Supplies: glue, iron, permanent
marker and seeds.
Planting Depth
The ideal planting depth of
seeds in the AeroGarden
will not necessarily be the
same as recommended on
seed packages from suppliers.
In general, we have found that
small seeds need a shallower
planting depth than large
seeds. Plant oregano (a very
small seed) at 1/8” depth and
cilantro (a large seed) at 1/4”
depth. Seeds planted too deep
may rot before germinating.
9
Building a Seed Pod
Oregano – 1/8” deep
Cilantro – 1/4” deep
Number of Seeds
As with an outdoor garden, it is important to plant extra seeds in each
Seed Pod to ensure success. A rule
of thumb is that for larger seeds and
fruiting plants, sow only a few extra
seeds. Increase the number of seeds
as the seed size gets smaller and for
plants that grow in bunches, such as
chives. Typically, 6 seeds per Seed
Pod does the trick.
Chive seeds
Dwarf tomato
seeds
Grow Sponges with suggested number
of seeds.
Getting Ready
To get started building a Seed Pod, here are a few preliminary steps
that will help the process go smoothly.
• Preheat iron to a moderate temperature (between the silk and cotton
setting on most irons, 300°- 400°F).
Do not use steam.
• Write the name of the seeds you
will sow on the Label(s) with a
permanent marker. Doing this before
you start planting prevents accidental
mislabeling of Seed Pods.
• If you are re-using a Split-Apart
Basket, be sure to scrape any
residue from the previous Label off
the surface or the remnant glue will
prevent the new Label from adhering.
(Continued on next page)
Building a Seed Pod
10
Building a Seed Pod (Continued)
Placing Seeds in Grow Sponge
It is helpful to use a little bit of glue to keep the seeds at the desired
planting depth and prevent them from rolling away. You’ll only need a
dab. Be sure to use a water-soluble, non-toxic, white school glue.
• Squirt some glue on a piece
of paper.
• Gently open the slit in the
Grow Sponge.
• Using a cotton swab, toothpick,
matchstick, or something else
with which you can grab a small
amount of glue, apply a thin
coat of glue on the inside of
the Grow Sponge at the desired
planting depth.
• Place the seeds on the glue.
Keep the seeds away from the
side edges of the Grow Sponge.
It is okay if the seeds overlap one
another. (Large seeds can be easily
put in place with your finger.)
A little trick for tiny seeds:
• Spread the seeds on a flat surface.
• Open Grow Sponge and gently
touch the glued surface to
the seeds.
11 Building a Seed Pod
• Close the Grow Sponge and
insert it into Split-Apart Basket
(slit side up).
• Be sure the base of the Grow
Sponge is resting on the bottom of the Split-Apart Basket.
HELPFUL HINT: Don’t risk mislabeling
your Seed Pods! If you are planting
multiple Seed Pods with the same seed
variety, then continue placing seeds in
additional Grow Sponges. If not, take
the time to apply Labels as you go.
(Continued on next page)
Building a Seed Pod
12
Building a Seed Pod (Continued)
Labeling Seed Pods
The Label not only helps you keep track of what you planted and the
planting date, but it also promotes germination and decreases algae
growth. Be sure to take the time to fill out and apply the Labels.
Remember to preheat your iron to a moderate temperature
(between the silk and cotton setting on most irons, 300°- 400°F).
Do not use steam.
HELPFUL HINT: Before you begin ironing, make sure the Grow Sponge is pushed
down to the bottom of the Split-Apart Basket. This will prevent the Grow Sponge and
seeds from getting overheated.
• Place Seed Pod Label on top of the Split-Apart Basket.
• Iron for a total of 10 seconds as follows:
– 5 seconds with the iron in one place.
– 5 seconds moving the Seed Pod around the outside
edge of the iron – to ensure Label is secure.
Your Seed Pod is now ready to plant.
13 Building a Seed Pod
WARNING: Burns can occur from
touching hot metal parts, hot water
or steam. Extreme caution should
be used near children. Never leave
iron turned on or unattended, especially when children are present.
P
lanting Your Garden
Planting your custom Seed Pod is the same as planting one of
the Seed Pods from an AeroGarden Seed Kit. We recommend
that you record the planting date, seed depth, and number of
seeds planted in the Gardener’s Log in the back of this Guide
(sample shown below). This will be a great reference when
planting future gardens.
Placing Seed Pods in Your AeroGarden
• Insert the Seed Pod into a Grow
Surface Opening by pressing the
Seed Pod down firmly until rim of
the Seed Pod almost touches the
Grow Surface. (The direction of the
Seed Pod does not matter, but for
easy reading, we recommend you
have the Label facing forward.)
• Place a Dome on top of the Seed Pod.
Note: Please refer to the Quick Start Guide included with your
original AeroGarden or, if you don’t have one, contact your
retailer.
Pod
#
1
Sample of Gardener’s Log found in the back of this Guide.
2
3
4
5
6
7
Plant Type
(# of seeds planted)
Chives (20)
Cilantro (6)
Seed
Depth
Planting
Date
1/8” 12/1/06
Germination Nutrient
Time
Regime*
7 days
1/4” 12/1/06 11 days
B
B
(Continued on next page)
Planting Your Garden
14
Planting Your Garden (Continued)
Adding Water
Add water to the AeroGarden
Bowl up to “Fill to Here.”
We recommend using municipal
tap water, bottled or purified
water. Well or softened water
SHOULD NOT be used because
the extra minerals in these sources
may be harmful to aeroponically
grown plants.
Lowering Lamp Hood
Set the Lamp Hood at the
lowest setting when starting
a new garden. Most seeds need
maximum light to germinate.
15 Planting Your Garden
“Fill To Here”
Setting the AeroGarden
Light/Water Cycle
The AeroGarden has a timer that
automatically controls the length of
time the lights and the water pump
are on and off. There are 5 different
plant settings on the Control Panel
from which to choose. This allows
you to find the ideal combination
of light and moisture for the plants
you grow. Use the chart below to
determine which plant setting is
best for your garden.
Control Panel Light and Pump Cycles
24-Hour Light Cycle
24-Hour Pump Cycle
Hours Lights
Control
are Off with
Panel
Hours Lights Hours Lights Hours Pump Hours Pump
Pump
Setting
Are ON
Are OFF
Is ON
is OFF
Running
Tomatoes/
Peppers
Salad
Greens
Herbs/Basil
Flowers
Strawberry
16
8
20
4
4
16.5
7.5
24
0
7.5
17
7
17
7
0
15.5
8.5
20
4
4.5
15
9
15
9
0
Note: On all settings, the pump always runs when the lights are on.
HELPFUL HINT: “Herbs/Basil” & “Strawberry”
are the only setting for which the pump is
always off when the lights are off. All other
settings have a “wet” interval, when the lights
are off but the pump is still running.
(Continued on next page)
Planting Your Garden
16
Planting Your Garden (Continued)
Choosing a setting for a plant that
is not listed on the Control Panel
will take a little bit of guesswork.
For example, eggplant grown in a
traditional soil garden has similar
needs to dwarf tomatoes, so selecting the “tomatoes/peppers” setting
would be a good place to start.
If you are not sure which setting to
use, keep your eyes open for signs
of plant stress. You can always
change the setting.
HELPFUL HINT: On the “Salad Greens”
setting, the pump is always running. Use
this setting only for plants that can tolerate constant moisture, such as lettuces
and other leafy greens.
Note: You can program your AeroGarden so that the lights turn off
and on at a time that is convenient for you. Please refer to
“Setting Your Light Timer” in the Appendices section of this
Guide for detailed instructions.
17 Planting Your Garden
F
eeding Your Garden
The Master Gardener Deluxe Kit comes with two different types of
nutrient tablets to meet the needs of a variety of plant types.
The amount of nutrients in your garden increases with tablet size.
The nutrient tablets consist mainly of mineral salts that provide
13 micro- and macro-nutrients that all plants require. There is also
seaweed for a boost of 65 micro-nutrients and trace elements.
Each nutrient tablet also has ingredients that will keep the water
in your AeroGarden at a pH level that is ideal for aeroponically
grown plants.
Choosing a Nutrient Regime
Most gardens will need a combination of the small and large nutrient
tablets. Since we don’t know what’s growing in your garden, we can only
offer some guidelines for deciding which tablets to use.
Small Tablets
These tablets should always be used
when you first plant your garden.
They have a lower amount of
nutrients, and are sufficient for
sprouting and the first two weeks
of growth. Leafy greens, such as
lettuces, grow best with
2 Small Tablets at each
feeding for their entire
life cycle.
Lettuce grown with Small Nutrient
Tablets.
HELPFUL HINT: We have also found that
woody herbs that prefer dry conditions (such
as oregano, savory and thyme) grow best with
(Continued on next page)
Small Nutrient Tablets for their entire life cycle.
Feeding Your Garden
18
Feeding Your Garden (Continued)
Large Tablets
Most plant types other than leafy
greens and woody herbs, need the
higher amount of nutrients found
in the Large Tablets after 4 weeks
(i.e. the third feeding after planting.)
Mint, basil and cilantro are examples of herbs that grow
well with 2 Large
Tablets at each feeding
for the remainder of
their life cycle.
19 Feeding Your Garden
Gourmet Herbs grown with a
combination of Small and Large
Nutrient Tablets.
B
C
D
Fruiting Plants with vines**
A
Fruiting Plants
(with upright main stem*)
Options
Non-Woody Herbs
Note: Options (A, B, C,
etc.) in the chart at right
are provided for your
use when filling out the
Gardener’s Log(s) found in
the back of this Guide.
Nutrient Recommendations for Plant Types
Lettuce/Leafy Greens/Woody Herbs
Nutrient Feeding
Schedule Options
The table at right shows a
suggested feeding schedule
based on plant type. Use
this table as a starting point
for selecting a nutrient
regime. But, keep in mind
that experience and keeping a watchful eye on your
plants will be the best way
to learn the ideal nutrient
regime for the plants you
choose to grow.
Set Up
S (2)
S (2)
S (2)
S (2)
Week 2
S (2)
S (2)
L (2)
S (2)
Week 4
S (2)
L (2)
L (2)
S (2)
Week 6
S (2)
L (2)
L (2)
S (2)
Week 8
S (2)
L (2)
L (2)
S (2)
Week 10
S (2)
L (2)
L (2)
S (2)
Week 12
S (2)
L (2)
L (2)
S (2)
Week 14
S (2)
L (2)
L (2)
S (2)
Week 16
S (2)
L (2)
L (2)
S (2)
S (2)
L (2)
L (2)
S (2)
Plant
Description
S (2) = 2 Small Nutrient Tablets Subsequent
L (2) = 2 Large Nutrient Tablets Feedings
*Such as dwarf tomatoes, chili peppers and eggplant
**Such as squash, strawberries and peas
(Continued on next page)
Feeding Your Garden
20
Feeding Your Garden (Continued)
Adding Nutrients
• Add two nutrient tablets
when you first set up your
AeroGarden and then every
two weeks when the “Add
Nutrient” light begins to blink.
• Add water to raise the water
level up to “Fill to Here” in
the Bowl.
• Push and immediately release
the “Reset” button to restart the
two-week nutrient timer and to
turn off the blinking lights.
Resetting Your Garden
If you have already grown a
Seed Kit in your AeroGarden,
please follow the instructions
below to reset the nutrient timer
in your Garden for your new
Seed Kit:
Bowl
• Press and HOLD the “Reset”
button for 6 seconds.
• When the “Add Nutrient”
light begins to blink*, release
the “Reset” button.
• Your garden is now reset.
*Note: In some cases you may see other lights blink as well.
This is nothing to worry about. Your garden is reset.
21 Feeding Your Garden
Signs of Stress
Reading the message from plants that are receiving too many or not
enough nutrients is tricky.
Overnourished
If you notice the tips of the leaves
are brown, almost burnt looking,
then your plant is probably getting
too many nutrients. You may
want to decrease the tablet size
for the next feeding, or use just
one tablet. Look for signs of improvement on new plant growth.
Note: If the browning is severe, the nutrient concentration in the Bowl may
be too high to bring down by simply tapering nutrient tablets. You may
need to empty all the water out of the Bowl, put in fresh water, and
add nutrient tablets. Please see “Rinse and Refill” on page 47 of this
Guide for detailed instructions.
Undernourished
A plant that is not getting enough
nutrients starts to yellow. If you notice the yellowing increasing over
several weeks, you may want to
add an extra tablet or increase the
tablet size at the next feeding.
Look for signs of improvement,
which will mainly be apparent on
the new growth. It takes time for
the extra nutrients to be taken up
by the plants and the yellowing
to disappear. Be patient.
HELPFUL HINT: Err on the side of
undernourishing plants rather than
overnourishing, if you are uncertain
of which nutrient regime to use.
Feeding Your Garden
22
T
ending Your Garden
A little bit of care for your garden will ensure rapid growth and
healthy plants. All gardens will need the Domes removed, water
and nutrients added, and the lights adjusted as your plants grow.
Some plants may need additional tending, such as thinning or
pollinating. This section provides some general guidelines to
follow as your garden matures.
Removing Domes
• Shortly after planting your garden
(4 days to 2 weeks), tiny plants will
appear through the center hole in the
Label on each Seed Pod.
When this occurs, remove the Domes
from each Seed Pod and save for your
next garden. Do not remove the Label.
• Remove the Domes only from Seed
Pods with emerging plants.
• To reduce plant stress, we recommend
removing the Domes shortly after the
lights turn off or near the end of the
light cycle.
Don’t let this happen!
If your plant is curled inside the
Dome, it was left on too long.
Immediately remove Dome.
!
23 Tending Your Garden
Never remove the Labels.
They promote germination,
decrease algae growth and
identify your plants.
Adding Water
• When additional water is needed,
the “Water Level Low” light on
the Control Panel will blink. Add
water to raise the level up to “Fill
To Here” inside the Bowl.
“Fill To Here”
• It is okay to add water up to “Fill
To Here” before the “Water Level
Low” light blinks.
• When your plants mature, they
may need water as often as twice
a week. Be sure to check the
“Water Level Low” light regularly.
Smart Garden Control Panel
!
• Use room-temperature water. Very hot or very cold water will hurt
your plants.
• We recommend using municipal tap, bottled or purified water. Well
or softened water SHOULD NOT be used because the extra minerals
in these sources may be harmful to aeroponically grown plants.
Tending Your Garden
24
Raising Lights
As your plants begin to grow, leave approximately 1-2 inches
of space between the top of plants and the lights.
To raise the lights:
1
Unplug the AeroGarden (the
backup system will save your
settings).
2
Carefully remove the Bowl from
the Base and set aside.
3
Turn the AeroGarden around
so the back of the Lamp Arm is
facing you.
4
Firmly hold the lower section of
Hood
the Lamp Arm and push in the
Locking Button on the Arm. With Locking
Button
your other hand, grasp the silver
Lamp
Arm
ring at the top of the Arm (where
the Lamp Hood attaches to the
Arm). Pull up firmly on Lamp
Hood until the Locking Button
becomes visible in the next hole.
Move Locking Button up only one hole at a time. The lights need to
be as close to the plants as possible for optimal light intensity.
5
Replace the Bowl on the Base
and plug in your AeroGarden.
6
Lift the View Door to check that
the water is flowing. If not, refer
to Troubleshooting on page 52
of this Guide.
Base
Bowl
Lamp
25 Tending Your Garden
!
If the Grow Bulbs are too
close to the plants, the
leaves may brown and burn.
If they are too far away, your
plants will “stretch” towards
the light and look floppy
and unhealthy.
Thinning
We recommended earlier in this Guide that you plant multiple
seeds in each Seed Pod. This practice usually does not cause a
crowding problem for plants because typically the seeds that are
first to germinate will out-compete the later germinating seeds.
This is particularly true with herbs, lettuces, and plants that grow
in bunches (such as chives). However, with broad-stemmed
varieties, such as fruiting plants, it is best to thin the plants as
described below.
• When plants are about 1” tall,
check each Seed Pod for multiple
plants. Using scissors gently snip
the smallest plants at the base of
the stem, leaving ONE healthy
plant in each Seed Pod.
• Thinning seedlings ensures that
the remaining plant in each Seed
Pod will have room to grow, get
enough nutrients and water, and
produce many, many fruits.
!
Be sure to cut, not pull, the extra
seedlings to avoid damaging the
roots of the strongest plant in
each Seed Pod.
Tending Your Garden
26
Pollinating
The table below shows some common plant types and a
recommended method for hand pollination. For plants not
listed below, you may need to do some additional research to
find out the most effective method of pollinating. The internet
and seed suppliers are good sources of information.
Pollination Methods for Common Garden Plants
Pollination Method Plant Examples
Self-pollinating
How to Hand Pollinate
(After Flowers Appear)
Legumes (such as peas and beans) No hand pollination necessary
and English cucumbers
Shaking
Dwarf tomatoes and peppers
Shake plant gently every other day
when the lights are on.
Eggplant
Shake plant vigorously every other
day when the lights are on. An
electric toothbrush works well.
Move male pollen to
Pumpkin, squash, watermelon
female flower
and common cucumbers
Use paintbrush to move pollen
from male flower to female flower. Pollinate when the lights are off.
HELPFUL HINT: If you find your garden
is producing many flowers but no fruit,
then chances are you need to do some
pollinating or change your pollinating
method. Dead blossoms on the Grow
Surface are a good indicator that your
chosen pollination method is not working.
Dwarf tomato plants
being pollinated by
gently shaking.
27 Tending Your Garden
Pruning
Your garden may need pruning to keep the plants at about the
same height and to control growth. Use garden shears or scissors
to prune. While every plant has different pruning needs, here are
some general guidelines on how to prune a variety of plant types.
Fruiting Plants with Upright Main Stem (1st Pruning)
(such as dwarf tomatoes, peppers, and eggplant) – Early pruning of
this plant helps strengthen the main stem and encourages the plant to
branch out. A strong plant with many branches will be able to bear the
weight of much fruit without tipping over.
• From the base of the plant, follow the
main stem up past the first 5 branches.
• Cut the main stem just
above the 5th branch.
The photo at left shows how a
dwarf tomato plant should look
after the first pruning.
(Continued on next page)
Tending Your Garden
28
Pruning (Continued)
Fruiting Plants with Upright Main Stem (Ongoing)
When grown in an AeroGarden, these plants need extra pruning to
control plant height and spreading.
• Branches that touch the lights
when the Lamp Hood is at the
highest setting need to be pruned.
• Use scissors to cut branches
that are growing into the lights.
Follow the branch to where it
meets another branch – make
cut just before this junction.
Don’t be discouraged if you end
up cutting a branch with some
flowers, or even a few small unripe
fruit. Pruning strengthens your plants
and allows your garden to put
energy into growing new branches
that can support more fruit.
The photo at right shows the
same garden after pruning.
The branches are no longer
growing into the Lamp Hood.
29 Tending Your Garden
Occasionally you may need to
prune branches on fruiting plants
that are growing outside the
reach of the Lamp Hood’s lights.
• The picture at right shows a
bird’s eye view of plants that
need pruning. The circled
branches hang too far over the
edge of the Grow Surface and
do not receive enough light
from the Lamp Hood to be
productive.
• Use scissors to cut branches
that hang over the edge of the
Grow Surface. Make your cut
so that the branch no longer
overhangs the Grow Surface.
The photo at right shows the
same garden after pruning. The
branches no longer hang over
the edge of the Grow Surface.
Note: You don’t need to
remove the Lamp
Hood to prune
your plants.
(Continued on next page)
Tending Your Garden
30
Pruning (Continued)
Herbs with Upright Main Stem – Sometimes an early pruning of a
plant, such as basil, will encourage the plant to branch out, rather than
grow straight up. For plants that will benefit from this, you should…
• Follow the main stem up from
the base of the plant, past 3 sets
of leaves.
• Cut the main stem just above
the 3rd leaf set.
The photo at right shows how a plant
might look after its first pruning.
31 Tending Your Garden
• Weekly pinching or cutting
of the plant just above the
uppermost set of leaves (the
growth point) at the top of the
stem will also encourage many
plants to grow and branch out.
All Non-Fruiting Plants – If
you see flower buds or flowers on
a plant that is being grown for its
leaves, not its fruit or flowers,
remove them. Cut the flowering
stem just above a set of leaves, no
more than 1/3 of the way down the
stem. This will extend the life and
productivity of your plant.
HELPFUL HINT: For easier pruning,
remove the Bowl from the Base. This
makes it easier to reach all the plants
and shape your garden.
(Continued on next page)
Tending Your Garden
32
Pruning (Continued)
Flowers – To keep flowering plants
(such as petunias) full of blossoms,
remove the old flowers (process
known as “dead-heading”).
• As the number of blooms and
buds dwindle, a seemingly severe
pruning can result in an additional
“season” of flowers.
• Cut the entire plant to a height
of about 3 to 5 inches. Make
your cuts so that the plant
shape is appealing.
(Remember to lower the Lamp
Hood after pruning, if necessary.)
Though this garden may look
severely pruned, in a few weeks,
you should start to see a whole
new crop of flowers.
33 Tending Your Garden
Keeping Your Garden Healthy
Keeping a watchful eye on your garden is not only a joy, but
also a smart way to make sure your plants stay healthy.
As your plants grow, you may
see some dead or brown leaves
around the base of your plants.
This is perfectly normal.
• Remove these leaves or
branches with scissors or
pinch off with your fingers.
• Remove dead blossoms
from plants by pinching off
with your fingers.
• Keep the Grow Surface
clear of dead leaves and
fallen blossoms for
healthier plants.
Tending Your Garden
34
Plant Problems and Remedies
These pictures show plants that are stressed. Follow the suggestions
to restore your garden’s health.
Wilted
Plants are not getting enough water.
Check water level.
Burned
Plant is too close to the Grow
Bulbs. Raise the Lamp Hood or
prune the plant.
Unpollinated Flowers Falling Off
Fruiting Plants
If you see unpollinated flowers on
your plant or blossoms on your Grow
Surface, plants are not being pollinated
sufficiently. Pollinate your plants as
described on page 27.
Bolting/Flowering
(Non-Fruiting Plants)
Plant is at end of productive growth
period when it begins producing
flowers. To extend the life of your
plant remove all flowers when
they appear.
35 Tending Your Garden
H
arvesting Your Garden
If you grow culinary plants, it is important to continually harvest
to keep the plant healthy and productive. Here are some general
guidelines for harvesting plants grown in an AeroGarden.
• Do not remove more than a third of the leaves or
stems from any one plant at a time.
• Harvest just before using for the best flavor.
• Remove ripe fruit.
• As you harvest, try to keep the plants at about the
same height so that they all receive enough light.
• After harvesting, lower the lights, if necessary.
How to harvest each plant depends on the plant’s structure and growth.
Here are some general guidelines for some common plant types.
Leafy Greens
(such as lettuce varieties)
• Remove entire leaves by cutting
at the base of the leaf.
• To ensure healthy new growth,
do not harvest all the leaves
from any one Seed Pod. For
continuous harvesting, we
suggest that you never harvest
more than 1/3 of the plant at
any time.
(Continued on next page)
Harvesting Your Garden
36
Harvesting Your Garden (Continued)
Bunching Herbs
(such as cilantro, chives and parsley)
• Harvest herbs that grow in a bunch
by cutting an entire stem – just the
stem, not the entire plant!
• Select the oldest stems, found
near the outer edges of the plant.
(These stems are generally wider
than the younger ones and the
leaves may have some yellow
around the edges.)
• Make your cut near the base
of the stem.
Also, remember to remove stems that
shade other plants in your garden.
37 Harvesting Your Garden
Branching Herbs
(such as mint, basil, oregano)
Cut plants just above a set of
leaves (growth point) not more
than halfway down the stem.
Also harvest by cutting just above a
termination point (the place where
one stem meets another).
Cut the wider (older) of the
two stems.
Harvesting Your Garden
38
Preparing for Your Next Garden
After your plants reach the end of
their life cycle:
1
2
Unplug the AeroGarden.
Carefully remove the Bowl
and Grow Surface from the
Base and bring to a sink.
Set the Base and Lamp
Hood aside.
NEVER SUBMERSE BASE AND
CONTROL PANEL IN WATER.
3
Remove the Grow Surface from the Bowl and place on
a counter near the sink.
4
Empty contents of Bowl into
sink – never into your houseplants. The nutrient mixture
may be too strong for them.
5
Lamp
Hood
Remove Seed Pods and roots
from Grow Surface.
• Pull the Seed Pods out of
the Grow Surface Openings.
• Separate the Split-Apart
Basket. You may need to cut
roots and/or the Label.
• Throw away the plant debris
and Grow Sponges. If you
compost, the plant debris
can be composted.
39 Harvesting Your Garden
Grow
Surface
Bowl
Base
Grow
Surface
6
Rinse and clean the Pump Stand
and Pump Filter*.
• Use a soft scrub brush to
clean tangled roots from the
Pump Stand.
• Remove the Pump Filter from
the Pump Stand. Gently scrub
the roots from the Pump Filter.
• Place the Pump Filter back in
the Pump Stand.
Pump
Stand
Pump
Filter
After cleaning, there may still be a
few roots in your Pump Stand or
Pump Filter. This will not affect the
operation of your AeroGarden.
7
Clean the Bowl and Grow
Surface.
Use a soft cloth or sponge to
thoroughly wipe the Bowl and
Grow Surface. A mild soap may
be used if desired, but rinse
thoroughly.
* IMPORTANT NOTE: We recommend replacing the Pump Filter after
growing two Gardens. Order Pump Filters from your retailer.
(Continued on next page)
Harvesting Your Garden
40
Preparing for Your Next Garden (Continued)
8
Sanitize your AeroGarden
and Split-Apart Baskets.
• Fill Bowl 3/4 full with water.
• Add 1 cup of chlorine bleach
or disinfectant cleaner.
• Place Split-Apart Baskets
in Bowl and let soak in
disinfecting solution for 10
minutes.
• Remove Split-Apart Baskets
and rinse thoroughly with
water.
• Replace Grow Surface on
Bowl, place Bowl on Base
and plug in AeroGarden for
1-2 minutes. (Select Salad
Greens on Control Panel
to make sure the water
is flowing.)
• Unplug AeroGarden and
empty sanitizing water
from Bowl.
• Refill Bowl with tap water
and replace on Base.
• Plug in and run AeroGarden
for 1-2 minutes. (Select Salad
Greens again.)
• Unplug AeroGarden and
empty water from Bowl.
41 Harvesting Your Garden
9
Towel dry the Bowl and Grow
Surface before putting them
back together and setting them
back on the Base.
10
Use the sharp edge of scissors
to remove any remaining
Label residue from Split-Apart
Baskets.
11
Your Split-Apart Baskets and
AeroGarden are now ready for
replanting.
12
If you have an AeroGarden
with a backup battery and
you plan on storing it before
replanting, remove the backup
battery from the underside of
the Base. If you need to replace
the backup battery, use any
CR2032 3-volt lithium battery.
(Newer AeroGardens no longer
rely on batteries to power the
backup system.)
!
Use only water and mild
soap when cleaning your
AeroGarden (except when
Sanitizing - Step 8). Do not
use abrasive cleaners or run
through the dishwasher.
A
ppendices
Transplanting Seedlings
The supplies included in the Master Gardener Deluxe Kit
are designed primarily for growing an indoor garden in the
AeroGarden. You can however, start seedlings to transplant
to an outdoor garden. Below is a quick description of how to
transplant seedlings.
Transplant seedlings to the outdoors when the plants are about 4
inches tall and have at least 3 sets
of true leaves. Plants should only
be transplanted when the weather
outside is favorable (a problem
you will never have if you grow
indoors using your AeroGarden!).
If the weather is too cold, the
ground temperatures will not promote new root growth and the tender
top growth of the seedling could be damaged by frosty nighttime
temperatures. If it is too hot, the seedling will be stressed and may die
even with the best shading precautions and continuous watering for
consistent moisture levels. Your seed packets should have guidelines on
when to transplant.
(Continued on next page)
Appendices
42
Transplanting Seedlings (Continued)
To transplant a seedling, remove entire Seed Pod from the AeroGarden.
Pull apart the Split-Apart Basket
and place the seedling and Grow
Sponge into a 4 to 6 inch deep hole.
(Do not remove the seedling from
the Grow Sponge; this could
damage the roots.)
Amend the soil with compost, if
needed, before transplanting to
ensure appropriate nutrition and
good drainage. Fill the hole with soil
so that the top of the Grow Sponge
is even with, or less than 1/4” below
the ground surface. Water the seedling immediately after planting.
Make the transition as easy as possible for your seedling by creating
a small protected environment to
shelter the plant to keep it out of
direct sun. An upside down pot or bucket works well for this. Water the
plant daily. In about a week, the plant should start growing roots and
you can remove the shelter.
43 Appendices
Supporting Plants
Fruiting plants may produce so much fruit that you may find
the plants are starting to tip over or even break. If this occurs,
support your plants and bring them back to the upright position
by securing each plant to the Lamp Arm with a tie.
Suggested Materials to Use for Supporting Fruiting Plants
There are a variety of materials
you can use to support plants,
all of which are easy to find at a
local hardware store or even in
your own home. Some options
are shown at right.
Ribbon (at least 1/4 inch wide), velcro
plant ties, or old stockings will all work
for securing your plants.
!
Do not use ties that will dig into (and damage) the stem, such as string
or wire. Also avoid materials that stretch, such as stretch ties sold in
gardening shops, as these are not strong enough to support heavily
laden branches.
(Continued on next page)
Appendices
44
Supporting Plants (Continued)
How To Support Plants
The plant on the right is in
need of support. The following
steps explain how to support
your plants.
• Loop a tie around the main
stem at a point where it:
a) is strong enough not to
bend or break when the
tie is secured, and
b) stands upright when the
tie is pulled towards the
Lamp Arm.
Helpful Hint: The best way to figure out where to place the tie, is
to very gently push on the main stem with your fingers, testing for
strength and ability to support the plant. Typically, your tie will be
no more than 2” above the base of the plant.
45 Appendices
• Tightly loop one end of the tie
two times around the Lamp Arm.
Hold the tie in position with
one hand. With the other hand,
gently pull the opposite end of
the tie to bring the main stem to
an upright position.
• Secure the two ends of the tie
to each other (in this case, we
used velcro).
• If you notice other heavy
branches that need additional
support, secure them to the
Lamp Arm as well.
The photo at right shows the
same garden after tie supports
have been added.
!
Loosen or untie the supports before raising the Lamp Hood, to avoid
damaging the plant stems.
Appendices
46
Rinsing and Refilling
If the plants in your garden are severely burned from too many
nutrients, follow these Rinsing and Refilling directions.
1
2
Carefully remove the Bowl from
the Base and bring it to a sink.
Remove the Grow Surface from
the Bowl and place on a counter
near the sink.
(Hint: Lift the View Door and slide one
hand into the Bowl. Don’t worry if you
gently tear some roots.)
3
Empty contents of Bowl into sink and
rinse Bowl. (Use only water.)
4
Fill Bowl with room-temperature
water up to “Fill To Here” and set
Bowl on counter.
5
Place Grow Surface back on Bowl.
6
Carefully replace Bowl on Base.
7
Add two nutrient tablets as follows:
Bowl
Grow Surface
• For herbs and other non-fruiting
plants, add 2 nutrient tablets of the
same size used for previous feeding.
• For fruiting plants that were receiving Large Tablets, add
3 tablets after completing the Rinsing and Refilling steps.
For subsequent feedings, use only 2 tablets.
47 Appendices
Bowl
Questions and Answers – Lights
Do I need to turn the
AeroGarden lights on and
off manually?
No. Your AeroGarden includes a
built-in timer that turns your lights
on and off at specific intervals. The
timing system started when you first
plugged in your AeroGarden. Every
day it will automatically turn your
lights on beginning at that time.
Non-fruiting plants (herbs, flowers,
leafy greens) don’t care when the
lights go on and off.
Note: If you are growing non-fruiting
plants, you may prefer to have
the lights go off when you go
to bed and come on in the
morning when you wake up.
Or, you may prefer to use the
AeroGarden as a nightlight.
Can I change the time of day
the lights go off?
Yes. To change the time your lights
go off, follow the simple steps in
“Setting Your Light Timer” on page
53 of this Guide.
Can I change the number of
hours the lights are on and off?
Only by selecting a different plant
type on the Smart Garden Control
Panel. The light cycle for each
setting is described on page 16
of this Guide.
Does it matter what time
of day the lights go off?
It depends on what you are
growing. Fruiting plants (dwarf
tomatoes, peppers and eggplants)
all require a daily dark period in
order to produce flowers. If your
fruiting plants will receive any
room light during the day
(either natural or artificial) we
recommend that you set your
AeroGarden Grow Lights to be on
during the day and off at night.
Can I temporarily turn off
my lights?
Absolutely. Just push the “Lights”
button and then immediately
release to manually turn the lights
off (or back on). This will not
change any of the settings for
your AeroGarden and your lights
will turn on (or off) at the next
regularly programmed time.
Occasional use of this feature
will not harm or slow down the
growth of your plants.
Appendices
48
Troubleshooting
Why haven’t my seeds
germinated?
If the seeds in your AeroGarden
do not germinate, the first thing
to check is the expiration date on
the seed package. The viability of
seeds decreases significantly with
age. Also verify that your seeds,
whether in the seed packet or in
a Seed Pod, were stored properly.
Excessive humidity and/or heat
can ruin a seed.
Examine the non-germinated Seed
Pod by opening up the Grow
Sponge. If the seeds are moldy, the
planting depth may have been too
deep. Try planting the seeds at a
shallower depth next time.
A hard outer coat on a seed may
also hinder germination. Try gently
rubbing the outer coat of these
types of seeds with sandpaper or a
file before placing them in a Grow
Sponge.
Finally, make sure you “over-plant”
your Seed Pod. Even the best seeds
do not germinate 100% of the
time. Always plant more than one
seed to ensure a successful growing experience. (See page 10 for
more details on how many seeds
to plant in each Seed Pod.
49 Appendices
Can the Grow Sponges be
re-used?
If your seeds did not germinate,
you should be able to re-use
your Grow Sponge(s).
Gently remove the Grow Sponge
from the bottom of the Split-Apart
Basket. (Try to do this without ripping or removing the Pod Label.)
Remove non-germinated seeds
and clean off any residue that may
be on the Grow Sponge. Follow
the steps on page 11 of this Guide
for Placing Seeds in Grow Sponge.
What do I do if one of the
plants in my AeroGarden
dies?
Occasionally you might find that
one of the plants in your custom
garden does not thrive. If a plant
dies, remove the entire Seed Pod
from the AeroGarden. Cover the
empty Grow Surface Opening to
prevent algae from growing in the
Bowl. Choose a material that will
stand up to a moist environment
such as, aluminum foil or a plastic
lid from a milk jug.
What can I do if one of the
plants in my AeroGarden is
much taller than the others?
Despite all your planning, you
may find you have a plant in your
garden that is growing faster than
the other plants in your garden.
Try pruning the plant to keep the
size in check and keep the lights
at the lowest level possible without burning the plants.
How do I prevent a plant from
spreading out and shading the
other plants in my garden?
Try rearranging the plants to
put the spreading plant near the
outer edge of the AeroGarden.
Sometimes this, combined with
pruning, can alleviate some of
the shading problems.
What do I do when one of
my Grow Bulbs burns out?
Replacement bulbs can be
ordered from your retailer. You
should replace your Grow Bulbs
after 6 months of use.
What should I do if my Grow
Bulbs aren’t working?
Make sure the Grow Bulbs are
firmly inserted into the sockets
in the Lamp Hood. Also check
that the Lamp Cord is plugged
into the Lamp Hood.
How long does the backup
battery last?
If your AeroGarden has a backup
battery located in the underside
of the Base, it will work for
6 months after activation. To
replace it, use any CR2032
3-volt lithium battery.
(Newer AeroGardens no longer
rely on batteries to power the
backup system.)
What do I do if I want to
move my AeroGarden to
another location?
Go right ahead! Your AeroGarden
has a built-in backup system that
lets you unplug it without losing
any of the settings.
To move your AeroGarden, be
sure to pick it up by holding the
Lamp Arm with one hand and
sliding your other hand under the
bottom of the Base.
(Continued on next page)
Appendices
50
Troubleshooting (Continued)
My garden doesn’t look
healthy. What can I do?
If you are concerned about the
health of your garden, please
make sure to…
• Keep the lights as close to
your plants as possible,
without the leaves touching
the bulbs.
• Do not use softened or
un-filtered well water.
• Continually remove dead
leaves and flowers.
• Prune and harvest to keep
plants full and bushy.
• Review nutrient guidelines
on pages 18-22 in this Guide.
Your plants may be getting
too many or too few nutrients.
51 Appendices
How do I take care of my
garden when I go out of town?
Add water to raise the level
up to “Fill To Here.” A newly
planted AeroGarden with Domes
removed may not need care for
up to 2 weeks. However, if your
AeroGarden is mature and you
will be out of town for several
days, we recommend you make
arrangements for someone to
care for your AeroGarden while
you are away.
What can I do to reduce the
sound of water dripping from
the Seed Pods into the Bowl?
Keeping the water level in the
Bowl at “Fill To Here” will help
reduce the sound of dripping
water. As your plants grow and
the roots reach the water in the
Bowl, the dripping noise will
go away.
Shouldn’t water always be
flowing over my Seed Pods
and plant roots?
Yes and no. It depends on which
plant setting you selected on the
Smart Garden Control Panel.
Please refer to the chart on page 16
to see the number of hours that the
AeroGarden pumps water through
the Seed Pods.
If the water isn’t flowing when
it should be, please check the
following:
• Is the Lamp Arm fully inserted
into the Base? (see your Quick
Start Guide, step 1B).
• Is the Bowl firmly seated in the
Base? (see your Quick Start
Guide, step 1F).
• If the water still isn’t flowing,
contact your retailer.
Appendices
52
Setting Your Light Timer
Your Built-In Light Timer
Your AeroGarden has
lights and a built-in timer
that automatically provide
your plants with “sunlight”
and “night.” (The hours of
“sunlight” depend on the
selected plant setting. See
page 16 to determine the
best setting for your garden.)
As long as your plants get
the optimal amount of light,
it does not matter when the
lights are turned off.* You
may find it convenient to
have the lights go on in the
morning and off at night to
match your own wake and
sleep schedule.
Note: If reflection from your
AeroGarden lights is visible from your bedroom,
you may want to set the
lights to go off about the
time you usually go to
bed, so as not to disturb
your sleep.
*With the exception of fruiting
plants. Please see page 48
for an explanation.
53 Appendices
5 Simple Steps...
In order to make this as simple as
possible, you only need to set the
time you want the lights of your
AeroGarden to go off (Off Time)
and your built-in light timer will
automatically set the On Time...
nothing more for you to do.
Do the following to set the time
you want your lights to go off:
1
Decide what time of day you
want the lights to go OFF.
2
AT THAT TIME check that the
lights are on. If they are off,
quickly press the Lights button
and immediately release.
3
Press and hold the Lights
button until the green SELECT
light (next to selected plant
type) starts blinking – about 5
seconds.
4
Release the button.
5
When the blinking stops (about
9 seconds), the lights will go off.
Your lights are now set to go off
at this time every day.
Lights Button
Blinking Light
Now, each day, your AeroGarden lights will automatically:
• Turn off at the time you set using the steps on the previous page.
• Remain off for the number of hours shown in the table below.
• Turn on for number of hours shown below.
You can reset your timer as often as you want.
Setting
Hours Lights OFF
Hours Lights ON
Tomatoes/Peppers
8
16
Salad Greens
7.5
16.5
Herbs/Basil
7
17
Flowers
8.5
15.5
Strawberry
9
15
Note: In case of power failure, your AeroGarden has a back-up system
that stores your light and nutrient timers and plant selection
settings. When the power is restored, your AeroGarden will go
back to the Off-On cycle you have set.
Appendices
54
Reminders About Your AeroGarden Setup
Please use the Quick Start Guide included in your original
AeroGarden box for more detailed setup instructions. If you
no longer have your Quick Start Guide, contact your retailer.
Setting up Your AeroGarden
1 Is the Lamp Arm firmly
inserted into the Base?
2 Are the Grow Bulbs firmly
inserted into the sockets in
the Lamp Hood?
9 Are the Seed Pods pressed
firmly into the Grow Surface
openings (until the rim of the
Dome almost touches the
Grow Surface)?
3 Is the Lamp Cord plugged
10 Did you add 2 “Small”
4 Is the Bowl securely placed
11 Did you record your planting
5 Is there water in your Bowl
Starting Your Garden
into the Lamp Hood?
in the Base?
up to “Fill To Here”?
6 Is your Lamp Hood at the
lowest level?
Planting Your Garden
7 Is there a Seed Pod or
cover in/on every Grow
Surface Opening?
8 Did you put a Dome on
each Seed Pod?
55 Appendices
Nutrient Tablets?
date in a Gardener’s Log?
12 Did you plug in your
AeroGarden?
• Is the water flowing? • Are the lights on?
13 Did you select your plant
type?
14 If this is not your first
planting, follow “Resetting
Your Garden” instructions on
page 21 of this Guide.
2
6
3
12
10
1
9
5
4
13
14
11
Pod
#
Plant Type
(# of seeds planted)
1
2
Cilantro (6)
Chives (20)
Seed
Depth
Planting
Date
1/8” 12/1/06
Germination Nutrient
Time
Regime*
7 days
1/4” 12/1/06 11 days
B
B
3
4
5
6
7
7
8
Appendices
56
Gardener’s Reference and Log
Planting a custom garden in an AeroGarden is a bit of an experiment.
Keeping track of your plantings will help you plan your next garden.
Use the blank garden layout (shown below) as a reference for each
plant’s pod location. (Careful Seed Pod location can make a difference
in how well plants do in your AeroGarden.)
Record what
you’ve planted
in each pod in the
corresponding
space on your log.
Use the log to record and track the progress of your
garden. Take notes as needed in the area provided on
each page. Your log can serve as a great reference
when planting future gardens.
Sample
Gardener’s
Log
Pod
#
1
2
3
4
5
6
7
Plant Type
(# of seeds planted)
Chives (20)
Cilantro (6)
Seed
Depth
Planting
Date
1/8” 12/1/06
Germination Nutrient
Time
Regime*
7 days
1/4” 12/1/06 11 days
B
B
*See page 20 of this Guide for nutrient regime options.
57 Appendices
Gardener’s Log – Garden #1
Pod
#
Plant Type
(# of seeds planted)
Seed
Depth
Planting
Date
Germination Nutrient
Time
Regime
1
2
3
4
5
6
7
#
Notes:
Appendices
58
#
Gardener’s Log – Garden #2
Pod
#
Plant Type
(# of seeds planted)
1
2
3
4
5
6
7
Notes:
59 Appendices
Seed
Depth
Planting
Date
Germination Nutrient
Time
Regime
Gardener’s Log – Garden #3
Pod
#
Plant Type
(# of seeds planted)
Seed
Depth
Planting
Date
Germination Nutrient
Time
Regime
1
2
3
4
5
6
7
#
Notes:
Appendices
60
Seed Information
The following is a listing of recommended seed suppliers and some seed
suggestions for your custom AeroGarden.
Seed Companies
Web Address
Description
Burpee
www.burpee.com
Family owned since 1876. One of the most
progressive seed companies in the U.S.
D. Landreth Seeds
www.landrethseeds.com
Started in 1784 - the oldest seed house
in the U.S. Lots of specialty seeds.
Johnny’s Selected Seeds www.johnnyseeds.com
Full service seed producer – superior
products, research and online descriptions.
Kitazawa Seed Co.
Specializes in Asian vegetable seeds.
Richters Herb
www.kitazawaseed.com
www.richters.com
Canadian supplier specializing in herbs.
Grimes Seeds
www.grimesseeds.com
Full service seed producer – flowers, herbs
and vegetables.
Park Seed
www.parkseed.com
Providing vegetable & perennial seeds
since 1868.
Thompson & Morgan
www.thompson-morgan.com Flower seeds galore! Also herb and
vegetable seeds.
Seed Savers Exchange
www.seedsavers.org
Non-profit organization specializing in rare
and heirloom seeds.
The Cook’s Garden
www.cooksgarden.com
Seeds and recipes for gardeners who love
to cook.
Seed Suggestions:
Dwarf plants – growing up to 12” high
Dwarf Tomatoes & Chili Peppers
Dwarf/Miniature Bell Peppers
Most Culinary Herbs
(exceptions: Rosemary & Lavender)
Most Hardy Annual Flowers –
examples: Marigolds, Calendula & Gazania
(exceptions: Poppies, Nasturtium & Celocia)
Miniature Cucumbers
61 Appendices
Salad Greens Mixes
Braising Greens Mixes
Mesclun Greens Mixes
Sugar Snap Peas
Green Beans
HELPFUL HINT: Be sure to check full
grown plant size when choosing seeds.
The term “dwarf” may refer to the size of
produce – not the size of a mature plant.
M
y Garden Notes
Appendices
62
AeroGrow International, Inc.
300309 INTa 8/14/07
© 2006-2007 AeroGrow International, Inc.
Patents Pending