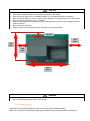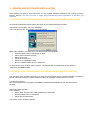
1
User guide HTP500 V2 Thermal transfer printer HTP500 V2 User Guide Contents CONTENTS ................................................................................................................ 2 INTRODUCTION .................................................................................................... 4 1 - BEFORE USE ................................................................................................... 8 1.1 ACCESSORIES ..................................................................................................... 8 1.2 IDENTIFICATION OF THE PRINTER PARTS ............................................................... 9 1.3 IMPORTANT SAFETY INFORMATION ......................................................................11 1.4 PRINTER FEATURES ..........................................................................................15 2 - PREPARING OF THE HTP500 V2 ON PRINTING .........................................16 2.1 CONTROL PANEL AND ITS FUNCTIONS .....................................................16 2.2 POWER SUPPLY CABLE CONNECTION ......................................................18 2.3 USB CABLE CONNECTION ...........................................................................18 2.4 LOADING / REMOVING THE CLEANING CASSETTE ..................................19 2.5 LOADING A RIBBON CASSETTE ..................................................................21 2.6 TURNING THE POWER ON / OFF .................................................................21 2.7 REMOVING A PLATE .....................................................................................22 3 – DRIVER AND SOFTWARE INSTALLATION ................................................23 3.1 STEP BY STEP INSTRUCTIONS FOR THE HTS500 SOFTWARE INSTALLATION ....................................................................................................23 3.2 STEP BY STEP INSTRUCTIONS FOR THE HTS500 SOFWARE ACTIVATION ..............23 3.3 DEFINITION PRINTER DEVICE .............................................................................24 3.4 STEP BY STEP PROCEDURE FOR THE DRIVER INSTALLATION AND CONFIGURATION WITH W INDOWS .....................................................................................................24 3.5 CENTERING .......................................................................................................41 3.6 CALIBRATION ....................................................................................................42 3.7 PRINTER DRIVER UNINSTALL..............................................................................43 3.8 SUMMARY TABLE OF THE DRIVERS AND PRINTER’S SETTINGS ............................44 4 – PRINTS OF TAGS WITH AUTOMATIC FEEDER IN “STACK” FEEDER MODE ...................................................................................................................46 4.1 FEEDER ACCESSORIES ......................................................................................46 4.2 PREPARING OF THE CARD STORE.......................................................................46 4.3 PREPARING OF THE SUPPORT PLATE..................................................................47 4.4 TURNING ON THE PRINTER .................................................................................48 4.5 PRINT ON CABLE TAGS .......................................................................................49 5 - PRINTS OF TERMINAL BLOCK TAGS IN “SINGLE” FEEDER MODE.......50 5.1 ACCESSORIES ...................................................................................................50 5.2 PREPARING OF THE SUPPORT PLATE..................................................................50 5.3 TURNING ON THE PRINTER .................................................................................51 5.4 PRINT ON TERMINAL BLOCK TAGS TB SERIES .....................................................52 6 - PRINTS OF PVC TAGS AND METHACRYLATE TAGS IN “NONE” AND “ACRYL MODE” ..................................................................................................52 6.1 PREPARING THE PRINTER...................................................................................52 6.2 INSERTING THE MODULES ON THE PRINTER ........................................................53 6.3 TURNING ON THE PRINTER .................................................................................54 6.4 PRINT ON TAGS AND STRIPS ...............................................................................55 7 - MAINTENANCE ..............................................................................................55 7.1 USEFUL FUNCTIONS ....................................................................................55 7.2 TROUBLE SHOOTING ...................................................................................57 7.3 PRINTER MESSAGES / ERRORS .................................................................58 7.4 DAILY CARE ...................................................................................................61 7.5 CLEANING AND STORING PLATES .............................................................62 7.6 TEST PRINT ...................................................................................................63 7.7 CORRECT USE OF THE SYSTEM.................................................................63 8 – PACKAGING AND TRANSPORTATION ......................................................64 9 – SPARE PART’S USAGE ...............................................................................64 10 - SUMMARY CHART OF MODULES, SUPPORT PLATES AND ACCESSORIES OF HTP500 V2 SYSTEM ..........................................................64 11 - INFORMATION TO USERS ON RECYCLING OPERATIONS ....................65 PACKAGING ............................................................................................................65 DISPOSAL ...............................................................................................................65 12 – INFORMATION ON THE USER GUIDE ......................................................65 INTRODUCTION Thank you for choosing HTP500 V2! HTP500 V2 will help you marking fast and easy. To ensure HTP500 V2 best performances, read this manual thoroughly before use. Make sure to follow very carefully the instructions given in this manual, in particular the ones described below: WARNING Indicates situations where mishandling might result in serious injury or even death. For your own safety, observe always these warnings CAUTION Indicates situations where mishandling might result in personal injury or damage to property. To protect yourself and your property, be sure to observe these cautions NOTICE Indicates important information and restrictions concerning operation. Be sure to read this information to prevent the unit from breaking down or being damaged, and to ensure it is not operated incorrectly REMIND Indicates supplementary information and instructions In this manual have been used the following shortened products names: Full product name: Shortened product name: Microsoft® Windows® XP Windows XP Microsoft® Windows® Vista Windows Vista Microsoft® Windows® 7 Windows 7 Environmental Information HTP500 V2 Plate Printer To reduce the risks associated with environmental contamination, which if not avoided, may result in minor or moderate injury and / or property damage: Do not through the product after into the normal domestic waste. Dispose device at end of life in accordance with national and/or local regulations. Explanation of shown symbols or labels Alert symbol Hot surface WEEE CE Mark Important safety instruction Keep this manual for future reference! This document will support you during the use of the ABB HTP500 V2 Plate Printer. Please read the warnings carefully and use the product as described in this instruction to avoid accidental injury or damage. Explanation of Signal Word Consequences WARNING Indicates a potentially hazardous situation, which, if not avoided, could result in death or serious injury and/or property damage. CAUTION Indicates a potentially hazardous situation, which, if not avoided, may result in minor or moderate injury and/or property damage. Indicates a property damage message NOTICE Summary of device labels containing safety information Caution Hot surface Caution: WEEE – Don't throw it into the normal domestic waste! General information Regulations 2006/95/EC, EN60950-1: 2006 with the following amendments to this standard A11:2009, A1:2010, A12:2011 Regulations 2004/108/EC EN55022:2006 with the following amendments to this standard A1:2007 EN55024:2010 EN61000-3-2:2006 with the following amendments to this standard A1:2009, A2:2009 EN61000-3-3:2008 Commission Regulation (EC) No 1275/2008 EN 62301-2005 Direttiva EC RoHs: 2002/95/EC, Direttiva EC WEEE: 2002/96/ CSA and UL listed Tested to comply to FCC Standard for home and office Intended use: The Printer HTP500 V2 is approved only for the use in closed rooms and at dry environment. HTP500 V2 Printer WARNING To reduce the risks associated with short circuit, fire and/or electrical shock, which if not avoided, could result in minor or moderate injury: Don’t set this printer up close to alcohol, paint thinner and other flammable chemicals Don’t use flammable sprays close to the printer When cleaning the printer, dampen some gauze and wring it out thoroughly. Don’t use flammable solvents, such as alcohol, benzene or paint thinner. If the printer begins working not properly, emitting smoke or strange smells, turn it off immediately, unplug the power cord and contact the ABB™ Technical Assistance Never handle the power cord with wet hands Don’t use multi socket adapters to plug more than one device into one single plug Make sure that the power cord is properly plugged in Never attempt to disassemble or modify the printer Before cleaning the printer, always turn it off and unplug the power cord Don’t put the power cord close to a heat source for not to melt it Take care to follow carefully the safety instructions set forth in 1.3 Don’t connect the printer to a power source that provides other than the rated voltage (100V to 240 AC, 50/60 Hz). Using any other voltage could cause a fire or electric shock. Don’t pull the power cord when it is connected to the power cord socket on the rear of the printer or otherwise apply undue force to the power cord connector. Doing so could damage the wiring and cause a short, fire, or electric shock. When unplugging the power cord from the power outlet or the socket on the rear of the printer, always grasp the plug or connector. For the print of Tags in automatic MODE, always make sure to utilize the correct SUPPORT PLATE Item:HTP500-PL - Support pate for cable tags ( this accessory is included in the packaging). Failure to follow the warnings and cautions describe below during use and maintenance of the printer could result in accidents, fire, electrical shock or burns: Don’t touch the print head immediately after printing. Don’t use this printer and its accessories for any purpose other than the one designed for. CAUTION To reduce the risks associated with short circuit, fire and/or electrical shock, which if not avoided, may result in minor or moderate injury: Don’t connect the printer to a power source that provides other than the rated voltage: 100-240V AC, 50/60 Hz If some foreign material (a piece of metal, some water or some other liquid) gets inside the printer, turn the power off immediately, unplug the power cord and contact the ABB™ Technical Assistance While unplugging the power cord, always grasp the plug not the cord. Pulling the cord can damage it. If the printer is not going to be used for a long time, unplug the power cord. If the cord is not unplugged, that could result in an electrical leak. It is always good habit not to leave the cord plugged in for long periods of time anyway Use an USB 2.0 compliant printer cable. Failure to do so could cause electronic noise or radio interference. Before connecting the USB interface cable, perform the procedure described below: 1) Turn off the printer and unplug its power cord from the power outlet. 2) Turn off the computer and unplug its power cord from the power outlet. Don’t place heavy objects on the printer Don’t place metallic objects or containers of liquids on the printer Don’t set up the printer on an unstable surface or in a location subject to vibrations Don’t set up the printer in a hot, humid or dusty location, nor in the vicinity of an open flame Don’t set up the printer on a rug or a carpet Keep the area around the power plug free of obstructions so that you can unplug the power cord at any time Don’t cover the fan holes Keep the area around the printer free as shown in the pictures below Always clean the printer when it is turned off and not plugged to power. Use a dry cloth or a little wet with water. Do not use flammable liquids. Internal Cleaning Don’t scratch the print head. Don’t clean the print head using cloths that have metallic particles adhering to them. If the print head is scratched this can’t print anymore in the scratch zone. When cleaning the print head be careful. Failure to follow the warnings and cautions describe below during use and maintenance of the printer could result in accidents, fire, electrical shock or burns: Use only the ribbon cassette on equipment. Never to attempt to disassemble the ribbon cassette to place another ribbon inside the cassette. Don’t pull the plate or sheet while print is being in process Don’t expose HTP500 V2 to direct sunlight, high humidity or dust. Use and store the printer and its accessories respecting the environmental conditions listed below: Temperature °C Operative environment 15 - 32.5 Storage environment 5 - 35 Humidity %RH 15 - 80 35 - 85 When opening and closing the cassette cover or the tray, do it gently, being careful not to catch your fingers During the printing process never open the cassette cover and never touch the cleaning auxiliary roller, the conveyor roller. This equipment has been tested to comply with EMC Directive technical requirements. Shielded cables have to be used in compliance with EMC Directive technical requirements. Never use the printer without the cleaning cassette. Using the printer when the cleaning roller is dirty can damage the print head. Before loading the cleaning cassette, take out the ribbon cassette. Trying to load the cleaning cassette while the ribbon cassette is still in his place, could cause a bad cleaning cassette loading. The cleaning tape must not be loose! The cleaning tape must always adhere to the cleaning roller. After loading the cleaning cassette, make sure that the guide tabs are securely fixed in the notches of the cassette. Never remove the cleaning cassette without unlocking the cleaning auxiliary roller first or the cleaning cassette tape could be damaged. The printer can’t detect the ribbon if the ribbon cassette or the ribbon itself is loose. When inserting the ribbon cassette ensure the ribbon is not loose and push the cassette until it touches its mount. Don’t turn off the printer while it is printing to avoid damaging the print head or the ribbon. Don’t tighten the locking screw too much. Don’t loosen the locking screw too much, only enough to adjust and fix the guides in the proper position. If the message doesn’t disappear from the display, even if the power is turned off and back on again, turn the power off, unplug the printer and contact the ABB™ Technical Assistance. To reduce the risks associated with environmental contamination, which if not avoided, may result in minor or moderate injury and / or property damage: Do not through the product after into the normal domestic waste. Dispose device at end of life in accordance with national and/or local regulations. NOTICE To reduce the risks associated with cleaning and maintenance, which if not avoided, may result in property damage: This printer has an automatic cleaning function. In case the automatic cleaning function should not clean enough, remove the roller and clean it manually as illustrated above. Don’t scratch the cleaning roller. After the cleaning, let the roller dry completely before inserting back into the printer. The cleaning roller is a consumable part so, once is worn up, replace it with a new one. Replace the cleaning roller at least once the year. WARNING Do not wait until the components (e.g. support plate, roller, etc.) are worned to before to proceed with the substitution. We suggest to utilize only original spare parts Each non proper or incorrect operation on the printer caused by the user releases the manufacturer from any liability and makes the user the solely responsible in respect of local authorities for the prevention of accidents. The manufactured reserves the right to vary the characteristics of its products without obligation to promptly update this document. Since the discussion of certain risks beyond the scope of interest of this document, please note that the considerations related to risk prevention and protection of workers in the workplace about the handling, use and maintenance of the printer should be included in the process of risk assessment proper of the workplace in which the printer will be installed. 1 - BEFORE USE This chapter is written as an introduction to the HTP500 V2. The chapter contains four sections as follows: 1.1 Accessories 1.2 Identification of Printer’s Parts 1.3 Important Safety Information 1.4 Printer Features 1.1 ACCESSORIES The HTP500 V2 is delivered with the following accessories: Ribbon cassette Cleaning cassette Cleaning roller Feeder for marker cards HTS500 CD containing: Software HTS500 Printer Driver User guide 1.2 IDENTIFICATION OF THE PRINTER PARTS Printer Front Part cover Instruction sticker Cleaning cassette mount Ribbon cassette mount Control panel Locking screw Width guides Instruction sticker Tray support Inside details front part of the Printer Print head Conveyor roller Setting lever Cleaning auxiliary roller Cleaning roller Feeding tab Back Part of the Printer Fan Power switch USB port Power connector In the Printer back part are presents: CE Marking label The CE homologation contains: Manufacturer name Address / Web page Year of manufacturing CE marking attesting that the product conforms to EU rules to it applicable Serial Number 1.3 IMPORTANT SAFETY INFORMATION Always observe the following warnings and cautions for a safe and correct use of HTP500 V2. 1.3.1 Printer Setup Location The Printer is suitable to be used in internal environmental, in absence of dust or liquid substances. The Printer is not suitable to be used on external places and should not be exposed to weathering. The Printer cannot be used in places where it may be danger of explosion because it is not suitable to be used in explosive atmosphere (the electrical equipment is not compliant with regards to the risk of explosion, to the actual norm in force). Place the HTP500 V2 in an operative environmental in which are observed the following precaution: Follow all described instructions with the printer turned off. 1) Install the printer HTP500 V2 on the Basis as shown on the following picture. 2) Open the Right support for inserting the Items in the Printer. CAUTION Don’t place heavy objects on the printer Don’t place metallic objects or containers of liquids on the printer Don’t set up the printer on an unstable surface or in a location subject to vibrations Don’t set up the printer in a hot, humid or dusty location, nor in the vicinity of an open flame Don’t set up the printer on a rug or a carpet Keep the area around the power plug free of obstructions so that you can unplug the power cord at any time Don’t cover the fan holes Keep the area around the printer free as shown in the picture below 100 mm 500 mm 335 mm 500 mm 1418 mm WARNING Don’t set this printer up close to alcohol, paint thinner and other flammable chemicals Don’t use flammable sprays close to the printer 1.3.2 Power Supply Remember any electrical equipment can cause injury if not handled properly. Make sure to observe the following warnings and cautions to prevent accidents and injuries. WARNING If the printer begins working not properly, emitting smoke or strange smells, turn it off immediately, unplug the power cord and contact the ABB™ Technical Assistance Never handle the power cord with wet hands Don’t use multi socket adapters to plug more than one device into one single plug Make sure that the power cord is properly plugged in Don’t put the power cord close to a heat source for to not to melt it Never attempt to disassemble or modify the printer Before cleaning the printer, always turn it off and unplug the power cord When cleaning the printer, dampen some gauze and wring it out thoroughly. Don’t use flammable solvents, such as alcohol, benzene or paint thinner. CAUTION Don’t connect the printer to a power source that provides other than the rated voltage: 100÷240 V AC, 50/60Hz If some foreign material (a piece of metal, some water or some other liquid) gets inside the printer, turn the power off immediately, unplug the power cord and contact the ABB™ Technical Assistance While unplugging the power cord, always grasp the plug, not the cord. Pulling the cord could damage it If the printer is not going to be used for a long time, unplug the power cord. If the cord is not unplugged, that could result in an electrical leak. It is always a good habit not to leave the cord plugged in for long periods of time anyway. 1.3.3 External Cleaning of the Printer Always clean the printer when it is turned off and not plugged to Power. Use a dry fabric or a little wet tissue with water. Do not use flammable liquids. 1.3.4 Use and Maintenance Failure to follow the warnings and cautions described below during use and maintenance of the printer could result in accidents, fire, electrical shock or burns. WARNING Don’t touch the print head immediately after printing Don’t use this printer and its accessories for any purpose other than the one designed for CAUTION Use only the ribbon cassette on equipment. Never attempt to disassemble the ribbon cassette to place another ribbon inside the cassette Don’t pull the plate or sheet while print is being in progress Don’t expose HTP500 V2 to direct sunlight, high humidity or dust. Use and store the printer and its accessories respecting the environmental conditions listed below: 1.3.5 Precaution while moving the Printer Before moving the printer while using and maintaining the HTP500 V2, always observe the precaution here following to prevent risks of fire, electric shock or burns. Remember that the printer weight is 9,5 kg Lift up the printer with both hands Keep the printer near the person body while you are moving it Find out a flat surface on which position the printer, on its destination place, before to move the printer itself Make sure that all the printer parts that can be rotated and / or move (e.g. cover of the head protection) are fixed and / or locked properly Make sure that the printer is not plugged in on the socket Check the available space along the path to follow, verifying the compatibility with the dimensions Check the power supply compatibility into the destination place Hold firmly the printer like a hook under the arm Do not carry the printer thanks to the cover protection 1.3.6 Recommended Environmental Conditions Use the HTP500 V2 in the following environmental conditions: Operative environment Storage environment Temperature °C 15 ÷ 32.5 5 ÷ 35 Humidity %RH 15 ÷ 80 35 ÷ 85 When opening and closing the cassette cover or the tray, do it gently, being careful not to catch your fingers Cassette cover Tray for feeding Articles WARNING Do not touch the cassette cover and the rollers during the printing phase 1.4 PRINTER FEATURES This describes the Main features of the printer HTP500 V2. Plate types and sizes Rigid plastic Thickness: 0.2÷6.0mm Size: width10÷80mm; length 60÷500mm Print method Thermal transfer print Resolution 300dpi Print speed Plate: 30mm/sec, Acryl mode: 20mm/sec, Automatic : 20mm/sec Guaranteed print area Size: width 54mm; length 496mm Ribbon Ribbon cartridges Ribbon length: 130 MT Colours available: silver, gold, black Operating environment Temperature:15÷32.5 °C RH:15÷80% without condensation Interface Standard Centronics interface Power supply 100÷240V AC, 50/60Hz Power consumption 45W Dimensions Width 418mm, Depth 235mm, Height 210mm Weight 9.5 Kg Supported materials Only items supplied and tested for HTP500 V2 by ABB can be used. 2 - PREPARING OF THE HTP500 V2 ON PRINTING The following content describe the steps you need to follow to get HTP500 ready to print. 2.1 CONTROL PANEL AND ITS FUNCTIONS LEDS POWER: Lights when you turn on the power switch ONLINE: Lights when the printer is ready to receive data and flashes when the printer is receiving data. Turns off when the printer is offline MESSAGE: Flashes when an error has occurred and the printer is not able to print KEYS [ONLINE]: Press this key to switch the printer online [MENU/ ]: Press this key to enter the printer Menu selection mode when the printer is offline Once entered the Menu mode, use this key to select the Menu function desired If the Menu function has been selected, holding down this key will cause the conveyor roller to rotate to the left ejecting the item inserted into the printer [ ]: [ENTER]: [CANCEL]: Once entered the Menu mode, use this key to display each Menu function If the Menu function has been selected, holding down this key will cause the conveyor roller to rotate to the right ejecting the item inserted into the printer Press this key to confirm and execute the Menu function selected Press this key to cancel the Menu function selected Press this key to eject an item inserted into the printer Hold down this key at least 3 seconds straight, to cancel the data received from the printer REMIND In order to perform a Menu function, always put the printer offline pressing the ONLINE key so that the ONLINE led turns off. LCD display HTP500 V2 display shows the printer functions and statuses. 2.1.1 Control Panel Menu mode Turn on the HTP500 V2 The two following messagges will appear on the display PLEASE WAIT… VERSION X.X PRINT READY PLATE SBLACK Press the ONLINE button to put the printer OFFLINE (the ONLINE led turns off). At this stage each one of the following Menu functions can be selected: CLEANING to clean the cleaning roller TEST PRINT select this item to set the time until the power automatically switches off PRINT MODE to set the print speed and Quality Mode AUTO CLEANING to set the timer for the automatic cleaning of the cleaning roller REMOVE to clear a jam or to eject a printer media Use always the [MENU/ ] and [ ] keys, located on the control panel, to select among the printer Menu functions and then press ENTER and CANCEL to confirm or cancel the execution of a function. 2.1.2 Data receiving Display Messages REMIND If from the driver you set the function of data check the LCD display will visualize the following message 2.2 POWER SUPPLY CABLE CONNECTION Make sure that the printer power switch is off (0). 1) Connect the power cord to the power cord socket on the rear of the printer. 2) Plug the other end of the power cord into the power outlet (100V to 240V AC). USB port Power WARNING Take care to follow carefully the safety instructions set forth in 1.3. Don’t connect the printer to a power source that provides other than the rated voltage (100V to 240V AC, 50/60Hz). Using any other voltage could cause a fire or electric shock. Don’t pull the power cord when it is connected to the power cord socket on the rear of the printer or otherwise apply undue force to the power cord connector. Doing so could damage the wiring and cause a short, fire, or electric shock. When unplugging the power cord from the power outlet or the socket on the rear of the printer, always grasp the plug or connector. 2.3 USB CABLE CONNECTION Make sure that you are using an USB interface cable compatible with your PC. 1) Connect the USB cable on the rear of the printer. 2) Connect the other end of the USB cable on the PC REMIND The HTP500 V2 Printer is supplied with one USB Port (A to B) CAUTION Make sure to use a printer cable IEEE-1284 of lenght under 2mt so to avoid any kind of disturbs or radio interference. NOTICE This equipment has been tested to comply with EMC Directive technical requirements. Shielded cables have to be used in compliance with EMC Directive technical requirements. 2.4 LOADING / REMOVING THE CLEANING CASSETTE 2.4.1 Loading of the Cleaning Cassette HTP500 V2 has a special cleaning cassette purposely designed to clean up the cleaning roller. To load the cleaning cassette perform the following steps: 1) Lift up the cassette cover. 2)Take out the ribbon cassette. NOTICE Never use the printer without the cleaning cassette. Using the printer when the cleaning roller is dirty can damage the print head. Before loading the cleaning cassette, take out the ribbon cassette. Trying to load the cleaning cassette while the ribbon cassette is still in his place, could cause a bad cleaning cassette loading 3) Lower the setting lever. The cleaning roller will raise. Lower the setting lever Auxiliary Cleaning Roller will rise 4) Open the new cleaning cassette pulling out the tape untill the cleaning tape comes out. Peel off the tape. Peel Off the tape 5) Set the cleaning cassette along the guides passing the cleaning cassette tape around the cleaning auxiliary roller. Correct position of Cleaning tape and Auxiliary Cleaning roller NOTICE THE CLEANING TAPE MUST NOT BE LOOSE! THE CLEANING TAPE MUST ALWAYS ADHERE TO THE CLEANING ROLLER 6) Raise the setting lever to lower the cleaning auxiliary roller into place. rise the setting LEVER IN set POSITION NOTICE After loading the cleaning cassette, make sure that the guide tabs are securely fixed in the notches of the cassette. 2.4.2 Removing the Cleaning cassette 1) Lift up the cassette cover. 2) Take out the ribbon cassette. 3) Lower the setting lever. The cleaning roller will raise. 4) Take out the cleaning cassette. Cassette cover The ribbon is taken off Lower rise the setting LEVER in RELEASE POSITION NOTICE Never remove the cleaning cassette without unlocking the cleaning auxiliary roller first or the cleaning cassette tape could be damaged. REMIND When the end of the cleaning cassette tape is reached, use the automatic cleaning mode function to keep on printing without damaging the print head. 2.5 LOADING A RIBBON CASSETTE Load a ribbon cassette performing the instructions shown in the pictures below. 1) Remove the ribbon cassette stopper and take care the ribbon is well wound. Wipe in the tape until the tape is tighten 2) Install the cleaning cassette first, then insert the ribbon cassette and close the cassette cover. Make sure the ribbon cassette touches its mount NOTICE The printer can’t detect the ribbon if the ribbon cassette or the ribbon itself is loose. When inserting the ribbon cassette ensure the ribbon is not loose and push the cassette untill it touches its mount. 2.6 TURNING THE POWER ON / OFF 2.6.1 Turning the Power On 1) Ensure that the power cord is properly connected. 2) Press the (I) side of the power switch to turn on the printer. The power led on the control panel lights. 3) After the printer performance of its internal tests, if no irregularities are detected, the online led lights and the printer is ready to print. If any item is loaded into the printer, the printer will detect the leading edge of the article. The following messages appear: PLEASE WAIT… VERSION X.X PRINT READY.. PLATE SBLACK 2.6.2 Turning the Power Off 1) Ensure that the printer is not performing any operation. 2) Press the (0) side of the power switch to turn off the printer. NOTICE Do not ever turn off the printer while it is printing so to avoid any possible damages on the printer head or ribbon cassette. REMIND To cancel the printing and the related printing data, keep pressed the CANCEL Key for at least 3 seconds. At the prints end the item will be ejected. REMIND The printing on an Item has an external margin (top, bottom, right, left) of 2 mm. The guaranteed printed Area has a maximum height of 54mm and a maximum length of 496mm. The guaranteed printed area is centred in height between the top and bottom margin 2.7 REMOVING A PLATE Press CANCEL on the control panel to remove a plate or sheet already loaded into the printer. The roller will lift up allowing you to remove the item. After the printing process, a plate is Automatically ejected. Use the Remove function in case a plate should not be ejected after printing. Automatic ejection after 5 Minutes REMIND If a plate has been left loaded in the printer for 5 minutes straight without pressing any key or without receiving any data input from the PC, the roller will lift Automatically up, allowing the plate to be removed. 3 – DRIVER AND SOFTWARE INSTALLATION Here following the step by step instructions for the HTS500 Software installation and creation of all the Printer’s Devices. You will also find a single page summarizing these operations in the box you received. 3.1 STEP BY STEP INSTRUCTIONS FOR THE HTS500 SOFTWARE INSTALLATION Here follow the illustrated step by step instructions for the HTS500 software Activation. The Software is included in the CD of installation. The Cd is auto-running. The software runs automatically. Note: if the software in the CD doesn’t runs automatically from Windows: Press the Right button of the Mouse on “Start” Select “Open Windows Explorer” Select the CD unit Select the HTS500 CD Select the “HTS5002000” folder Run the software double click on “Setup.exe” On each window click on all the ‘NEXT’ buttons. The software will be installed into the PC directory: C\\program files\ABB\HTS500 3.2 STEP BY STEP INSTRUCTIONS FOR THE HTS500 SOFWARE ACTIVATION The Activation is the operation that has to be done just the first time that the HTS500 software is installed in the PC. This means that the HTS500 software needs to be activated each first time for each PC. To make the activation. Run the programme from C:\program files\ABB\HTS5002000\HTS5002000.exe with the administrator privilege: Note in Win Vista and Win 7: From Windows Select: Start, Program Files, ABB HTS500 Hip, HTS500 Hip Press the Right button of the Mouse Select “Run as Admistrator” The window for the Activation appears Please go on www.swactivation.com in order to get the licence numbers. 1) The program asks to read the Precode and Code. 2) The program ask to fill the field License with the Company name (use upper case letters) 3) The ABB Online Assistance operator gives back the values to be inserted in the Activation window: a. Serial Number b. Pre-Code Activation c. Code Activation Press OK to runs the HTS500 software. If the fields are filled correctly the HTS500 software will execute. Note: the Precode and Code of the activation change every time till the activation procedure runs successfully. This means that the operator should be close to the PC while is making the software activation. 3.3 DEFINITION PRINTER DEVICE Glossary: Printing Device, Device Printer installed using the same driver but with different settings according to the Material, the page dimension, the density, the orientation. We suggest to use virtual names to identify the printing devices. 3.4 STEP BY STEP PROCEDURE FOR THE DRIVER INSTALLATION AND CONFIGURATION WITH WINDOWS 3.4.1 Driver Installation and Configuration for Windows XP REMINDER The driver of the HTP500 V2 Printer cannot be used with the printers of the HTP500 previous version (light grey) A) Creation of the first Device P-PRINTER Plug and Play Remind: The printer must be not connected to the PC. Disconnect the USB cable from the printer. Driver Installation: Select HTS500 CD Select the subfolder \Drivers Select the subfolder \HTP500V2 Execute the file Setup.exe, select your preferred language, press Install The process begins When it’s done, press Next Select the first option : I accept the items of the license agreement Press Next Verify that the printer is NOT connected to the PC: disconnect the printer from the PC Press Install Press Continue Anyway The PC should be restarted Press OK Press Finish Remind: With the printer switched off connect the printer to the PC with the USB cable Switch the printer on Windows detects a new hardware Go on with the guided installation of the new Hardware. Press Next Press Next Press Continue Anyway Press Finish The printer has been detected and has been added among the printers available in the folder printer and faxes with the name P-PRINTER. B) Check of the assigned plug and play port From Windows: Select Start Select Settings Select Printer and faxes Select the printer P-PRINTER Click on it with the right button of the mouse Select Properties Select Port It appears the Properties window Verify the connection port that has been assigned to the P-PRINTER during the driver installation. For instance the USB002 port C) Suppress the option for the printing confirmation From the printers folder right button of the mouse on one of the HTP500 V2 driver: Select Properties Select Utility Select Printer Settings Select Review Mode Select OFF Confirm with OK and APPLY D) Copy Installation of the 6 Printing Devices for Windows XP Restart the PC, connect the HTP500 V2 to the USB port and switch on the printer. Select the HTS500 CD Select the subfolder \Drivers Select the subfolder \HTS500 Select the subfolder \ENG Select the subfolder \Copy Driver Eng Runs the PRPCOPY.exe file with a double click The following window appears Select RUN It appears the window that indicate the assigned USB port for the PLATE PRINTER. Press OK Press OK Press OK Into the Devices and Printers folder you will find the file of origin P-PRINTER and the 6 devices installed with the following names: HTP500 V2 TERMINAL BLOCKS HTP500 V2 CABLES HTP500 V2 HORIZ METHACRYLATE HTP500 V2 HORIZ PVC LABELS HTP500 V2 OTHER TERMINAL BLOCKS HTP500 V2 VERTICAL PVC LABELS E) Devices settings in HTS500 Software with the use of the pre-defined profiles The profiles contain the Driver settings (printable area, density, orientation, materials, feeder mode, alimentation). Execute the HTS500 Software. Select the File Menu. Select the Menu Plotter Setup. The Window Setup Plotters/Printers appears. Select the button on the Left in the First raw that is available in the Window. Select the Printer EVO AUTOM CABLES Select Properties The Window for the Selection of the profiles appears. Select the Profiles Folder. The Window with the Pre-set Profiles appears. Select the AUTOM CABLES Profile. Press the Retrieve button. The Window for the Confirmation of the Profiles appears. Press Yes button to Confirm. Press Ok to Confirm. Press Ok to Confirm. The Window for setting the Multiple Device Setting appears. Press the Centering button. The following window appears. Select the Thermal Transfer Printer box. Press Ok to Confirm. F) Table of Printer Devices and Pre-set Profiles Pre-set profiles contain the Printer Device Parameters: PRINTER DEVICE NAME created in WINDOWS HTP500 V2 TERMINAL BLOCKS HTP500 V2 CABLES HTP500 V2 HORIZ METHACRYLATE HTP500 V2 HORIZ PVC LABELS HTP500 V2 VERTICAL PVC LABELS HTP500 V2 OTHER TERMINAL BLOCKS PRE-SET PROFILE that must be associated to the PRINTER DEVICE NAME SINGLE TB T-BLOCKS AUTOM CABLES MMA HORIZONTAL Plates PVC HORIZONTAL PVC VERTICAL AUTOM AF T-BLOCKS 3.4.2 Driver Installation and Configuration for Windows 7 A) Creation of the first Device P-PRINTER Plug and Play Remind: The printer must be not connected to the PC. Disconnect the USB cable from the printer. Driver Installation: Select HTS500 CD Select the subfolder \Drivers Select the subfolder \HTP500V2 Execute the file Setup.exe, One Window appears: Do you want to allow the following program from an unknown publisher to make changes to this computer? Program Name: Setup.exe Author: Unknown Press YES button to Proceed. select your preferred language, press Install The Installation starts: Press Next Select the first Option: I accept the items of the license agreement Press Next Verify that the Printer is not connected to the PC. Press Install Press Install the Software Driver The PC must be turned off and restart. Press OK. The PC turns off and restarts. The PC must be Turned Off and Restarted. Press Finish Important: With the Printer turned OFF, connect the Printer and the PC with the USB cable. Turn ON the Printer A new hardware found message appears. The Driver Installation proceeds. The System Detected the Printer. The Printer had been detected and had been added to the list of the available printers with the name PPRINTER B) Check of the automatically assigned plug and play port From Windows: Select Start Select Printers and Devices Select Printers and Faxes Select the P-PRINTER Printer. Press the Right Key of the Mouse. Select Printer Property. Select the Ports Folder. Verify which is the connection Port that had been assigned to the P-PRINTER Port during the Driver Installation. For instance the detected port is USB001. C) Eliminate the option for the prints confirm From the printers folder right button of the mouse on one of the HTP500 V2 driver: Select Properties Select Utility Select Printer Settings Select Review Mode Select OFF Confirm with OK and APPLY D) Copy Installation of the 6 Printing Devices for Windows 7 Restart the PC, connect the HTP500 V2 to the USB port and switch on the printer. Select the HTS500 CD Select the subfolder \Drivers Select the subfolder \HTP500 V2 Select the subfolder \ENG Select the subfolder \Copy Driver Eng Runs the PRPCOPY.exe file with a double click The following window appears Select RUN It appears the window that indicate the assigned USB port for the PLATE PRINTER. Press OK Press OK Into the Devices and Printers folder you will find the file of origin P-PRINTER and the 6 devices installed with the following names: HTP500 V2 TERMINAL BLOCKS HTP500 V2 CABLES HTP500 V2 HORIZ METHACRYLATE HTP500 V2 HORIZ PVC LABELS HTP500 V2 VERTICAL PVC LABELS HTP500 V2 OTHER TERMINAL BLOCKS E) Devices Setting in HTS500 Software with the use of pre-defined profiles The profiles contain the Driver settings (printable area, density, orientation, materials, feeder mode, alimentation). To select the settings: Run the HTS500 Software Select the File Menu. Select the Menu Plotter Setup. It appears the Setup Plotters/Printers window Select the button on the Left in the First raw that is available in the Window. Select the Printer AUTOMATIC CABLES Select Properties It appears the window for the selection of the profiles. Select the Profiles Folder. It appears the window with the Pre-set Profiles Select the AUTOMATIC CABLES Profile. Press the Retrieve button. It appears the window for the Confirmation of the Profiles Press Yes to Confirm. Press OK to Confirm. The Window for setting the Multiple Device Press the Centering button and the Thermal Transfer Printer button. Select the Thermal Transfer Printer box. Press OK to Confirm. Setting appears. F) Table of Printer Devices and Pre-set Profiles Pre-set profiles that contains the Printer Device Parameters. PRINTER DEVICE NAME created in WINDOWS HTP500 V2 TERMINAL BLOCKS HTP500 V2 CABLES HTP500 V2 HORIZ METHACRYLATE HTP500 V2 HORIZ PVC LABELS HTP500 V2 VERTICAL PVC LABELS HTP500 V2 OTHER TERMINAL BLOCKS PRE-SET PROFILE that must be associated to the PRINTER DEVICE NAME SINGLE TB T-BLOCKS AUTOM CABLES MMA HORIZONTAL Plates PVC HORIZONTAL PVC VERTICAL AUTOM AF T-BLOCKS 3.5 CENTERING The centering allows you to makes some corrections at the print start point. The coordinates (x,y) can be modified for to move the starting point on the right, left, to the top, or at the bottom. a.1) Run the HTS500Hip a.2) Select ‘File’, Select ‘Plotter Setup’ a.3) Select the centering button (the second of the three buttons for each device) a.4) Check the box ‘Thermal Transfer Printer’. It is possible to make corrections on the starting position inserting a relative value express with a hundredth of millimetre precision. To move the print starting: At the top At the bottom On right On left Type in a positive value for the Y axis Type in a negative value for the Y axis Type in a positive value for the X axis Type in a negative value for the X axis To verify the print starting position it is possible utilize any available item and compatible with the selected device. a.5) Create a single-item job inserting as text ‘HHHHHH’ in the first tag. a.6) Print the job a.7) Verify the centering of the first tag. a.8) a) Example: text too high : makes a correction to the bottom (-Y) HHHHHH a.9) b) Example: text too low : makes a correction to the top (+Y) HHHHHH a.10) c) Example: text shift on right : makes a correction on left (-X) HHHHHH a.11) d) Example: text shift on left: makes a correction on right (+X) HHHHHH Notice This operation (a.1, a.11) should be done once for all the prints devices with any kind of items on those at disposal for the device. 3.6 CALIBRATION The calibration allows to make some corrections on the print step length. For each laser or thermal printer device it is possible to give a unic correction value, positive (extend the step) or negative (shorten the step) utilizing any kind of item at disposal. Look at a calibration example of the Horizontal axis with the SI2K201 item. a.1) Run the HTS500Hip a.2) Create a single-item job a.3) Insert some texts (HHHHHH) for all the item tags. a.4) Verify the centering of the first and the last tag a.5) If the print is too short: first left tag last right tag HHHHHH HHHHHH d1 d2 the print step should be extended. a.5.1) Measure of how many mm the print step is shorter (for example 3 mm). To obtain the difference, the d1 distance between the left item edge and the first ‘H’ of the first tag will be measured, and also will be measured the d2 distance between the left edge item and the first ‘H’ of the last tag; so the difference will be: d1-d2=3mm a.6) Select ‘File’, Select ‘Plotter Setup’ a.7) Select the centering button (every device has three button, select the second one, black cross) a.8) In the window on the left bottom side there is the calibration part: a.8.1) Select for the X axis the SI2K201 item a.8.2) After the item description in the parentheses there is the reference measure of the printed area (220 mm): a.8.3) In the X field type in the value in millimetre of the print step really printed. a.8.4) In our example: if the SI2K201 is the selected one, the print area is 220mm a.8.5) If the printer prints 3 mm shorter, insert in the X field the value 220-3= 217mm. a.8.6) HTS500Hip makes a correction for each print of 217mm and expand it at 220mm. a.8.7) This correction value works for all the items of that device. Look at a calibration example for the Vertical axis with the SI2K02W/15 item for the Feeder. a.9) Run the HTS500Hip a.10) Create a Single-item job a.11 Insert some texts (HHHHHH) for all the item tags. a.12 Verify the centering of the first and last tag a.13) If the print is too short: first top tag last bottom tag HHHHHH HHHHHH D1 D2 d the print step should be extended. a.13.1) Measure of how many mm the print step is shorter (for example 3 mm). To obtain the difference, the d1 distance between the left item edge and the first ‘H’ of the first tag will be measured, and also will be measured the d2 distance between the left edge item and the first ‘H’ of the last tag; so the difference will be: d1-d2=3mm a.14) Select ‘File’, Select ‘Plotter Setup’ a.15) Select the centering button (the second of the three buttons for each device): a.16) In the window on the left bottom side there is the calibration part: a.16.1) Select for the Y axis the SI2K02W/15 reference item a.16.2) After the item description in the parentheses there is the reference measure of the printed area (85 mm). a.16.3) In the Y field type in the value in millimetre of the print step really printed. a.16.4) In our example: if the SI2K02/15 is the selected one, the print area is 85mm a.16.5) If the printer prints 3mm shorter, insert in the Y field the value 85-3=82mm a.16.6) HTS500Hip makes a correction for each print of 82 mm and expand it at 85mm. This correction value works for all the items of that device. 3.7 PRINTER DRIVER UNINSTALL Important: The Printer must not be connected to the Personal Computer. Unplug the USB cable from the printer. To uninstall the Driver: Select the HTS500 Software CD Select the Folder \Drivers Select the Folder \HTP500 V2 Execute Setup.exe Select your language Press Install Select Remove all Installed features Press Next Press Yes button. After the elaboration, The PC must be restarted. The PC must be Turned Off and Restarted. Press Finish 3.8 SUMMARY TABLE OF THE DRIVERS AND PRINTER’S SETTINGS Printers devices Pre-Defined Profile AUTOM CABLES HTP500 V2 AUTOM AF TTERMINAL BLOCKS BLOCKS SINGLE TB THTP500 V2 OTHER BLOCKS HTP500 V2 CABLES Support Name 60 x 150 (mm) 60 x 150 (mm) 60 x 150 (mm) Orientation Support type (Plate) Vertical Feeder Vertical Feeder Vertical Feeder Feeder option Stack Feeder Stack Feeder Single Feeder Copy 1 Density 1 1 3 1 3 TERMINAL BLOCKS HTP500 V2 HORIZ METHACRYLATE HTP500 V2 HORIZ PVC LABELS HTP500 V2 VERTICAL PVC LABELS MMA HORIZONTAL Plates PVC HORIZONTAL PVC VERTICAL 60 x 500 (mm) Horizontal Plate Name Manual 1 3 60 x 500 (mm) Horizontal Plate Name Manual 1 3 60 x 500 (mm) Vertical Plate Name Manual 1 3 In case of doubt, particular questions or information requests on the HTP500 V2 printer utilization, before to proceed on printing an item that might cause technical components internal problems contact the ABB Technical Assistance at the number +39 02 7035 6495 4 – PRINTS OF TAGS WITH AUTOMATIC FEEDER IN “STACK” Feeder Mode This shows how to print Automatically the cable tags with HTP500 V2 easily and quickly. All you need to do is to mount correctly the Feeder on the printer’s guides and utilize the right Plate following carefully the instructions here below. 4.a Feeder accessories 4.b Preparing of the Card Store 4.c Preparing of the Support Plate and card Store 4.d Turning on the Printer 4.e Print on cable tags 4.1 FEEDER ACCESSORIES HTP500 V2 is supplied with the following accessories: HTP500-FEED – Card Store HTP500-PL Support Plate for Cable Tags Mobile support for loading the Items 4.2 PREPARING OF THE CARD STORE Position the HTP500 V2 in an operative system in where all the Safety Information are observed. Execute all the described operations with the printer turned off. Position the HTP500 V2 on its proper support base as in the picture. Screw A Locking card Store Push the lever on the left underneath the screw A NOTICE Do not tight too much the locking screw A so not to damage it. Do not loosen too much the docking screw A but just enough to fix the guides. 4.3 PREPARING OF THE SUPPORT PLATE Execute all the described operations with the Printer turned off. Take the SUPPORT PLATE and pass it through the CARD STORE till its mobile part reaches the position indicate in the picture: REMIND Make sure to have positioned correctly the CARD STORE so that it will be well fixed to the screw A and rest on the guides. WARNING To prints in automatic MODE, always make sure to utilize the correct SUPPORT PLATE. Pick up 2 modules of cable tags and insert it in the Card Store. B Fix the B screw of the Card Store so that the mobile part of the Card Store indicated with the arrow lets to pass just one module to be printed. It cannot pass more than one module at a time. See picture below. REMIND It cannot pass more than one module at a time beneath the card store. Under the mobile part of the card store should pass just one module. See picture below Screw B for regulation of height of thickness for the movement of the Items under the CARD STORE Only 1 module (THE FIRST) must pass beneath the CARD STORE, the SECOND must stay in the CARD STORE WARNING The maximum number of modules storable in the card store is 64 4.4 TURNING ON THE PRINTER After having prepared the printer and its accessories, TURN ON the Printer. On the display will be visualized the message PLEASE WAIT… VERSION X.X And afterwards the following message PRINT READY.. STACK SBLACK Take the “Support Plate” carefully and insert it beneath the “Card Store” till the mobile part is just under the “Card Store” The printer detects the “Support Plate” and moves it in the correct HOME position READY for the Print. REMIND When the “Support Plate” is in the correct HOME position, if you don’t print with the PC in 5 minutes, the printer Automatically moves the “Support Plate” from the home position. Be sure that the ONLINE light is turned on and that the HTP500 V2 is in ONLINE mode. 4.5 PRINT ON CABLE TAGS Run the printing from software HTS500. Press push Button New Job. Select the Item to Print WM12 (or another one if you bought some others) Press the Button New from the Generator Window. Insert the data to print. Press push button Confirm. Press push button Close. Press push button Run. Press push button Print. Press push button of the Device/Printer “AUTOMATIC CABLES” 5 - PRINTS OF TERMINAL BLOCK TAGS in “SINGLE” Feeder Mode This section explains how to print with the HTP500 V2 easily and quickly. Execute all the described operations with the printer turned off. All needs to be done is to position correctly the Support Plate for the Semi-Automatic Terminal Block on the printer guides following carefully the instructions here follow. 5.1 Accessories 5.2 Preparing of the Support Plate 5.3 Turning on the Printer 5.4 Print on Terminal Block tags TB Series 5.1 ACCESSORIES HTP500 V2 is supplied with the following accessories: Item: HTP500-PL3 – Support Plate for Semi-Automatic T-Blocks tags (others manufacturers than ABB) 5.2 PREPARING OF THE SUPPORT PLATE To print the T-Blocks tags it is necessary to position them on the SUPPORT PLATE as shown in the picture here follow. This is a Module of T-Blocks tags, ABB item code MC512. Take the Module of the Terminal Blocks Tags and position it on the Support Plate for Terminal Blocks in the way that the module’s feet can fit in the Support Plate for Terminal Blocks holes as in the picture. Be sure that the Module is well positioned on the Support Plate for Terminal Blocks. The HTP500-PL3 Support Plate for the T-Blocks tag should be inserted in the HTP500 V2 printer in the way that the encoder, underneath the support plate, should be on the below left lateral part. Guides for regulating Items’ width Screw fixing the guides Left side where you lay the Optical line below the support Plate With the Support Plate positioned on the printer, fix the guides using the locking screw. Once the guides are aligned, fix them in the desired position utilizing the screw. NOTICE Don’t tighten the locking screw too much. Don’t loosen the locking screw too much, only enough to adjust and fix the guides in the proper position. Insert the support plate till you hear a beep as in the picture 5.3 TURNING ON THE PRINTER After preparing the printer and accessories, proceed with Turning On The Printer. On the display will be visualized the message PLEASE WAIT… VERSION X.X And afterwards the following message PRINT READY.. SINGLE SBLACK Bring the “Support Plate TB” with a module of T-Block tags positioned on and insert it carefully till the printer makes a beep. The printer detects the “Support Plate TB” and moves it in the correct HOME position ready for the print. REMIND When the “Support Plate TB” is in the correct HOME position, if you don’t print with the PC in 5 minutes, the printer Automatically moves the “Support Plate TB” from the home position. Be sure that the ONLINE light is turned on and that HTP500 V2 is in ONLINE mode. 5.4 PRINT ON TERMINAL BLOCK TAGS TB SERIES Run the printing from software HTS500. Press push Button New Job. Select the Item to Print MC512. Press the Button New from the Generator Window. Insert the data to print. Press push button Confirm. Press push button Close. Press push button Run. Press push button Print. Press push button of the Device/Printer Terminal Blocks. 6 - PRINTS OF PVC TAGS and METHACRYLATE TAGS in “NONE” and “ACRYL Mode” This explain how to print in manual modality the tags and strips with HTP500 V2 easily and quickly. All needs to be done is to position correctly the items to be printed on the printer following carefully the instructions here follow. 6.1 Preparing the printer 6.2 Inserting the Modules in the Printer 6.3 Turning on the Printer 6.4 Print on tags and strips 6.1 PREPARING THE PRINTER To load an item perform the steps shown below. Open the tray pulling the auxiliary tray as shown in the picture below. Auxiliary tray 6.2 INSERTING THE MODULES ON THE PRINTER 1) Place a plate on the feeding table and align the edge with the cleaning brush. Plate edge Item to Print ON Guides well aligned with the Plate NOTICE Printing on a plate that has burrs on its edges can cause printing problems and can damage the print head. Also, metallic particles adhering to a plate can damage the print head, so handle and store plates carefully. Damage to the print head caused by printing on dirty plates is not covered under the warranty. Printing on plates that have dirt or grease (including skin oils) on the surface will result in poor print quality When aligning the width guides with the width of the plate, align the leading edge of the plate with the cleaner brush. If you push the leading edge of the plate into the feed opening, the printer Automatically takes up the plate and positions it for printing 2) Adjust the width guides to the plate sides. REMIND If the width guides are too close together, the plate will not be feed properly. It is important to adjust the width guides so that the plate is not loose but it moves smoothly to the left. If the width guides are too loose, the plate will be fed not straigth, yielding poor print results. Always make sure the guides are properly aligned with the plate. 3) Tighten the locking screw securing the width guides in the right position. NOTICE Don’t tighten the locking screw too much. Don’t loosen the locking screw too much, only enough to adjust and fix the guides in the proper position. 4) Insert the plate into the feed opening until the printer beeps. REMIND When printing more than one plate, before loading another plate, wait until the printer ejects the previous plate and beeps and until the message PRINTING disappears from the display. At this stage you can load the next plate 6.3 TURNING ON THE PRINTER Turning On The Printer. On the display will be visualized the message PLEASE WAIT… VERSION X.X and afterwards the message PRINT READY PLATE SBLACK The printer detects the Tag or Strip (if it is already on the plane of the printer) and moves it in the correct HOME position READY FOR THR PRINT. 6.4 PRINT ON TAGS AND STRIPS Here follow an example on how to print on a METHACRYLATE item. Run the printing from software HTS500. Press push Button New Job. Select the Item to Print PPB2715.. Press the Button New from the Generator Window. Insert the data to print. Press push button Confirm. Press push button Close. Press push button Run. Press push button Print. Press push button of the Device/Printer “HORIZONTAL METHACRYLATE” Here follow an example on how to print on a PVC item. Run the printing from software HTS500. Press push Button New Job. Select the Item to Print PAM43020. Press the Button New from the Generator Window. Insert the data to print. Press push button Confirm. Press push button Close. Press push button Run. Press push button Print. Press push button of the Device/Printer “VERTICAL PVC” 7 - MAINTENANCE 7.1 USEFUL FUNCTIONS To access at the printer functions Press Online on the control panel, so that the online led turns off and the printer goes offline. CHANGE LANGUAGE 1) Press [Menu/ ] 2) Press [Menu/ ] and [ ] to display “Language” 3) Press ENTER 4) Press [Menu/ ] to change selection (English, French, Italian, German, Spanish) 5) Press ENTER to confirm. AUTO Turn Off This function is designed to define the time after which the printer will automatically turn off. This option can be turned off saying NO in the menu. 1) Press [Menu/ ] 2) Press [Menu/ ] and [ ] to display “Auto Off” 3) Press ENTER 4) Press [Menu/ ] and [ ] to change selection (off to delete the option, later 5min, later 10min, later 30min) 5) Press ENTER to confirm BACKLIGHT Function for the definition of the brightness of the Printer LCD Panel. 1) Press [Menu/ ] 2) Press [Menu/ ] and [ ] to display “Backlight” 3) Press ENTER 4) Press [Menu/ ] and [ ] to change selection (1 darker, 5 lighter) 5) Press ENTER to confirm AUTO CLEANING - Changing the cleaning roller timer for cleaning AUTO CLEANING Function This function is optional and must be set according to the environmental conditions. The User sets the timing for the automatic cleaning of the cleaning roller. The cleaning interval is set in terms of printed length (NO, 500, 1000, 2000, 5000 mm). If the cleaning roller quickly becomes dirty, the interval should be reduced on the contrary if the cleaning roller stays clean, the cleaning interval can be lengthened. 1)Press [Menu/ ] 2)Press [Menu/ ] and [ ] to display Auto Cleaning 3)Press Enter and [Menu/ ] and [ ] to select NO or 500, 1000, 2000, 5000 mm after 4)Press Enter to confirm CLEANING – Cleaning of the cleaning roller CLEANING Function Select Cleaning to clean the cleaning roller. This function removes debris from the cleaning roller preventing therefore any eventual printing problem. 1)Press [Menu/ ] 2)Press [Menu/ ] and [ ] to display Cleaning 3)Press Enter to confirm TEST PRINT Select this function to make a test print without using the PC. The test print confirms that the printer is ready to print. REMOVE – Removing a plate in of jammed Item Select this function to remove a plate from the printer: 1)Press [Menu/ ] 2)Press [Menu/ ] and [ ] to display Remove 3)Press Enter to confirm 4)Press [Menu/ ] and [ ] to Move the Jammed Item Left or Right. JAMMED PLATE Utilize only the “MENU – REMOVE” function to eject the item from the printer. Press “ONLINE” and then “MENU” With the right arrow select “REMOVE” and press the right or left arrow to eject the item REMOVING THE PLATE WITH STRENGHT OR NOT USING THE ‘REMOVE’ FUNCTION MIGHT DAMAGE WITH NO SOLUTION THE HEAD PRINT. CANCEL for 3 seconds - ABORT A PRINT To abort a print and cancel print data, press Cancel at least for three seconds straight before the printer has started to print. 7.2 TROUBLE SHOOTING Printer won’t turn on Is the power cord properly plugged into a power outlet? Connect the printer power cord to the printer power connector, then plug it into an AC outlet. Is the power switch turned on? Turn on the printer. Printer won’t go Online Is the cassette cover well closed? Make sure that the cassette cover is completely closed, then press ONLINE. Is the ribbon cassette properly loaded? Ensure that there are no slacks in the ribbon before loading the ribbon cassette properly on its mount. PC won’t communicate with the printer Is the USB interface cable properly connected? Ensure that the USB interface cable is properly connected with the printer and the PC. Is the printer driver installed on your PC? Before printing, install the printer driver on your PC. Plate is not normally transported Is the item jammed inside the printer? If a plate jams inside the printer, use the REMOVE function following the procedure below. Select REMOVE from the Menu 1)Press the ONLINE button to put the printer OFFLINE. The ONLINE led turns off. 2)Press the button [Menu/ ] to enter in the Menu. 3)Press the button [Menu/ ] and [ ] to select REMOVE, press ENTER to confirm 4)Keep pressed the button [Menu/ ] or [ ] to rotate the conveyor roller, ejecting the item out of the printer. REMIND If the plate is too short to be load, press Enter to eject the plate from the printer. Using the Enter button to remove a jammed plate, could damage the print head. This method should be used only when the plate is too short and pressing [Menu/ ] and [ ] doesn’t work. Are the width guides adjusted properly? Adjust the width guides so that they can hold properly the plate Dirty or slipping rollers? Clean carefully the rollers. Is the cleaning roller installed properly? Ensure that the cleaning roller has been properly installed. Is the plate positioned correctly in the printer? See 2 sections 7 and 8. Printing problems due to dirty Are there any dirt or debris adhering to the plate? Before loading a plate into the printer, ensure that it is clean. Clean the cleaning roller regularly with a cloth a little wet. Print faints at the top or bottom of the print area or streaks appear Is the item warped? If the print head doesn’t touch a rigid plate evenly throughout its surface, some of the print characters may faint, or may appear streaks. Don’t use warped items. Always store items properly to prevent their warping. Horizontal streaks appear on the print Is the print head dirty? Clean the print head being careful not to scratch it. Cleaning cassette end Is there any spare cleaning cassette? When the cleaning tape end has been reached, the following message appears on the display: No Cleaning Tape Change cassette. Replace the cleaning cassette. If you don’t have a spare cleaning cassette, press Cancel to clear the message. Now put HTP500 V2 in Auto cleaning mode and set this Option to NO. The cleaning roller is automatically cleaned while using the printer. Plate size unknown Do the plate sizes match the ones set in your PC? Before printing, the print parameters appear on the display for confirmation. Therefore always make sure that the item sizes match the item sizes set in the PC. If you need to gauge the item you can always use the scale on the edge of the printer tray. 7.3 PRINTER MESSAGES / ERRORS If the print is in progress and one of these messages appears on the HTP500 V2 display, proceed as follows: 7.3.1 WRITING PROBLEMS The print stops before the plate end Verify that in the driver it is set the correct print area. For Ex., if in the driver it has been set a print area of 80mm x 50mm the prints will stop after 50mm. After have launched a print, the plate pass over and no print is on it This is a problem of non correct software settings. 1) Verify that all the driver’s settings are correct. See previous chapters of settings in this document to do a right installation. 2) Verify the centering and the calibration from the HTS500Hip in particular: 2.1) It might be inserted a center value to high and this can move the print too much out of the print area. 2.2) It might be inserted a calibration value to high and this can move the print too much out of the print area. For both problems delete from the HTS500Hip the installed printer device and repeat the centering and calibration operations. After have launched the print the plate stack and doesn’t move This problem depends on the non correct position of the red cleaning roller. Verify that the red cleaning roller is perfectly positioned and fixed on its right position. The prints looks faint and too heavy 1) Verify that all the drivers’ settings are correct. See previous chapters of settings in this document to do a right installation. 2) Verify that the red cleaning roller is clean. Makes a clean of the cleaning roller and try to print. 3) Makes higher the density value from the driver settings. This value can go from 1 to 5. The prints of Cable and Terminal Tags is not continuous and homogeneous 1) The item’s step is not maintained 2) Some texts are horizontally cut Verify that the encoder beneath the support plate for cable and terminal tags is not damaged and is clean. If some lines of the encoder are not read it, the head print will lift up and will not write. 7.3.2 NOTIFICATION MESSAGES Cover Open The cassette cover is open. Close the cassette cover and press Online. Push Online The cassette cover has been open when the printer was ready to print. Close the cassette cover and press Online. No Plate! O NO SHEET! No item has been loaded into the printer. Insert an item into the printer. Insert plate! O INSERT SHEET! No item has been detected at the start of printing. Insert an item into the printer. Insert Feeder At started print the printer warn that no support plate for the items has been inserted. Insert the correct support plate in the printer. Remove plate and set plate again Printer could not position properly the item to print. Pull out the item and try again to insert it. No Ribbon! There is no more ribbon in the ribbon cassette or the ribbon cassette has not been loaded correctly. Check the ribbon in the ribbon cassette and load the ribbon cassette again. No Cleaning Tape Change cassette The end of the cleaning tape has been reached. Replace the cleaning cassette. Head too hot The printer internal temperature is too high. Wait for the printer to cool down. Cooling is automatically carried out. Once the cooling process is complete, the printer can start printing again. Media not ready The sensor doesn’t recognize the item’s edge. Verify that the item’s edge isn’t indented or isn’t regular. Contact the ABB Technical Assistance. 7.3.3 FAILURE MESSAGES For any kind of failure message that appears on the display control panel contact the ABB Technical Assistance. Service Call CODE: 01 The head print doesn’t communicate correctly with the control unit. Verify that the connector is well connected to the head. Service Call CODE: 02 The switch of the cassette cover is not closed. Verify that the cassette cover is closed and perfectly adherent to the body. Service Call CODE: 03 One of the printer parts might be damaged. Ask ABB Technical Assistance. Service Call CODE: 06 The fan in the back side of the Printer does not work well. Verify that the fan is well connected and that there is enough space behind the printer. Service Call CODE: 07 The printer doesn’t communicate correctly with the group head / ribbon. Verify that the ribbon cassette is well loaded, that is tighten beneath the head, that is adherent to the body printer. Service Call CODE: XX One of the printer components may be damaged. Ask ABB Technical Assistance. REMIND To clear this message from the printer display, turn the printer power off and wait at least three seconds before turning on the printer again. NOTICE If the message doesn’t disappear from the display, even if the power is turned off and back on again, turn the power off, unplug the printer and contact the ABB Technical Assistance 7.4 DAILY CARE A careful daily care helps to keep HTP500 V2 in good condition and achieving best print performances. 7.4.1 CLEANING THE CLEANING ROLLER Cleaning Function The printer is equipped with a cleaning roller that cleans dust and dirt off the plates before printing. 1) Press Online to set the printer offline. The online led turns off. 2) Press [Menu/ ] to select Cleaning. 3) Press Enter to confirm and start up cleaning the roller. Now Cleaning message appears on the display. REMIND Sometimes the Auto Clean mode is recommended, it depends on how the printer is being used. Cleaning (Maintenance) Clean the cleaning roller regularly. 1) Turn off the printer. Open the cover cassette, then remove the cleaning cassette and the ribbon. 2) Grasp the shaft of the cleaning roller, lift it upwards to the right and remove it gently. 3) Clean the roller using a soft, damp cloth and taking good care not to scratch it. 4) Once the roller surface is completely dry, install the roller back into the printer. NOTICE This printer has an automatic cleaning function. In case the automatic cleaning function should not clean enough, remove the roller and clean it manually as illustrated above. Don’t scratch the cleaning roller. After the cleaning, let the roller dry completely before inserting it back into the printer. The cleaning roller is a consumable part so, once is worn up, replace it with a new one. Replace the cleaning roller at least once a year. 7.4.2 OTHER PARTS TO CLEAN Before using the printer check it and clean it as described below. Print head Clean the print head using a blower, soft cloth, cotton swab or cleaning paper. Remove accumulated dusts. Be careful not to scratch the print head. Roller Use a soft cloth to clean the roller wiping dirt and oil off. CAUTION Don’t scratch the print head. Don’t clean the print head using cloths that have metallic particles adhering to them. If the print head is scratched this can’t print anymore in the scratch zone. When cleaning the print head be careful. 7.4.3 SPARE PARTS Cleaning roller The printer is equipped with a cleaning cassette that helps to maintain the cleaning roller effectiveness. 7.5 CLEANING AND STORING PLATES CLEANING PLATES Static electricity on the plates surface, attracts paper residue from packaging, airborne dust and dirt. Printing on such plates without cleaning them first, may cause poor print results and may even scratch the print head. 1) Remove any eventual burr you may find on the plate edges. 2) Clean both sides of the plate. Use a soft, damp cloth and then thoroughly wrung out to wipe away finger prints and grease. Make sure the plate is completely dry before loading it in the printer. STORING PLATES The way plates are stored effects their surface and the print quality. For this reason it is recommended to observe the instructions listed below: Store plates in plastic bags to protect them from dust and dirt. Place plates on a flat surface to prevent them from bending or warping. Store plates at a temperature from 0°C to 40°C, and 10% to 85% RH. Temperatures higher than these ones, even for a short time, will cause plates to bend or warp. Don’t leave plates in the car. 7.6 TEST PRINT The test print can be performed by the printer without using the PC. 1) Turn on the printer 2) Load an item REMIND Use an item at least 60mm wide and 100mm long. 3) Execute a test print following the steps below Press Online to put the printer offline (the Online led turn off) Press [Menu/ ] Press [Menu/ ] and [ ] to select Test Print Press Enter to confirm Press [Menu/ ] and [ ] to select, among the 6 kinds of material available in the printer Menu, which is the material of the item loaded in the printer Press Enter to confirm your choice 4) The printer begins to print the print test on the item and then ejects it 7.7 CORRECT USE OF THE SYSTEM Follow carefully the instructions for the correct HTP500 V2 printer utilization: 1) Only items supplied by ABB and tested for the HTP500 V2 can be used. 2) Before to insert an item into the printer, verify that it is flat with no curve. 3) Before to insert an item into the printer, verify that the item’s surface has no dirt, dust, steel or what else that might compromise the head functioning. 4) In the case that the HTP500 V2 printer gets blocked, utilize only the “REMOVE” function from the control panel to take off the item. Never take off the blocked item with force. This operation might compromise the printer functioning. 5)Never modify the initial resistant value set by the supplier. This operation might compromise the right head functioning. 6)To obtain the best print quality set correctly the HTP500 V2 printer depending on the different item’s typologies (as in the instructions of this user’s guide). A non correct setting doesn’t allow to obtain the best print quality and might compromise the correct head functioning. 7)Do not try any fixing, tampering; utilize only original accessories and spare parts. 8 – PACKAGING AND TRANSPORTATION The Printer HTP500 V2 complete with: MANUAL SI2K0003 – CLEANING ROLLER RIB-B – Strong Black Ribbon. USB Cable. SI2K0011 – Power Cable. Must be fixed with its original supports that adhere the external shape of the Printer. Must be packaged and closed in its original box and Packaging. The complete packaging of the HTP500 V2 printer complete with: CD HTS500 HTP500-PL3 – Support plate for Terminal block tags. HTP500-FEED – Card Store. HTP500-PL – Support Plate for Cable Tags. SI2K0016 – Support Base for the Printer. All these shall be inside in the wooden box (CD may be replaced by other media or internet) The accessories must be fixed with insulating and separation material. Due to the different weight of internal components inside the wooden box, and the asymmetric distribution of the weight, you must take care to the lifting operations of the whole package. 9 – SPARE PART’S USAGE Here is the list of the average file of the components and main spare parts. HTP500-ROLL: cleaning roller Duration: 15 km printed product, for about 6.000.000 Cable tags. RIB-B: Strong Black Ribbon. Length: 130 m Number of printing varies according to the length of any single item. HTP500-CLEAN: Cleaning Cassette. Length: 7 m Number of Cleanings for each tape: 52 NOTE: The Interval of cleaning can be set through the Auto Cleaning Function. 10 - Summary chart of modules, Support plates and accessories of HTP500 V2 System Here is a short Description of the Accessories of HTP500 V2 System. Items HTP500-FEED Automatic feeder SUPPORT PLATE Non ABB Terminal-block tags to print manually Cable tags to print with automatic no HTP500-PL3 Manual support plate in Semi-automatic mode HTP500-PL feeder in « STACK » feeder mode ABB Terminal-block tags To print with automatic feeder in « STACK » feeder mode BA4 marker to print with automatic feeder in « STACK » feeder mode Items Non ABB Terminal-block tags to print manually Mandatory Mandatory Mandatory Support plate to print the cable tags HTP500-PL2 Support plate to print the ABB Terminal-block tags HTP500-BA4 Support plate to print the BA4 markers HTP500-FEED Automatic feeder SUPPORT PLATE no HTP500-PL3 Manual support plate in Semi-automatic mode Tab-sum-01 – Table accessories for printing modules. 11 - INFORMATION TO USERS ON RECYCLING OPERATIONS PACKAGING The packaging materials for this printer are recyclable and can be reused. Therefore, it is appropriate to dispose all materials according to national provisions relating to waste disposal and in compliance with current local operational. (city waste, etc.). The materials of this printer can be recycled and reused if disassembled by a specialized firm. Do not discard or throw in the fire electrical and electronic components. The electric and electronic components must be disposed of according to national rules on waste electrical and electronic equipment and in compliance with any local operational forecasts. DISPOSAL The above symbol indicates that this appliance must be disposed of separately from the usual waste, according to the RoHS Directive 2002/96/EC. This appliance must be disposed of by returning it to the retailer upon purchasing a new replacement “returnable” or disposed of by an authorized designated collection point for the recycling of waste electrical and electronic equipment. For further information on waste collection and recycling centers, please refer to the RoHS Directive and contact your local authorities. Incorrect disposal of this type of waste product can damage the environment and cause problems to health due to the hazardous substances produced by electrical and electronic equipment. The separate collection and recycling of waste equipment at the time of disposal will help to conserve natural resources and ensure that it is recycled in a manner that protects human health and the environment. Illegal disposal of waste of the product arranged by the holder involves the application of the administrative sanctions according to the article 20, point 5, of the Italian Legislative Decree number 151/2005. GENERAL INFORMATION: The equipment has to be kept in a proper environment, far from heat sources, possible in indoor or not subject to weather. Tape ribbon or cleaning cassette cannot be disposed of as ordinary waste but must be properly reclaimed through recycling of the same. 12 – Information on the User Guide Product Revision HTP500 V2 121019 1SNC160010M0202 – 10.2012