1
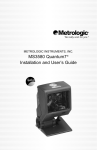
MS9530 Series Voyager® RF
Single Line Hand-Held RF Bar Code Scanner
Installation and User’s Guide
PRELIMINARY
MS9530 Voyager RF
Version: 1.1
1
Printed: September 2002
Status: Approved
Table of Contents
Voyager RF Scanner – Overview ............................................................ 3
Base Station.............................................................................................. 4
Unpacking List.......................................................................................... 5
Connecting the Base Station to the host ............................................... 6
Linking the Voyager RF to the Base Station .......................................... 7
Fixing Voyager RF ID numbers ............................................................... 9
Base Station Testing Bar Code ............................................................. 11
Battery Pack............................................................................................ 12
Visual Indicators..................................................................................... 14
Start up sequence ....................................................................................................... 14
Synchronisation Sequence ........................................................................................ 14
Data Transmission Sequence .................................................................................... 14
Low battery message.................................................................................................. 15
Programming Modes.............................................................................. 16
MetroSet® ............................................................................................... 17
Software Version .................................................................................... 18
EML.......................................................................................................... 19
EML Handshaking Timeout ................................................................... 19
Specifications ......................................................................................... 20
RF Link Specifications................................................................................................ 20
Electrical....................................................................................................................... 20
MS9530 Voyager RF
Version: 1.1
2
Printed: September 2002
Status: Approved
Product Overview
The MS9530 Series Voyager RF is a wireless single line hand-held scanner
with one bi-directional RF channel radio which provides about 20-30 meters
portability.
It has got a battery pack which can be removed from the unit to be charged
through a Wall-Power supply in about 110 min. No charging stand is required.
Once charged the unit can read and transmit more than 30,000 readings. In
order to save the battery charge, the unit will enter into standby mode, when left
idle. To “wake” the unit, and begin scanning, simply press the CodeGate button
located on the head of the scanner. When idle mode, the battery is still
supplying the unit and its charge will last for approximately 5 days.
To interface with the host, a Base Station is provided which allows the scanner
to transfer data to Host via various interfaces, including: Wedge, RS232, Light
Pen and OCIA emulation.
Every time the unit is activated, it will try to link with the Base Station for a few
seconds. In the event that there is no response, for example, the Base Station
is turned off or the unit is out of range etc, the scanner will give an error beep
and will keep the unit locked with the Green and Red LEDs “on” until the user
presses the CodeGate button. Once pressed, the unit will work normally once
the problem is solved.
The unit has Green and Red LED indicators to inform the user of the scanner’s
status. Basically, the Green LED is used for scanning issues and the Red LED
is used for radio transmissions.
There is also a beeper which provides an audible indicator for low battery,
errors, successful operations, programming mode and start up diagnostics.
As long as the Voyager RF has got a decoder built-in, it has got its own
programming manual which can be used to program decoding issues as well as
the RF interface (Base Station serial number, Mobil ID, and so on….)
MS9530 Voyager RF
Version: 1.1
3
Printed: September 2002
Status: Approved
BASE STATION
The Base Station is a interface decoder to which the Voyager is connected via a
virtual RS232 port. Its function is to receive RF data from Voyager RF and
transmit it to the Host.
Therefore, all the standard features that can be used when connecting a RS232
device to a Base Station, as explained in the Base Station Configuration Guide,
can be obtained from the Base Station when working with the Voyager RF.
It is very easy to change a Base Station parameter. Once the Voyager RF is
linked with the base, simply read the ENTER/EXIT barcode from Base Station
Configuration Guide and change the desired parameter. Once finished, read the
ENTER/EXIT bar code again to return it back to Standard Operation mode.
The Base Station can support several output interfaces such as; Wedge,
RS232, Light Pen and OCIA.
When a Wedge connection is desired, a Y-XX cable is required as well as
Power Supply when required*. Please refer to the Base Station Configuration
Guide to choose the configuration number as well as cable required to interface
with HOST
When RS232 Output interface is desired, an M-01 (DB25/DB9) and a power
supply are required.
For Light Pen and OCIA, no special cable is designed. Normally, it is designed
for each specific Host.
Each Base Station has got a unique serial number (Factory defined) and can
work with up to 5 Voyager RF at the same time. Each Voyager must have an
Identifier (ID: 1 to 5) defined as well as the serial number of the base station
which will receive the transmitted data. In case of RF collision, each Voyager
RF will wait its turn based upon its ID before re-trying. This means that Units
with a lower ID will be more aggressive whilst transmitting.
As long as the Voyager RF has got its own decoder and the Base Station also
has its own, then two manuals should be used.
Voyager RF manual is used for Barcode Decoding issues
Base Station Manual is used for interface issues.
User should combine both manual parameters to perform best functionality
which fits the desired application.
* Although not always necessary to utilise a power supply when the Base Station is in wedge
mode, it is good practice to power it with an external power supply to avoid any loss in RF
performance
MS9530 Voyager RF
Version: 1.1
4
Printed: September 2002
Status: Approved
UNPACKING LIST
The kit is packed according to its functionality:
Transmitter:
•
•
•
•
Voyager RF: Reader + Battery Pack
Wall-Power Supply for Battery Pack charging
Voyager RF Configuration Manual
Voyager RF installation and User guide
Base Station:
• Base Station
• Base Station Manual
• For Wedge interface:
1. Cable Y-XX
2. Power Supply (Required to ensure better RF performance)
• For RS232 interface:
1. Cable M-01 (DB25/DB9)
2. Power Supply (if Host can’t provide it)
MS9530 Voyager RF
Version: 1.1
5
Printed: September 2002
Status: Approved
CONNECTING THE BASE STATION TO THE HOST
WEDGE INTERFACE
1. Turn off the Host system
2. Connect the cable Y-XX between the keyboard and Host
3. When Power supply required (it is recommended all the times
for better RF transmissions), check that the voltage matches
the AC outlet and then connect
4. Power up the Host system
RS232 INTERFACE
1. Turn off the Host system
2. Connect the cable RS232(DB25/DB9) to the desired RS232
input port of the Host
3. When Host can’t provide power supply, check that the voltage
matches the AC outlet and then connect
4. Power up the Host system
LIGHT PEN AND OCIA INTERFACES
Technical assistance will be required depending on the HOST interface.
Now follow the matching procedures to link the Voyager RF to the Base Station
MS9530 Voyager RF
Version: 1.1
6
Printed: September 2002
Status: Approved
LINKING THE VOYAGER RF TO THE BASE STATION
This section explains how to link the Voyager RF to the Base Station. It is
supposed that the software is already loaded into the unit and that the Base
Station is configured with its own serial number.
•
Power ON the Base Station
•
Insert Battery Pack and press CodeGate button to power ON the
unit.
•
Voyager will show its ID number by keeping RED and
GREEN LEDs on while flashing YELLOW on as many times
as the ID value ( 1 to 5 )
•
Voyager will try several attempts to link with Base Station.
Every try will make the Red LED flashing.
•
If no Link is performed, an error beep will sound. In this
case press Code Gate button to continue. Otherwise, if link
is performed the scanner will operate normally.
•
Read Enter/Exit Configuration Mode barcode
•
Read the Recall Defaults barcode (MetroSelect Single Line
Voyager Configuration guide) to default Voyager parameters.
•
Read the RF Defaults barcode to default RF engine
MS9530 Voyager RF
Version: 1.1
7
Printed: September 2002
Status: Approved
•
Read Fix Serial RF Number barcode to load Base Station's serial
number into the Voyager.
•
Read Base Station Serial Number barcode. (located on the Base
Station).
•
Read Enter/Exit Configuration Mode barcode.
•
After reading this barcode the Voyager will try to link the
Base Station. Now a linking should be performed.
At this moment the Voyager RF is linked to Base Station with ID =1.
Two Voyager RF’s with the same ID cannot be linked to the same
Base Station. In this case, follow the “Changing ID procedures” to
change the ID of the appropriate Voyager RF
The user can change any parameter of MetroSelect’s Single Line Configuration
Guide apart from the following:
RS-232, Keyboard, OCIA, Light Pen Parameters, IBM 46xx Configuration,
Custom Defaults, Scanner Operation-Led Options, Scanner OperationHost Scanner Commands, Scanner Operation-Test Modes, MS 9500
Voyager-Activation Range, MS 9500 Voyager-CodeGate Status
Failure to observe the above will result in the scanner operating with reduced
functionality.
NOTE ABOUT RF DEFAULTS:
This barcode will default the RF parameters of Scanner:
• RF interface will be fixed
• Serial Number will be fixed to 9999999999
• ID number will be fixed to 1
• Minimum length will be fixed to 1
MS9530 Voyager RF
Version: 1.1
8
Printed: September 2002
Status: Approved
FIXING VOYAGER RF ID NUMBERS
This section explains how to fix an Identifier number to each Voyager RF.
Basically, each Base Station can work with up to 5 VoyagerRF’s at the same
time. To enable this facility, an Identifier Number (ID) must be configured to
each Voyager RF. By reading RF Defaults, ID=1 is configured.
There cannot be more than one Voyager RF with the same ID and Serial
Number.
In the case of two Voyager RF’s trying to communicate with the base station at
the same time, the unit with the lower ID will re-try first. That means that the
lower a number ID the VoyagerRF has, the more aggressive it will be.
To change the ID, follow the steps below,
•
Read desired Voyager ID:i (i=1,..,5) barcode to load the ID = i into
the Voyager RF
MS9530 Voyager RF
Version: 1.1
9
Printed: September 2002
Status: Approved
The system is ready to work.
Please note again, that each time a Voyager RF is activated, it indicates its ID
number just before linking with Base Station with steady RED and GREEN
LED’s whilst the YELLOW LED flashes an appropriate number of times in
relation to its ID number. Ie; one YELLOW led flash means ID=1 and 5
YELLOW LED flashes would indicate that that unit’s ID=5
MS9530 Voyager RF
Version: 1.1
10
Printed: September 2002
Status: Approved
BASE STATION TESTING BARCODE
The Base Station will accept all data from Voyager RF where the Base Serial
Number is “0000000000”.
Use this Test Barcode as Base Serial Number when programming the Voyager
RF Serial Number to fix the Voyager RF in test Mode.
This Barcode is for testing purposes and should NEVER can be considered as
functional Base Station Serial Number.
Once Testing is performed, a valid Base Station Serial Number should be
loaded into the Voyager RF
MS9530 Voyager RF
Version: 1.1
11
Printed: September 2002
Status: Approved
BATTERY PACK
In order to charge the Battery Pack, there is no need to use a cradle. It can be
re-charged when disconnected from the scanner with the Voyager RF 5V, 1.5A
Wall Power Supply.
The Battery Pack can’t be recharged while inserted into the Voyager. Therefore
it is recommended that two battery packs are used. One can be in use with the
scanner while the other one is being recharged.
Once the Voyager RF gives a “Low Battery” warning, the user should remove
the Battery Pack from Voyager by pressing the two side clips and pulling the
pack vertically from the scanner.
Once removed, the user can see a socket to insert the jack of the 5V, 1.5 A
Power Supply. See figure: Batt1
Figure: Batt1
There is an LED which indicates the status of the charge as Table 1.0 shows:
CHARGE STATUS
Charging
Done
FAULT
No Battery
RED
GREEN
ON
OFF
Flashing (1 sec.)
OFF
Table 1.0
OFF
ON
OFF
OFF
It takes a charge of around 100 min. for a Battery to be fully charged. Once
charged, the unit is able to handle around 30,000 continuous first pass readings
over a period of approximately 5 hours. Taking into account that that the
scanner will go into standby mode while not in use for an average of 2.5
minutes, you can expect that in normal use the unit can be used for in excess of
8 hours per day with one battery pack.
MS9530 Voyager RF
Version: 1.1
12
Printed: September 2002
Status: Approved
Standby mode will discharge the battery pack in around 5 days. The number of
readings will naturally decrease as the standby time increases. To avoid having
low battery messages appearing, it is recommended that the battery pack is
disconnected from the scanner when not in use over an extended period of
time.
MS9530 Voyager RF
Version: 1.1
13
Printed: September 2002
Status: Approved
VISUAL INDICATORS
The scanner has RED and GREEN LED’s. When the scanner is on, these
visual indicators show the state of the scanner functionality.
Start Up Sequence
From Stand-by, once the user presses CodeGate button, the scanner goes into
start-up mode.
Whilst in this mode, the YELLOW LED is displayed.
1. The scanner starts checking its OS (Operating system). If there is an
error, RED and GREEN will be on and YELLOW will flash
continuously.
2. The scanner will check Flash integrity. If there is an error, RED and
GREEN will be on and YELLOW will flash once. After this the unit will
enter into user RF Flash mode (Same as when METEOR RF
Barcode is read. See how to load software via RF with METEOR RF
for details)
After OS and Flash has been successfully checked, YELLOW LED is off
and the unit will enter its own start-up sequence.
Synchronisation Sequence
Once the unit has finished all start-up sequences including Laser, Motor,
Flash,…. tests, Voyager RF will take the following actions:
•
Show its ID( Mobile Identification number) by keeping RED and
GREEN LEDs on while flashing YELLOW LED as many times as it
own ID (1 to 5)
• Link with base station.
The RED LED will flash several times while trying to synchronise. In case
no link is made, the scanner will make a Razzberry tone with RED and
GREEN LED’s on.
Once the reason why the link was not made (out of coverage area, Base
powered off etc) is solved, the user is requested to press the CodeGate button
to continue. A Beep tone will be executed and the RED and GREEN LED’s will
be off.
Data Transmission Sequence
Once the unit has read a barcode, it will try to transmit the data to Base Station.
Every time a transmission is performed, the RED led will flash and the scanner
will wait for an acknowledgement from Base Station. If no ACK arrives after 14
tries, the unit will emit a Razzberry tone and the user will be requested to press
the CodeGate button to continue.
MS9530 Voyager RF
Version: 1.1
14
Printed: September 2002
Status: Approved
Low Battery Message
When the battery starts to loose its charge, the scanner detects it and makes a
Razzberry sound every time a new reading is performed. The YELLOW, RED
and GREEN LED’s will also flash alternatively. However, the Voyager RF will
continue to operate.
The operator should, at this point, remove the battery pack and recharge it.
MS9530 Voyager RF
Version: 1.1
15
Printed: September 2002
Status: Approved
PROGRAMING MODES
Voyager RF can be programmed via Barcodes. Use Metrologic’s MetroSelect
Single Line Configuration Guide to configure the unit.
This configuration guide is common to all Voyagers. When using Voyager RF,
this one should be used and the following sections of the Single Line
Configuration Guide should be avoided:
RS-232, Keyboard, OCIA, Light Pen Parameters, IBM 46xx Configuration,
Custom Defaults, Scanner Operation-Led Options, Scanner OperationHost Scanner Commands, Scanner Operation-Test Modes, MS 9500
Voyager-Activation Range.
The Base Station also can be programmed via Base Station Configuration
Guide.
Meanwhile, the MetroSelect Single Line Configuration Guide is used to control
scanner and reading parameters, the Base Station Configuration Guide is
mostly used to control data transmission to Host.
PC Windows Based programs are provided to configure both Base Station and
Voyager RF units:
MetroSelect2 (RF version) to configure Voyager RF via RF (not yet available).
BaseSet to configure Base Station.
Both of them request that Base Station is RS232 connected to the PC.
MS9530 Voyager RF
Version: 1.1
16
Printed: September 2002
Status: Approved
MetroSet
It is possible to download/upload settings from MetroSet 2 (PC based
software) to each Voyager RF by radio.
In order to do that, read the MetroSet RF barcode with the Voyager RF that you
want to work with and follow MetroSet RF instructions.
Always read this barcode before running the MetroSet RF upload/download
commands.
Keep the Voyager RF close to Base station to get the best RF performance.
Base Station must be connected to the comport of the PC via M-01 DB9 Cable.
Only one Voyager can perform this operation at a time.
While uploading/downloading settings, the base Station will not communicate
with any other Voyager RF’s and communications will be temporarily locked
until the settings are transferred.
MS9530 Voyager RF
Version: 1.1
17
Printed: September 2002
Status: Approved
SOFTWARE VERSION
It is possible to find out the software of Voyager RF as well as the Base Station
to which the unit is linked with.
Scanning the following barcode, the Base Station will transmit the actual
software revision with the following format:
MI9530 BASE STATION: #50200, MARCH 2002.| MS9530: BODY/OS
#14655/50100
MS9530 Voyager RF
Version: 1.1
18
Printed: September 2002
Status: Approved
EML
EML Handshake is a defined data formatting handshake that allows the
Voyager RF to send and receive data from the Host System through the Base
Station.
To be able to use this feature, the Base Station:
• Must be connected via RS232 to the Host System using the M-01
cable
• Must have EML feature activated (see Base Station’s manual to know
how to activate EML into Base Station as well as EML Packets
description).
EML Handshaking Process
When EML is active, every time a Voyager RF reads a barcode, the Base
Station will send “Data Packets” to Host (via Wedge or RS232) so that the Host
will know which Base Station and Voyager RF is sending data.
Furthermore, the system provides a way to inform the Voyager RF whether its
data was found in Data Base by activating EML Handshake within the Base
Station. The process is as follows:
The Voyager RF sends data to Base Station and a “WAIT” radio command is
sent from Base to Voyager RF. After that, Base sends the “Data packet” to the
Host and waits for “EML Command” from Host. When this has been received,
Base acknowledges it with “ACK Packet” and transfers it to Voyager RF which
performs the corresponding action.
If Host Delays its answer, Voyager will timeout and will consider an error in
transmission, informing the Base Station that timeout (1 – 17 sec) has elapsed.
Base will send “RESET Packet” to Host to inform of this situation and will
answer with a “NAK Packet” to every command coming from Host until a new
“Data Packet” is received from the Voyager RF.
The possible Voyager RF timeout values must be between 1 – 255 in steps of
70 msec. This will give us a range of 1 to 17 sec. By default is 2 Sec.
EML HANDSHAKING TIMEOUT
MS9530 Voyager RF
Version: 1.1
19
Printed: September 2002
Status: Approved
SPECIFICATIONS
RF LINK SPECIFICATIONS
Frequencies:
Bandwidth:
Modulation:
RF Protocol:
Output Power Voyager RF:
Output Power Base Station:
Operating Range:
434 MHz
2 x 75 kHz
FM
Two way data transmission, One channel.
39062.5 Baud speed.
<10 mw
6 mw
Up to 30 Mts. (Open Air)
Specifications subject to change without notice
ELECTRICAL
VOYAGER RF
Input Voltage:
Battery Operating Life:
Battery Idle Time:
Operating current:
DC Transformer:
Laser Class:
3,7/3,8 V (1400mA-hour) rechargeable
Lithium-Ion Battery Pack.
30,000 scans in 5 Hours (at first read rate
with full battery charge)
Approximately 5 days
10mA – STANDBY
110mA – NORMAL with LASER OFF
250mA – NORMAL with LASER ON
5VDC @1.5A. Battery wall charger.
BASE STATION
Input Voltage:
Operating current:
DC Transformer:
5VDC
40mA
INPUT: 220V 50/60Hz
OUTPUT: 5VDC @700mA
POWER: 200mW
Specifications subject to change without notice
MS9530 Voyager RF
Version: 1.1
20
Printed: September 2002
Status: Approved